jukebox
Member

Posts: 43 
Likes: 9
1961 Shasta Airflyte
Currently Offline
|
Post by jukebox on Dec 5, 2018 6:24:44 GMT -8
Since you are replacing your trailer light wiring as well, you may want to consider wiring the trailer brake lamps in parallel to the switched side of your break away system. That way if the trailer does disconnect then the trailer brake lamps will come on as well. This may save your trailer from getting rear ended by a following vehicle. I am not sure but it may be possible that the break away systems when engaged are full on brakes. That means your trailer will likely skid to a stop and real fast.
|
|
jukebox
Member
Posts: 43
Likes: 9
1961 Shasta Airflyte
Currently Offline
|
DUH!
Dec 2, 2018 18:27:15 GMT -8
Post by jukebox on Dec 2, 2018 18:27:15 GMT -8
Too bad the inside is so beat. Even the counter top is broken. $500 is a little light. There is a lot of good hardware on it if anything. The door lock , windows and frames, Shasta emblem etc. Around my area these are hard to find in any condition. I was lucky to find mine but I would like to see one of these beat up ones in person just to see how the hell they can get like this.
|
|
jukebox
Member
Posts: 43
Likes: 9
1961 Shasta Airflyte
Currently Offline
|
Post by jukebox on Nov 16, 2018 8:00:05 GMT -8
Very Cool !!!
|
|
jukebox
Member
Posts: 43
Likes: 9
1961 Shasta Airflyte
Currently Offline
|
Post by jukebox on Nov 8, 2018 8:07:57 GMT -8
Just opened a Flickr account and read the forum picture posting tutorial so trying it out. This is the trailer I bought last summer 2017 . Also my first vintage trailer. Pretty much all original in and out. Even the flooring. I had the front seats recovered to as close as the original color. The previous owner put that lower rock guard on the front. You can see it is still original paint. The white is thin is spots and showing the lower color through. They must have taped off the Z stripe then painted the lower color and then the white on top. The front panel is dented from rocks and a spot on each side where it looks like someone turned too tight. I may replace the front panel. Not sure yet. Right now I really like the original look. This trailer must have spent some of its life inside somewhere because it is really nice. I will be taking all skins off and doing a complete reseal. Maybe replace the front panel at that point. Anyway, I know you all love pictures.  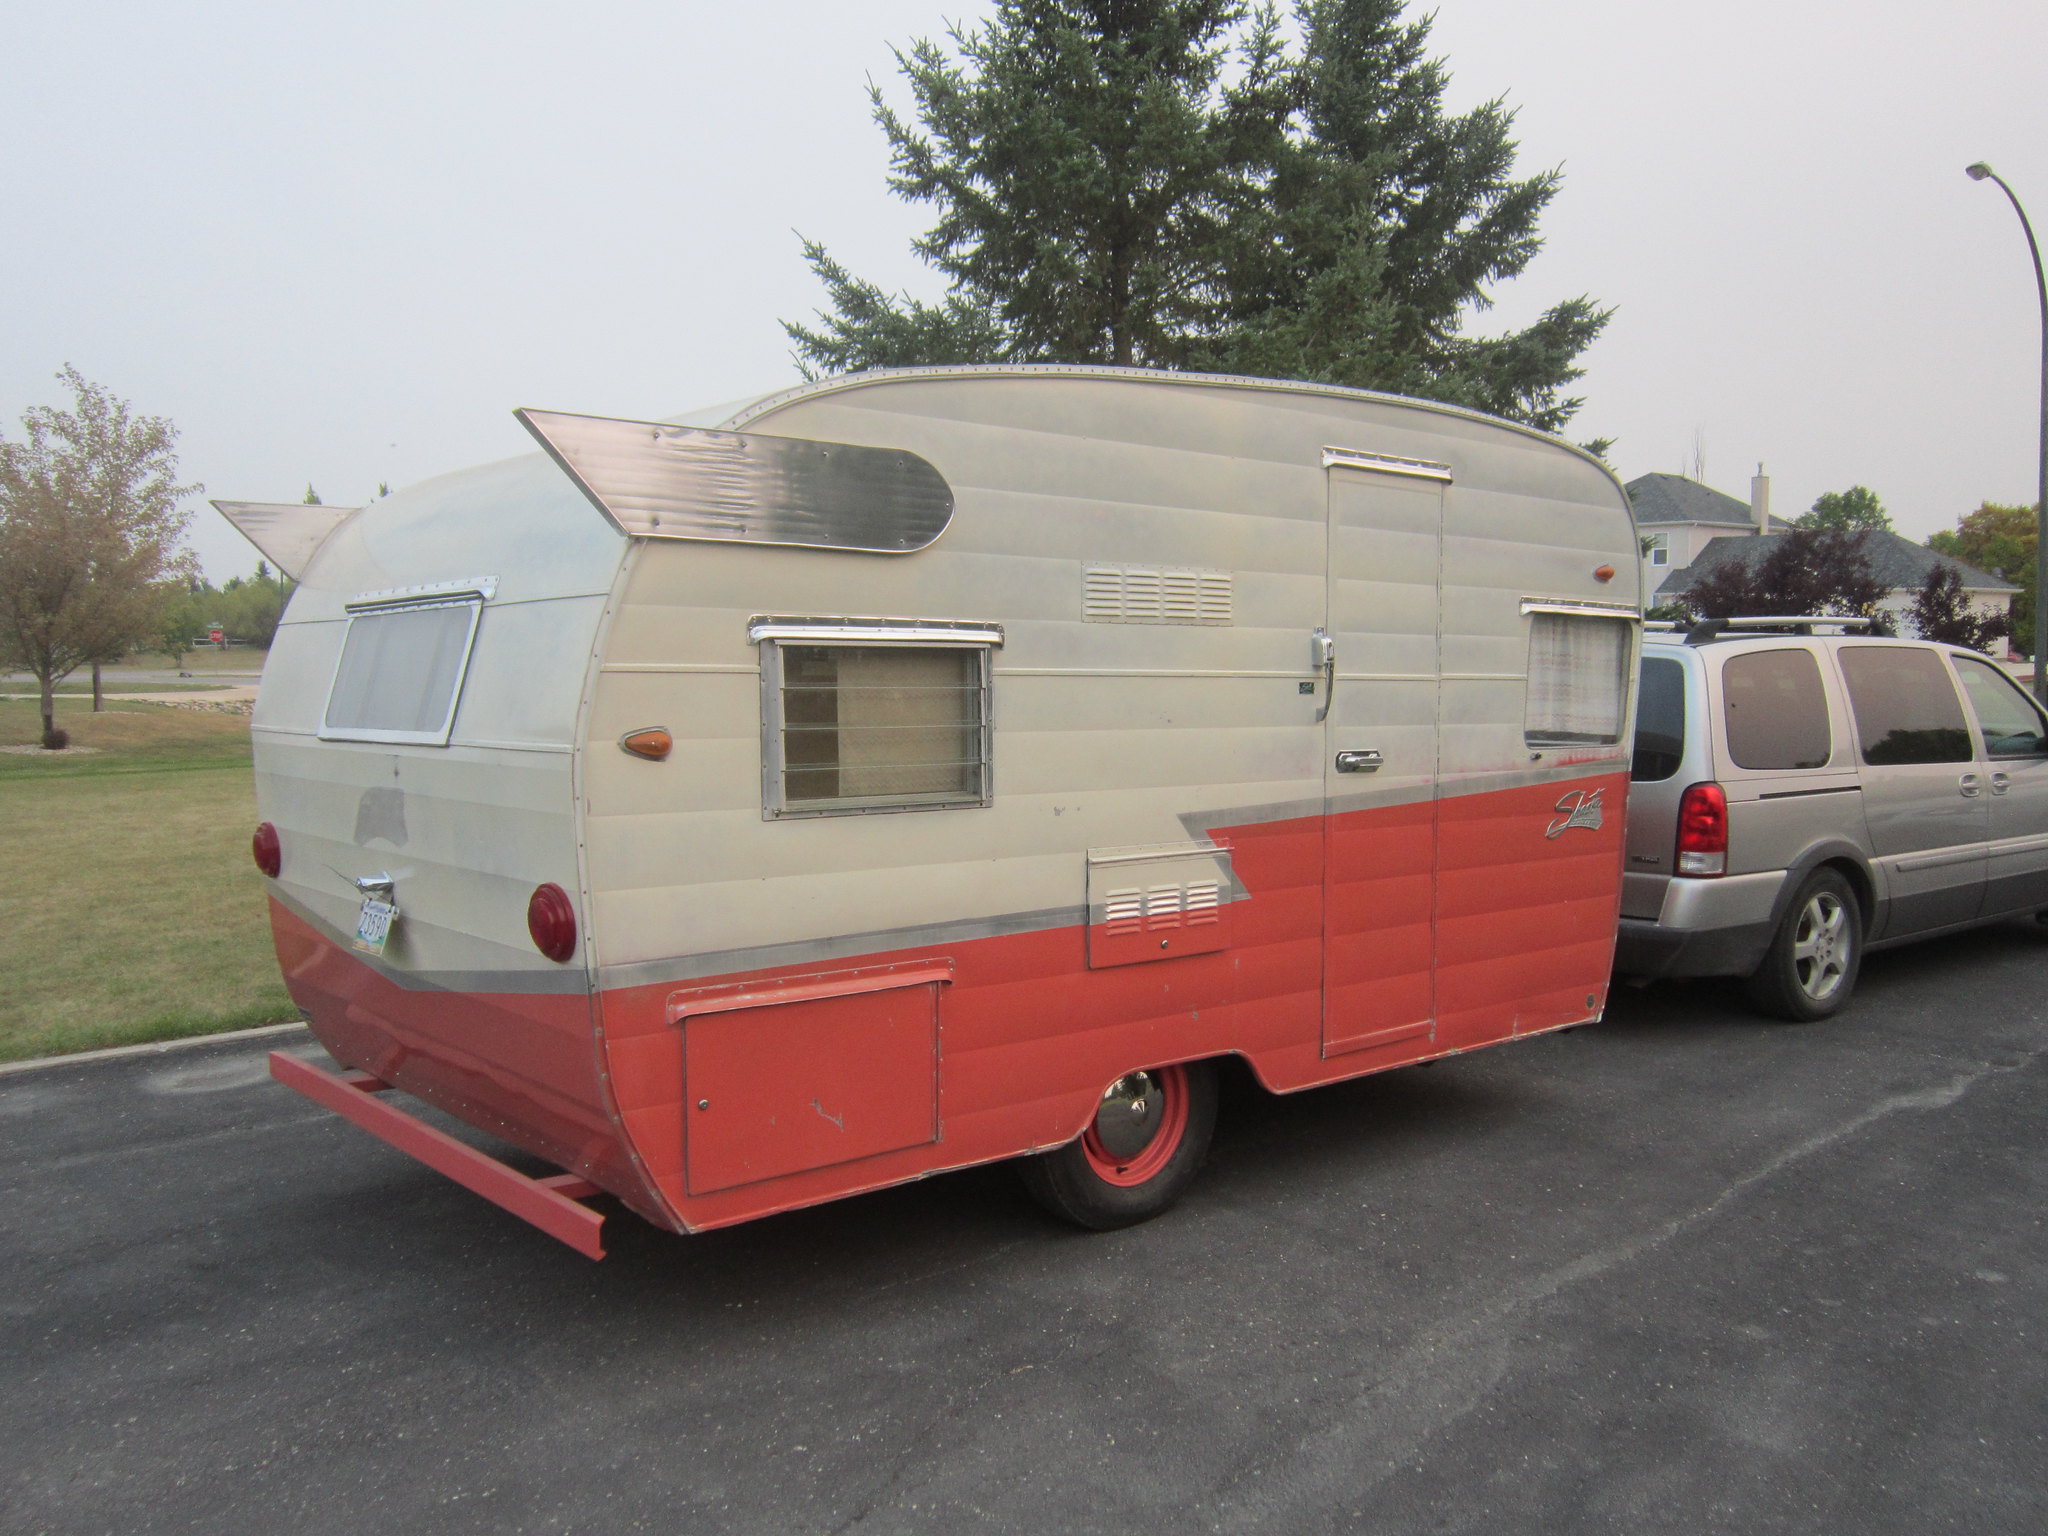 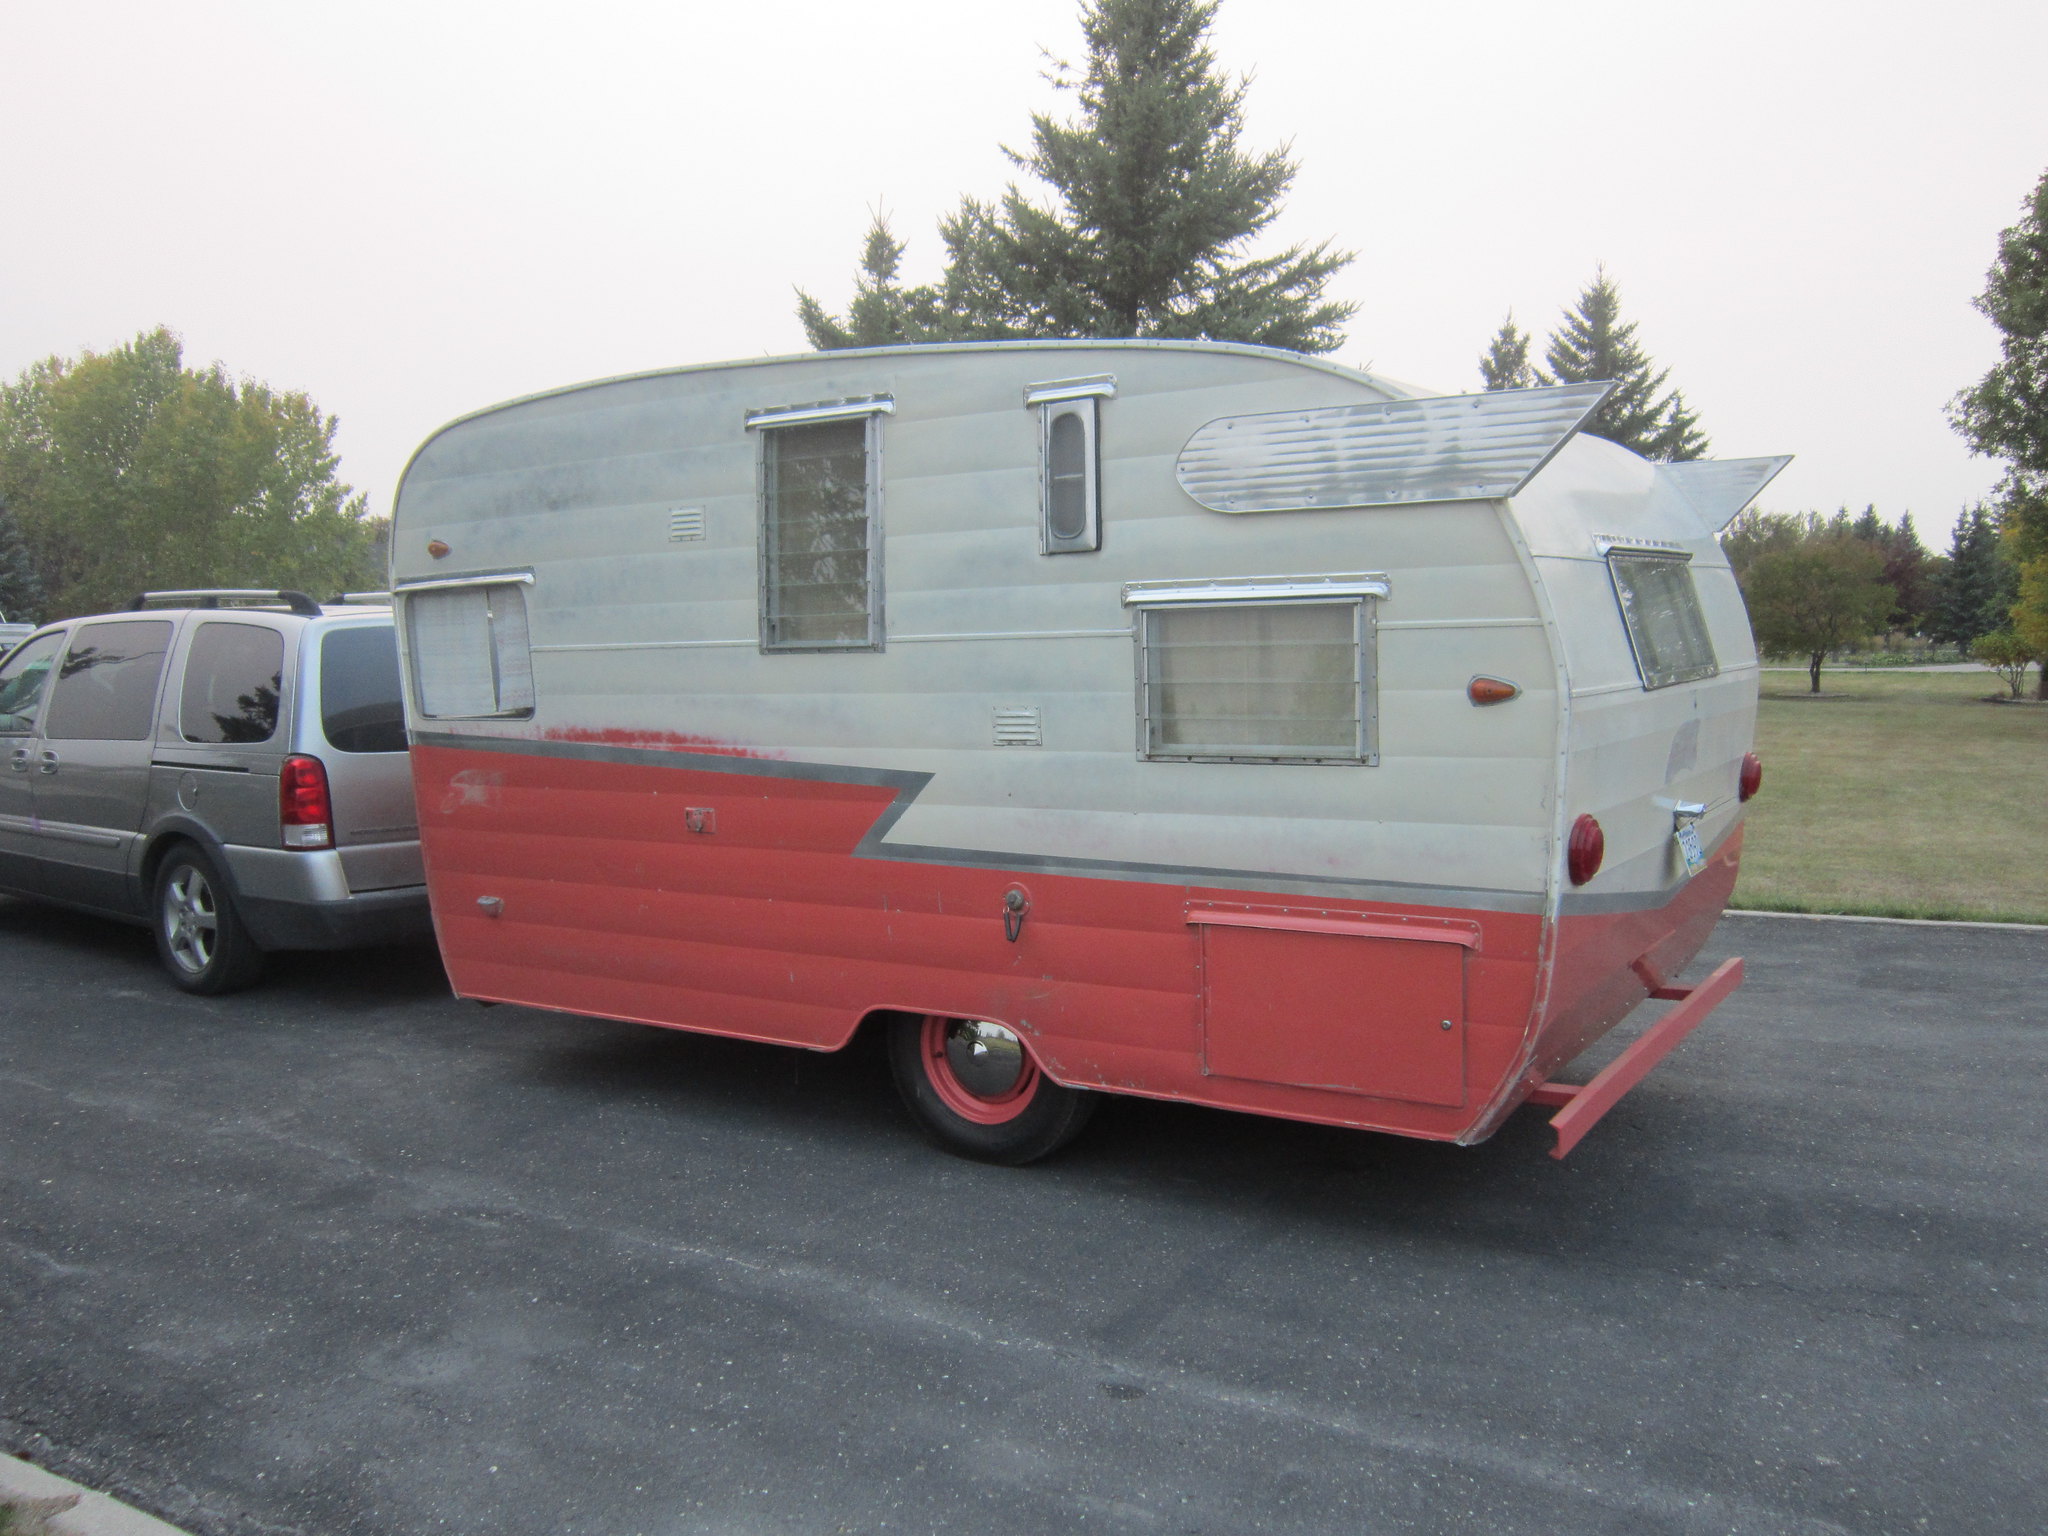 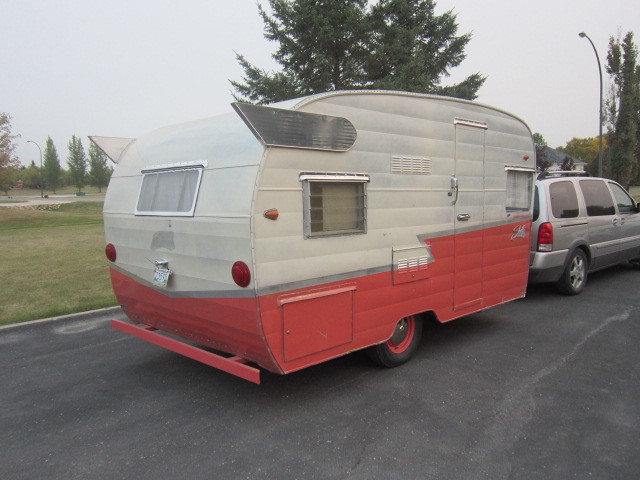 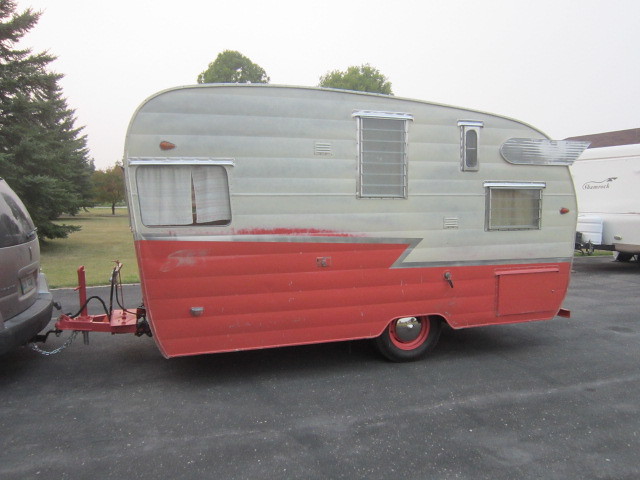 I I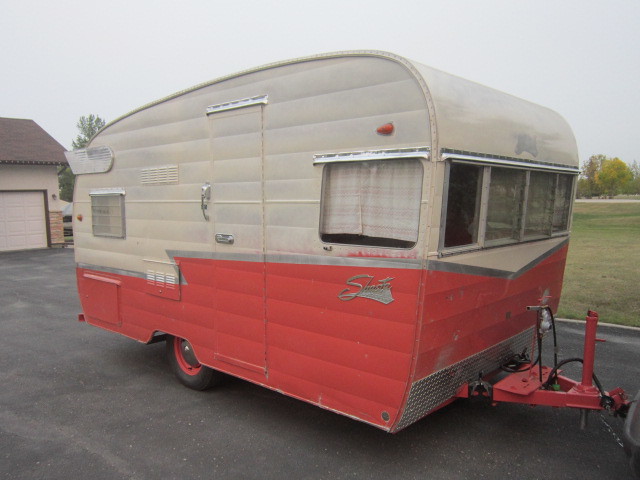 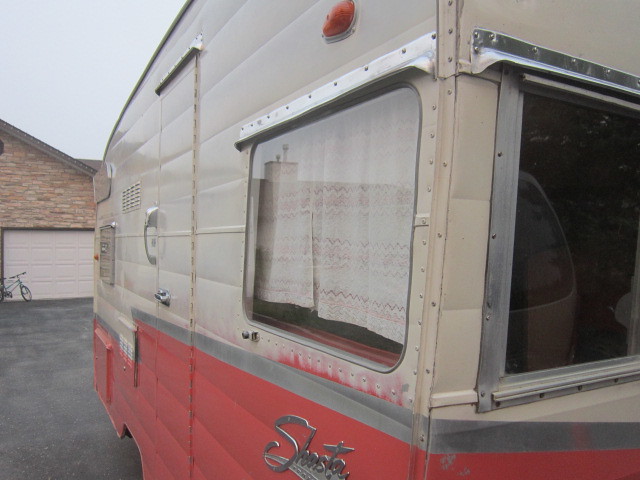 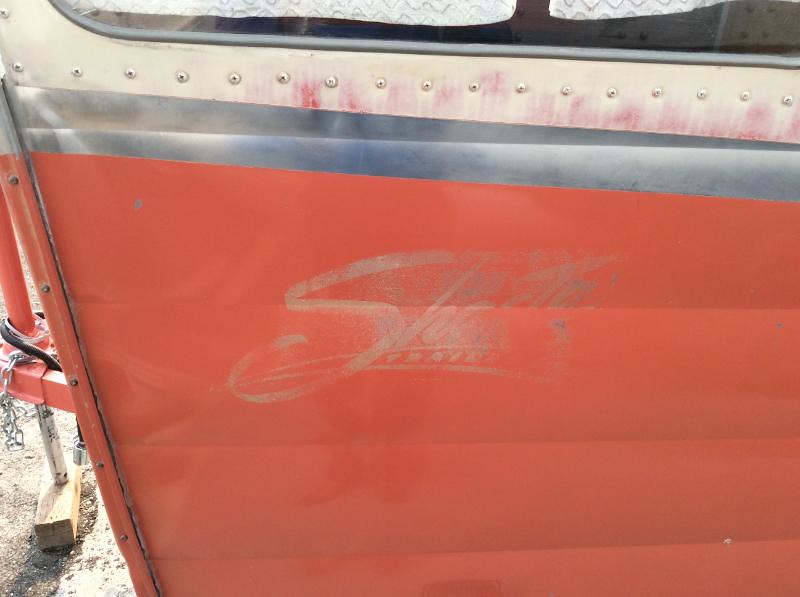 1961 Shasta 3 1961 Shasta 3 by Joey McDonald, on Flickr 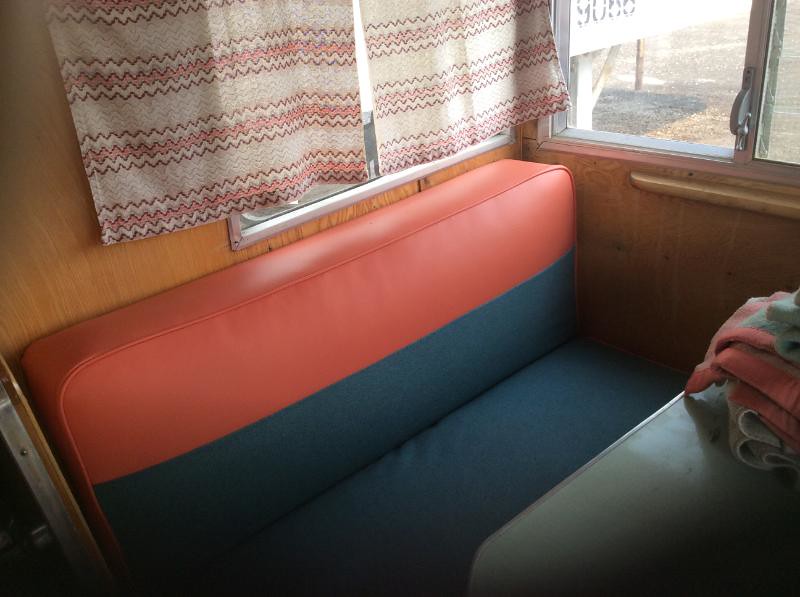 1961 Shasta 7 1961 Shasta 7 by Joey McDonald, on Flickr 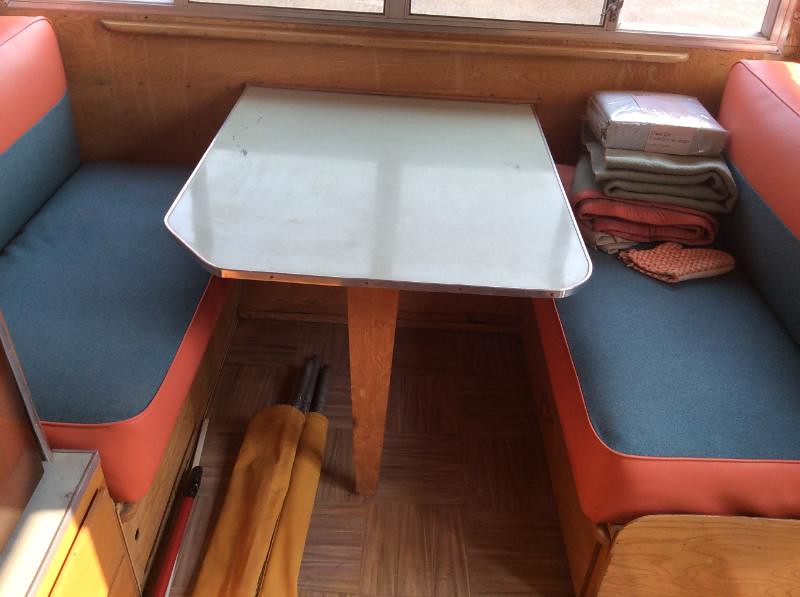 1961 Shasta 8 1961 Shasta 8 by Joey McDonald, on Flickr 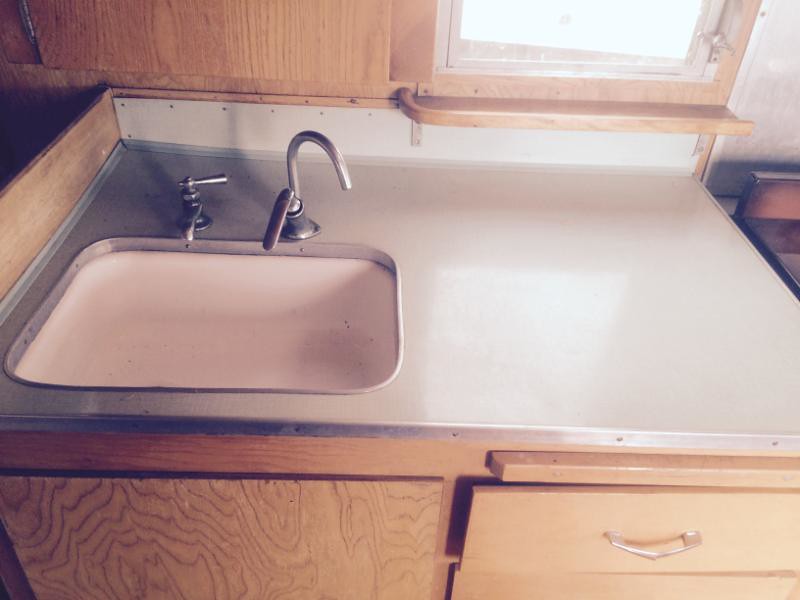 1961 Shasta 13 1961 Shasta 13 by Joey McDonald, on Flickr |
|
jukebox
Member
Posts: 43
Likes: 9
1961 Shasta Airflyte
Currently Offline
|
Post by jukebox on Sept 17, 2018 6:06:12 GMT -8
Where was this trailer rally in Wisconsin? Is it an annual show? What were your thoughts?
I would really like to go to a vintage trailer show/rally but most of the shows I see advertised are in the southern US states. I am thinking vintage trailer popularity is more prominent in some states rather than others. Do you think this Wisconsin show is the most northern show? Does anyone know if there is a show/rally in Minnesota , North Dakota , South Dakota , or Montana ?
|
|
jukebox
Member
Posts: 43
Likes: 9
1961 Shasta Airflyte
Currently Offline
|
Post by jukebox on Aug 30, 2018 17:40:54 GMT -8
Something happened drastic for a large tow vehicle like that one to bust through the guard rail. Also the trailer being upside down and still be connected would take a ton of force. Unlikely to happen if being towed at a reasonable tow speed.
|
|
jukebox
Member
Posts: 43
Likes: 9
1961 Shasta Airflyte
Currently Offline
|
Post by jukebox on Aug 30, 2018 17:32:33 GMT -8
I have the correct stock springs. Ride height seems pretty good compared to new and old pictures for comparison.
Shackle bushings have been replaced and well greased. Tires are new Carlisle trailer rated tires of the correct size and rating.
Watching the movement while driving I didn't see the tire sidewall flex much. It did flex but didn't seem enough to contribute to the bouncing.
There is also leaf springs available with 2000 lb rate ratings with 2 leaf / 3 leaf / 4 leaf setups. I am skeptical that changing springs would change the rebound rate. It would most likely make a more firm situation rather then reduce the rebound of the spring action.
There is shock kits available by Joyride but they seem very heavy duty and start at 3000 lb ratings. I think that is way too much for the canned ham trailers.
|
|
jukebox
Member
Posts: 43
Likes: 9
1961 Shasta Airflyte
Currently Offline
|
Post by jukebox on Aug 29, 2018 18:19:54 GMT -8
I didn't notice this untill I followed my wife towing our Shasta Airflyte. It bounces more than I think it should.
The ride height seems correct. Springs ( nice arc ) / shackles / bushings all good. I noticed it a bit when towing myself because you can feel it tugging as it bounces. You can't really see it too much because the trailer is so close to the back of my tow vehicle.
There is a few ways to try and address this and I am wondering if there is any experience from others here to share.
Good and bad.
|
|
jukebox
Member
Posts: 43
Likes: 9
1961 Shasta Airflyte
Currently Offline
|
Post by jukebox on Apr 4, 2018 5:14:47 GMT -8
From the picture it looks like the screw can be removed from the backside. Instead of trying to remove the screw out the front try to continue screwing it inward and then remove from the back. That channel space should be big enough to allow the screw to come out. That screw was originally screwed in. Continue to screw it in and see if you can get it out as long as the shoulder of the screw doesn't bind.
Work from the front in and out to free it. Use a penetrating spray to help and keep it coated as you work it back and forth.
Take your time and don't force it.
|
|
jukebox
Member
Posts: 43
Likes: 9
1961 Shasta Airflyte
Currently Offline
|
Post by jukebox on Feb 18, 2018 7:10:30 GMT -8
It would be best to take a level measurement from the hub face. This is where the back side of the wheel rim mates when installed. If your frame is sitting true then place your level against the hub face and check it there for plumb and level.
If you had a couple of magnetic levels that would work great.
Place them both vertical and check for plumb. Then turn your wheel hubs 90 degrees and check for square with a tape measure to the level.
I don't think this angle will change with weight because the hub assembly is so close to the spring mount.
Horizontal level ( square ) is more critical because this is a tire wearing angle. ( Toe in or toe out ) like with a car. Vertical is camber and that angle is not as critical for tire wear.
|
|
jukebox
Member
Posts: 43
Likes: 9
1961 Shasta Airflyte
Currently Offline
|
Post by jukebox on Feb 8, 2018 7:30:58 GMT -8
Some people call a tow package slapping on a hitch and trailer wiring. There is more to it than that.
Do your research as allready suggested. Actually asking here is doing some research. That is a short vehicle as well. The 4.3L has decent power but you are wanting to tow a heavy trailer and even heavier when loaded. If you are looking at purchasing a vehicle and don't require 4WD then you may consider the full size truck C1500 that was also available with a 4.3L in that era. the C1500 was available with a factory tow package. These tow options would include a transmission cooler, different automatic transmission calibration and sometimes larger brakes as well as the hitch and wiring.
|
|
jukebox
Member
Posts: 43
Likes: 9
1961 Shasta Airflyte
Currently Offline
|
Post by jukebox on Feb 8, 2018 7:22:47 GMT -8
The new white panel looks nice. With that gold band in the center of the upper and lower panels it might be a good time to consider a 2 tone look. Too much white might be just too much white.
I am considering replacing the front panel on my Shasta Airflyte. How was your panels shipped?
Is your roof one piece now?
I also notice that they crimped the bottom edge of you new panel to accept another panel. Nice.
|
|
jukebox
Member
Posts: 43
Likes: 9
1961 Shasta Airflyte
Currently Offline
|
Post by jukebox on Jan 26, 2018 8:41:45 GMT -8
Where I am here in Central Canada, its hard to find these old trailers in any condition. Usually the hunt would lead to long distances of driving. That costs money and time. Then when you find one it will most likely need work just to make it towable. Around here it would usually be a field or barn find and not the greatest condition.
I have not been a member here long. I have a 61 Airflyte and have noticed people also refer to these old Shasta as a 1500. Same trailers? I notice this one in this topic has the louvered front side windows.
|
|
jukebox
Member
Posts: 43
Likes: 9
1961 Shasta Airflyte
Currently Offline
|
Post by jukebox on Jan 20, 2018 7:21:10 GMT -8
Thats a cool name plate. I like the spintop at the end of it.
This trailer will look great with a nice repaint.
|
|
jukebox
Member
Posts: 43
Likes: 9
1961 Shasta Airflyte
Currently Offline
|
Post by jukebox on Jan 7, 2018 15:36:34 GMT -8
I agree that the switch could be suspect of a problem. The switch is just that it has a contact blade inside that shorts across the contacts when switched on. If there is resistance on the switch contacts then you can have flicker issues.
Is the flickering lights flickering at some sort of patttern? Like bright/dim at same time intervals? If this seems liek it has a pattern then suspect the bulbs or inverter/converter.
Have you verified the voltage at the bulb socket with a multimeter and watch voltage fluctuations? An LED bulb can flicker and display these symptoms because they simply can. An incandescent bulb will not display these characteristics because it is to slow to respond and you cannot see it with your eyes in most cases. 60HZ frequency can be seen with LED's.
Can you swap out the bulbs you bought with a known good LED one? Putting in a incandescent bulb will not help you with this problem.
Similar issue. I changed out all my basement potlight bulbs with LED ones. I noticed a couple of things.
First when used with a dimmer they won't turn on unless the dimmer is set to full bright. I also noticed that they would hum and flicker when dimmed even though is clearly says on the package that they are dimmable. I researched this abit and found that you have to use a LED compliant dimmer switch. So, I replaced one dimmer and the new LED bulbs worked great. They would even turn on in full dim mode. Of course I had to try it. I replaced all the dimmers and now work great.
$23 for each dimmer. I guess my cost savings is delayed with the new LED bulbs.
|
|


