Ten
3K Member

Posts: 3,432
Likes: 1,467
70 Shasta 16SC + 1964 Airflyte
Currently Offline
|
Post by Ten on Feb 3, 2016 20:33:31 GMT -8
Hi fishfarm.
Welcome aboard....
I am going to answer your question just as vaguely as I possibly can. This is well worth restoring, in my opinion only. Whether it is worth it to you will depend just how far you want to take it and how much your budget will be.
This looks like it is a great prospect, but don't fool yourself into thinking you will knock this out in a few weekends and be camping before the end of the season in it. The price is absolutely right, but this will be a project. It will likely need to be taken way down in order to repair the frame and floor, and the missing parts such as the window will be a treasure hunt for sure. But those are the things we love doing, the hunt and progress is most of the fun!
|
|
Ten
3K Member
Posts: 3,432
Likes: 1,467
70 Shasta 16SC + 1964 Airflyte
Currently Offline
|
Post by Ten on Feb 3, 2016 20:18:21 GMT -8
Very cool set of photos. If SusieQ passes on it I would love to be next in line for "dibs". Personally I am trying to land a '64, to go with my Airflyte. But if a '59 were to be available, I would make it my second choice.... Love what you are doing with this, and I can't wait to see progress and cheer-lead as you make it! |
|
Ten
3K Member
Posts: 3,432
Likes: 1,467
70 Shasta 16SC + 1964 Airflyte
Currently Offline
|
Post by Ten on Feb 3, 2016 5:44:38 GMT -8
One thing to consider is shipping costs. The rails can cost more for freight than for the material itself because of the size. If you have a local dealer readily available, sometimes it can be more cost effective to purchase locally than to try saving a buck buying and shipping. Also, forming the new rails to fit your contour is another ball of bees.
I would suggest reading through some of the threads that concern polishing of aluminum. Refurbishing the old from your unit can be easier than it might seem. Aluminum is very forgiving and pliable, and damaged spots are not that hard to fix. Paint removal can seem never-ending, and polishing is tedious and time-consuming, but the results can be quite rewarding. This applies only of course if you have something decent to start from.
|
|
Ten
3K Member
Posts: 3,432
Likes: 1,467
70 Shasta 16SC + 1964 Airflyte
Currently Offline
|
Post by Ten on Feb 1, 2016 13:35:56 GMT -8
Hello drphillipjones. Glad you found us. A/C info; pre 70s trailers were not designed to support weight on the roof, and that subject has been discussed a lot. Don't know if your 73 is stronger, but there have been bad results from roof a/c units However, removing the window mount one is the first order of business...these old trailers were never designed to support the weight in the window frames to begin with. Welcome aboard! |
|
Ten
3K Member
Posts: 3,432
Likes: 1,467
70 Shasta 16SC + 1964 Airflyte
Currently Offline
|
Post by Ten on Feb 1, 2016 12:57:19 GMT -8
If it is set up the same, the tank has a screw-thread fitting "welded" into it, and the flange in the floor is also threaded. The toilet will be connected with a 3" ABS nipple, threaded both ends. You will need to remove the toilet and then unscrew the flange from the floor in order to turn one or the other end out of the threads to release the connection. I am anxious to see how yours is set up and how similar the construction with the difference of the years and models. 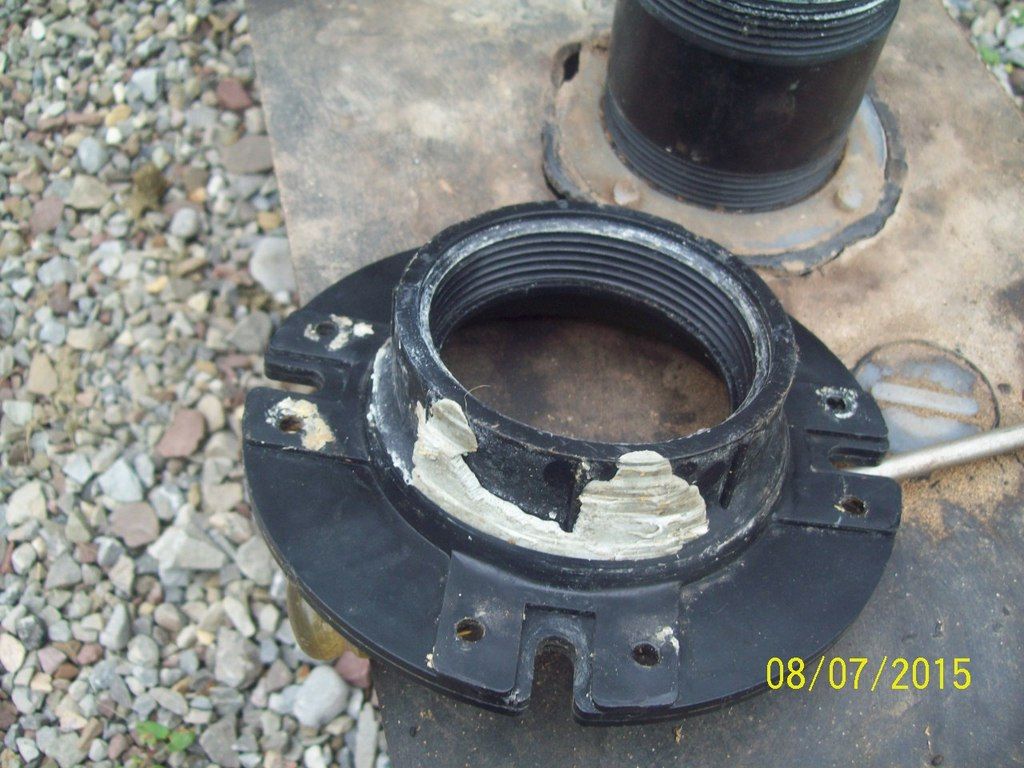 |
|
Ten
3K Member
Posts: 3,432
Likes: 1,467
70 Shasta 16SC + 1964 Airflyte
Currently Offline
|
Post by Ten on Jan 31, 2016 20:25:11 GMT -8
It sounds like it is a similar setup to the one in my SC. Check the end of the tank where the clamp removes. The tank should be pushed fairly close to the wooden frame above the mount point. Mine had a small piece of plywood that was screwed into the wood frame. It acted to wedge the tank back toward the welded clamp. There was little room to unscrew it, but the tank pushed up and back enough to reach it. Once it was removed the tank slipped right out from the opening and down off the welded bracket. I don't have very many photos that really tell the story, but this one is the space the tank was removed from. The 1-1/2 inch pipe is the sink drain exiting the floor pan. The hole above is the exit point for the toilet drain. Centered in the forward part of the opening you can see the bolts which held the removable bracket, and the dark spot above that is where the wood block was located. 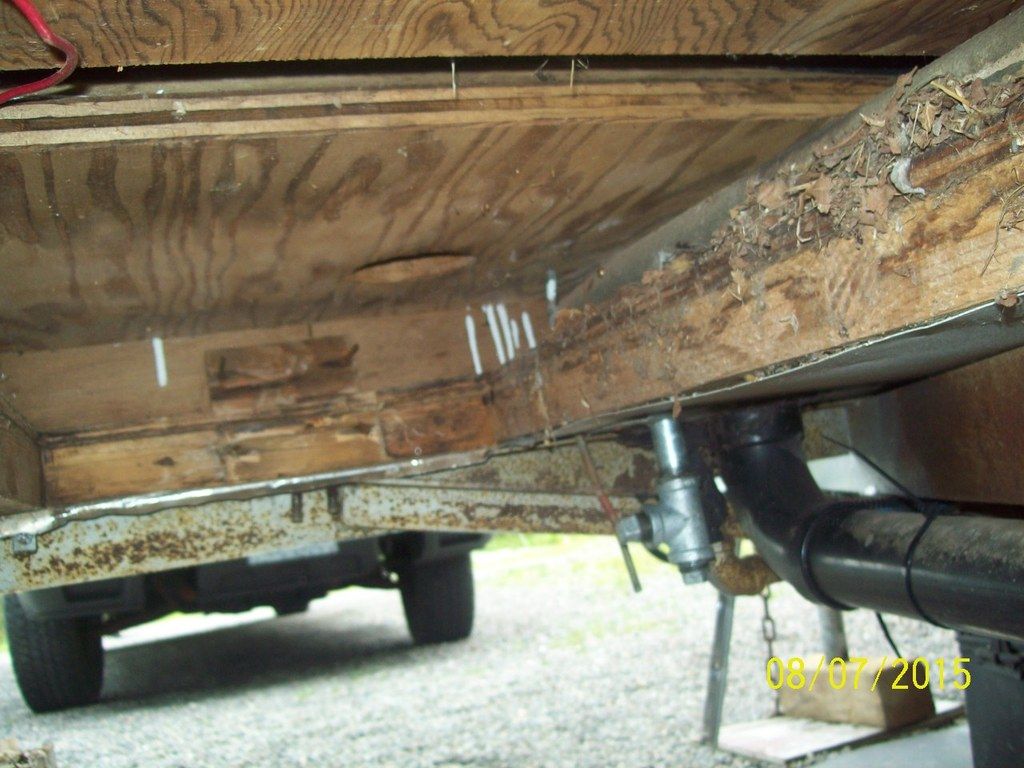 The forward end of the tank is the end to the left. The actual shape of the tank provided the wedging effect. The tighter the inclined end of the tank was drawn against the plywood block, the more it pushed rearward into the fixed bracket. 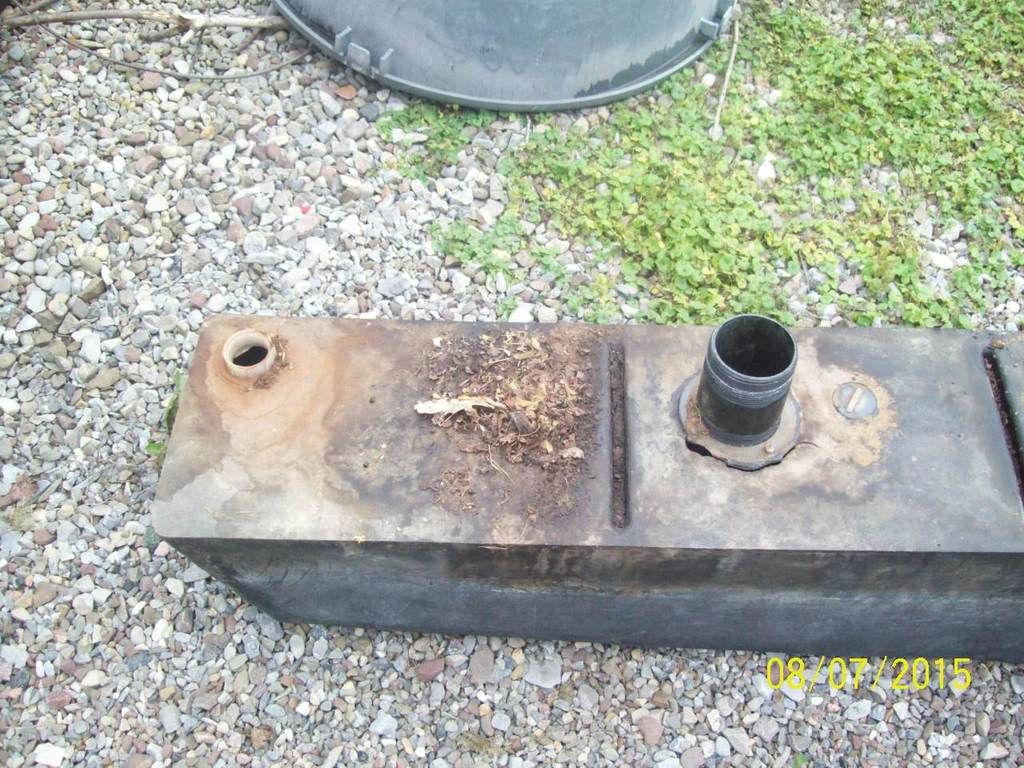 Before it was all removed, this is the outlet end of the tank, and the gray drain pipe cut off. (The joint of the shower drain and the sink drain is directly behind the outlet opening of the tank in the photo.) 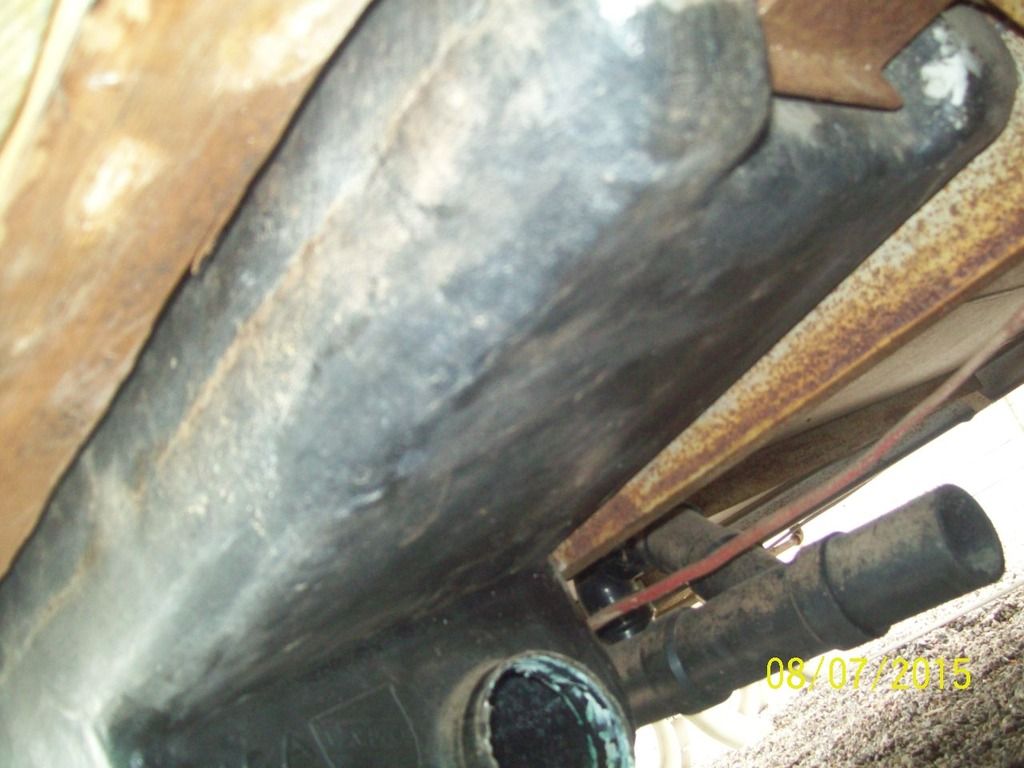 This is the valve from the dump and the junction point of the two: 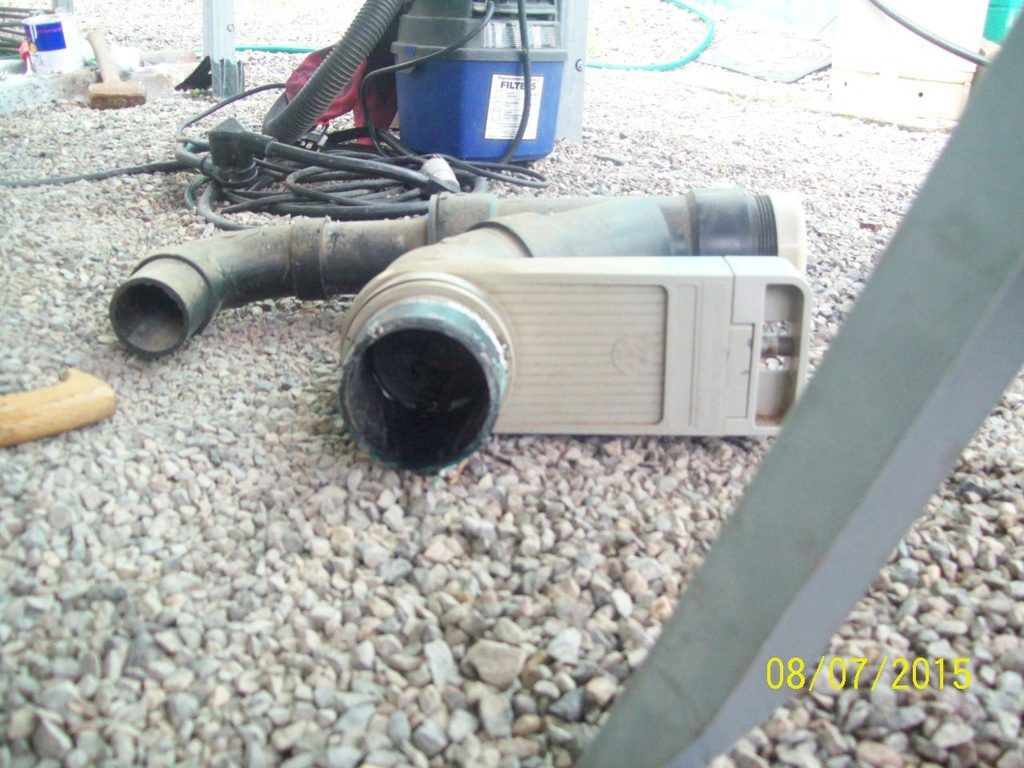 |
|
Ten
3K Member
Posts: 3,432
Likes: 1,467
70 Shasta 16SC + 1964 Airflyte
Currently Offline
|
Post by Ten on Jan 31, 2016 19:43:37 GMT -8
Looks worthy of an entry to the "Wood Rot Hall of Fame".... This is such a great unit with a history to boot. Should be a great project!
|
|
Ten
3K Member
Posts: 3,432
Likes: 1,467
70 Shasta 16SC + 1964 Airflyte
Currently Offline
|
Post by Ten on Jan 29, 2016 15:51:05 GMT -8
Be warned about the Cardinals...the pre-1960 models had rather flimsy framework to them, and were known for bent and broken tongues, among other problems.
|
|
Ten
3K Member
Posts: 3,432
Likes: 1,467
70 Shasta 16SC + 1964 Airflyte
Currently Offline
|
Post by Ten on Jan 29, 2016 8:01:25 GMT -8
Back in the era of your Starflyte, the ABS was the most commonly-used plastic piping and was the material of choice amongst Shastas. Generally the gray water drain lines and vent should be 1-1/2", and the black tank 3".
The Starflyte should have an elevated floor in the bath area, and the toilet should be sitting on top of the black tank. Even though the shower shared the floor space, the drain from it should bypass the tank. The other drain for the kitchenette sink (and bath sink, if there was one) would join together with the shower drain line underneath. Those would join with the dump-end of the black tank drain, so that all drains would exit at the same point. There should be a shut off valve on the black tank, upstream of the outlet of the gray-water drain pipe.
Essentially this made it so the gray water would drain freely, and the black water would remain captive, no matter what else happened externally. It is important to remember that the black water cannot be allowed to drain freely. It needs to be captive in order to properly empty the tank, otherwise solids can plug up the works and make for a very unpleasant camping experience.
(Photos are currently unavailable, but I'll try to remember to illustrate my points later.)
|
|
Ten
3K Member
Posts: 3,432
Likes: 1,467
70 Shasta 16SC + 1964 Airflyte
Currently Offline
|
Post by Ten on Jan 29, 2016 6:08:27 GMT -8
|
|
Ten
3K Member
Posts: 3,432
Likes: 1,467
70 Shasta 16SC + 1964 Airflyte
Currently Offline
|
Post by Ten on Jan 29, 2016 4:41:04 GMT -8
Denatured Alcohol does make shellac sticky and/or soft... If it doesn't touch the finish, it's not shellac. But whatever you do, do NOT mix it up with your Sierra Nevada..... ![(=])](//storage.proboards.com/3684717/images/NVMMIBL1J3sN4gcz6aYv.png) |
|
Ten
3K Member
Posts: 3,432
Likes: 1,467
70 Shasta 16SC + 1964 Airflyte
Currently Offline
|
Post by Ten on Jan 27, 2016 13:23:37 GMT -8
|
|
Ten
3K Member
Posts: 3,432
Likes: 1,467
70 Shasta 16SC + 1964 Airflyte
Currently Offline
|
Post by Ten on Jan 27, 2016 10:00:56 GMT -8
I was considering getting one of these paint removers, but I am not sure if I have a big enough shop....  |
|
Ten
3K Member
Posts: 3,432
Likes: 1,467
70 Shasta 16SC + 1964 Airflyte
Currently Offline
|
Post by Ten on Jan 27, 2016 9:34:20 GMT -8
First, welcome to our addiction. Second, rule around here is "photos or it didn't happen". (We're a terribly voyeuristic bunch here....) Where to start? Well,how about here: vintagetrailertalk.freeforums.net/thread/29/shasta-astrodome-16sc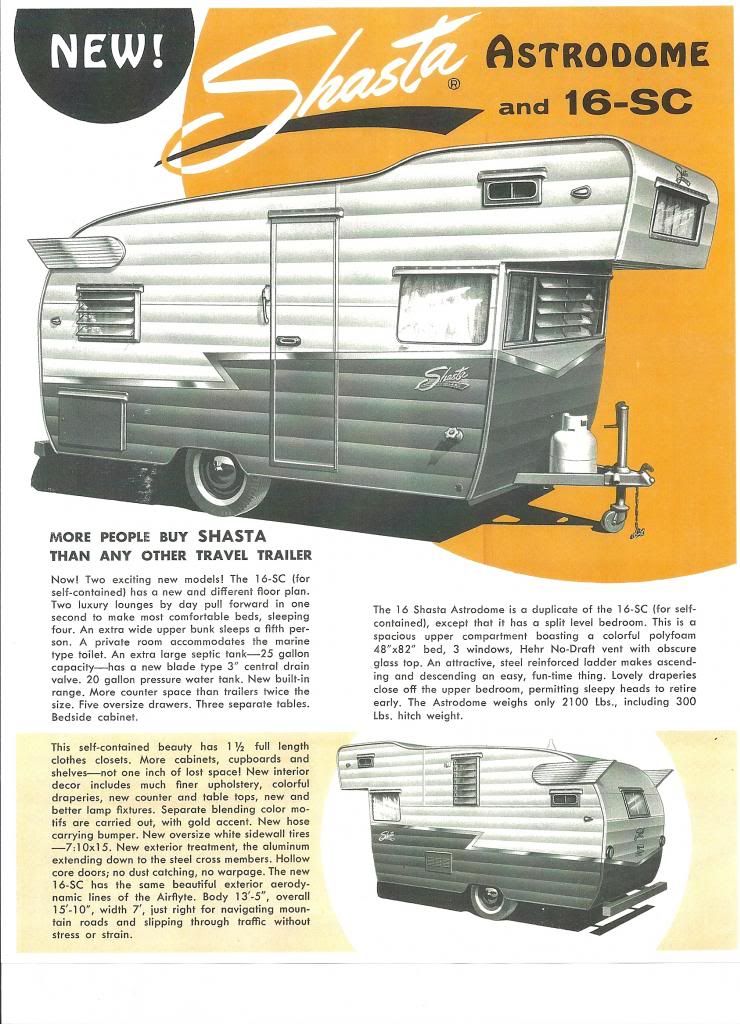 Then maybe here: vintagetrailertalk.freeforums.net/thread/5944/shasta-vin-locations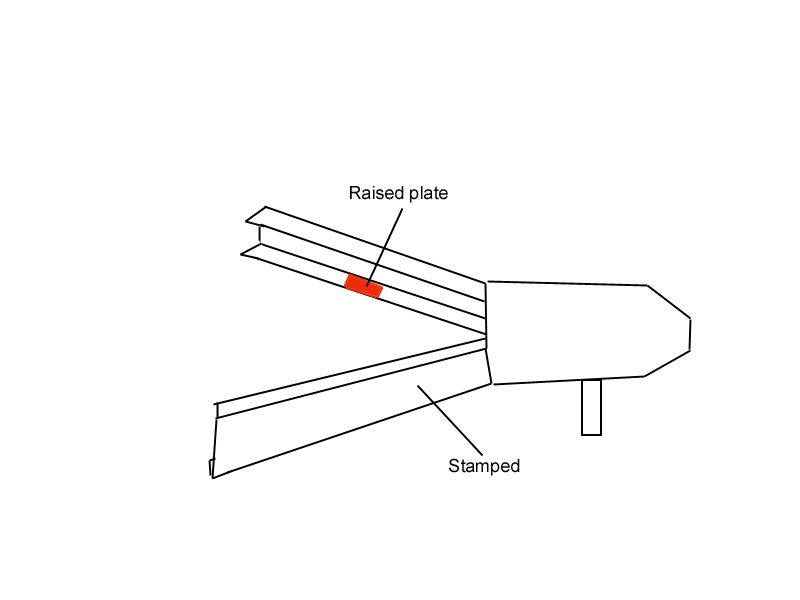 The "controversy" that has surfaced concerning the Astrodome/Astroflyte models, and others like them, started some time ago. Personally I think the bunk over the hitch just screams "early-60's camper". Others that have worked on this model have kept it to preserve the originality of the trailer, as well as keeping the useful storage and sleeping space. The bunk design combined with the construction methods that lead to leakage over years make it a natural catchall for rot, on top of it being a towing problem for most types of vehicles. This has lead to the opinion that cutting the bunk off is the best way to proceed with rebuilding this design. The bottom line will always be "it's yours do what you want with it". We're here to help, purists and cutters alike. One of the best ways to research is to see what others have done with this particular model. Here are a couple for you. First, one of the finest examples of a "cutting" job remodel. This belongs to our friend schweetcruisers. He documented every step of the journey at www.schweetcruisers.blogspot.com/Before:  After: .JPG) I'll leave you with Tyler's blog of his restored Astrodome. www.nastyshasty.blogspot.com/search/label/My%20'64%20Astrodome%20Restoration Before:  After:  And of course, the page for his wings: www.nastyshasty.blogspot.com/search/label/WINGS%20-%20For%20Sale%20%28Shasta%29He has a great gallery of photos of finished trailers with his wings mounted. It is worth a look even if you don't like wings. (But be careful how loud you admit that...) |
|
Ten
3K Member
Posts: 3,432
Likes: 1,467
70 Shasta 16SC + 1964 Airflyte
Currently Offline
|
Post by Ten on Jan 27, 2016 8:06:28 GMT -8
Shasta stamped the VIN numbers into the curbside outer face of the tongue, usually just behind the coupler and ahead of the propane tank rack. There should also be a plate which was welded into the inner side of the streetside tongue rail containing the same number. Often the numbers are obscured by rust or layers of paint, but can be located and read with the use of a wire brush or a paint remover. Sanding or grinding is highly discouraged as the stamp can easily be marred or obliterated. The VIN was usually preceded by a letter, which indicated the manufacturing plant. Shasta's VIN numbers were sequential numbers for the particular plant of manufacture, and did not encode any other information. Dates of manufacture can be estimated by inserting the number into a known sequence for each plant. VTT member Ross has been compiling a database of Shasta VIN numbers for some years. He can be contacted for help by personal message or by posting to this thread: vintagetrailertalk.freeforums.net/thread/22/shasta-vin-model-database-include |
|


![(=])](http://storage.proboards.com/3684717/images/NVMMIBL1J3sN4gcz6aYv.png)
