Ten
3K Member

Posts: 3,432
Likes: 1,467
70 Shasta 16SC + 1964 Airflyte
Currently Offline
|
Post by Ten on Jan 24, 2016 6:50:28 GMT -8
kirkadie , I thought the same thing when I first looked. It is actually the bottom portion pushed out from the bottom, hinged in the middle, like the side window is. The top portion is a solid pane. Absolutely beautiful. It is so cool seeing this in it's "before" state. It was a great find. Agreed, John does great work, miss his input here.
|
|
Ten
3K Member
Posts: 3,432
Likes: 1,467
70 Shasta 16SC + 1964 Airflyte
Currently Offline
|
Post by Ten on Jan 24, 2016 4:37:59 GMT -8
As you probably know, Atwood currently makes a replacement which fits the same slot as the old Bowen heaters fit. They build them from the basic manual-lit pilot model to a combo unit that will run either propane or electric (which in most cases would also require some extensive rewiring of the trailer to accommodate the draw). There are also models in between which are propane-fired but have electronic ignitions, which require a separate 12-volt wiring unit to operate the ignition. Prices vary and they are not cheap, but are well worth it if you consider the price as investment. Pricing can vary greatly, and you can save a few bucks shopping around. Camping/RV places will be pretty expensive compared to other sources. After all that being said, fixing up an old one can be risky business, as they can fail at any time, and usually at the worst time, just like any other old appliance. I have seen them fire up and quit, fire the pilot but not the burner, fire the burner but not the pilot, etc. etc. But as long as you are prepared for the worst there is no real reason not to try. Two basic things to check. First, the tank will have to hold under pressure. Put the water to it and see if it holds with no leaks (referring to the tank, not necessarily the plumbing leading to and from it) before going any further with the propane end. The tank can be flushed out, using the drain plug to do so. The instructions with the new one states that the tank will hold a couple quarts of water in the bottom when allowed to drain, so running water through will help flush the sediment. Replacing the thermocouple should not be necessary if the pilot functions properly. They either work or they don't. Modern replacements are a bit different than the originals, and can present problems in replacing. I would steer away if it is possible. The regulator is another piece of the puzzle that is on or off, and if it is original to an old trailer I would consider replacing it anyway, along with the pigtails for the tanks. The entire system should be checked for leaks religiously, and should all be checked before putting the propane to the system to test the water heater....it is a good excuse to do so, and then the rest of the appliances can also be run safely as well. I did mine the last thing before it was time to winter-up, and decided on replacement because of some of these factors. Attwood manual model: 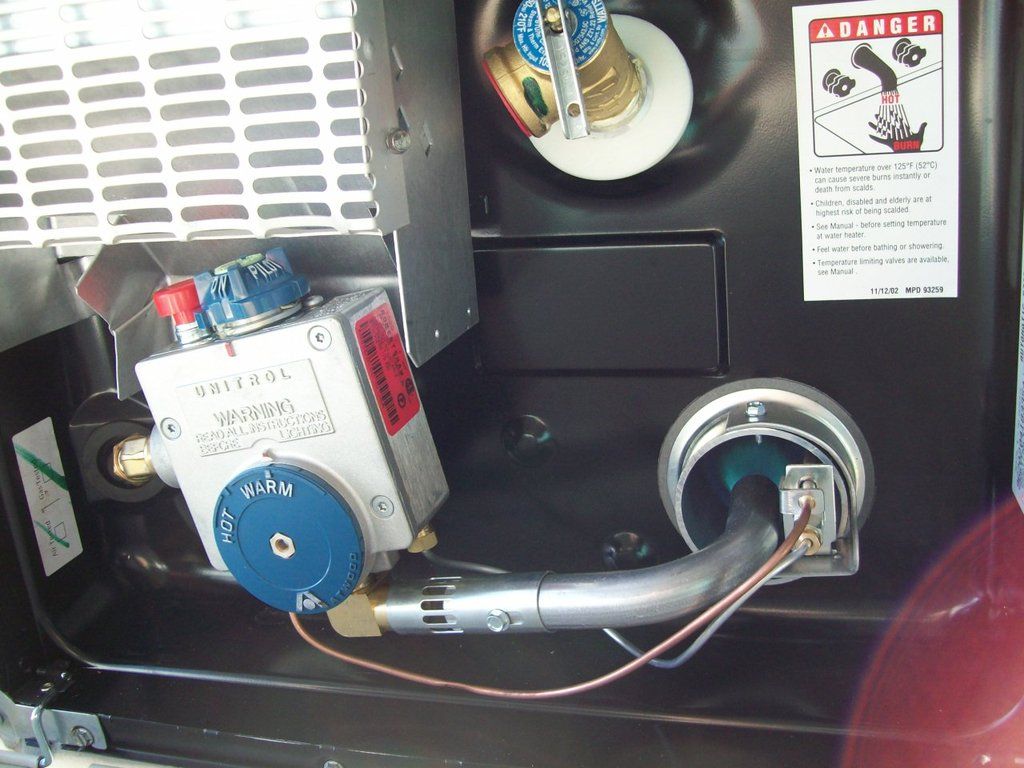 If and when you do replace it, and maybe even if you don't, you might consider a bypass kit in the plumbing. It makes winterizing much simpler. 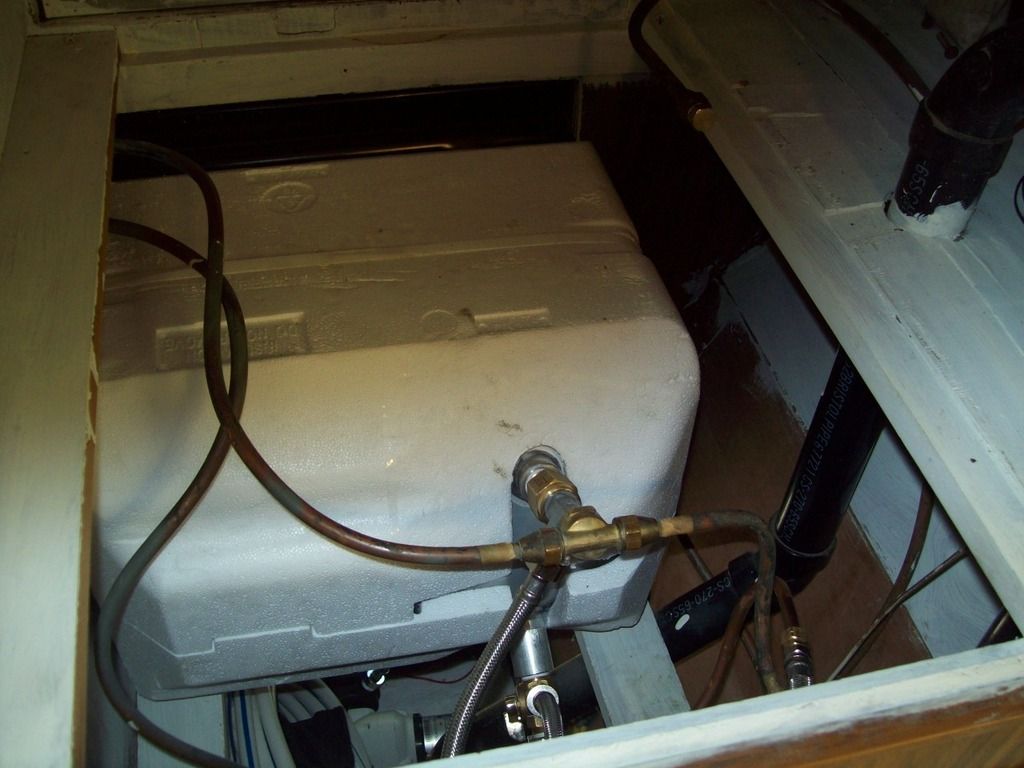 |
|
Ten
3K Member
Posts: 3,432
Likes: 1,467
70 Shasta 16SC + 1964 Airflyte
Currently Offline
|
Post by Ten on Jan 21, 2016 14:52:06 GMT -8
Perhaps someone should contact the designers at Thetford.....
|
|
Ten
3K Member
Posts: 3,432
Likes: 1,467
70 Shasta 16SC + 1964 Airflyte
Currently Offline
|
Post by Ten on Jan 20, 2016 4:50:57 GMT -8
If you can save it at all, try Mobil's way first. The old tanks can be brittle and break with even a little stress. I hate working on this end of a trailer...I have to agree. The only reason I started to take mine apart rather than remove it with a sledge was the fact it looked like it had never been used. Oh yeah, and the fact the tank was broken. The nipple is threaded into both ends underneath, so there is no room for stress. what appears to have been a good shot to the underside of the tank punched the fitting out of the top of the tank. This is a good time for you to be able to inspect the valves, seals, and mechanisms in the working of the toilet, too. If they are suspect it is easier to replace now than to have to remove it all again. |
|
Ten
3K Member
Posts: 3,432
Likes: 1,467
70 Shasta 16SC + 1964 Airflyte
Currently Offline
|
Post by Ten on Jan 19, 2016 21:19:35 GMT -8
Mine had a black ABS plastic flange, rather than the brass flange. Replacing the closet bolts may be the easiest way to go, along with cleaning everything thoroughly, although I believe I have seen the flanges available (I'll try tracking down the sources I had tomorrow.) Mine was held down with 8 large, Philips-head screws, attached into the fiberglass floor pan. 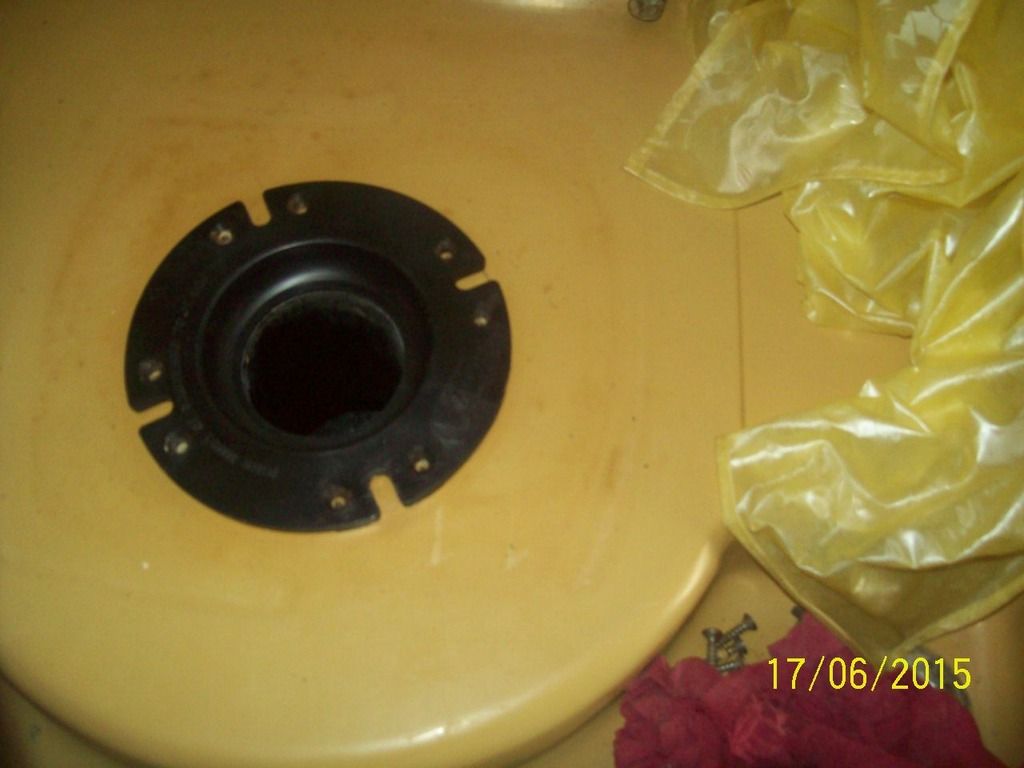 Beneath, it was threaded with a 3" ABS pipe nipple, which turned into the flange, and into the fitting in the top of the black tank as well.  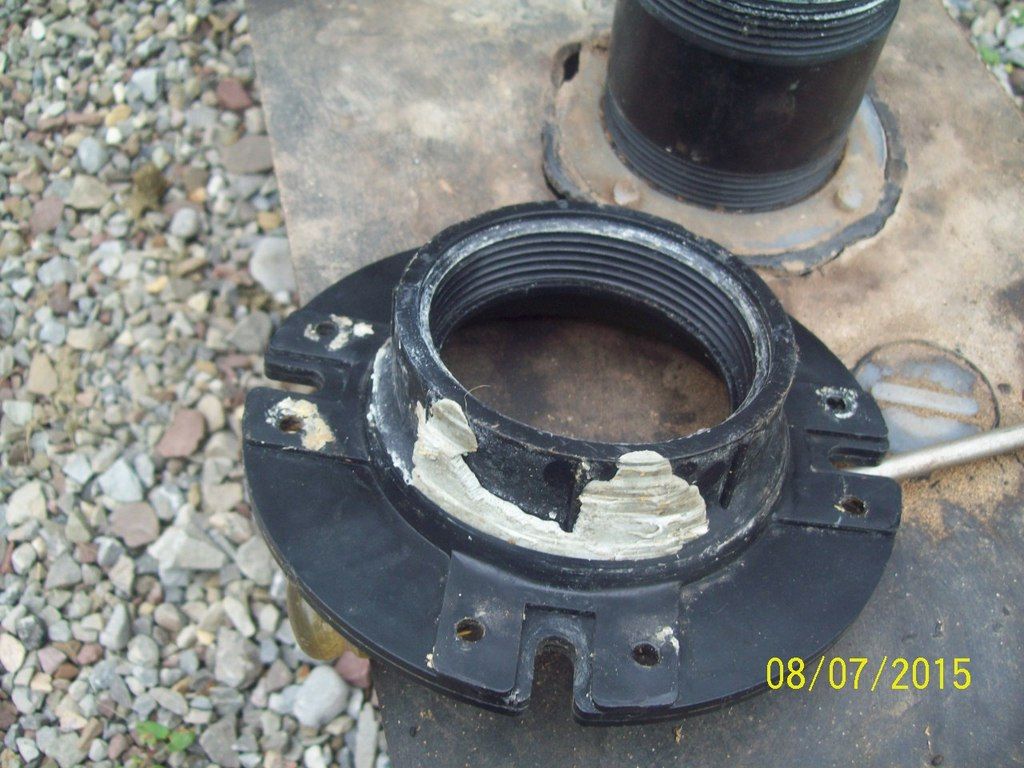 I can't say for sure the metal flange is threaded the same way, but I would suspect it is. Thus, the procedure would just be digging the screw heads out of the crud, cleaning well, remove the screws, and then turn the flange off the nipple. EDIT: Source of flange: www.vintagetrailersupply.com/Toilet-Floor-Flanges-p/vts-736.htm And another: www.vintagecampers.com/viewpart.php?partID=325 |
|
Ten
3K Member
Posts: 3,432
Likes: 1,467
70 Shasta 16SC + 1964 Airflyte
Currently Offline
|
Post by Ten on Jan 19, 2016 9:49:40 GMT -8
I know, I know.....
|
|
Ten
3K Member
Posts: 3,432
Likes: 1,467
70 Shasta 16SC + 1964 Airflyte
Currently Offline
|
Post by Ten on Jan 19, 2016 8:56:53 GMT -8
Hi spoma, The VIN won't actually tell the model. The VIN numbers were simply sequential from the plant, in this case the "P" indicates it was built in the Leola Pennsylvania plant. Ross should be able to narrow the year down by the sequence. From my own experience, I had a 1969 that was VIN P138XX, and have a 1970 that is VIN P172XX. I would venture a guess of 1968-1969 for date of manufacture. From the length you describe I would guess it was a Starflyte, or its close cousin, the Astroflyte. We could help more with photos of yours. There are some sales brochures posted which may help you identify the model by the layout of the interior. They are here: vintagetrailertalk.freeforums.net/board/1/shasta-brochures-vintage-ads |
|
Ten
3K Member
Posts: 3,432
Likes: 1,467
70 Shasta 16SC + 1964 Airflyte
Currently Offline
|
Post by Ten on Jan 18, 2016 12:11:15 GMT -8
I apologize, I really dropped the ball on this discussion.
The first order of business is understanding that you could possibly be testing a piece of equipment that is 40-50 years old. Even though many of them have relatively little use time compared to their age, their age is still a huge factor in the units failing. Most if not all will fail soon even if they test in working order now. The antiquated cooling system is impossible to repair and usually most cases, just as impossible to replace.
The first test is the smell test. Before you light a match or put a thermometer inside the unit, smell of it when you open the door. If there is a hint or stronger of ammonia, then the likelihood the cooling coils are leaking is extremely great. I tested my Astral model from my Airflyte and found that the burner would light and burn...zip tube and all... but after running in 60-degree temperatures (meaning fairly low demand for cooling), it never cooled below ambient temperature. I had another unit that would work on electric, and it would cool, but the propane burner was shot. It was also a 40+ year old unit that was not worth putting time and effort into to make it work properly. As expensive as it may seem, replacement really can be the best option. I would point at the warranty as a part of that decision, which is something that does not come with a 40+ year old unit seldom comes with.....
What you replace with is a really personal choice, dictated by the type of camping you envision yourself doing the most. If you are always plugged in at a campground or in the driveway, then a dorm fridge or other electric-only model can be the best. (Remember the fact that you need access to an outlet nearby to the installation point.) If you want to be away from civilization far enough to not see the power poles, let alone plug in, then a good (spendy) propane unit may best serve your needs. Weekending-only might call only for ice chests. Personally I like the idea of having a plan that will work for any circumstance. The gas/electric combo works very well for planning that out.
|
|
Ten
3K Member
Posts: 3,432
Likes: 1,467
70 Shasta 16SC + 1964 Airflyte
Currently Offline
|
Post by Ten on Jan 18, 2016 11:51:07 GMT -8
There is some discussion here: vintagetrailertalk.freeforums.net/thread/5843/fridge-ventabout just this subject, along with some photos. The principles will always be the same. So will all rules applying to proper and safe installation. Be sure to pick out the unit before you do any cutting. Follow the manufacturer specs for sizes of opening for venting. THEN cut holes through the walls. It is much easier than uncutting them. EDIT: By the way, this vent is the same type as the bottom vent in my 16SC.  This is the one on my Airflyte: 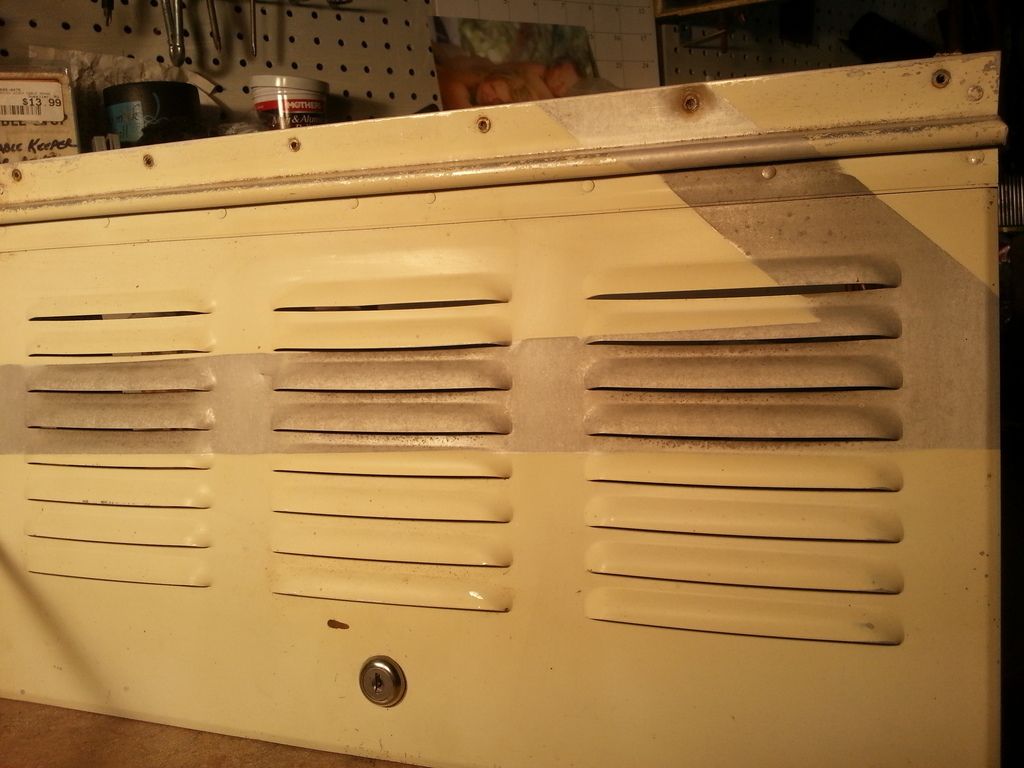 The lower vents are usually larger, and are accessible, so that servicing the business end of the fridge is possible. |
|
Ten
3K Member
Posts: 3,432
Likes: 1,467
70 Shasta 16SC + 1964 Airflyte
Currently Offline
|
Post by Ten on Jan 18, 2016 11:34:35 GMT -8
Firefox here too. I have used it since well before the Chrome browser came out, you know, back before google had invaded every single part of our lives, like facebook has. Most things I want to do are a right-click away....  |
|
Ten
3K Member
Posts: 3,432
Likes: 1,467
70 Shasta 16SC + 1964 Airflyte
Currently Offline
|
Post by Ten on Jan 17, 2016 18:36:16 GMT -8
I may have missed it earlier, but how large a camper was it? I suspect there may have been some factor like light tongue weight or uneven loading....not placing blame, just sayin'....possible suspects for causes of towing and sway problems.
|
|
Ten
3K Member
Posts: 3,432
Likes: 1,467
70 Shasta 16SC + 1964 Airflyte
Currently Offline
|
Post by Ten on Jan 17, 2016 15:50:33 GMT -8
Upstate NY also here, Finger Lakes, south of Rochester. Nice way to get into the trailering camping life. New old-style. It is cute and the layout is a nice use of the space. 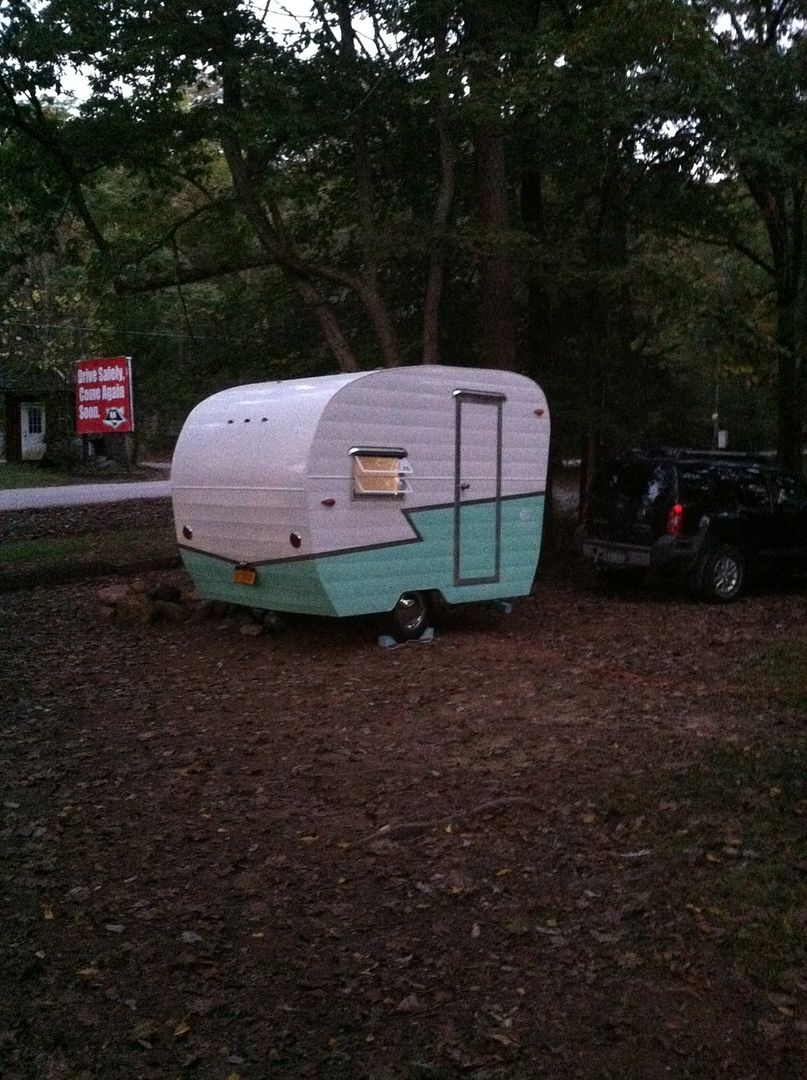 |
|
Ten
3K Member
Posts: 3,432
Likes: 1,467
70 Shasta 16SC + 1964 Airflyte
Currently Offline
|
Post by Ten on Jan 16, 2016 12:20:11 GMT -8
Look on the bright side...you probably can't do any worse than this....  |
|
Ten
3K Member
Posts: 3,432
Likes: 1,467
70 Shasta 16SC + 1964 Airflyte
Currently Offline
|
Post by Ten on Jan 16, 2016 8:10:21 GMT -8
I am of the opinion that if this were the original factory setup, then it should work properly for venting. It is quite different from the larger vents that Shasta, and several other manufacturers, used. I would have to guess there is some sort of a "funnel" setup to move the air to the round outlet.
The most important part of the puzzle is venting for combustion exhaust. These refrigerators burn very small burners, just a bit more than a pilot light would be. They don't really need huge vents, but positive air flow is important. The surrounding area needs to be open to allow for it to move air through.
As far as the concern over heat... the heat generated by the burner is very little, but the heat given off by the coils is greater from the actual refrigeration process, also requires a positive air flow. The higher the rate the better, for internal cooling of beverages and other items. I think this must have also worked in its present configuration, but you could add a 12-V fan to the vent to add to that air flow and help natural convection along. This would most be beneficial in warmer weather especially.
|
|
Ten
3K Member
Posts: 3,432
Likes: 1,467
70 Shasta 16SC + 1964 Airflyte
Currently Offline
|
Post by Ten on Jan 15, 2016 18:28:49 GMT -8
Yeah, the side that shows to everyone that passes you on the road....
These all are of a vintage where the vent in question is a lower refrigerator vent, and also, these vents have no trim or framing to break them from the paint color.
|
|


