joek
Member

Posts: 42
Likes: 16
Currently Offline
|
Post by joek on Dec 28, 2015 11:54:41 GMT -8
The 1/4" Ash plywpopod they sell at Macbeath in Berkely is MDF core. When I bought some 5 years ago, it was plywood core, but I guess no longer.
|
|
joek
Member
Posts: 42
Likes: 16
Currently Offline
|
Post by joek on Dec 28, 2015 11:50:56 GMT -8
A note, I picked up a couple sheets of Ash at Macbeath this weekend. It is MDF core material. The veneers look very nice, but I'm not too comfortable with using MDF around anything that could possibly get wet.
|
|
joek
Member
Posts: 42
Likes: 16
Currently Offline
|
Post by joek on Dec 27, 2015 19:42:34 GMT -8
Very nice work going into it to date.
|
|
joek
Member
Posts: 42
Likes: 16
Currently Offline
|
Post by joek on Dec 27, 2015 19:06:00 GMT -8
I definitely avoid towing inthe rain, but it can be unavoidable. I think its happened 2 or 3 times. Water does leak through the front jealousies at 60mph, but that's to be expected.
Water can wick uphill all by itself too, especially if there is a pressure differential between the interior and exterior. In any case, I want to seal it, just not with something like Vulkem that would be impossible to take apart in the future.
|
|
joek
Member
Posts: 42
Likes: 16
Currently Offline
|
Post by joek on Dec 27, 2015 11:19:01 GMT -8
It's a simple non locking Pittsburgh seam.
|
|
joek
Member
Posts: 42
Likes: 16
Currently Offline
|
Post by joek on Dec 27, 2015 0:35:43 GMT -8
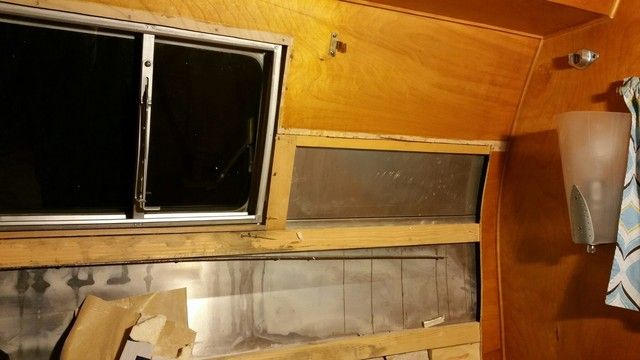
Did the deed today. Removed the skin, framing and paneling on the back of the trailer. Found no smoking guns. That is to say, I didn't find any obvious signs of where the water was getting in. All of the butyl tape looked to be in good order. The framing was in better shape on the aluminum side, no staining where I was expecting it to be. The worst staining looked to be right a the corners of the windows, but it was very minor. Current theory is the corner of the window frame was leaking.
And maybe the horizontal seam. On the Shasta, there is a siding panel on each side of the rear window. This creates a horizontal seam leading to both the top and bottom of the window. The upper seam had butyl tape in it. The lower on did not. I think when I did the restoration before, I decided not the put the butyl in the lower seam because the top one was so darn hard to do, and it wasn't originally sealed. So I reasoned that it wasn't needed. When I put it together again, I think I'll try to inject some kind of non hardening sealer. |
|
joek
Member
Posts: 42
Likes: 16
Currently Offline
|
Post by joek on Dec 24, 2015 5:47:13 GMT -8
Funny, you'd think I'd know more about termites, considering how often I've encountered them in my career. I know they are attracted to moisture, and I think will die if you remove the water source. They build the little mud tunnels to travel round in, and can't stand the light. I've opened a wall in a house and thousands of them poured out. I went go get a camera and when I got back they were all gone. I'm still debating whether to go ahead and fog the whole trailer. I've cleared it of all personal effects, so now would be the time I guess.
With the holidays and rain, I haven't had a chance to work on it any further. I work full time, so only have weekends to work on the trailer, and they just haven't been dry enough to even go the lumber yard and bring home a sheet of birch ply.
I plan to do the finish on the plywood before installing it. If I can just get a sheet home, I'll have something to do when it's raining.
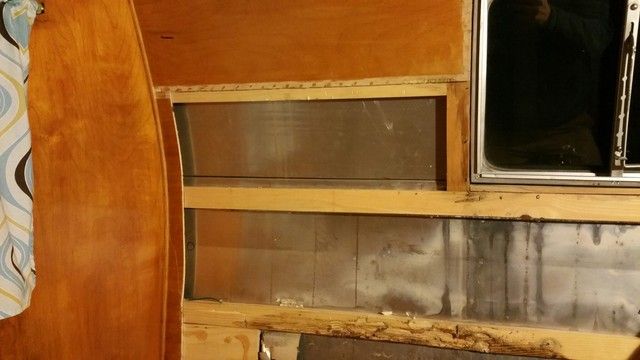
The drips along that metal seam only appear below the horizontal framing member. The is about an inch of metal above it that show no sign of water. The seam itself is a standard double fold seam, I can't remember the name, maybe Hayward seam or something. My thoughts are that the water is leaking below the window, migrating horizontally along the framing, then dripping down. But the case isn't closed yet, so I'm keeping an open mind.
|
|
joek
Member
Posts: 42
Likes: 16
Currently Offline
|
Post by joek on Dec 9, 2015 18:54:21 GMT -8
Just called the Berkeley, Ca store today to check stock. They have about 20 sheets on hand, of 1/4" Ash for $65 per sheet.
|
|
joek
Member
Posts: 42
Likes: 16
Currently Offline
|
Post by joek on Dec 6, 2015 9:06:00 GMT -8
what will you do on the ceilings?
|
|
joek
Member
Posts: 42
Likes: 16
Currently Offline
|
Post by joek on Dec 1, 2015 7:52:22 GMT -8
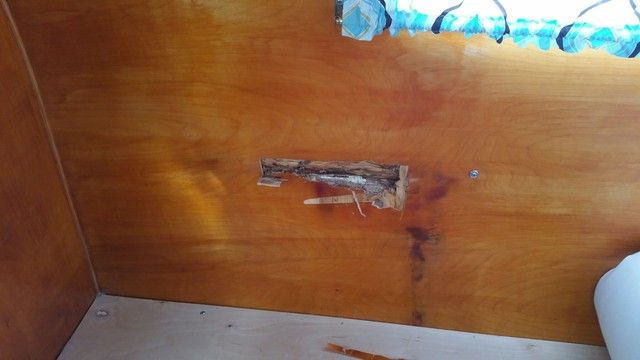
Did some demo last night. Yum, live termites. Well, not alive any more but they were when this photo was taken... 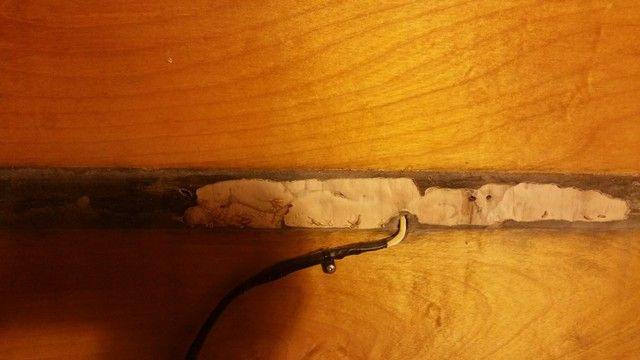
In removing the rear interior panel, it looks like the water is entering at the bottom of the window. Then migrating sideways. There was nothing above the bottom of the window., No staining or watermarks, either on the plywood, insulation board or aluminum skin. Still a little confused by the stains directly to the sides of the window, but at this point I'll assume this is just moisture migrating along that horizontal piece under the window, before dropping down. I had added a steel stiffener underneath that 1x2 below the window. This may create a path, if you will, for the water to travel. It is a little rusted.
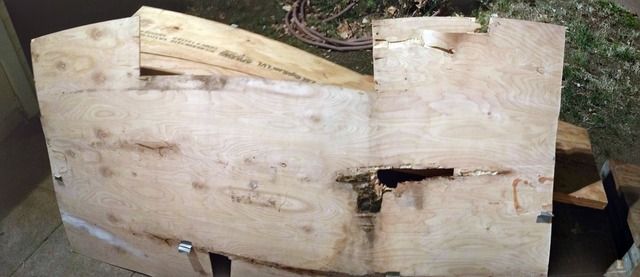
There was also this termite damage way off to the side, seemingly away from all the damage. I won't know oif this from the corner until I come in from the outside. 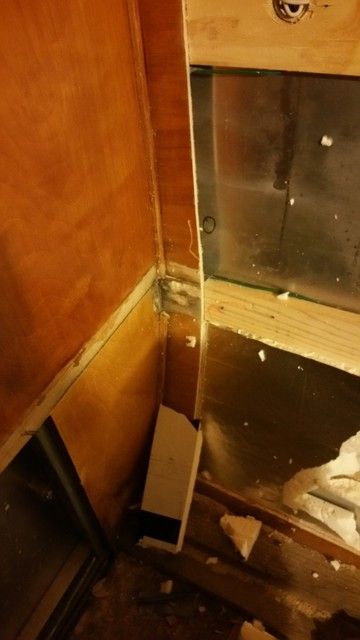
I'm probably also going to replace an interior side panel at the curb side rear, from a leak I had from the wings in the first winter after the restoration. |
|
joek
Member
Posts: 42
Likes: 16
Currently Offline
|
Post by joek on Nov 30, 2015 10:13:19 GMT -8
It will certainly get repaired from the outside in. But I may take your suggestion of demoing from the inside out, to look for leaks. I can cut out the panels that I know are getting replaced while leavinghe outsidfe intact. Then look for water staining, or even do water testing and look for water flow.
|
|
joek
Member
Posts: 42
Likes: 16
Currently Offline
|
Post by joek on Nov 29, 2015 11:14:38 GMT -8
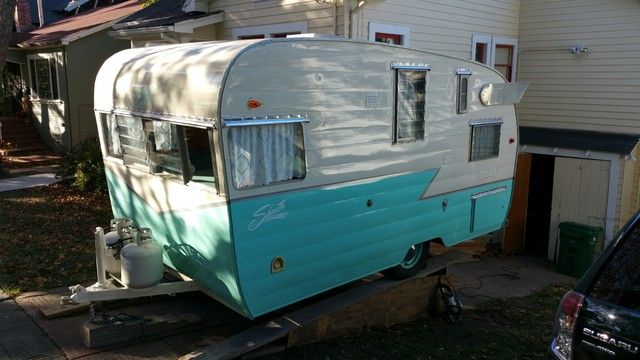
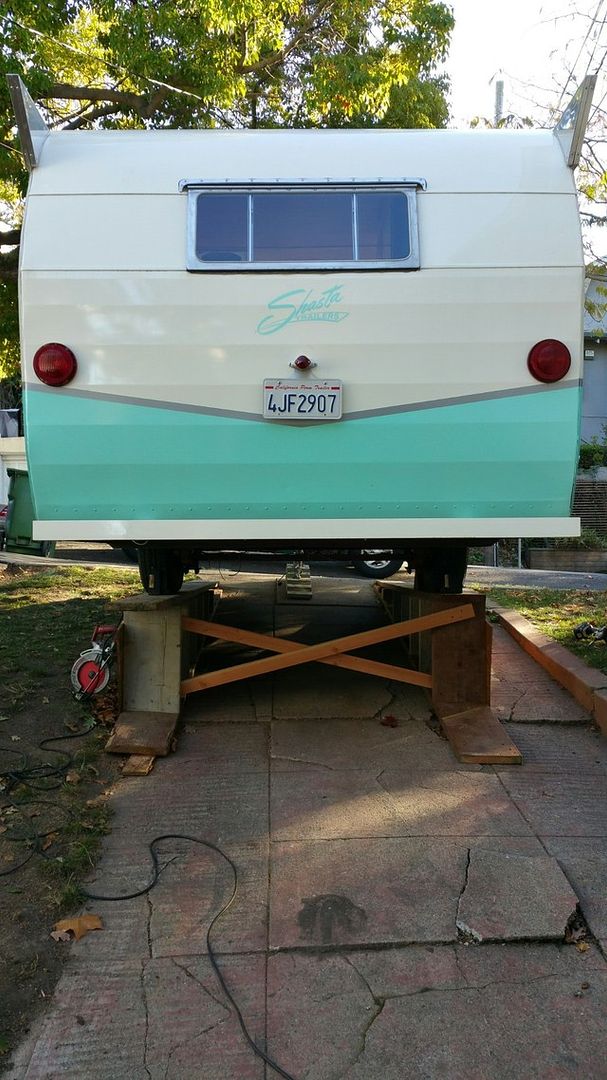
She sat on ramps very similar to these for just about a year when I did the original restoration. Driveway I too steep to do anything but the ramps, without them it would sit at probably a 5 degree slope even with the front all the way on the ground. Ramps took about 2 hours to build, using scrap lumber from work, and are screwed into the concrete driveway.
The paint is about 3 years old. It was done by Miracle Auto Paint in Santa Rosa, Ca. The Shasta is just too big for me to paint. At the very least, I'd have had to build a shelter over it in order to paint it in the quality I wanted, and I just didn't (and still don't) have enough space for that.
|
|
joek
Member
Posts: 42
Likes: 16
Currently Offline
|
Post by joek on Nov 29, 2015 8:19:46 GMT -8
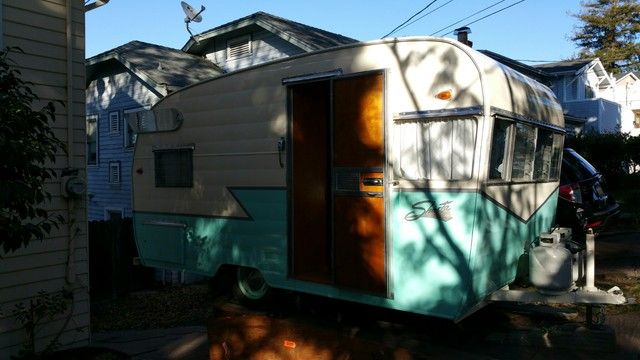
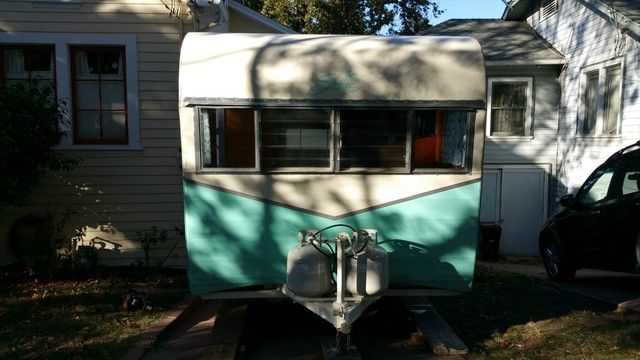
Figured I'd share the repairs I'll be doing to my '61 Shasta Airflyte. I finished the restoration of this trailer about 5 years ago. We've been using it quite a bit since then, making about 6-8 trips a year. It fits our family of 3 very well, and we plan to continue using for years to come.
I don't have any place to park it at home, so we store in a trailer storage yard about 20 miles from our home. The storage yard is about a mile off the freeway, in the same direction as about half of our camping trips, so we feel this works pretty well. We just pack the truck, and pick up the trailer on our way.
After our last trip of the year, we cover the trailer for the rainy season, by wrapping it tightly in big blue tarpaulin. When we went to cover it up for this winter, I noticed a bubble on the interior skin, at the back wall. Upon inspection, my finger went right through it. Pretty moist in there, and what appears to be termite eggs.
So this is bad news. I really felt I did the restoration right. Used the butyl tape at the edges, removed the windows and rebuilt them with new Tremco at the corners, installed with the standard HEHR rubber gasket, and butyl tape behind it for added insurance.
But, water is getting in there from someplace. Only way to track it down is to start tearing her down. Hopefully I'll find the source, but I know I'll have to replace some framing and plywood at the very least. Probably also have to do some paint touch ups as well. So, I built new ramps in my driveway, and brought it home this weekend. I'll start by emptying the entire trailer of all the gear. Anyway, here is my starting point:
|
|
joek
Member
Posts: 42
Likes: 16
Currently Offline
|
Post by joek on Nov 27, 2015 18:51:21 GMT -8
All of the screws I used on my trailer were Stainless Steel. I have had no issues whatsoever after 5 years. Theoretically, zinc and aluminum aren't as compatible as SS and Aluminum, but I doubt you'll ever see any issues either way. I'd be concerned with rust if using zinc, but if painting it'll be fine to.
I ordered most of my screws from Boltdepot.com. Cost for stainless steel online is similar to the cost of zinc screws at the local hardware store.
|
|
joek
Member
Posts: 42
Likes: 16
Currently Offline
|
Post by joek on Nov 27, 2015 9:15:19 GMT -8
I found these types of wire strippers to be most effective for pulling those tiny nails. Wire Strippers
The tips are really sharp and super close to the end of the plier. This allows me, in most cases, to push in and grab hold of the nail head, then I wiggle a little and pull straight out. Does take some hand strength though. Also works well for twisty nails on the interior.
These can be easily found at Home Depot or Lowes, but look in the electrical section, not the regular tool department.
|
|


