joek
Member

Posts: 42
Likes: 16
Currently Offline
|
Post by joek on Nov 29, 2015 8:19:46 GMT -8
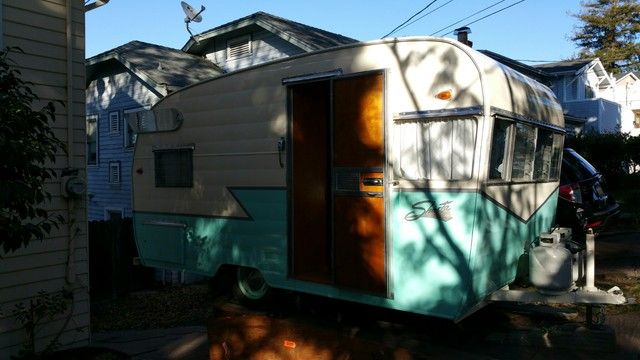
Figured I'd share the repairs I'll be doing to my '61 Shasta Airflyte. I finished the restoration of this trailer about 5 years ago. We've been using it quite a bit since then, making about 6-8 trips a year. It fits our family of 3 very well, and we plan to continue using for years to come.
I don't have any place to park it at home, so we store in a trailer storage yard about 20 miles from our home. The storage yard is about a mile off the freeway, in the same direction as about half of our camping trips, so we feel this works pretty well. We just pack the truck, and pick up the trailer on our way.
After our last trip of the year, we cover the trailer for the rainy season, by wrapping it tightly in big blue tarpaulin. When we went to cover it up for this winter, I noticed a bubble on the interior skin, at the back wall. Upon inspection, my finger went right through it. Pretty moist in there, and what appears to be termite eggs.
So this is bad news. I really felt I did the restoration right. Used the butyl tape at the edges, removed the windows and rebuilt them with new Tremco at the corners, installed with the standard HEHR rubber gasket, and butyl tape behind it for added insurance.
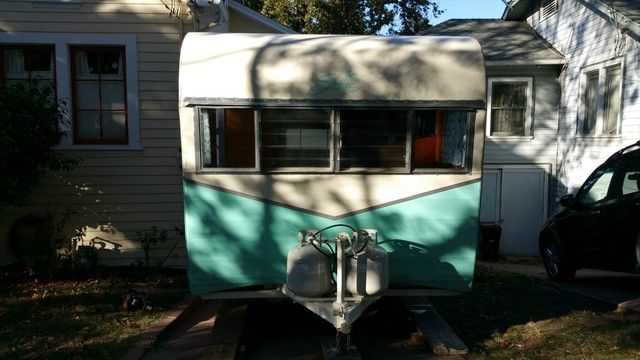
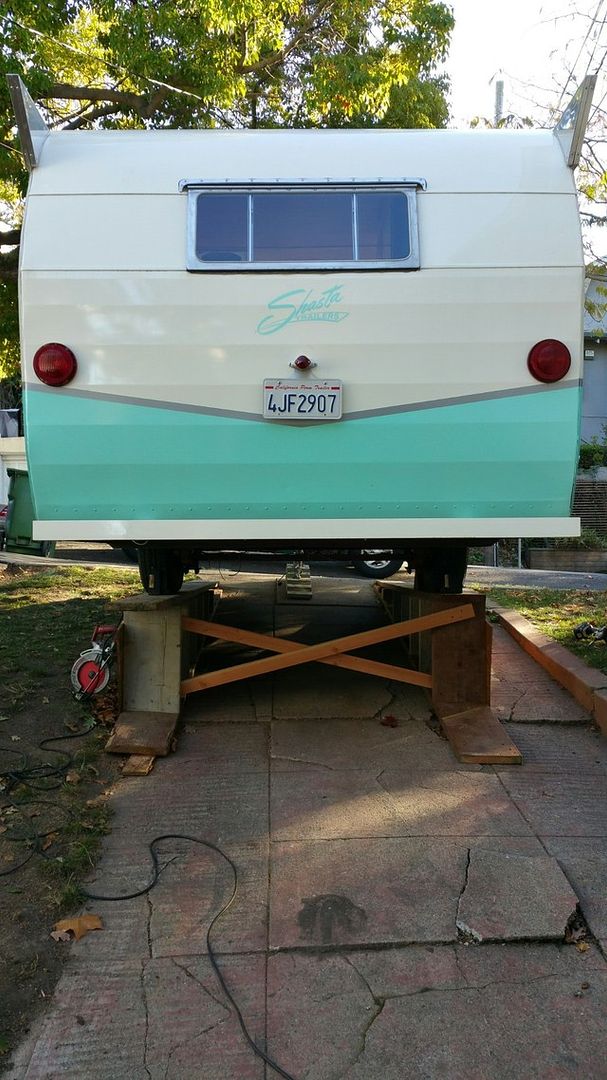
But, water is getting in there from someplace. Only way to track it down is to start tearing her down. Hopefully I'll find the source, but I know I'll have to replace some framing and plywood at the very least. Probably also have to do some paint touch ups as well. So, I built new ramps in my driveway, and brought it home this weekend. I'll start by emptying the entire trailer of all the gear. Anyway, here is my starting point:

|
|
54campin
Member
Posts: 44 
Likes: 20
1954 Shasta
Currently Offline
|
Post by 54campin on Nov 29, 2015 8:25:10 GMT -8
I like the ramps, good idea
|
|
nccamper
Administrator 
Posts: 7,744
Likes: 2,871
1962 Forester- 1956 Shasta
Currently Offline
|
Post by nccamper on Nov 29, 2015 10:19:03 GMT -8
I think everyone leaving their camper parked out has to expect a 5 year face lift. Termites are always bad news.
Your paint seem to have held up well to the weather. Did you paint it yourself?
The ramps are smart.
|
|
joek
Member
Posts: 42
Likes: 16
Currently Offline
|
Post by joek on Nov 29, 2015 11:14:38 GMT -8
She sat on ramps very similar to these for just about a year when I did the original restoration. Driveway I too steep to do anything but the ramps, without them it would sit at probably a 5 degree slope even with the front all the way on the ground. Ramps took about 2 hours to build, using scrap lumber from work, and are screwed into the concrete driveway.
The paint is about 3 years old. It was done by Miracle Auto Paint in Santa Rosa, Ca. The Shasta is just too big for me to paint. At the very least, I'd have had to build a shelter over it in order to paint it in the quality I wanted, and I just didn't (and still don't) have enough space for that.
|
|
|
|
Post by vikx on Nov 29, 2015 21:09:20 GMT -8
I would do some serious sleuthing to find where the water is coming from... I suspect the wings in most Shastas, there always seems to be drips from the screw holes when you see the inside of the metal. Yours look very well mounted, so maybe they are OK.
That back window may be a culprit; I have had them leak in more than one trailer. Removing that may give you some clues, but not always.
If this trailer were mine, I would remove the back (ruined) panel with a multitool. Most of us frown on inside out repairs but in this case it might tell you what you need to know. If there are stains from the window down, for instance.
There are only so many places that will allow water into the back like that. Wings, window, tail and license lights. I'm guessing your edge trim (j rail) is just fine, as you described it.
Hope I've given you some ideas. It's so frustrating to have a beautifully built trailer only to discover LEAKS.
|
|
joek
Member
Posts: 42
Likes: 16
Currently Offline
|
Post by joek on Nov 30, 2015 10:13:19 GMT -8
It will certainly get repaired from the outside in. But I may take your suggestion of demoing from the inside out, to look for leaks. I can cut out the panels that I know are getting replaced while leavinghe outsidfe intact. Then look for water staining, or even do water testing and look for water flow.
|
|
|
|
Post by vikx on Nov 30, 2015 21:58:32 GMT -8
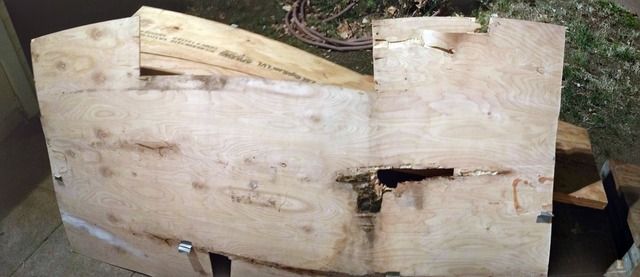
Yeah, that panel is no good the way it is...
|
|
joek
Member
Posts: 42
Likes: 16
Currently Offline
|
Post by joek on Dec 1, 2015 7:52:22 GMT -8
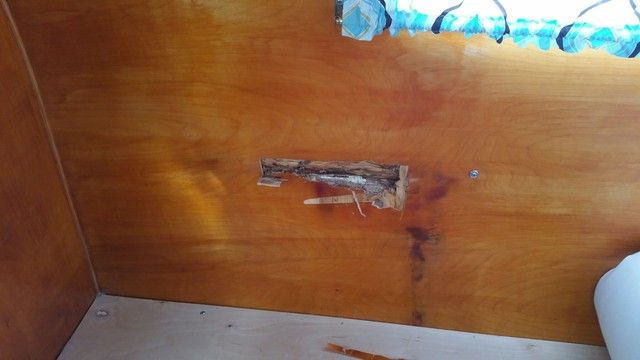
Did some demo last night. Yum, live termites. Well, not alive any more but they were when this photo was taken... 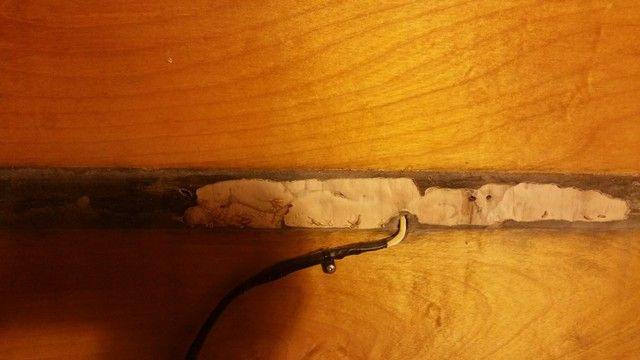
In removing the rear interior panel, it looks like the water is entering at the bottom of the window. Then migrating sideways. There was nothing above the bottom of the window., No staining or watermarks, either on the plywood, insulation board or aluminum skin. Still a little confused by the stains directly to the sides of the window, but at this point I'll assume this is just moisture migrating along that horizontal piece under the window, before dropping down. I had added a steel stiffener underneath that 1x2 below the window. This may create a path, if you will, for the water to travel. It is a little rusted.
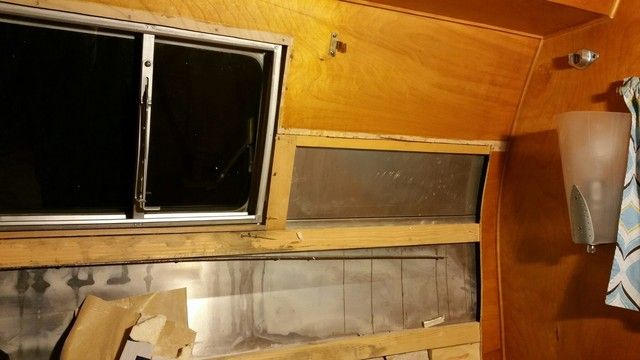
There was also this termite damage way off to the side, seemingly away from all the damage. I won't know oif this from the corner until I come in from the outside. 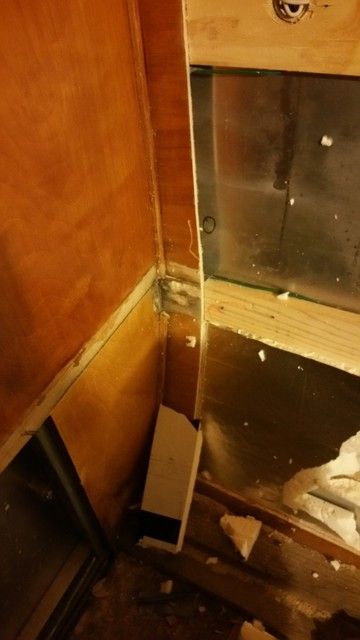
I'm probably also going to replace an interior side panel at the curb side rear, from a leak I had from the wings in the first winter after the restoration. |
|
|
|
Post by vikx on Dec 1, 2015 21:53:22 GMT -8
Thank you! for posting pictures of what you found. Always good to study and learn. Keep us in the loop.
|
|
mobiltec
5K Member
 I make mistakes so you don't have to...
Posts: 9,822
Likes: 3,749
1954 Jewel In Progress...
Currently Offline
|
Post by mobiltec on Dec 20, 2015 18:38:50 GMT -8
It happens. Just part of the game sometimes. We try to avoid such things but no matter how well we do things, sometimes stuff just happens.  |
|
|
|
Post by vikx on Dec 20, 2015 22:27:20 GMT -8
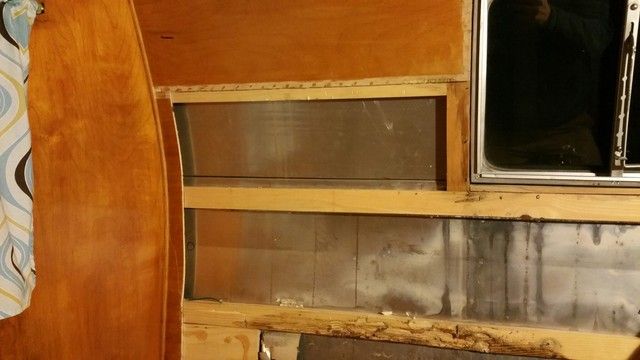
I'm suspecting that metal seam as well. It appears to have drips all along, worse at the window...
Agreed: Don't give up!
|
|
agent99
Member
Posts: 44 
Likes: 12
Currently Offline
|
Post by agent99 on Dec 21, 2015 8:51:05 GMT -8
Sorry to hear about your discovery. It is such a beautiful trailer. Fortunately I have never encountered a termite problem. Is there any way to deter them in the future? Or is it inevitable? I am assuming they seek water? I too love your ramps. I wish that I had a concrete floor so that I could do the same thing! Best of luck to you and try to enjoy the process!  |
|
|
|
Post by vikx on Dec 21, 2015 22:51:56 GMT -8
I think "most" termites enjoy moisture, yes. In fact, some live in the ground and migrate into rotten wood to feed. I believe the tunnels are made of mud and visible. In a trailer, they would have to either live in or have the opportunity to migrate up and into that tasty wood...
|
|
mobiltec
5K Member
I make mistakes so you don't have to...
Posts: 9,822
Likes: 3,749
1954 Jewel In Progress...
Currently Offline
|
Post by mobiltec on Dec 22, 2015 8:16:47 GMT -8
I think "most" termites enjoy moisture, yes. In fact, some live in the ground and migrate into rotten wood to feed. I believe the tunnels are made of mud and visible. In a trailer, they would have to either live in or have the opportunity to migrate up and into that tasty wood... Could be Carpenter Ants.... The leavings look very much the same. Carpenter ants make their homes in the wood itself. |
|
|
|
Post by vikx on Dec 22, 2015 11:58:44 GMT -8
In any case, KILL THE LITTLE BUGGERS.....
|
|