pdalber
Junior Member

Posts: 75 
Likes: 37
Currently Offline
|
Post by pdalber on Nov 16, 2017 16:50:57 GMT -8
|
|
pdalber
Junior Member
Posts: 75
Likes: 37
Currently Offline
|
Post by pdalber on Nov 13, 2017 18:28:38 GMT -8
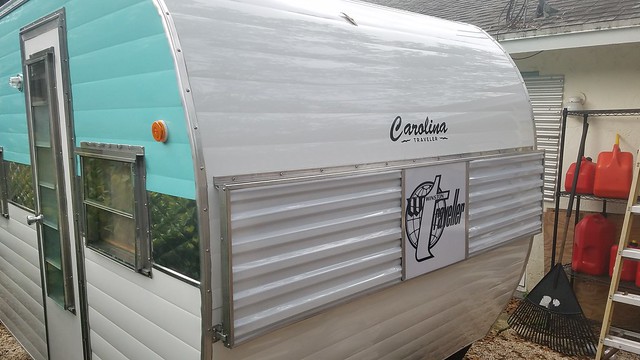
So, its been a while since I posted on my project. I got pretty frustrated when a certain photo sharing app changed their "policy" and blocked everyone from seeing the images in my thread. But, now I'm almost finished and a solution has been found for the blocked photos, so I tought I'd share. Since the last time, I received a shipment from Hemet Valley RV and all new aluminum has been installed: 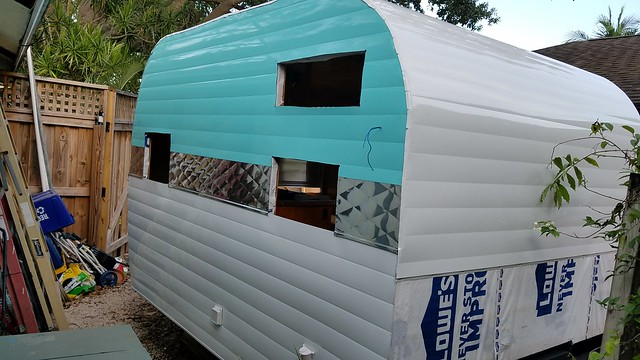 20170812_192120 20170812_192120 by pdalber, on Flickr Next came the windows, doors, and fixtures: 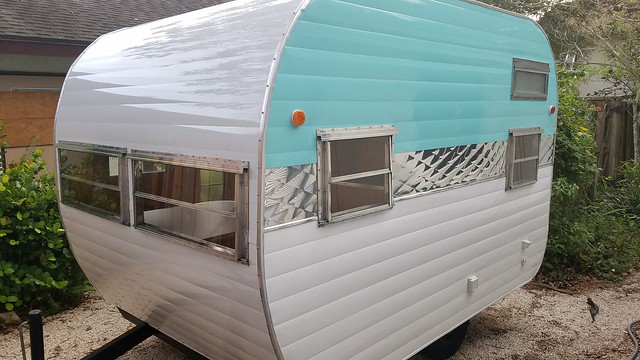 20170930_183750 20170930_183750 by pdalber, on Flickr I was really happy with the way the A/C venting came out. As you (hopefully) saw in an earlier post, I installed a window AC under the gaucho bed. I cut intake and exhaust vents in the rear panel, used expanded sheet aluminum to cover the holes and trimmed it out with aluminum strips. 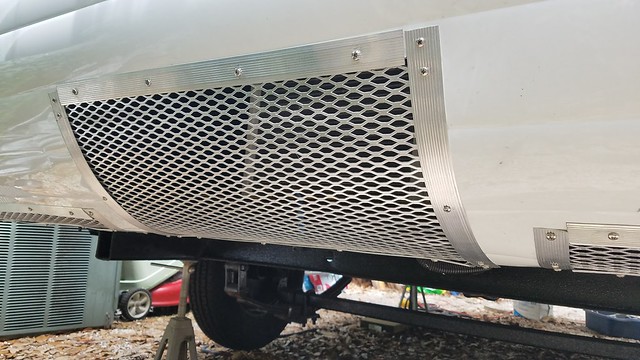 20170903_141048 20170903_141048 by pdalber, on Flickr 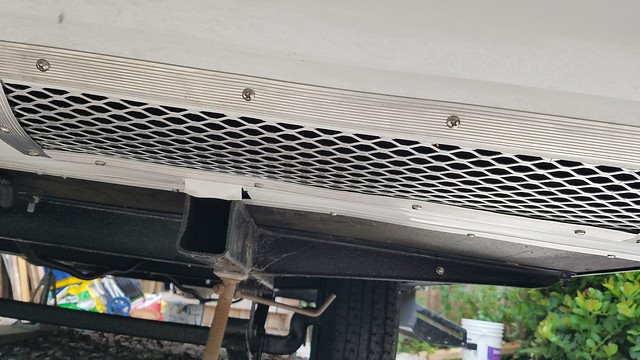 20170903_141053 20170903_141053 by pdalber, on Flickr 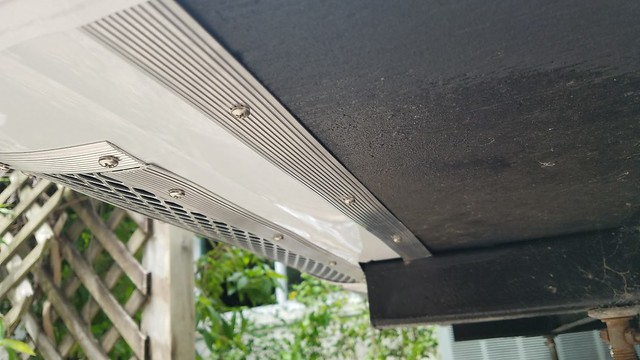 20170903_141107 20170903_141107 by pdalber, on Flickr This past weekend I cleaned up the aluminum frame for my rock guard and replaced the original fiberglass panels with polycarbonate roof panels from HD and a piece of lexan from a local plastic shop.  20171111_171755 20171111_171755 by pdalber, on Flickr While I was working outside, my wife was working on curtains and some final interior details: 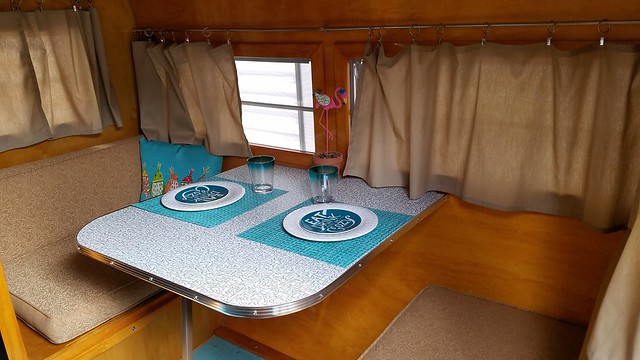 20171112_115942 20171112_115942 by pdalber, on Flickr 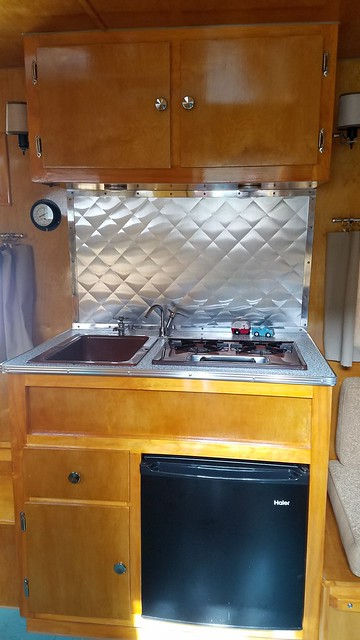 20171112_115951 20171112_115951 by pdalber, on Flickr 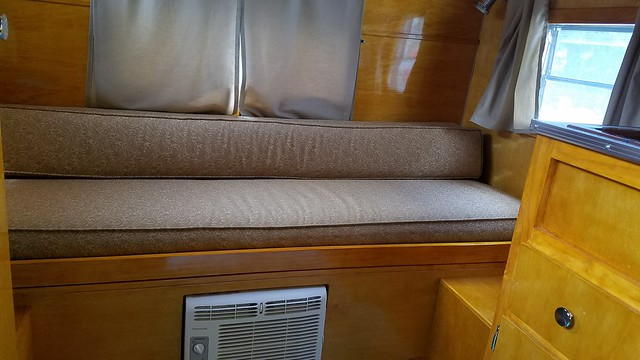 20171112_120002 20171112_120002 by pdalber, on Flickr We have new material to re-upholster the cushions, we're waiting on an awning from Marti's Awnings, and I ordered vinyl decals to replace the original logos. Aside from that, we're ready to go camping! |
|
pdalber
Junior Member
Posts: 75
Likes: 37
Currently Offline
|
Post by pdalber on Nov 12, 2017 23:55:52 GMT -8
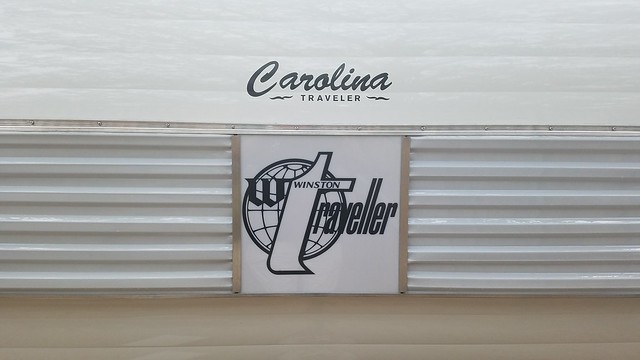
Some nice options. I'm not a big fan of the effect a rock guard has on the front window. It creates (a little) obstruction of the view and make the camper seem a little darker. Plus I tow with a Tundra which shields the camper from most small rocks. With that said, some rock guards are beautiful. Hi Friends, My only experience with a rock guard is the 60's version on my 50's Rod and Reel. I am assuming all are easily removable like mine. Maybe some are not. Some PO had mounted it at some time in it's history. I really like having light come into my trailer and when I don't want the shade from the rockguard, then I just loosen the wing nuts in the telescoping support arms and slide it out of it's track and set it over to the side. This process only takes a few minutes. However, it leaves the telescoping arms hanging down, but the trade off is more sun coming into the trailer. Rock guards can also offer an attractive adornment by offering an opportunity for adding character. I think PD's solution was a very resourceful one and it unifies well with the new paint on his camper. IMHO, on a newly painted camper, an aged and yellowed rock guard can look out of place, making painting an option. PD, did you ever consider putting the Lexan all the way across? Cheers, Rod Thanks. I could have put lexan all the way across, but the framing for the outer panels would have needed modification. The slots in the framing that held the outer sections were approximately 1" deep, to accept the "louvered" panels. The slots in the center were about 1/4" deep, to accept the flat panel. The 1/4" lexan slid into the middle perfectly, but it would have been very loose in the outer sections. I was also shooting for the "original" look (even though I was using modern materials). I'm going to bring the original center panel to a local sign shop later today and have them recreate the logo in a vinyl decal. |
|
pdalber
Junior Member
Posts: 75
Likes: 37
Currently Offline
|
Post by pdalber on Nov 12, 2017 23:27:31 GMT -8
Nice job. I take it that's the original frame? Thanks. Yes it is. |
|
pdalber
Junior Member
Posts: 75
Likes: 37
Currently Offline
|
Post by pdalber on Nov 11, 2017 15:36:25 GMT -8
I came up with a solution. HD sells a polycarbonate patio roof panel in white. It wasn't a perfect fit for the outer portions, but pretty close. I then bought a piece of white lexan for the center. Total cost was $19. I'm going to take the original panel with the logo to a sign shop and have them replicate it in a viyl decal. Here's what the rock guard looks like: 20171111_171755 by pdalber, on Flickr 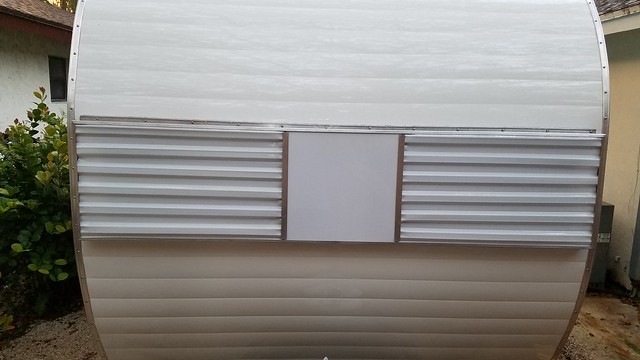 20171111_171742 20171111_171742 by pdalber, on Flickr |
|
pdalber
Junior Member
Posts: 75
Likes: 37
Currently Offline
|
Post by pdalber on Nov 9, 2017 18:34:37 GMT -8
That looks great!!
|
|
pdalber
Junior Member
Posts: 75
Likes: 37
Currently Offline
|
Post by pdalber on Nov 8, 2017 23:24:18 GMT -8
Hi Friends, Wow! P -, That's some nice looking lil one! I love the diamond pattern aluminum strip! In one of the recent issues in the vintage trailer magazine, there is an article on how someone restored an old road guard similar to yours. It was losing fibers. It was that worn. He goes into some detail how he did the restoration. I can scan the article and send it to you. PM me if you want it and include your email in the PM. I can scan it for you this weekend. Perhaps it might offer some options. He restores it sort of like working on a surfboard. Cheers, Rod PM sent! |
|
pdalber
Junior Member
Posts: 75
Likes: 37
Currently Offline
|
Post by pdalber on Nov 8, 2017 19:04:07 GMT -8
I have already disassembled the aluminum frame and I'm in the process of cleaning/polishing. I was toying with the idea of painting the panels white and having a sign shop replicate the logo with a vinyl decal. However, my wife doesn't think the paint will look good. I'm leaning towards just cleaning them up and clear coating them. Here's a recent pic of the trailer:  20170930_183750 20170930_183750 by pdalber, on Flickr |
|
pdalber
Junior Member
Posts: 75
Likes: 37
Currently Offline
|
Post by pdalber on Nov 8, 2017 1:52:36 GMT -8
I need some advise. We are nearing the end of our camper project and our focus has turned to the rock guard protecting the front window. It has an aluminum frame with three fiberglass panels. The panels appear to be original equipment and are showing their age after 50+ years in the sun. They have yellowed and, in some areas, frayed fiberglass fibers are exposed. We have shiny new white aluminum (from Hemet Valley) on the trailer and I don't think the yellowed fiberglass is going look good. What can I do to restore these panels so they compliment the new aluminum? 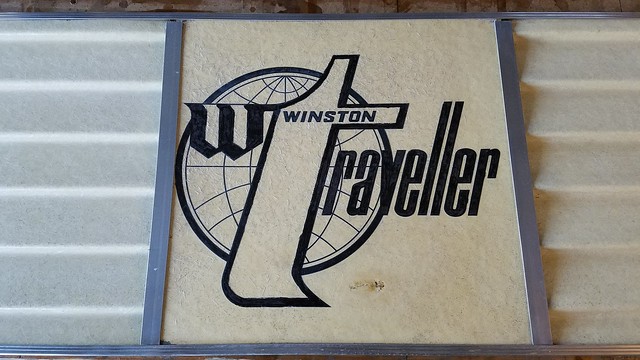 20171107_155525 20171107_155525 by pdalber, on Flickr |
|
pdalber
Junior Member
Posts: 75
Likes: 37
Currently Offline
|
Post by pdalber on Oct 8, 2017 18:38:43 GMT -8
You can do both. Once you have applied enough coats of amber shellac to get the color you want, you can apply a couple of coats of Zinsser Seal Coat and then fininsh with urethane. It's a lot of work but the finished product is very nice. There's a detailed write-up about the process on Repairing Vesterday's Trailers . Here's a couple of pics showing how mine came out:
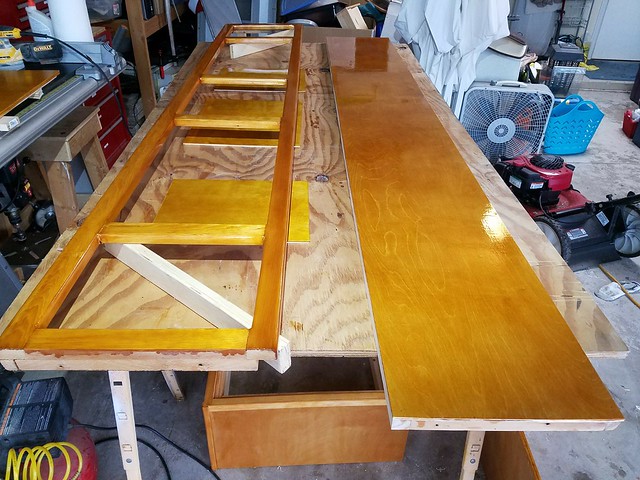 20170106_163345 by pdalber, on Flickr 20170106_163345 by pdalber, on Flickr
 20170112_164341 by pdalber, on Flickr 20170112_164341 by pdalber, on Flickr |
|
pdalber
Junior Member
Posts: 75
Likes: 37
Currently Offline
|
Post by pdalber on Aug 26, 2017 18:30:08 GMT -8
|
|
pdalber
Junior Member
Posts: 75
Likes: 37
Currently Offline
|
Post by pdalber on Jun 14, 2017 20:21:17 GMT -8
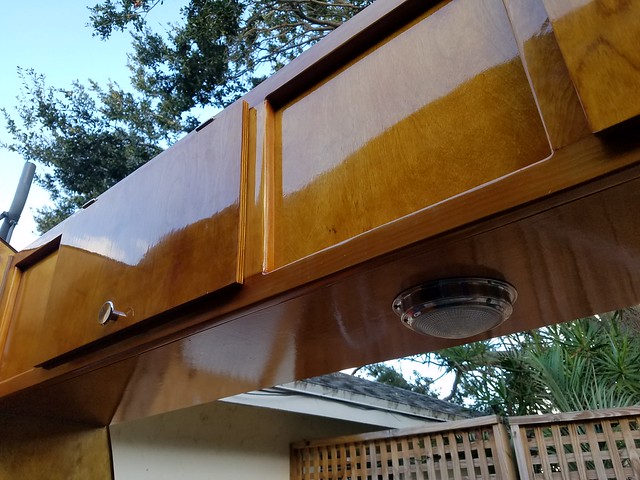
Here are some more progress reports and photos. After getting the main interior components installed in the trailer, we closed in the front and back, I trimmed in the wheel wells and we completed the kitchen. For the front and back, we used 1/8" Birch plywood, which was shellaced, sealed and covered with 2 coats of polyurethane before before being installed. We also glued the 2x2 framing to the plywood beforehand. 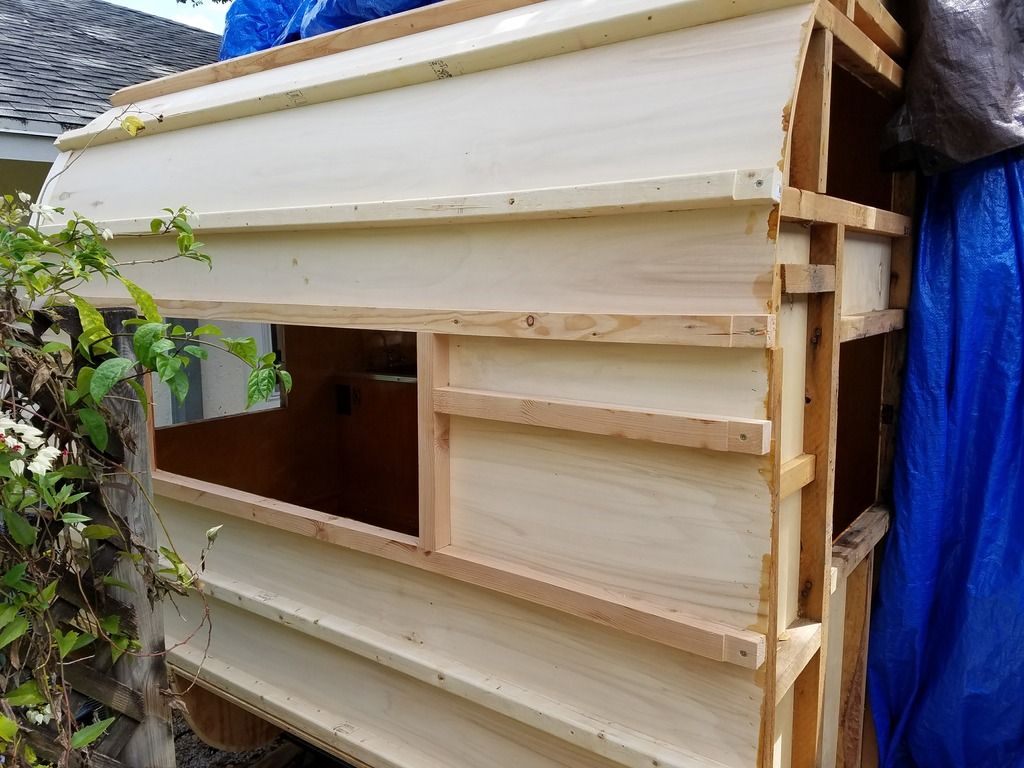 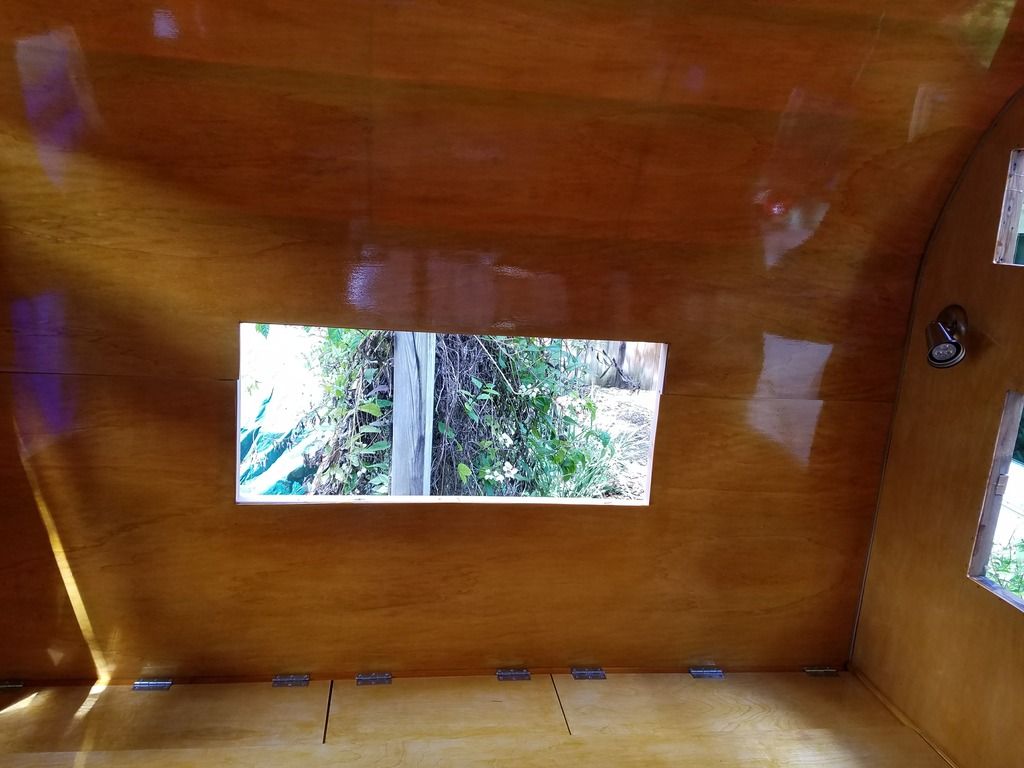 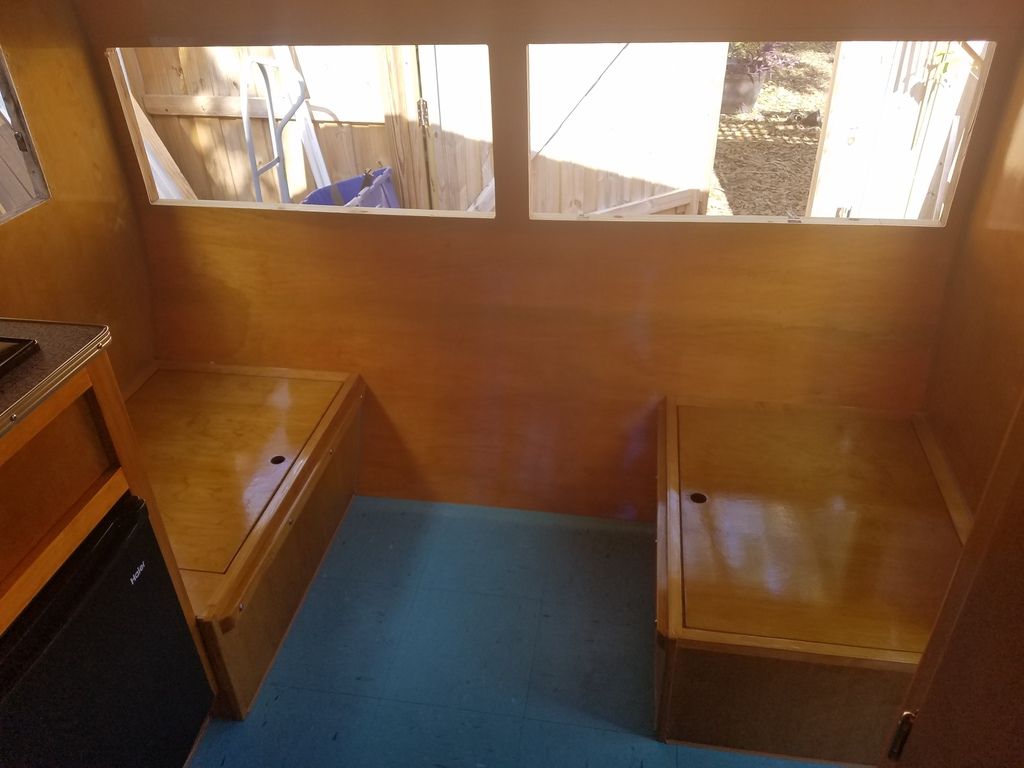 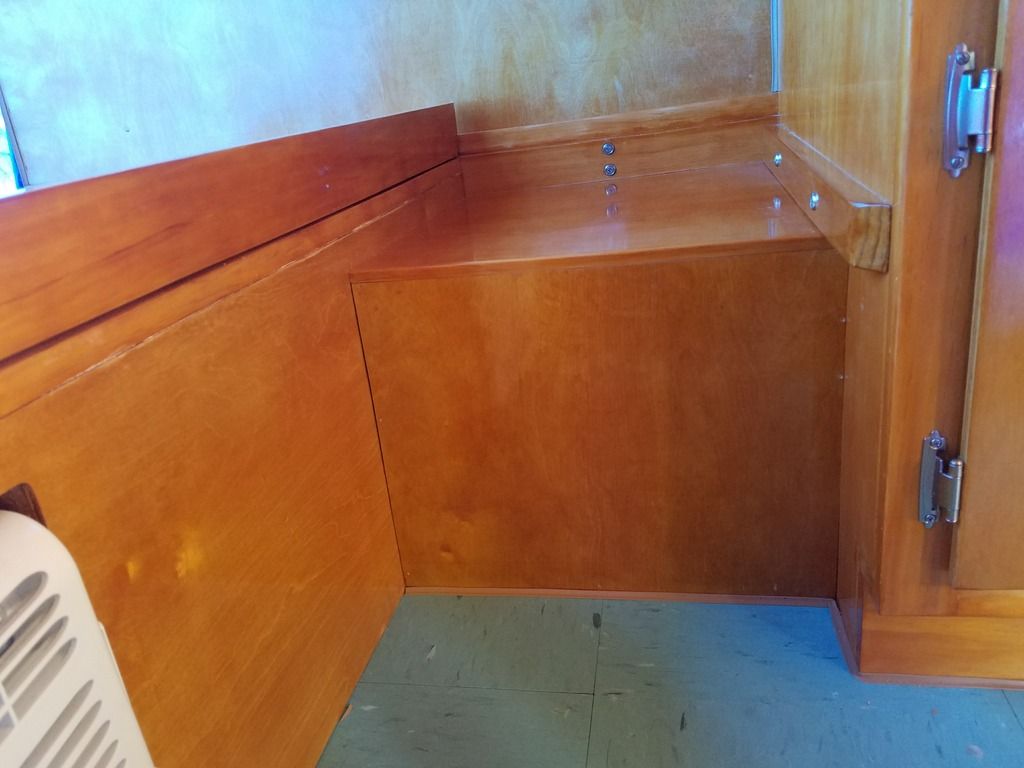 And here's a sneak peak at the new material for the cushions (After we bought the material, we couldn't help but wrap the cushions to see what they would look like): 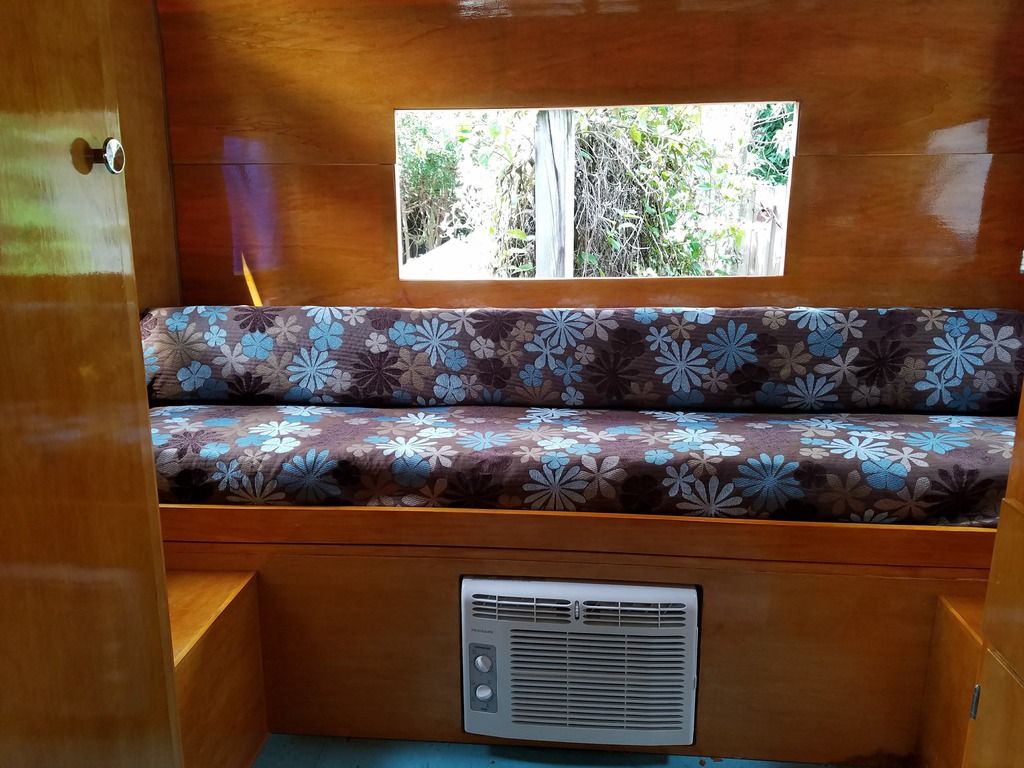 From there, we finished running wires and we installed new LP lines. We mounted two original light fixtures above the kitchen, one on either side of the cabinet, and installed LED fixtures under the cabinet. 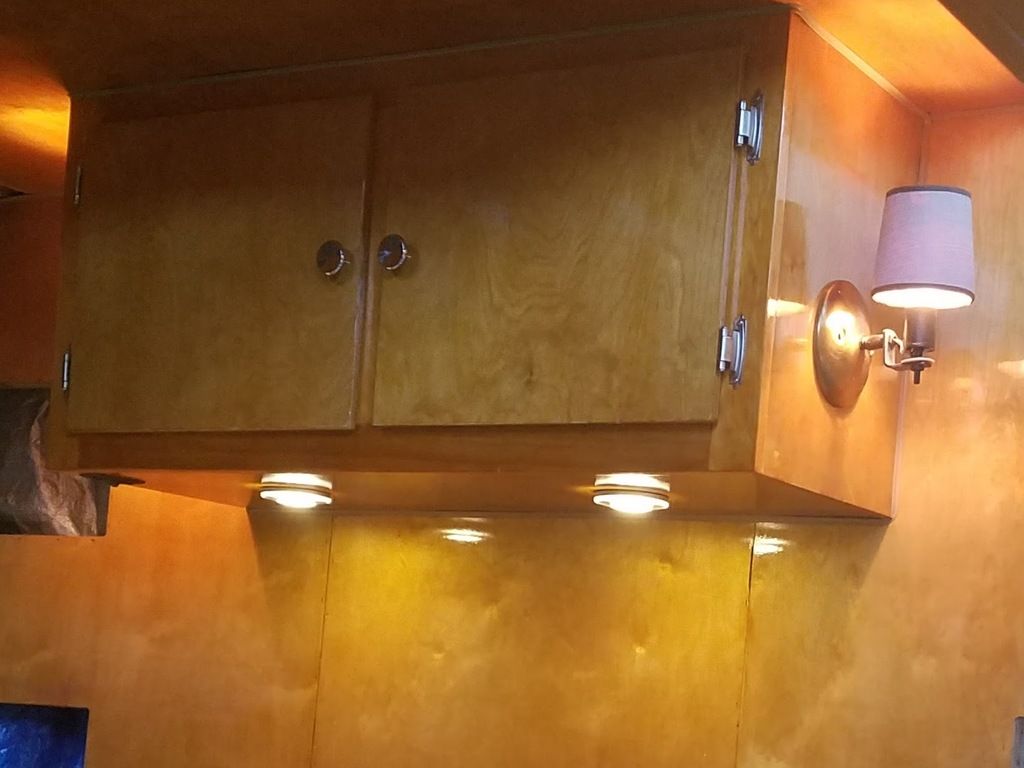 With new LP lines came fire in the stove and light from the origical LP lamp:  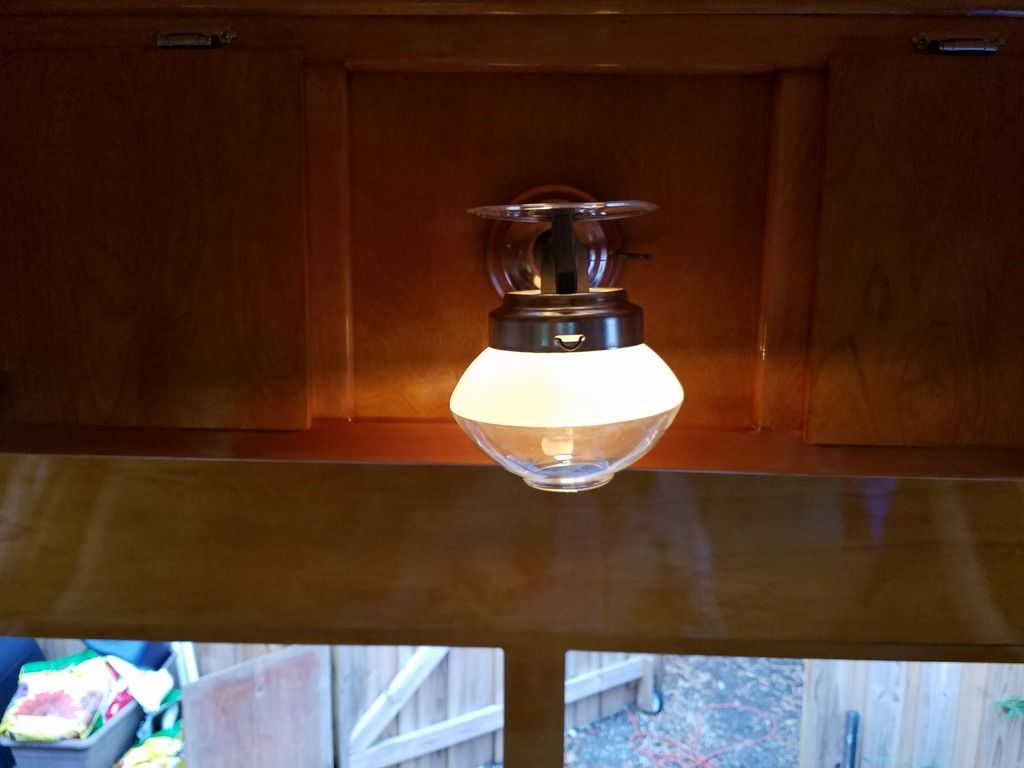 Finally, last week, I made and installed an aluminum back splash above the kitchen: 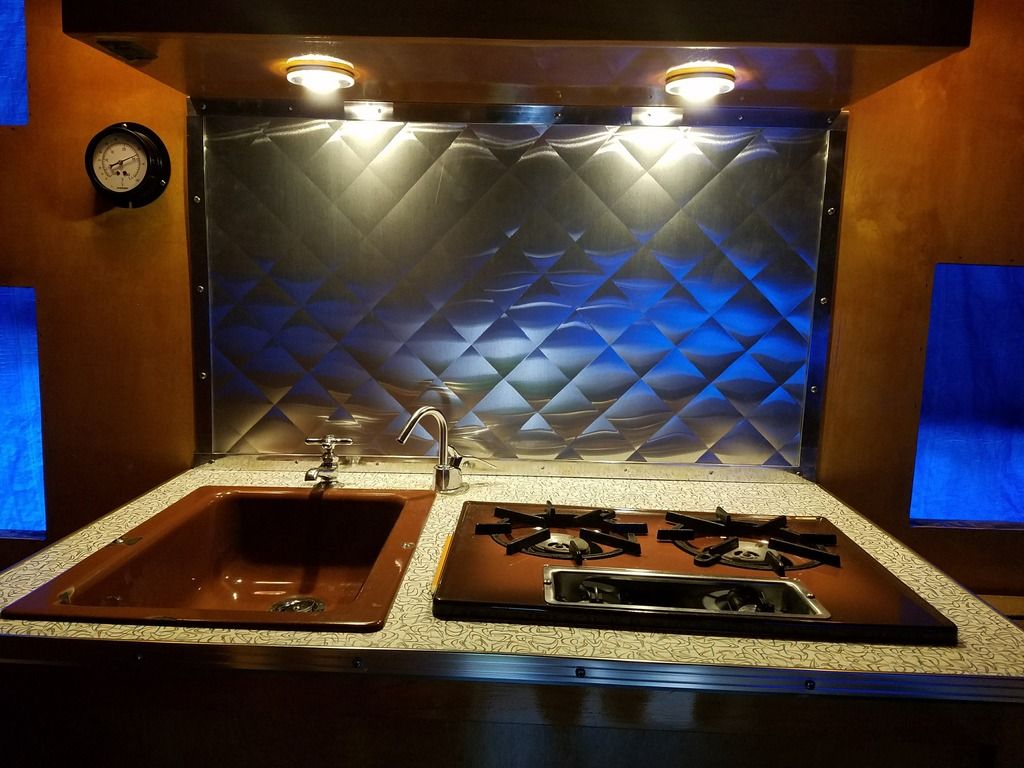 I bought the aluminum at HD and used the screen roller technique (posted here on the forum) to create the diamond pattern. The trim is just aluminum strips I polished on the buffing wheel. The fixture on the right is an old-school thermometer my buddy gave me. The line to the sensor runs down the wall (behind the paneling) and through the floor. The temperature sensor is mounted under the trailer. And that's it! We've reached the current status on the build. Thanks again to all the forum members who have posted so much useful information here. We could not have gotten to this point without your help. Now, hopefully it won't rain this weekend and we can get some more work done! |
|
pdalber
Junior Member
Posts: 75
Likes: 37
Currently Offline
|
Post by pdalber on Jun 13, 2017 11:03:27 GMT -8
I'm in the process of re-habbing the entry door to my trailer. Most of the weather strip in the frame was gone and what remained was brittle and cracked. Does anyonne know where I can find replacements? Any suggestions for alternative solutions if the original material is not available? Here are a couple of pics of what I'm looking for:   |
|
pdalber
Junior Member
Posts: 75
Likes: 37
Currently Offline
|
Post by pdalber on Jun 12, 2017 17:13:48 GMT -8
The air condition caused me a lot of stress. We knew the trailer would need AC if we were going to use it here in South Florida, but we had limited options for the install. We decided to take advantage of the space under the gaucho bed. The original design of the trailer had a dead space created by a "step" under the gaucho bed in the very rear. The space can be seen in these photos:  This is the view from the underside: 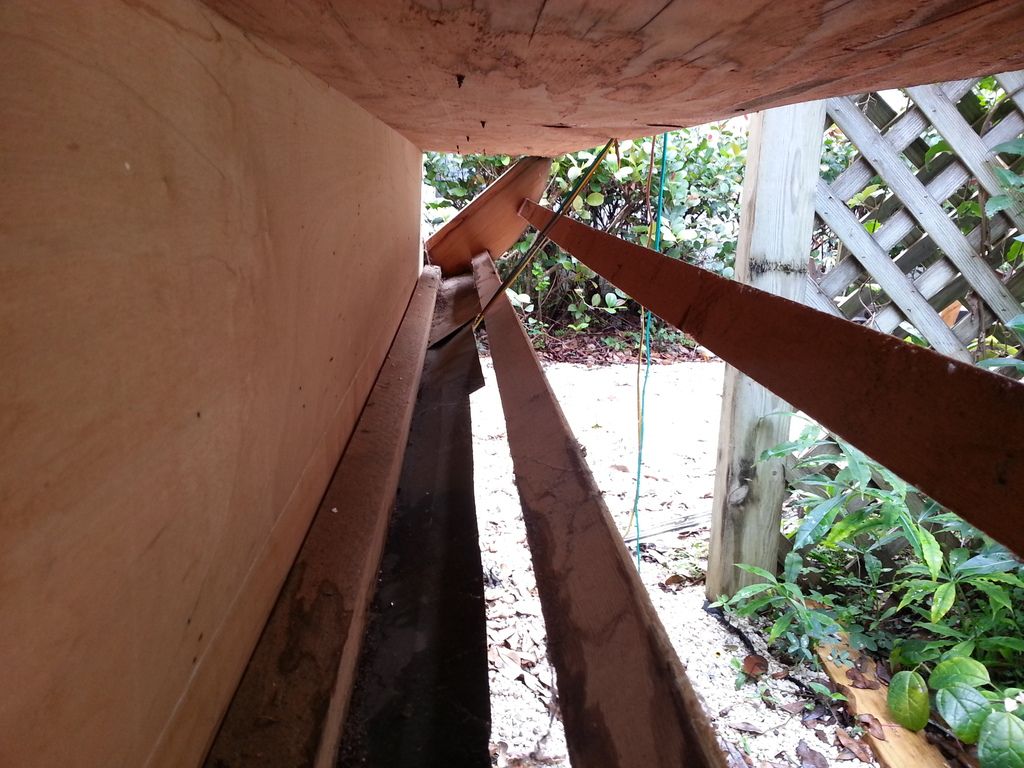 I decided to try and take advantage of this design and maximize the use of the space under the gaucho. It was decided that the AC would be mounted where once there had been an access door, facing forward, in the middle of the bed. Here is the basic plan: 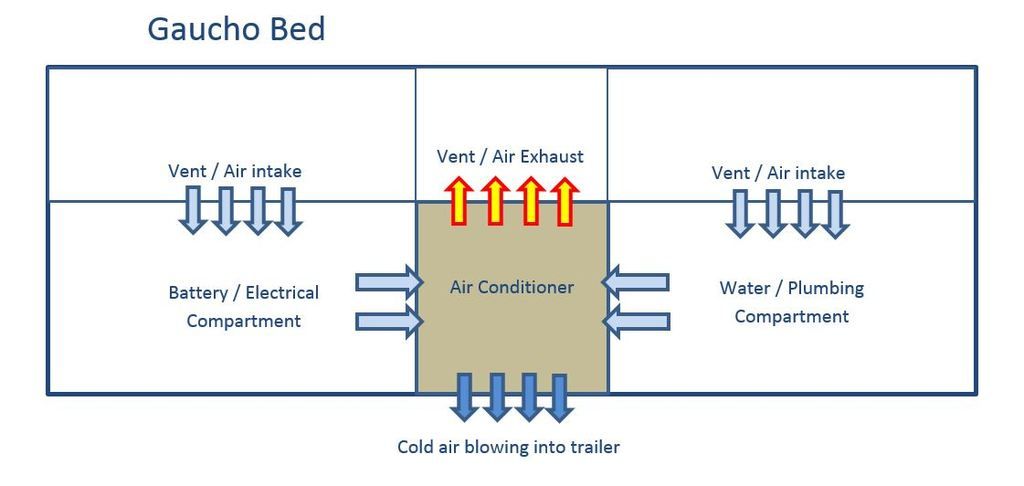 The dead space at the rear will be divided into three sections. The walls between the electrical and water compartments and the dead spaces to the rear have vents (with screens) to allow for the free flow of air. That air will flow into the sides of the AC, be blown across the condenser coils and out the back. The back of the air conditioner sits against back wall and there is foam moulding there to keep the hot air from leaking into the adjacent compartments. We installed a drain in the bottom of the AC pan so that condensation can drain out of the bottom of the trailer. The unit is mounted in such a way that it can be removed through the front for service (if needed). 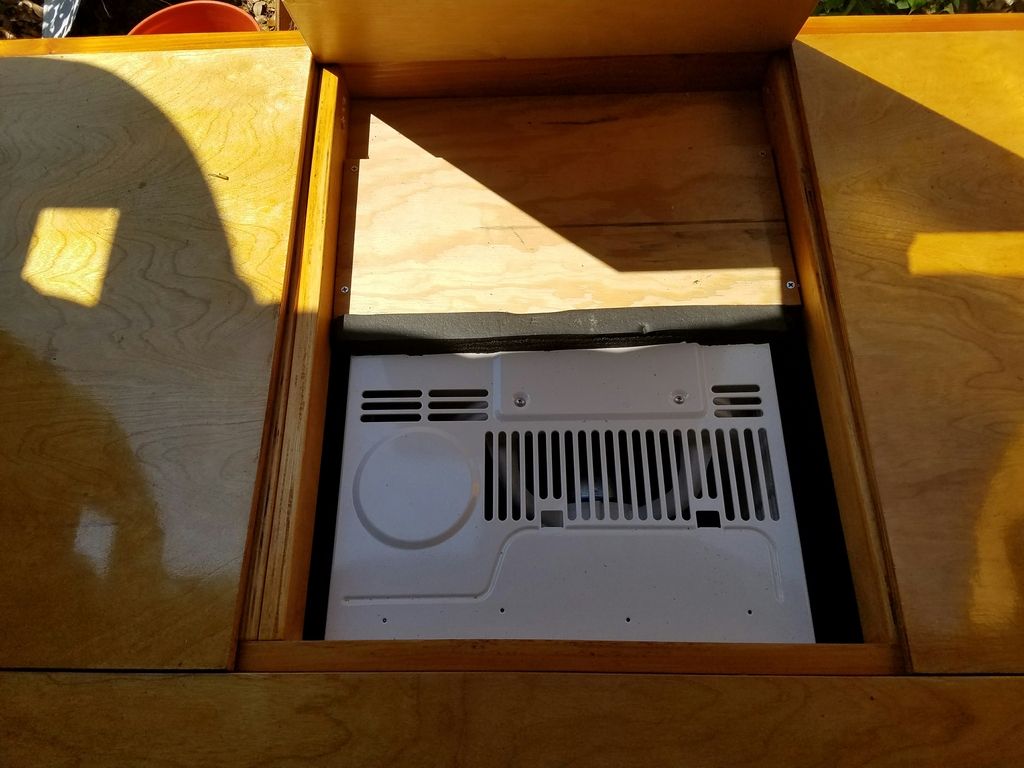 View from the rear: 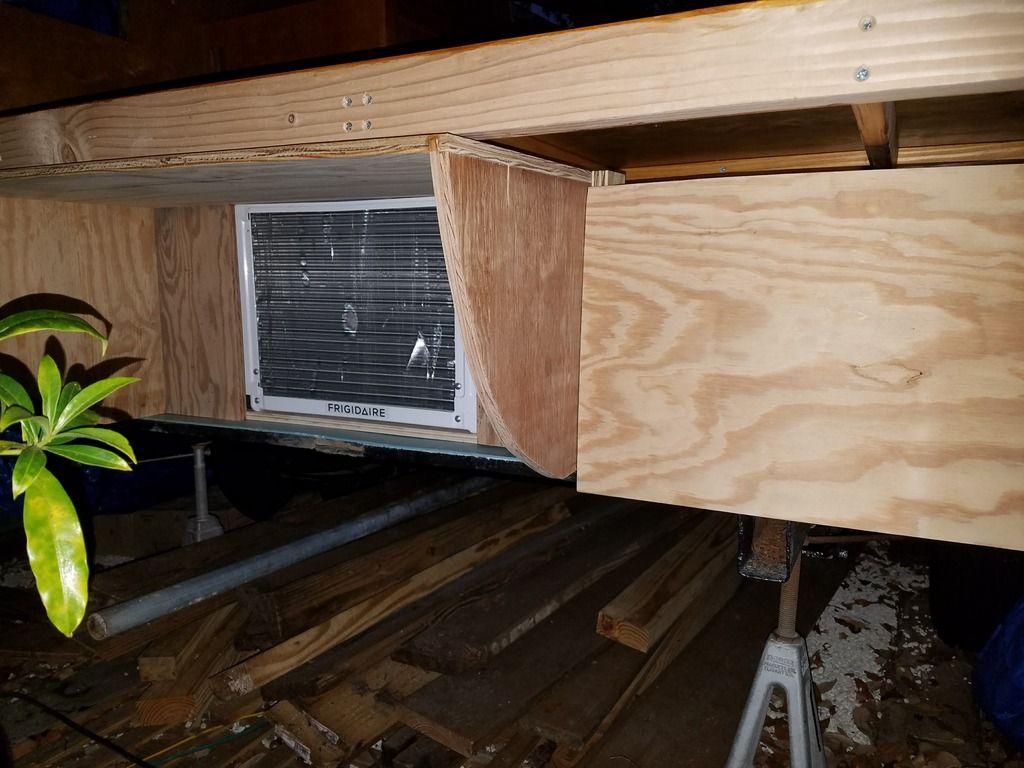 This pic was taken before the install was complete. The wood panel on the right (and the same panel on the opposite side of the AC) now has a stainless steel vent installed and the area at the top, under the bed, is covered. From here, I'm going to seal/paint all the wood and install some 2x2's to support the aluminum skin. When we install the new aluminum, the plan is to create openings near the bottom for ventilation. The openings on the intake sides will be smaller/narrower and should be barely visible. The exhaust vent in the center will need to be a bit larger and will be visible from the rear. But I'm thinking of hiding the vent behind a bumper and spare tire. The vent openings will utilize an aluminum screen material like this, and trimmed around the edges with some type of aluminum moulding: 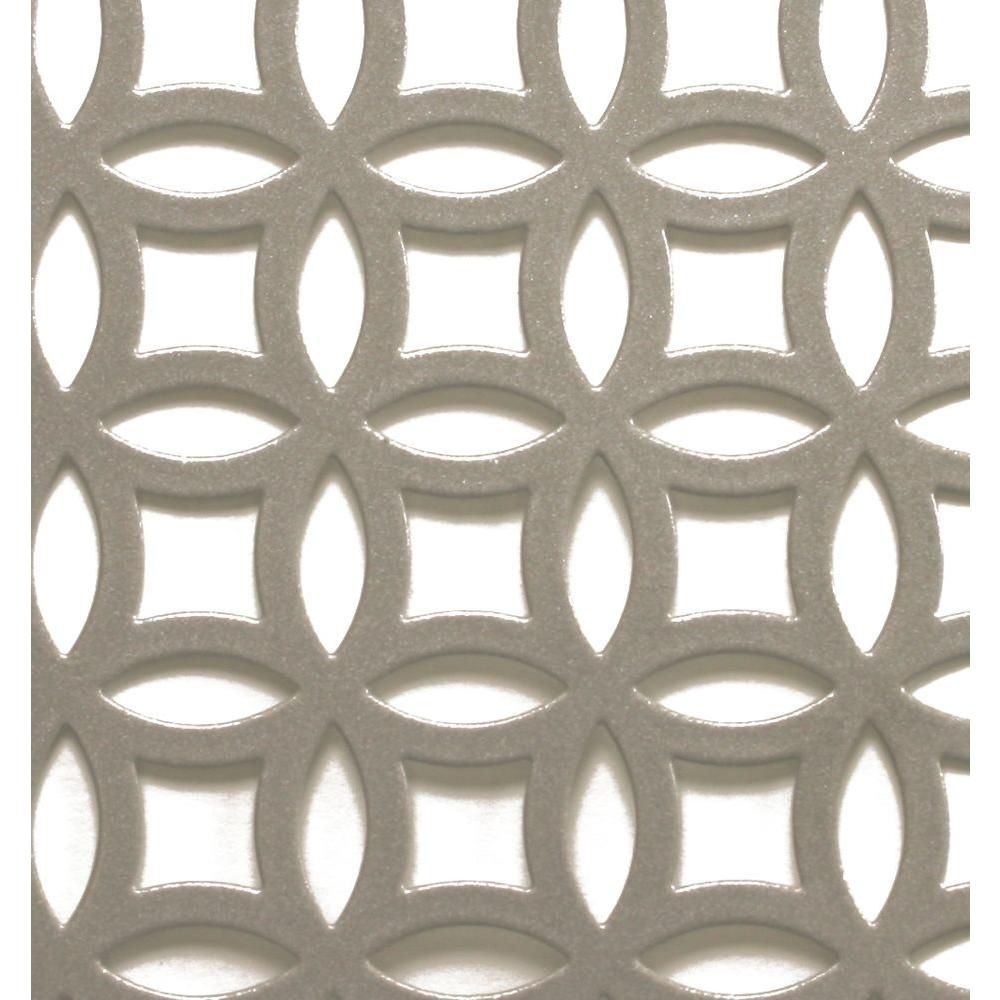 I plan to mock it all up with the old aluminum before the final install. |
|
pdalber
Junior Member
Posts: 75
Likes: 37
Currently Offline
|
Post by pdalber on Jun 10, 2017 19:28:01 GMT -8
Once the gaucho bed was in place, we installed some of the "modern conveniences" in the space under the bed. On the curb side was the electrical: a 45-amp converter/charger, an AGM battery, and circuit breakers. Here is an "in progress" photo of the install. We have since trimmed and (neatly) secured the wiring and the battery now sits in a frame with a strap holding it down. We mounted the 12v fuse panel against the back wall inside the closet (We figured it was more accessible there and we plan to put a fuse list inside the closet door). 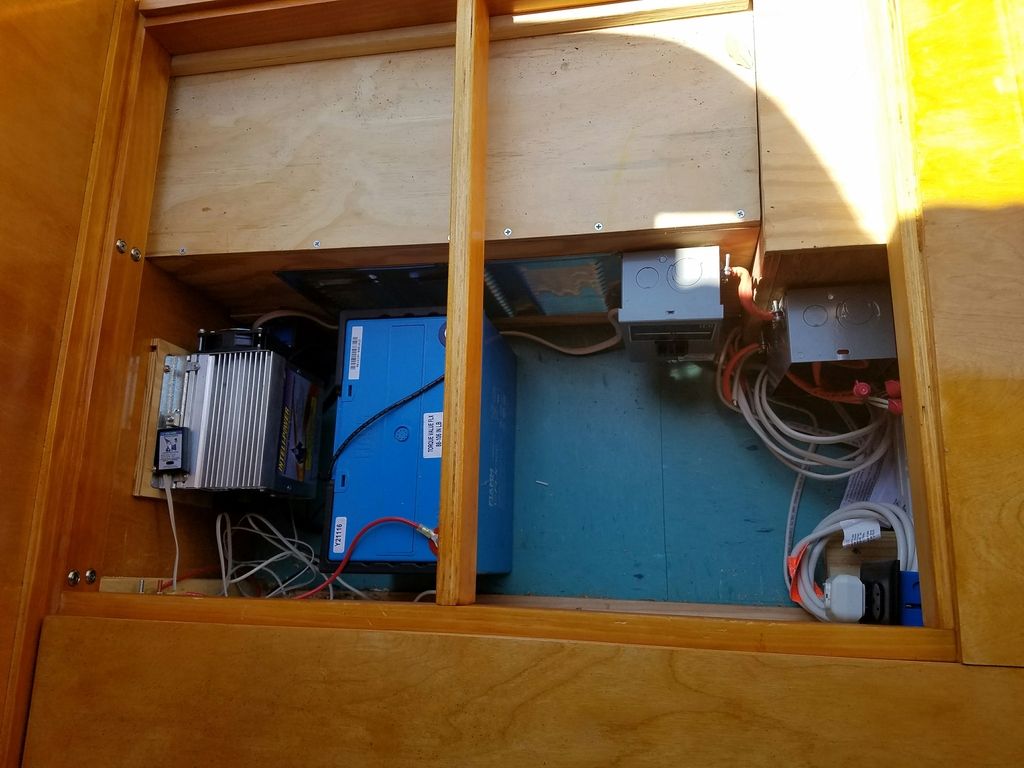 On the street side of the trailer, we installed a 10-gallon freshwater tank: 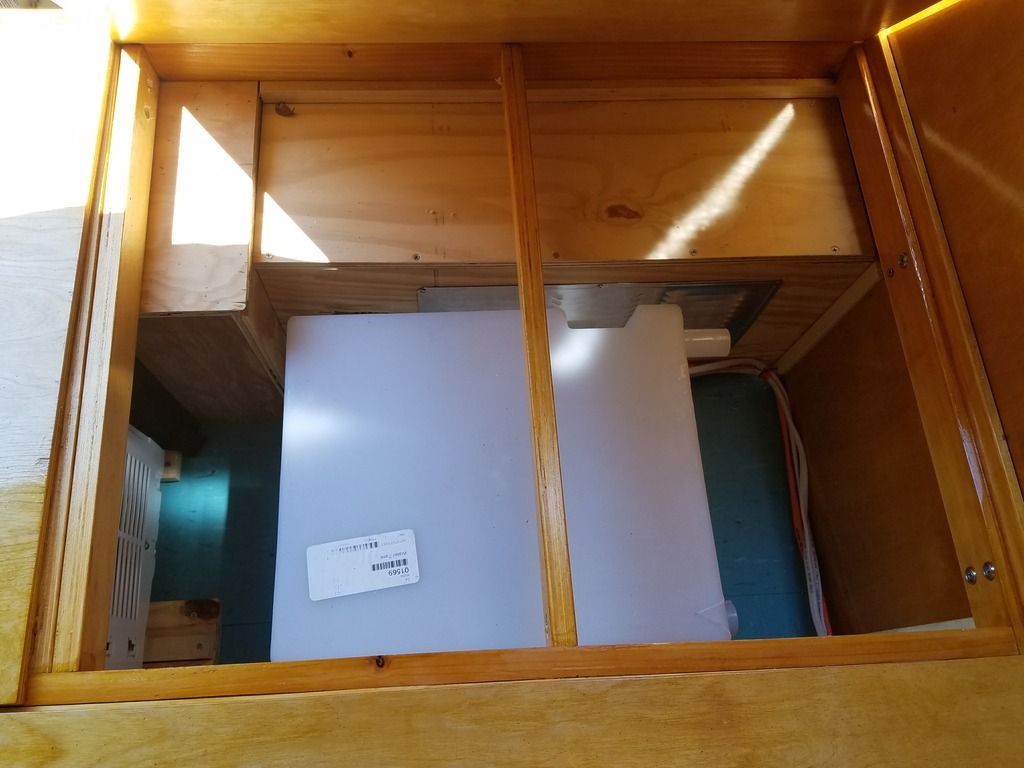 And, in the middle, we installed a window AC unit:  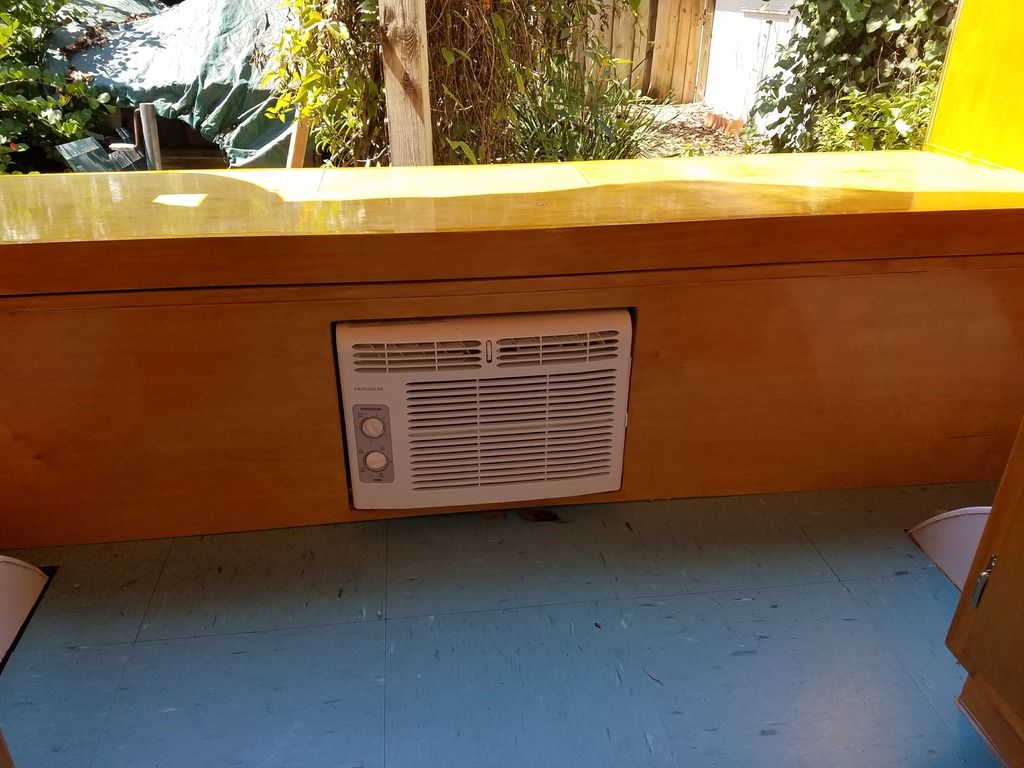 The AC install is still a work in progress and would probably be best described in detail on a seperate post or thread. Basically, the system draws in air through screens in the electrical and water tank areas, then vents it out throught the rear of the trailer. Condensation drips through the floor via a tube we plumbed into the pan of the AC. |
|