|
|
Post by Teachndad on Mar 26, 2021 4:40:57 GMT -8
SWEET!
You are teasing us with the scant views of the new skins, aren't you. We need a team drink when you unveil the new skins.
Rod
|
|
|
|
Post by Teachndad on Mar 23, 2021 20:02:16 GMT -8
Hi and Welcome,
Hey where is your Fleetwood? Still covorting with the aliens, I guess, as our friends here have previously posted.
Just happened on this thread. I noticed the rope glued along the interior wall edging. Usually, people do that to hide something. I wonder if this was repaired from the inside. The current location for the water tank under the dinette is a typical installation location for these trailers. My Westerner had it behind the streetside wheel, though.
I echo also about verifying if the putty tape underneath the j-rail was replaced. The mounting screws are hex heads for ease and speed. Doesn't mean anything wrong was done, using those to mount, but it does show maybe that the putty tape was replaced or longer screws were screwed in where the old ones were and the seller called it a day.
I am looking at the mounting for the wings. I think those were added later. Check behind to see how the mounting screws are sealed if possible. I see dimples in the wings from the screws and the rear most screw looks mighty, like too close to the radius. Just observations. Plenty of Shasta experts to comment on my inexperienced observations.
I am looking forward to seeing you pull the Fleetwood out off your land and also what you do with this one.
Cheers,
Rod
|
|
|
|
Post by Teachndad on Mar 21, 2021 9:09:14 GMT -8
Hi Friends, Well, I wanted to just report on some adventures in towing this most recent trip a few days ago. On Friday, I had to leave my home and drive 360 miles after work up to the San Francisco Bay Area. I hauled my Westerner frame and my pristine plywood for the floor. The plywood already cut and ready for installation was cradled in the back of my pick up truck. I had to also bring my bike, my son’s bike, him and my stuff. I didn’t think I had the room for the bikes in the truck bed, so I decided to put them on a very bouncy trailer frame. Sounded like a good idea and it was an even better idea to use ratchet straps. I used a bolt down steel fork mount for my mountain bike and ratchet straps with my son’s bike. All I had to do was just flip the bike upside down, rest it on it’s handlebars and with the seat as a third contact point, it made for a perfect triangle plane of support. Hmmmmm, I thought…. I finished getting everything cinched down and the little voice in me says, “Dude, that’s sketchy”. Even one of my other sons looked at the setup and said the same thing. Yah, but Dad knows all. I get on the freeway and as I swish through the on ramp gaining speed, I hit a rough patch on the onramp, the trailer hiccups and then I notice in my rear view mirror the upward jutting front wheel has rotated about 20 degrees between glances with merging traffic. “That’s not right”, I thought. I decide the better part of valor is to pull off the freeway about a mile up at the next offramp and check things out. Internal debate begins: Do I pull over now and check it out next to the freeway or limp to the next offramp. Having been stranded on the side of a major freeway isn’t the safest place to be is it? I make it to the offramp. I find a nearby empty parking lot and walk around to see the front handlebars have jumped the stop I screwed into the now attached original plywood. Not good I think.(Yuh think?) Okay. Go to plan B, Rod. Bike gets pulled off, pedals get removed and the bike is placed on my plywood inside the bed. I pat myself on the back that I brought a crescent wrench with me at the last moment. The bike initially never went into the bed as I was afraid of gouging the plywood with sharp parts of the bike if it rested on top. I don’t have a choice now to save the plywood from gouging. I flip the pre sanded plywood nice side down first before adding said bike. “Hmmmmm, why didn’t I think of that before?” Picture shows rig after my son’s bike was placed into the truck bed. 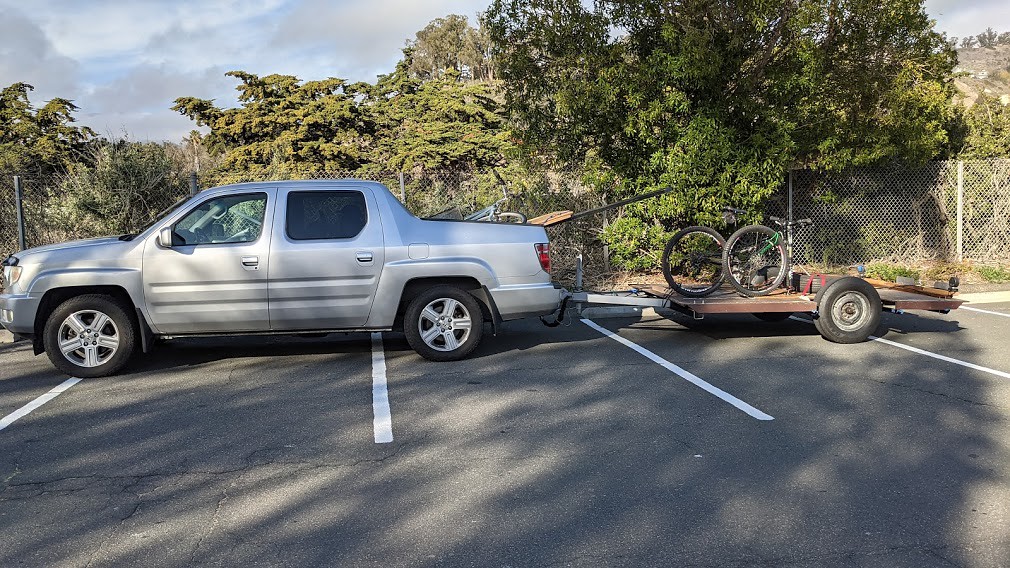 Okay, now, that’s taken care of. On the bed of the trailer, let’s retighten the four ratchet straps that hold down the spare tire for the trailer. I think, these straps might loosen up. I give them a few more clicks. That tire probably won’t go anywhere. Will it? We drive 120 miles and at 100 miles it starts to rain lightly. Curses! Rain, the bane of pristine lumber. I even pre-checked the weather report all up and down the route and everything indicated small percentages of rain expected. I should have been okay. (famous last words) Now, remember that the plywood in the bed is basically pristine and it’s raining. I could drive faster and hope the slipstream would not allow drops to layer up on the plywood. Yah but… I elect to pray that the rain will stop as I head inland from the coast. Nope, it continues to rain lightly, though. All the time I am worried about my plywood. I drive about 15 minutes in light rain and look for a gas station at the nearest location. We pull in under the roof of a gas station and for the next 20 minutes, what do you think I was doing? Yep, you guessed it. I pulled out a new tarp I had packed for just this situation. The 35 pound bike comes out of the bed of the truck. We lay down the tarp, I tuck the edges and use wood clamps to fasten the tarp, so it won’t start to flap and rip. Bike goes back inside the bed of truck this time on top of the tarp. We get the tarp squared away and I pray again that the tarp won’t come loose, flap and rip to pieces especially if it rains for the next hour and half. I turn to double check the spare tire that was fastened 120 miles ago. It’s just lying there on the bed of the trailer 3 of the straps are loose and the hooks are either dangling or just sitting loose on top of the bed of the trailer. The tire is still there too! Geeze Louise! Wonderful, just wonderful… Remember, my mountain bike was mounted to the trailer plywood with a bolted steel fork mount. It wasn’t going anywhere. It never did. So, in case it did, at the trip's outset, I tied a rope leash from the bike frame to the spare tire because everyone knows that the tire would always be strapped down and it would anchor the bike if the fork mount broke. Right?... Well, that’s not really what happened. Actually the reverse happened. The rope leash held the spare tire from sliding. Fun times.  I had no room in the cab of the truck for the spare, so it had to stay on the trailer. I reset the straps, and added two pieces of scrap wood I brought along for things like this and created a V shape with them to form a stop. Screwed them in with Mr. Makita and the spare screws I brought along for emergencies. The V was the stop if the straps came loose again. The tire could slide into the V stops. I end with a prayer. (On a wing and a prayer?) We finish and mosey over to the local McDonalds down the street, use the restroom, clean hands and buy the worst McDonalds sandwich I have ever eaten. Cardboard tastes better. I must be under a dark cloud or something. It’s taken almost 3.5 hours to go 120 miles with traffic and these trailering gymnastics. Off to a great start. Ohhh, did I tell you I had been up since before 5 a.m. We are back on the road. It’s still raining lightly. We make it to the next stopping point a rest stop up 100 miles. Rained the whole way and finally stops as we pull into the rest stop. Things appear to be going better, though. The tarp has held and never came loose or flapped. The bikes were drenched, and the spare had moved yet again due to slipped straps, but the V shape I screwed in did its job. Okay, so, by now, you know the drill. Re-strap, tighten, pray, and stay off the bouncy sections of the road. So, to end this odyssey. I stop one more time about 50 miles out from my destination and recheck the spare. Retighten, pray etc. So, we finally get to our destination around midnight. The rain had finally stopped, and the tire was still on the trailer. In the morning, I remove the tarp and the lumber was dry and there is no water damage. I then sit through an agonizingly long 7-hour zoom training for work. Fun times. So, what did I learn? Never ever use ratchet straps(period?) to hold down a spare unless it’s inside some sort of steel framework. Never ever strap down a bike on a trailer unless you have something made of steel designed for this application. The ratchet straps should never have gone over and inside the center hole but rather back to themselves at each corner. Better yet, dedicate a place in the truck. Get a bigger truck? LOL. Bring hand tools, spare screws, battery powered tools, and scrap lumber just in case. Prayer helps. I bid you adieu. I make mistakes so you don't have to...  Rod |
|
|
|
Post by Teachndad on Mar 17, 2021 22:00:22 GMT -8
Hi Barbara,
I am responding for sake of discussion. I haven't been in your situation as badly, so my answer is based on assumptions. Any vets are welcome to comment on my ideas - yay or nay. I would pull the skins off both walls completely to see how the front wall crush is effecting the rest of the trailer. You might be able to use wood supports inside that support the ceiling off the floor. Even a T shaped wood structure could be used with a temporary reinforced extra large piece of plywood on the floor to distribute load, but you need to make sure it's secure if the ceiling is lifted, then the support would fall. Take it slow and easy. I am envisioning slowly lifting from inside with a bottle jack or scissor jack using an extended long T to raise the roof.
Once you find the original height, then maybe you can create an X type of structure almost like the Roman numeral 10.
Like Whitney says. It's an idea. Didn't say it was a good one.
Rod
|
|
|
|
Post by Teachndad on Mar 17, 2021 21:44:51 GMT -8
Hi Friends, Digging on that white stove. Looks in really good shape actually. Well, you know, you can turn it into an outside office over the weekend. Just add some varnish and sand down a few spots. The fragrance of past cute rodent activity will make you feel closer to nature. and you can use it as your office. I really don't see why not. That way you can keep using your office in the house for storing trailer parts. Just an option vs. working on this little puppy.  Looking forward to another NCcamper project.  Rod |
|
|
|
Post by Teachndad on Mar 17, 2021 21:25:09 GMT -8
Hi and Welcome!
Nice find, even barn finds that were only the last 30 years are still good news to save these babies.
What is that thing in the center of the ceiling? That's a new one for me.
From the only picture you show of the curbside, the springs look really compressed. I can't tell really, but it might be just the angle. If the springs are compressed, then you should consider re-arching them or replacing them. A cheap fix is to move the axle below the springs. Still, the springs should be cleaned up at a minimum. It seems like it's one of the things a lot of owners don't do. I only mention the possible spring compression issue, because having the axle low slung makes tire changes much harder.
You also mentioned you are towing it with a Santa Fe. Make sure your Santa Fe is appropriately set up for towing with a tranny cooler and enough horsepower to do the pulling. Make sure you are not exceeding the towing capacity. I am finding a trailer weight rating for an Airflyte at 2180 lbs.
Finally, thank you for doing your homework and watching videos. I hope you are watching videos that do not show gutting the trailer. At VTT, we always discourage gutting a stick and tin trailer like yours.
Lookig forward to see what you do with your new baby.
Rod
|
|
|
|
Post by Teachndad on Mar 13, 2021 10:59:15 GMT -8
Hi Friends,
Piggy backing on what Vikx said, I know with my backyard barbecue, I have learned to open up the propane tank valve slowly and then wait a minute or two to make sure the gas is fully in the system. Might be something you already have tried, but it's worth mentioning. Just from my experience, anyway.
Rod
|
|
|
|
Post by Teachndad on Mar 13, 2021 7:11:49 GMT -8
Hi,
I am sorry you are going through this very frustrating experience. I can't help you other than in the thread you referenced, there is a mention of trailertrasher. He's a vintage trailer parts guy. If you aren't able to figure whats' going on, his contact information is trailertrasher1@gmail.com.
Good luck,
Rod
|
|
|
|
Post by Teachndad on Mar 13, 2021 7:03:17 GMT -8
Hi Roady,
Great!
Can you give us any before and after pix if you get a chance?
Thanks,
Rod
|
|
|
|
Post by Teachndad on Mar 13, 2021 6:58:52 GMT -8
Hello and Welcome!
I have always liked the amount of window space these Loflytes have. The light paneling is a deal maker for me with this trailer. I have seen trailers of this vintage that had the brown paneling and it sucks up the light. I think you lucked out with the whitish interior. It's really trendy right now in kitchens and in general houses. I really think your experience with the Airstream will help you. The repair skills will transfer over to a stick and tin trailer like this one.
I am really curious to see how that base of the front wall looks like once the skin is removed.
I look forward to following your restoration.
Cheers,
Rod
|
|
|
|
Post by Teachndad on Mar 11, 2021 22:29:28 GMT -8
Well you know what I say to my kids. "The thing about nice stuff(the gas detector), is that it's nice." I have found a few extra bucks for something we say is nice, is worth it in the long run. Ohhh, and BTW, the windows look really NICE. Trying to be original.  Geeze, I wonder if there is just a gremlin running around in this trailer. You get handed what seems to be more struggles than the average build. Yah, but you get an A for determination, persistence and resourcefulness. Cheers, Rod |
|
|
|
Post by Teachndad on Mar 9, 2021 19:27:08 GMT -8
Hi Friends May 2020 - I continued on the windows, but made a detour. I picked up a yellow and white Princess stove on Ebay for a good price in late May 2020. This is the type of stove that was originally in Andy, but lost long ago.  May 2020 - May 2020 - I built a wood frame as a cradle for the front window assembly until it is placed in the trailer. It keeps it from stressing the rivets and damaging the flanges. 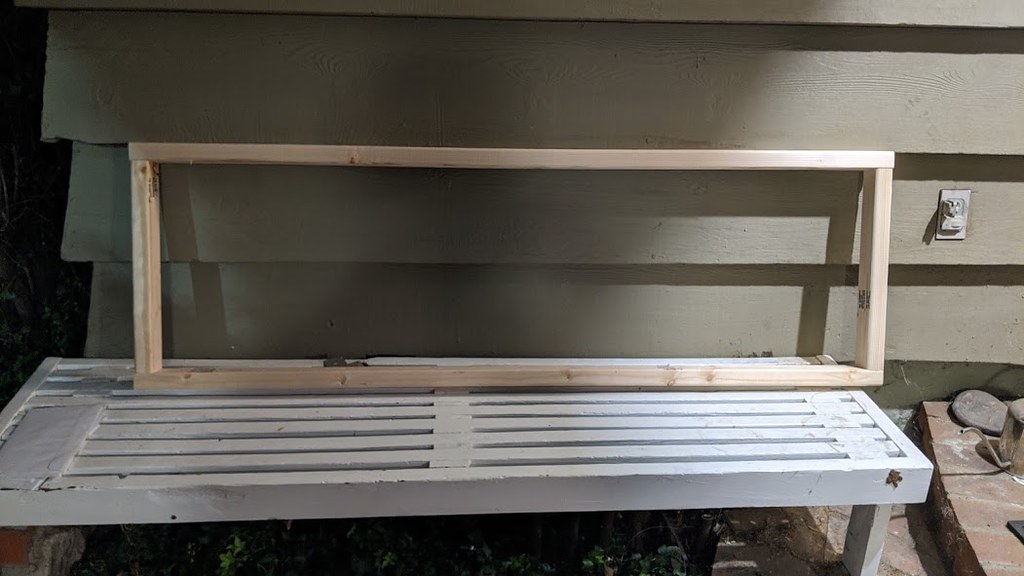 Wood frame for front window assembly Wood frame for front window assembly 
Here is the before image of the front window assembly as purchased before any work was done.

I finally finished the front window assembly with new center glass and new Hehr window gaskets. Frame is hand polished. '
 During this time, I also riveted in the "keepers", the locking strip for the extension arms that open the windows. These have new back frame gaskets as well as new screen material. The door window frame is also present from a donor trailer - a 1965 Fireball.  Keepers are in and door window frame Keepers are in and door window frame I also hand polished the interior aluminum window glazing and the internal midframe supports. 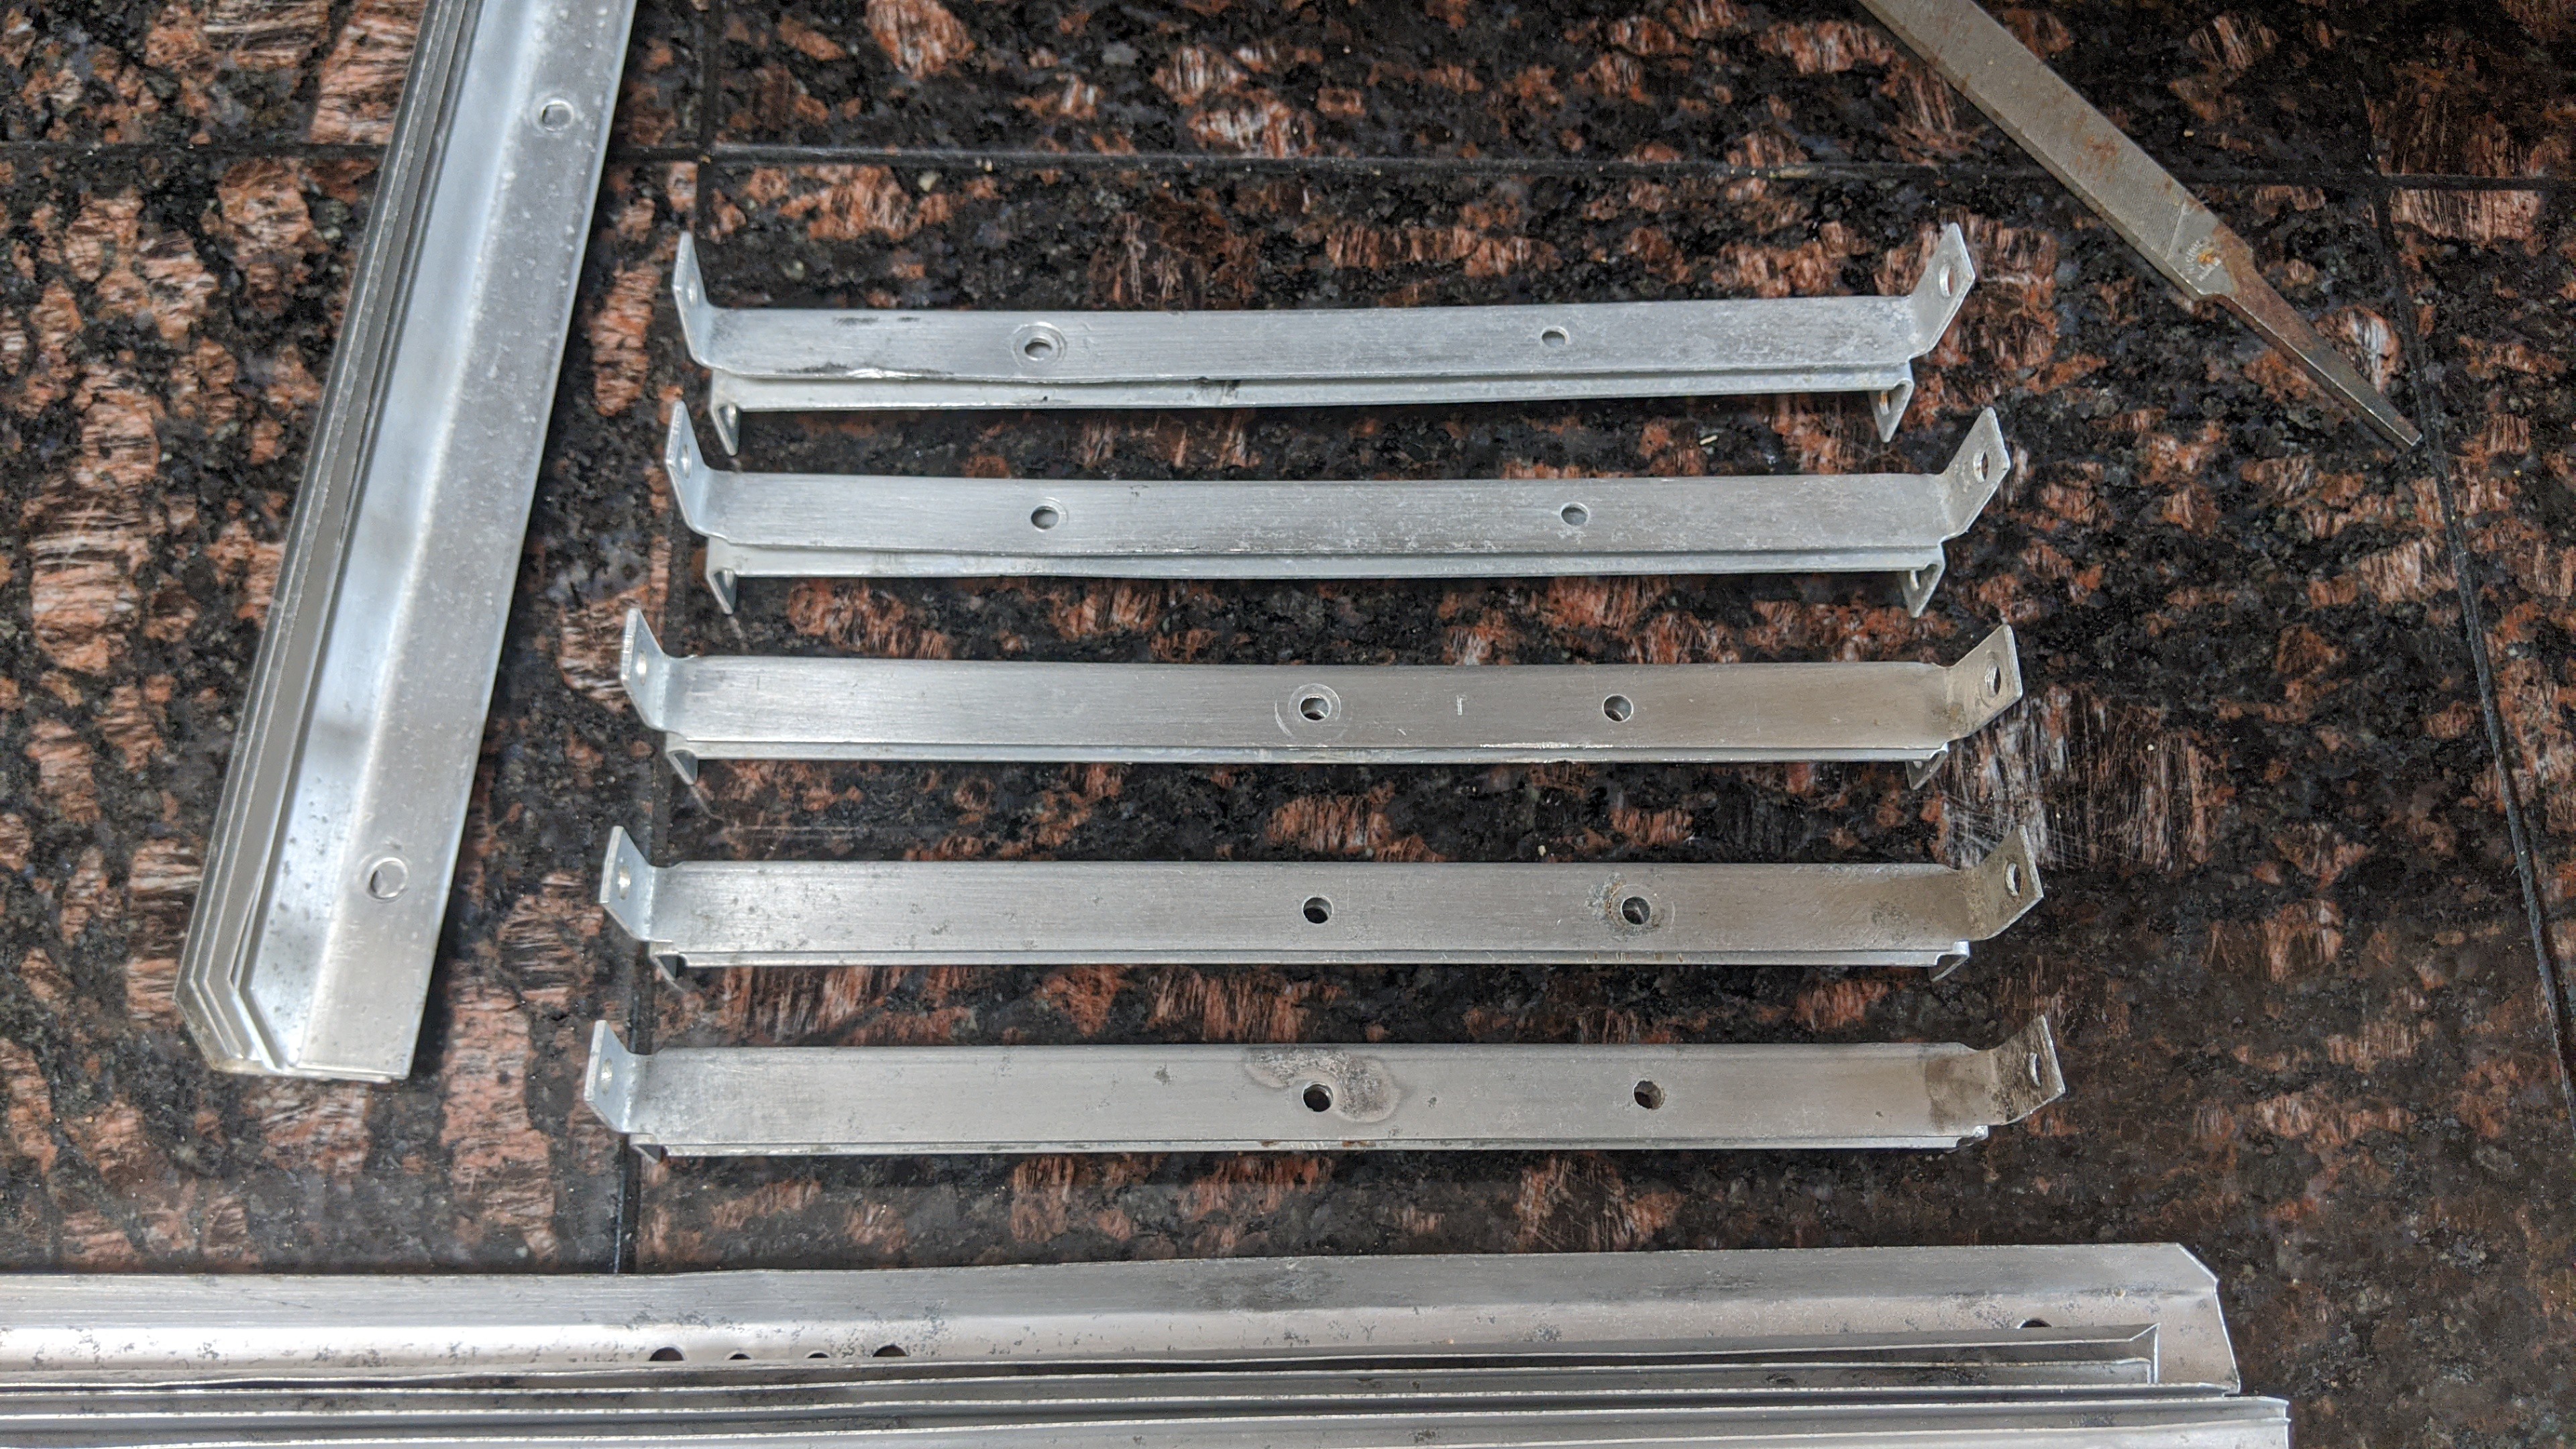 September 2020 September 2020. I built a movable rack to keep Andy’s walls out of the way until it’s their turn for restoration. We needed room to the left for my wife’s car. No place for the walls. So, I built the rack.  The next work was done at two locations 360 miles away from So Cal to Nor Cal. I bought new tires for the trip and a new spare as well. The old ones had less than a thousand miles on them, but were 8 years old. It’s the price of peace of mind. December 2020 - On the road again… The galvanized wheel wells started to split at the screw holes on the trip. The top arc of the wheel wells couldn't handle the wind force and flexing from the road so the arc started to split also. At a rest stop, I noticed the splitting at 180 miles of a 360 mile trip and removed them before they would inevitably fly off. I was going to replace with new ones anyway as they were already bent up.  That’s the original plywood still with brown paint and a scab across the seam for added structural integrity.  Over the past few months, I added 6 more floor joists to the floor for support.he 6 new joists would be measured, cut and notched with a skill saw and shimmed with large stainless steel fender washers to even things out. No one is perfect. At the Nor Cal work address, I drilled all the joists for carriage bolts. Since I had replaced all the outriggers with new steel 5 years earlier, the ends had to be drilled. I used pilot holes in the wood and a sacrificial pilot drill to got through the lumber and dimple the steel. Removed the clamped wood and then drilled out the hole using the dimpled steel to start and enlarged to match the size of the carriage bolts. Oil and patience were my friends when drilling out the steel. Clamped Joists  Joists Bolted - Notches over axle are for a lap joint for the plywood floor.   March 2021 March 2021 Painted the joists with primer and black paint.   Rod’s Mobil Restoration services will hopefully be in business over our upcoming Spring break… Cheers, Rod |
|
|
|
Post by Teachndad on Mar 9, 2021 17:51:27 GMT -8
Fabulous!!
|
|
|
|
Post by Teachndad on Mar 8, 2021 23:07:29 GMT -8
Thanks for offering to help Agpa. This thread is 6 months old. Lets see if Hamlet still needs a fix for this. She will be along soon enough.
Cheers,
Rod
|
|
|
|
Post by Teachndad on Mar 5, 2021 7:26:41 GMT -8
Hi Friends, On my Rod and Reel, I went for the under the trailer connection inspired by Larry in one of his videos. I chose the connector you see below that I found at a big box store. I liked it because it had the mini ballcock valve in it that I could turn closed to keep spiders and such from crawling up there when the trailer was not in use. The original designs back in the day included a garden spigit, so I figured why not. I angled it backwards because I figured I would run the water hose line back under the trailer and around the tire footprint just in case someone walked caught it with their foot and pulled on it. I should also mention that this connection only goes to the sink faucet, not the water tank. Cheers, Rod  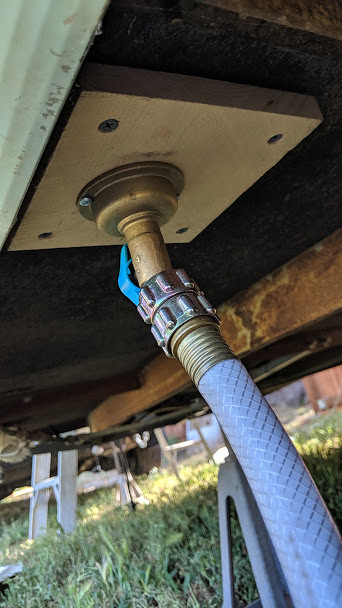 |
|


