ladywendolyn
2K Member

Posts: 2,315 
Likes: 928
1964 Golden Falcon
Currently Offline
|
Post by ladywendolyn on Mar 30, 2018 20:21:42 GMT -8
|
|
CorvettCrzy
Full Member

Posts: 934
Likes: 273
'58 Corvette, '64 Franklin
Currently Offline
|
Post by CorvettCrzy on Apr 16, 2018 19:09:23 GMT -8
While waiting on gas line and propane tank parts we've been finishing up the pieces that have to be done before the skin goes on. It was a little scary for him, but he cut out all the windows, framed inside and cut out the door, installed the tank tray, cut out for the vent and installed one of the dinette bases. The roof should be here in the next few days. I am stripping and sanding the stove front to repaint. 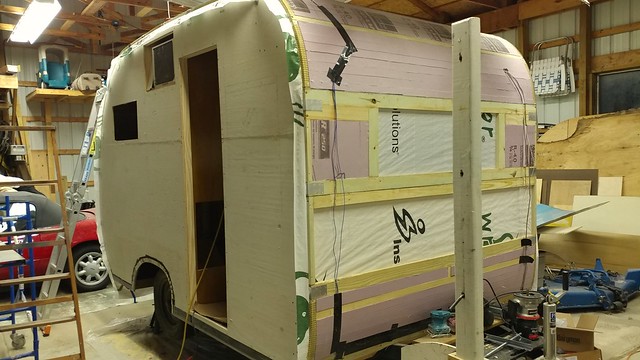 Door cut and door frame in Door cut and door frame in by Corvett crzy, on Flickr  First dinette base in. First dinette base in. by Corvett crzy, on Flickr Made a big mistake washing off the stove burner parts because I wanted them to be clean before I painted them. Didn't want problems with the paint, here's a hint -- Never, never put water on the burner parts. I put them in the oven because I wanted them to dry thoroughly - they rusted before they could even dry. They looked really good before I had tried to "clean" them. So I cleaned them with acetone as best I could and coated them with a coat of High Temp paint. 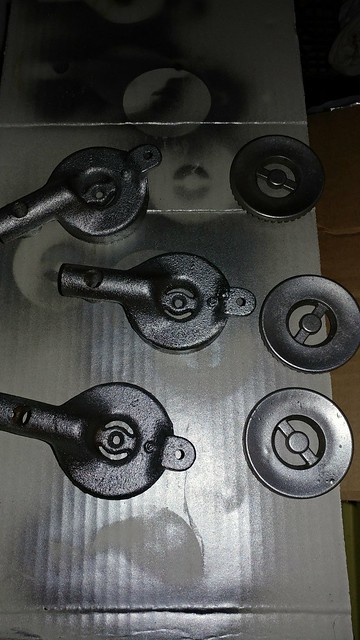 Painting the burners. Painting the burners. by Corvett crzy, on Flickr |
|
CorvettCrzy
Full Member
Posts: 934
Likes: 273
'58 Corvette, '64 Franklin
Currently Offline
|
Post by CorvettCrzy on May 7, 2018 19:19:17 GMT -8
I am excited to say that in the last few weeks we have made some progress. The bases for the dinette were built which included raising them up about an inch to accommodate a porta potti - I am not trapesing through a campground with wild animals to go potty and I'm also not digging a hole in the middle of the night to pee in. There will be a cabinet door which we will open at night and pull out the potty. (Hole and door need to be cut and made). I will close off the remainder of the bench seat for storage. All the gas lines are in:  Stove assy Stove assy by Corvett crzy, on Flickr Stove top works with the exception of a missing part on one of the burners. Spent an hour looking for the gas light parts I purchased 3 years ago tonight, will test that out tomorrow along with the fridge after we read the instructions on how to light it. Only thing left to hook up is the Peerless furnace. We did put a shut off valve to the furnace as we don't intend to use it on a regular basis and will probably travel with our little portable heater. We will test it for function though. While Dad was working on the gas lines, my son and I hung insulation on the sides and put up the upper side panels. We flattened a few of the bumps made when he "ran over" the skin in the driveway and although there are a number of small dents I didn't see any that were pierced completely through. I did follow by example from some other members and used waterproof tape on the backside where someone had attempted to install the door holder about 3 times before they found the right spot. I will JB weld those holes later. I'll come back and post more pictures and comments later as my photos do not seem to be loading into flicker tonight. |
|
CorvettCrzy
Full Member
Posts: 934
Likes: 273
'58 Corvette, '64 Franklin
Currently Offline
|
Post by CorvettCrzy on May 11, 2018 18:52:13 GMT -8
After an extremely unusual series of events I found myself with a stove, hoping to find the missing part for our stove top. It does appear that the very end brass fitting is missing. We were very excited to disassemble a slightly "newer" stove to see a very similar fitting. Unfortunately it has some weird thread size in it and we can't find a nipple to fit it with a compression fitting on one side and pipe on the other, oh the things I am learning. Anyone have any ideas on how to change the threads or find another fitting, don't hold your tongue. It only goes on about 1/2 a rotation before it stops. In between driving all over trying to find that little piece, we got some other "stuff" done. Insulation and both upper side skins installed all windows cut out except the back. 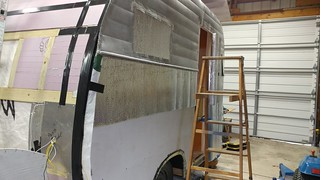 0506181810b 0506181810b by Corvett crzy, on Flickr Getting the bottoms ready. I do think that adding the bubble insulation gave the skin a little of the "puff factor" Mobiltech talks about. I liked it.  005181052 005181052 b 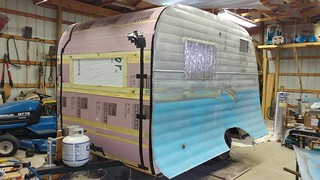 0506181810a 0506181810a by Corvett crzy, on Flickr Tested the Gas Light. works well but after it's been on a few minutes it kinda stutters, makes a puffing sound? Almost sounds like the gas is running out, but it's not, full tank? If we turn it down a little it doesn't do it as frequently, but it still does it. We've messed with the adjustment on the top (screw) doesn't seem to have made a difference.  Gaslight Gaslight by Corvett crzy, on Flickr 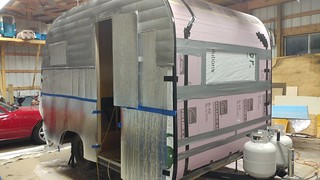 There it is... There it is... by Corvett crzy, on Flickr Proof it's definitely a Vette, going to have to get another sticker............  There it is... There it is... by Corvett crzy, on Flickr After hanging the bottom skin realized that the inlet for the gravity feed is quite a bit lower than the spout for the new tank........hhhmmm...........Hhhmmmmmm.............. Plus thought we were going to have to cut out more of the cupboard because the tank was such a tight fit. Give us a puzzle..................... answer, we are building a wedge to go under the tank. Tilting up the back side allows us to move it toward the front, allowing for some extra room for the fittings, puts the tank at an angle so it will drain better when winterizing, and lowers that inlet on the tank, just enough to get it close to at least level with the exterior inlet. 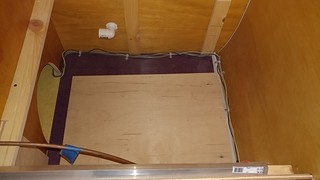 Progress Progress by Corvett crzy, on Flickr Did a rough cut for the counter top. Enclosed the back of the stove as there is now a refergerator vent behind it, so no more odd little indentation..............never did figure that out, almost looked like they made the stoves too small. 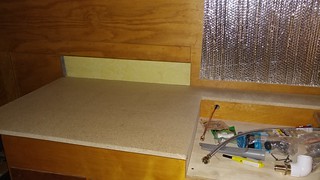 Progress Progress by Corvett crzy, on Flickr Side skins are on. The new sides are close in size, fortunately just a touch smaller, almost like he planned it - sure he did. So the "trimming" the PO did to square off the back I thought we were going to have to "patch" on both sides, now only has to happen on the curb side (which is also where we need to cut out a storage door). 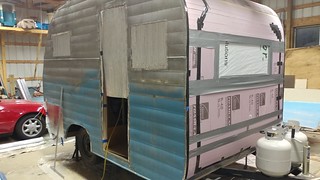 Progress Progress by Corvett crzy, on Flickr Fragile, can you say fragile........ Hubby got a little too enthusiastic with his torx (or whatever you call it) screw gun. Going to work on it with some JB weld, hopefully I can fix it. 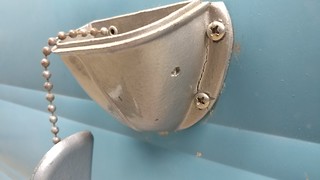 Progress Progress by Corvett crzy, on Flickr Along with the good comes the bad I guess, he cracked the water fill and I managed to lose (I was trying to be so careful too) the funnel that comes out the bottom of the sink. Have no idea how I'm going to replace that, and the kicker is I lost it when I was purchasing all the hoses and fittings to install it. Hoping It'll turn up around here soon, but I've looked everywhere and checked Menards lost and found several times. Also cut the particle board for the table. Ordered the rims and the vent from VTS, next step - the roof and a lot of time re-reading painting posts!!!! |
|
|
|
Post by vikx on May 11, 2018 19:44:03 GMT -8
You can redo the sink drain. Most of the drains are 1 1/2". Purchase a rubber Fernco fitting to clamp on t the end of the drain. Then insert a reducer in the other end, down to 3/4 threads. Screw a 3/4 barb into the reducer. I use tractor "breather hose" for the drain. It goes out thru the floor. I insert a 3/4 barb/ male threaded hose fitting at the end. That way you can cap it when not in use to keep critters out. Email me if you need more info/pix.
|
|
CorvettCrzy
Full Member
Posts: 934
Likes: 273
'58 Corvette, '64 Franklin
Currently Offline
|
Post by CorvettCrzy on May 13, 2018 20:04:26 GMT -8
Well pretty exciting Mother's Day!!! Nope, didn't sit around relaxing............... Guilted my family into getting the roof out of the box and onto the camper. Had a few issues along the way but made some great progress and all the while working together (well except the 8 year old, she kept herself busy). Trimmed off some edges that were hanging over. These were primarily due to 2 reasons: 1. we hung the upper side panel a little tilted. 2. Hubby must have deliberately (or accidently) made the new sides a little smaller. Which works out well for us because it had been extended and hobbled together and the skin had been trimmed. I thought we were going to have to patch both sides but now we only have to patch 1.  The roof The roof by Corvett crzy, on Flickr We unpacked the roof: 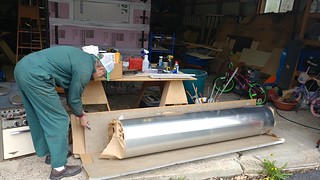 The roof The roof by Corvett crzy, on Flickr and new rear panel  The roof The roof by Corvett crzy, on Flickr Finished taping all of the  pre-treated wood and Added 3/4 to the vent as recommended to assist in drain off. 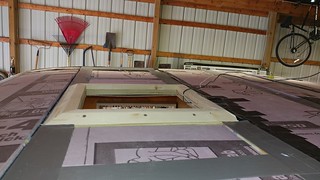 The roof The roof by Corvett crzy, on Flickr And put roof on the camper and lined up one side and banded it 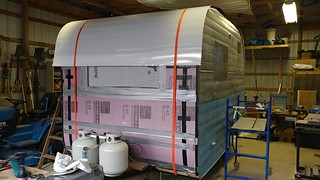 The roof The roof by Corvett crzy, on Flickr Then started checking seam locations and cross boards....................... Unbanded it.... 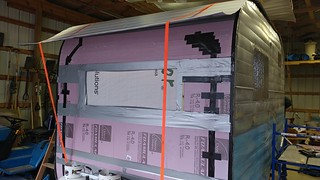 The roof The roof by Corvett crzy, on Flickr and added more cross boards so we would have something to attach the skin to. This was due to a few factors. We had raised the rear window and didn't take into consideration the location of the cross frame for the window and the skin seams. There was also some miscommunication regarding seam location because I had requested that it not fall on the vent. Whether a mistake or the addition of the 3/4 " material and angle he added, in order for one of the roof seams not to fall on the vent we slid the roof forward slightly which meant we had to add cross member in front as well. "SShhhh", he says, don't show them the mistakes, "but then how can we help someone else not make them......." she says. 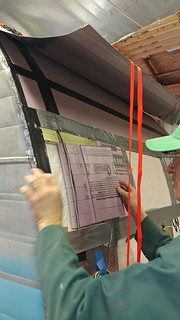 The roof The roof by Corvett crzy, on Flickr 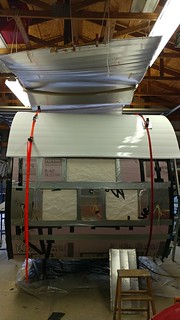 The roof The roof by Corvett crzy, on Flickr So while he was adding the extra supports I cut down the ramp for the water tank increasing the angle between the inlet and inlet on the tank by about 1/4", not much I know but a lot better than it was before. I also removed the delaminated fronts of some cupboards so we could reuse the frame. Finished more taping, sent the kids out to get sushi and had a cold one (he had one too!) Tucked her in and called it a great Mother's Day!! |
|
mel
Senior Member
1964 Shasta Airflyte
Posts: 1,729
Likes: 523
Currently Offline
|
Post by mel on May 14, 2018 3:58:36 GMT -8
Pretty exciting stuff!!
|
|
CorvettCrzy
Full Member
Posts: 934
Likes: 273
'58 Corvette, '64 Franklin
Currently Offline
|
Post by CorvettCrzy on May 20, 2018 21:38:18 GMT -8
Well we've been tweeking the roof. Today I lined up Mobiltec's videos on installing the roof in succession on the computer and suggested that he watch them. We measured and found we had a 1/16" difference on the front window from side to side (to the roof) and we decided to go with it. If we keep messing with it, it'll probably go out a 1/4". We've got it strapped down and ready for bending..... now that's where we kind of got stuck. I've been spending my evenings reading about putty tape, butyl, gutterseal etc. I know that most do not use any type of sealer between the roof fold over and the side panel. Neither one of us feel comfortable with having the only seal be putty tape under the J rail. So I continued reading what lots of others had done and what we ultimately decided to do was to gutterseal all of the staples and old staple holes and screw holes on the sides. Jim doesn't want to cut the foldover if he doesn't have to and has decided to try using a tool to create this "crimp" like hvac people do -- Picture coming soon..... I've read where vikx has said that you should use gutterseal sparingly, not sure what that means. I hope I haven't overdone it. The only type I could get at my Lowe's was the clear kind..... 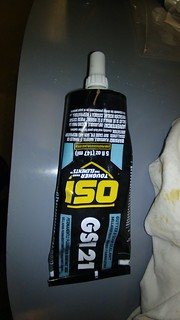 May 20 May 20 by Corvett crzy, on Flickr In the meantime while all this thinking was going on I removed the damaged luan on the cupboard doors and bought a new sheet of 1/4" mahogany Luan (matching what was there originally). I'm not sure what type of finish to put on it to get a match to the original. I'll have to test a piece with clear and amber shellac. I'm just thinking they probably didn't stain them originally but used what they had on hand. 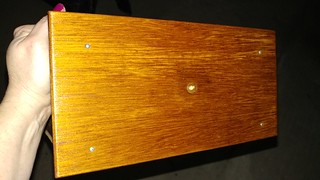 0320172244a (1) 0320172244a (1) by Corvett crzy, on Flickr  Progress Progress by Corvett crzy, on Flickr  May 20 May 20 by Corvett crzy, on Flickr Need to figure out the access door and the running lights. I'd like to use the old ones but that would take some doing and I wonder if they would stay assembled with just that wire ring holding them in.  May 20 May 20 by Corvett crzy, on Flickr To complicate matters more, it seems we have lost not only a parking light but the main body of the Hehr vent. We wired for a Fantastic Fan, just in case, but we have an A/C so it doesn't seem necessary. Now we can't figure out what Jim did with the vent. I have the original cover and interior trim. I know it's in that barn, we wouldn't throw it away, and will probably find it when everything is done. To assure that will happen I ordered a replica vent from VTS and was disappointed that the interior is plastic. It doesn't even look like I'll be able to use the original interior piece either. We were able to work through the stove problem. On the very day I was riding around looking for the burner part an old friend (who also has a Shasta waiting for rebuild) gave me a call to ask if I had any need for a stove. I was literally on my 3rd stop and 2 miles from her house. I picked it up hoping we could find the part we needed. We did but the threads were wrong. I picked up some scrap brass and were considering asking a friend to try to duplicate one of the originals, but in the long run Jim just re-tapped the salvaged part, planning on testing it tomorrow.  May 20 May 20 by Corvett crzy, on Flickr 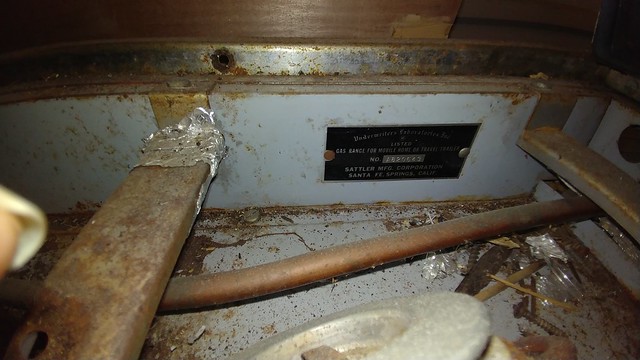 May 20 May 20 by Corvett crzy, on Flickr I've got a stove available for parts if someone needs something. My friend had someone who wanted the grates so they aren't available. Well Roof Bending and stove testing begins tomorrow, wish us luck. Now I'm gonna go back to reading about Paint..... |
|
|
|
Post by vikx on May 21, 2018 20:08:31 GMT -8
By sparing on the Gutter Seal, I mean smooth it carefully with a paint thinner dipped finger. You don't want bumps. Another coat is fine, just be sure you smooth well. It's hard to see but you can "feel" if you've got enough on.
|
|
CorvettCrzy
Full Member
Posts: 934
Likes: 273
'58 Corvette, '64 Franklin
Currently Offline
|
Post by CorvettCrzy on May 22, 2018 19:07:51 GMT -8
|
|
|
|
Post by vikx on May 22, 2018 20:27:09 GMT -8
Well, you are lucky you used OSI Gutter Seal. Take some paint thinner on a rag and wipe the lumps. Paint thinner will "remove" gutter seal. That's one reason I use it. Easy on, easy off. Take your time. You can trim first if you like, but you'll have to use paint thinner to smooth. It takes a lot of thinner and it has to be *real* paint thinner.
Once you are satisfied with it, let dry well. Then go over the flaws again with gutter seal. Sometimes it helps to shine a light sideways so you can see if the staples/divots are well sealed.
|
|
CorvettCrzy
Full Member
Posts: 934
Likes: 273
'58 Corvette, '64 Franklin
Currently Offline
|
Post by CorvettCrzy on May 24, 2018 19:52:36 GMT -8
Roof edges crimped and folded over. Staples gutter sealed. Thin roll of Plumbers putty between the side and roof under the fold. Going to work on smoothing the edges down some more.  Attaching the roof Attaching the roof by Corvett crzy, on Flickr 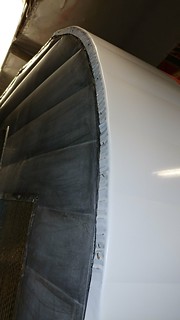 Attaching the roof Attaching the roof by Corvett crzy, on Flickr Back panel getting fitted. Received my tent poles, awning rope and Primer 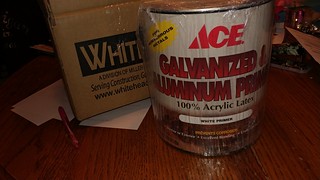 Primer from GA Primer from GA by Corvett crzy, on Flickr Tried a new wheel on the camper, aahh it's nice to see progress. |
|
CorvettCrzy
Full Member
Posts: 934
Likes: 273
'58 Corvette, '64 Franklin
Currently Offline
|
Post by CorvettCrzy on May 28, 2018 19:45:45 GMT -8
Added diamond plate under the bottom edge of the front skin as a rock guard.  Sanding, Ugh! Sanding, Ugh! by Corvett crzy, on Flickr Got the back all buttoned up. 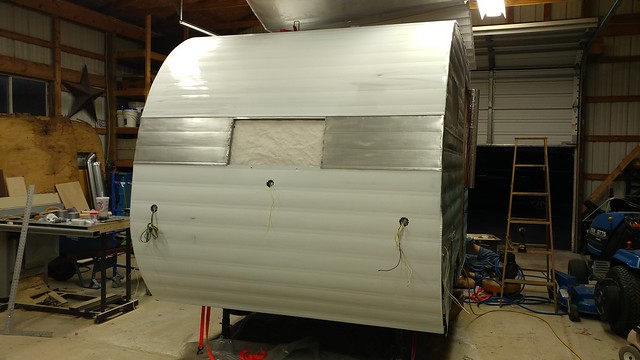 Sanding, Ugh! Sanding, Ugh! by Corvett crzy, on Flickr  Stove parts and progress Stove parts and progress by Corvett crzy, on Flickr Installed the last front panel and some skin repairs. And then, sanded, and sanded, and sanded.............. have I ever said how much I hate sanding..... 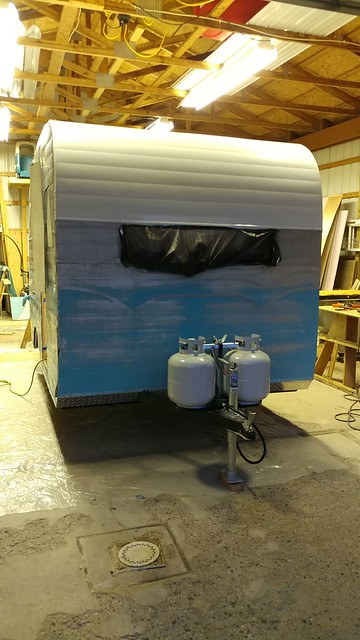 Counter top Counter top by Corvett crzy, on Flickr Laminated my counter and stuck it in there just to see how pretty it looked. It's finished just need some plumbers putty to seal the sink and figure out what type of screw or nail to attach the trim. I was extra careful taking it off so I want to reuse the original.  Counter top Counter top by Corvett crzy, on Flickr Of course Jim realized we didn't have enough birch to do the interior of the door so I started shellacing again. Ugh, thought I was finished, but it beats sanding. It's been a busy but successful long weekend. |
|
mel
Senior Member
1964 Shasta Airflyte
Posts: 1,729
Likes: 523
Currently Offline
|
Post by mel on May 29, 2018 3:21:28 GMT -8
Your counters and stove top look amazing!
|
|
CorvettCrzy
Full Member
Posts: 934
Likes: 273
'58 Corvette, '64 Franklin
Currently Offline
|
Post by CorvettCrzy on May 30, 2018 20:41:11 GMT -8
thanks mel can't wait to see your progress. Saturday looks like good day, clear skies and 75! |
|


 pre-treated wood and

