kaffi311
Active Member

Posts: 283 
Likes: 98
1963 Shasta 16 SC
Currently Offline
|
Post by kaffi311 on Apr 26, 2019 13:22:05 GMT -8
So this is the very front of my camper at the tongue (tongue is to left in this photo). The bottom piece of wood was added - bolted to frame- so that I can secure front metal at the very bottom. In working on wiring today under the camper- I am somewhat confused as to how the battery wires, tow wire/cord and propane lines run. Do they just all go under that bottom steel piece? Mine is a piece of "L" shaped steel. I can't run it on top of that metal piece- as my skin will be there. Just making sure that all of these things are run under the steel to the front of the tongue. Hope I am making sense ! Lol Thanks  IMG_6458 2 IMG_6458 2 by kathy, on Flickr |
|
kaffi311
Active Member
Posts: 283
Likes: 98
1963 Shasta 16 SC
Currently Offline
|
Post by kaffi311 on Apr 26, 2019 6:48:29 GMT -8
I have tried laying it over the top and the roof metal edges would not lay flat. I had to cut Reflectix back at the wall top and inset into the cavity. It is OK over the vent opening but not at the edge Ok-sorry if I am still not clear. I do have it cut back at the edges all around the roof stapled to the inside of the cavity at the edge boards. Can I lay it over the roof rafters? Or do I need to cut and fit into the cavities between roof rafters as well? Thanks ! K |
|
kaffi311
Active Member
Posts: 283
Likes: 98
1963 Shasta 16 SC
Currently Offline
|
Post by kaffi311 on Apr 25, 2019 16:20:12 GMT -8
Ok, I gotta get started on my propane system. Can someone show me how it connects at the tongue? I know you have a tank and a regulator hose coming off it- but what does it look like right after that? Haven't seen a clear photo and just wondering what the hook up to the pipe looks like.
Thanks
Kaathy
|
|
kaffi311
Active Member
Posts: 283
Likes: 98
1963 Shasta 16 SC
Currently Offline
|
Post by kaffi311 on Apr 25, 2019 16:16:54 GMT -8
I am using Reflectix insulation on my roof- and am wondering if I can just lay/staple it over the roof framing, or is it best to cut and just have the cavities filled? Will putting it over my roof framing cause issues with installing the skins? ( I bought all new skins).
Thanks
Kathy
|
|
kaffi311
Active Member
Posts: 283
Likes: 98
1963 Shasta 16 SC
Currently Offline
|
Post by kaffi311 on Apr 23, 2019 18:35:30 GMT -8
I see the photos. Cool camper!!! Have fun- its going to be a beauty when you are done  |
|
kaffi311
Active Member
Posts: 283
Likes: 98
1963 Shasta 16 SC
Currently Offline
|
Post by kaffi311 on Apr 23, 2019 18:26:46 GMT -8
I just read your entire thread, you go Girl...... I'm only a few years behind you. I went back to collage when I was 30 years old after my 3rd child started school. Joined to National Guard and went to Basic Training at the age of 34. In the last 15 years in the National Guard, I have deployed 2 times. I am know rebuilding my very own Shasta Compact. When we put our minds to something there is nothing we cant accomplish. Your doing a grate job... Debra Thanks!! Ive been following your build as well and its coming along beautifully!! You go girl !! ha ha |
|
kaffi311
Active Member
Posts: 283
Likes: 98
1963 Shasta 16 SC
Currently Offline
|
Post by kaffi311 on Apr 20, 2019 6:48:16 GMT -8
Thank you for that statement that got buried. "At 53 you can do ANYTHING" . To me you are the "poster person" for this site. One Real positive statement takes down a mountain of negative critical statements. Great work on your pride and joy ! Thanks for sharing. Thanks you for that! Your comment is so appreciated |
|
kaffi311
Active Member
Posts: 283
Likes: 98
1963 Shasta 16 SC
Currently Offline
|
Post by kaffi311 on Apr 19, 2019 18:29:27 GMT -8
So, it's finally Spring. Now that the barn is not an icebox, I am back at the camper. It's getting there everybody....so very close! I can see the light at the end of the tunnel- and it is getting closer everyday!! April Update: Well, Mom stuck with it and actually got all the cushion covers done! She is a trooper, and worked hard to get all of her sewing correct. Not bad for 82, huh? I will love sleeping on my bed, knowing the work my mama put into the cushions. They look amazing- and are currently sitting in my bedroom until the camper is ready for them (too dusty in there right now). They look dull in this photo- but actually a vibrant color of green !  All of the rusted and pitted exterior pieces are puttied, painted and ready for install.Just gotta wait- as they go on after the new skins. They all turned out great     I installed my first electric box- not too tough ! This one is under the bed with access from outside. (I've added a waterproof cover since this photo)  I finally installed my original Shasta step- it's a little beat, but I love that it is original  I cut out the kitchen table top and repaired the under framing- now need to laminate it and we are done! 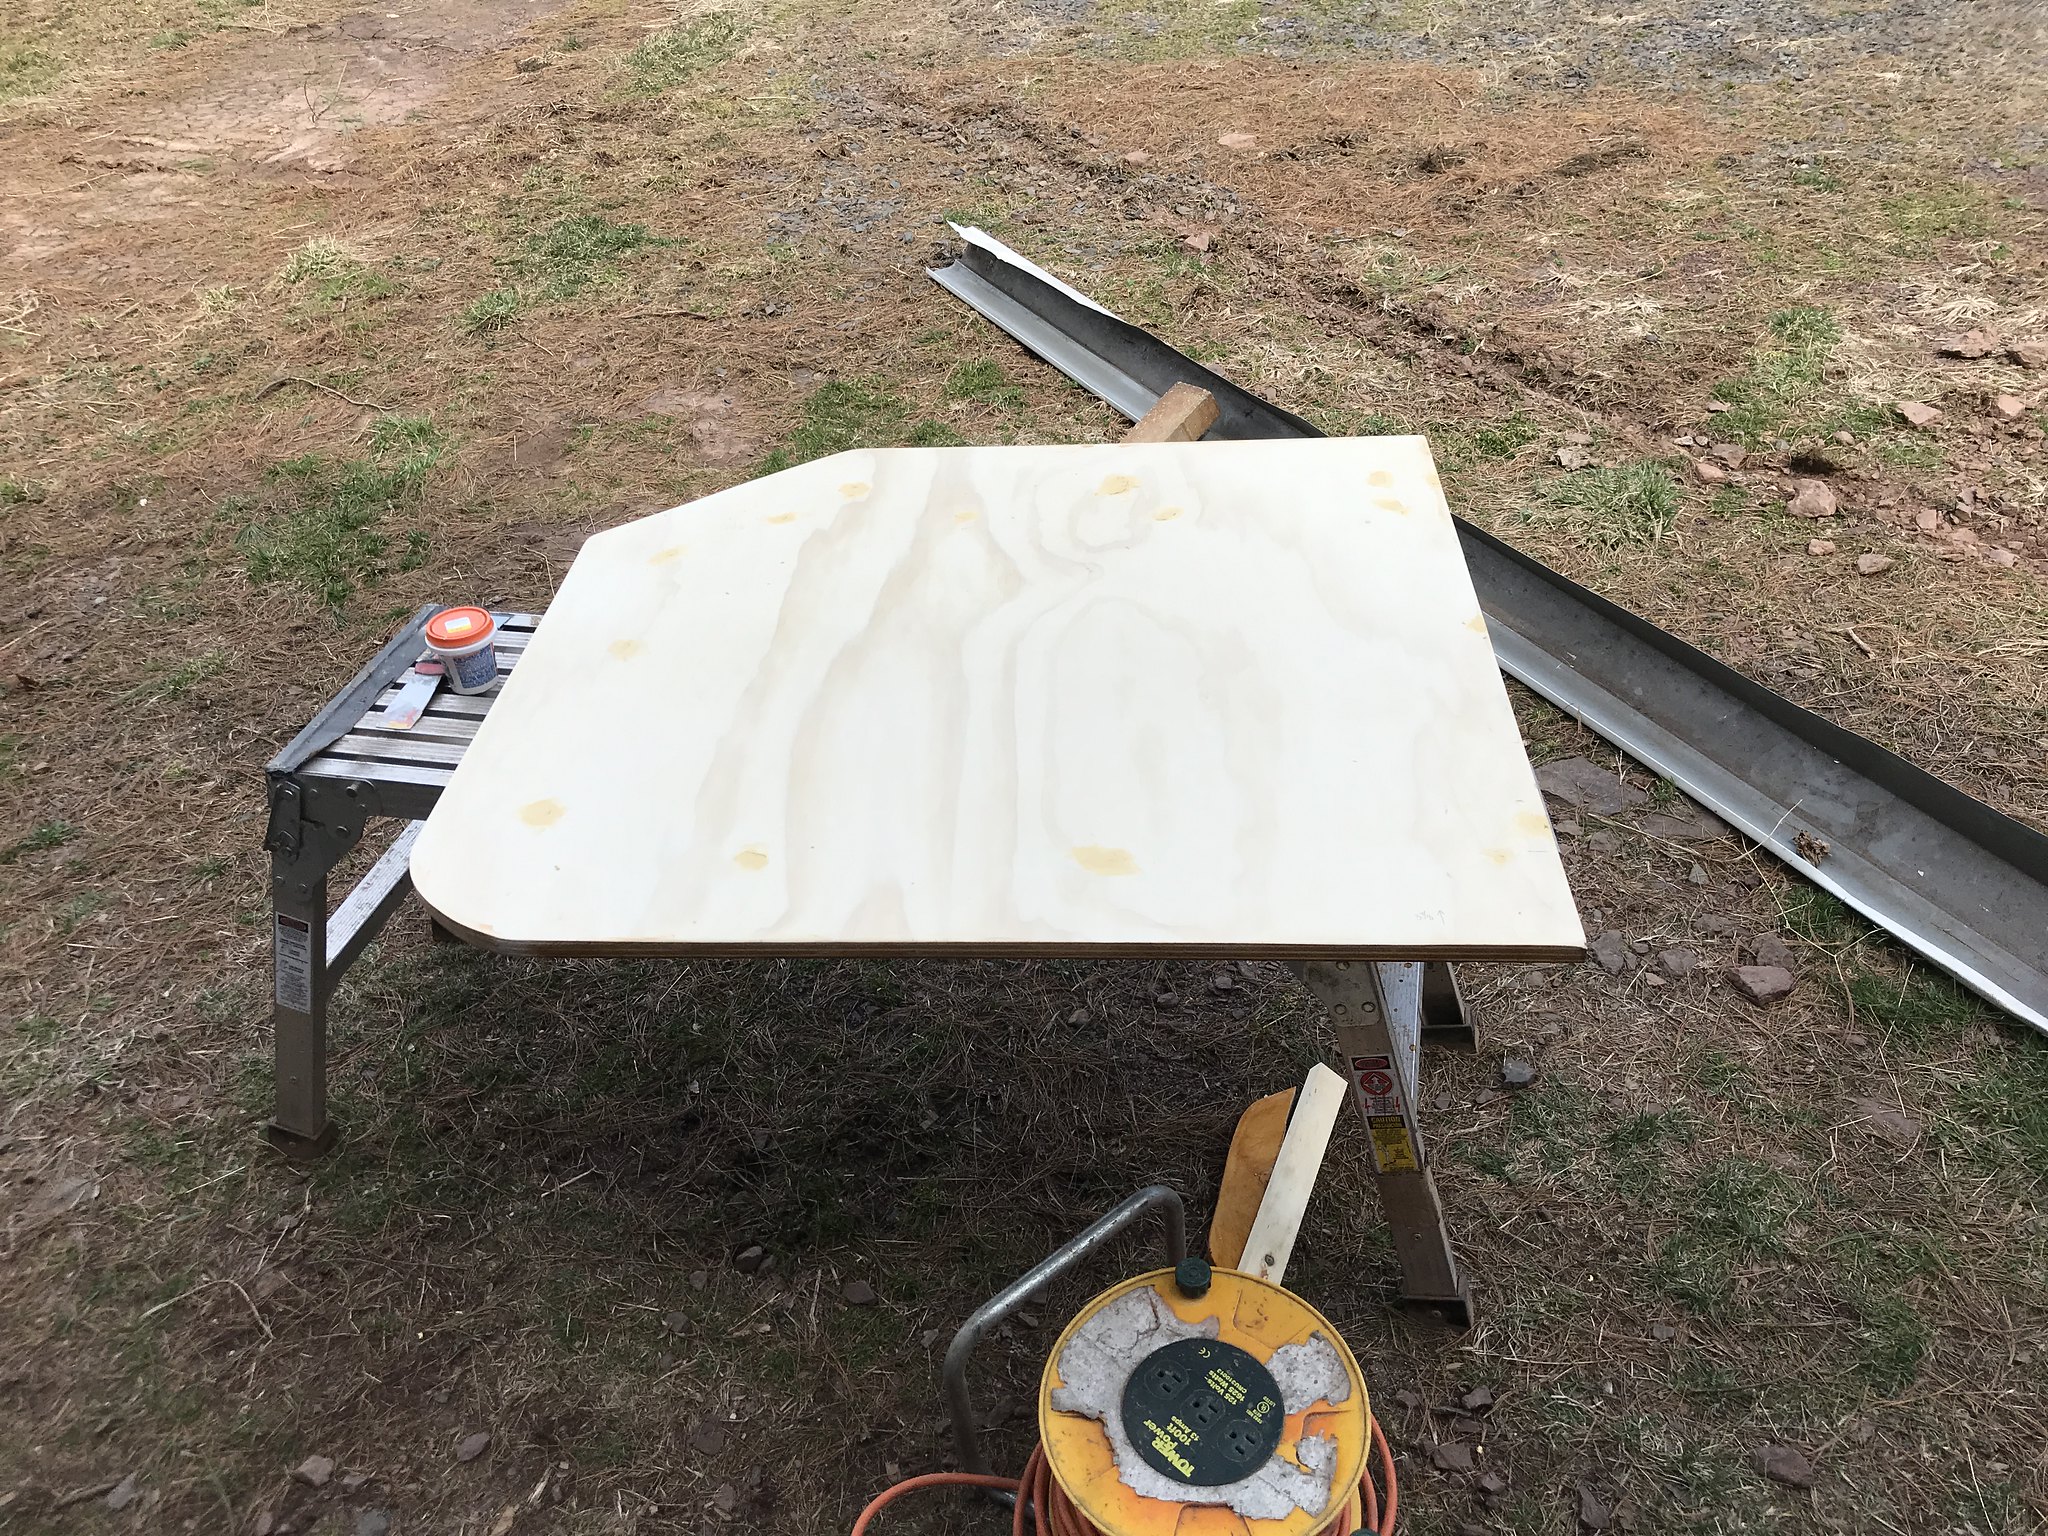 The 110v electric is done!!! My buddy John came again for a day of camper work, and finished hooking up all the wires to my converter. It's so nice to flip the switch and have lights!!! Yahoooo!! I can't thank him enough- that was a lot of work! Thanks UJT !! You are one talented handyman  I finally installed the refrigerator, hooked up the 12v wires, put a hole in the floor for the drain, and plugged it in! It works !!! Another Yahooooo!! (Propane's not in yet- that's coming soon!)   I added the wood 'crown' around the ceiling hole where my Fantastik Fan will go. Just gotta sand down the edges and it's done too. Another thing off of my 'to do' list !  Today, I started to install the rest of the roof insulation. Only 2 more pieces to go- then DONE! Next, vapor barrier.... and then it's ready for METAL!!! I truly cannot believe I am at this stage. It's been 17 months since I pulled my ole' camper into the driveway. I am aiming to be done by July- as my son is moving to Colorado... and this mama bear is taking a road trip on my August break to see my only kiddo. Lots done, lots of little things to still do.... but I can see the light !!! Hallelujah !! Ha ha |
|
kaffi311
Active Member
Posts: 283
Likes: 98
1963 Shasta 16 SC
Currently Offline
|
Post by kaffi311 on Apr 14, 2019 16:59:46 GMT -8
Well, I am back after some time away from the camper. Almost ready for metal. I am wondering about the wiring for the fantastic fan. I know we always want wire connections accessible - so where do you stuff the wire nuts for the 12 v wiring to the fan? I see some make a notch in the framing around it - but could really use a photo of how that is used for the wire connections.
Thanks !!
|
|
kaffi311
Active Member
Posts: 283
Likes: 98
1963 Shasta 16 SC
Currently Offline
|
Post by kaffi311 on Jan 29, 2019 7:07:20 GMT -8
THanks for that- I was planning to find another cover- and that one is just what I wanted! You are right- being under the bed is a risky place as I love my coffee in bed |
|
kaffi311
Active Member
Posts: 283
Likes: 98
1963 Shasta 16 SC
Currently Offline
|
Post by kaffi311 on Jan 27, 2019 16:10:39 GMT -8
I had wrestled with the idea of outside lighting, and decided on something a little more subtle than a porch light. This later year model also does not have the option of a light in the grab rail at the door. So, I painted the framework underneath with white primer, and strung rope lights up underneath. They are permanently mounted, and plug at that outlet. (They are 110-V, so I can't use them for dry-camping.) Photos do not do the effect any justice...
Ten- that's nice! I mounted my outlet box today- decided it was easiest to mount it on the floor. Won't be too hard to plug into Thanks 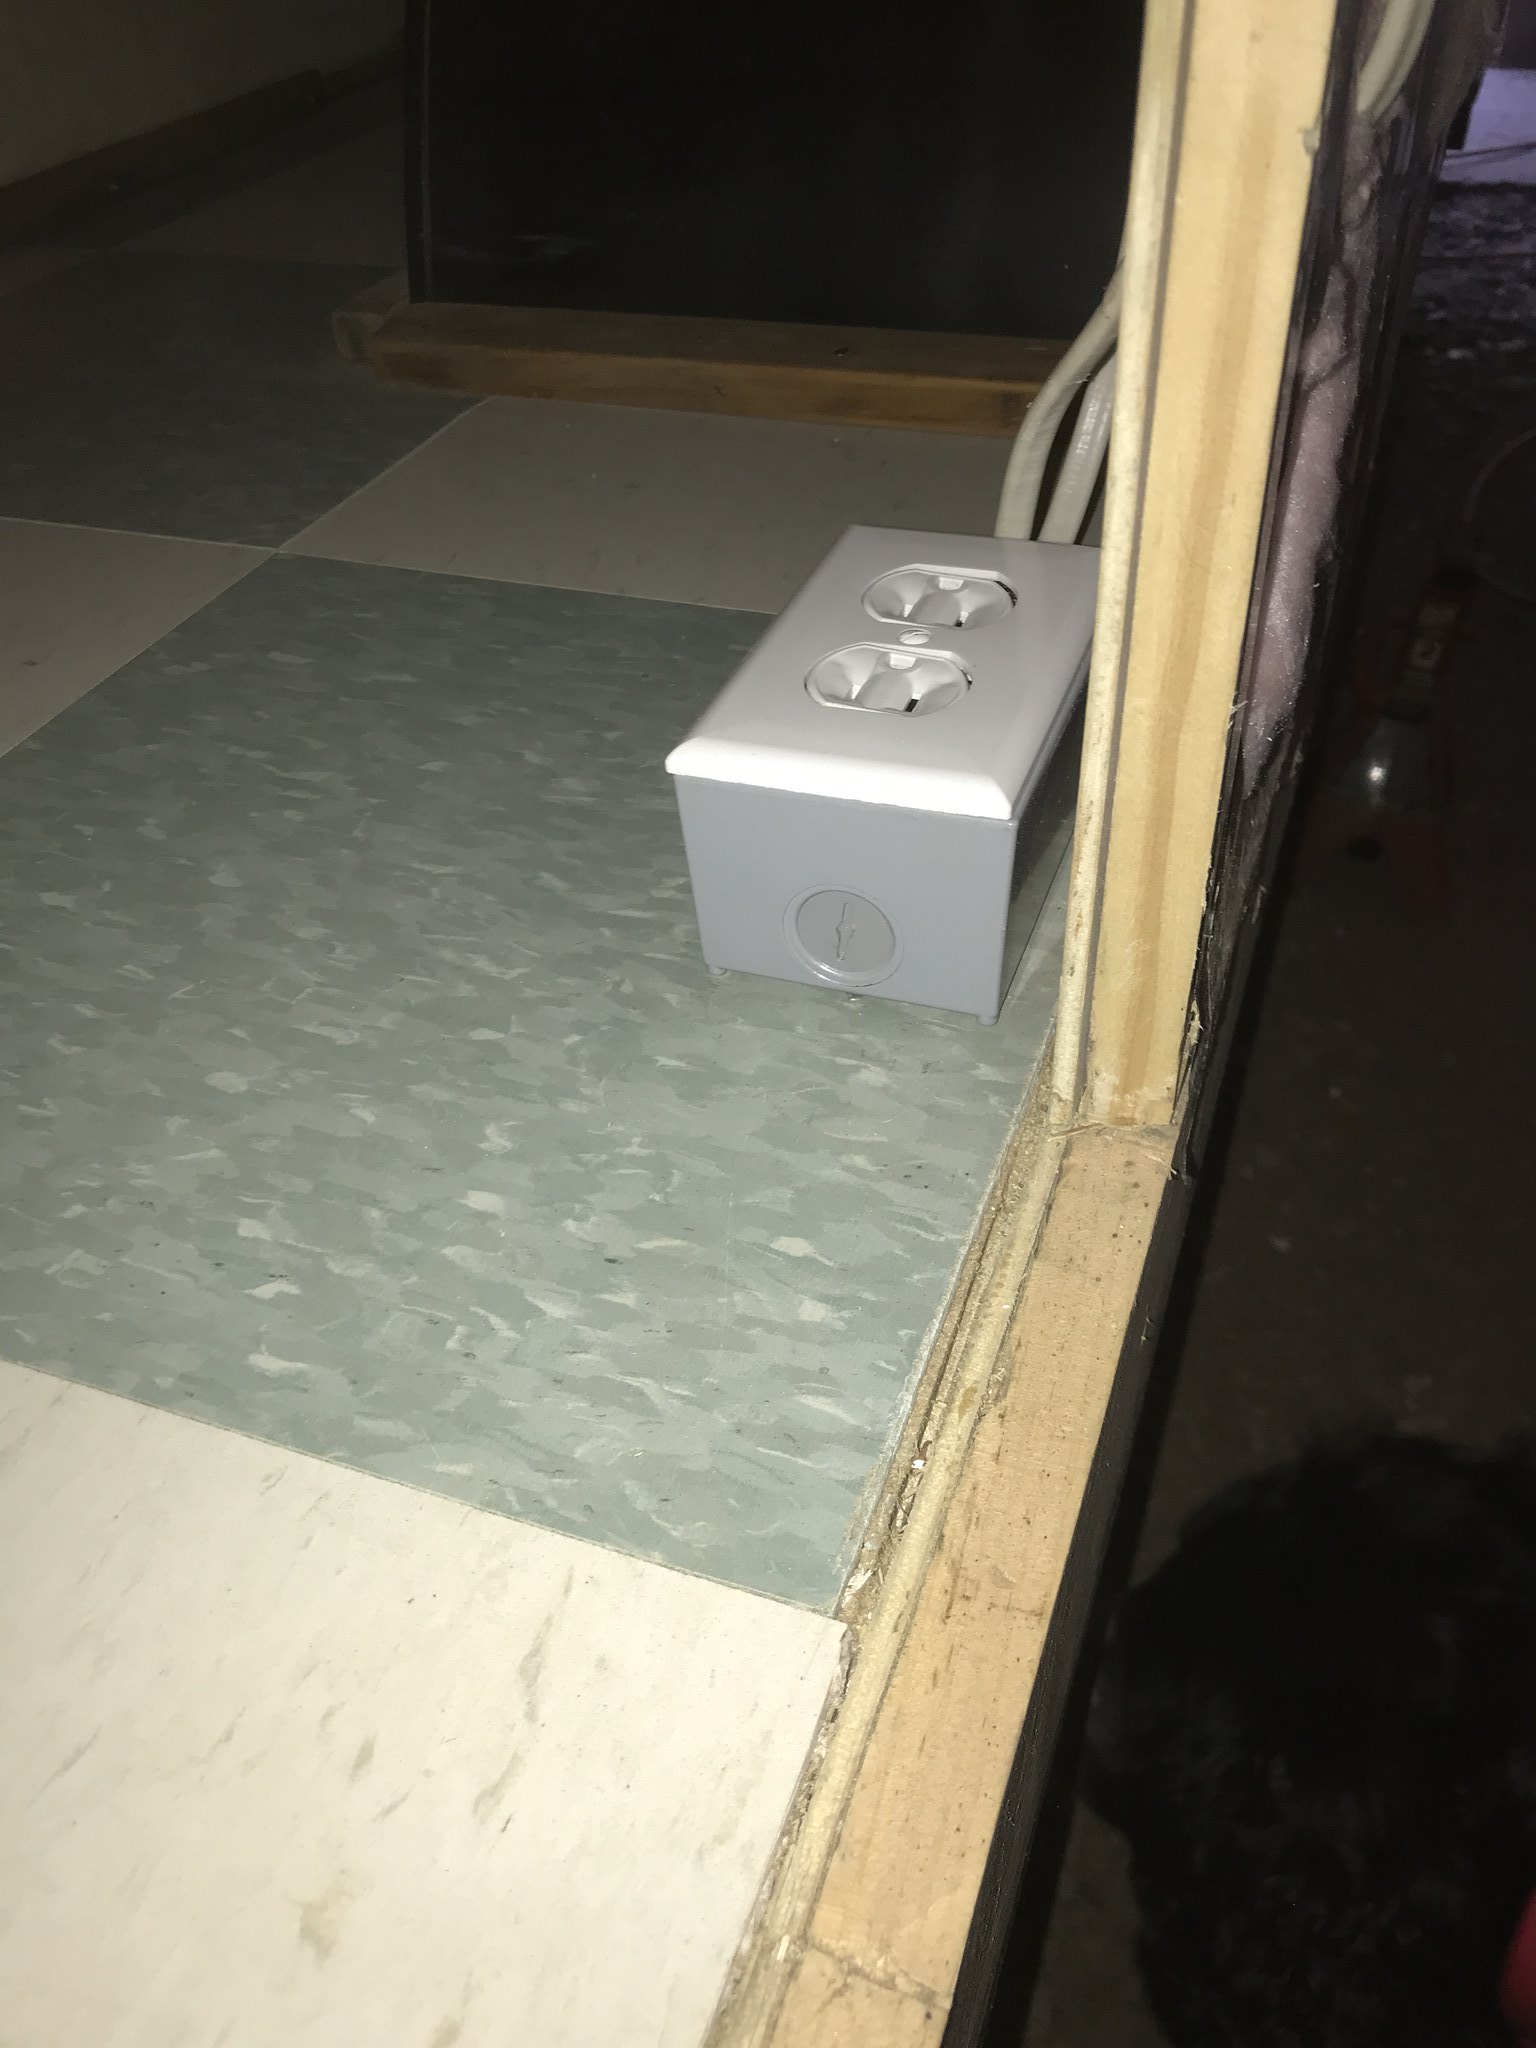 IMG_5826 IMG_5826 by kathy, on Flickr |
|
kaffi311
Active Member
Posts: 283
Likes: 98
1963 Shasta 16 SC
Currently Offline
|
Post by kaffi311 on Jan 27, 2019 16:04:23 GMT -8
This is my solution to where the floor meets the front wall of the camper. I used a cedar 2x4 and ripped it lengthwise at the correct angle of the front wall. I then fitted the lower pieces, and then clamed the upper and lower together sandwiching the floor. I predrilled the holes, counter sinking them, and then used galvanized lag bolts to secure it together. I am pleased at the results. Sure made it much more rigid in this area. I did pretty much the same thing with the 57 Shasta. Worked great. I like it- and want to do the same on my shasta. My floor is already in- Suggestions for how to mount? A 2x4 fits there perfectly- so I cut it at the same angle as the front wall. It's sitting on the front metal of the frame. Screw through that into the 2X4 from below? |
|
kaffi311
Active Member
Posts: 283
Likes: 98
1963 Shasta 16 SC
Currently Offline
|
Post by kaffi311 on Jan 26, 2019 15:09:02 GMT -8
|
|
kaffi311
Active Member
Posts: 283
Likes: 98
1963 Shasta 16 SC
Currently Offline
|
Post by kaffi311 on Jan 26, 2019 15:03:39 GMT -8
|
|
kaffi311
Active Member
Posts: 283
Likes: 98
1963 Shasta 16 SC
Currently Offline
|
Post by kaffi311 on Jan 26, 2019 14:54:28 GMT -8
Welcome to the insanity...Errrr ummm I mean the FUN! Ha ha !!! Oh how true!! |
|


