bmrrwolfe
Member

Posts: 36 
Likes: 3
Currently Offline
|
Post by bmrrwolfe on Aug 27, 2015 18:00:46 GMT -8
I am at the point of rewiring my 1966 Scotty, and am starting from scratch.
I wanted to get some opinions on running just a 110 system, since I plan to always camp where I can have a hookup. Any suggestions on this?
I plan to have 3 interior lights & a porch light (probably all LED), 3-4 outlets, 19" LED TV, a dorm size fridge, Window unit type A/C & 900W mircrowave, which should be about all of the power demand.
Any insight would be greatly appreciated.
|
|
bmrrwolfe
Member
Posts: 36
Likes: 3
Currently Offline
|
Post by bmrrwolfe on Jul 27, 2015 9:21:44 GMT -8
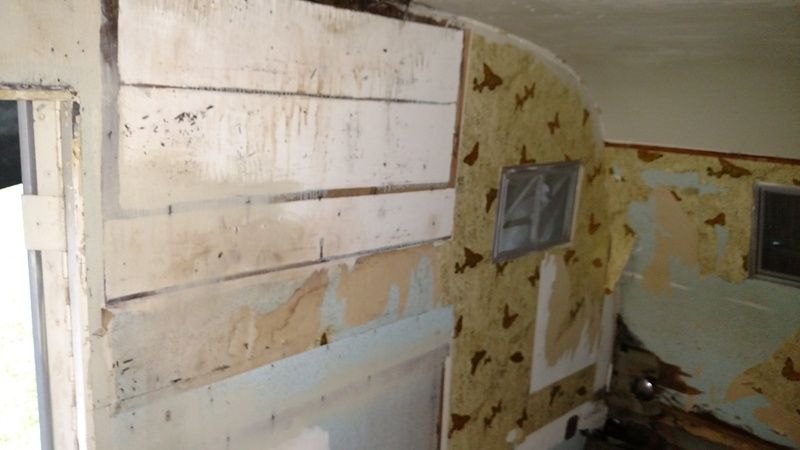
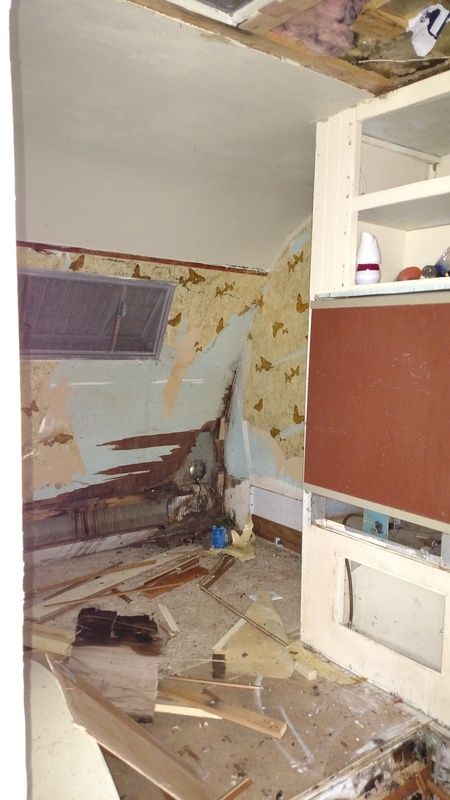
Thanks for the info. I kinda figured the MDF was not a good solution but as i was offered it for free, I figured I had to ask. Unfortunately with this trailer it was so rotted away it was gutted to the frame so the one panel at a time would not have worked with it.
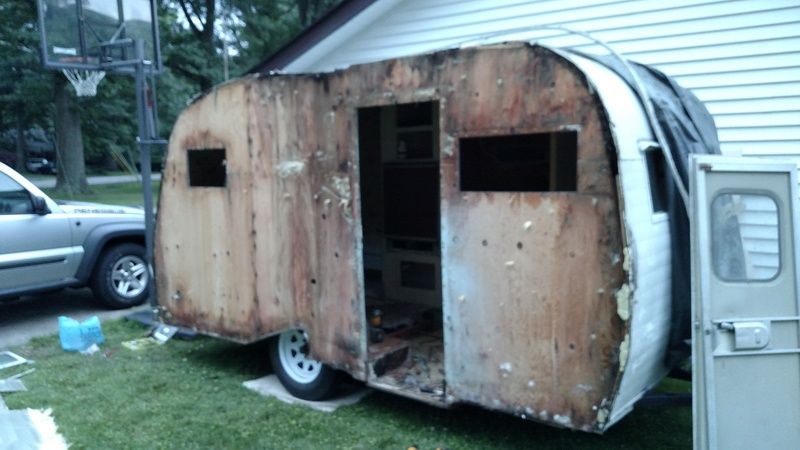
I know I'm a little different then most here, since I'm not doing the restoration. But the original components were all good and I'm working on a small budget, so the exterior will stay original with a modern interior.
I will try to work with the luan, since its cheap and can get it down the street. Any tips to getting the boards to bend easier?
|
|
bmrrwolfe
Member
Posts: 36
Likes: 3
Currently Offline
|
Post by bmrrwolfe on Jul 26, 2015 18:51:31 GMT -8
I did not mark my seams, and the fact that some of of the original paneling was replaced, and some just had layers over the old, I didn't know what was the original seams.
One big question I was wondering, is if anyone has used something other then Birch? I have some family that owns a company that uses a lot of 1/8" MDF that I can get 4x8 sheets for free or next to nothing, it is flexible and seems to have decent strength. Another option I saw was 4x8 sheets of almost plastic like panels like what is in a new camper, just using alot more cross braces.
I am not worried about originality or weight, just a functioning camper that is strong and will last.
|
|
bmrrwolfe
Member
Posts: 36
Likes: 3
Currently Offline
|
Post by bmrrwolfe on Jul 25, 2015 7:13:02 GMT -8
I have my side walls done on my 1966 Scotty, and am about to start the front/rear/roof paneling. I was just wondering if anyone had any tips or tricks to get the paneling installed?
The first step will simply be getting the whole setup square and straight.
Second I need to pick a good budget friendly paneling.
Lastly will simply be the install.
Any tips tricks secrets or how-tos for any of these processes would be greatly appreciated!
|
|
bmrrwolfe
Member
Posts: 36
Likes: 3
Currently Offline
|
Post by bmrrwolfe on Jul 23, 2015 18:53:54 GMT -8
Well I got the 1/8" interior paneling put in this week, and will be getting the luan flooring down over the plywood tomorrow The next step is to get the front/roof/rear walls in. Any advice on getting the right wood, and tips on installing the paneling?
Thanks!
|
|
bmrrwolfe
Member
Posts: 36
Likes: 3
Currently Offline
|
Post by bmrrwolfe on Jul 22, 2015 3:35:15 GMT -8
Just curious what thickness are your sidewalls, and roof paneling?
|
|
bmrrwolfe
Member
Posts: 36
Likes: 3
Currently Offline
|
Post by bmrrwolfe on Jul 21, 2015 12:27:47 GMT -8
Looks awesome especially in only 5 months! Motivates me to get my Scotty done quicker!
|
|
bmrrwolfe
Member
Posts: 36
Likes: 3
Currently Offline
|
Post by bmrrwolfe on Jul 21, 2015 12:21:13 GMT -8
bmrrwolfe, when I was at the stage where you are now I made a bunch of 'warp stabilizers'; my '69 is 76" wide so I cut a bunch of 1Xs to that length, glued and stapled 2"X3" pieces of 1/4" plywood to the ends so they would just overhang the walls, then attached 1X scraps to the stabilizers just inside the walls. Keeps the plywood sides parallel plus I can reuse the stabilizers as horizontals after the ceiling panels go on. They fit tight enough that you don't need to fasten them to the walls and can be moved around as needed. If someone could explain to me how to add my flickr pics to my signature I could show instead of mumble through verbally. I think I understand what you are saying. Right now all the supports are clamped in place to the walls to avoid putting any screws through the new wall. It was kind of done quickly with scrap wood as we were expecting another storm last night. But I am going to get some paneling in the next day or two and hope to have the structure leveled and square and get some installed by the weekend. |
|
bmrrwolfe
Member
Posts: 36
Likes: 3
Currently Offline
|
Post by bmrrwolfe on Jul 20, 2015 17:44:51 GMT -8
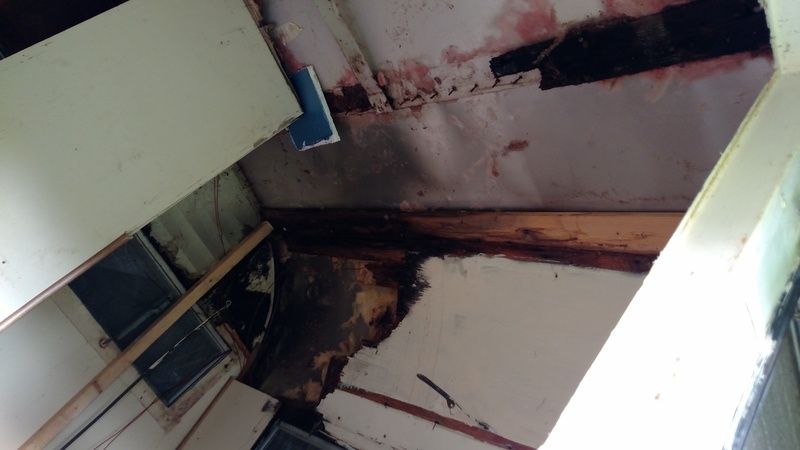
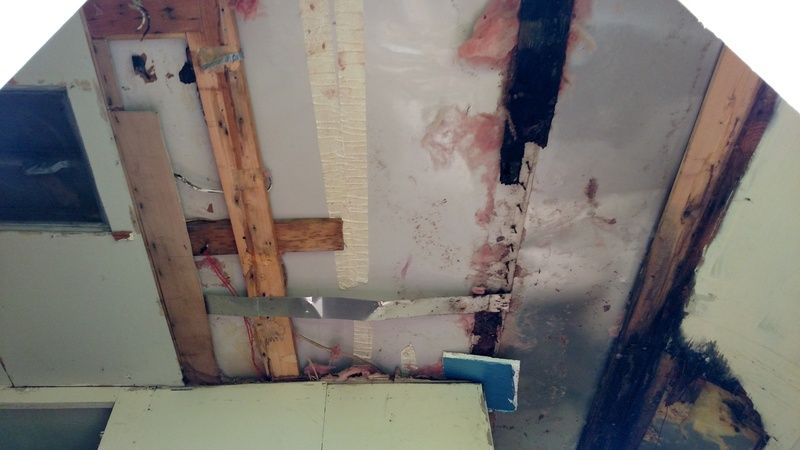
A little update. We have been having a lot of rain here in NE OH, so work has been a little slow. I got the other wall and roof torn down, pulled staples off most of the skins (a task in itself) and cut and put in the new drivers side wall. The wall was very rotten and pretty much feel apart so the template came from the door side, with some measuring to get the wheel cut, and left the window holes until I get the skin on.   Next is to get the 1/8" subfloor down over the ply, then the side wall interior paneling put up then the front/rear/roof paneling and supports. I know most people use 1/4" birch paneling, but are they any good alternatives that are easier on the budget to use? I am not worried about a perfect finish or grain pattern as its going to be painted not stained. The goal of this project is to keep the exterior looking original, but since there was no original components left when I got it, to make it very modern/contemporary inside. |
|
bmrrwolfe
Member
Posts: 36
Likes: 3
Currently Offline
|
Post by bmrrwolfe on Jul 10, 2015 19:25:52 GMT -8
  New door side wall cut and installed! Door frame and bracing put in place to hold it in while I start on the roof and other wall. |
|
bmrrwolfe
Member
Posts: 36
Likes: 3
Currently Offline
|
Post by bmrrwolfe on Jul 7, 2015 13:33:00 GMT -8
Do you have any photos down to bare trailer frames? When removing the floors, did you take off the other side walls a little to remove the entire flooring? Thanks for sharing your progress. Something I am also wondering...can the entire body be repaired and then supported on stilts, so the floor can be removed from within the trailer? bmrrwolfe I have a costco version of that car cover. I put it together with only the first 2/3 sections and it is a perfect 14 feet to cover the trailer, just leaving the extra roof tied down in the rear wall. With the inner paneling off (so just the 1/2" plywood wall on this model) the floor could be removed from within the trailer. Probably would need to cut sections out at a time though and be sure to remove or cut the bolts that hold the floor down to the frame. |
|
bmrrwolfe
Member
Posts: 36
Likes: 3
Currently Offline
|
Post by bmrrwolfe on Jul 7, 2015 12:23:27 GMT -8
Do you have any photos down to bare trailer frames? When removing the floors, did you take off the other side walls a little to remove the entire flooring? Thanks for sharing your progress. I am sorry but I did not get any pictures of the bare frame, and I did not take off the other wall off, but the entire floor did come off. For the outer floor support on the drivers side, I simply cut the bolts and and broke it loose from the frame (but still attached to the wall) and did not screw the floor down on that side. So when the other wall is removed I will be able to pull out the support and slide the new one in. Then bolt to the frame and screw to the supports. I will be sure to get some pictures of that. But will all the rain we have been getting in Cleveland right now, I had 4 days rain free and was trying to get as much done as possible. Also an update I did get a 10x20 portable garage/canopy from Harbor Freight to keep the camper dry. For anyone who can not fit their camper in their garage or don't have a garage space this is a great investment as it was $130 after tax (on sale for $149 and you can use a 20% coupon) |
|
bmrrwolfe
Member
Posts: 36
Likes: 3
Currently Offline
|
Post by bmrrwolfe on Jul 5, 2015 13:51:33 GMT -8
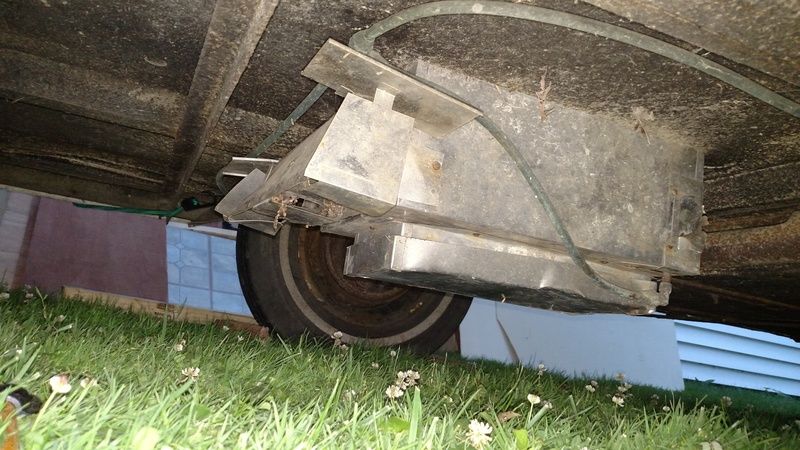
I am doing this a little unconventional, but I want to keep the camper as complete as possible while working on it instead of going down to the frame.. So the passenger side wall came off, and the floor was inspected, and although mostly solid, I decided to do it right and pull it all out section by section and replace. In the process I also pulled out any of the floor supports that had any damage (about half) and replace with new as well as new bolts dropped through the frame. Quick wire brush on the angle grinder to the frame and a quick coat of black paint on the top side of the frame and the floor supports and the new floor started going down. 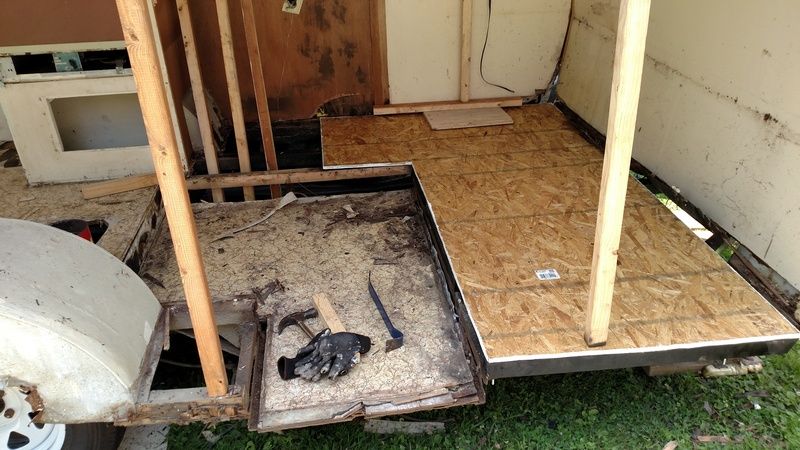 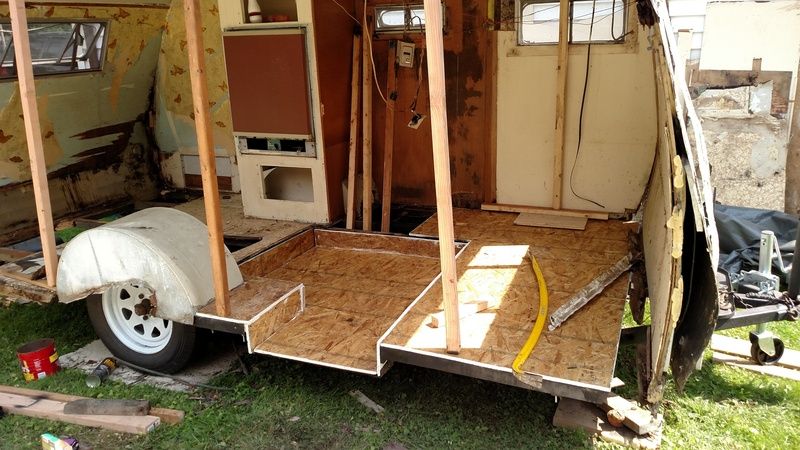 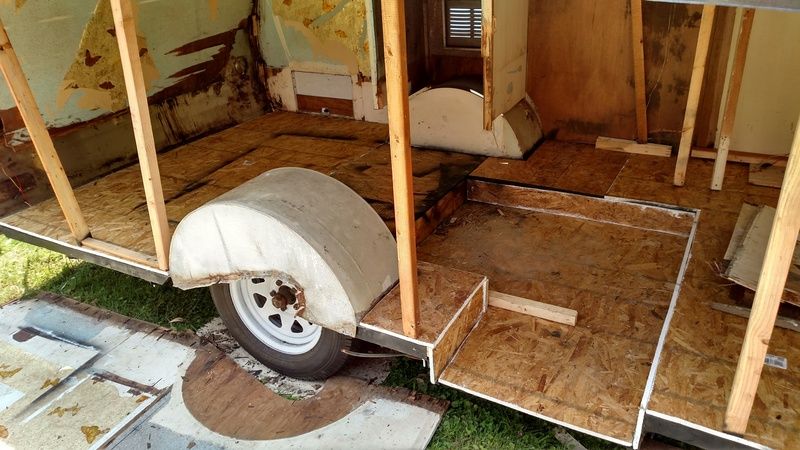 All of the floor was coated on the bottom and edges before going down, and will also probably get a heavy coating of undercoating once the shell is finished. I also picked up the 1/2" boards to construct the side, but ran out of steam for the weekend.. |
|
bmrrwolfe
Member
Posts: 36
Likes: 3
Currently Offline
|
Post by bmrrwolfe on Jul 5, 2015 13:44:36 GMT -8
|
|
bmrrwolfe
Member
Posts: 36
Likes: 3
Currently Offline
|
Post by bmrrwolfe on Jun 30, 2015 12:40:56 GMT -8
Thanks for the input! What wood does everyone use as the roof & front/rear supports? I am going to get some this long weekend and hope to start building some walls.
|
|