ladywendolyn
2K Member

Posts: 2,315 
Likes: 928
1964 Golden Falcon
Currently Offline
|
Post by ladywendolyn on Feb 5, 2019 22:11:55 GMT -8
Great work!
|
|
debranch
Active Member
 Wee Camp
Posts: 237
Likes: 90
71 Shasta Compact
Currently Offline
|
Post by debranch on Feb 7, 2019 14:37:47 GMT -8
I've been working on the floor this week, its coming along.
 IMG_0678 by debra branch, on Flickr IMG_0678 by debra branch, on Flickr
I painted the blocks red It took 2 coats so I worked on doing that Monday and Tuesday night after work.
 IMG_0682 by debra branch, on Flickr IMG_0682 by debra branch, on Flickr
Wednesday night after work I got back to work on the red blocks to get them done.  IMG_0680 by debra branch, on Flickr IMG_0680 by debra branch, on Flickr
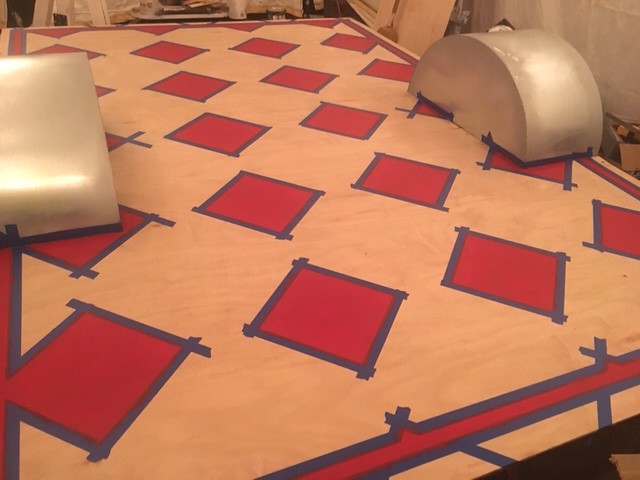
I used 2 different colors of red + silver spray paint to get them to look like this. it looks a lot like tile. I also figured out the layout for the pattern on the floor before I went to bed so Thursday would go faster.  IMG_0683 by debra branch, on Flickr IMG_0683 by debra branch, on Flickr
Today I was off work so I was able to get an early start. I got the stencils done today it took a good bit of time because I was working with 4 stencils so I had to work around them and the more you do the less space you have to work.
 IMG_0686 by debra branch, on Flickr IMG_0686 by debra branch, on Flickr
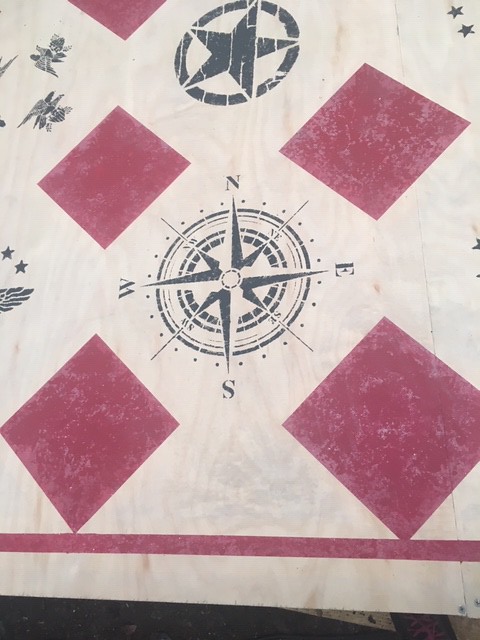
This is the first thing that will be seen when I open the door of the camper. 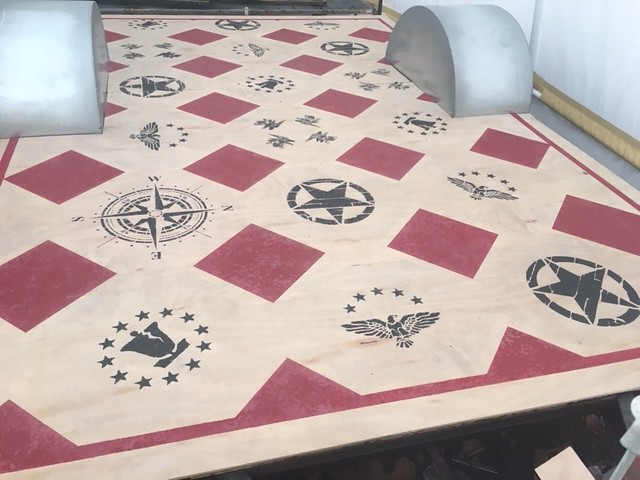 IMG_0684 by debra branch, on Flickr IMG_0684 by debra branch, on Flickr
Floor from the front of the camper. 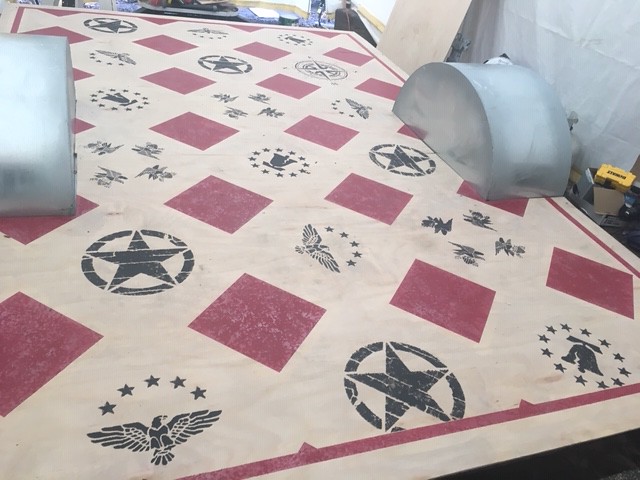 IMG_0685 by debra branch, on Flickr IMG_0685 by debra branch, on Flickr
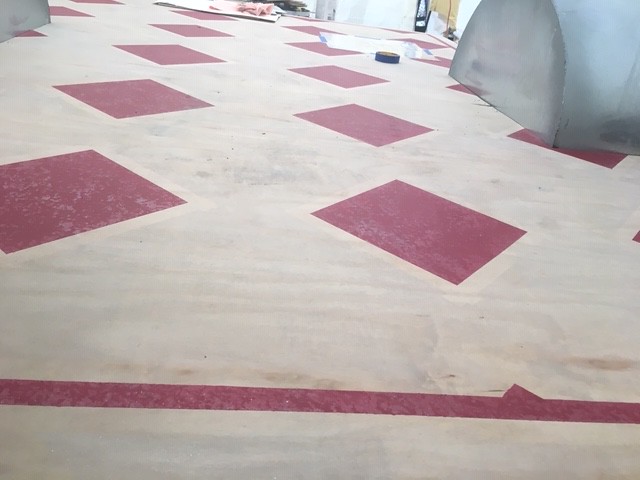
Floor from the back of the camper. a lot of the stencils will be covered but when I open compartments I didn't want it to look odd if it shows. the color will change some when I polyurethane it I am sure. I will be using a polyurethane for floors so it will be durable. I love the way it looks. I couldn't find prefab flooring that gave me the effect I was looking to get so I had to make my own. I'm going to let it seat for a few days to make sure the paint cures. anyone have any suggestions as to how long I should let it cure before polyurethane.
|
|
|
|
Post by vikx on Feb 7, 2019 22:14:37 GMT -8
LOVE THE FLOOR!!
|
|
jeremiah
Active Member
Posts: 274 
Likes: 36
Currently Offline
|
Post by jeremiah on Feb 8, 2019 8:04:34 GMT -8
If this is the Floor, I can hardly wait to see what you do with the rest of your build.
|
|
debranch
Active Member
Wee Camp
Posts: 237
Likes: 90
71 Shasta Compact
Currently Offline
|
Post by debranch on Feb 10, 2019 13:02:33 GMT -8
Thank you Vikx, Jeremiah, and Mel
Its always nice when people let you know that the vision I see in my head works. I have a very hard time getting Richard to understand my vision, you would think after 30 years he would learn to just go with it and know that it will be ok. What is the worst that could happen, that I may have to fix something. I find that I have to use Paint on my computer to show him a lot of my ideas to get him on board. The theme is clear to see in my floor.
The past few days I have been working on the compartment doors and shelf over the back window. Just like the other cabinets the PO painted them and I'm trying to reuse anything that I can so I'm repairing what I can but painted they will be. the shelf over the window is an inch shorter than the width of the back wall so I had to rip a 2x4 down and add a strip of wood to each side I defiantly want a good fit to give it the support across the back from side to side. It wasn't a big job but it does take time. I look forward to getting the camper put together so I can get all the pieces and parts I've completed out of the house.
|
|
debranch
Active Member
Wee Camp
Posts: 237
Likes: 90
71 Shasta Compact
Currently Offline
|
Post by debranch on Feb 16, 2019 21:09:06 GMT -8
Throughout this week I have finished polyurethane the floor in preparation for this weekend.
We have had a very productive day. Richard and I went to breakfast, stopped by Lowe's (no surprise there) and then got to work on the Compact. Todays goal get the walls up...... The ceiling panel rails have been clean up and put on the top of the walls.
It took a while, to put the shelter back on lifts to have the head room needed for the walls, added cleats to the bottom of the skirt wood to create a lip to support the wall till we could get it screwed in, and do some adjustments to the floor and walls to get them to fit properly but I expected that. 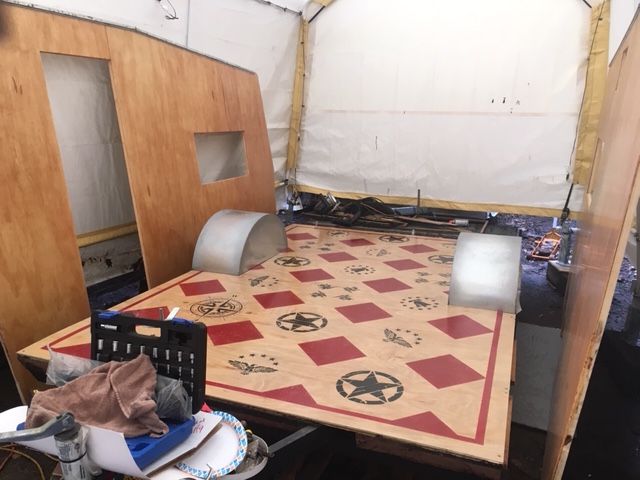 IMG_0698 by debra branch, on Flickr IMG_0698 by debra branch, on Flickr
Walls dry fit, and adjustments made.  IMG_0700 by debra branch, on Flickr IMG_0700 by debra branch, on Flickr
We put the benches in place and screwed them down. By the time we got this done It was time to think about dinner. 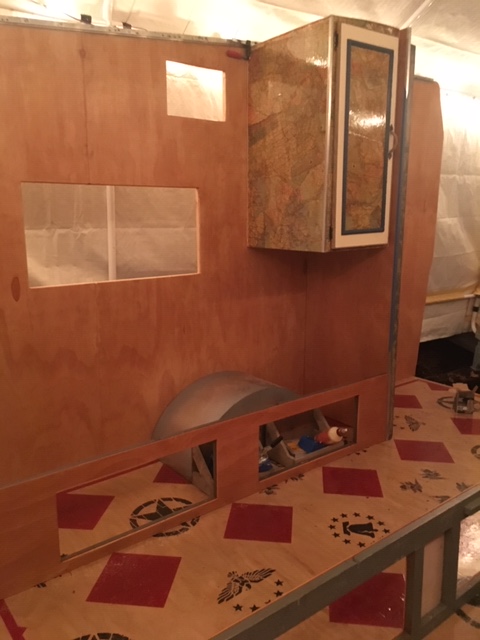 IMG_0703 by debra branch, on Flickr IMG_0703 by debra branch, on Flickr
We put the street side on and added the cabinet to give it more support. 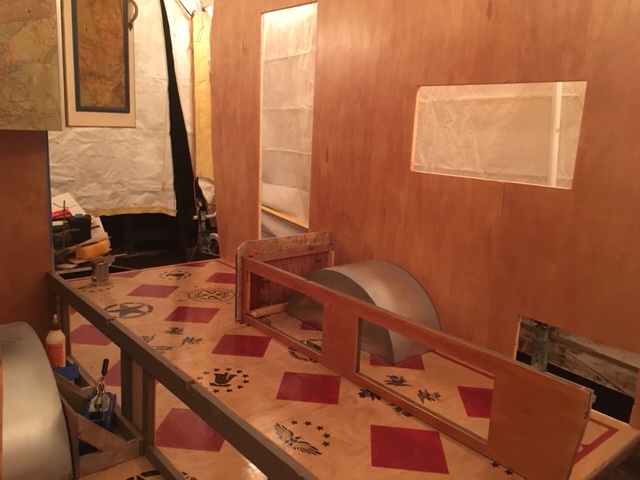 IMG_0706 by debra branch, on Flickr IMG_0706 by debra branch, on Flickr
Then we put the curb side on. 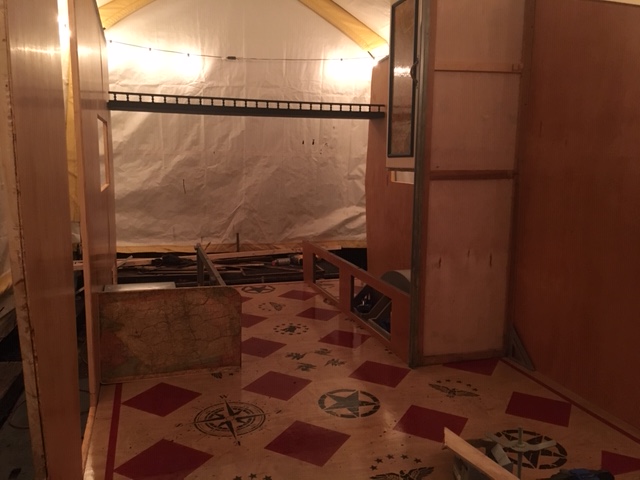 IMG_0707 by debra branch, on Flickr IMG_0707 by debra branch, on Flickr
Before we called it a night we attached a piece of 1x3 across the front of the camper and added the shelf across the back for support. This is the first day that I have gotten everything I wanted to get done accomplished.
It has been a very good day............. |
|
jeremiah
Active Member
Posts: 274
Likes: 36
Currently Offline
|
Post by jeremiah on Feb 17, 2019 23:41:24 GMT -8
This project is so Nice, I would lose sleep thinking about, if the pattern lines up properly with the walls and if. I had any sand on my shoes that would scratch the floor.
|
|
debranch
Active Member
Wee Camp
Posts: 237
Likes: 90
71 Shasta Compact
Currently Offline
|
Post by debranch on Feb 18, 2019 4:38:59 GMT -8
This project is so Nice, I would lose sleep thinking about, if the pattern lines up properly with the walls and if. I had any sand on my shoes that would scratch the floor. [ It’s perfectly imperfect......... It’s not perfect it’s about 1/4” off from being square but I’m not going to sweat it. As far as the sand on my shoes it’s going to happen but it is just as strong as the finish on any other hardware floor and the camper will have far less traffic and no Great Danes on it. Besides a few scuffs will only give it a more loved look. By the way I have 2 Great Danes + a lab mix at home so I know there will be scuffs on floors. I’m not building this camper for a show piece it will be used and the building of it is good for me. I get to use the things my daddy taught his little girl about woodworking and learn new stuff from y’all. + it helps me manage my PTSD from 2 deployments in the Middle East. |
|
debranch
Active Member
Wee Camp
Posts: 237
Likes: 90
71 Shasta Compact
Currently Offline
|
Post by debranch on Feb 22, 2019 20:44:54 GMT -8
How different the Compact looks.... Wednesday with Richards help I got the toilet room doorway / wall in place. 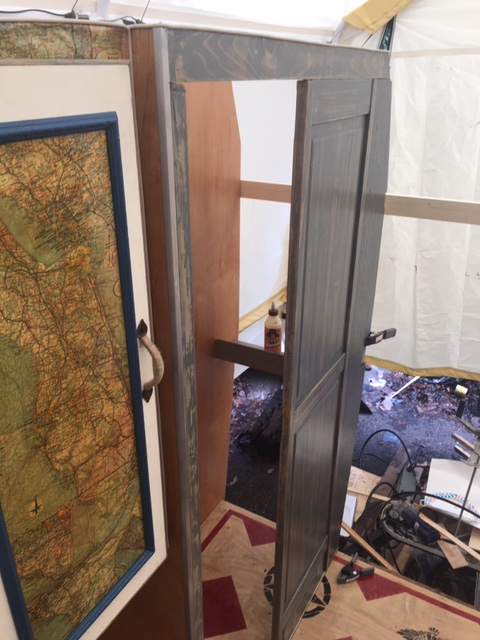 tolit room wall by debra branch, on Flickr tolit room wall by debra branch, on Flickr
Thursday, I added gimp to the top of the toilet room wall, the shelf on the back wall, and the benches. 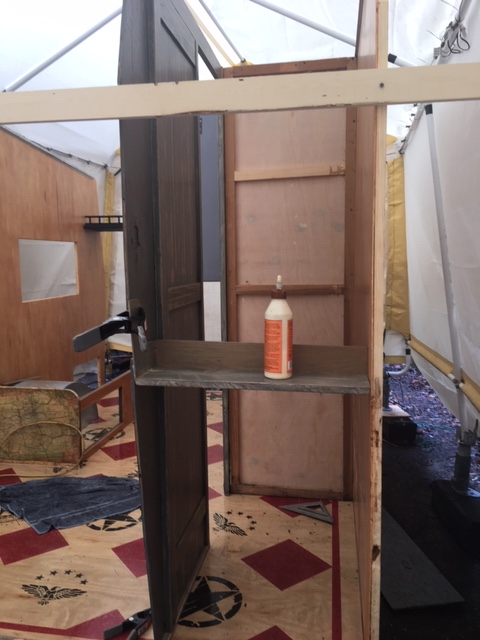 tolit room shelf by debra branch, on Flickr tolit room shelf by debra branch, on Flickr
I also added a small shelf in the toilet room, I think it will add some support to the wall. I also plan to add a small shelf higher about 6" from the ceiling for added strength. I also brought the ceiling panels up from the garage in preparation for getting them up. I couldn't do a lot I'm at a point that I need extra hands Ceiling goes up next.... This afternoon Richard got home around 3:00 so we worked to get the ceiling up.... 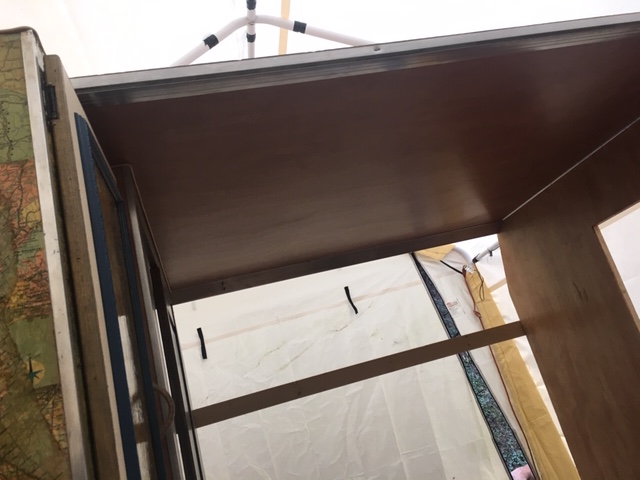 first ceiling panel by debra branch, on Flickr first ceiling panel by debra branch, on Flickr
Were making progress. First ceiling panel in it took a little time, working out getting the panels in place properly. 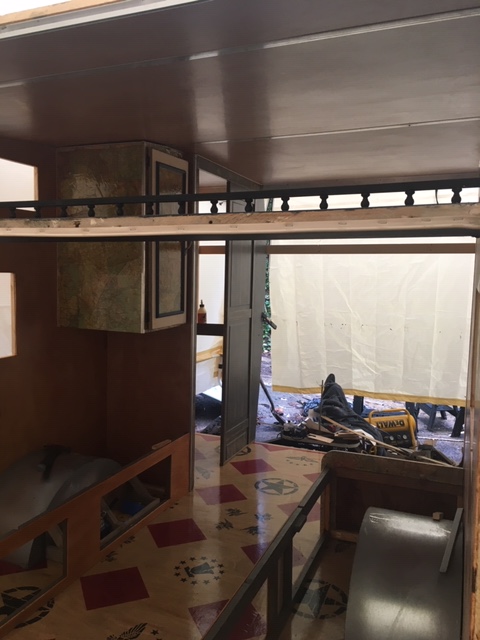 ceiling from back by debra branch, on Flickr ceiling from back by debra branch, on Flickr
We have a ceiling..... We also added screws through the top of the ceiling down into the cabinet and toilet room door frame to add support and lock it all together. 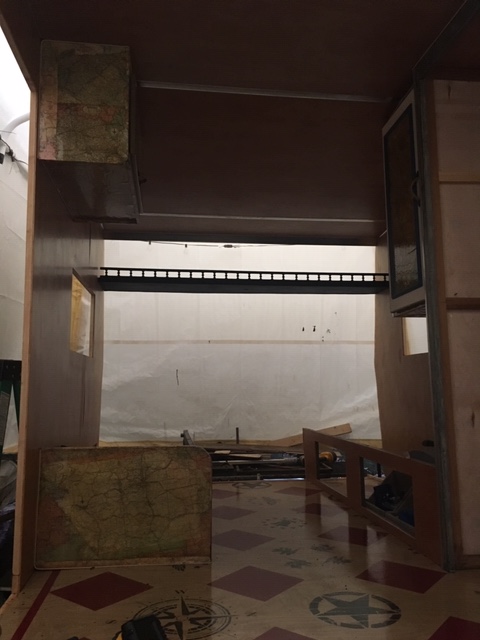 coming along by debra branch, on Flickr coming along by debra branch, on Flickr
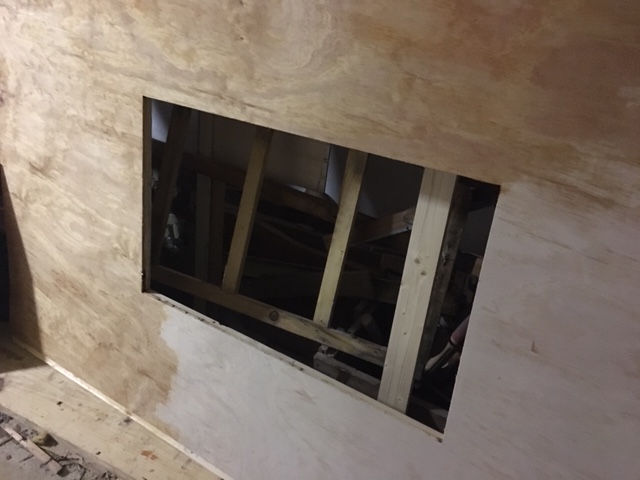
Before we called it a day we added the cabinet to the curb side. We screwed it to the wall and ceiling to lock the side together. That gets just about all the big stuff out of the garage. Its time for me to get started building the back wall panels, and the cabinets for the front wall next. I'm still trying to figure out how I want them to look. I think I want them to have by-pass doors on the upper and lower cabinets, I know that's not how Shasta did theirs but I don't want to block the walkway / doorway with cabinet doors when you open them to get things out, and by-pass doors are not hard to make. The front cabinet area is 54" there will be a small vassal sink, a 5.6 cubic foot refrigerator 23.7" square by 34" tall. The refrigerator is 110v power only, we believe it is big enough for 3 days worth of food. We got a propane generator for those rear trips that we will be off grid. We will be cooking outside so we will only have a corning wear hot plate and corning wear electric percolator inside the camper. I'm loving the progress I hope I can keep it going. As always thank y'all for reading and any and all thoughts and ideas are welcome and appreciated.
|
|
debranch
Active Member
Wee Camp
Posts: 237
Likes: 90
71 Shasta Compact
Currently Offline
|
Post by debranch on Feb 24, 2019 17:16:10 GMT -8
Is the rain ever going to stop? I have been working on the compact for 6 months in that time North Carolina has had more rain then we normally get in a year....  draw at back door by debra branch, on Flickr draw at back door by debra branch, on Flickr
this is the draw at the back of my house. I don't believe it has stopped flowing in months. So much water is coming down it that it is jumping its banks and going down the driveway, the benefit is I get to hear the water while I work on the camper. It rained most of the day yesterday I spent the first part of the day online. Richard decided he would rather have all the lights in the camper to be 12v so I started shopping. I had planed to use some 110v vintage mid-century light fixtures so I still wanted that look, and we made a plan on where we wanted outlets and lights in the camper. I'm hoping I can have the camper far enough along that Richard can get all the wiring done by the first week of April.
We also discussed paint ideas for the skin. 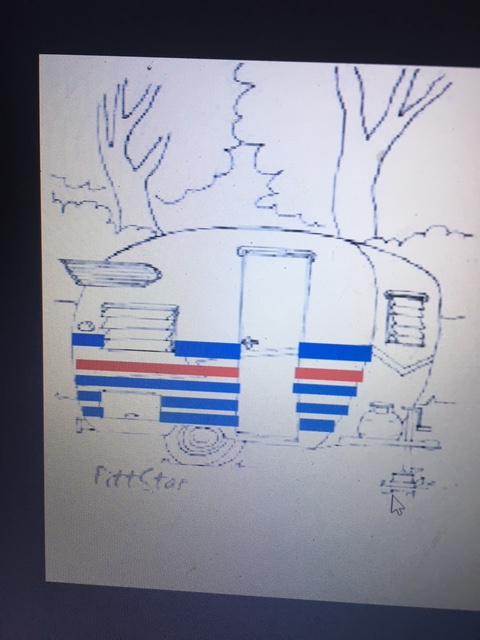 skin design by debra branch, on Flickr skin design by debra branch, on Flickr
I pulled a color page online and copied it into paint.... Richard has to see things on paper this is what we are thinking for our design, we are talking about the strips going across the front as well. and the door, compartment door, windows, and j-rails being mill finish for contrast. I talked to 2 men at church in the paint and body industry about the pro/cons of paint vs vinyl wrap for the strips. they said that the vinyl comes in different grades like paint does, and it can be just as durable as paint. I also talked with the man that is going to help me install my skin when I get to that stage. He will be at a convention the end of April so I am hoping to have the camper ready for the skin by early May when he will be available to help me with it.
yesterday afternoon we installed the supports for the roof. 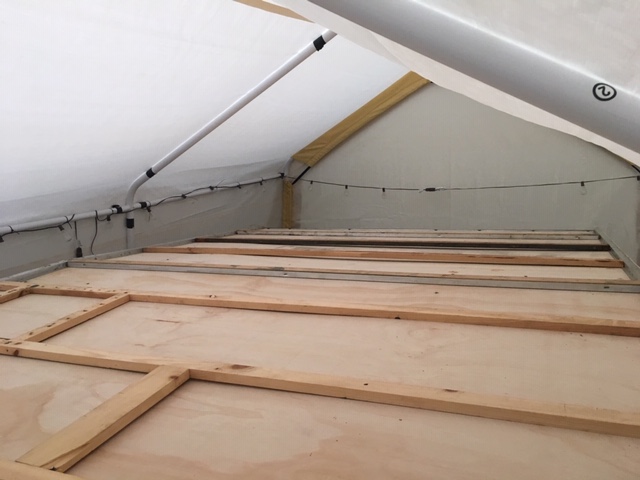 top1 by debra branch, on Flickr top1 by debra branch, on Flickr
After we run the wire for the lights we are going to add liquid nails under the rafters and add a t-brace inside to apply pressure till they dry. We added strips of wood to help support the bench seats. and installed the door for the toilet room.
 WC door2 by debra branch, on Flickr WC door2 by debra branch, on Flickr
Today after I got home from church and going out to eat, I started framing the back wall.  back wall top 2 by debra branch, on Flickr back wall top 2 by debra branch, on Flickr
I was able to get all the pieces for the upper back wall cut. I glued the long horizontal pieces in place and prepped the vertical pieces including adding the pocket jig holes.
Well the forecast isn't calling for rain for the next 2 days so its back to work for me.
|
|
debranch
Active Member
Wee Camp
Posts: 237
Likes: 90
71 Shasta Compact
Currently Offline
|
Post by debranch on Mar 2, 2019 19:37:38 GMT -8
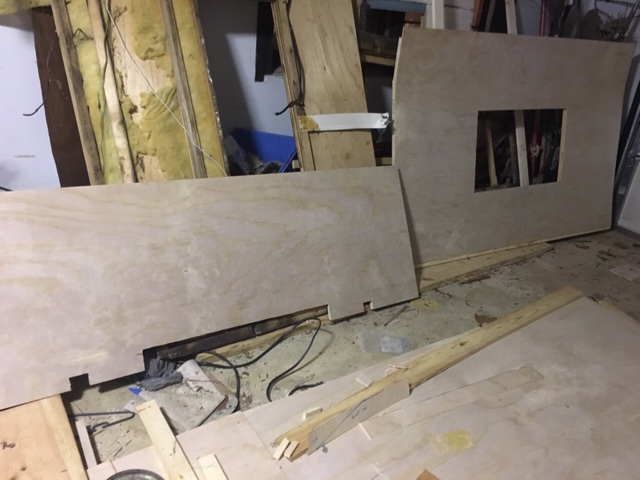
It seems like I have been watching glue dry all week. Well maybe not all week I did get the front and back upper wall built this week I started working on it Sunday afternoon, it is know Saturday night and I'm still working on the front and back walls.
 back upper by debra branch, on Flickr back upper by debra branch, on Flickr
I worked on getting the upper walls framed up after work each night. On Friday evening Richard helped me dry fit it, we left it in place overnight.
 front upper by debra branch, on Flickr front upper by debra branch, on Flickr
This morning we dry fit the front upper wall. Once we got it in place we went to breakfast, then stopped by Lowe's to pick up more stuff, before coming home and getting back to work on the compact. I left the upper walls in place so I could take measurements for the lower wall. I then cut the front and back lower walls and started gluing the supports on them.
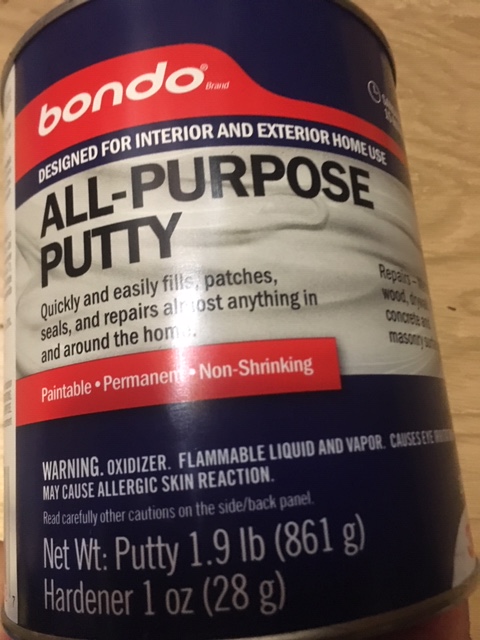 bondo by debra branch, on Flickr bondo by debra branch, on Flickr
I scored the seams with a utility knife where the wall changes angles to allow the plywood to bend easer, and used this bondo putty in the seam. My hope is that when I take the walls down tomorrow it will help the walls hold their shape while I polyurethane them in the garage.
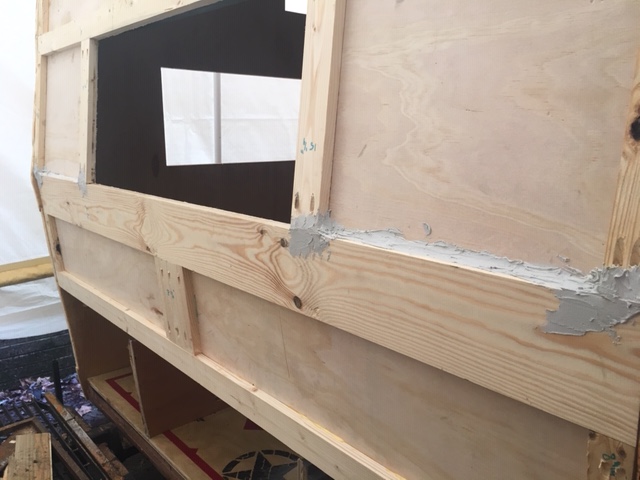 bondo wall by debra branch, on Flickr bondo wall by debra branch, on Flickr
A note about the bondo putty it works fast... it sets fast... I have not used the putty version before but I knew that the liquid kind would be hard to use on a vertical surface, I will clean up the excess on the 1x-- by sanding it.
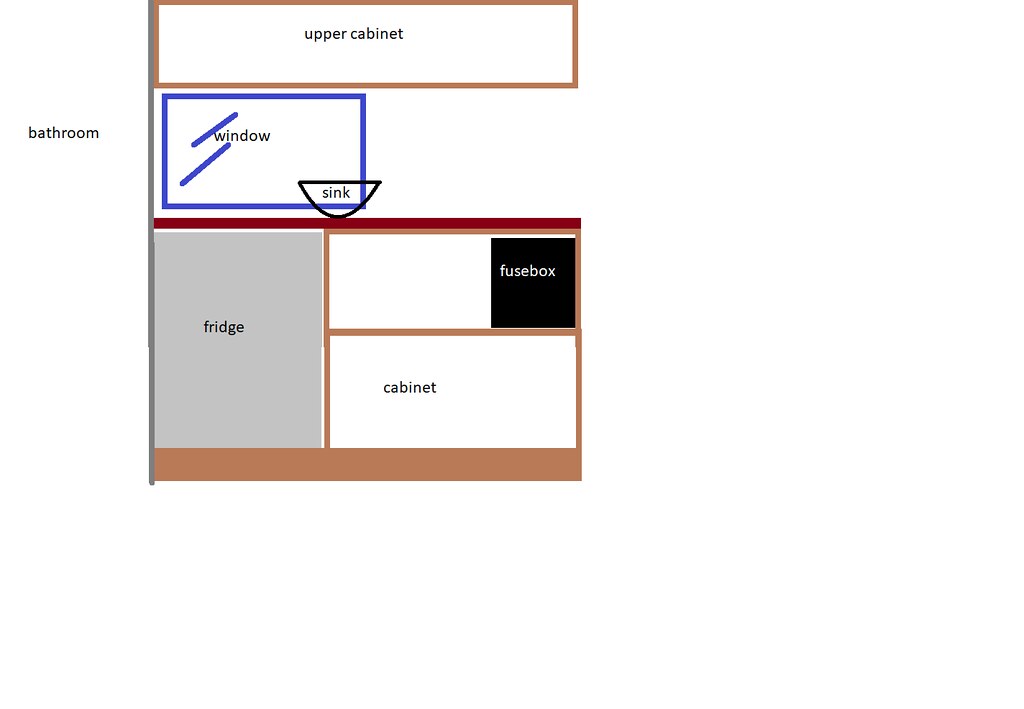 kitchenet by debra branch, on Flickr kitchenet by debra branch, on Flickr
drawing not to scale.... I drew this up to help Richard see where I thought the fuse box needed to be placed, due to its height, it can't go under the bench so the only place is in the cabinet on the front wall. I still have a lot to do but Its always nice when you can see your progress. |
|
Alaska Shasta
Active Member
Posts: 230
Likes: 246
1964 Shasta
Currently Offline
|
Post by Alaska Shasta on Mar 2, 2019 22:03:57 GMT -8
Looks great. Making good progress!
|
|
debranch
Active Member
Wee Camp
Posts: 237
Likes: 90
71 Shasta Compact
Currently Offline
|
Post by debranch on Mar 3, 2019 17:46:03 GMT -8
Thanks, Alaska Shasta
Todays progress report. With Richards help, I got the front and back upper wall back off and taken to the garage.
 front wall by debra branch, on Flickr front wall by debra branch, on Flickr The bondo in the seam worked. Both walls kept their shape when we took them down. If you look close you can make out the change in angle on both upper sections. I also finished framing the lower sections for the front and back walls. All four pieces are ready for polyurethane.
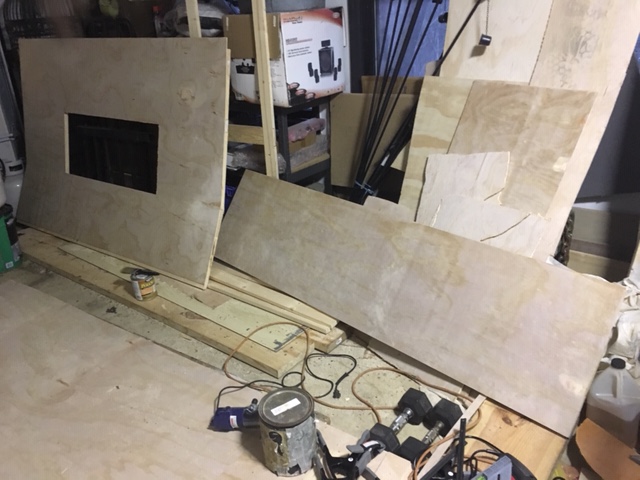 back wall by debra branch, on Flickr back wall by debra branch, on Flickr
It always surprises me how much the color changes with the first coat of polyurethane.
 poly started 2 by debra branch, on Flickr poly started 2 by debra branch, on Flickr
I ordered some stuff for the camper and they came in last week. Someone we know and love was doing a fundraiser that supplies books (Lawton's library) for kids and babies in the Children's Hospital, so I got these for the camper.
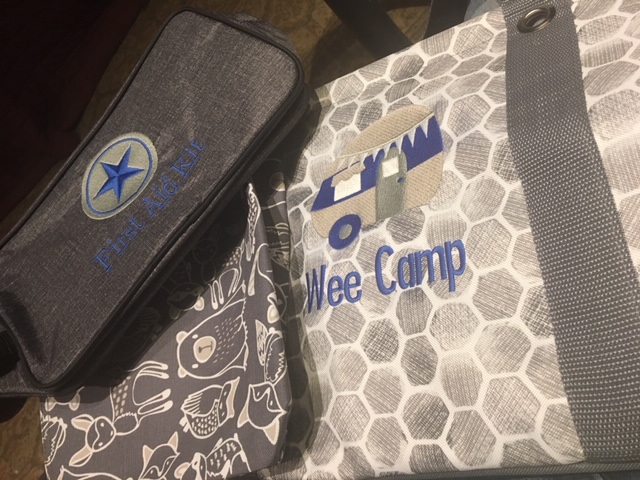 bags for camper by debra branch, on Flickr bags for camper by debra branch, on Flickr
I was able to pick the design I wanted and change the colors to what I wanted. The Wee Camp is a thing I use often. Richard was in the Navy years ago and we were stationed in Scotland. Where we lived there was a small lake called Loch Wee. We loved it, and We have been using Wee for Small ever since. We even considered it for our license plate.
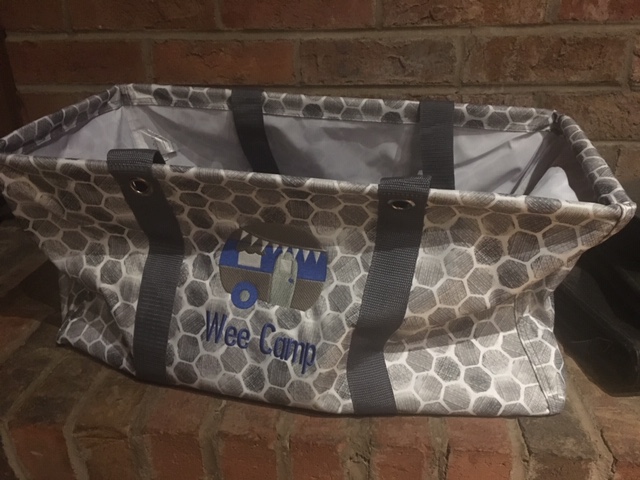 wee camp by debra branch, on Flickr wee camp by debra branch, on Flickr
One more update, Dewey was able to get by the Wilsonart factory in Fletcher NC. They don't have a showroom there.  so sad... so sad...
As always I am thankful for this site, I am sure if it was not for this site and the collective community here I would be lost on how to fix my Wee Camper. Debra
|
|
debranch
Active Member
Wee Camp
Posts: 237
Likes: 90
71 Shasta Compact
Currently Offline
|
Post by debranch on Mar 17, 2019 5:42:02 GMT -8
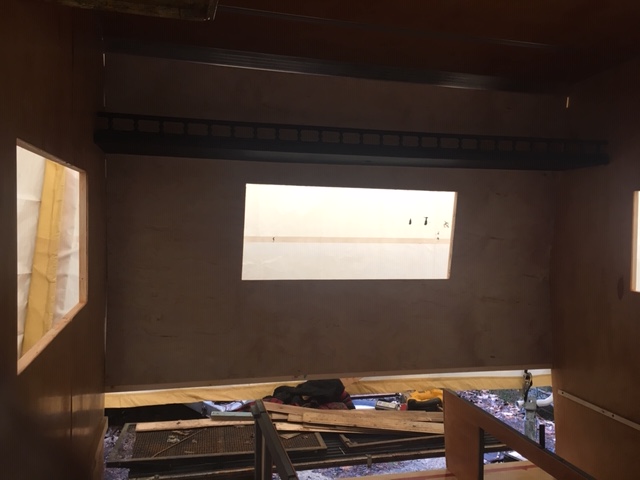
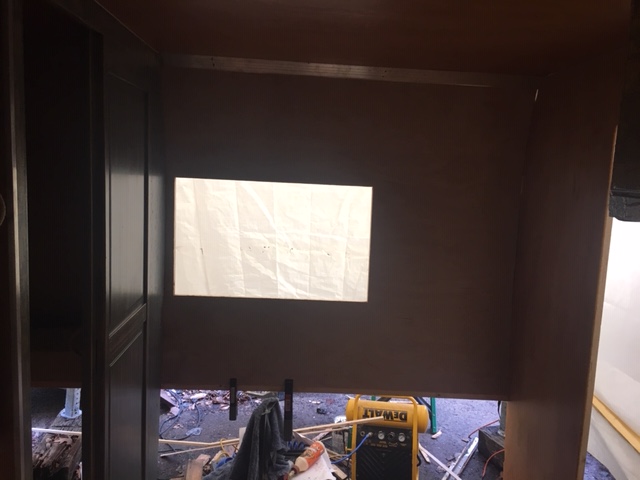
Its been a busy 2 week. I had National Guard drill last weekend and had to take a APFT. This week, 52 hours at work + going to the gym to work out 2 nights, but we still made progress. Richard got our counter top Formica ordered. (Lowes) It should be delivered to our local store by April 5, and I found an old door lock. 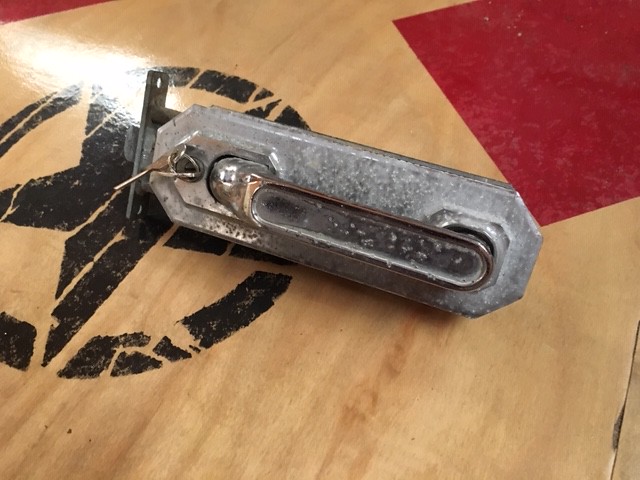 door lock door lock by debra branch, on Flickr It needs some work to clean it up. Richard took it to a locksmith and we had a set of keys for it the next day. I was also able to finish polyurethane the back and front walls 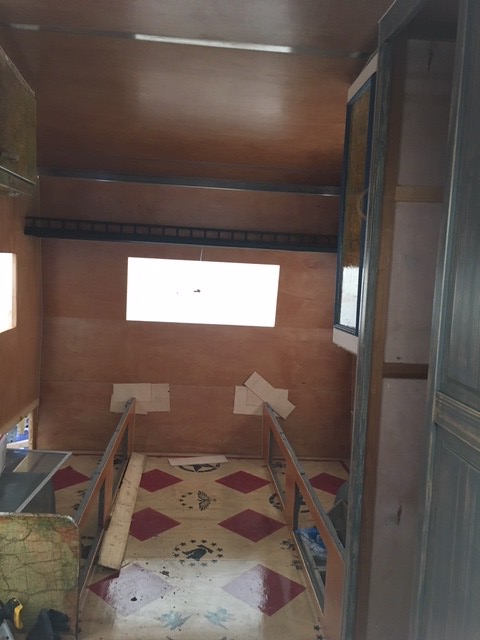 boxed in3 boxed in3 by debra branch, on Flickr Richard and I were able to get the Back and Front walls installed yesterday. Richard added a string to make running wire through the shelf for a light easier. 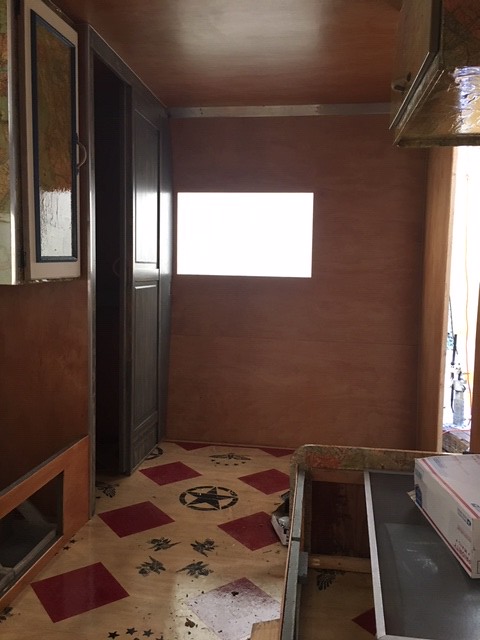 boxed in5 boxed in5 by debra branch, on Flickr We still have a ways to go but I am happy with our progress so far. Richard can start working on the electrical. I hope he will have it completely roughed in by the beginning of April. |
|
WhitneyK
Active Member
Posts: 492
Likes: 169
'67 Shasta Compact
Currently Offline
|
Post by WhitneyK on Mar 20, 2019 4:27:39 GMT -8
Thanks debranch, I'm feeling more inspired now!
|
|


 so sad...
 /Campers/67%20Shasta?preview=2019-02-03+18.01.00.jpg)