debranch
Active Member
 Wee Camp
Posts: 237 
Likes: 90
71 Shasta Compact
Currently Offline
|
Post by debranch on Nov 9, 2018 16:35:58 GMT -8
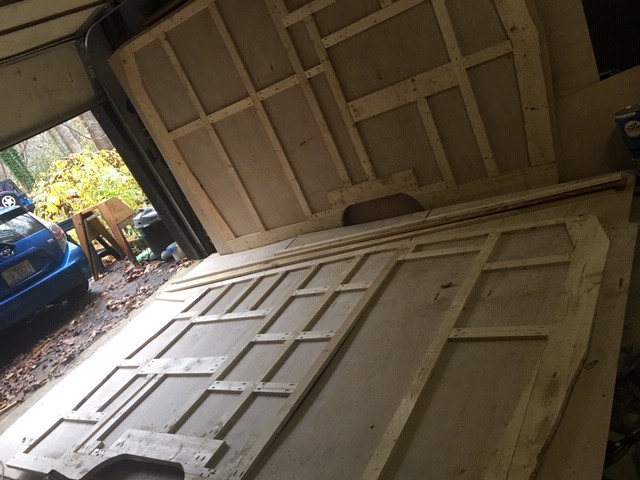
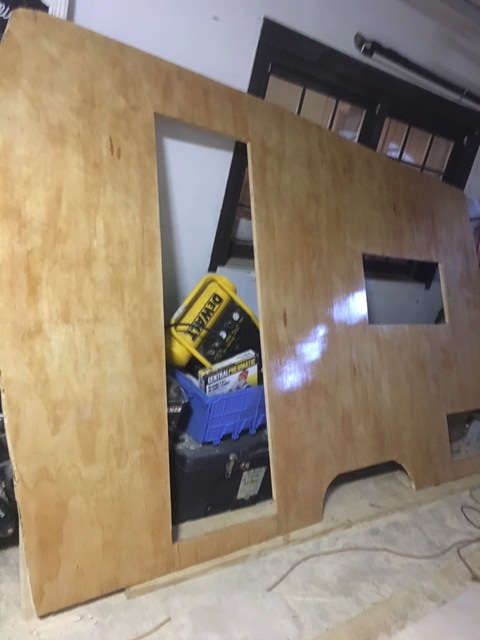
I have had a busy 2 weeks, but I have gotten some work accomplished on the Compact. Even though it has rained for the last 3 Fridays in a row (I have Fridays off work) I finished framing the walls.
 IMG_0515 by debra branch, on Flickr IMG_0515 by debra branch, on Flickr
I went to Reina & Dewey's last Friday and we worked on the windows a little while just enough so I was able to order the sills that are needed in the windows, and give Dewey an idea of what needed to be done. I sent him a link so he could watch Larry's video on how to restore the windows. I have no doubt Dewey will do an excellent job with them.
I worked on taking the roof vent out this week. 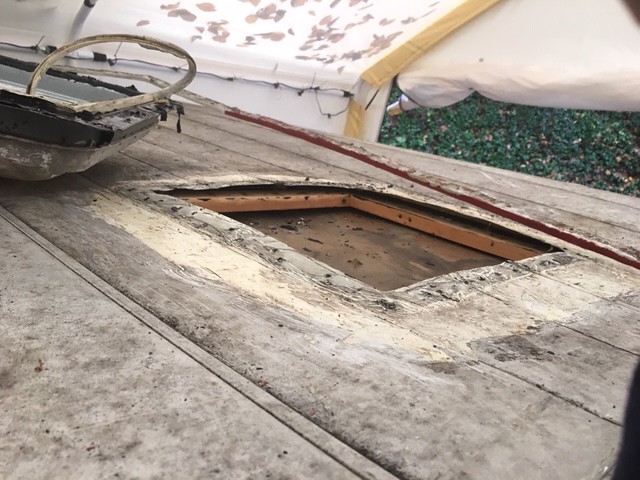 IMG_0513 by debra branch, on Flickr IMG_0513 by debra branch, on Flickr I was also able to get all the leveling sealant off with some elbow grease. PO had done a repair from the inside and covered the vent but they didn't fix the leak and you can see the water damage in the picture. I don't know why they thought that covering up a vent was a good idea. I rearranged the garage to make a little more room to stand the walls up. 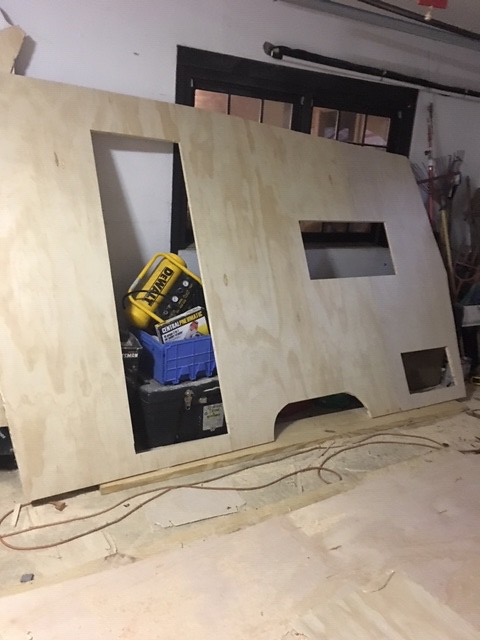 IMG_0519 by debra branch, on Flickr IMG_0519 by debra branch, on Flickr
I used a trim router to trim the walls and cut out the doors and windows. 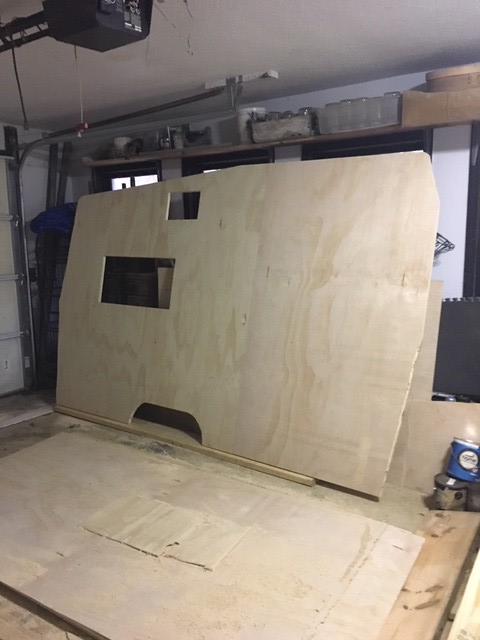 IMG_0518 by debra branch, on Flickr IMG_0518 by debra branch, on Flickr
I have decided to use Minwax PolyShad Classic Oak satin, to stain and seal the walls I did a test on scrap from the wheel well and liked the way it looked and I have use polyurethane on a number of projects in the past. I have never had any problems with it and I like it. I am also in the south and the extra protection it provides with the humidity in North Carolina is a plus.. I plan to put at least 6 coats of poly on the walls, sanding between coats before they are installed. I hope I will be able to put a coat on every other day doing a light sanding on the opposite day. working 4/10s doesn't leave a lot of time in the evenings, but I am making progress.
|
|
|
|
Post by vikx on Nov 9, 2018 20:21:57 GMT -8
The walls look good!
|
|
HOTRODPRIMER
Full Member
Posts: 774 
Likes: 257
1957 Shasta
Currently Offline
|
Post by HOTRODPRIMER on Nov 11, 2018 8:38:15 GMT -8
It doesn't look like you have let the rainy Fridays slow you down, the walls look great. Danny
|
|
debranch
Active Member
Wee Camp
Posts: 237
Likes: 90
71 Shasta Compact
Currently Offline
|
Post by debranch on Nov 11, 2018 16:10:57 GMT -8
No I didn't let the rain or cold stop me from working.
I got started on staining / polyurethane the walls yesterday and today, it turned cold in a hurry here. The leaves are collecting on the ground, it never got out of the mid 40s today so I cant be out there long before my fingers start to get stiff. I also got in the camper and started getting the street side seat out and took a look under the floor the PO had put in, there is mold under the boards by the door. so it will all have to come up. in my investigation I found that the PO just added it on top of the original floor, I don't know what kind of shape the subfloor is in but it looks like I will be coming up with a total new floor. I have thoughts of doing a paint / stain pattern kind of like you would see stained concrete, and stencils to create a one of a kind design the theme is a Vintage Americana, and I'm using road maps on the drawers / cabinet doors . I'm still playing with the idea I will defiantly be doing some test before I touch the floor but I want it to look distressed nothing perfect in my life, its the loved in look I like.
 wall with poly by debra branch, on Flickr wall with poly by debra branch, on Flickr I'm liking the way the walls are looking I did play with the stain a little. did a base coat Friday, then Saturday morning I used the sander to smooth all the rough wood then put a coat of classic oak, mid day I did a dry brush application with pecan stain just to give it a little color play, and before I went to bed I added another coat of classic oak. Today after Church I hand sanded both walls with 220 grit sandpaper, wiped it all down with a microfiber cloth and did another lite coat of the classic oak. I'm not sure how many coats I will add before I switch to clear polyurethane. but each coat will be hand sanded between layers now. Back to work tomorrow and we are expecting rain and cold through Thursday. I may have to come up with some projects that I can do inside at night, after being out side all day at work I don't know if I want to subject myself to more each evening also. I will update more as the project progresses. |
|
debranch
Active Member
Wee Camp
Posts: 237
Likes: 90
71 Shasta Compact
Currently Offline
|
Post by debranch on Nov 13, 2018 17:12:46 GMT -8
Due to rain I got off early yesterday and had today off so I was able to work on the Compact.
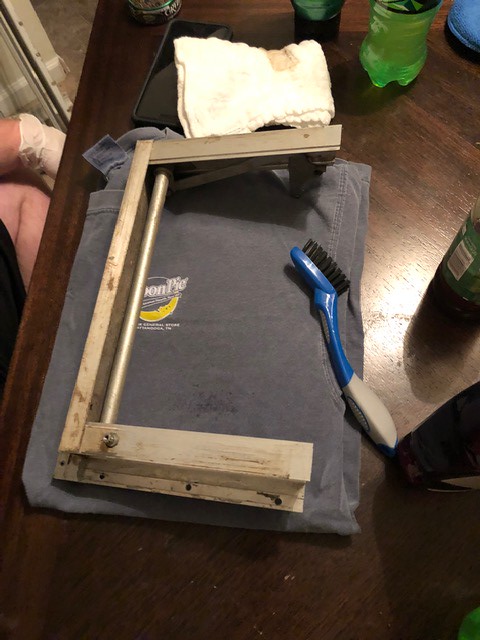
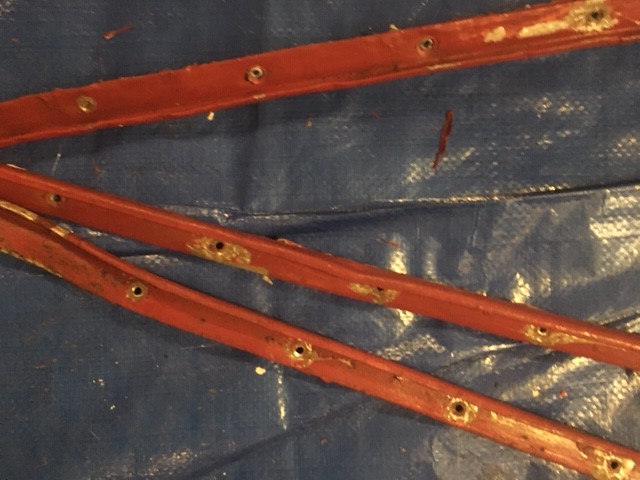 j-rail by debra branch, on Flickr j-rail by debra branch, on Flickr
I started working in the J-rails and C-rail seating on the kitchen floor.
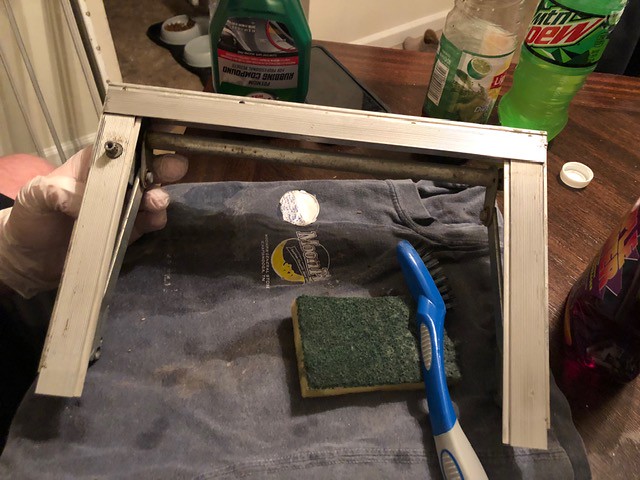
 c rail by debra branch, on Flickr c rail by debra branch, on Flickr
I still have a good bit to clean but its nice to get a little look at what they are going to look like when their done.
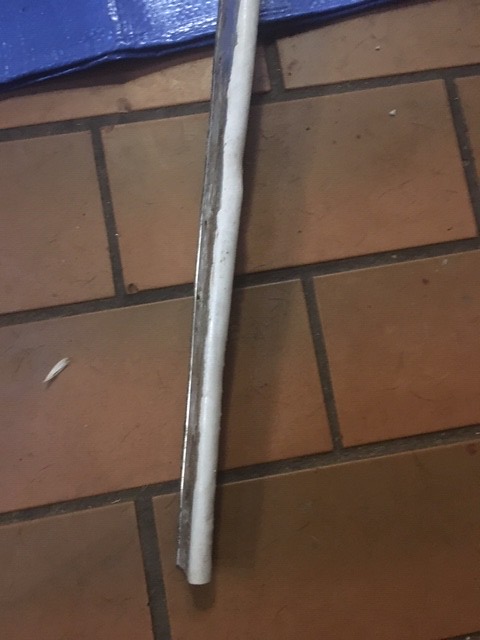
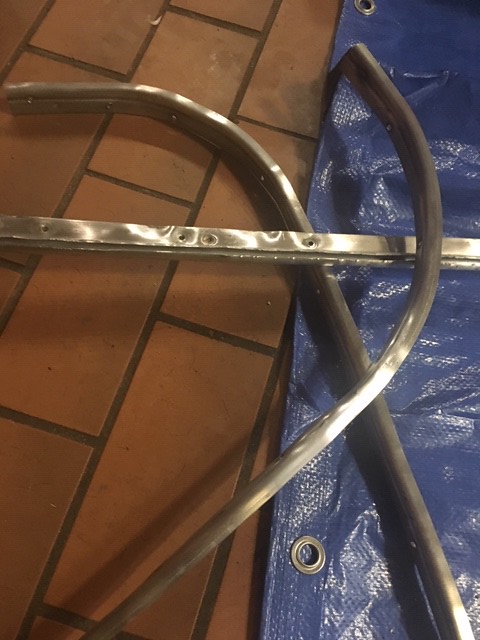 clean trim by debra branch, on Flickr clean trim by debra branch, on Flickr
I also got the walls hand sanded and got a coat of clear poly on. I took the street side bench front out and the old plywood removed and glued it to a new piece of plywood. It was not in good shape and the PO had painted it, so I'm going to redo the faces of both benches. I started getting the screws out of the curb side bench I have a few more stubborn screws to get out of that side. |
|
debranch
Active Member
Wee Camp
Posts: 237
Likes: 90
71 Shasta Compact
Currently Offline
|
Post by debranch on Nov 18, 2018 16:07:09 GMT -8
I'm starting to like rain days.
I got off early Wednesday and did not work Thursday because of rain so I had more time to work on the Compact. I was able to get a couple more coats of poly on the walls, get some more paint off the j-rails and start getting the floor that the PO had put in the compact up.
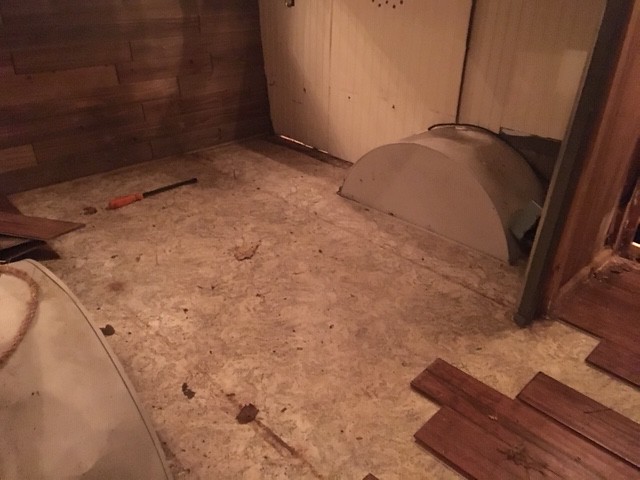 floor by debra branch, on Flickr floor by debra branch, on Flickr I will have to lift the floor, the subfloor has issues around the edges so I will have to remove it. There was already water damage by the door even though the wood floor had not been down very long there was black mold at the threshold and carpenter ants under the area where the PO has patch the subfloor, that was no real surprise I thought it would need to be replaced. Richard has been extremely busy because of the rain so he has not been able to help my as soon as he has time he will be getting the counter top taken out for me and the floor mounted cabinet so I can get the subfloor removed. I was also able to finish removing the plywood from the front of the benches and started staining / polyurethane them. 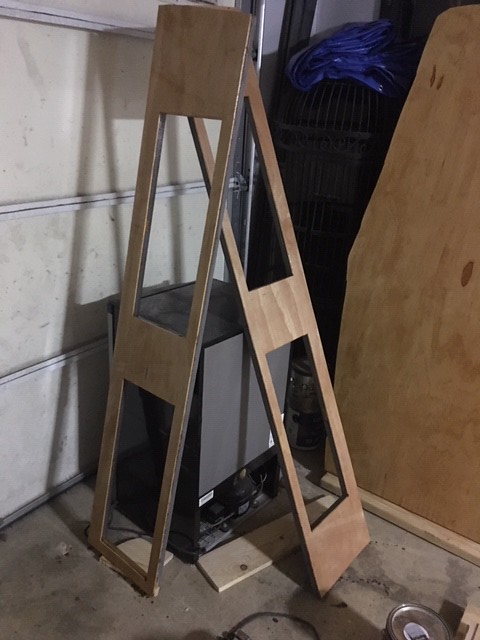 bench fronts by debra branch, on Flickr bench fronts by debra branch, on Flickr
I also ordered several samples from WilsonArt.com early this week and hope they come in by Wednesday so I can see if Reina and I can agree on a counter top from what I have read on here one sheet is enough for 2 campers so my next project, Reina's Camper will be getting the other half of the sheet. the gaskets have also come in and are at the post office, the joy of small town living is that the post office is only open for 2 hrs. on Saturday so I hope Richard can get by there tomorrow while they are open so we can take them to Dewey on Thursday. There is no rain in this weeks forecast so I will not have as much time to work on the compact this week and with Thanksgiving this week family comes first so I hope I can get back to it next week. |
|
debranch
Active Member
Wee Camp
Posts: 237
Likes: 90
71 Shasta Compact
Currently Offline
|
Post by debranch on Nov 25, 2018 16:18:14 GMT -8
Its been a productive few days on the Compact.
Friday, Richard helped me get the roof off and rolled up, and we got to work on removing the bathroom walls and the cabinets. 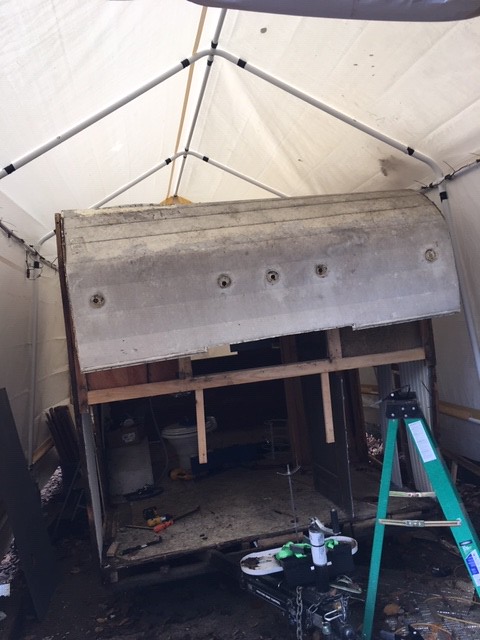 IMG_0544 by debra branch, on Flickr IMG_0544 by debra branch, on Flickr
 IMG_0545 by debra branch, on Flickr IMG_0545 by debra branch, on Flickr
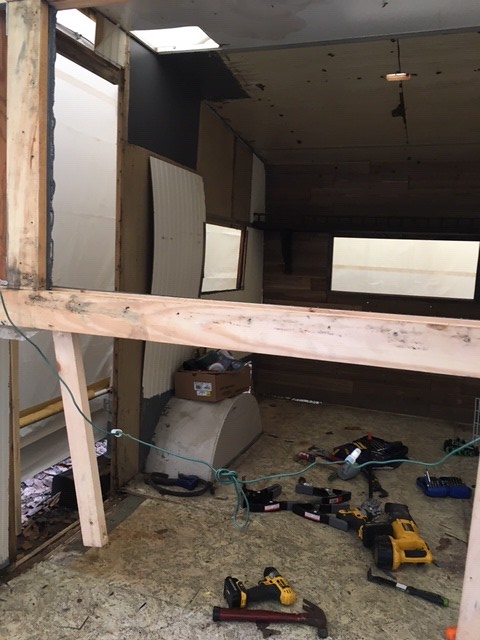 IMG_0546 by debra branch, on Flickr IMG_0546 by debra branch, on Flickr
There was a lot of dry rot around the edges of the floor so that came up also. Saturday Richard got that up so we could see what was underneath it the 2 x 4s going down the middle are in great shape but the ones around the edges are not in the best of shape, but I expected that so I will need to replace them. and that will allow us to put a coat of rustoleum on the frame to protect it from the elements. I started removing the edging that holds the ceiling panels today they were stapled in along the top edge of the sidewalls I have not pulled them down yet I have a few nails holding the sides to the top to remove but I have no doubt that a strong wind would bring the whole thing down. I added some 2x4s to help stabilize it till we get the new walls and floor back in. |
|
debranch
Active Member
Wee Camp
Posts: 237
Likes: 90
71 Shasta Compact
Currently Offline
|
Post by debranch on Dec 2, 2018 19:13:38 GMT -8
I have not been able to get a lot done on the compact this week. I leave for work before daylight and work till sundown. I took the sills for the windows to Dewey and he has started working on them. I worked on some more J-rail, striping the paint off them and starting working on the toilet room walls and door. We also started wire brushing the frame in preparation for painting, and ripped the mahogany boards down to the correct width. I'm trying to get several things prepped, in hopes that when I start putting it back together it will have plenty of support. I also ordered some more samples from Wilsonart.com. Reina did not seem to be in love with any of the samples that we likes so I ordered more. I'm hoping that Wilson Art has a showroom at their factory Dewey works for the town of Fletcher NC, where there factory is. if Its open to the public I will give an update but it will be after the New Year before he will have a chance to get by there to find out.
|
|
HOTRODPRIMER
Full Member
Posts: 774
Likes: 257
1957 Shasta
Currently Offline
|
Post by HOTRODPRIMER on Dec 3, 2018 6:59:51 GMT -8
any progress however small is a plus, your doing a great job.Danny
|
|
debranch
Active Member
Wee Camp
Posts: 237
Likes: 90
71 Shasta Compact
Currently Offline
|
Post by debranch on Jan 1, 2019 19:26:19 GMT -8
Happy New year
Its been a busy month. I haven't gotten a lot done on the compact between helping Kids move into a new house with projects, Christmas and visiting my oldest kid/grandkids in Georgia its been a quick month, and it doesn't seem like January is going to slow down any.
I have worked a little though.
 window before by debra branch, on Flickr window before by debra branch, on Flickr
Dewey started cleaning the windows. He has more to do but look at the difference a little elbow grease can make, and now that they are in their house and have a garage that he can work on them in maybe he will find more time to work on them. If Reina doesn't create to long of a (to do) list for him that is.
 windows by debra branch, on Flickr windows by debra branch, on Flickr
I cut the plywood for the ceiling and put several coats of polyurethane on them
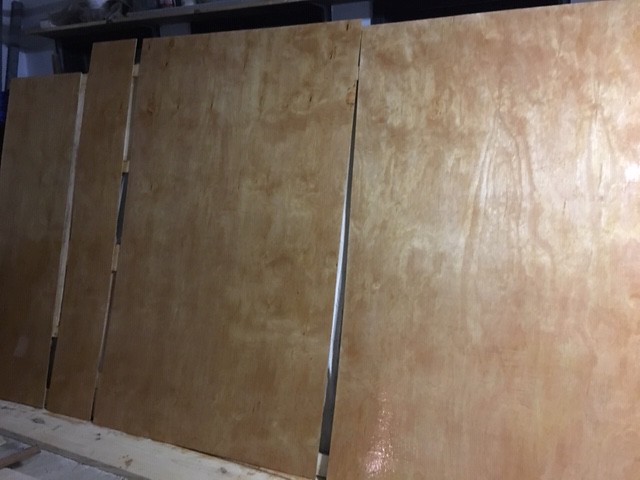 ceiling poly by debra branch, on Flickr ceiling poly by debra branch, on Flickr
the PO had replaced and painted the door / wall for the closet / toilet room and I want to reuse as much as I can to keep our cost down, so I'm just giving them new life and making them more our taste.
 door before by debra branch, on Flickr door before by debra branch, on Flickr
I sanded them, I didn't worry about getting all the paint off just distressed it.
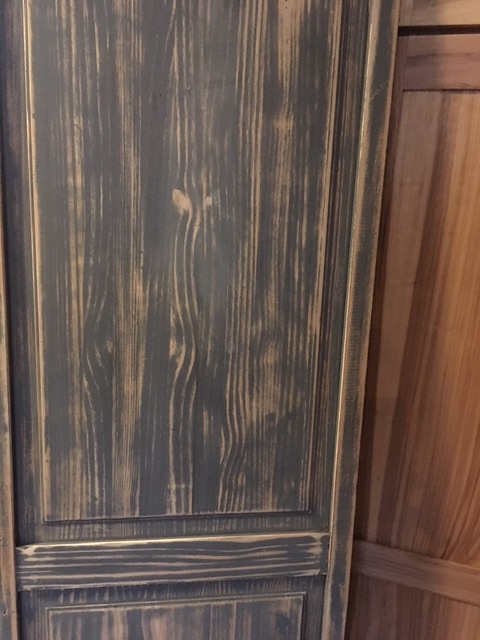 door sanded by debra branch, on Flickr door sanded by debra branch, on Flickr
then I added classic gray stain to blend the shades of gray
 door + stain by debra branch, on Flickr door + stain by debra branch, on Flickr I have added polyurethane but I haven't taken pictures of them because they aren't complete yet. I have also started working on the cabinets the PO had also painted them so I'm decoupage them with an old road atlas from 1971 when they are done I will post pictures but I have a little ways to go on them. and I still have work to do in the J-rails the butyl tape is not wanting to come off. ? What do you use to get the residue off the back side with. |
|
|
|
Post by vikx on Jan 1, 2019 20:35:27 GMT -8
I'm wondering if you have putty or butyl on the J rails. Both come off fairly easily with a putty knife and a little paint thinner. Heat also helps. Could it be silicone or some sort of caulk?
I've experimented with everything on caulk and snow goop without a lot of success. Paint stripper sometimes helps, as does "silicone remover" but that is very expensive or else it doesn't work. In other words, check online for the real remover. If it's cheap, forget it.
|
|
debranch
Active Member
Wee Camp
Posts: 237
Likes: 90
71 Shasta Compact
Currently Offline
|
Post by debranch on Jan 14, 2019 20:28:59 GMT -8
Its been a slow few weeks or a fast one depending on how you look at it, either way I haven't worked on the Compact much. Between drill the first weekend and then the kids needing help on the new house, life gets busy and the things you want to do get put off for the things you must do. I was able to get the door poly completed. 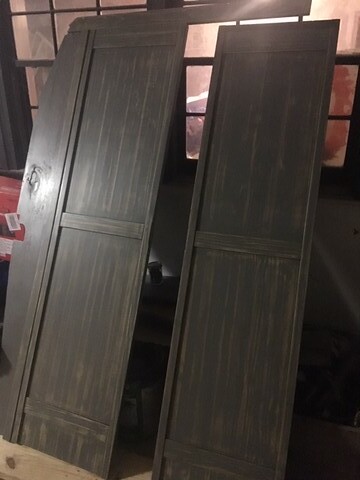 poly door by debra branch, on Flickr poly door by debra branch, on Flickr
and I have finished the cabinets the maps were from a 1971 road atlas.  cabinet2 by debra branch, on Flickr cabinet2 by debra branch, on Flickr
I attached the gimp to the cabinets also so they are ready to be installed when I get to that point in the build.  cabinet1 by debra branch, on Flickr cabinet1 by debra branch, on Flickr
I like the way they turned out well, I added the United States Map to the side of the larger cabinet and we are going to use it to mark all the areas we visit with the compact. |
|
debranch
Active Member
Wee Camp
Posts: 237
Likes: 90
71 Shasta Compact
Currently Offline
|
Post by debranch on Jan 26, 2019 7:46:57 GMT -8
The camper looks a lot different. All the walls are down, the floor has been removed, the frame has been wire brushed and painted with rustoleum. I have also replaced the floor joist/shirt wood, I used mahogany around the skirt for its strength, rot, and insect resistance. I know it weighs more then pine but the trade off in the other benefits is worth it to us. Richard picked up 2 sheets of 1/2" plywood for the subfloor and I got that cut, dry fix, and Richard painted it for me last night so we can get it put down and it all bolted to the frame today.
 IMG_0651frame + subfloor by debra branch, on Flickr IMG_0651frame + subfloor by debra branch, on Flickr
I hope it looks a lot different by Sunday night. |
|
debranch
Active Member
Wee Camp
Posts: 237
Likes: 90
71 Shasta Compact
Currently Offline
|
Post by debranch on Jan 27, 2019 18:38:09 GMT -8
Its been cold here by our standards, here in the south. I have had ice on my driveway for a week and a half. The pavement is cold, and more breaks are required to warm up.
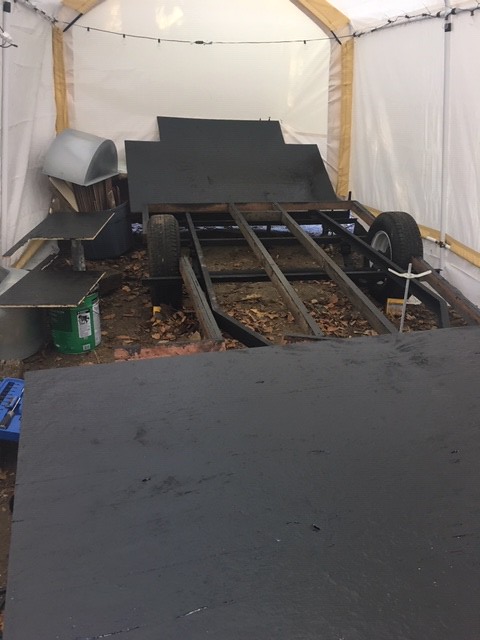
I didn't get as much done as I wanted this weekend but I did make progress so all is well. We were able to get the floor joist and subfloor bolted down and get the new wheel wells in place. We had new wheel wells fabricated because when Richard pulled the old floor up he damaged the old ones. It seems that it always takes longer to do each task I have planed on the camper and often I have to come up with a plan B and there are always more trips to the Lowe's, 13 miles each way so you can plan on a round trip taking at least an hour and a half.
 subfloor2 by debra branch, on Flickr subfloor2 by debra branch, on Flickr
I also had to sand a few areas on the walls. when I polyurethane the ceiling panels I got some drip on the walls so I had to repair them, not a big job but more work all the same. Its back to work tomorrow. |
|
debranch
Active Member
Wee Camp
Posts: 237
Likes: 90
71 Shasta Compact
Currently Offline
|
Post by debranch on Feb 3, 2019 16:05:56 GMT -8
I was able to work on the Compact this weekend, I'm not as far along as I would like to be but progress is being made all the same.
Friday was a nice day the sun was out there was not a lot of wind and the temp was better then its been in a couple weeks. I worked during the day cutting the floor and dry fitting it. I had to work on the areas around the wheel wells to get them fitted like I wanted but I would rather keep taking a little off at a time than risk taking to much, then I cut the pattern pieces for the floor, and Richard didn't get paged out for work Friday night so we were able to get to subfloor tightened down on the frame Friday night,
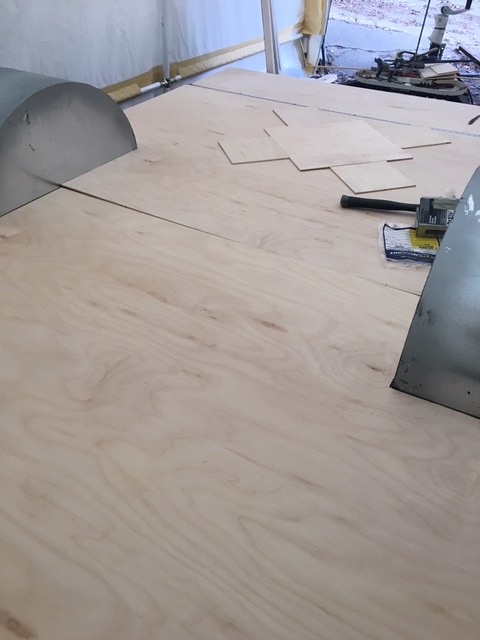 floor dry fit by debra branch, on Flickr floor dry fit by debra branch, on Flickr
the 5 pieces of plywood are to help me with taping off my color blocks for the floor pattern.
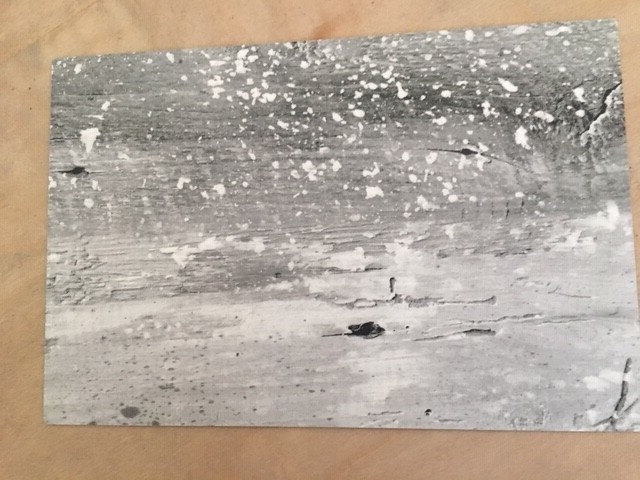
Saturday Morning I got up and got busy I stained the floor. I used weathered oak so it is a very light hint of gray, and just my luck I could not find our caulk gun, to apply the liquid nails to the subfloor to install the floor so we had to go back to Lowes, I'm glad we own stock in Lowes at least its helping it grow. After getting home from a Celebration of life gathering Saturday afternoon we got the floor down and let it set over night.
 floor stained by debra branch, on Flickr floor stained by debra branch, on Flickr
Today after church I got busy taping the pattern on the floor, each color block is 9" square set on a diagonal. They will be painted the negative space is 18" squares, each of them will be stenciled.
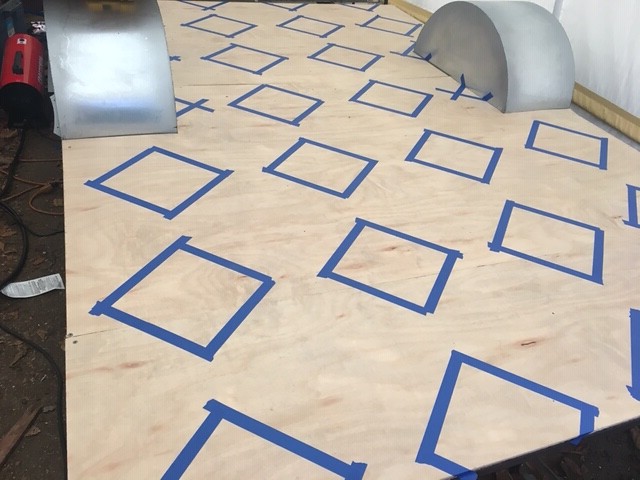 floor prep by debra branch, on Flickr floor prep by debra branch, on Flickr
I also did an edging band the strip will also be red.
 floor edge prep by debra branch, on Flickr floor edge prep by debra branch, on Flickr
Reina was in town this weekend and we settled on our counter tops, we wanted to pick something we both liked because I've read on here several times that one sheet is enough to do 2 campers and since her camper is the next project we didn't want things setting around or wasted.
 counter choice by debra branch, on Flickr counter choice by debra branch, on Flickr
Wilsonart, Carpenter's Crate, Its not Red Cracked Ice which was my favorite but I like it. I am sure that it will give us more options when decorating the camper. Hopefully Richard will bring home the paint tonight so I can get the floor painted this week.
As always I want to say thank you all for sharing your knowledge on this site in looking through older threads I am able to find answers to questions, as well as get Ideas from y'all, and this log keeps me on track with my project.
Debra |
|


