shea2288
Junior Member

Posts: 63 
Likes: 1
Currently Offline
|
Post by shea2288 on Jul 1, 2016 15:02:03 GMT -8
Where shall I begin to tackle this? What should I remove to see what's wrong with the frame? Thank you. 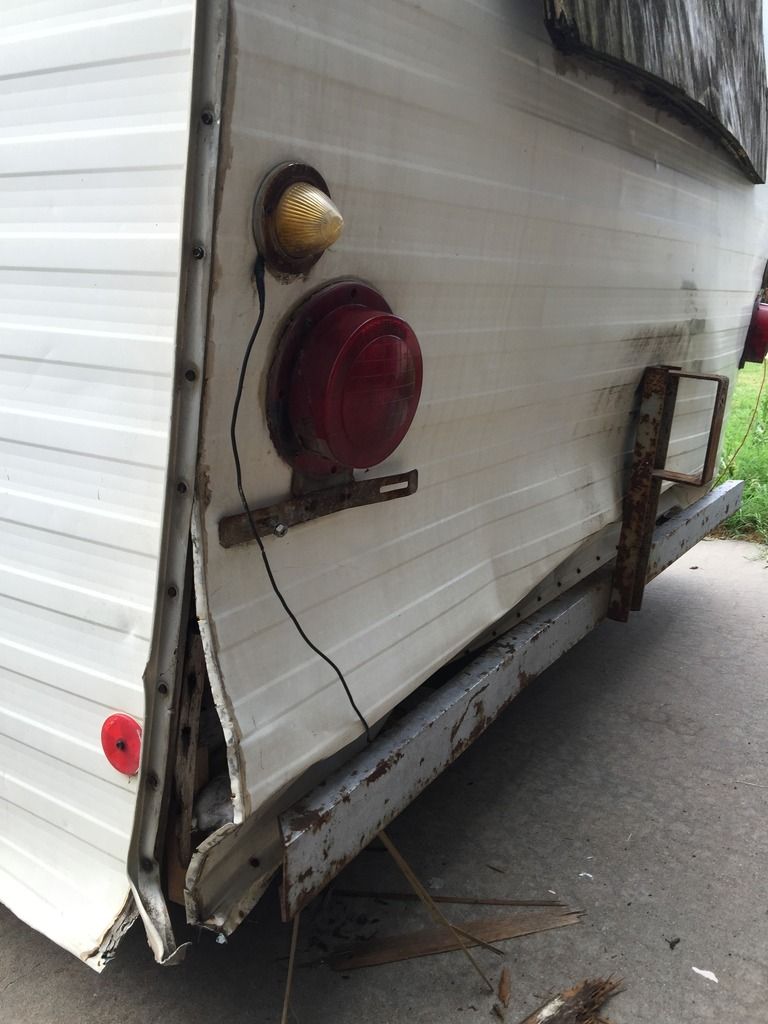 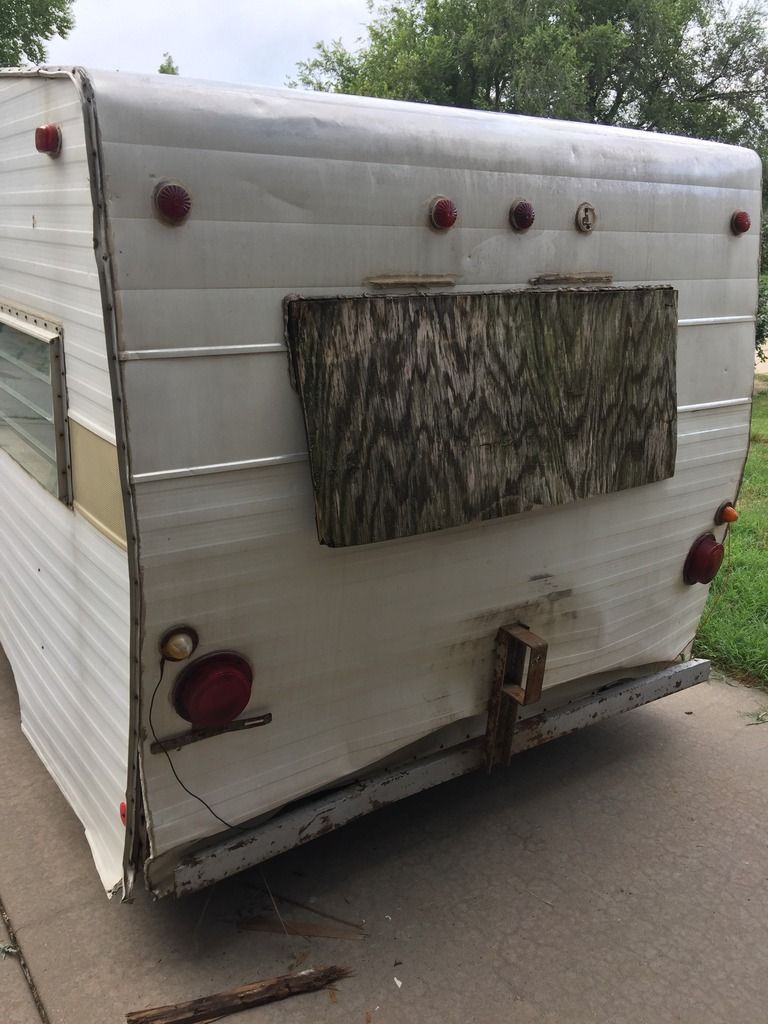 |
|
mobiltec
5K Member
 I make mistakes so you don't have to...
Posts: 9,822
Likes: 3,749
1954 Jewel In Progress...
Currently Offline
|
Post by mobiltec on Jul 1, 2016 20:24:08 GMT -8
Get rid of the spare tire carrier, remove the lights and the big piece of plywood, then begin to remove the J Rail along the edges. Use a putty knife so you don't bend it all up. It's pretty soft stuff. Then you will notice that under there the folded over edge of the rear panel is held there with little nails or staples. Remove all those. Then you can remove the rear metal panel and that will reveal all the wood framing and paneling. In other words, remove everything holding that rear metal panel on and then the panel will just lift off. I have lots of videos showing this process and Vikx book will lay out the complete order of disassembly. Thanks for the photos. They really help.
|
|
shea2288
Junior Member
Posts: 63
Likes: 1
Currently Offline
|
Post by shea2288 on Jul 1, 2016 20:39:04 GMT -8
|
|
iowagal
New Member
Posts: 23
Likes: 4
Currently Offline
|
Post by iowagal on Sept 21, 2016 11:18:52 GMT -8
This is exactly what mine looks like in back with the corners opened up. Mine doesn't have any real bumper, though. I wish I could figure out the picture thing so I could show my issues. It is going to really help me to see how you deal with this.
|
|
msgoehring
Full Member
Just call me Margaret the shellac, buff, sand an shine queen.
Posts: 860 
Likes: 303
1957 Westerner Deluxe
Currently Offline
|
Post by msgoehring on Sept 22, 2016 21:40:18 GMT -8
This is exactly what mine looks like in back with the corners opened up. Mine doesn't have any real bumper, though. I wish I could figure out the picture thing so I could show my issues. It is going to really help me to see how you deal with this. Here is a very easy tutorial on posting pictures to and from Flickr. Don't try Photobucket, they've become a real PITA with all the ads. vintagetrailertalk.freeforums.net/thread/7276/add-photos-hosted-flickr-tutorial |
|
iowagal
New Member
Posts: 23
Likes: 4
Currently Offline
|
Post by iowagal on Sept 22, 2016 21:52:51 GMT -8
Thanks, msgoehring, I am going to give Flickr a try and see if I have better luck.
|
|
|
|
Post by bigbill on Sept 23, 2016 12:51:02 GMT -8
The first thing I would do is take some 2x4s and build inside supports as it looks like the sidewalls have dropped about 3 or four inches below the bottom of the trailer. Look at the curled aluminum along the left side and the fold in the rear aluminum where it couldn't move down because of the bumper brackets. They might experience a major collapse if they take too much loose first. This trailer appears to need some major repair. Very doable if they use caution and don't cause more damage. Just my opinion.
|
|
|
|
Post by bigbill on Sept 23, 2016 13:07:59 GMT -8
I would make the supports by placing a 2x4 flat on floor from left to right then make up some vertical supports (3 or more) with top pieces (at least four foot long) running front to back. Cut them so that they wedge in place then screw a horizontal board to each up right near the top, x bracing would be even better. Once I had the thing supported then I would proceed to disassemble as Mobiltec said. Better safe than sorry.
|
|


