|
|
Post by vikx on Feb 27, 2018 23:41:40 GMT -8
We are anxiously awaiting more exciting pix!
|
|
bmxovich
Active Member
  
Posts: 187 
Likes: 69
1952 Airfloat Skipper
Currently Offline
|
Post by bmxovich on Mar 4, 2018 18:50:43 GMT -8
We are anxiously awaiting more exciting pix! You got it! Finally had to give in and dig the wife's laptop out as the ipad just wasn't getting along with flickr. I think I restored most of the pics photobucket blocked in my thread, exhausting. So I'll pick up from where I left off. We finished pulling all the cabinets, removed the wall and were left with this. 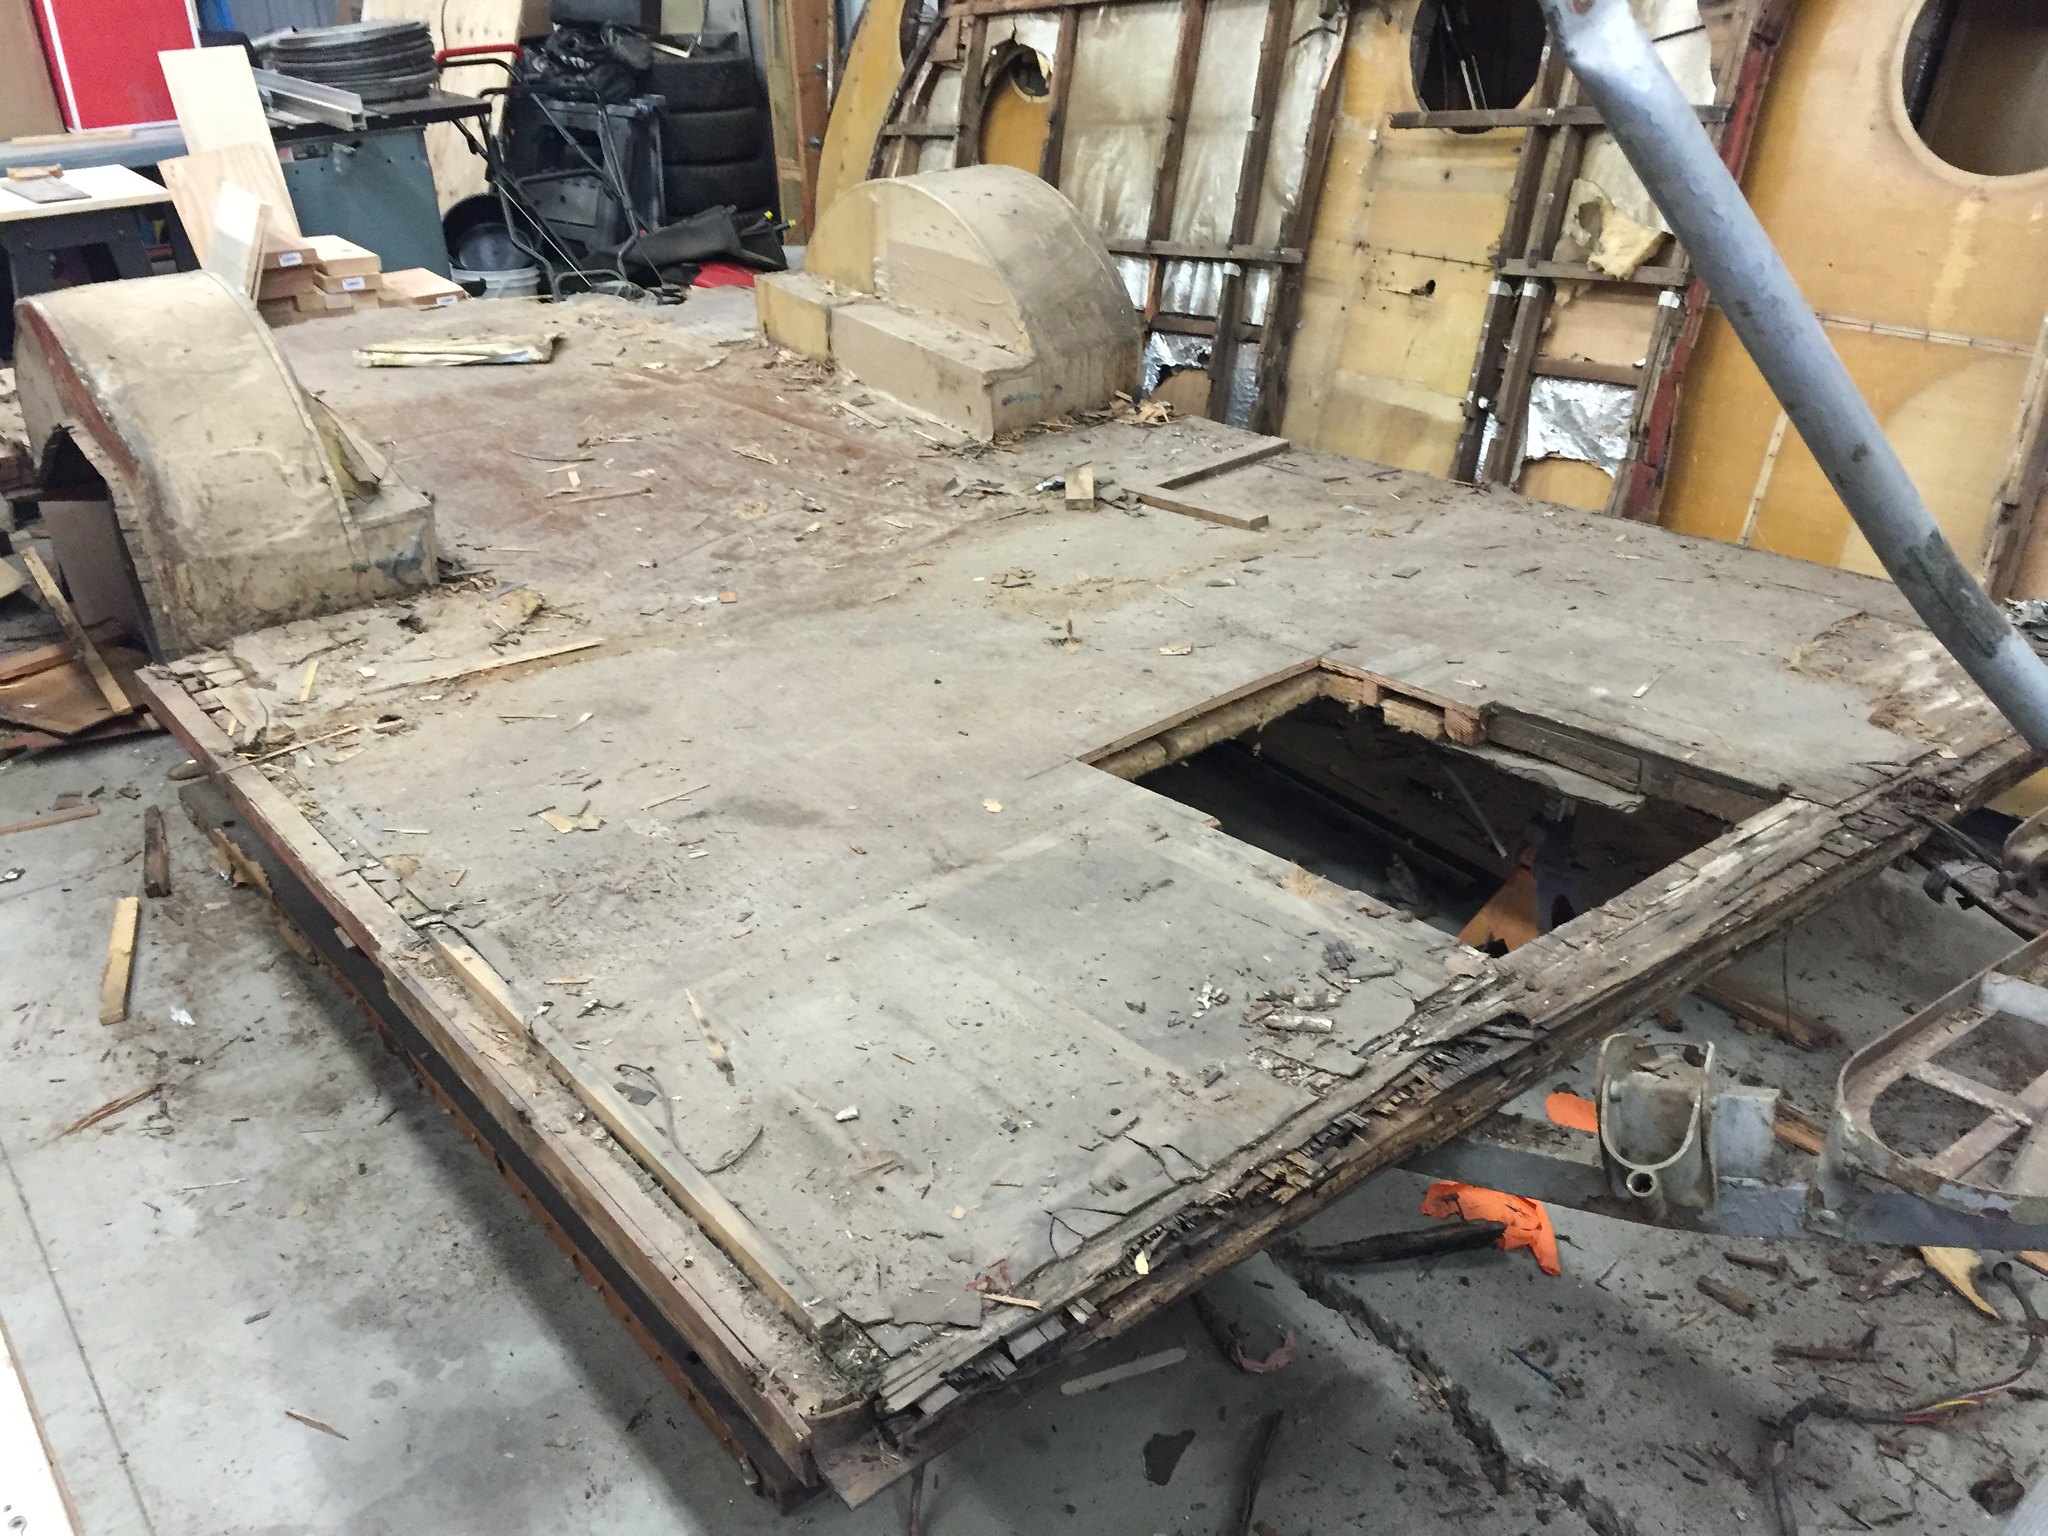 I took a bunch of measurements before pulling up the floor for reference. And here's what was underneath. 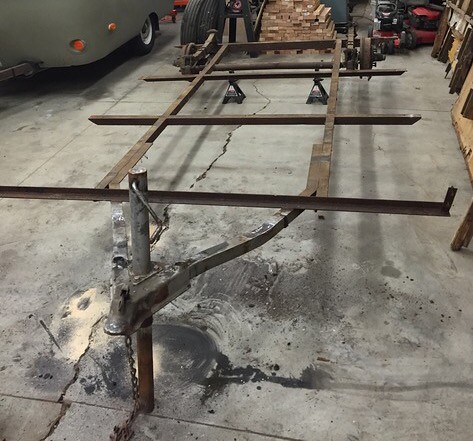
This is what Airfloat called their " Knee Action Suspension". 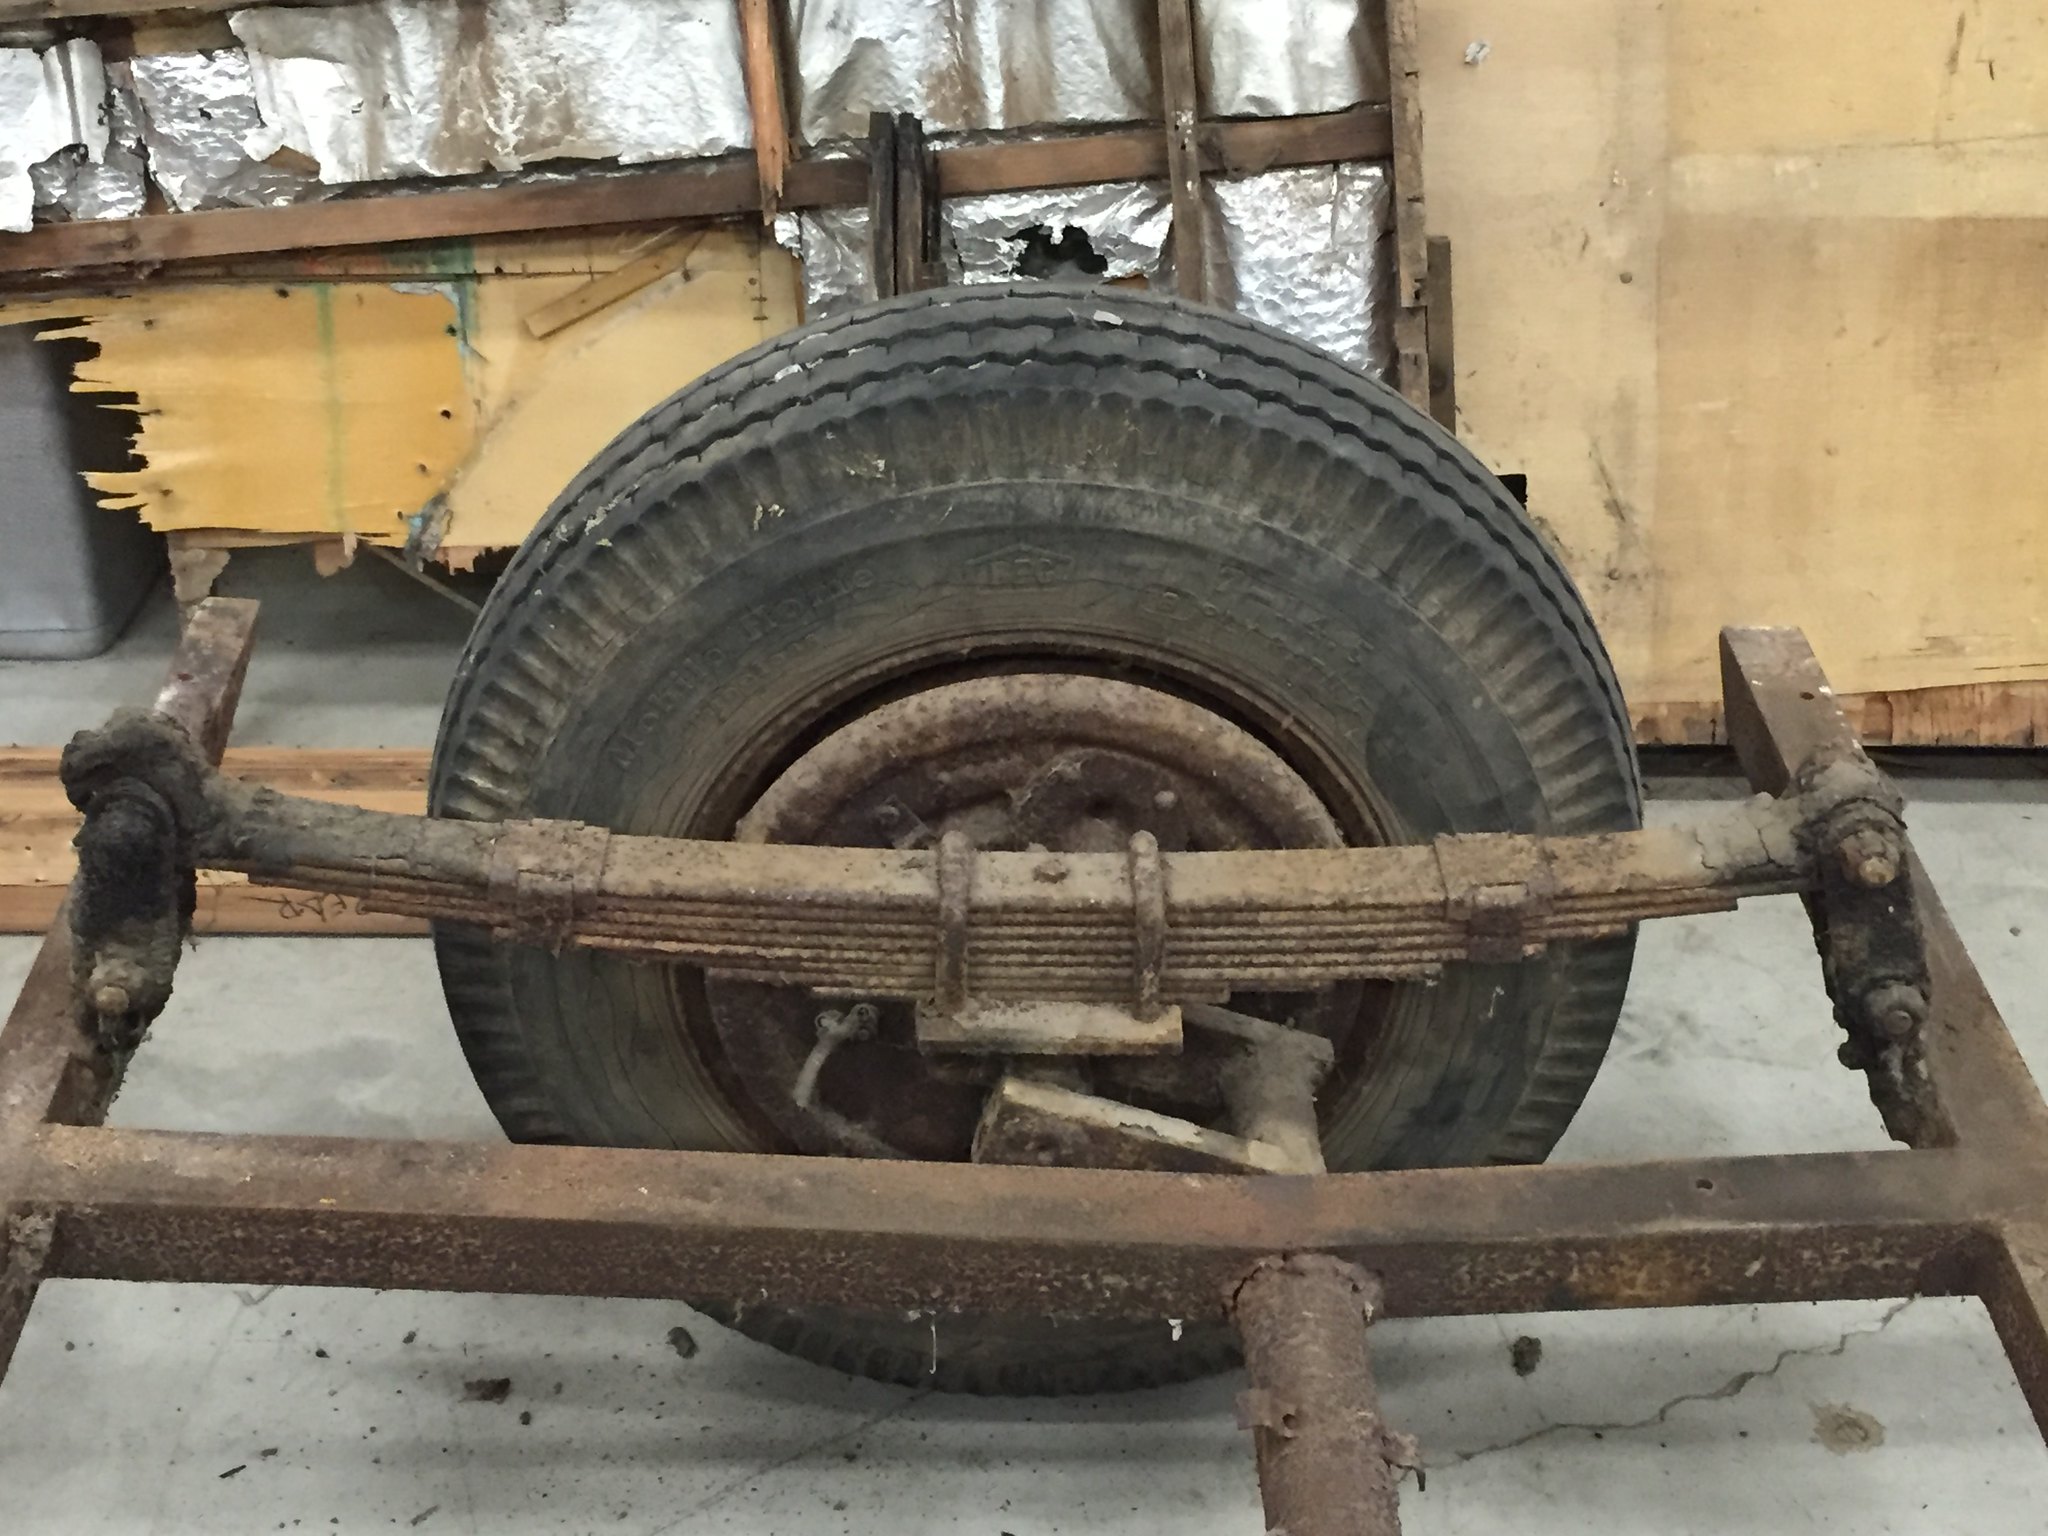
Both sides of the axle tube were badly cracked at the welds. 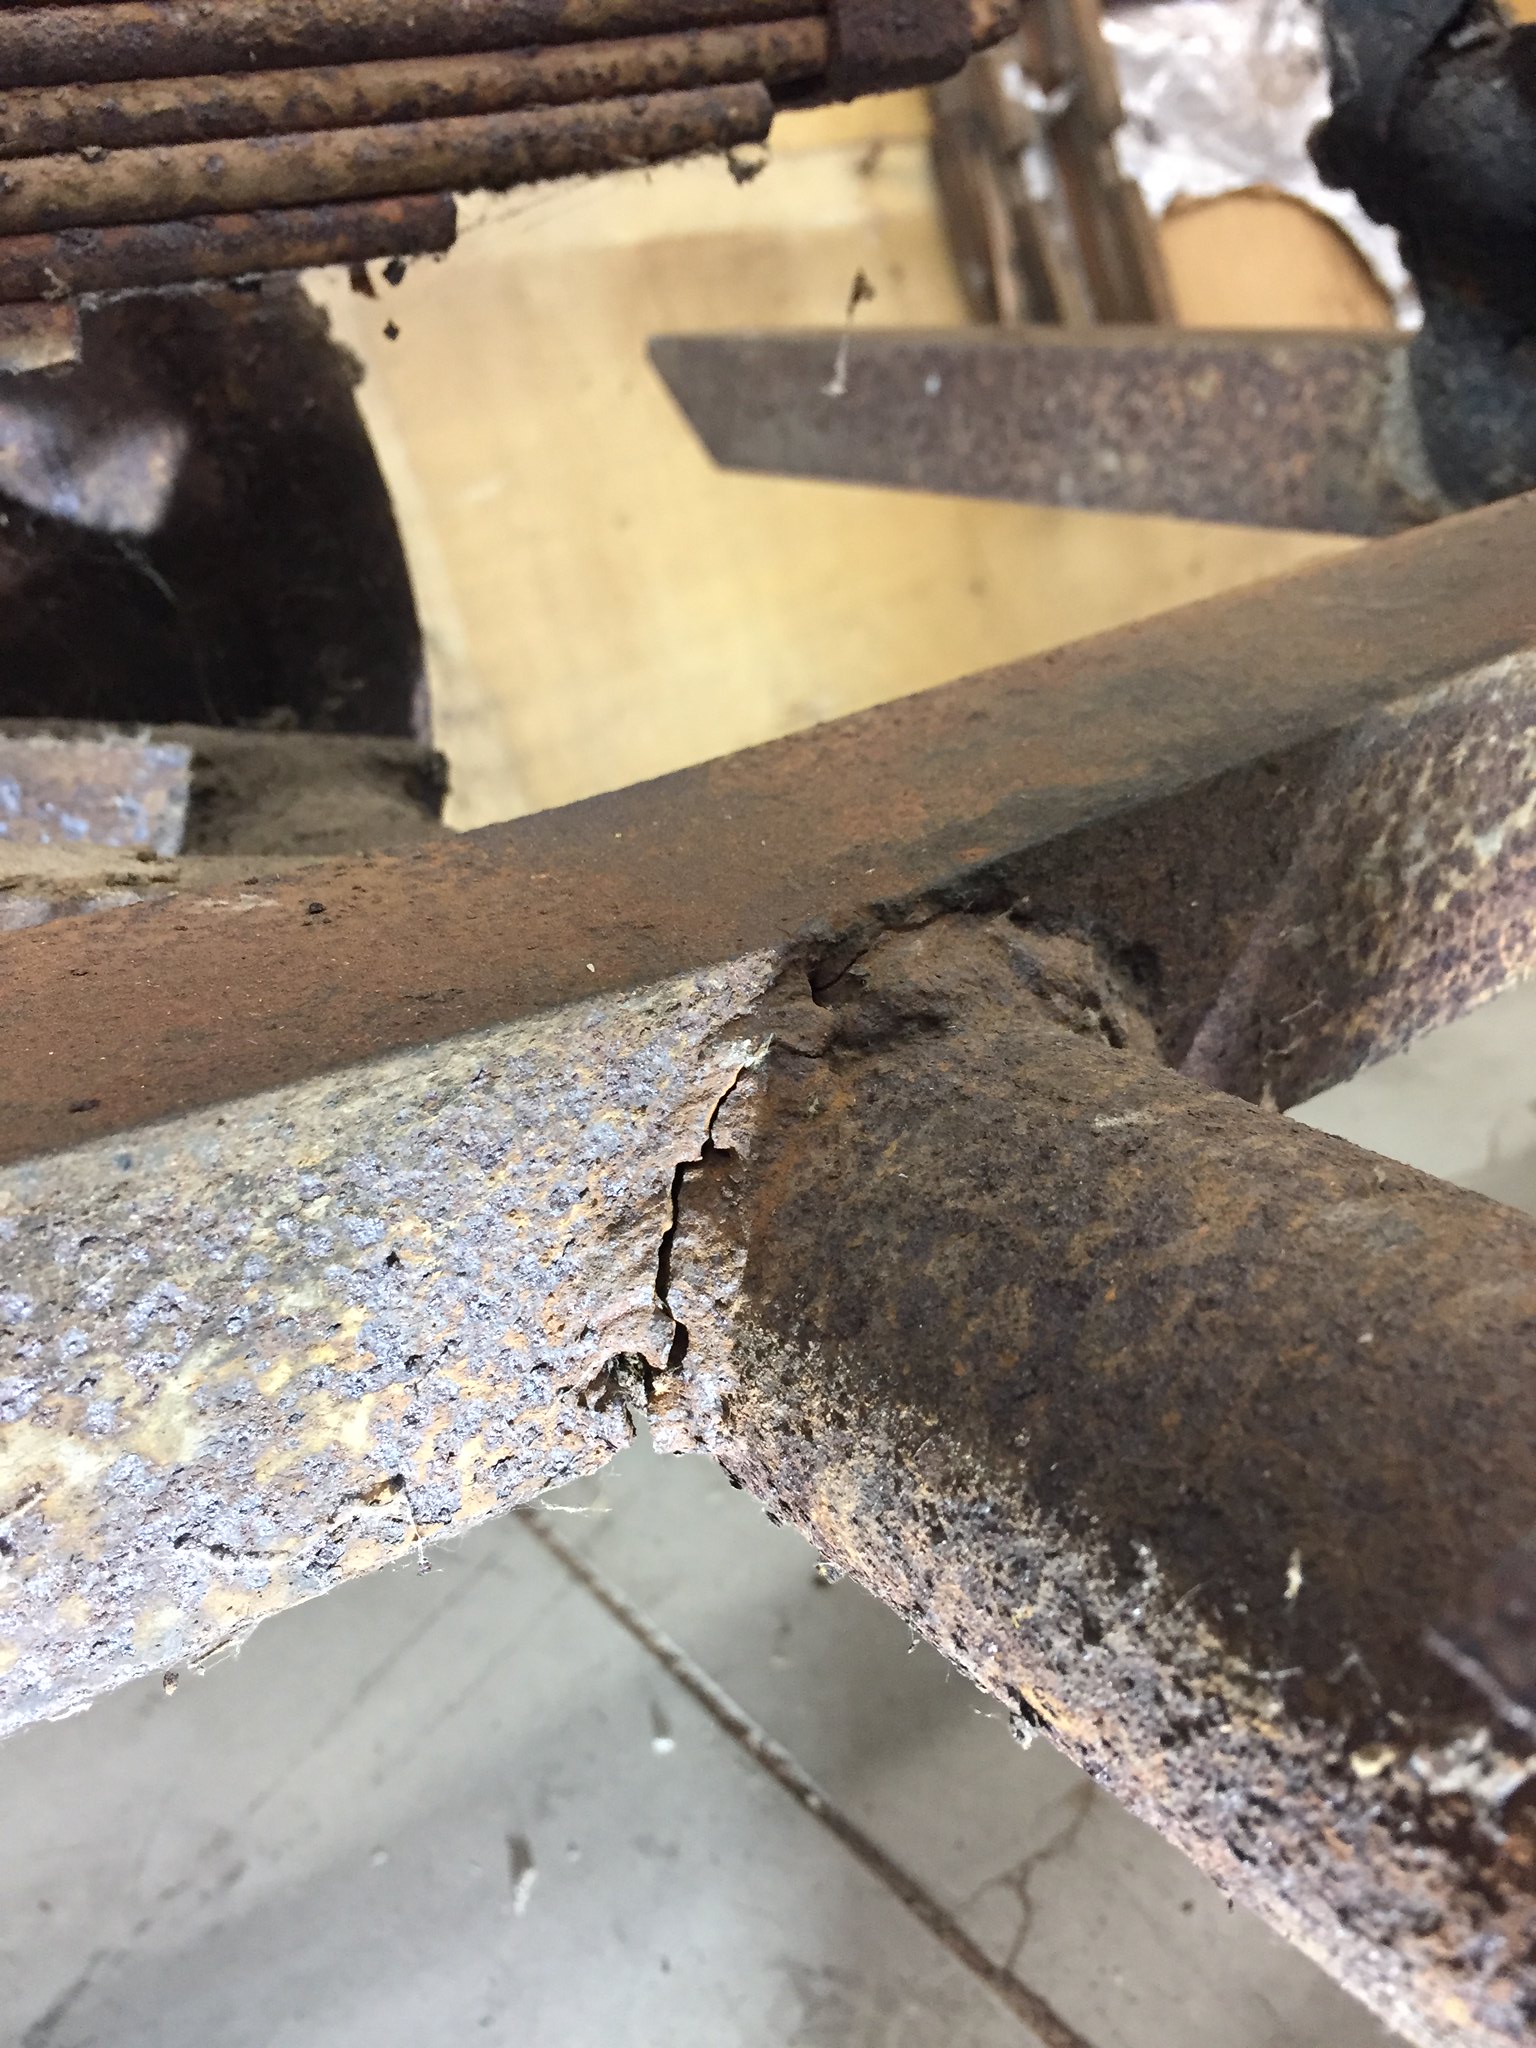
After pondering for about one second it was decided to build a new frame. I wanted to pattern it after a Spartan or Airstream style. I tracked down John Palmer and we exchanged lots of ideas on how to go about building the thing. The best piece of advise he gave me was to lay it out full size. I'm glad I did as I moved things around several times before I was truly happy with it. This was my first attempt but it gives you an idea of how nice it was to see the full size on the floor. 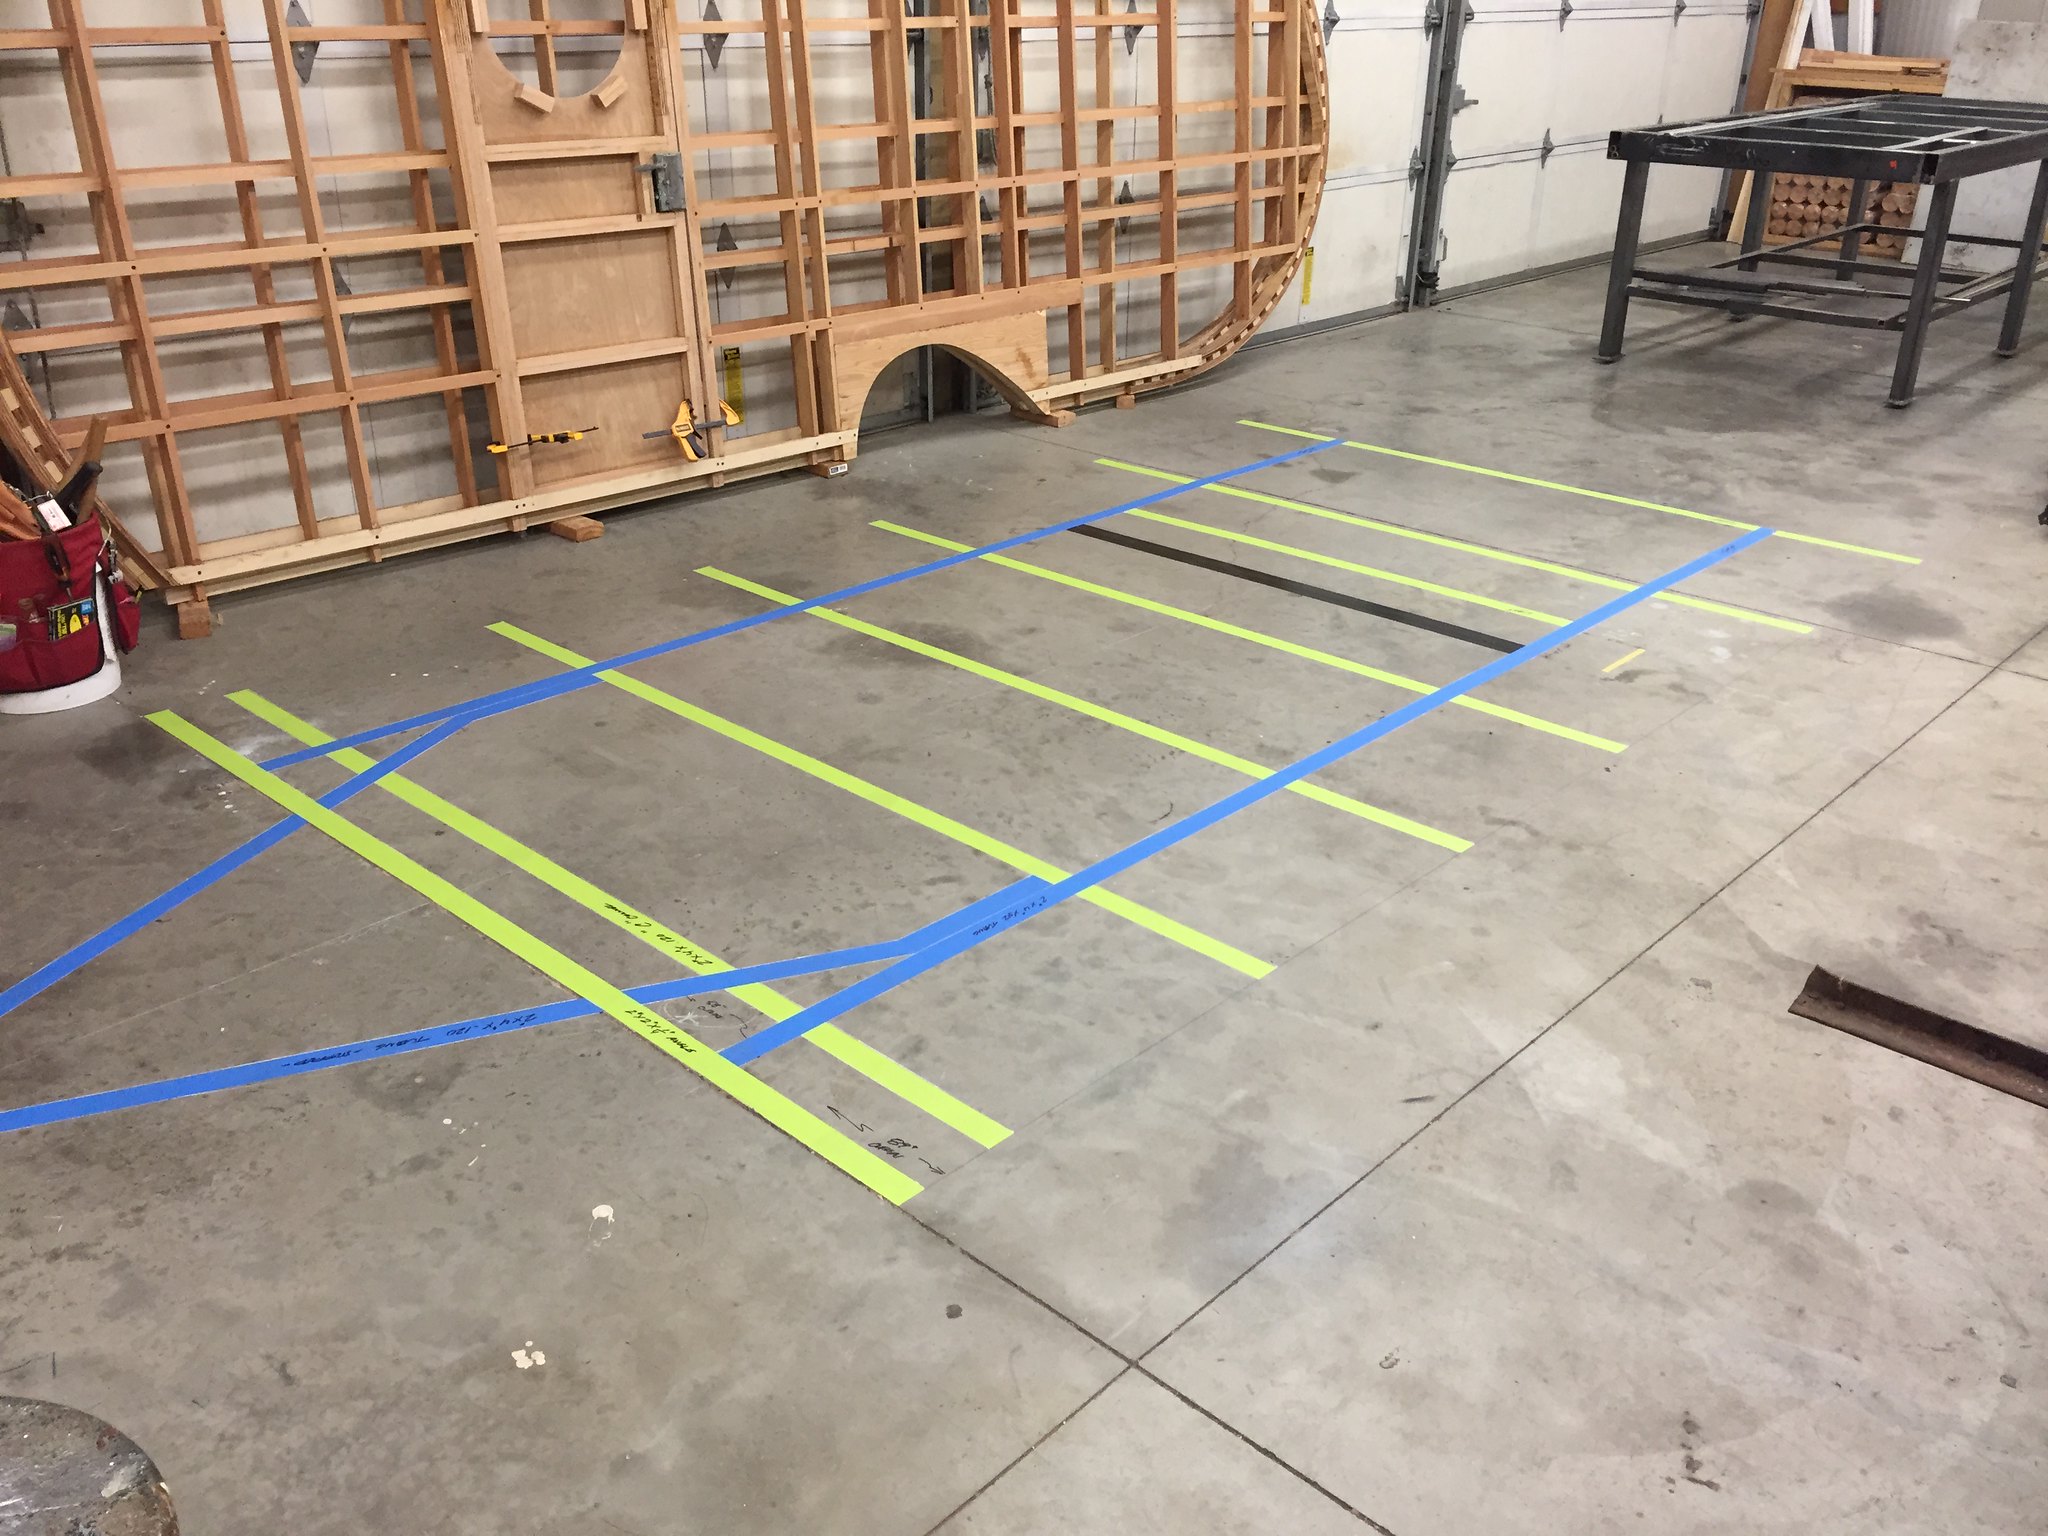
Using this method I could stand the walls on my not yet welded fame and make any adjustments I wished. One key change was widening the trailer by 6". The smaller Skipper and Navigator models are 7 ft wide, where the larger models are 8 ft. The new 7'-6" wide Skipper will be much roomier inside where it counts, and from the exterior it will look proportionally better. 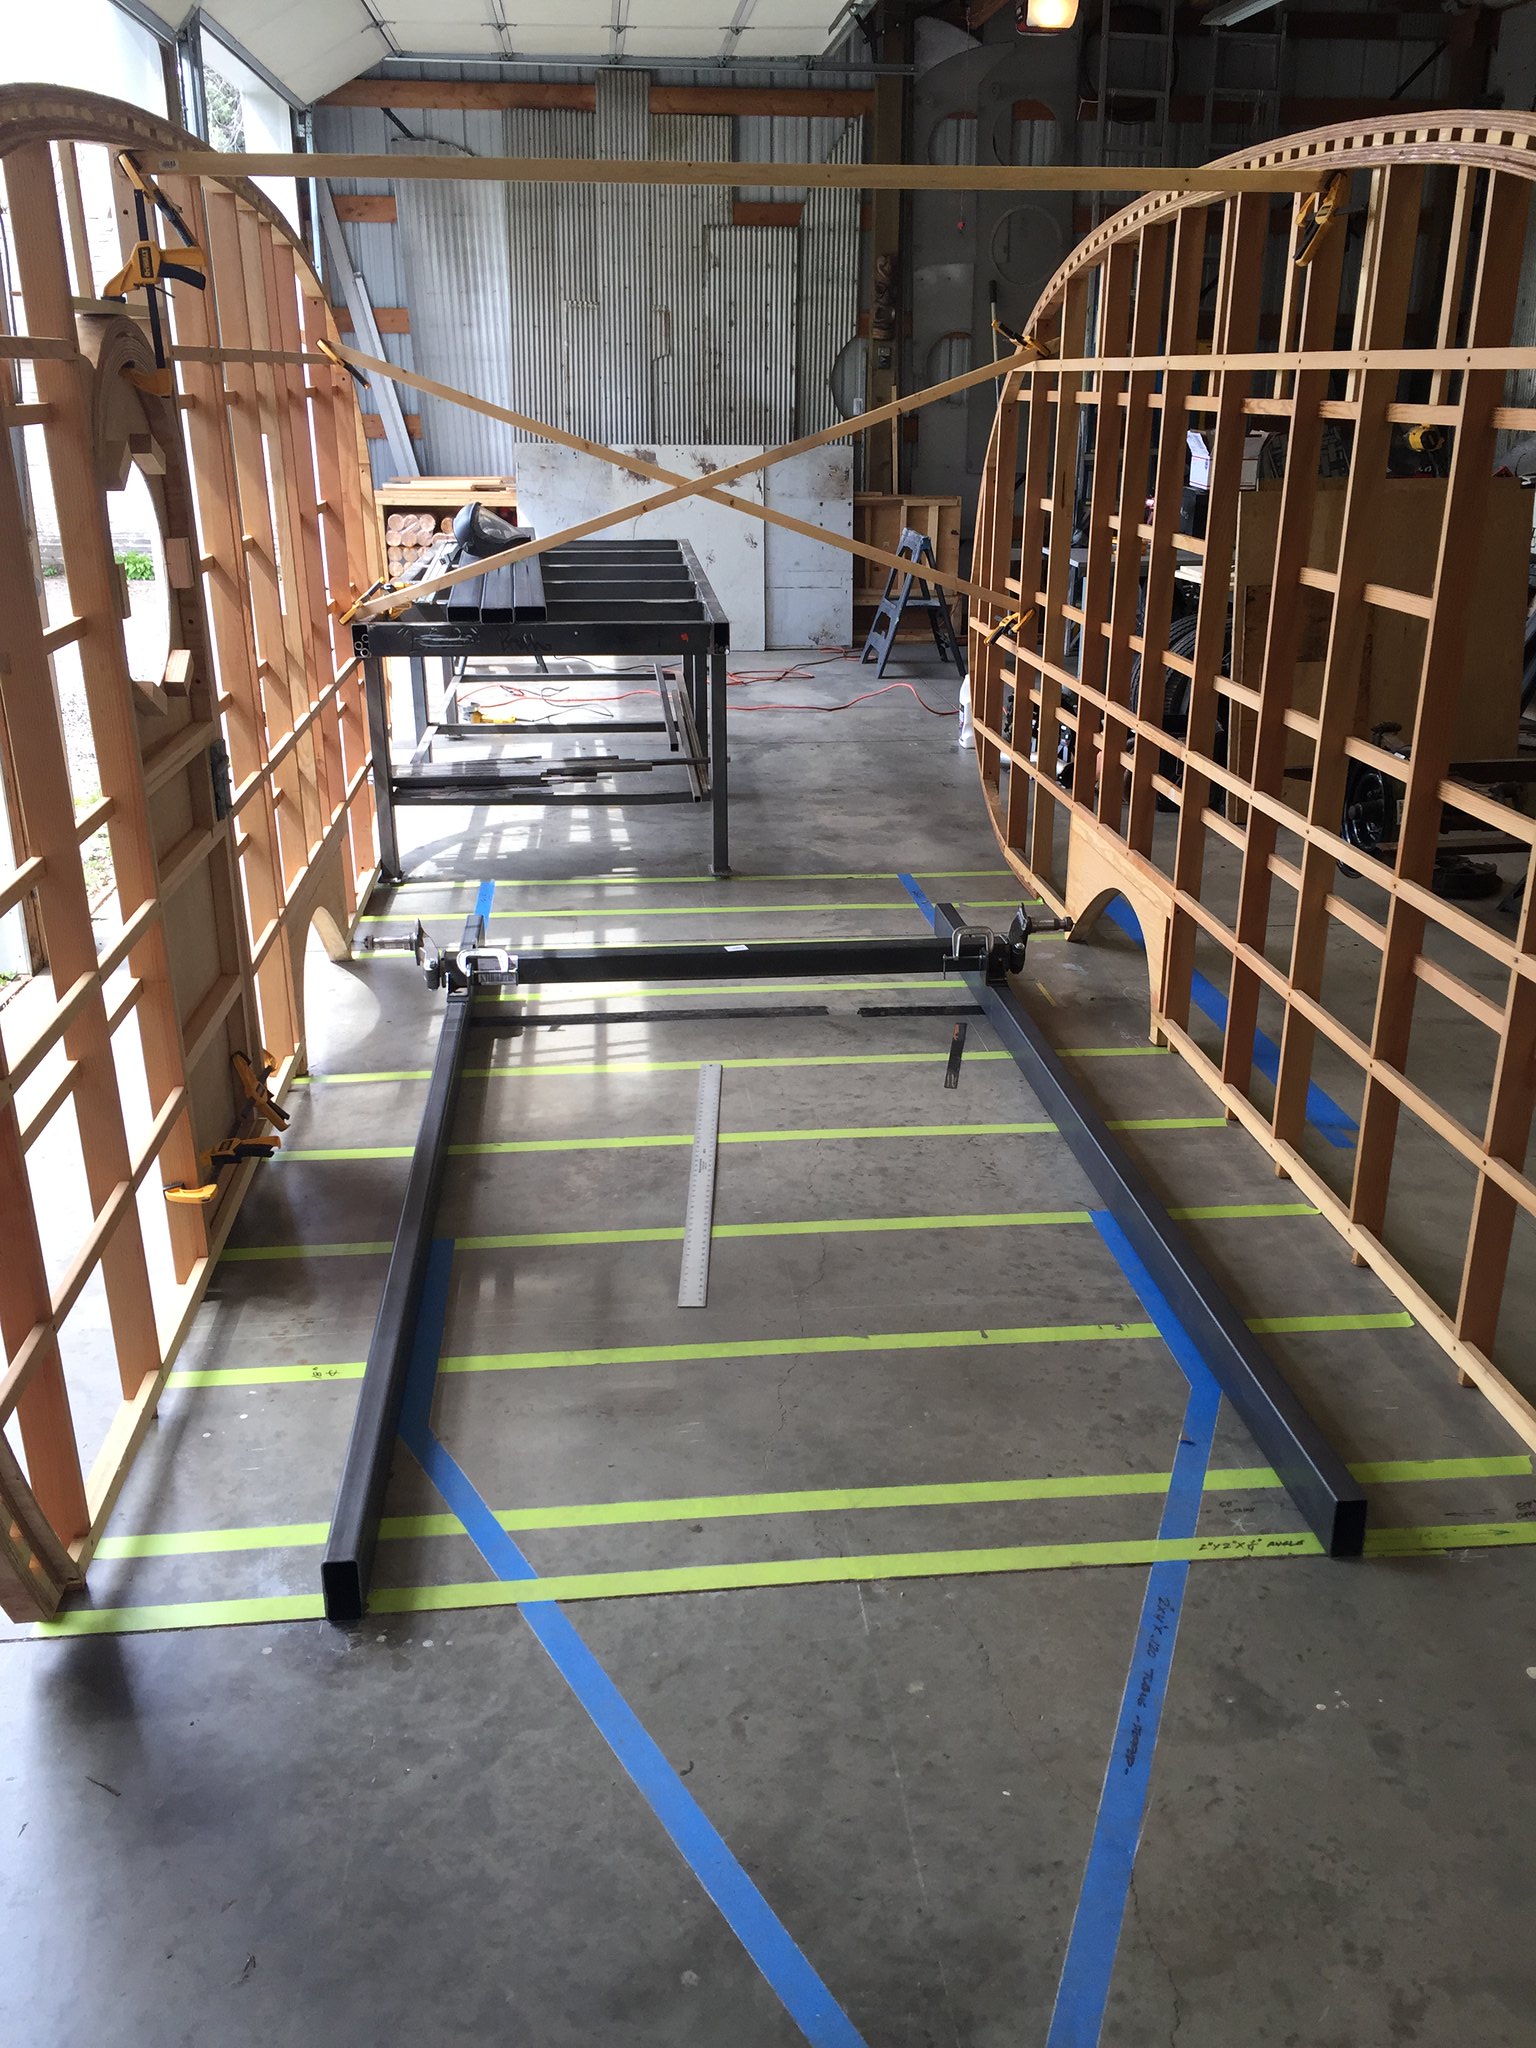
Time to get welding. I chose to use 4" 1/8" tubing and C channel that I had bent up. The tongue was constructed of 3/16". 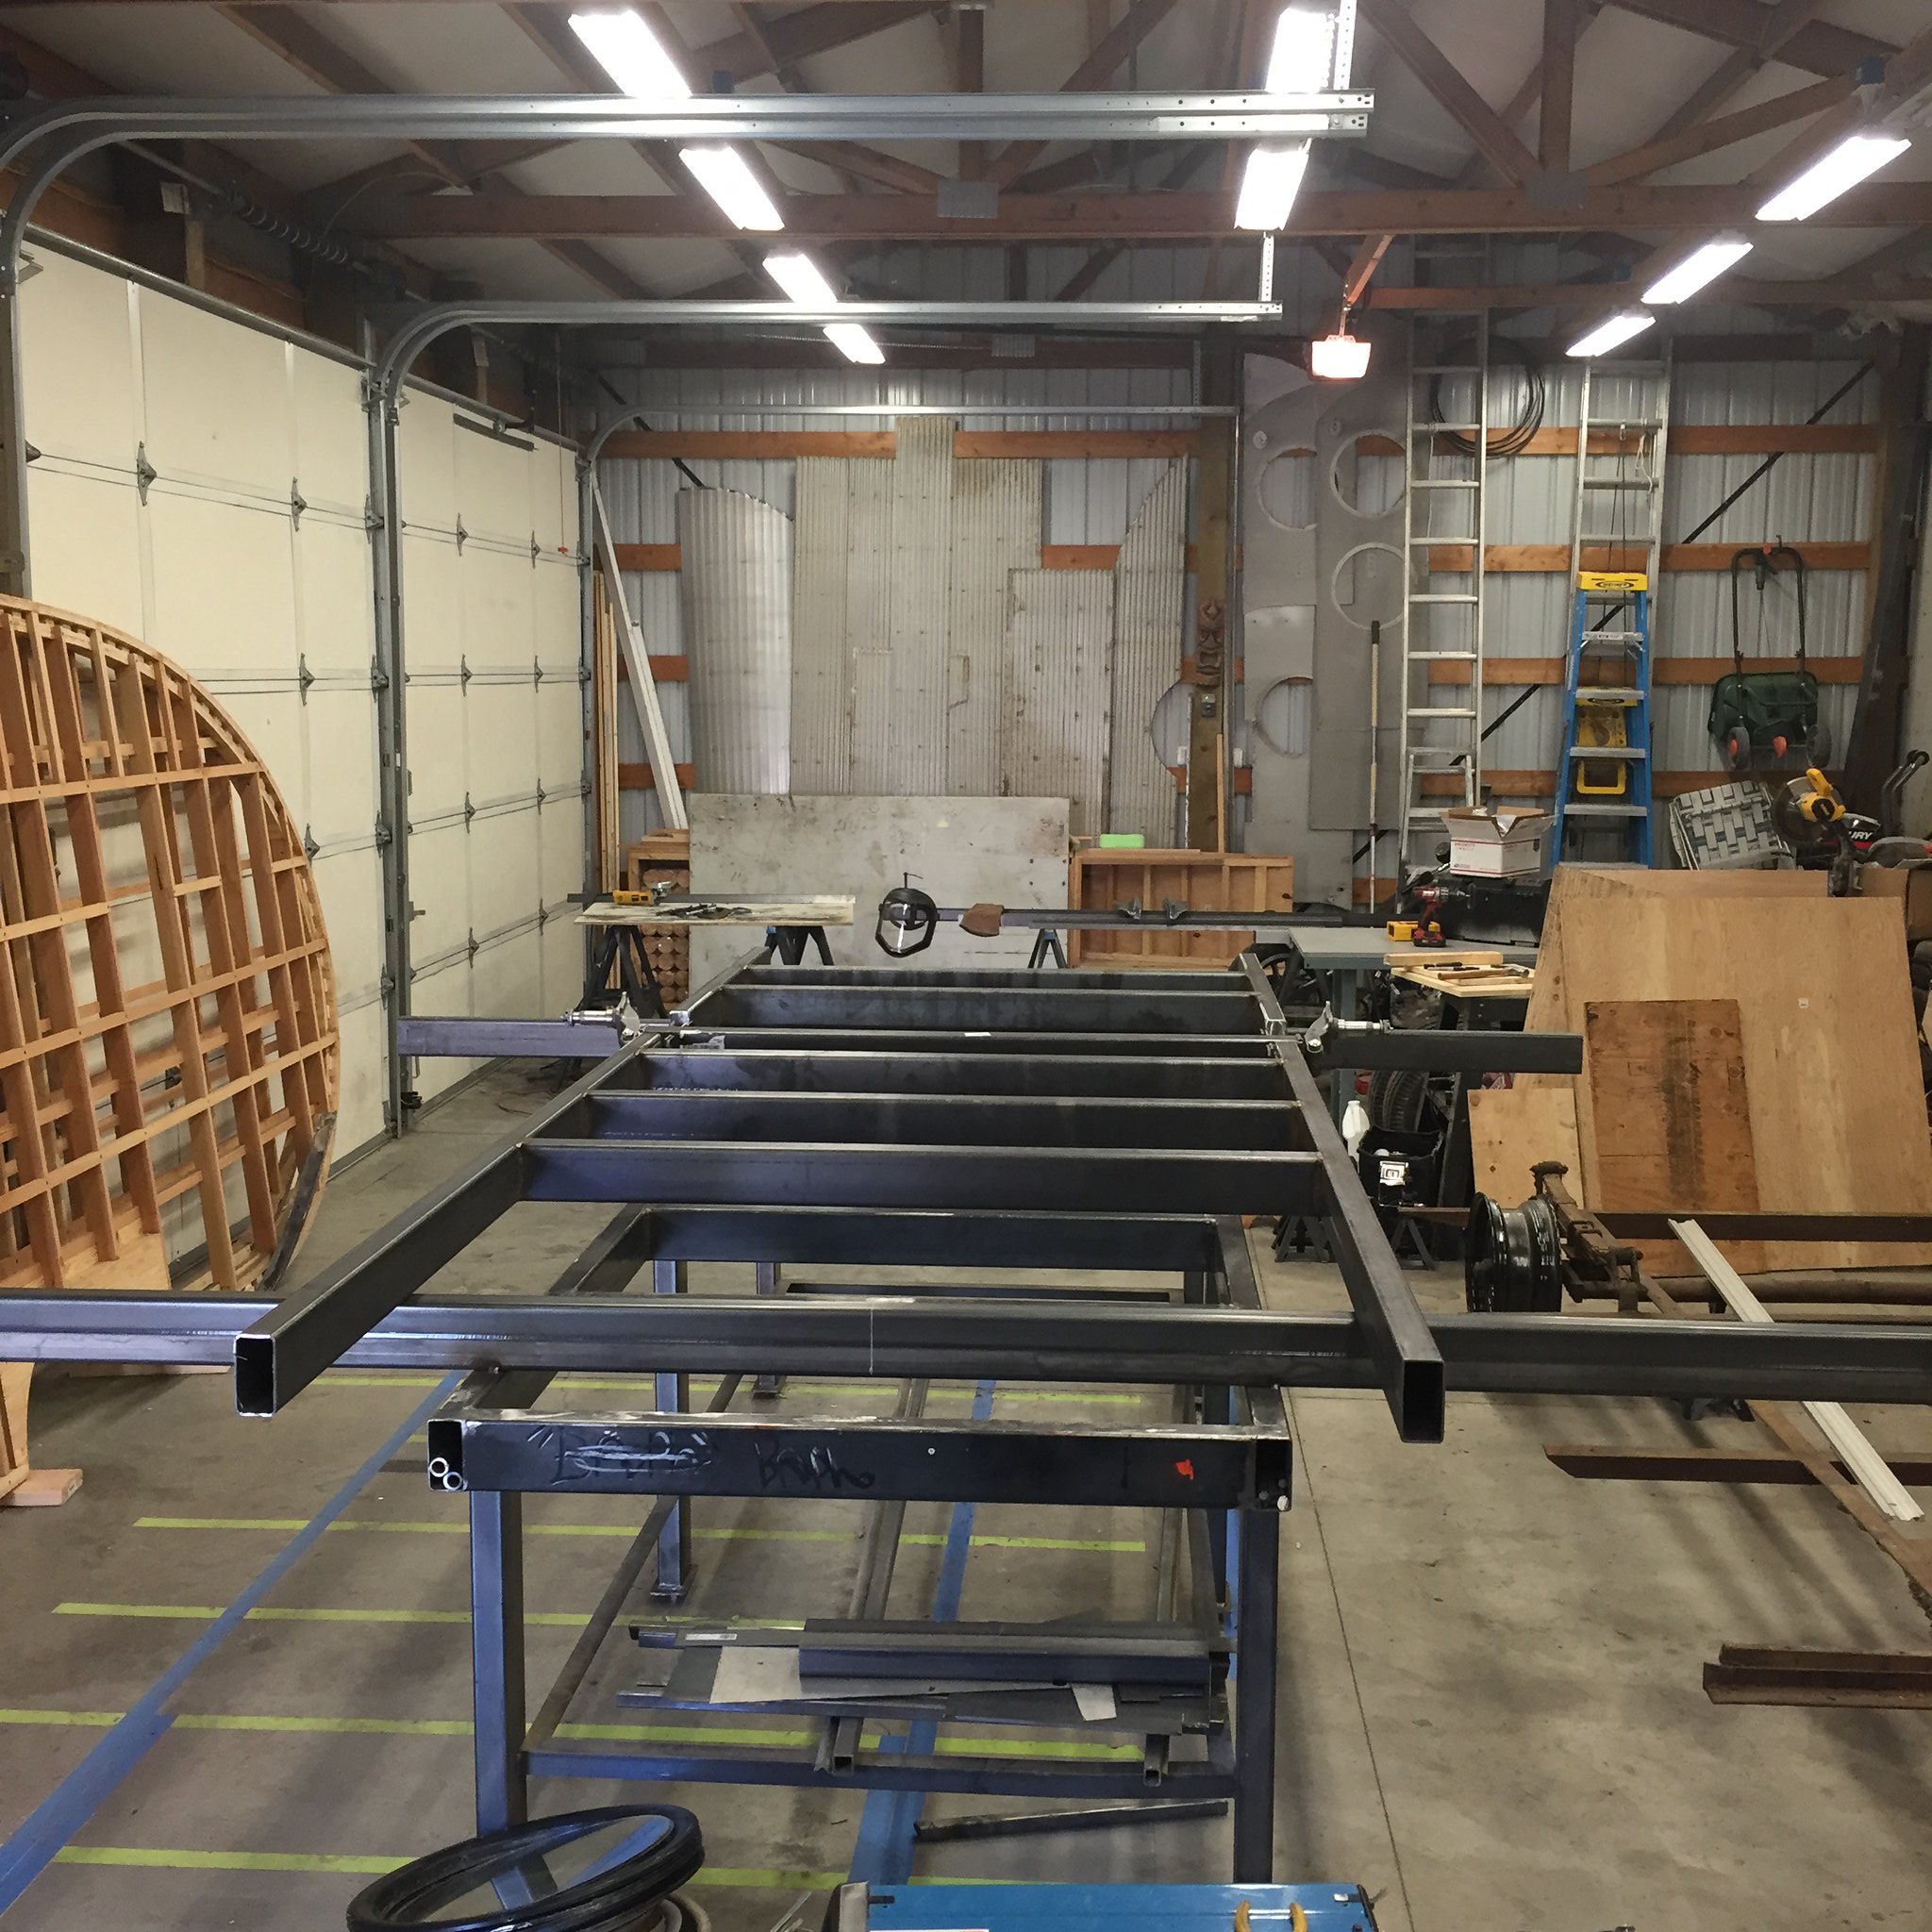
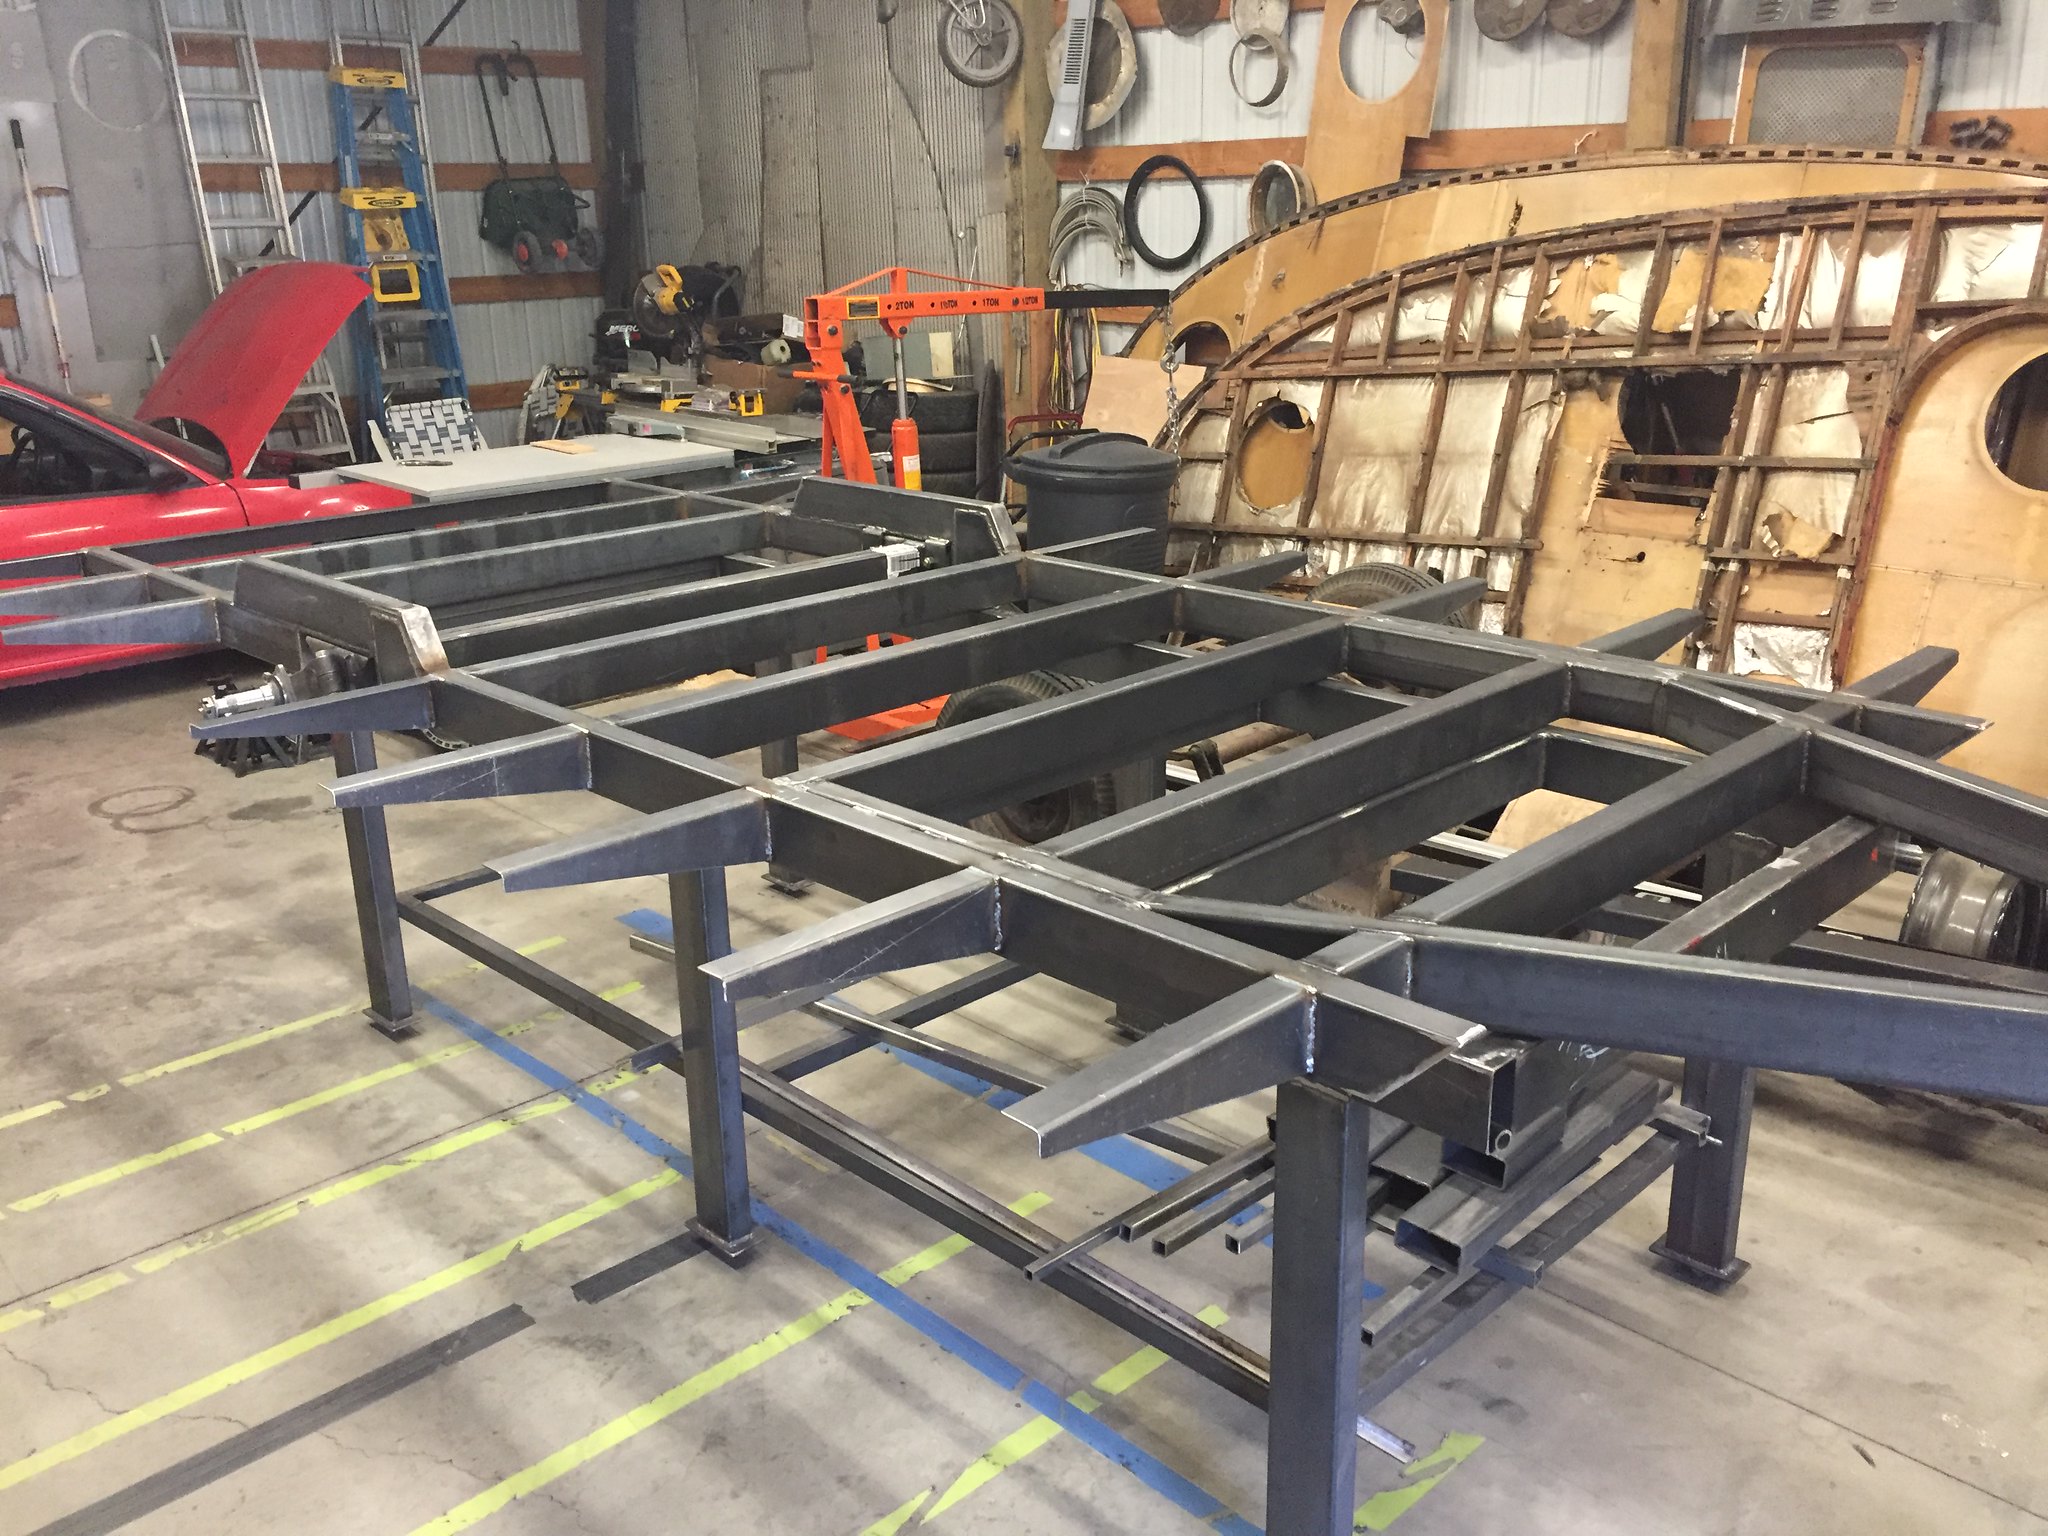
The next step was rebuilding the original jack and reworking the original propane tank holder. I want to keep as much of the original details as I can where possible. Metal rusts but it doesn't rot! 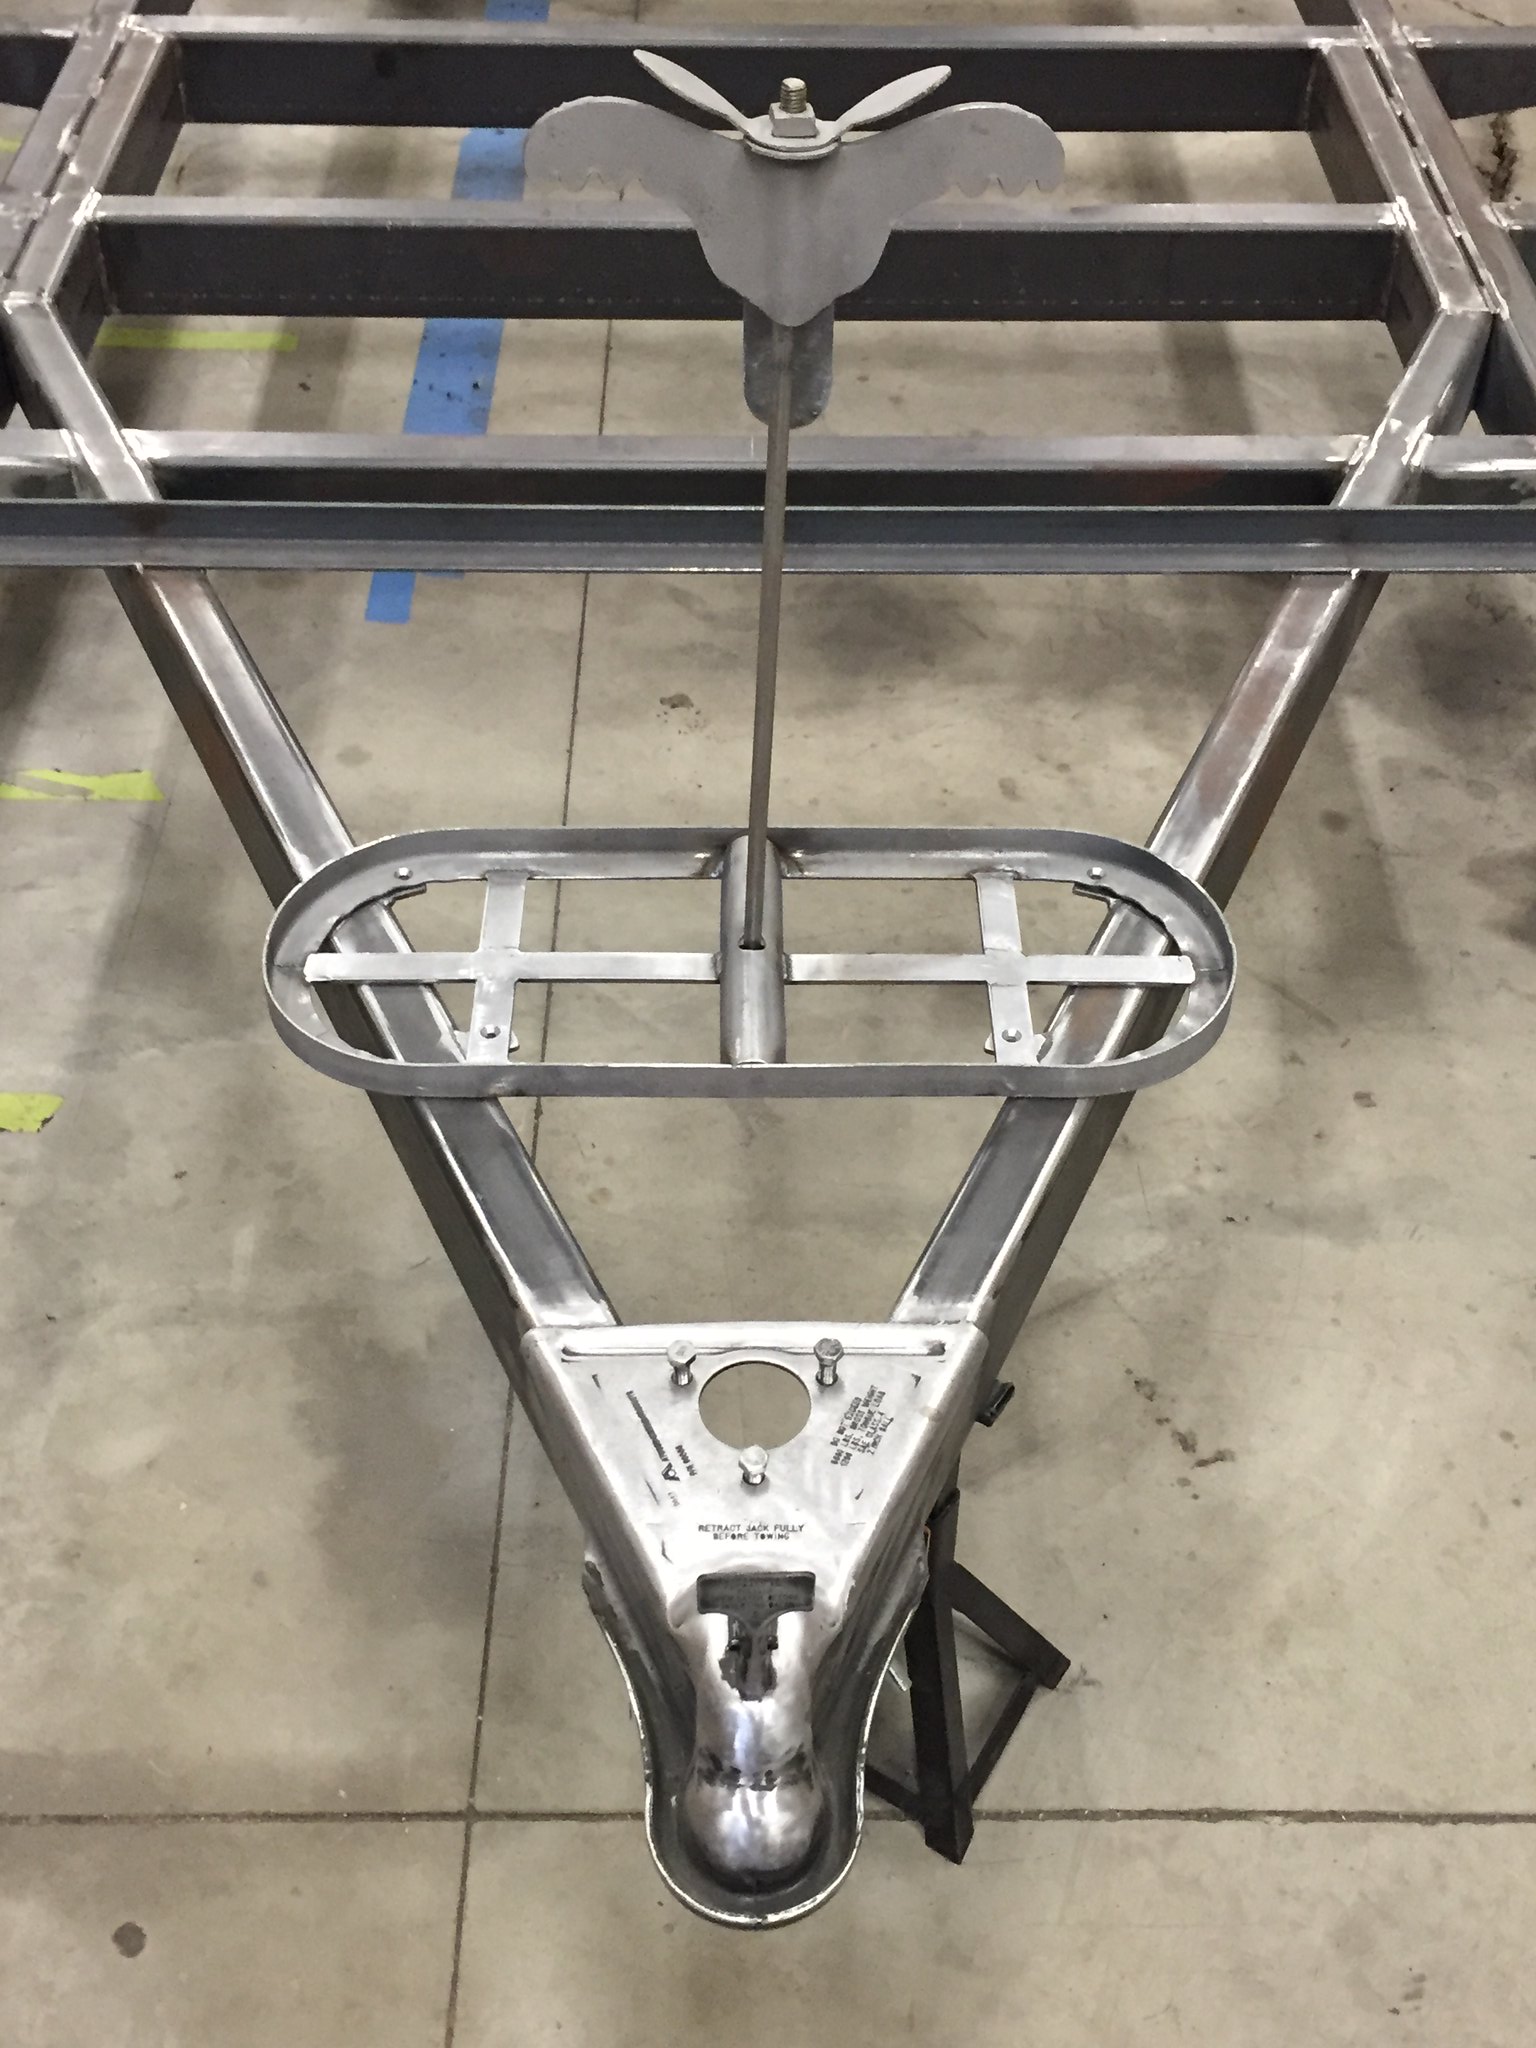 Time to shoot some paint. I choose to use an epoxy primer with black epoxy on the main body of the frame. And a silver PPG automotive basecoat / clearcoat for the tongue etc. 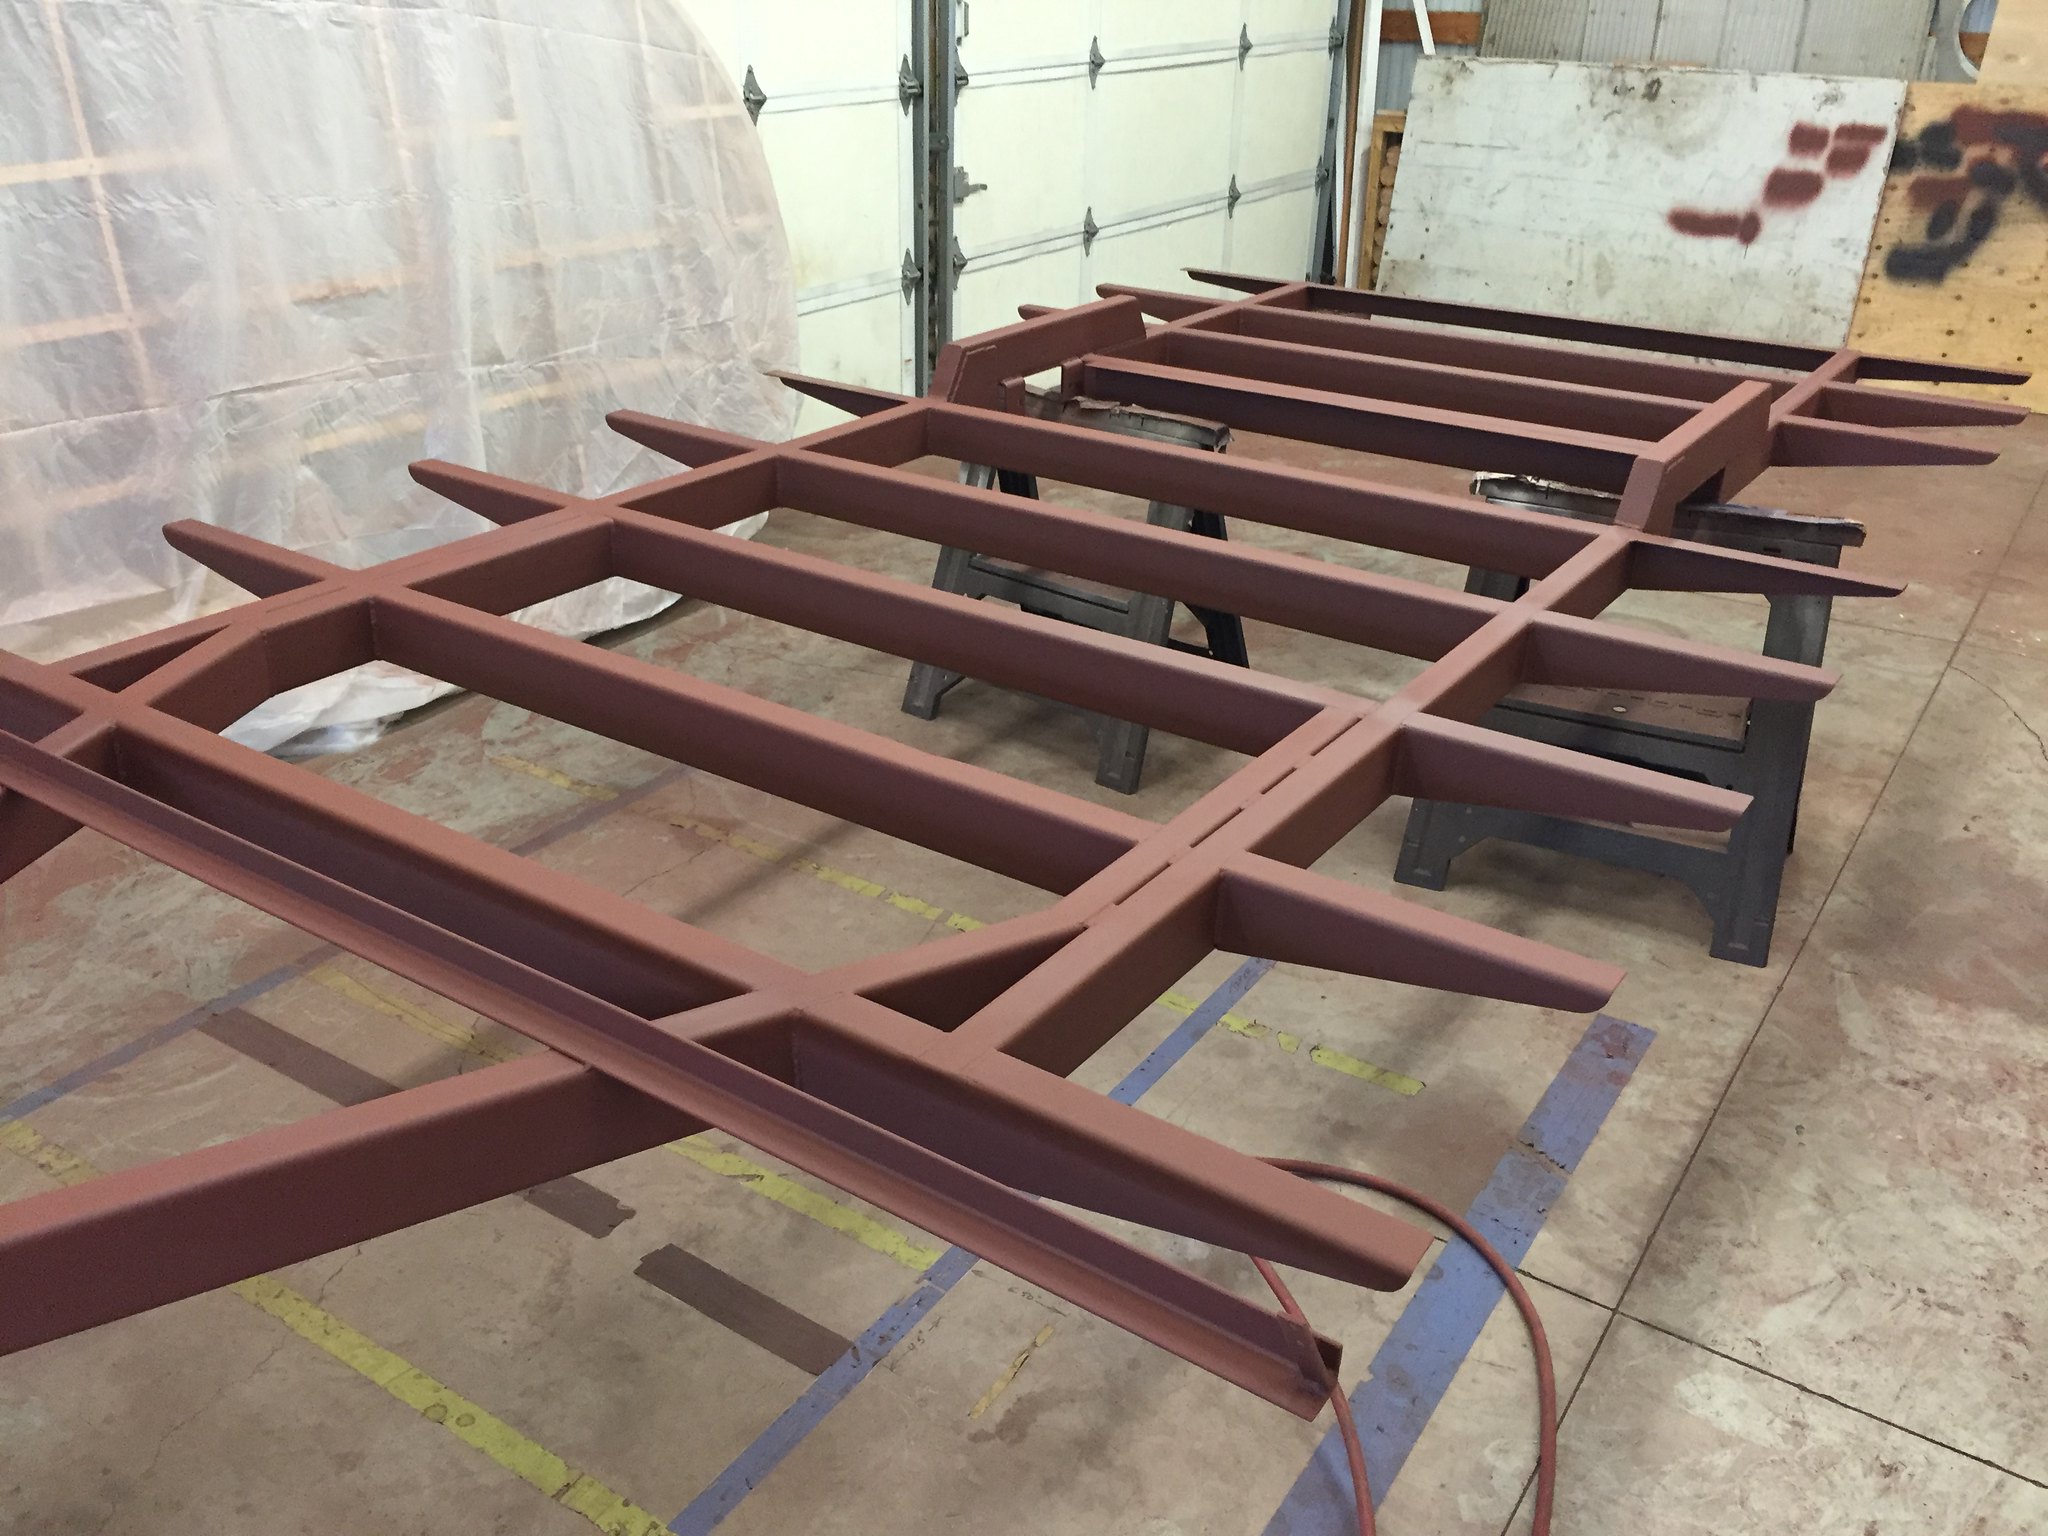
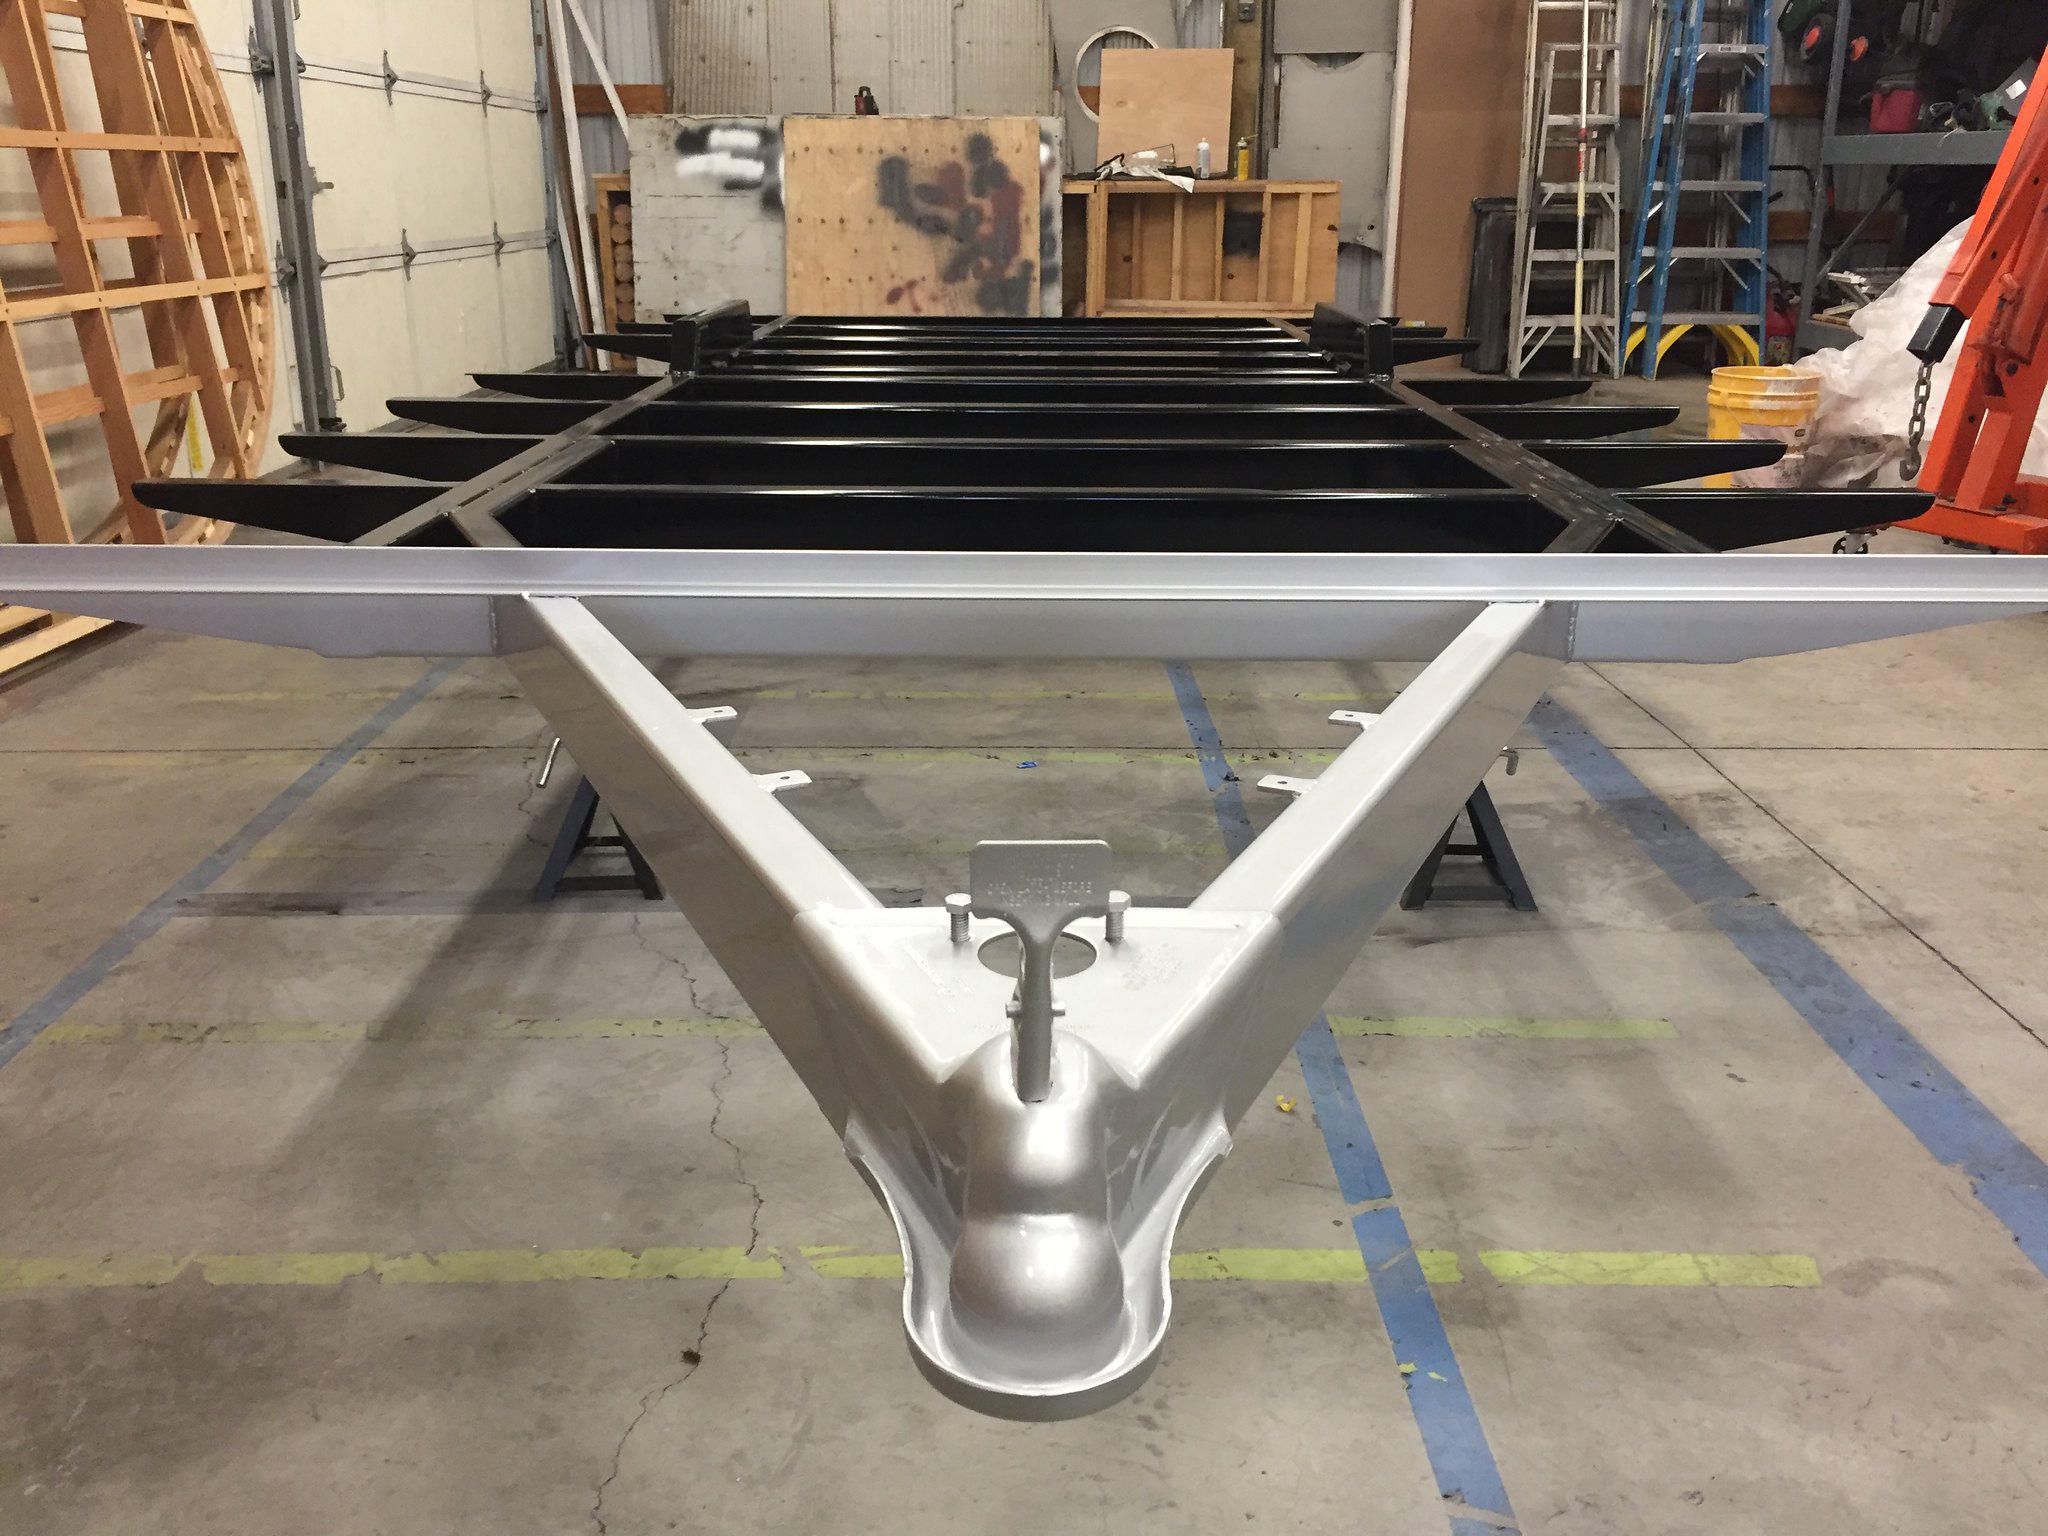
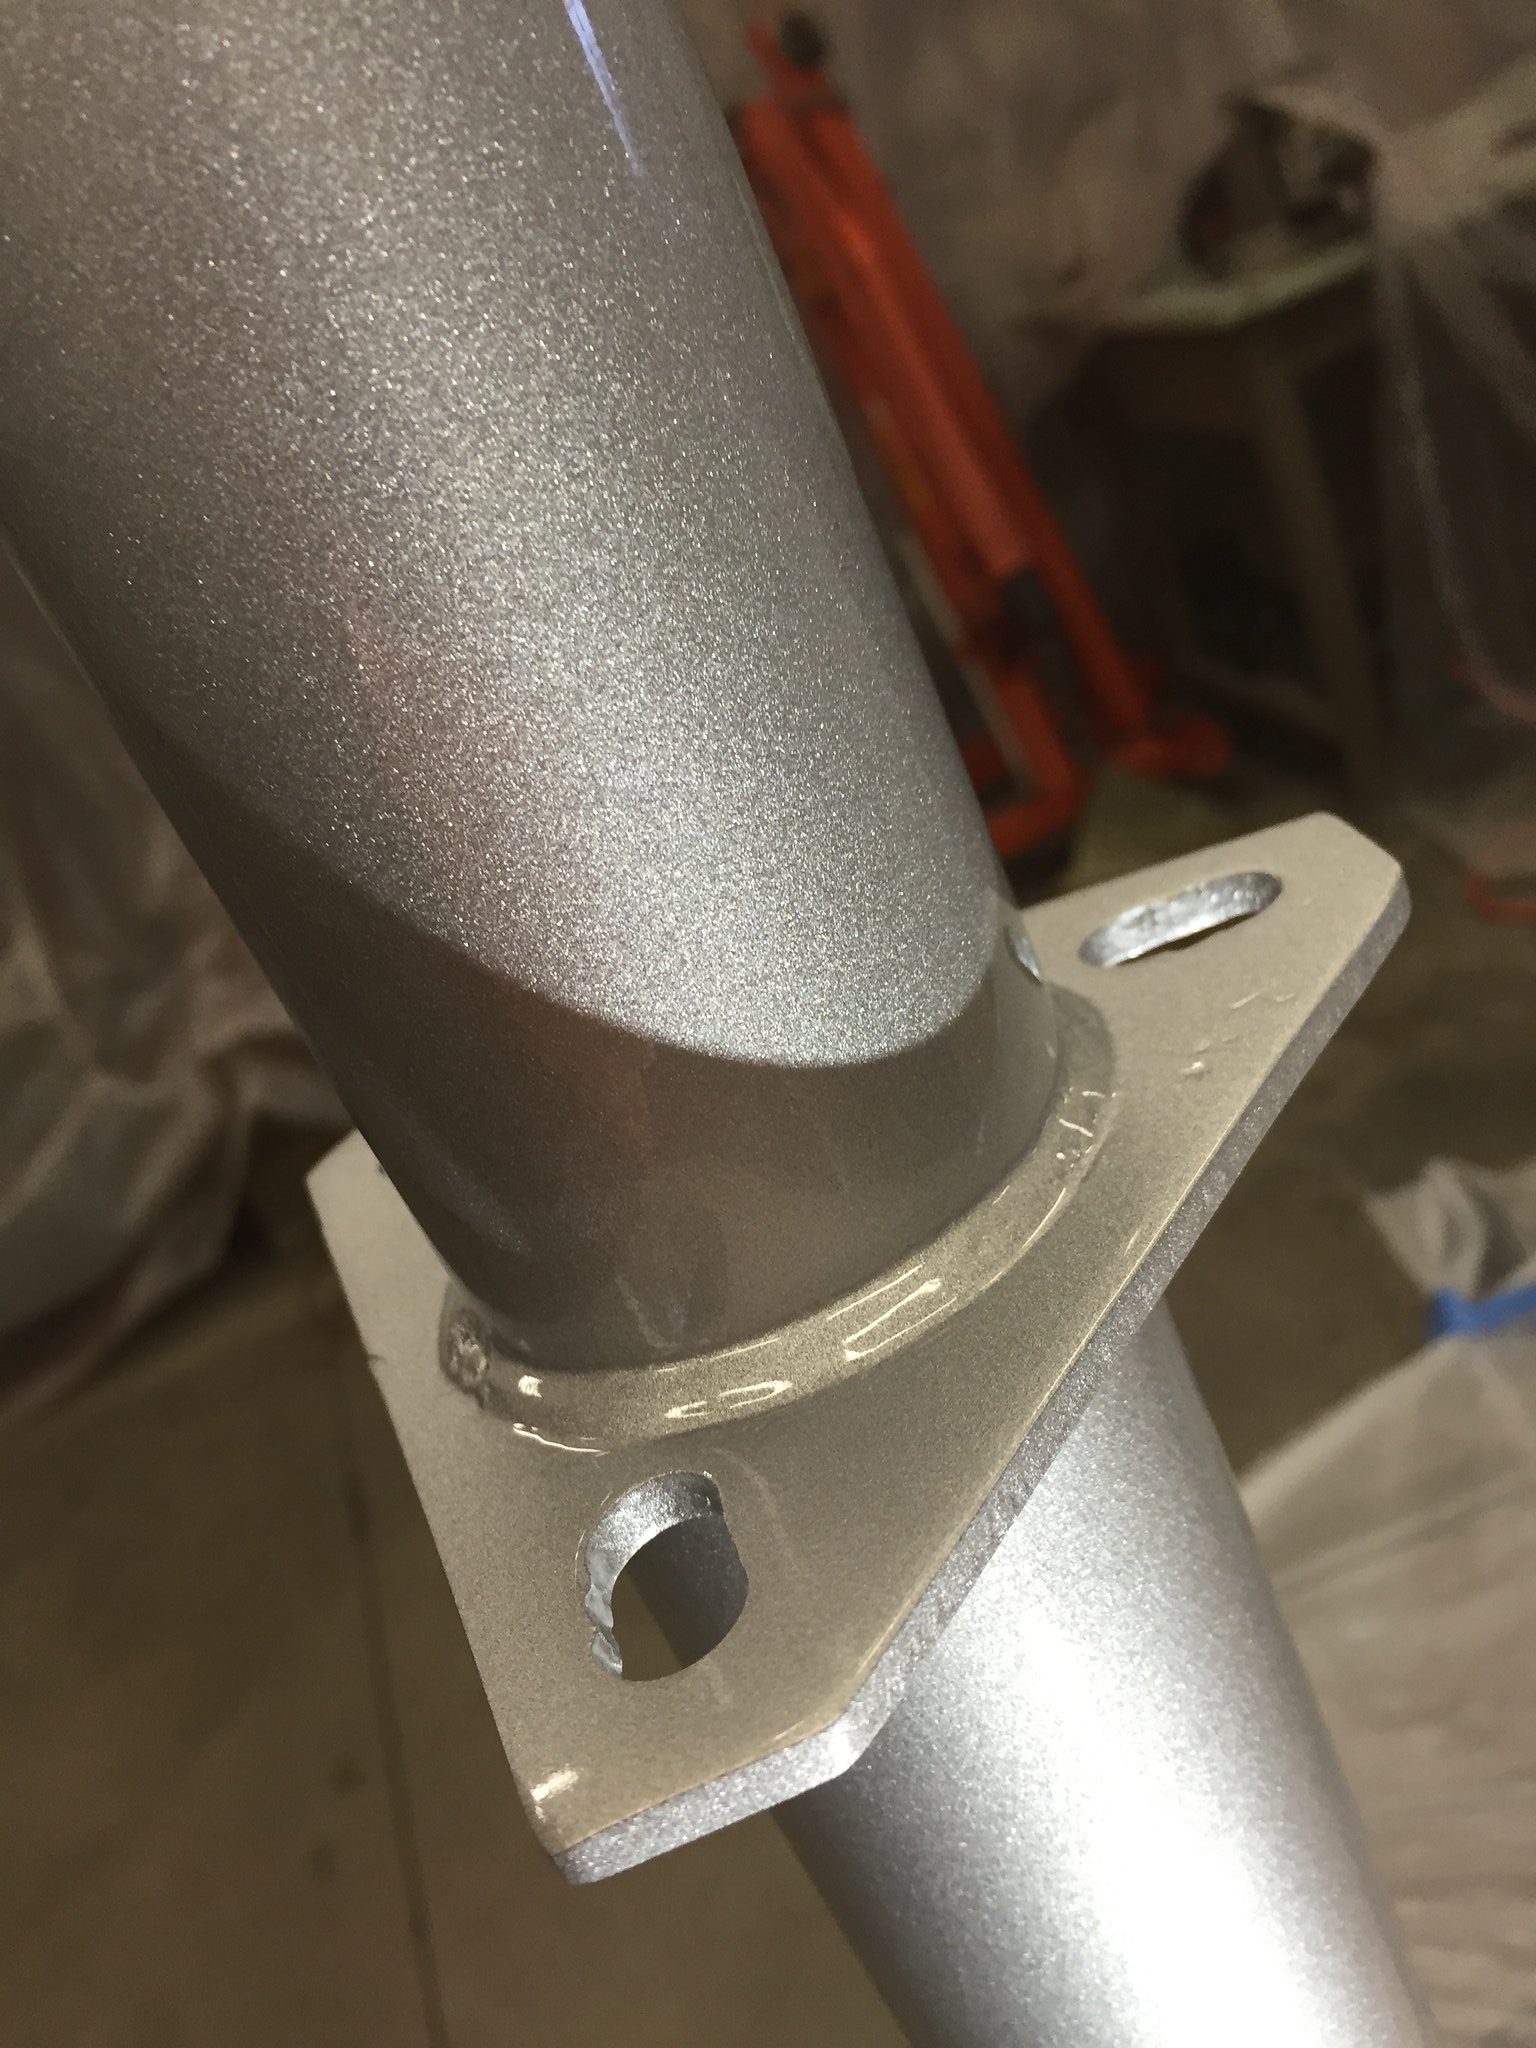
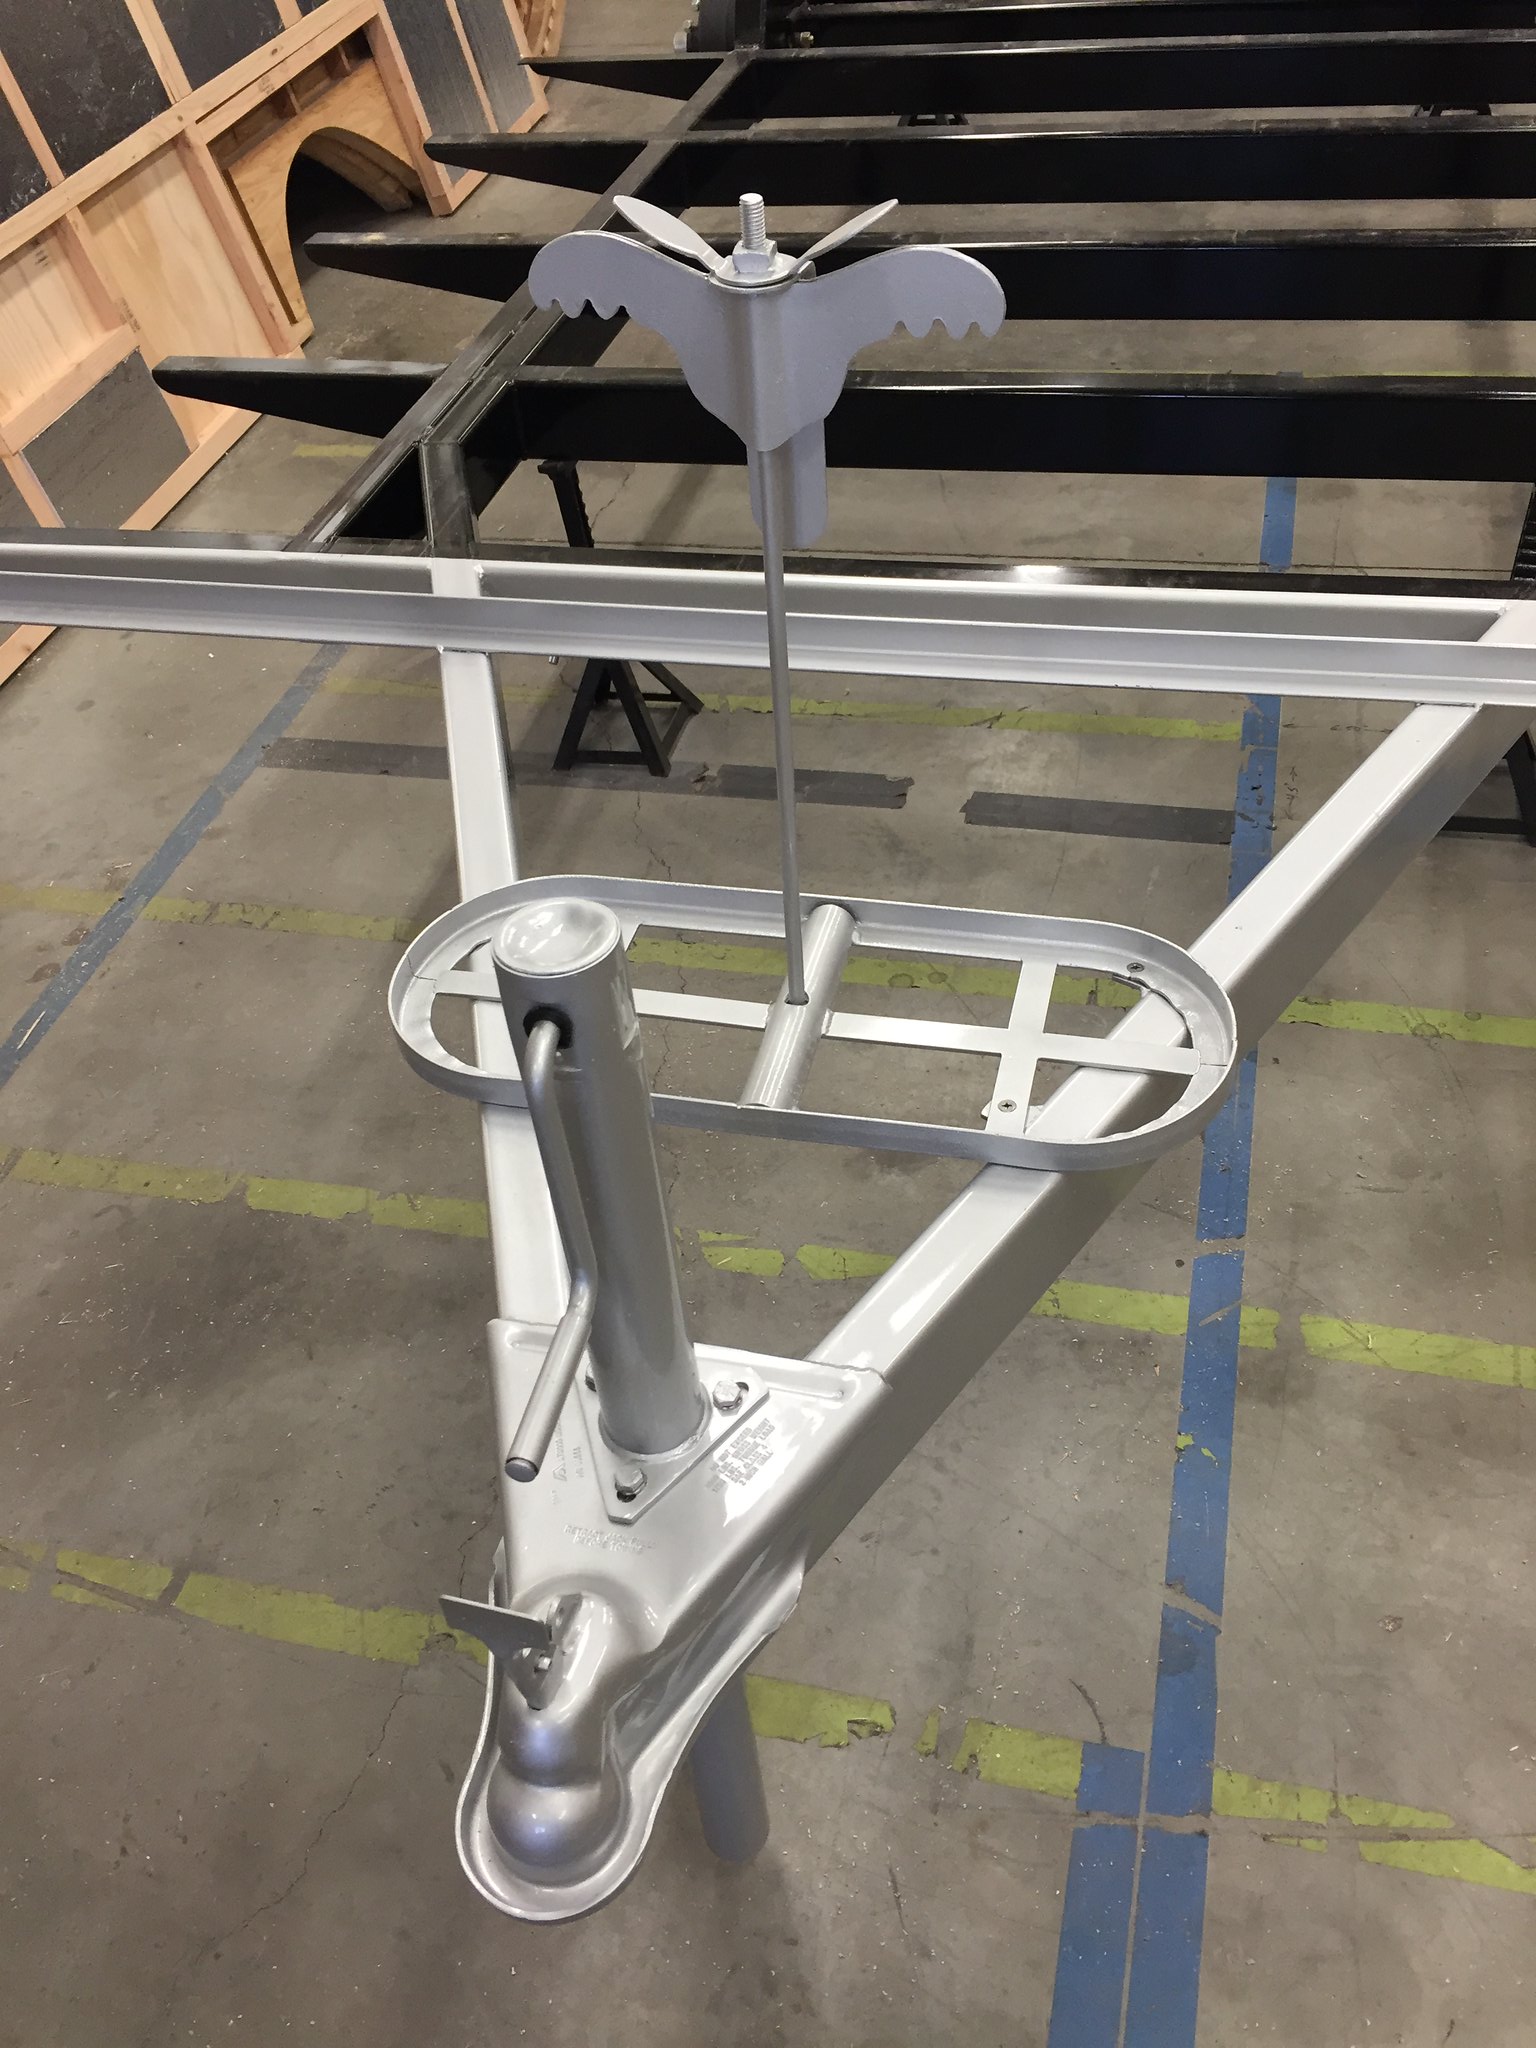 Next will come the sub floor. |
|
|
|
Post by vikx on Mar 4, 2018 20:43:44 GMT -8
Love your frame! Really impressive. The tongue is really special with the old style propane rack and wing nut, too. Important to keep those details.
I wasn't really able to understand what Airfloat did at the springs, looks like they had another pivot at the axle? And the springs were bracketed above. Interesting.
Looking forward to the subfloor.
|
|
bmxovich
Active Member
  
Posts: 187 
Likes: 69
1952 Airfloat Skipper
Currently Offline
|
Post by bmxovich on Mar 5, 2018 19:14:29 GMT -8
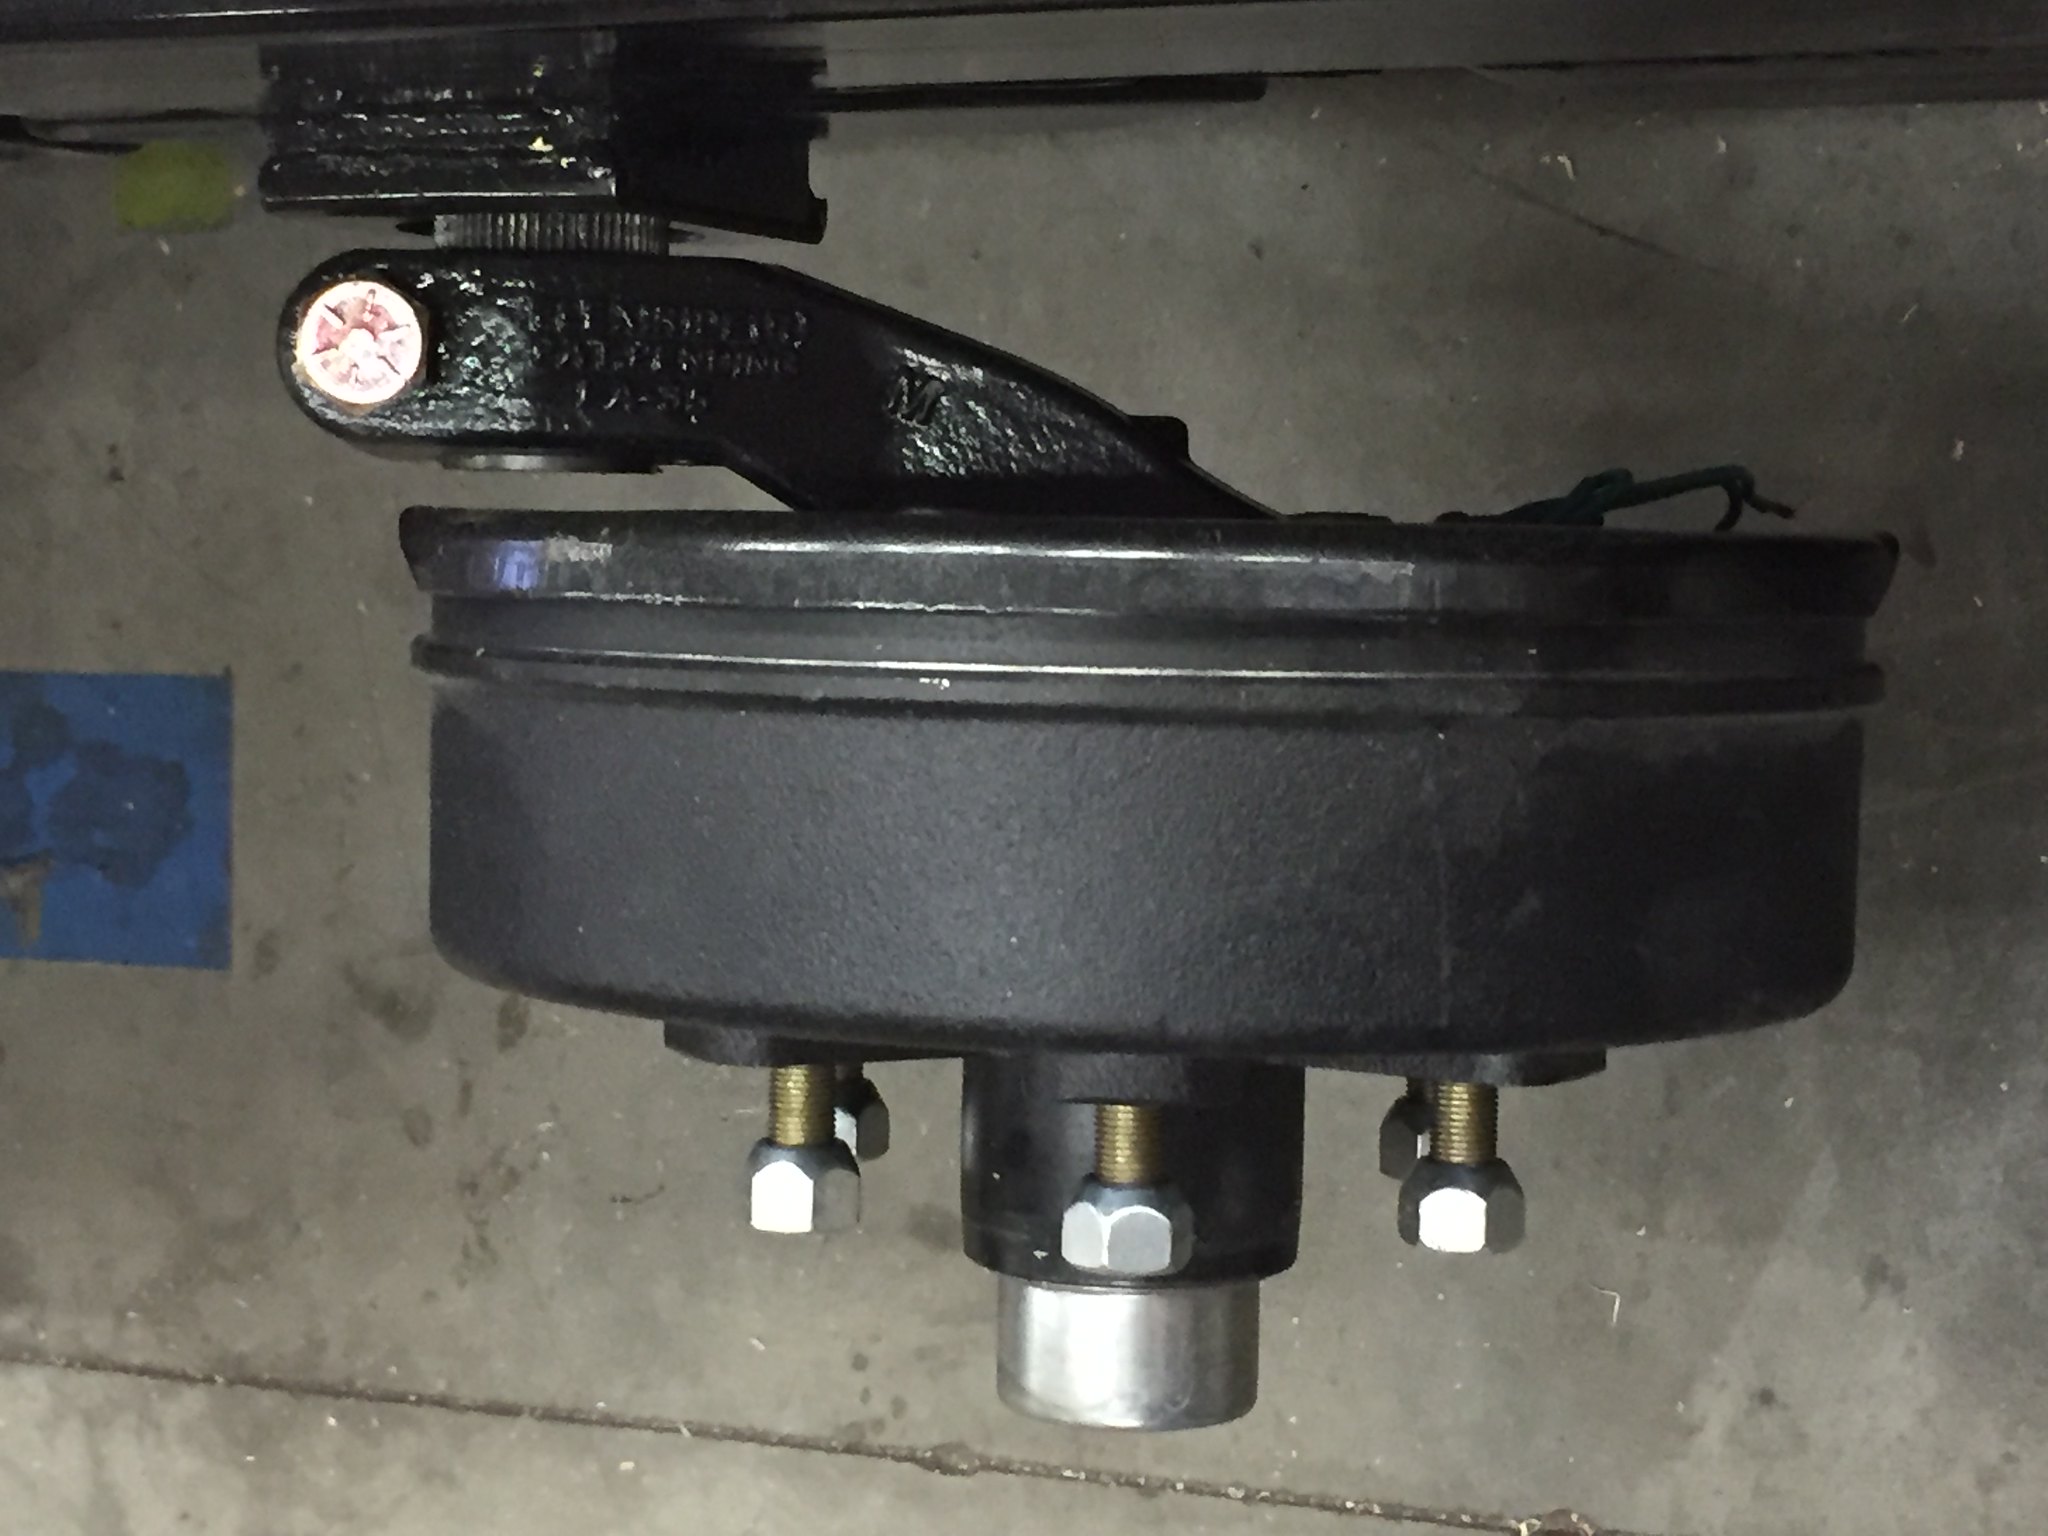
Love your frame! Really impressive. The tongue is really special with the old style propane rack and wing nut, too. Important to keep those details. I wasn't really able to understand what Airfloat did at the springs, looks like they had another pivot at the axle? And the springs were bracketed above. Interesting. Looking forward to the subfloor. Thanks. Aside from widening the frame 6", I lengthened it 32" in the rear from the rear spring shackle back to where the floor ends. And the tongue is 6" longer than stock to give it better clearance when backing up. It's not what I set out to do, deviating from the original so much. But I want this thing to last long after I'm gone. And until then it'll be seeing a lot of highway miles. The stock axle / suspension is interesting. Very simple in design and allows the trailer to ride lower then with a typical lief spring setup. What you see is what you get. The spindle and trailing arm pivot in the frame axle tube. Nothing special there just a loose slip fit. The spring mounts were cracked at the frame as well as the axle tube welds. I wasn't thrilled with the idea of using it since like I said we plan to do a lot of long trips with it. Finding a replacement spindle etc in the middle of nowhere isn't something I want to do. So after lots of research I settled on the Flexiride axle. It keeps the same lower profile as the stock suspension, has adjustable trailing arms for ride height, and the replacement parts are easily sourced. I custom ordered one in the length and capacity I needed. Cost was right around $850.00 with brakes shipped to my door. I stepped the frame up where the axle mounts to mimic the location of the stock axle tube that pierced the frame rails. The portion of the frame that is stepped fits perfectly in the old location of the lief spring within the wheel tubs. It wasn't by accident. I scratched my head plenty while sorting it all out. Here's a pic of the wonderful wheel well design that made this install possible. 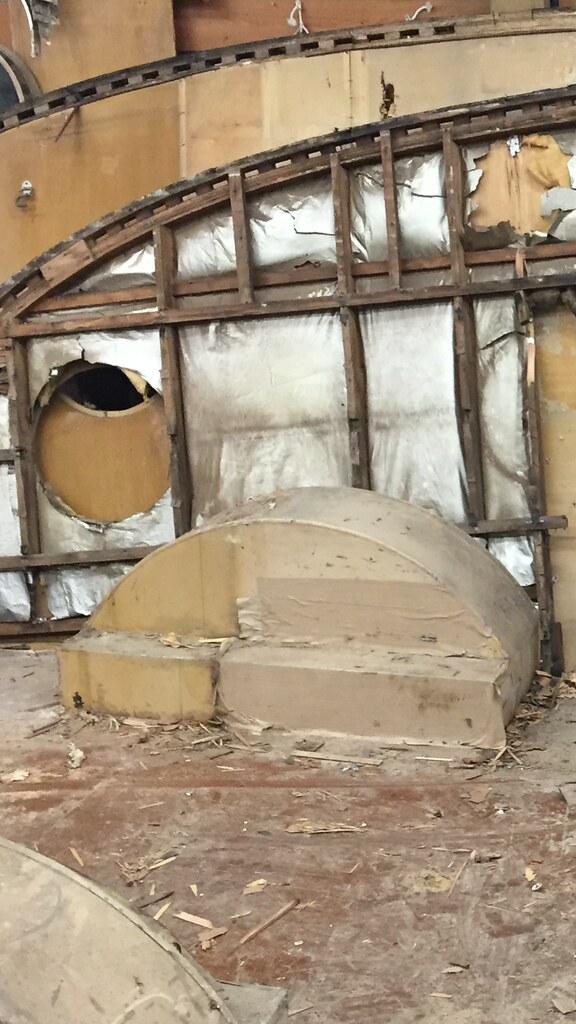
And here's how the new Flexiride axle looks in the frame. 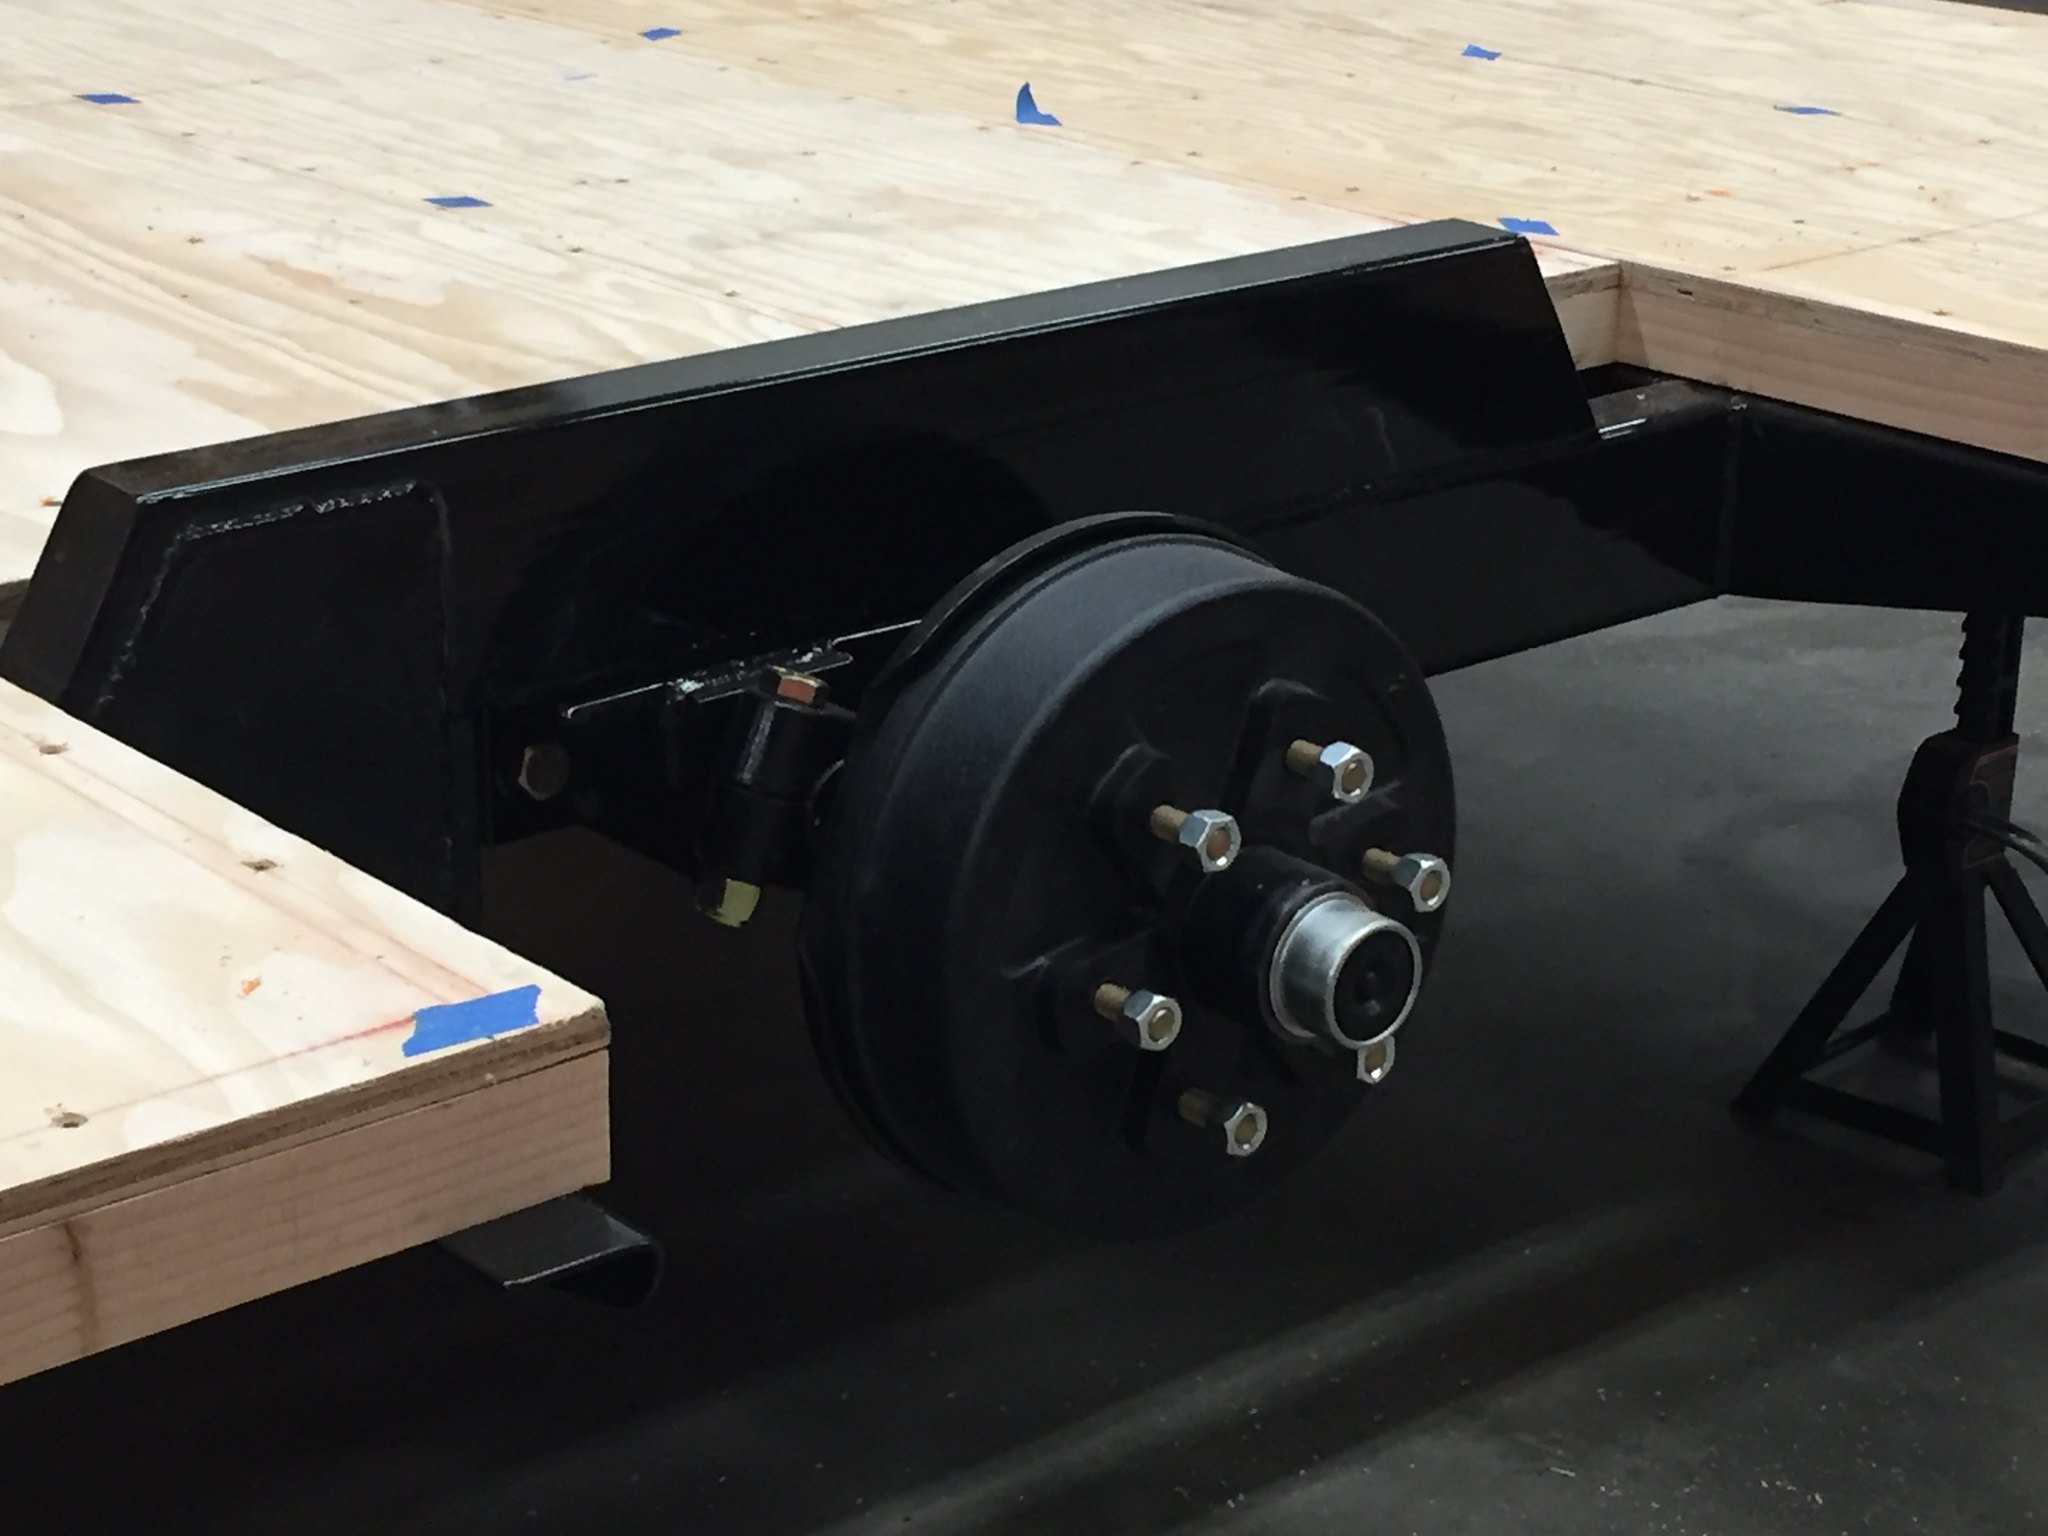
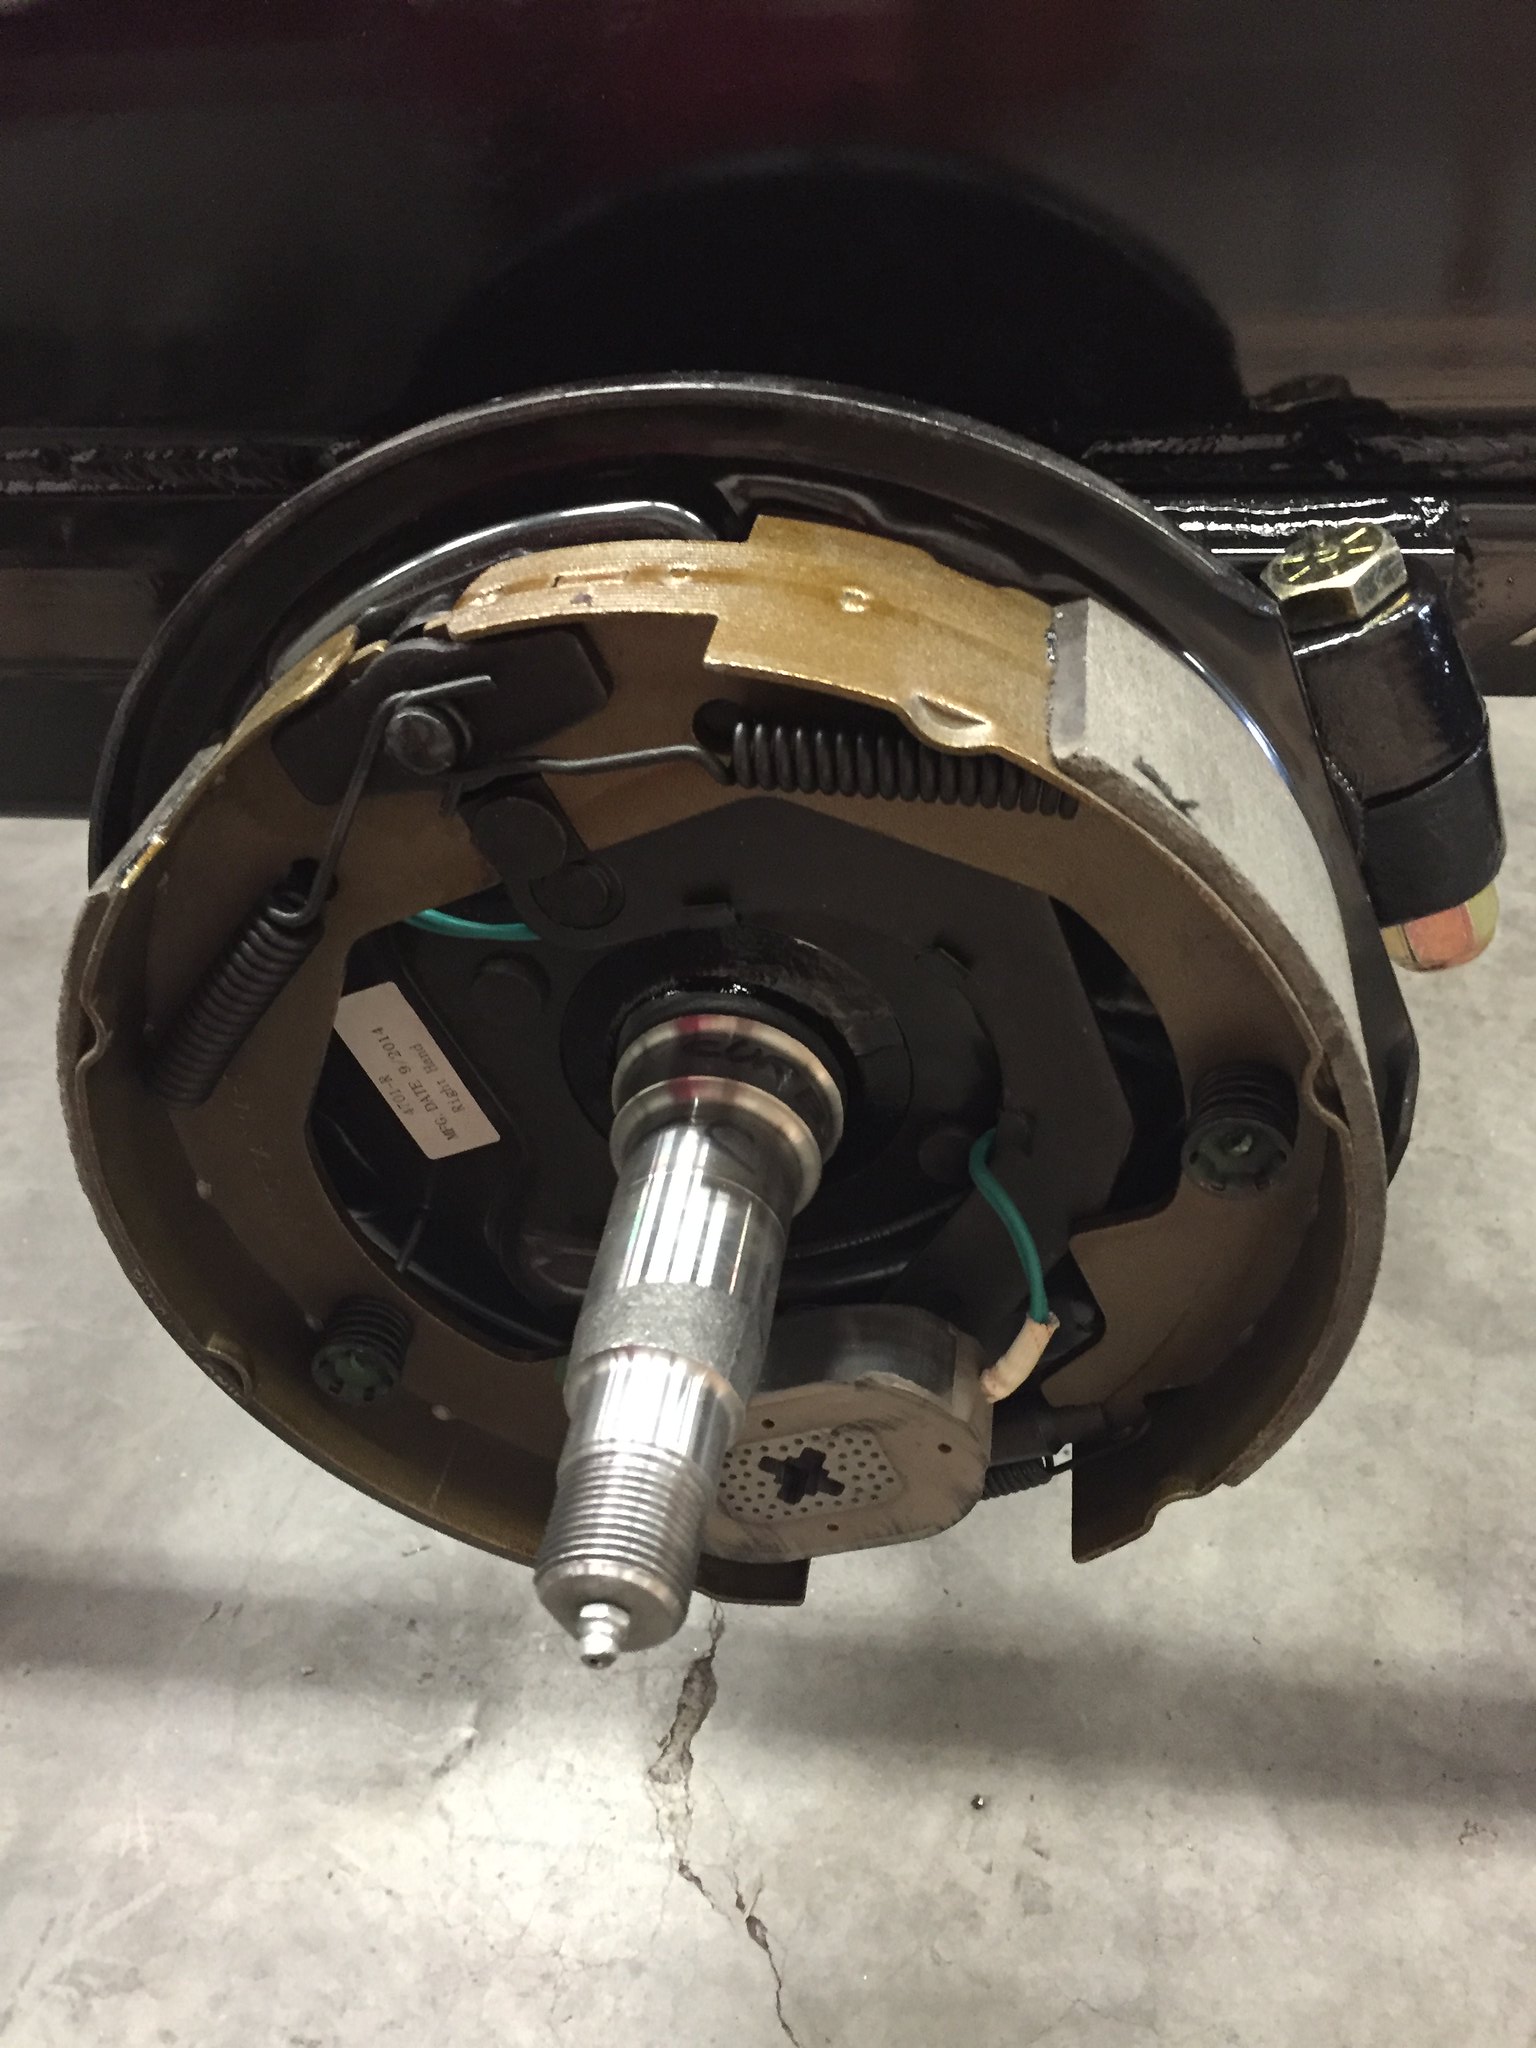
|
|
mobiltec
5K Member
     I make mistakes so you don't have to...
Posts: 9,888 
Likes: 3,810
1954 Jewel In Progress...
Currently Offline
|
Post by mobiltec on Mar 5, 2018 19:34:37 GMT -8
I never noticed this axle on an Airfloat before. I've been under a few too LOL... That is the weirdest suspension system I've ever seen. Was this peculiar to Airfloats?
|
|
bmxovich
Active Member
  
Posts: 187 
Likes: 69
1952 Airfloat Skipper
Currently Offline
|
Post by bmxovich on Mar 5, 2018 19:43:48 GMT -8
I never noticed this axle on an Airfloat before. I've been under a few too LOL... That is the weirdest suspension system I've ever seen. Was this peculiar to Airfloats? I haven't seen it on another trailer but I haven't crawled under many of them. They did have a patent on the design.......... " Knee Action Suspension". And I've seen the same setup on the larger Airfloats. The spindle was huge! On to the subfloor. Nothing special here, 2X2's with a 5/8" ply deck, 3mm ply belly and 1.5" foam insulation. I paid a little attention to running the stringers under the front edge of the cabinets where it was practical for support. 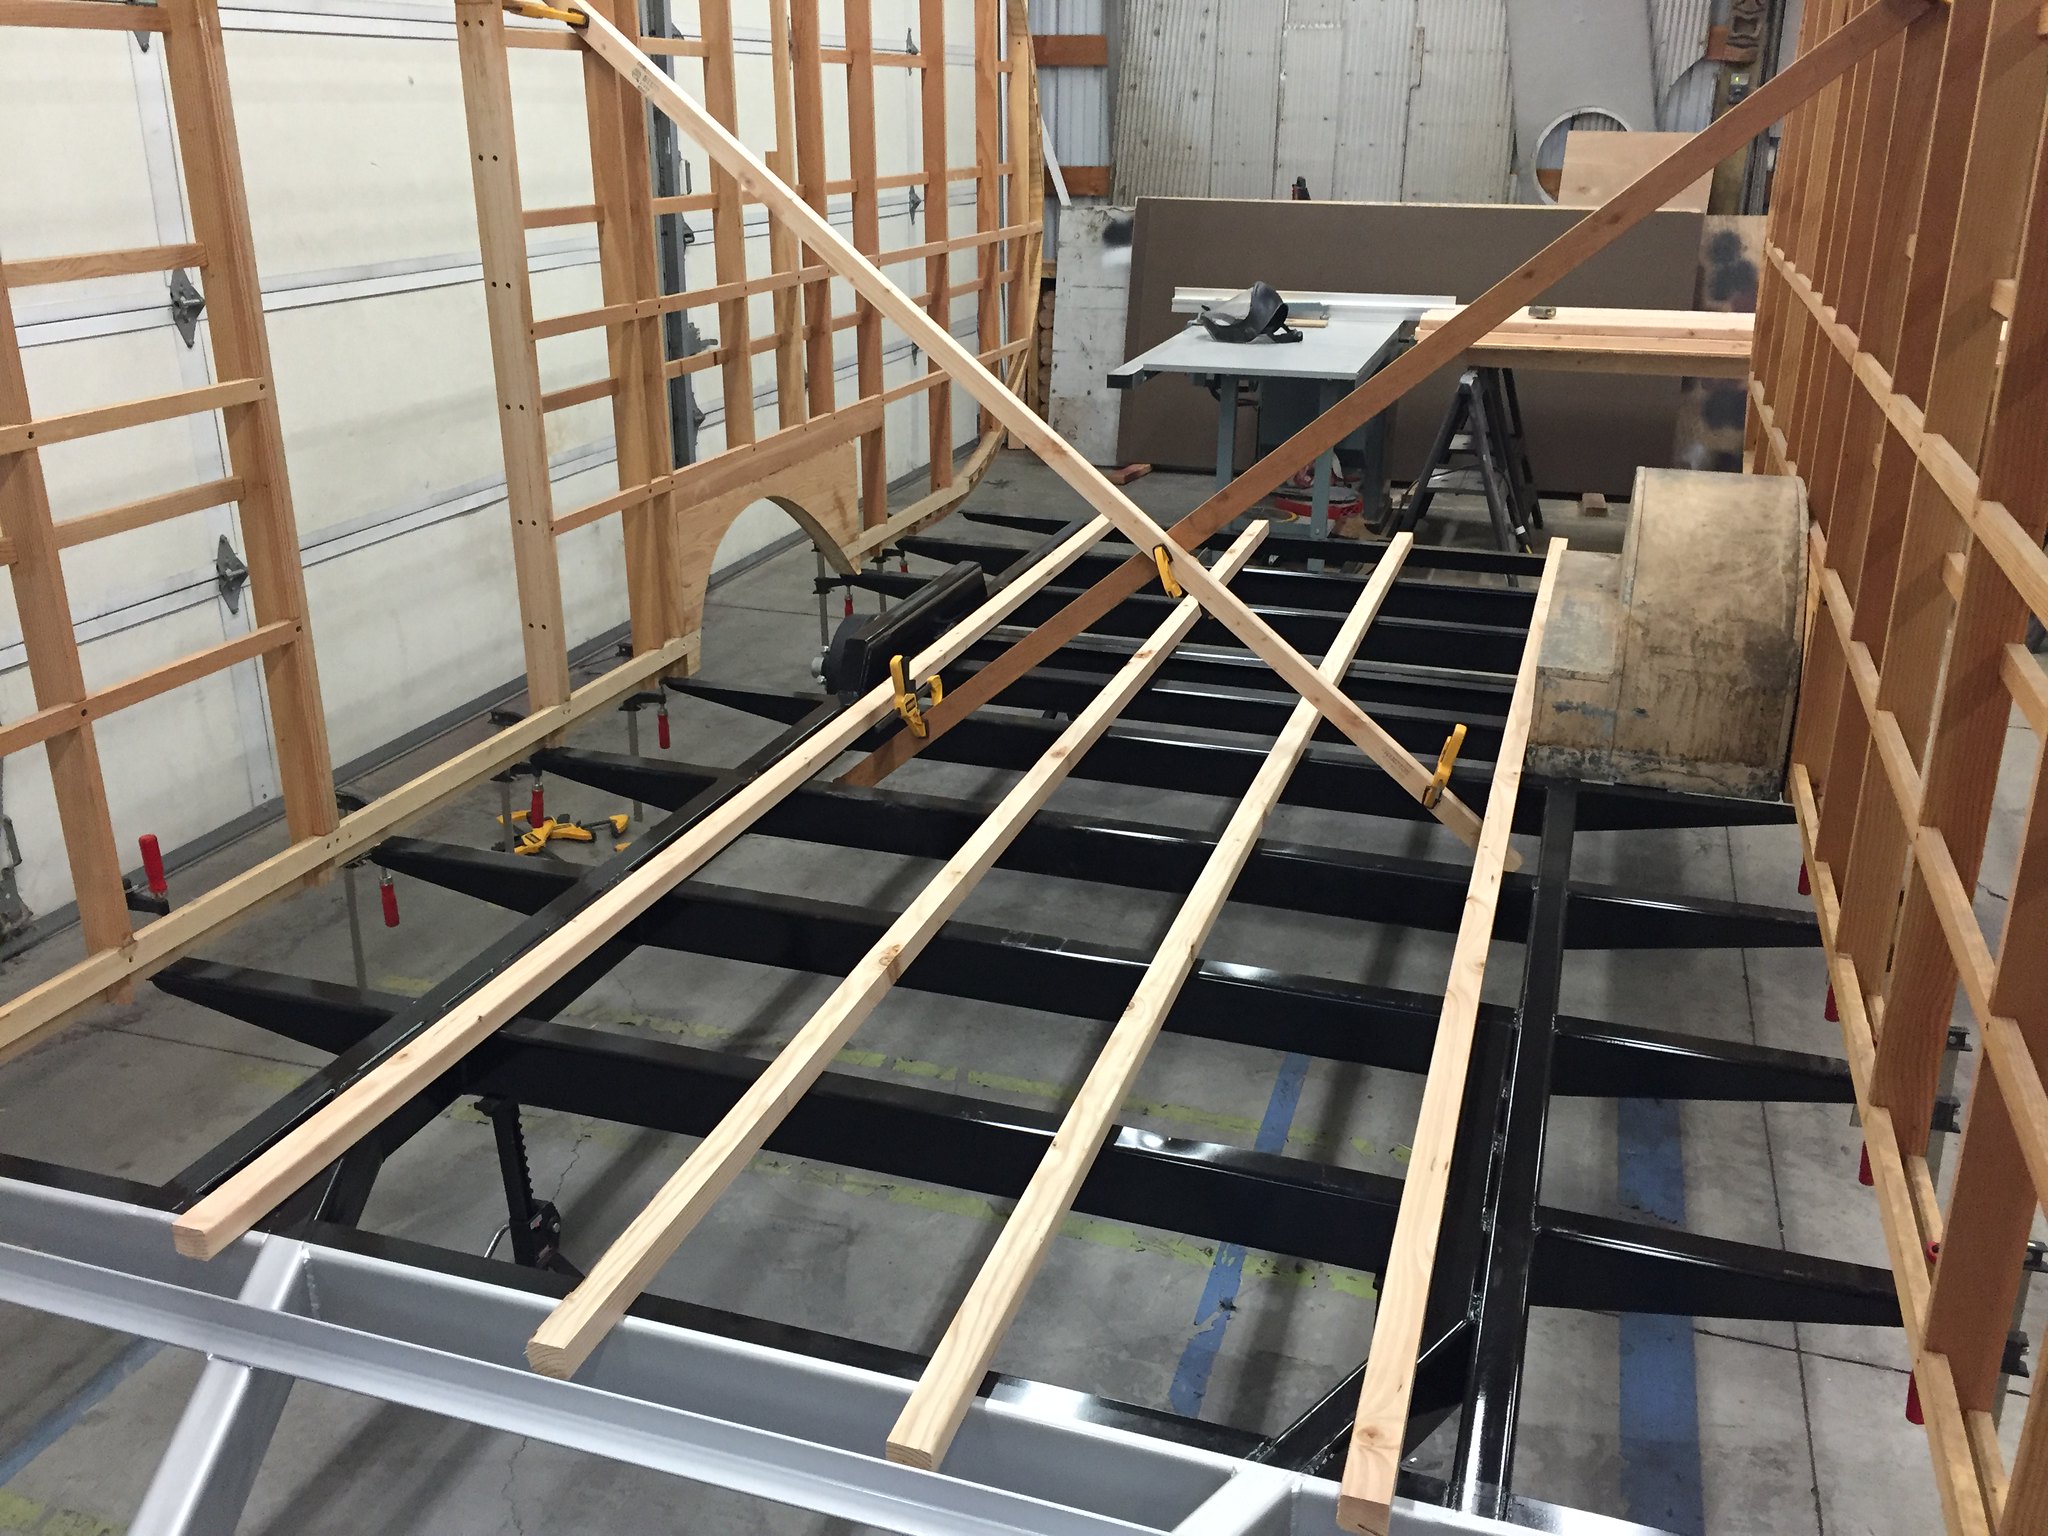
The decking was screwed down and the floor removed to add the insulation. I must say my wife gets full credit for firing up the table saw and cutting and installing every piece. 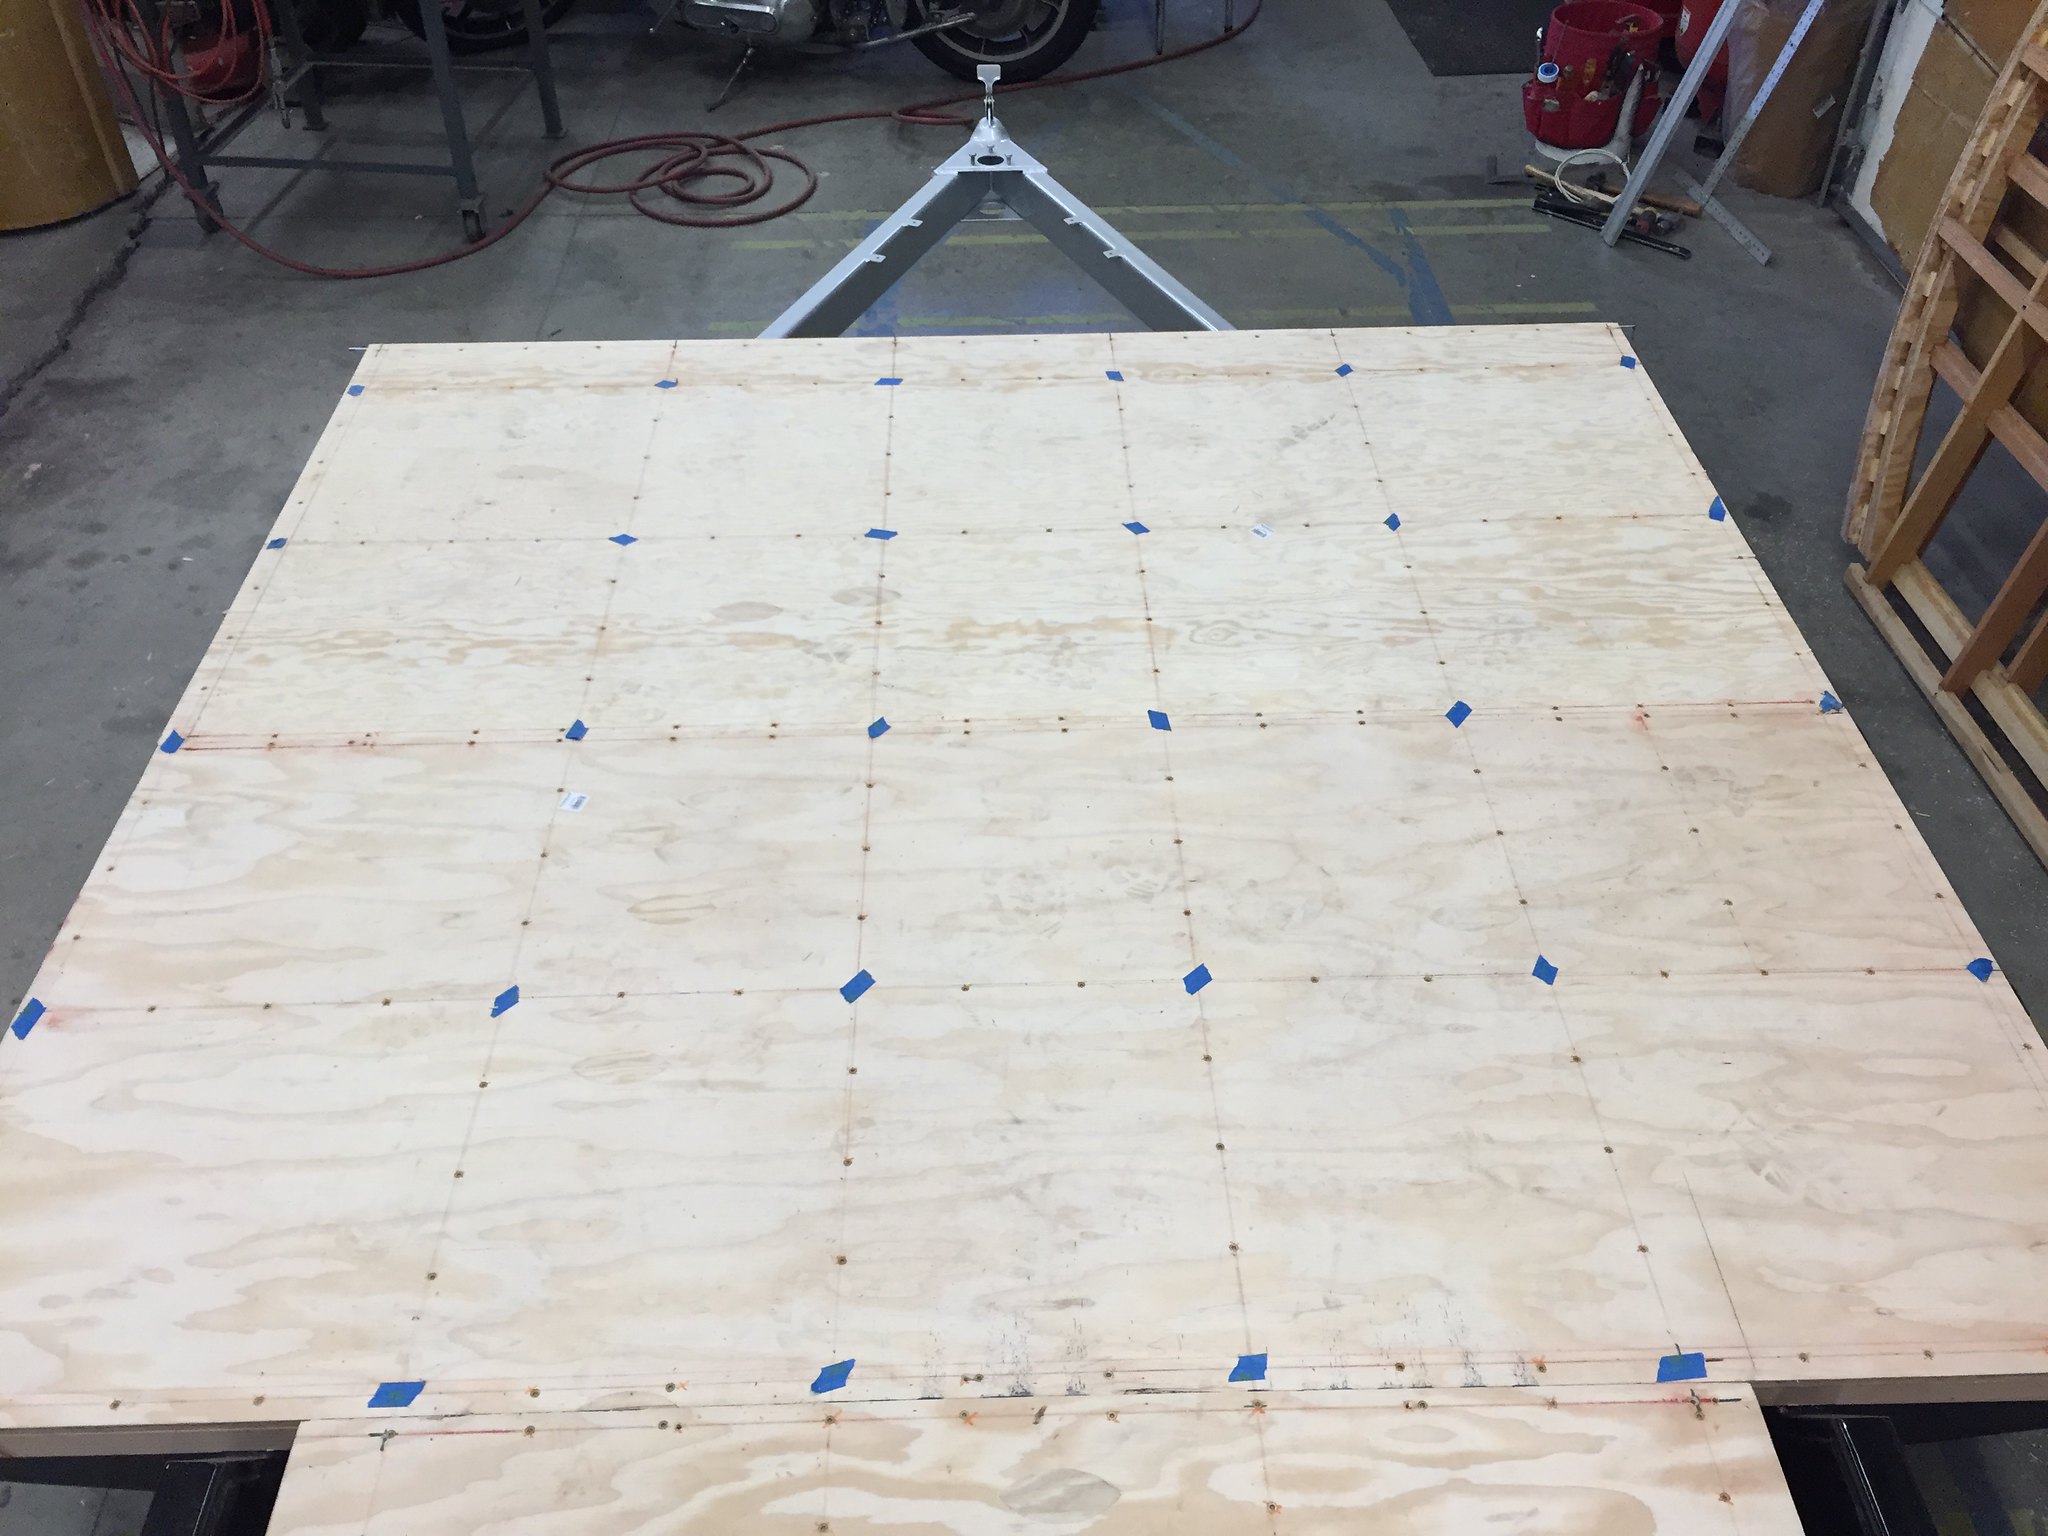 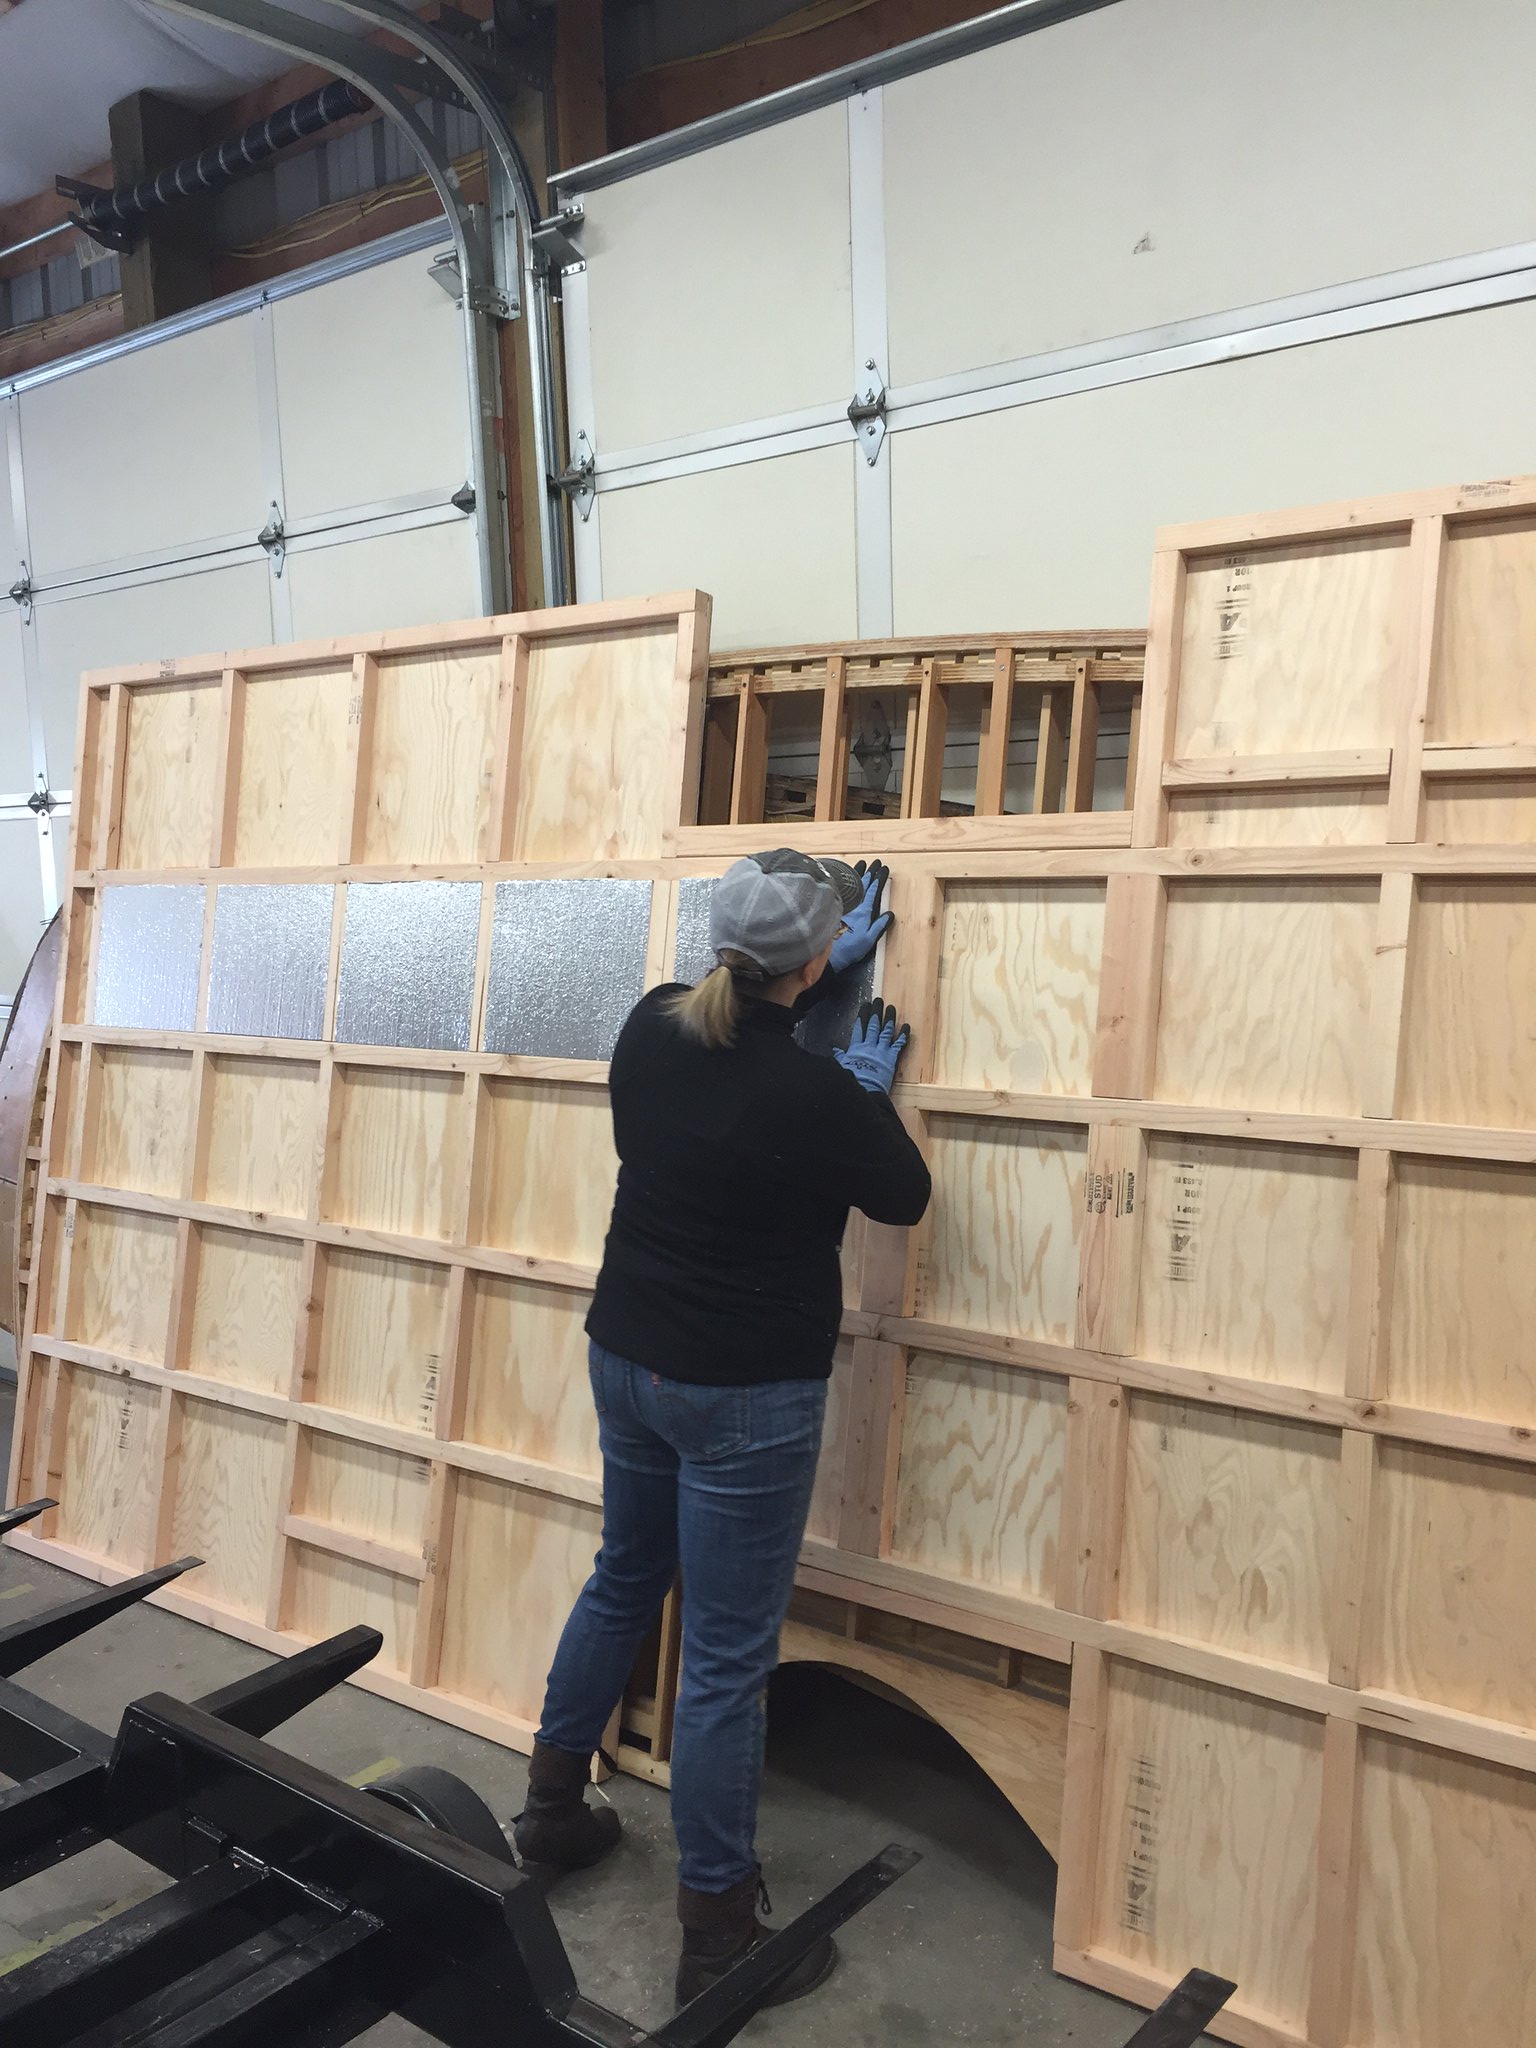 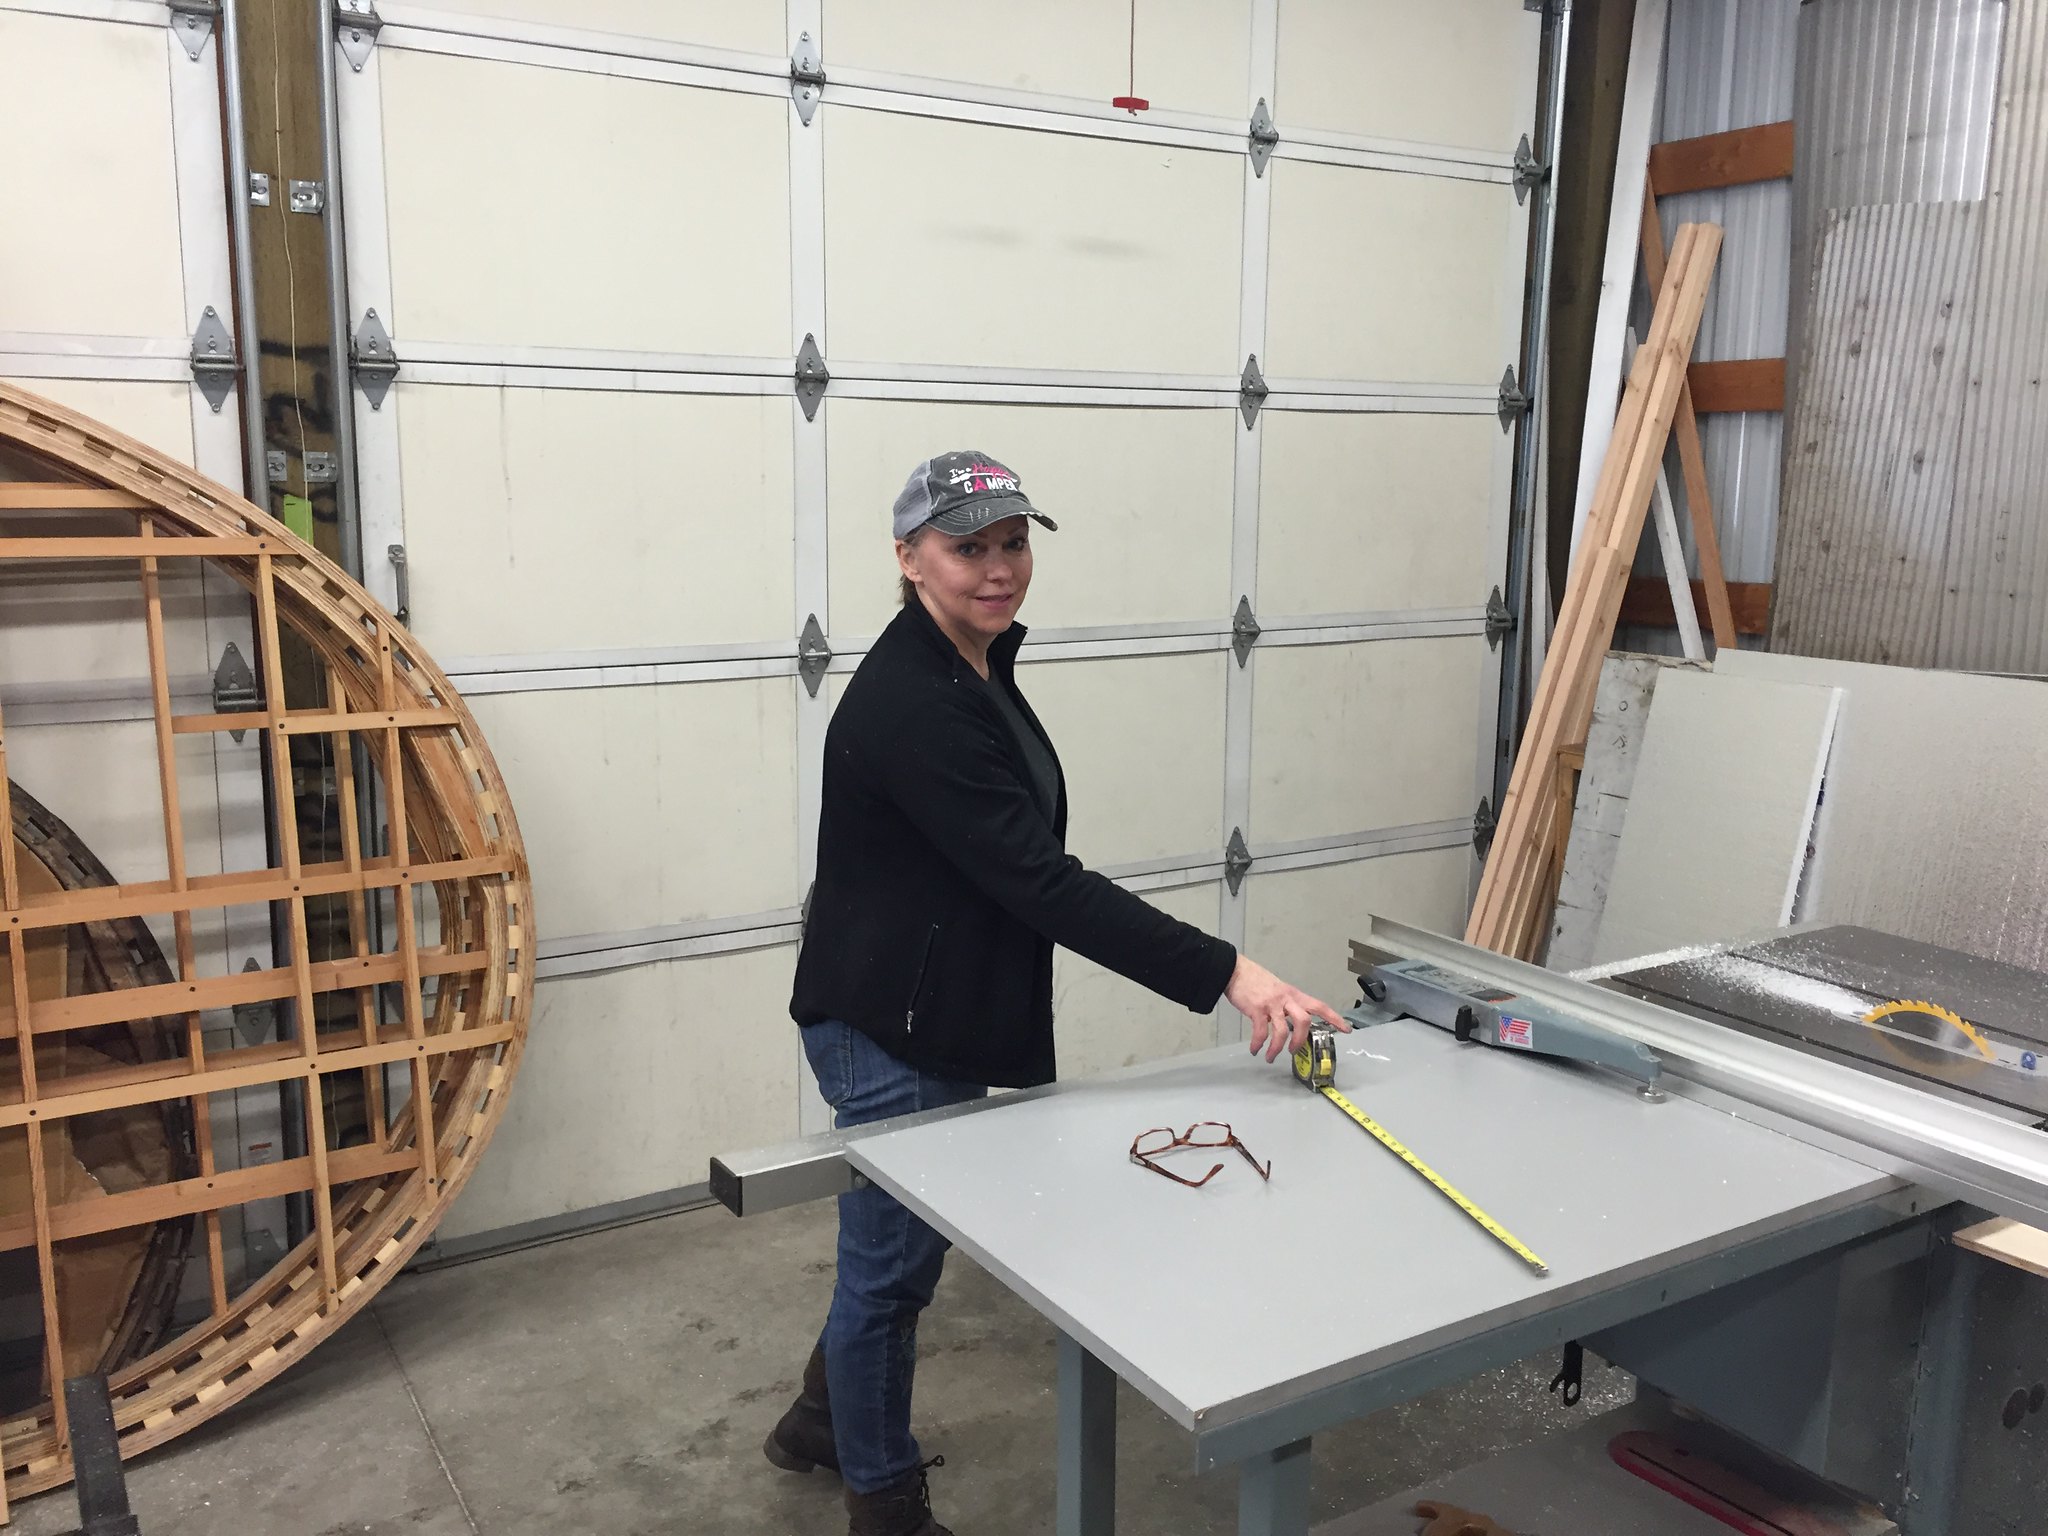  The bottom received two coats of asphalt sealer again by the wife. And left to dry for a couple of days. My son helped muscle the thing back onto the frame and I began to bolt it down for the last time. A great feeling to actually be assembling the thing. I chose to use 5/16" elevator bolts over normal carriage bolts. They don't crush the ply excessively when tightening them down, but do require an extra step. At least the way I use them. The head is broad and flat and to truly get a flush fit I first carefully hit the deck with a spade bit. 
Then drill the bolt hole through the deck and frame and tap it in. A nice flush fit.  All done and ready to set the walls after I prep and paint the wheel wells.  |
|
|
|
Post by vikx on Mar 5, 2018 21:02:41 GMT -8
Fascinating build. I was wondering why the wheel wells were stepped...
|
|
silvertonguedevil
Member
 1958 Shasta ~ 1959 Windsor
Posts: 47
Likes: 9
Currently Offline
|
Post by silvertonguedevil on Mar 8, 2018 8:58:40 GMT -8
Absolutely amazing! Looks like you're every bit the welder as you are the woodworker! Bravo! Can't wait to see more!
|
|
|
|
Post by roncatmandu on Feb 5, 2020 18:40:26 GMT -8
Hello bmxovich,
am fully captivated by your '52 airfloat skipper build!From scratch,it's just amazing that you have all this ability!Am missing your posts as of 3-2018 where you left off with new painted steel frame,tongue & new subfloor,as if side walls weren't captivating enough.I've only just recently stumbled upon this site & may be interested in a airfloat purchase,although in desperate need of an off-frame restoration.Your photos with descriptions,frankly,would be of great help!I've never done 1 before,haven't a garage & will be working out of a boatyard on the island I grew up on.Sure could use some additional direction if you are still posting here!Thank you
|
|
bmxovich
Active Member
  
Posts: 187 
Likes: 69
1952 Airfloat Skipper
Currently Offline
|
Post by bmxovich on Apr 8, 2022 11:59:34 GMT -8
OK, I’m back from the dead so to speak. Been a long while since I’ve been on here, 4 years I believe. A lots happened in that time, home projects, grand babies, job promotion from hell, and finally retirement! I’ve done some work on the Airfloat here and there and am starting to build the cabinets. Like everything else on this trailer they will be built from scratch. It’s been fun trying to source African ribbon Sapele ply for the interior. Finally located and received a batch, $97 a sheet, ouch. I plan on running it vertically on the walls and cabinets, and possibly a light wood for the ceiling wrap. Finding 1/8” anything is next to impossible these days so that’ll be a challenge. Anyway glad to finally have time to get back to it. I need to wrap my head around posting pics again, another challenge.
|
|
|
|
Post by wisconsinjoe on Apr 9, 2022 19:29:30 GMT -8
It is wonderful to see the bar raised so much in this hobby. Really impressed with the laminations. Well, really everything.
|
|
|
|
Post by Teachndad on Apr 10, 2022 5:05:05 GMT -8
   Hello Friends, I just read the last page of this build thread. Somehow I missed it when it first began. This is incredible! The rebuild of the frame is short of amazing. I love the tape on the floor idea. I have big shop space envy. Your craftsmanship is stellar and jaw dropping. So very interesting. THANK YOU for posting your journey and working so hard on this project. We all appreciate you coming back to share more. Cheers, Rod
|
|