nccamper
Administrator 
Posts: 7,777 
Likes: 2,892
1962 Forester- 1956 Shasta
Currently Offline
|
Post by nccamper on Sept 19, 2015 8:23:11 GMT -8
Warning: doing the support blocking below is no guarantee that the camper you're towing will be safe. These suggestions are for minor issues not a camper that has major structural problems. You need to do a full appraisal of the camper and decide what's needed. I've passed on several campers recently that I felt could not be made road worthy. Better not to buy it if it's not safe to tow. ---- The ideas here were given me by the pros on this forum. When it comes to getting a camper home, I'm amateur-hour in comparison to some of the people here. So I hope they will chime in. If you're new to vintage campers you'll eventually ask yourself, "Is it safe to tow?" Unfortunately there is not one answer to that question. I've bought several vintage campers and every one offered its own set of challenges. This is an idea I learned from a forum member to support the walls if the edge board is questionable. Cut a 2x4 about a foot long, line it up with the framing in the wall and screw it to that framing. (Careful to use screws that don't go through the wall and out the skin.) Then put two screws through the floor into the 2x4 floor framing.  I put one in each front bench (sidewall) an one in each rear sidewall truck space under the bed. Obviously, you find the wall framing by looking for the heads of the twisty nails running up the wall. See the second photo   I brought 3/4 inch board to replace a bad area of the edge board. It takes about an hour to loosen the skin, clean away the old rotten wood, check the framing and put in the pre-cut replacement board. See the new board to the left. That's usually the big problem area.  I took the top bunk and screwed it into the side railings, creating a cross support. Not really needed in this case, but better safe than sorry.  As you can see the last owner decided to cut out the rear panel from the inside. (No comment.) I made a support block for the lower wall that wasn't needed because the board there was solid. But here is the block...  Notice the angle is pre-cut. Why? Because the wall is arched. By cutting this on an angle it sits perfectly against the wall. You can make it as long as needed. The downside, you need to screw through the skin. But it's better than the skin flapping in the breeze. An example:  One member suggested cross bracing like a deck that would support the side walls and ceiling. Ideal if the front benches have been removed. I've never done it but this seems like the ultimate support. Imagine the side posts are along the walls and the floor joist in this illustration is the ceiling.  Whatever framing support you choose, make it before leaving home. This way you can just pop it in place. If the last owner won't let you work in their yard, make a reservation at the nearest state park for the first night. Take your time and check everything carefully. Okay gang, any other supports you recommend? P.S. TEN has the perfect system to get a camper home.  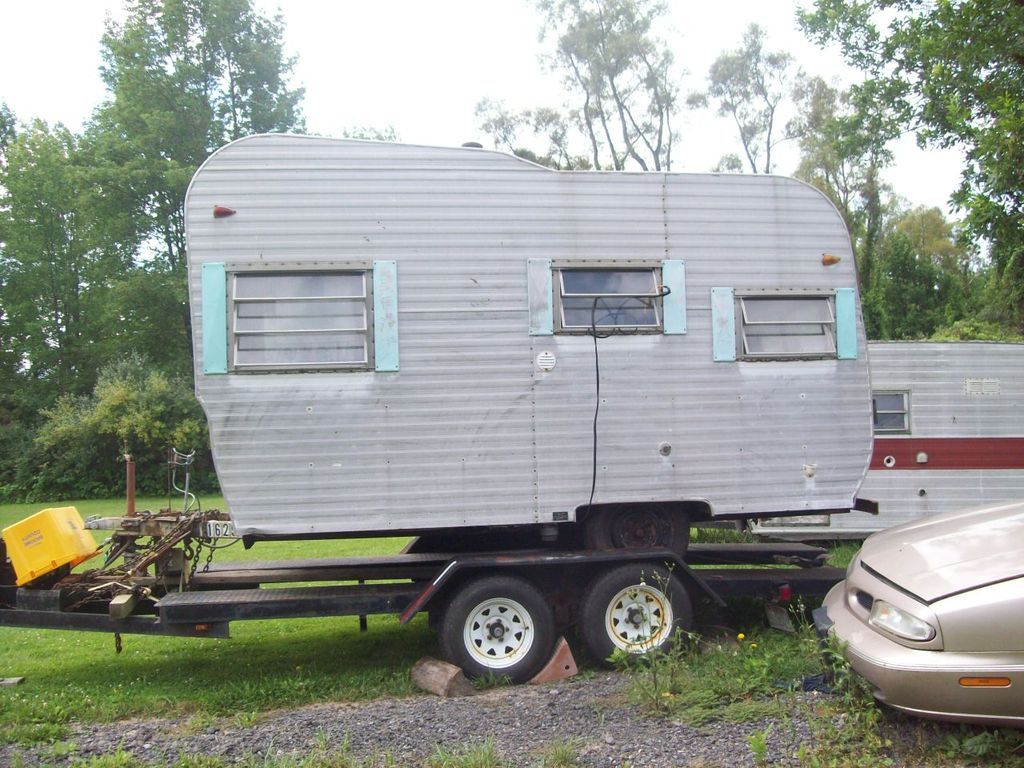 |
|
|
|
Post by bigbill on Sept 20, 2015 5:18:22 GMT -8
Even a trailer won't keep some units from collapsing. If you are dealing with a trailer with signs of serious rot I would build interior supports by placing a 2x4 across the floor from side to side then one across ceiling with vertical ones on each side with x bracing. I would place these about every 5 or 6 feet. If you are unsure of the ceiling/roof structure place some 1x3s or 4s above top 2x4 length wise long enough to spread load over larger area. Unless you are certain of the condition of trailer everywhere this is the safest way as it spreads the load over larger areas. Then you also have some lumber to start to rebuilding process. ALSO TO QUOTE ANOTHER PERSON ON HERE "YOU HAVE TO KNOW WHEN TO WALK AWAY"  |
|
mobiltec
5K Member
 I make mistakes so you don't have to...
Posts: 9,843
Likes: 3,761
1954 Jewel In Progress...
Currently Offline
|
Post by mobiltec on Sept 21, 2015 16:51:32 GMT -8
Very good tutorial NCC. And Bill... sometimes you better know when to RUN!
|
|
|
|
Post by bigbill on Sept 21, 2015 18:54:22 GMT -8
Very good tutorial NCC. And Bill... sometimes you better know when to RUN! Larry I'm getting to old to run so I walk away carefully.  |
|
|
|
Post by Teachndad on Mar 8, 2016 12:35:07 GMT -8
Hi Friends,
In the diagram below, I see what looks like a mark indicating a bolt running through the center of the X. Is this necessary? There would be a gap between the two diagonals at that point due the width of the vertical supporting 2 x 4's in the diagram. If there was a bolt, then wouldn't you need a piece of wood the same width as the vertical 2 x 4s to make it solid?
Also, how would you anchor the verticals to the floor or if you do like Bigbill suggests and place a 2 x 4 along the floor first, how would you attach the verticals to the 2 x 4 running along the floor?
Thanks,
Rod |
|
|
|
Post by bigbill on Mar 8, 2016 14:21:36 GMT -8
Hi Friends,
In the diagram below, I see what looks like a mark indicating a bolt running through the center of the X. Is this necessary? There would be a gap between the two diagonals at that point due the width of the vertical supporting 2 x 4's in the diagram. If there was a bolt, then wouldn't you need a piece of wood the same width as the vertical 2 x 4s to make it solid?
Also, how would you anchor the verticals to the floor or if you do like Bigbill suggests and place a 2 x 4 along the floor first, how would you attach the verticals to the 2 x 4 running along the floor?
Thanks,
Rod Run your 2x4s left to right then the vertical 2x4s can be Fastened to them with 3 1/2 inch drywall screws ran in at an angle (toenailed) Then you can run a couple screws into the floor to prevent sliding. As for your x bracing you could use a short 2x4 and screw it to braces, again using 3 !/2 inch screws. The reason for the horizontal 2x4s is to keep the brace from punching a hole in a soft plac in the floor, it spreads the load over a larger area. hope this answers your question, if not ask again and I will try again. PS: I like to run the top boards front to back to make certain I'm under more roof support. This is easier with two people but i can do it alone takes about an hour to brace the average trailer once you understand how to do it. As was stated in top post if too bad, walk away. |
|
|
|
Post by Teachndad on Mar 8, 2016 15:21:53 GMT -8
Hi Bigbill, Thank you. That is clear to me. Now, let's throw in an actual scenario into the pot. This is item 1. Below is the inside of a trailer. Just to the right of the kitchen it looks like it would be the only place to place the X support system in the front of the trailer that Bill described. If I look upward, there is the gas lamp and a shelf about 1' foot from the ceiling. This would prevent the vertical 2 x 4 from reaching the ceiling. Would it be practical to just go up to the gas lamp and stop, or remove the gas lamp and shelf to get all the way to the ceiling? What is on the right of the door way is unkown. We could assume that the dinette is removed on that side as well, I guess. 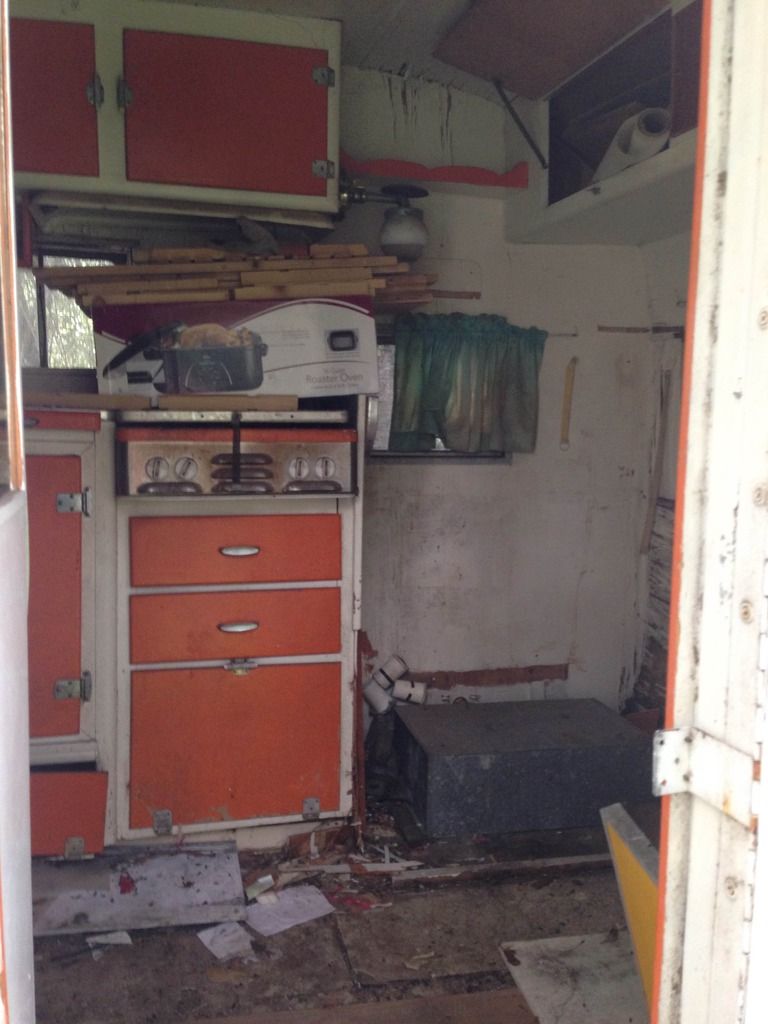 Item 2 Item 2: Below is an image of the rear part of the trailer. How can one place an X support system in this part of the trailer? 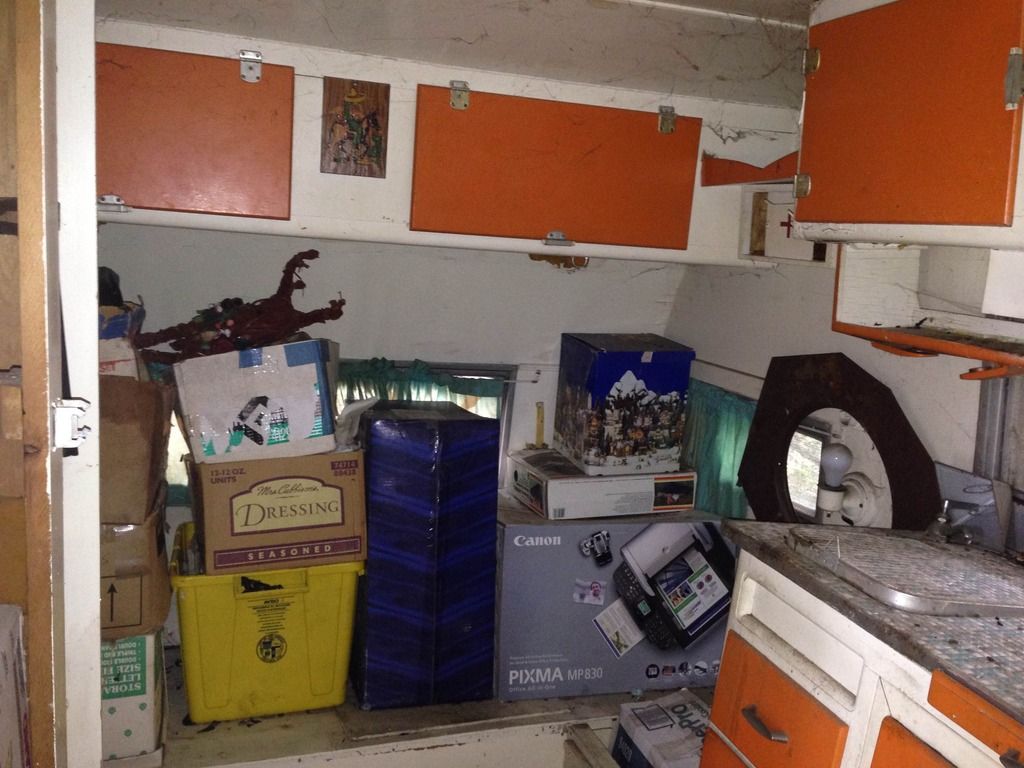 Item 3: Item 3: Now, there's more. Below is the listing kitchen. Anyone got any ideas to secure that for city street towing? 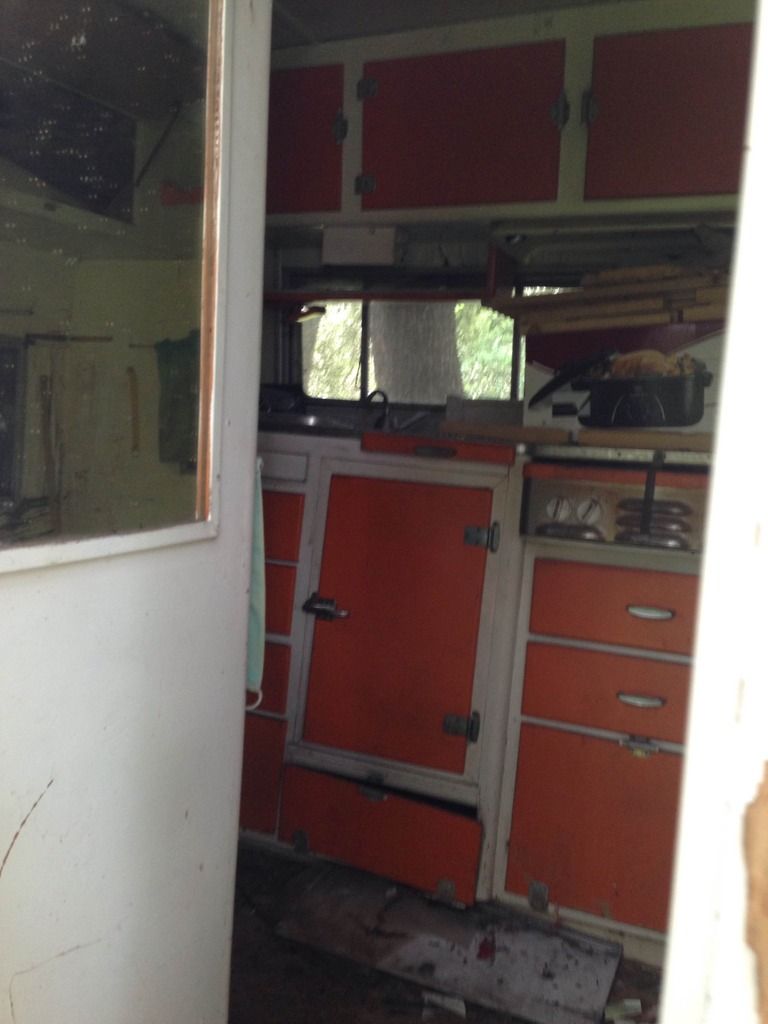 Thanks, Rod |
|
|
|
Post by danrhodes on Mar 8, 2016 15:37:55 GMT -8
Wow...I didn't notice the kitchen was listing like that at first glance at the photos. From the outside, is the whole silhouette a rhombus with that whole wall leaning? How is the floor looking in that area from the outside?
I've never done this, but I assume you're going to need to move some stuff like the lamp/shelf to get a support stretching wall to wall both in front and back. For good measure, I'd build two parallel supports down the center aisle to tie the end supports together as well. Doesn't look like there's much holding this thing together, so your structure will need to be fully self supporting in both axes. (i.e. a box)
BTW, I think they really should be paying you to take this one...For all the work you'll do to get a few hundred bucks in parts out of it, they would have to pay dump fees and someone to take it apart and haul it there. As someone cheap who has been putting old trailer debris in a residential trash can for over a year, it's a lot more trash than it looks like even when you flatten it all to a pile.
|
|
nccamper
Administrator
Posts: 7,777
Likes: 2,892
1962 Forester- 1956 Shasta
Currently Offline
|
Post by nccamper on Mar 8, 2016 20:56:55 GMT -8
What does the outside of that kitchen wall look like?
I also wonder about the floor. If the floor is rotted and causing the wall to shift, it may not make it home.
I would take out the tank or the lamp to do a full X support. Plus straps all the way around.
|
|
|
|
Post by Teachndad on Mar 8, 2016 21:14:12 GMT -8
What does the outside of that kitchen wall look like? I also wonder about the floor. If the floor is rotted and causing the wall to shift, it may not make it home. I would take out the tank or the lamp to do a full X support. Plus straps all the way around. Hi Friends, I can't tell you about the outside of the kitchen wall. I haven't seen any pictures of that side. I go to see it tomorrow afternoon and then I can make a better judgement. NC, when you said to ad straps all the way around, I assume you mean ratchet straps vertically all the way around (over the roof and down under the frame). Is that correct? Thanks Rod |
|
kirkadie
1K Member

Posts: 1,156
Likes: 556
'69 Serro Scotty Hilander
Currently Offline
|
Post by kirkadie on Mar 8, 2016 21:57:28 GMT -8
Your interior supports don't need to go all the way to the walls, they only need to be substantial and be the original height of the trailer before whatever sag it has developed. If the skin is still mostly connected (don't forget the roll of duct tape) and you have interior bracing, and don't try to set speed records, you'll make it home. Set TWO support braces as others have described, fitted to however they fit between street and curb sides, and screw some more cross braces lengthwise between them and you'll be fine. Since this trailer is going to need a full tear down, you can shoot screws into the floor, even cabinets, so just stiffen it up, hitch it up and take a leisurely drive home, knowing you are going to catch hell when your wife sees you pull up while you still have a project frame in your driveway. And before you leave to pick it up, unload the shotgun or you'll have a real 'bang-up' homecoming.
"Honey, it was in the parking lot when I went to walmart, with a free sign in the window; what else could I do but rescue it?". Ah, how we know we are addicted. |
|
|
|
Post by bigbill on Mar 9, 2016 7:26:00 GMT -8
Your interior supports don't need to go all the way to the walls, they only need to be substantial and be the original height of the trailer before whatever sag it has developed. If the skin is still mostly connected (don't forget the roll of duct tape) and you have interior bracing, and don't try to set speed records, you'll make it home. Set TWO support braces as others have described, fitted to however they fit between street and curb sides, and screw some more cross braces lengthwise between them and you'll be fine. Since this trailer is going to need a full tear down, you can shoot screws into the floor, even cabinets, so just stiffen it up, hitch it up and take a leisurely drive home, knowing you are going to catch hell when your wife sees you pull up while you still have a project frame in your driveway. And before you leave to pick it up, unload the shotgun or you'll have a real 'bang-up' homecoming.
"Honey, it was in the parking lot when I went to walmart, with a free sign in the window; what else could I do but rescue it?". Ah, how we know we are addicted. This is very good advice. the only thing I might add is have a heavily padded hat to put on as you pull in the drive way in case she has a frying pan. Seriously as mentioned above the braces don't have to be full width, just set them so that they give the most support to the largest area reasonably possible. If the side wall is bulging out you might want to remove the window screen then place a 2x4 outside with a ratchet strap coming in the window and hooked to x bracing to help control the bulge. also remove everything loose inside the trailer to lessen the load. |
|
nccamper
Administrator
Posts: 7,777
Likes: 2,892
1962 Forester- 1956 Shasta
Currently Offline
|
Post by nccamper on Mar 9, 2016 11:20:42 GMT -8
Bigbill beat me to it. I like the idea of a 2x4 and ratchet straps. An excellent idea.
|
|
|
|
Post by Teachndad on Mar 9, 2016 12:08:08 GMT -8
Hi Friends, I had forgotton all about this thread. Here is an update. The trailer I refer to in the posts above eventually had to be taken down to the frame to move it. It was just too far gone at the base of the walls. It's all shown here. Someone had put heavy tile on the counter top and that made it top heavy and when water got in, the weight pushed it outward. Sad. Rod |
|
mmh
New Member
Posts: 23
Likes: 25
Currently Offline
|
Post by mmh on Apr 28, 2023 15:35:03 GMT -8
What does the outside of that kitchen wall look like? I also wonder about the floor. If the floor is rotted and causing the wall to shift, it may not make it home. I would take out the tank or the lamp to do a full X support. Plus straps all the way around. I've got a split front seam, street side, it's on a vacation site that we lease a few hours away so I need to go pick it up and get it home to do repairs. Too much to fix up in the mountains with no electricity. I don't want to rush and drive myself crazy. I'm of course worried about it all disintegrating on the drive home and there's definite rot that I'm going to be replacing. I'm going to try and put in some of the 2x4 supports mentioned here but I was wondering about ratchet straps and if I could wrap one around the middle like a belt. Not too tight so that it goes from a belt to a corset, but that would provide enough support to keep me from losing my entire sidewall. Is that a totally ridicules idea? I'm going on year three with my canned ham (make unknown, thoughts welcome) so I'm still new to this stuff and eager to learn! |
|


