forrester
New Member
Posts: 11 
Currently Offline
|
Post by forrester on Jan 20, 2015 20:22:12 GMT -8
Hello vintage trailer talkers,
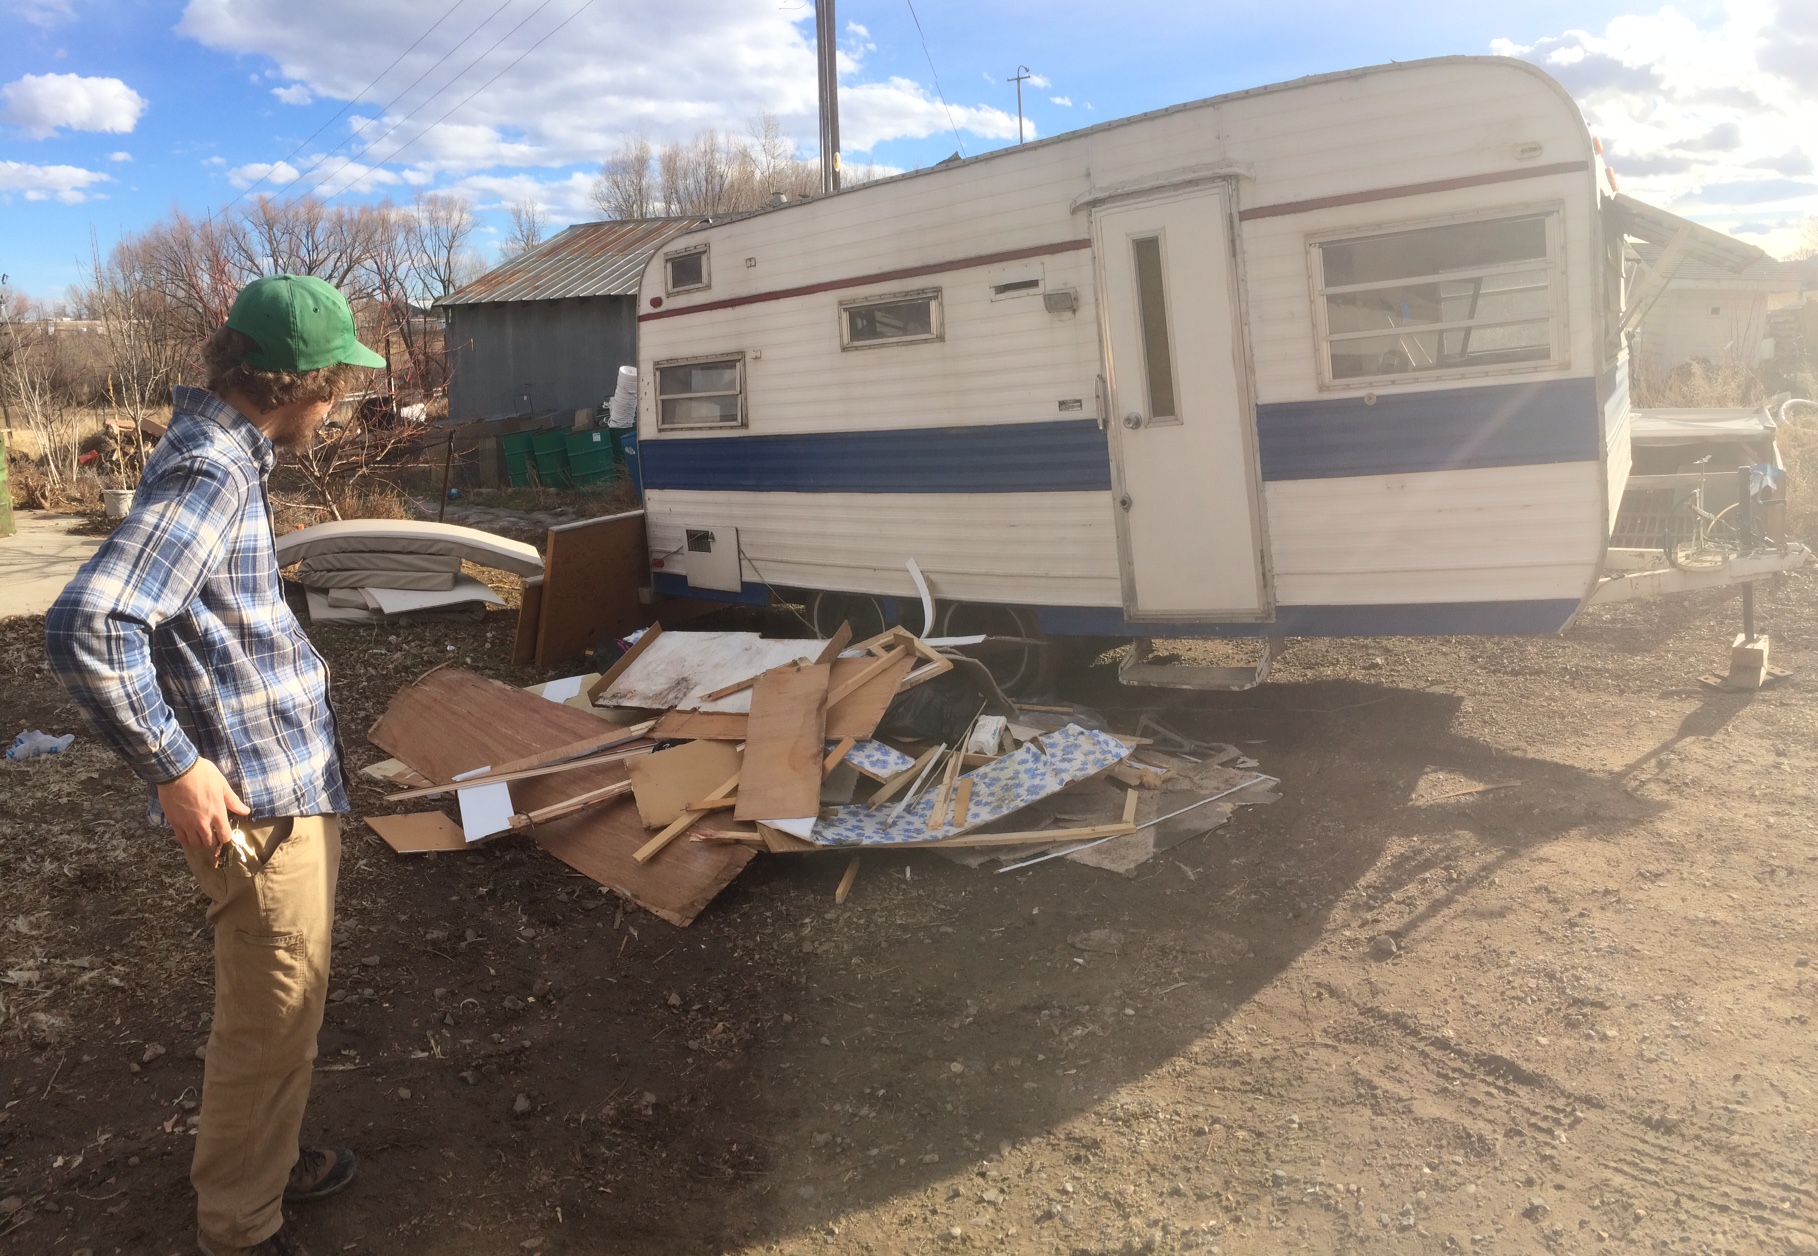
My name is Austin. This is my first post as I have recently purchased my first travel trailer. I've found this forum to be a wealth of information and decided I should start my own thread because I still have a lot of specific questions and know I will need the hand an active forum offers.
The trailer is a 1972 18' Comet made in Kansas City and I am planning on doing a complete remodel. Yesterday I gutted a good portion of the interior including the ceiling paneling and about half the wall space. I found rot surrounding all four "J-rails" and a good number of purlins have lost their integrity where the staples are used to attach them to the wall framing.
I'll try and keep photos, updates and ideas flowing.
I have a fair amount of building experience and feel comfortable designing and building about anything with wood or metal but the unique design of trailers is new to me so all constructive advice and feedback is welcome and would be delightful.
Thanks all, first time doing the forum thread thing.
|
|
forrester
New Member
Posts: 11
Currently Offline
|
Post by forrester on Jan 20, 2015 20:23:17 GMT -8
|
|
forrester
New Member
Posts: 11
Currently Offline
|
Post by forrester on Jan 20, 2015 20:33:33 GMT -8
First question, is there a most efficient and practical order of repairs? Ceiling purlins and j-rails? Exterior repairs to skins and windows? Floor?
It's cold here in CO and I don't have an indoor space to have it sit in with the skins off so I would like to have as much of it together at the same time through the process.
|
|
forrester
New Member
Posts: 11
Currently Offline
|
Post by forrester on Jan 20, 2015 20:48:00 GMT -8
|
|
|
|
Post by vikx on Jan 20, 2015 23:46:29 GMT -8
Welcome Forrester!
Pretty little trailer.
Vintage trailers need to be repaired from the "outside in". In other words, we remove the J rail/edge trim and lift the skins to do repairs. It's almost impossible to get to the bottom skirt boards and wheel well wood without doing that. Also, the ceiling overlaps the walls and to keep structural integrity, the roof needs to be off the trailer and ceiling panels replaced the same way. Then you repair or replace the rafters as needed.
The cabinets provide a lot of support for the ceiling and roof structure. When removed, it's prudent to place 2 bys as supports...
I start at the skirts and work around the front and rear, doing repairs as needed. Edge wood is often rotten all the way up and over the top of the trailer. If you're lucky, just above the front and rear windows. Wall studs are repaired, wiring done and insulation. Then the whole thing goes back together.
It is easier than it sounds to do repairs like this. I've found that rebuilding trailers as above is really the way to go. Keep us in the loop.
|
|
ladywendolyn
2K Member

Posts: 2,315 
Likes: 928
1964 Golden Falcon
Currently Offline
|
Post by ladywendolyn on Jan 21, 2015 13:44:38 GMT -8
Cool video
|
|
kirkadie
1K Member
Posts: 1,156
Likes: 556
'69 Serro Scotty Hilander
Currently Offline
|
Post by kirkadie on Jan 21, 2015 16:50:46 GMT -8
Dang, you guys are fast! Even when I was your age I couldn't move so quickly.
I'm impressed.
|
|
Hamlet
2K Member
Posts: 2,820
Likes: 925
Currently Offline
|
Post by Hamlet on Jan 22, 2015 17:51:11 GMT -8
Dang, you guys are fast! Even when I was your age I couldn't move so quickly. I'm impressed.  Love it! |
|
forrester
New Member
Posts: 11
Currently Offline
|
Post by forrester on Feb 11, 2015 15:22:34 GMT -8
Work and school got me down and progress is slow. I got around to clearing out a barn to put the trailer in to have it covered so I can do some skins action with peace of mind. For every hour of work or minute of pondering on the trailer a question arises. I started removing the rear skin today, the J rail (along with all other exterior pieces) was sealed with a fat bead of silicone. Is this kosher? From what I've read butyl tape is the only thing that should be used for exterior sealant save some of the roof vents. 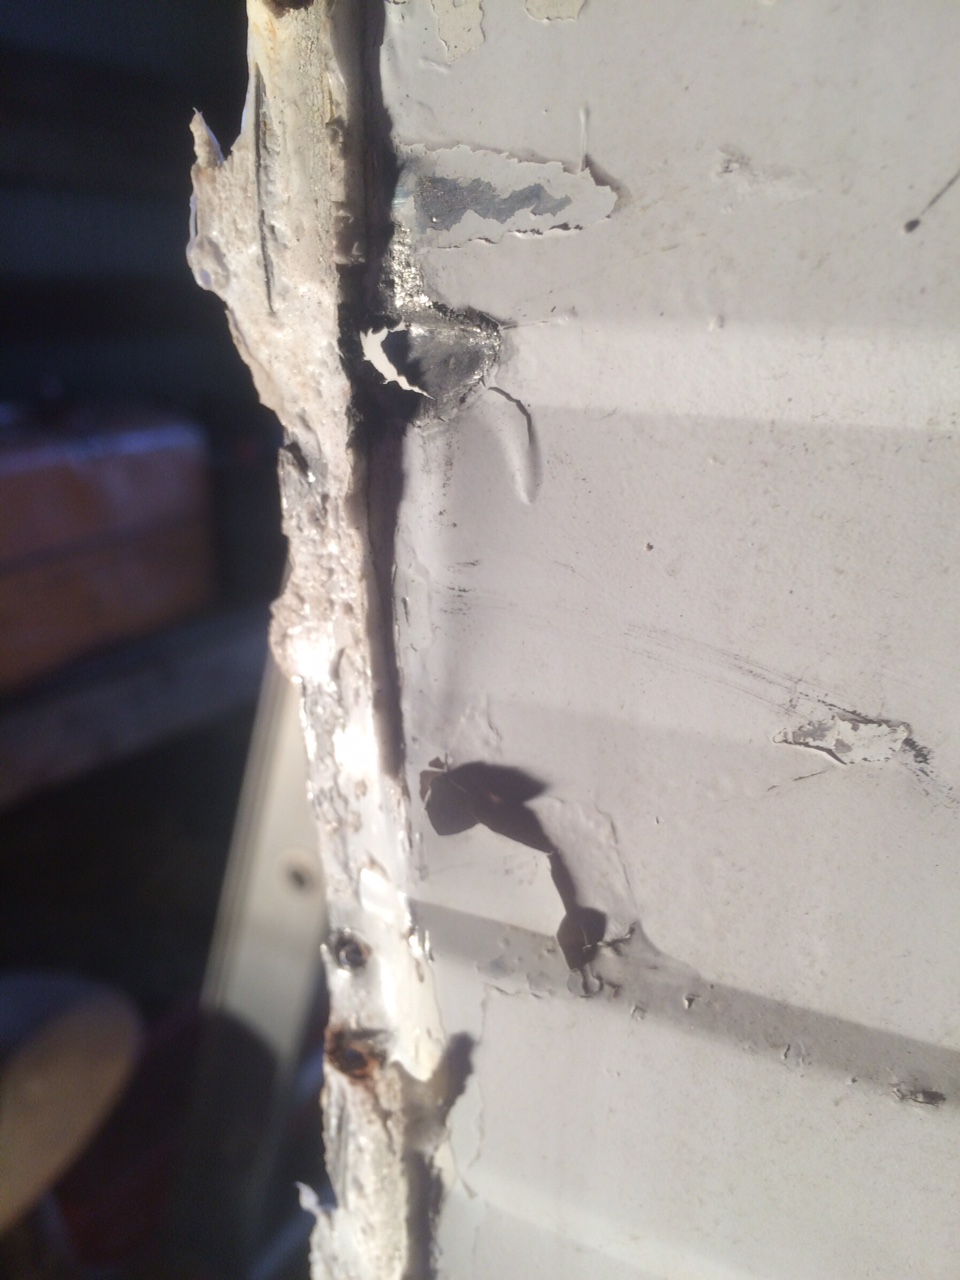 IMG_2165 IMG_2165 by Forrester Photo, on Flickr  IMG_2163 IMG_2163 by Forrester Photo, on Flickr Is there a good trick to getting the silicone off? A razor blade and then a wire wheel with a steady arm? The roof: 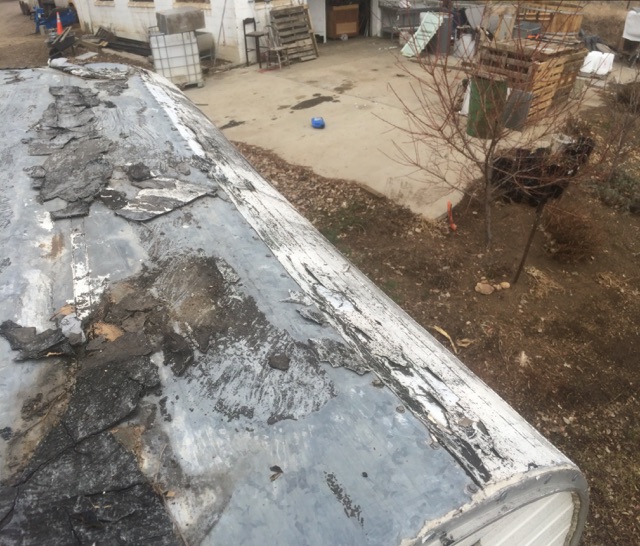 IMG_2143 IMG_2143 by Forrester Photo, on Flickr  IMG_2140 IMG_2140 by Forrester Photo, on Flickr 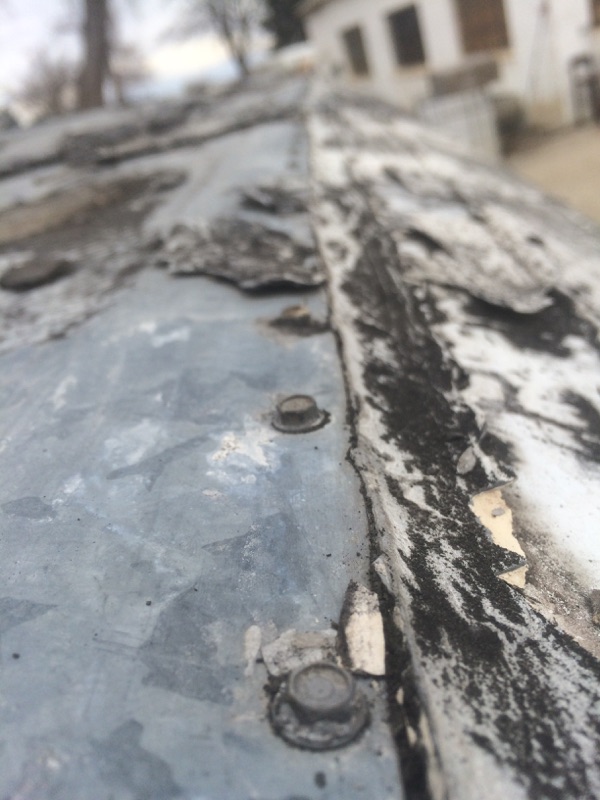 IMG_2139 IMG_2139 by Forrester Photo, on Flickr One of the previous owners apparently really liked the idea of caking the roof with sealant or tar or something. It's really thick and was not well chosen as it's cracking and mostly gone. The roof is not aluminium but galvanized sheet metal. Is this concerning? Obviously some structures have been covered with this for close to a century, but I haven't heard of it on a travel trailer and it's obviously not original. I really do not have the will or time to replace it, should I apply anything to it? I will re-lay the seams with a better overlap and butyl putty and reseal the vents. This brings me to my next ask for trailer wisdom. Would there be any reason that putting a light "crest" to the ceiling purlins would be a bad idea? Simply creating a long and short arched piece and placing it on top of the existing purlins. I would have to rehang some of the fixtures going through the ceiling. The roof in some spots sags and to counter any chance for water pooling have the slightest arch across the roof would help runoff. It would be just under any contour that would stress the ridges in the--in my case--sheet metal. Any thoughts? |
|
forrester
New Member
Posts: 11
Currently Offline
|
Post by forrester on Feb 11, 2015 15:52:42 GMT -8
Something I want to bring up because it just hit me is the theme and goal of this build. I am not interested in sticking to the original look this trailer once had. Partly because it had been sabotaged by its former owner(s) and then partly because I just want a different look. All of the builds I have seen and followed here have stuck to the vintage original look. Now I realize this is "vintage trailer talk" so what I'm wondering is if although my trailer does fall into the "vintage" era, if what I want to do will still be of interest to the community here?
|
|
Ten
3K Member

Posts: 3,432
Likes: 1,467
70 Shasta 16SC + 1964 Airflyte
Currently Offline
|
Post by Ten on Feb 11, 2015 16:51:26 GMT -8
I think I can speak for most everyone that assembles here in saying that the "vintage" themes are only one choice, and the choices that owners make are up to them, so whatever you decide is really your business, and we will all help as much as possible. I personally have this part of me that is "52% purist"... The one thing that seems to stream through is the fact that all the repairs should be done right. That is most important no matter how anyone decides to decorate.
As to the silicone and the roof, there is no real easy answer to silicone. Perseverance. You may find it easiest to replace the roof altogether. It may turn out easier and less expensive than you might expect, especially if you factor in the time saved scraping off silicone!
|
|
SusieQ
Global Moderator 
Posts: 4,781
Likes: 1,197
'62 Shasta Compact
Currently Offline
|
Post by SusieQ on Feb 11, 2015 18:31:23 GMT -8
Ten said it really well. Some of us do get really excited to see a trailer that has been brought back to its vintage glory. But most of all, we like to see them rescued and repaired properly, not just painted over. You're doing great and we all want to see your progress.
|
|
desertrat
Member

Posts: 48
Likes: 25
Currently Offline
|
Post by desertrat on Feb 11, 2015 19:14:05 GMT -8
Our fine friend mobiltec has a whole bunch of videos of rebuilds that he's done on his site www.cannedhamtrailers.com covering a few different trailers. None of them are the same model as yours but you may find a lot of the construction of these to be similar to your Comet. The amount of info in these videos is tremendous. Pay attention to what he does with the "curbing" at the edge of the trailer and how he attaches the new studs over the frame, not into the sides of the framing. You might be able to put a slight crown in the ceiling framing, but if you do, there's a good chance the metal may not go back on there easily or at all. As for the J-rail, there are silicone remover products (slips my mind, it's somewhere here though.) Depending on the condition of the rail you may want to consider replacing it. If you take a wire brush to it it's going to scrape the heck out of the aluminum on it. Last thing - if you don't have a Kreg Jig (or similar pocket hole jig kit) then you oughta get one. These things are wonderful, they'll save you time, they'll give you good strong framing without the crapshoot of toenailing, and after you start using it you wonder how you built things without it. There's a clamp-on type for about $20; I have the $100 Kreg Jig set and every time I use it I love it. Harbor Freight has a pocket hole jig set that mobiltec likes as well. |
|
|
|
Post by vikx on Feb 11, 2015 22:34:20 GMT -8
Silicone is a Flipper contagious disease...
From what I've read, coatings on galvanized roofing ARE recommended. Not sure what, but they do rust thru no matter the coating. Check for that before wasting time and money.
Please know that you and your trailer are welcome here. We love to help with proper repairs and you'll make friends too!
|
|
forrester
New Member
Posts: 11
Currently Offline
|
Post by forrester on Mar 24, 2015 13:53:50 GMT -8
I've decided to go with a new roof (as Ten mentioned) due to the work I would have to put into it and because it's not the most ideal roof regardless of its condition. There is a local metal supplier ( The Metal Company) in Denver I'm planning on using, for 102" x 16' they quoted me around $350, is this fair? It seems higher than online retailers but of course shipping is saved. They also have J rail. For the interior walls I've decided to do a white paneling similar to this picture 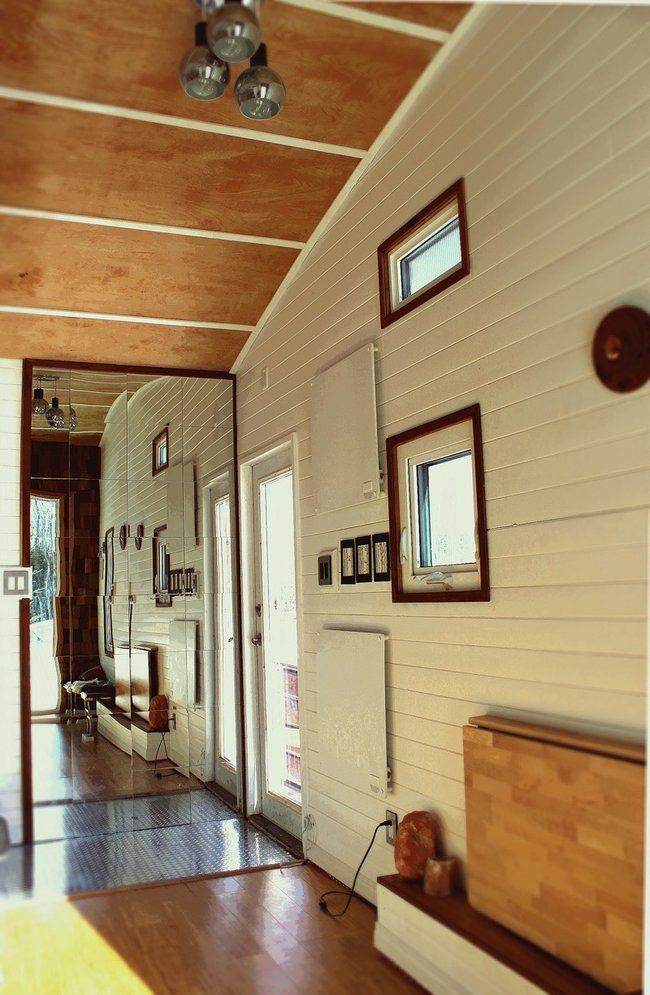 found here I can buy paneling like this at HD in 4'x8' sheets for a reasonable price. For the walls I'm going to make slats out of an essentially replenishable stock of dimensional pine we have from salvaging pine boxed crates from a local manufacturing facility that gets rolled stock steel in the crates. I think ill rip the material into 3"ish pieces and then flip them on edge to rip them close to 3/8 thickness and then run them through the planer to clean it up nicely. I have a question with the positioning of the of the walls and the roof/ceiling and the materials. So traditionally lauan (luan?) paneling is used on both the walls and ceiling. And the ceiling sheets are laid between the top of the wall framing and then the ceiling framing on top of that. Is there any reason that it would be unwise to cut new like-original-luaun-thickness strips to put atop the wall framing to keep that same measurements and then lay the new thicker pine strips on the ceiling only where it is visible. I hope this makes sense. here's a fun shot 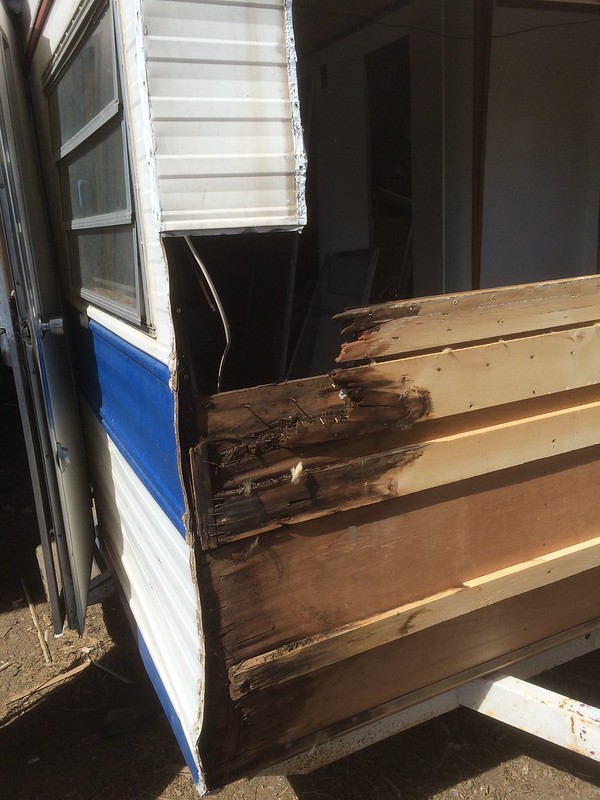 There is a really large vent that simply leads into the inside, its not for the gas stove, its not any sort of breather. Any thoughts on what is would be for and if I should leave it when I install the new roof? 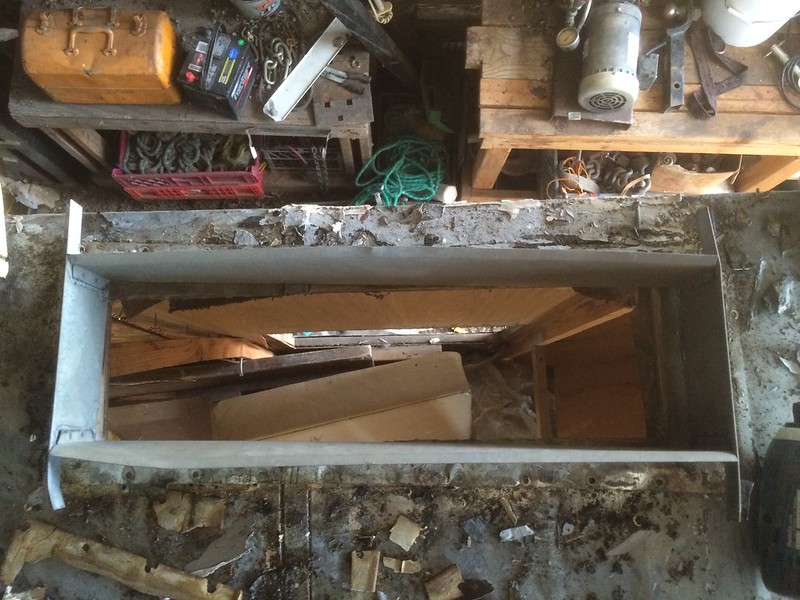 The vent has a cover, but it just looks like an escape root for warm air when I'm heating it. I'm planning on installing a small cast iron wood stove that I picked up for cheap as I'm planning to live in it or have it be lived in year round in Colorado. Anyone done this before? I've seen it commonly in tiny homes. I think I'll just use double walled pellet vent and keep it clear of combustibles with either hardy backer board on the near surfaces or something lighter, any ideas? |
|


 Love it!


