|
|
Post by wisconsinjoe on Mar 1, 2020 16:14:04 GMT -8
After getting some encouragement in the past somewhere in this forum, I decided to rebuild a door. I had been collecting louver windows and such from mining Craigslist in anticipation of a scratch build using a reconditioned old Jayco frame. I've had trouble finding a good door, but did manage to find one that had everything except the bottom aluminum molding frame, that had fallen away from the rotted door that I salvaged. I had everything else, including a good (but bent) exterior frame and even a perfectly intact screen door. Eventually, I found a nearby professional camper restorer who gave me a piece of aluminum trim that matched my profile close enough to be usable. I stripped paint from it, worked it straight with careful pounding, and scrubbed it clean to a nice mill finish with steel wool and GooGone. Then I started the re-build, with careful measurements designed to re-use the old door trim and frame. I built a wooded frame from some clear vertical grain cedar, glued on piece of prefinished 1/4 inch birch plywood, and insulated with pink foam. After the foam glue dries overnight, I will laminate new stucco aluminum (bought locally from a sheet metal fabrication shop), and install the cleaned up trim and door handle (which I just got re-keyed). Also installing a reconditioned louver window from a different, but ruined door. Here are some pics, in order of construction.  20200228_111101 20200228_111101 by Joe Mirenna, on Flickr  20200228_150929 20200228_150929 by Joe Mirenna, on Flickr  20200228_144613 20200228_144613 by Joe Mirenna, on Flickr 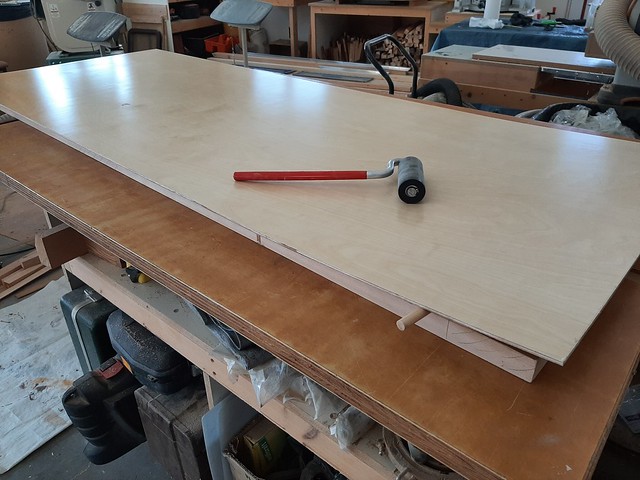 20200228_145104 20200228_145104 by Joe Mirenna, on Flickr  20200228_150553 20200228_150553 by Joe Mirenna, on Flickr  20200301_143930 20200301_143930 by Joe Mirenna, on Flickr  20200301_143920 20200301_143920 by Joe Mirenna, on Flickr  20200301_144304 20200301_144304 by Joe Mirenna, on Flickr  20200301_145054 20200301_145054 by Joe Mirenna, on Flickr Tomorrow I'll finish the rest of the door. |
|
|
|
Post by wisconsinjoe on Mar 3, 2020 13:09:36 GMT -8
Finally finished the entry door. I was worried that the odd piece of trim I found for the bottom of the door would not match up very well. Sure enough, when screwed into place, the angle of the protrusion was off compared to the original trim, and it was also a little longer. I had to bend the piece so I stuck into a cheap (HF) metal brake and tried to bend it. No go. So, I heated it up with a torch, a lot longer than I thought it would take, and put as much force as I could. Amazingly, it actually bent a little. Close enough. Screwed it back on, ground down the imperfections with a Dremel tool, and then added the window frame. Glass pane is out for replacement, so louvers are not in. A little worried about the weight because the original door was mostly foam and 0.24 aluminum. Now it has a substantial cedar frame, 1/4 inch ply inside, and 0.40 aluminum outside. Hope the aluminum frame hinges will support it. Now I have a shop that looks like a bomb exploded. After a clean up, I'll make a nice screen door, even though the original aluminum one is perfectly intact. Just like wood.  20200303_120442 20200303_120442 by Joe Mirenna, on Flickr  20200303_122242 20200303_122242 by Joe Mirenna, on Flickr  20200303_124152 20200303_124152 by Joe Mirenna, on Flickr Thought I would drill a few drainage holes in the bottom trim piece. May also carve out a small channel in the wood frame there. 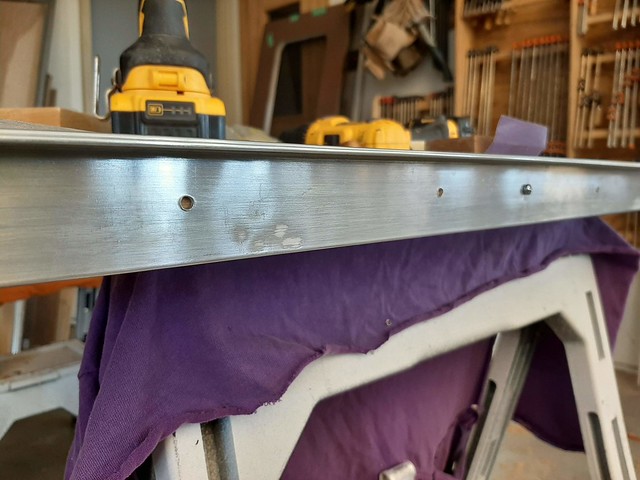 20200303_124219 20200303_124219 by Joe Mirenna, on Flickr  20200303_130321 20200303_130321 by Joe Mirenna, on Flickr 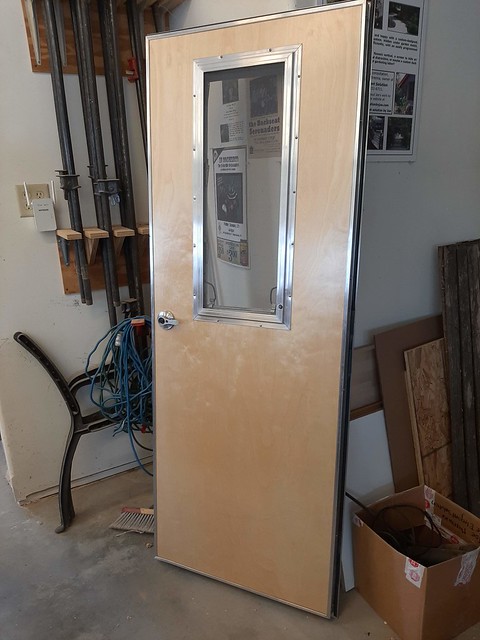 20200303_131702 20200303_131702 by Joe Mirenna, on Flickr  20200303_131810 20200303_131810 by Joe Mirenna, on Flickr  20200303_131733 20200303_131733 by Joe Mirenna, on Flickr And finally, the door sitting in its frame. Just need to build the camper around it.  20200303_131911 20200303_131911 by Joe Mirenna, on Flickr |
|
nccamper
Administrator 
Posts: 7,744 
Likes: 2,871
1962 Forester- 1956 Shasta
Currently Offline
|
Post by nccamper on Mar 3, 2020 15:54:30 GMT -8
Nice door.
"Now I have a shop that looks like a bomb exploded."
It's always that way, isn't it?
--
Today I cut the first side window on the Airflyte. I've never done one before with new skin so it was slow going. One mistake and the new skin is ruined. No pressure!
|
|
mobiltec
5K Member
 I make mistakes so you don't have to...
Posts: 9,822
Likes: 3,749
1954 Jewel In Progress...
Currently Offline
|
Post by mobiltec on Mar 5, 2020 9:56:14 GMT -8
Nice door.
"Now I have a shop that looks like a bomb exploded."
It's always that way, isn't it?
--
Today I cut the first side window on the Airflyte. I've never done one before with new skin so it was slow going. One mistake and the new skin is ruined. No pressure!
Did you see my video on how I cut that hole using a tin can for the radius??? "Use what you have" ... |
|
nccamper
Administrator
Posts: 7,744
Likes: 2,871
1962 Forester- 1956 Shasta
Currently Offline
|
Post by nccamper on Mar 5, 2020 10:10:44 GMT -8
Did you see my video on how I cut that hole using a tin can for the radius??? "Use what you have" ... I watched the video in the Shasta series but missed your tin can trick. At first I tried a can but instead took the old skin, placed cardboard under it and traced the corner then cut it out and used the cardboard as my guide. I cut it with the multi-tool (leaving a little extra) then hand trimmed it.
Anyone looking for pointers, check out Mobiltec's videos. cannedhamtrailers.com
|
|
nccamper
Administrator
Posts: 7,744
Likes: 2,871
1962 Forester- 1956 Shasta
Currently Offline
|
Post by nccamper on Mar 22, 2020 11:02:54 GMT -8
I can't remember if I shared my first finished dinette window before going to Haiti.
My $116 sheet of Boomerang Formica arrived. I ran out and bought the plywood and glue to make the table and countertop. No telling how long the Lowe's will stay open.
My neighborhood is as eerily quiet. My projects make a lot of noise. I feel like I'm running power tools in the local library.
Today I'm getting the vegetable garden going. Fresh vegetables may be a priority in a few months. Let's hope not.
|
|
mel
Senior Member
 1964 Shasta Airflyte
Posts: 1,729 
Likes: 523
Currently Offline
|
Post by mel on Mar 22, 2020 16:18:53 GMT -8
nccamper that new skin looks sooooooo good and I love the green boomerang.
|
|
SimonTuffGuy
Junior Member

Posts: 53
Likes: 9
1973 Shasta 1400
Currently Offline
|
Post by SimonTuffGuy on Mar 22, 2020 18:12:24 GMT -8
So many incredible projects happening... I love watching the progress of all these.
|
|
|
|
Post by Teachndad on Mar 24, 2020 14:13:52 GMT -8
Hi Friends, Joe, your work on that door is amazing. You have some mad skills!!  You can be right up there with NCCamper as part of the mad skills team. You too, Larry. Rod |
|
|
|
Post by Teachndad on Mar 24, 2020 14:16:02 GMT -8
Hi Friends, I have been working (off and on) on the galley jalousie window for my ’57 Westerner since June of last year along with my front window assembly. The galley window has been disassembled and rebuilt with new screws, cleaned and rescreened. I cleaned it with a sponge with some soap and water and then cleaned again with Alumabrite from Napa Auto Parts and Scotchbrite pads. I went over it with a low speed Dremel and a small brass cup brush on the interior only. The exterior frame was polished just yesterday with Mother’s Mag Polish. I am not going to polish the interior. I want to move on. Gutter seal was also used to seal up any corners/water intrusion points. More pix of the complete window before and after to come. The images below show only the non drive side of the jalousies before and after. Before  non drive interior dirty non drive interior dirty by
After cleaning
 Non drive interior view Non drive interior view by
Cheers,
Rod
|
|
|
|
Post by wisconsinjoe on Mar 28, 2020 11:53:22 GMT -8
Yep, been working old windows too. There are so many hard to reach surfaces to clean. Not going for any more shine than a nice mill finish. Still, lots of work.
|
|
|
|
Post by wisconsinjoe on Mar 28, 2020 11:57:48 GMT -8
Hi Friends, Joe, your work on that door is amazing. You have some mad skills!! You can be right up there with NCCamper as part of the mad skills team. You too, Larry. Rod I am not worthy. Although I can build a lot of stuff, it seems everything on these canned hams is new to me. I read, study, ask questions here (Thank you to everyone!), and then sometimes I think of another way to do something. I'm lucky I have a great workshop to work in. And now that we are all hunkered down, we have a lot of time to work on our new camper. Good way to stay busy. |
|
datac
Active Member
Posts: 339
Likes: 170
1957 Cardinal
Currently Offline
|
Post by datac on Mar 30, 2020 11:34:24 GMT -8
One of the upper cabinets in the Cardinal had some minor cosmetic veneer damage, and since I'm getting ready to replace the adjacent roof work it was now or never. I started just sanding the old veneer smooth to give a good base for a layer of fresh veneer, but it turned out to be easier just to strip off the whole layer and start from scratch. This is why I'm in year three of this not-taking-on-another-project project.
|
|
ekimnamniets
Active Member
Posts: 179
Likes: 34
Currently Offline
|
Post by ekimnamniets on Mar 30, 2020 11:39:29 GMT -8
Looks good!
|
|
mel
Senior Member
1964 Shasta Airflyte
Posts: 1,729
Likes: 523
Currently Offline
|
Post by mel on Mar 30, 2020 16:38:46 GMT -8
Wow, datac that looks so good |
|


 You can be right up there with NCCamper as part of the mad skills team. You too, Larry.


