Ten
3K Member
  
Posts: 3,432
Likes: 1,467
70 Shasta 16SC + 1964 Airflyte
Currently Offline
|
Post by Ten on Jun 16, 2015 7:48:51 GMT -8
Suffered a couple setbacks with the SC this week. One thing will always lead to another. I really did not want to get into the framing this year till after we had a chance to get out with the trailer, but looks like plans have changed themselves. 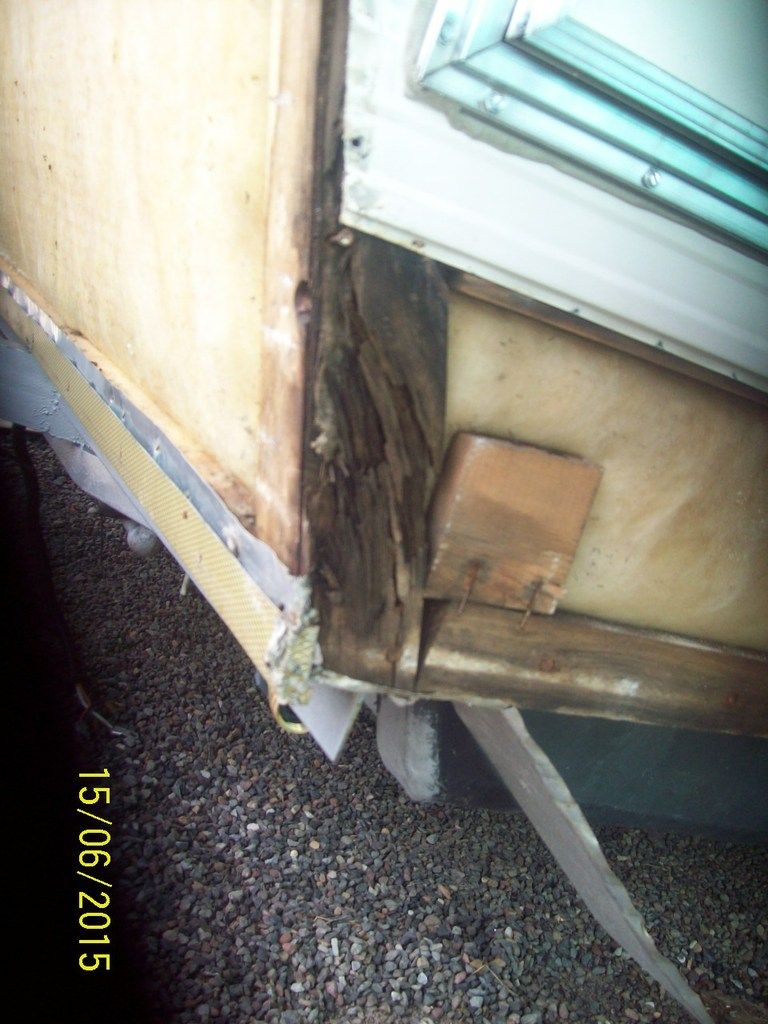 I finally put water to it to test the system. A few minor leaks were solved with a 3/4 wrench on some of the fittings. The inlet was sad-looking so I changed all that. The hardest part was the faucet in the kitchenette, as it leaked from the inlets and is hard to reach so I lifted the sink out, and ended up changing the strainers and the outlets and p-trap as well. With all put back together, the only thing left was the pump, and that refused to siphon from the holding tank, so a new 12-volt pump will be in order, when finances allow. Drainage is a small system, even on the self-contained setup. The grey water setup was all intact, and with the new tail off the galley sink, it is all buttoned up. The dreaded black tank is another story, as it had a hole in it. I took 3 days to patch the hole up using a product called "Plasti-Mend Black", a chemical solvent that "melts" into the ABS to bond the resin into the plastic. (There are other versions of this product available for different types of plastics as well.) Once the hole was sealed off and the Plasti-Mend set up, it was time to test. I filled the tank to the top, using the flush on the toilet and the garden hose with a tank-rinser attached. The hole was successfully patched...but there was water running everywhere from the top of the tank, even out the far side of the trailer across the belly pan! I certainly see why people give up on these old tanks and forfeit the bathroom feature...I am still investigating the leak, but I think the problem is there is no seal between the floor flange and outlet, and the opening in the tank itself. (Ideas on how to mend such a problem will be gratefully accepted.) I began to take the pieces of tin down to try inspecting the tank, and found myself elbows-deep in it...not the tank itself, thankfully.... I know there is always rot in the framing to some degree, and all the searching I have done so far has lead me to believe it is really minor in this one. The bottom corner on the curbside shows no water infiltration at all... 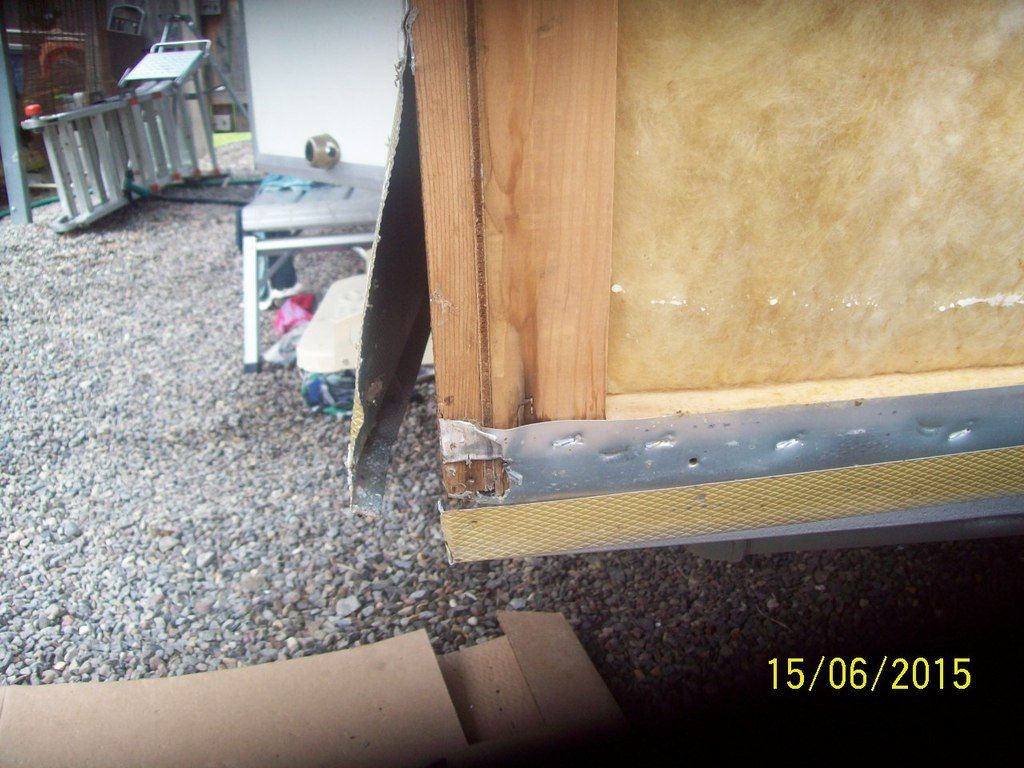 The streetside corner however is pretty bad... it is the corner below the area where the refrigerator vent had been missing for who-knows-how-long. 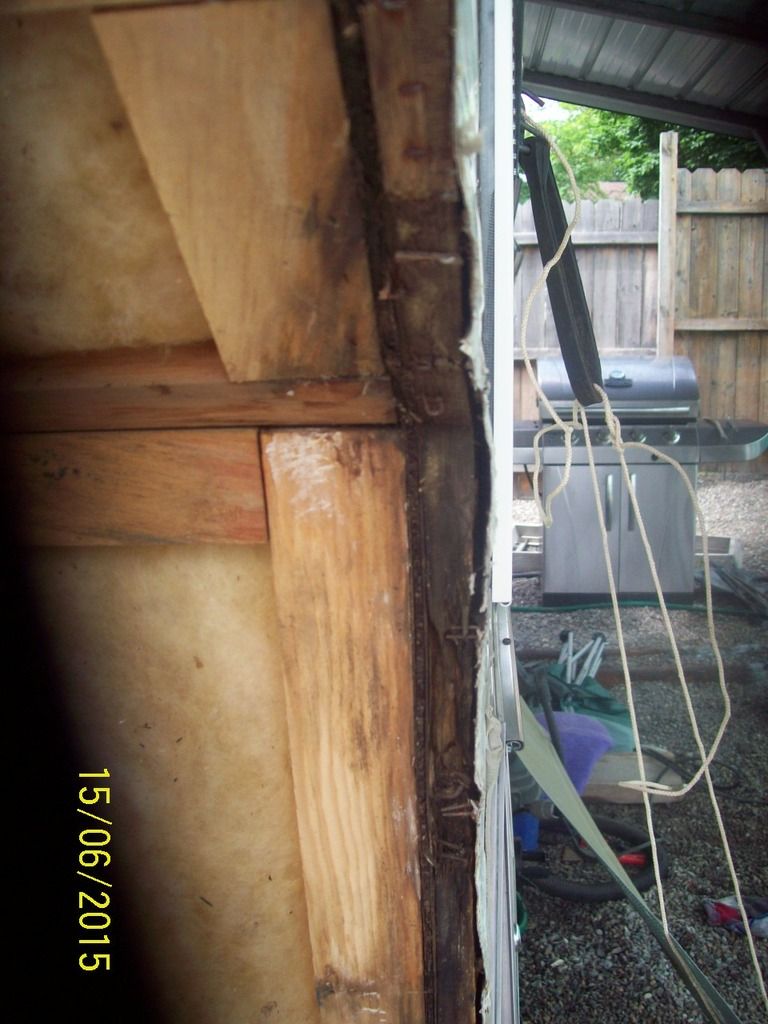 No real surprises here, but just didn't want to start on this right now. Off I go to pull the corner apart... 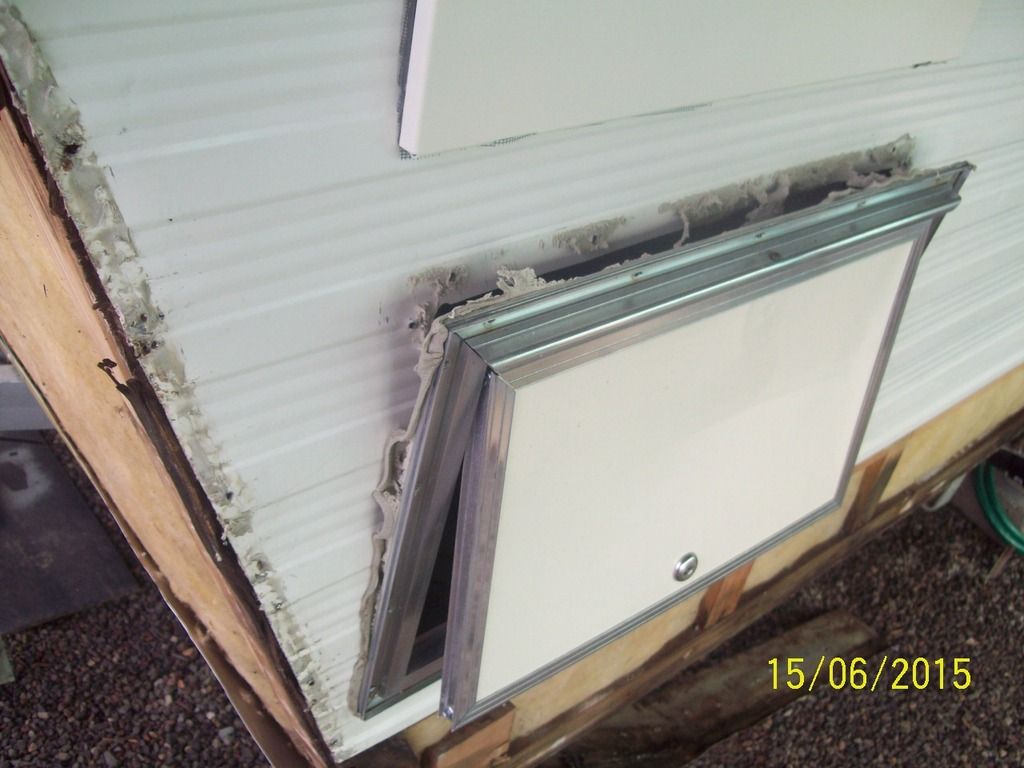 |
|
|
|
Post by vikx on Jun 17, 2015 10:02:31 GMT -8
Great pictures, Ten, and work ahead...
I'm sure many of us have opened the same can of worms. Sorry about the timing but you will get it fixed.
*Please accept my apologies for moving this post. It was the last of "What did you do to your Trailer Today IV". When I moved it to "V", the order of posts was out of whack.
|
|
RinTin
Full Member
    
Posts: 760 
Likes: 297
Currently Offline
|
Post by RinTin on Jun 17, 2015 10:34:19 GMT -8
I know the feeling. I bought my 65 Aloha thinking I could clean it up and use it for a couple years while I repaired the Jewel. Look where I'm at now, LOL. Oh well, now you have an opportunity to make it better.
|
|
Ten
3K Member
  
Posts: 3,432
Likes: 1,467
70 Shasta 16SC + 1964 Airflyte
Currently Offline
|
Post by Ten on Jun 17, 2015 16:33:34 GMT -8
Wow, I musta gradu-tated...I got my own thread! Thank you for the clean-up Vikx. I know how tedious it can get, but that is one of the reasons this has been such a great place to stay...great housekeeping! Next thing you know, I'll be finding a chocolate on my pillow! Okay, now back to work. I did not want to start a thread about this trailer because I usually accomplish so little, and the work is pretty boring to describe. I really did hit a turning point this time though on two fronts. First, that cargo door in the photo above had already been out, polished, and resealed. So was the fridge vent door above it, and the water heater was already leak-checked and waiting to fire. This teardown goes back over those steps, and like I said, I was going to wait...this little bit of rot would have traveled at least this year, maybe next, and gave me a shot at doing up the Airflyte, then taking this one back down. Nope, not so fast, Bucko.... The water spill had made a mess that would take a while to dry, especially with a belly pan. But the stench the following day was indescribable in mixed company. When I tried to open up the tin underneath, I knew the wall was coming apart as well. I am no carpenter and this kind of work always sets me on my heels. I have seen plenty of methods but have little hands-on experience, and fewer skills.....I decided to replace the bottom 1X3 with a 1X6...set to opening her up and trying to move quickly to adding the new board. I found that between the wall panel and the skirt board, there was a substance that looked like tar, at first thought was a sealer for the area around the black tank. Then thought might be ancient remains of a black-tank overflow...... ewwwwwwwwwww..... then, sorta relieved, found all the nesting in the void above, and realized it was actually ancient mouse leavings...! Imagine my relief!! Okay, don't even try to imagine it. It was not really pleasant. I bleached and scraped and bleached some more and planed the wood and bleached some more.... 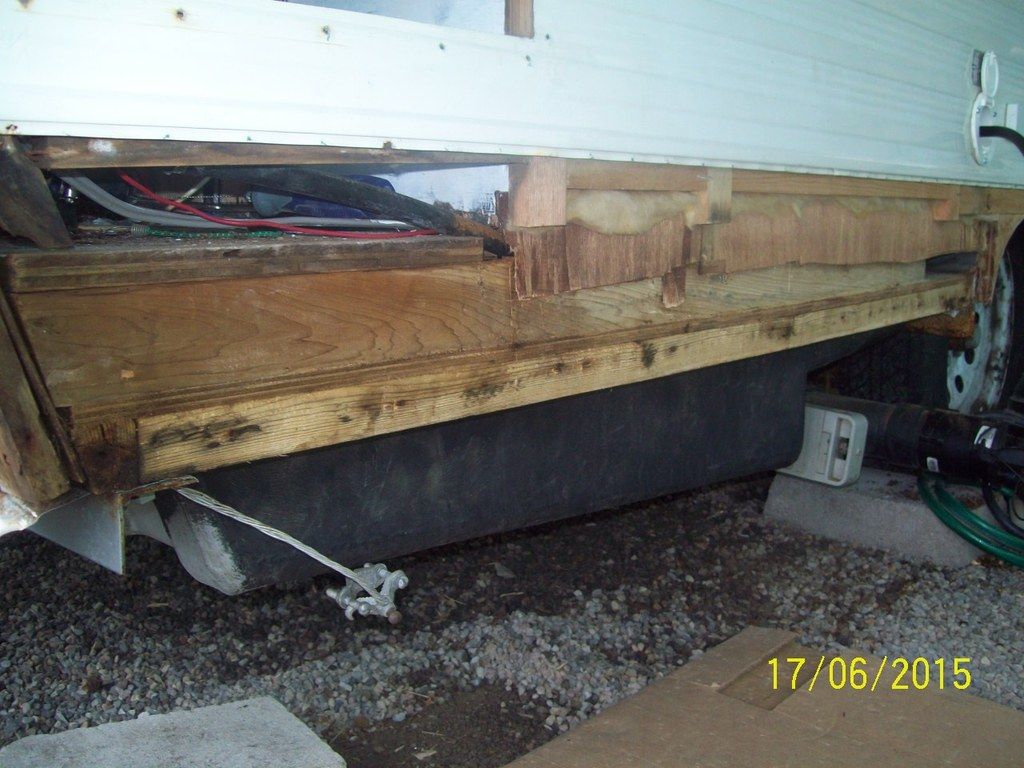 It will sure look better with new boards in place, AND, I'll be able to say I got something worthwhile done! |
|
Ten
3K Member
  
Posts: 3,432
Likes: 1,467
70 Shasta 16SC + 1964 Airflyte
Currently Offline
|
Post by Ten on Jun 17, 2015 16:55:10 GMT -8
The second "front" has to do with the black tank. I know there are lots of reasons for disposing with it and going with a porta potty. But, the 52-percent-purist in me really wants the bathroom feature to work in this critter. Mama and me aren't spring chickens any more, the grandkids are babies yet, and the bathroom feature at three A M is quite a selling point. It specially bugs me with a trailer that is this original and all there. But the seal is not existent between the drop tube and the tank. While the wall is open in this corner I set out to figure out a cure. First approach....everything is opened up, the toilet is dismounted, and the wall is opened up to access the rear portion of it, try dropping the tank. I cut the vent tube off to allow the front of the tank to drop down, but found it is wedge-shaped, and will not come down from the frame in the front. 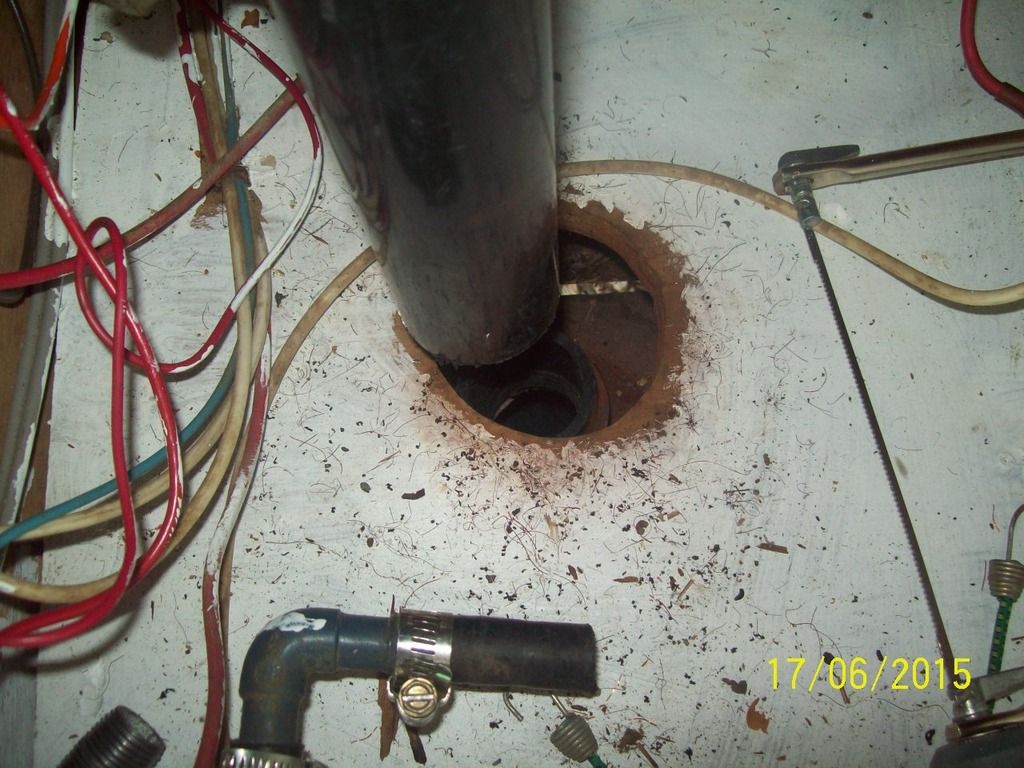  Besides being clamped by the outlet to the plumbing, the rear of the tank sets up inside and rests on an angle-iron frame rail. 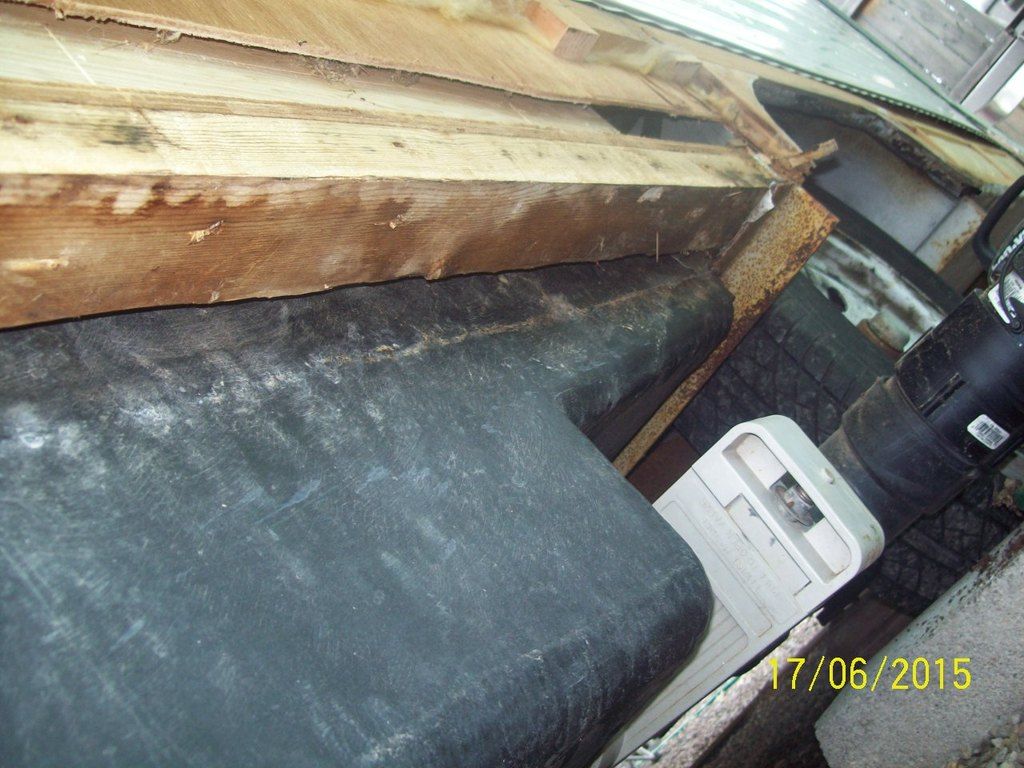 So much for dropping the tank. Next was to lift the floor flange, but it is hung up against the shower pan floor. It apparently had some sort of fitting that sealed it in the tank. It would not lift out more than this: 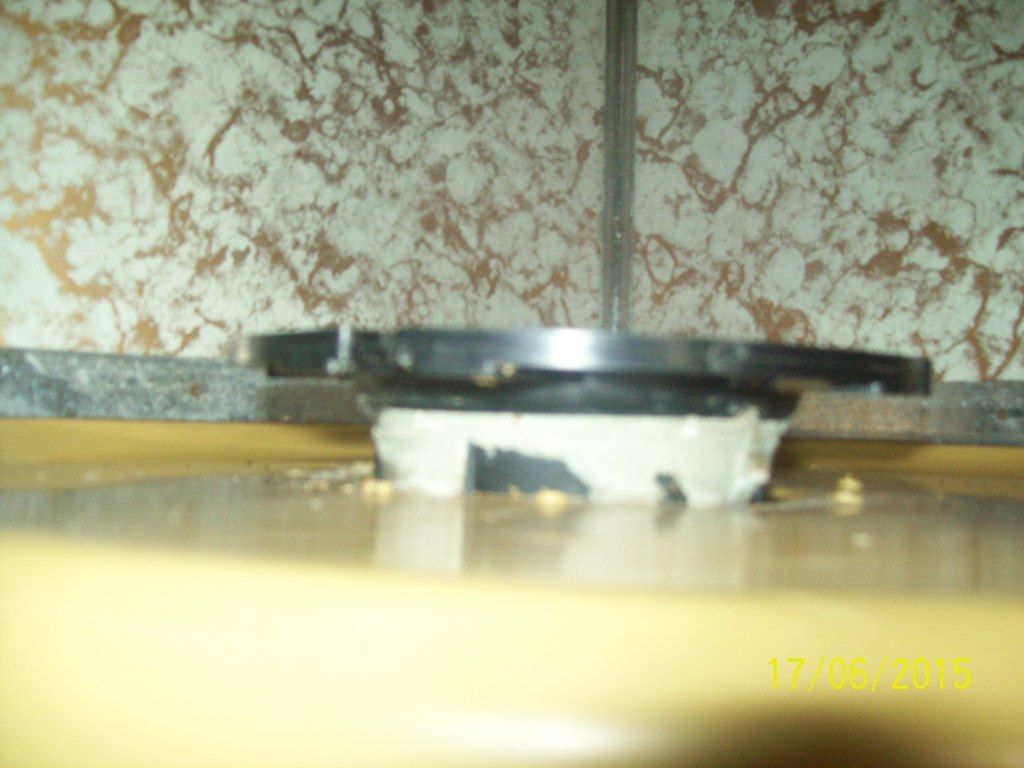 It appears the only other alternative is COMPLETELY removing the bathroom closet in order to lift the shower pan, and even then there is the shower drain to contend with. The wall board in the shower closet are INSIDE the pan, so the walls would have to remove before the floor pan would come up. If anyone has any insight as to how that tube could be resealed into the black tank with no access to it, I would sure be appreciative of knowing how.... Thank you in advance! |
|
|
|
Post by vikx on Jun 17, 2015 21:48:04 GMT -8
Is there anything on the tank where the drop tube should be? Is it just an open hole or?
My thought is to use a Fernco on the toilet flange (rubber coupler with radiator clamps). Clamp a pipe onto the bottom... I believe they still make rubber grommet tank fittings. They sort of snap around the hole/plastic. If you could install one on the tank, smear it with plumber's grease and the right size pipe should slide in.
Sounds like a real pain. I really haven't worked on many black tanks (wonder why?) but do remember the grommet fittings...
Last thought: could a grommet/pieces have fallen into the tank? It could be a blockage, if so.
|
|
Ten
3K Member
  
Posts: 3,432
Likes: 1,467
70 Shasta 16SC + 1964 Airflyte
Currently Offline
|
Post by Ten on Jun 18, 2015 13:23:40 GMT -8
As near as I can tell, there is just a rough-cut hole in the top of the tank. {WARNING: Graphic Image..."Belly of the Beast"...} 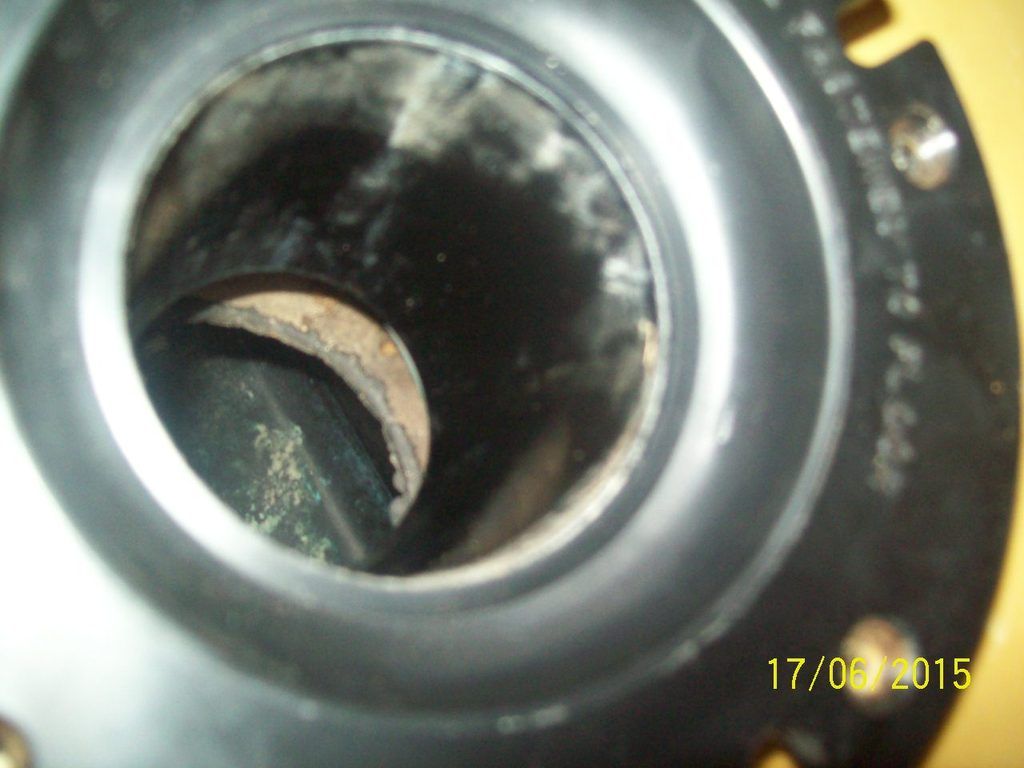 I cannot say for absolute sure that there isn't something dropped into the tank, but it seemed to dump okay when I let her loose last week. I do know there were mouse-leavin's in the tank, some nut shells and paper leftovers from nesting. If I can pull the tube up through the shower pan then I could use a fernco or a grommet of sorts, but the way it is, there is absolutely zero access to the space between the floor and the tank. It would also allow access to inspect the tank more closely, and would solve the mystery of how they were originally put together... a piece of information I'd dearly love to know....( I know, I am easily entertained!) |
|
Ten
3K Member
  
Posts: 3,432
Likes: 1,467
70 Shasta 16SC + 1964 Airflyte
Currently Offline
|
Post by Ten on Jun 18, 2015 13:36:20 GMT -8
Oh yeah, and by the way.... Before: 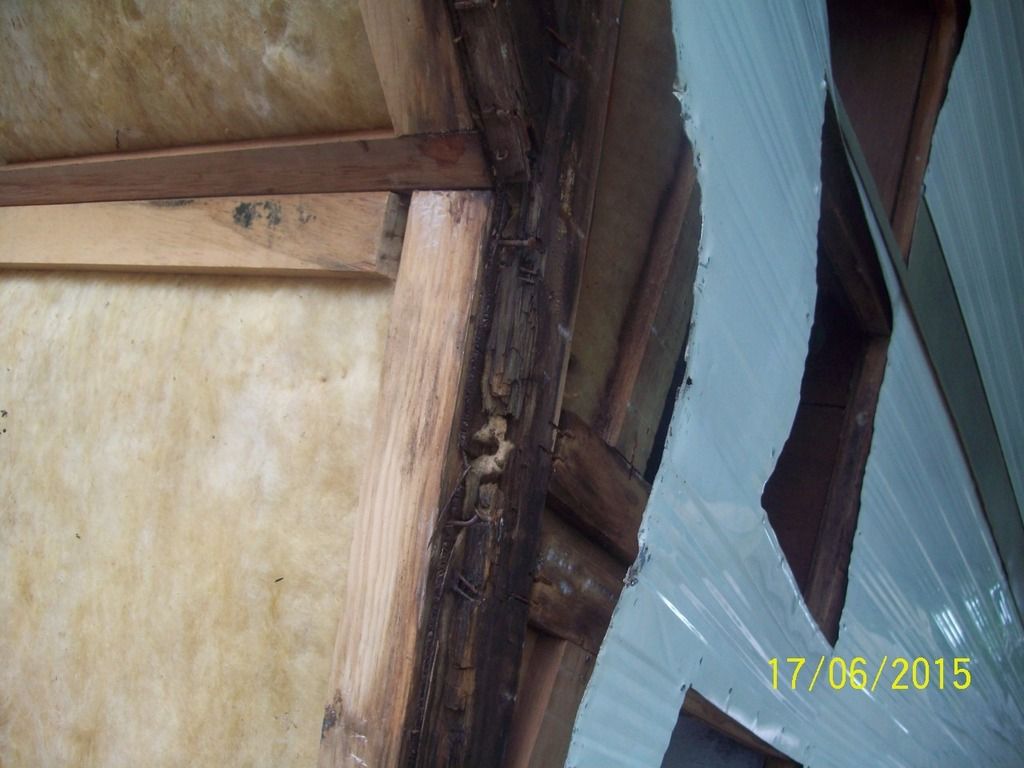 After: 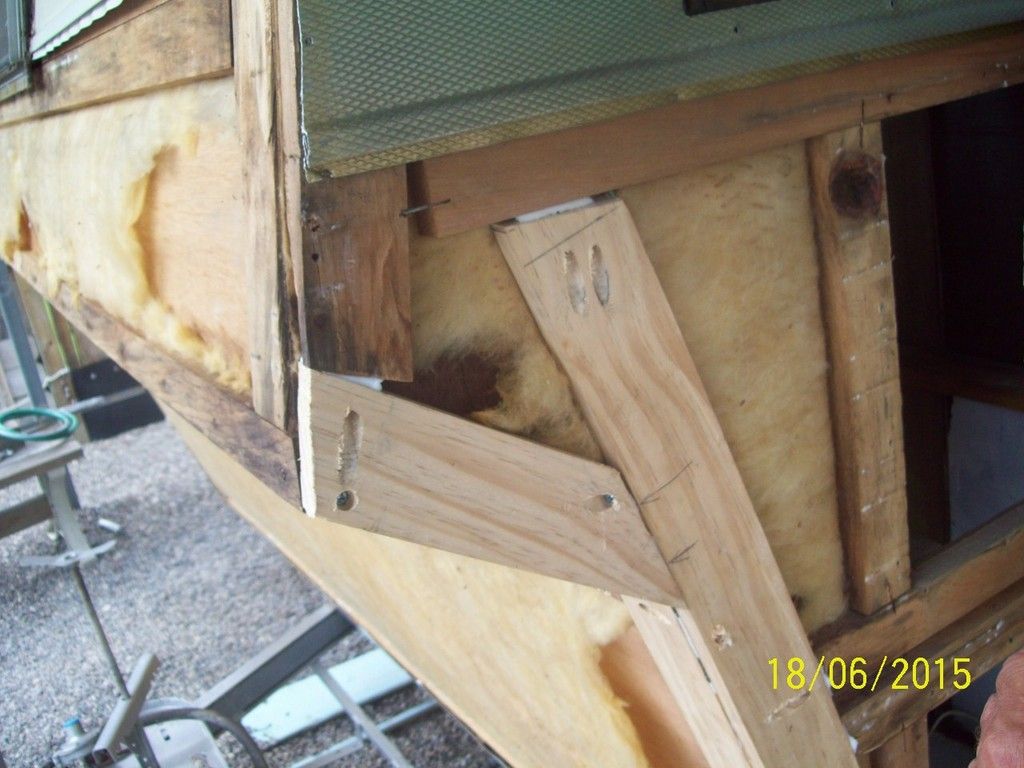 Got to use all my carpentry skills today...both of them.... Hand saw and a pencil, and the Kreg jig. My favorite part so far is the 6" skirt board replacement. I'm not sure it makes a huge structural difference, but it sure covers up a lot of sin... 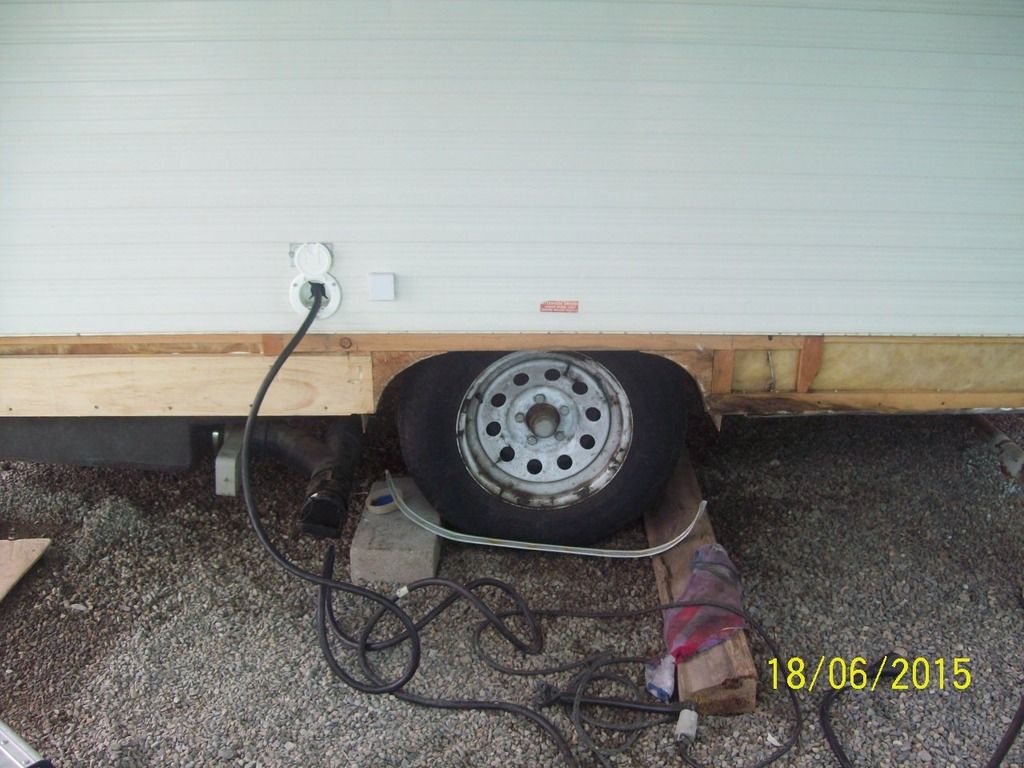 |
|
mobiltec
5K Member
     I make mistakes so you don't have to...
Posts: 9,895 
Likes: 3,815
1954 Jewel In Progress...
Currently Offline
|
Post by mobiltec on Jun 18, 2015 17:39:43 GMT -8
Looks good to me. And yes new skirt boards can make a huge structural difference.
|
|
nccamper
Administrator     
Posts: 7,824 
Likes: 2,935
1962 Forester- 1956 Shasta
Currently Offline
|
Post by nccamper on Jun 18, 2015 20:06:59 GMT -8
I like the wider skirt board idea.
My wife asked why I couldn't leave the Forester alone since it's good to camp in. A wise woman...but I will still go looking for problems once our Compact is finished next week.
|
|
|
|
Post by vikx on Jun 19, 2015 21:19:59 GMT -8
Framing is looking good Ten!
I'm at a loss on the tank/toilet. I've worked on a small motorhome with no connection. The man kept complaining about toilet paper "catching". My boss told him to use more water... Really? He sent him down the road like that. I was shocked.
So, I'm thinking something has to be dismantled to fix what you have. The tank should tip and drop but I believe you that it won't. Option: ruin the tank and fix the plumbing, this would entail a new tank and possible new shower pan. Whatever is on the bottom of the toilet flange is probably the grommet or similar. You could cut the shower pan to gain access and put it back together your way to access the fittings.
One last thought is to talk to a mom and pop RV repair shop. The older grey haired guy might know of a few tricks to get the tank to drop and/or replace the grommet.
Keep us in the loop.
|
|
Ten
3K Member
  
Posts: 3,432
Likes: 1,467
70 Shasta 16SC + 1964 Airflyte
Currently Offline
|
Post by Ten on Jun 20, 2015 11:05:11 GMT -8
I am considering a number of options at this point, none of which are "officially-sanctioned fixes"... But should work. 1.) Use it. The tank won't leak over the top if it is only used for emergency nighttime use for liquids only, monitored closely, and kept with a deodorizer in it at all times. Not a good alternative, because even with a deodorizer there will be fumes present. Traveling may lead to "slopping"... I would rather fix it right. Second, leave the toilet dismounted and out, plug the drop tube off and cover the raised portion of the floor pan and the flange with a plywood cover, and use the porta-potty.... 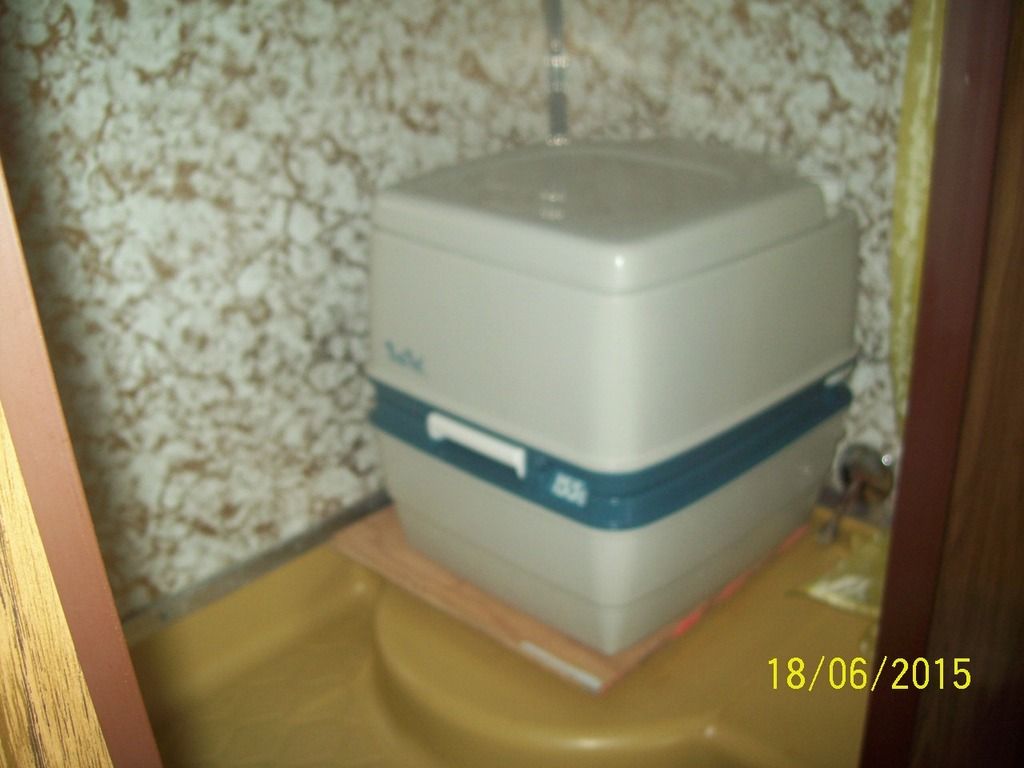 Another possibility may be to lose the black tank, and plumb the drop tube to accept a bayonette fitting, then use a portable tank to flush directly out. I guess I really need to keep trying to drop that tank altogether to try fixing the original setup... time is going to tell. Anyway, as long as the front corner is open already, seems logical to keep on opening it up, and seal off the J-channel along the edges seams now. 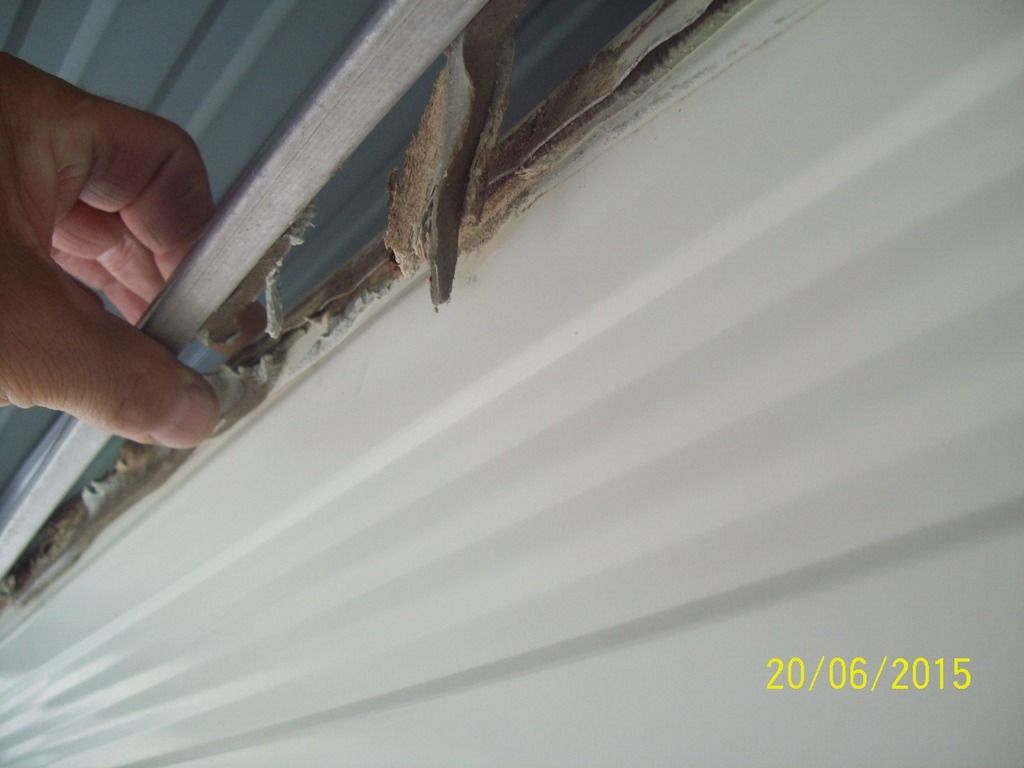 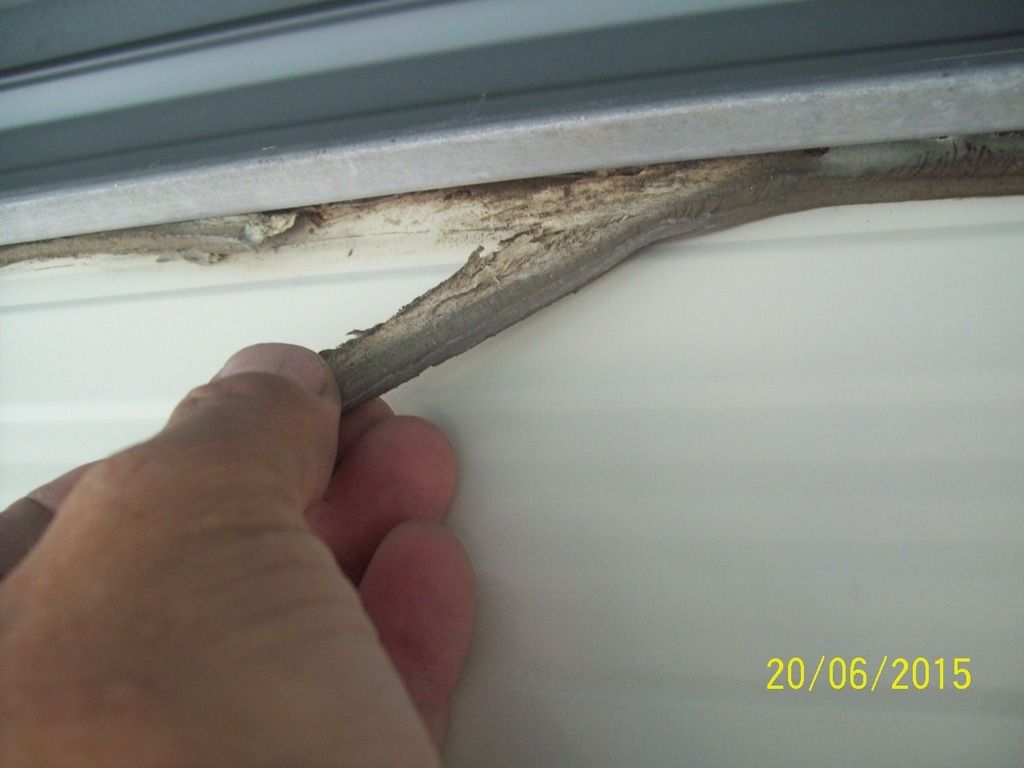 What I am finding is a perfect example of why it keeps being insisted on, that the putty be replaced along all the seams, J-channels, window frames, etc etc, on all the older trailers that haven't had it done. The old tape comes off very dry and crumbly, some of it actually feeling like cardboard rather than putty. This dried-out stuff will not stop water seepage around the edges, folks. This is where all the frame rot comes from. |
|
mobiltec
5K Member
     I make mistakes so you don't have to...
Posts: 9,895 
Likes: 3,815
1954 Jewel In Progress...
Currently Offline
|
Post by mobiltec on Jun 20, 2015 13:55:10 GMT -8
Exactly. And it should be replaced every 15 to 20 years at least. All older trailers that have not been re-sealed should be immediately. Anything older than 15 years is leaking. Some younger than that because of the really crappy production methods and practices being incorporated at the factories today.
|
|
theresa
1K Member
 from Northern Maine ~ Proud new owner of Lola, a 1960 Shasta Airflyte and Pearl, a 1962 Mobile Scout
Posts: 1,055 
Likes: 347
Currently Offline
|
Post by theresa on Jun 22, 2015 7:42:03 GMT -8
Exactly. And it should be replaced every 15 to 20 years at least. All older trailers that have not been re-sealed should be immediately. Anything older than 15 years is leaking. Some younger than that because of the really crappy production methods and practices being incorporated at the factories today. My 1999 5th wheel had more leaks and rot than my 1960 Shasta. I'm another proponent of frequent checking and resealing. |
|
mobiltec
5K Member
     I make mistakes so you don't have to...
Posts: 9,895 
Likes: 3,815
1954 Jewel In Progress...
Currently Offline
|
Post by mobiltec on Jun 22, 2015 10:05:09 GMT -8
Exactly. And it should be replaced every 15 to 20 years at least. All older trailers that have not been re-sealed should be immediately. Anything older than 15 years is leaking. Some younger than that because of the really crappy production methods and practices being incorporated at the factories today. My 1999 5th wheel had more leaks and rot than my 1960 Shasta. I'm another proponent of frequent checking and resealing. Trailers are being built worse today than ever before. Motor Homes as well. I hear horror stories all the time about trailers leaking or parts and appliances failing in the first year of ownership. Many times in the first month. First trip. |
|


