dkelley
Member

Posts: 35
Likes: 9
Currently Offline
|
Post by dkelley on Apr 16, 2024 1:49:59 GMT -8
Id like to replace part of the roof on my Trotwood Lark. Im not putting back the furnace so I don't need or want the vent. Replacing the old Herh with a Maxxair vent/fan. After all the work I'm doing rebuilding the interior, I don't trust myself to patch in the hole from the vent. I need a piece about 84 inches wide. To get that i think it will need to be seemed. I tried Atomic Trailer Parts but they say they aren't doing seemed roofs now. I'm in the northeast (Maine). Any ideas for resources?  IMG_0966 IMG_0966 by David Kelley, on Flickr 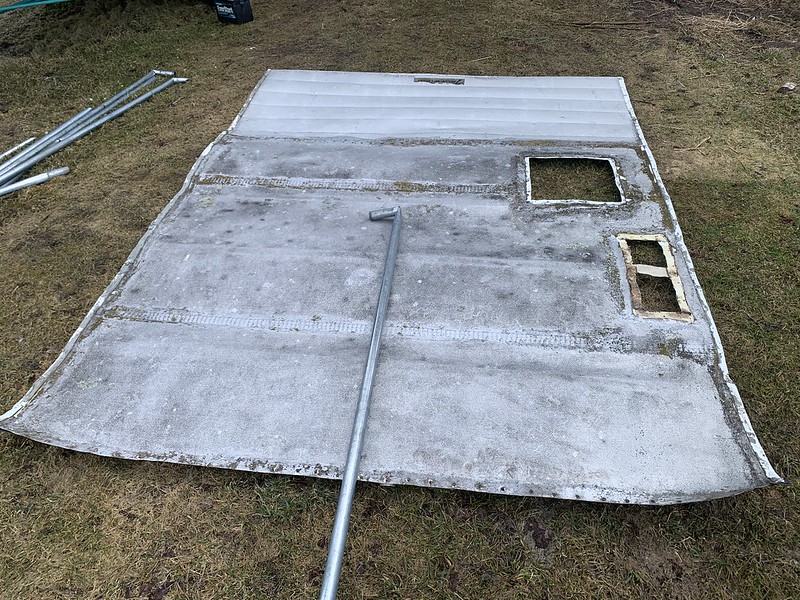 IMG_0970 IMG_0970 by David Kelley, on Flickr |
|
nccamper
Administrator 
Posts: 7,744 
Likes: 2,871
1962 Forester- 1956 Shasta
Currently Offline
|
Post by nccamper on Apr 16, 2024 2:20:07 GMT -8
If the roof has a standard seam you won't be able to replace a small section. As I understand it, the machine crushes the seam closed. I doubt you'll find a fabricator who will work with your old roof. My advice is replace the entire roof. Others may disagree.
|
|
dkelley
Member
Posts: 35
Likes: 9
Currently Offline
|
Post by dkelley on Apr 16, 2024 2:28:35 GMT -8
Thanks nccamper, I do want to replace the whole roof. I'm wondering who makes sheets for roofing?
|
|
|
|
Post by Teachndad on Apr 16, 2024 6:03:19 GMT -8
|
|
John Palmer
Senior Member
 Hi, From a vintage trailer guy located in Santa Ana, CA. It's good to see lots of activity here.
Posts: 1,629
Likes: 576
Currently Offline
|
Post by John Palmer on Apr 16, 2024 7:34:39 GMT -8
Smooth 103" wide, .040" thick, Semi-Trailer roof skin is sold "by the foot" for under $20/ft at any Semi Trailer repair shop. You do not have to do an RV "S" lock, or a Pittsburg seam at the ends. It can be installed using a "lap seam" at the ends. Every riveted skin trailer you have ever seen was built with lapped aluminum seams. You just need to make the seam over a good poplar rafter for support. Use a urethane seam sealer (Trem Pro 635) between the joint. The ability to buy it, and "will call" locally will save you thousands of $$$$.
John Palmer
|
|
dkelley
Member
Posts: 35
Likes: 9
Currently Offline
|
Post by dkelley on Apr 16, 2024 8:26:37 GMT -8
Very helpful info. Thanks!
|
|
newin62
Active Member
Posts: 167
Likes: 141
1962 Shasta Airflyte
Currently Offline
|
Post by newin62 on Apr 19, 2024 6:52:07 GMT -8
Hi dkelly,
I used the .040 semi trailer roofing material for the roof on my build. It was a bit difficult to handle and a pain to pick up but I saved a ton of money and it worked out quite well. I'm in Canada so our lousy dollar, import duties, taxes and shipping made Hemet in California a non starter for me.
Keep in mind that because the semi trailer material is thicker, it is much more difficult to bend the folds along the edges, especially around a radius. To fold around the radius, Wisconsin Joe who is a member here posted how he made several relief cuts along the edges that were shallow enough to still give a good overlap and putty tape seal. I copied that method with success.
if you go that route, make sure the aluminum is pulled off a large roll when you buy it as the forklift drivers damage the inside of the rolls when moving them around. Avoid any pieces that are pre-cut and rolled up already.
With all that being said, one big benefit of ordering from Hemet is that I'm pretty sure they can also bend the 5 breaks at the one end so it would match the original look of the trailer. Also the thinner aluminum thickness would certainly be easier to work with.
Good luck.
|
|
dkelley
Member
Posts: 35
Likes: 9
Currently Offline
|
Post by dkelley on Apr 19, 2024 13:52:07 GMT -8
Thanks for your input newin62. The roof panels on this trailer don't fold over the edge. I see how that would be a better seal but it's not how it was built originally. Knowing that the .040 is hard to bend, I'll stay with the flat edge and hope for a successful putty /J-rail seal.
The part I want to replace covers the flatter part of the roof before the radius. I can reclaim the section that has the breaks and reuse it. It's stuck to the roof piece with some stubbornly sticky substance. I hope a heat gun will soften things up.
Thanks for sharing your experience and for your suggestions and encouragement.
|
|
John Palmer
Senior Member
Hi, From a vintage trailer guy located in Santa Ana, CA. It's good to see lots of activity here.
Posts: 1,629
Likes: 576
Currently Offline
|
Post by John Palmer on Apr 19, 2024 18:58:48 GMT -8
Hi dkelly, I used the .040 semi trailer roofing material for the roof on my build. It was a bit difficult to handle and a pain to pick up but I saved a ton of money and it worked out quite well. I'm in Canada so our lousy dollar, import duties, taxes and shipping made Hemet in California a non starter for me. Keep in mind that because the semi trailer material is thicker, it is much more difficult to bend the folds along the edges, especially around a radius. To fold around the radius, Wisconsin Joe who is a member here posted how he made several relief cuts along the edges that were shallow enough to still give a good overlap and putty tape seal. I copied that method with success. if you go that route, make sure the aluminum is pulled off a large roll when you buy it as the forklift drivers damage the inside of the rolls when moving them around. Avoid any pieces that are pre-cut and rolled up already. With all that being said, one big benefit of ordering from Hemet is that I'm pretty sure they can also bend the 5 breaks at the one end so it would match the original look of the trailer. Also the thinner aluminum thickness would certainly be easier to work with. Good luck. Let's use some actual numbers to discuss the "thick and thin aluminum skin topic". Hemet Valley's aluminum skin is .030" thick. The Semi Trailer repair skin is .040" thick. So, what we are talking about is .010" or ten one thousandths of an inch. To put .010" in perspective, the average human hair is .003", so .010" is roughly three hairs thicker, not very much. Let's make it clear that the .040" thick aluminum is noticeably thicker than the .030". But with standard metal working practices it can be bent over the edge using only common hand tools. I use two different blocks of wood, and a leather mallet, and a plastic tipped body hammer. I've done several roofs with the Semi-Trailer aluminum and have never needed to notch the metal to make the curves. The 1/4" crown stapler I use is a cheap Harbor Freight tool, and the staples are off the shelf inventory at Home Depot. You can bend it and staple it with normal hand tools. A couple of things that are often overlooked is when stapling you need to find the "sweet spot" on adjusting your air pressure "at the stapler". Too little is bad, and Too Much is bad, there's a sweet spot that will drive the staples to the correct depth, and also have enough power to penetrate the extra .010" of metal. The other "best practice" is to hold the stapler at an angle to the work surface. This allows one staple leg to hit first, instead of both hitting at the same time. I also like to drive the staples down, and away from the edge so if you hit any screws (I use lots of screws) the staple will not curl back. The "five brakes", is called an RV "S-Lock" seam. It's kind of like a poor man's version of an air conditioning duct Pittsburg seam without the locking edge. Hemet Valley does not use a brake to do this step. It's done on a special roller, "at about light speed". John Palmer |
|


