newmexicogal
Junior Member

Posts: 77 
Likes: 25
Currently Offline
|
Post by newmexicogal on Oct 30, 2013 5:31:49 GMT -8
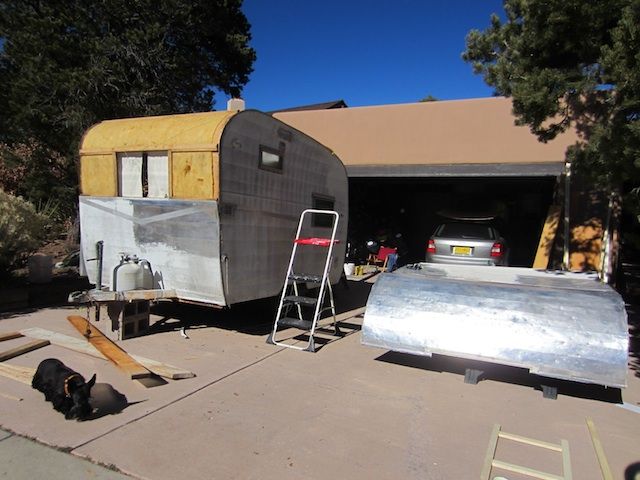
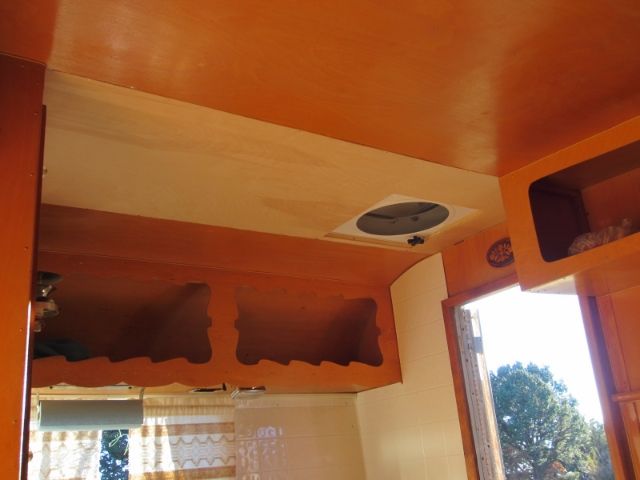
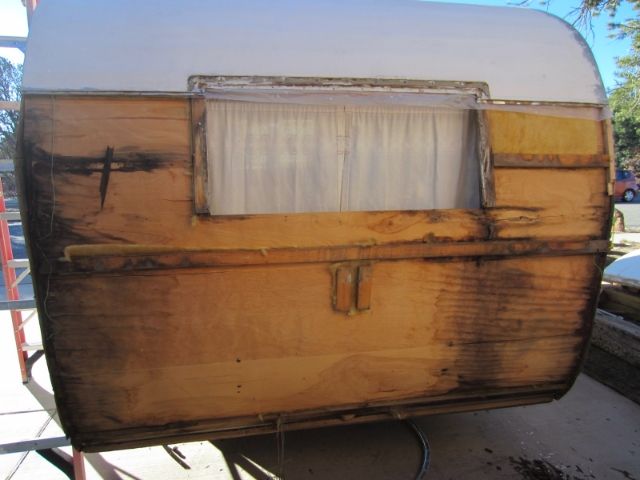
I could sure use some advice and help. We recently purchased a really sweet, really original 1964 Shasta Compact. We crawled all over her and she appears pretty sound with minimal water damage. I'm posting photos of the damage we are aware of -- the dreaded roof vent ceiling. I've started stripping her paint. Her roof has a nice coating of sno seal that's been slow going. I've also discovered a good layer of black tar, well applied, around her vent. The roof vent appears to be in good shape and seems to work well. She has some hail damage that you can see in the photos but the skin is generally in pretty good condition. I plan to strip her paint, bondo smooth the worst of the hail damage and repaint her. My questions are these: 1. Is it likely that the roof leak is her vent or j-rails? I've watched all of Mobiltec's videos on these topics but I'm new to this adventure. 2. Should I try and remove the roof vent, strip the sno seal and black goo? It sounds like the forum thinks a heat gun is the best way to attack the tar. I haven't tried that yet. 3. Would you recommend I pull the j-rail and peek under her roof to see how extensive the damage is? Is it likely the seal tape on the j-rail is failing and is the source of the leak? I watched Mobiltec's video where he raised the peak of the roof to prevent pooling -- I think that would probably be a useful exercise here. It appears the roof skin has enough play to allow that. 4. Does the forum advise replacing the old roof vent with a more water tight model or clean up the original (big job but I can do it) and seal it well going back in? I am planning to replace the damaged paneling inside and I want to do this repair right. We're willing to replace her roof skin but I'm not sure that's necessary here. Whew! Lots of questions! Any and all advice are much appreciated! 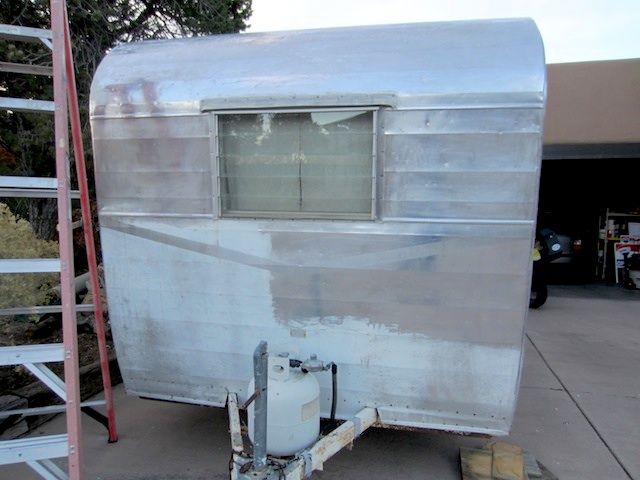 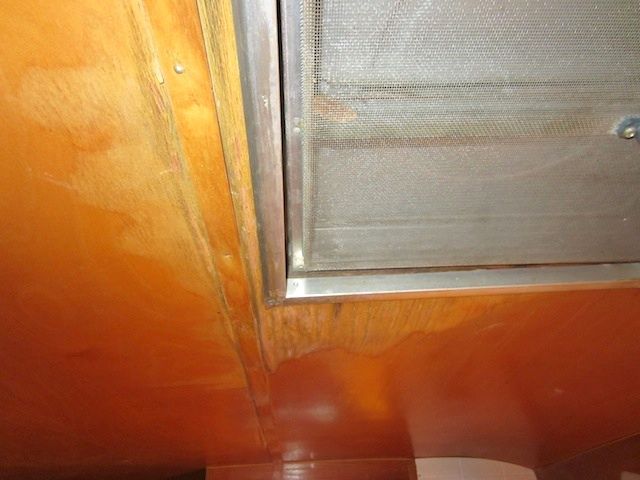 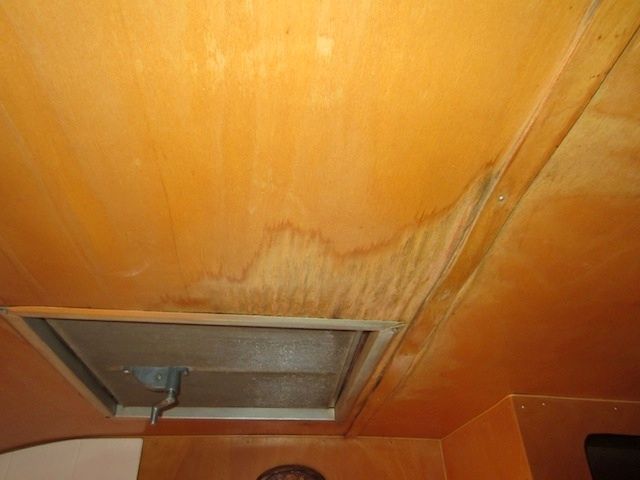 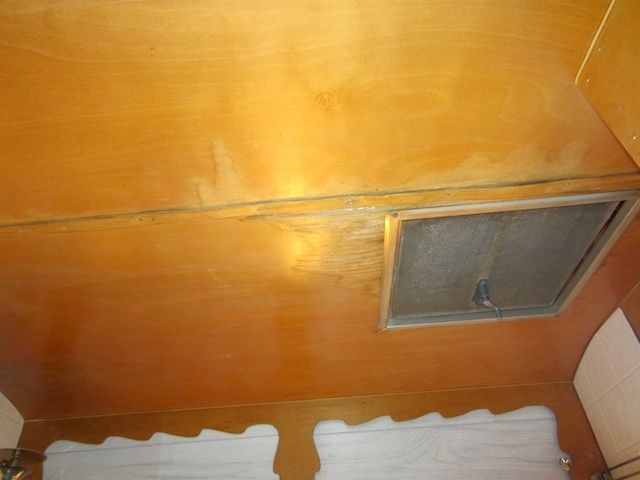 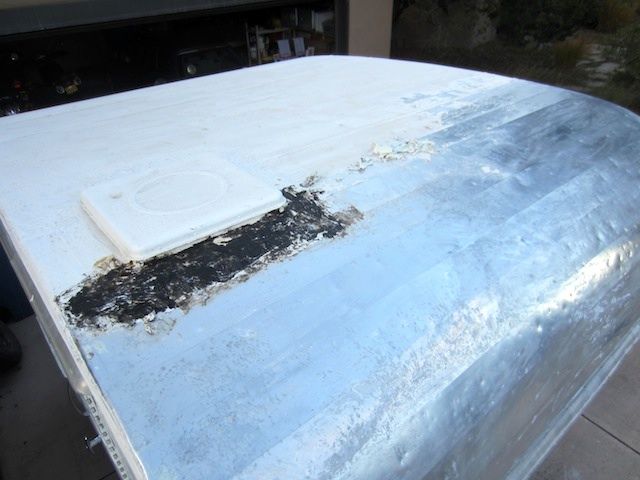 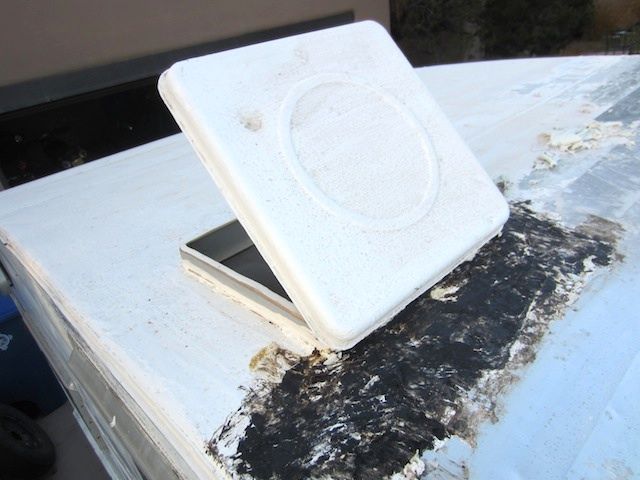 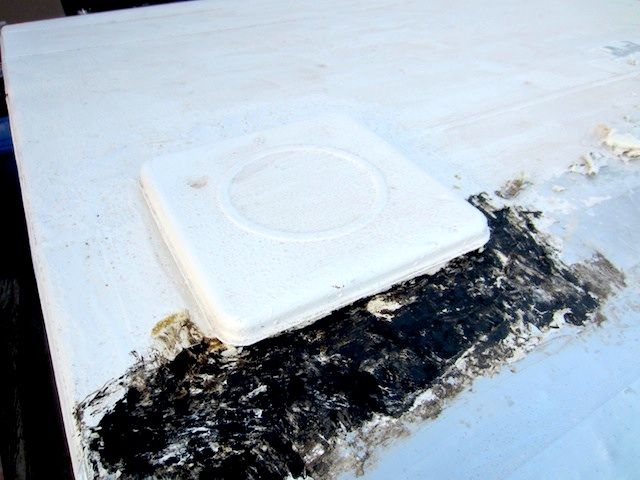 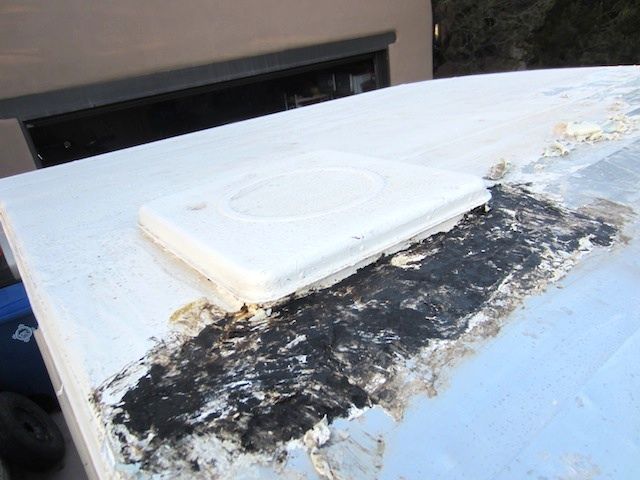 |
|
Ten
3K Member

Posts: 3,432
Likes: 1,467
70 Shasta 16SC + 1964 Airflyte
Currently Offline
|
Post by Ten on Nov 2, 2013 6:40:32 GMT -8
Okay, I'll take a stab at this one... Welcome.  My first piece of advice would be to ship that to me, and then you would not have to worry about it any more...I'll even send a couple hundred bucks for your troubles... Uhh, no, huh?  Well it didn't cost anything to ask. Seriously though, congrats on your find. We picked up a '64 Airflyte last year and are working on it still, and would love a '64 Compact to go with it, eventually. They are rather scarce around these parts. They seem like they are getting scarce everywhere though. From what you have shown in your photos, my inclination is to believe the damage inside is from the roof vent. That being said, if you have no reason to believe it has been done, then the putty tape should be replaced throughout anyway. J-rails, window seals, door frame, and roof vent. The putty will dry and harden over time, and usually the roof vent is just the first place the problem shows up. Leakage will develop around the windows and other areas eventually and will cause damage to framework in the walls and at the lower corners that is not so easily noticeable before it becomes extensive. The roof vent is installed from the outside, so the screws go in from the top. You will need to expose the screws which means getting some if not all the tar and snoseal off. I removed on that was similarly tarred, by exposing the screws and removing them, lifting the vent out, and the edge that was left offered a great starting spot to "lift" and "peel" the tar away. It might even give a similar advantage to the snoseal. You may find the tar preserving the finish of the paint, which may show an original color, and also may lift away cleanly, to a certain degree. Heating the tar is another option, it makes it more pliable to give it some "give"...the black stuff should also dissolve with diesel fuel or kerosene. Be advised that it becomes a messy project when you use oil-base substance to dissolve it. I never will understand why anyone would think it is necessary to coat an entire painted aluminum surface...it can only leak through seams, not through the solid panels. When you get the vent removed, you should be able to tell how much damage there is to the roof rafters and the immediate framing, as they will be exposed. The framing for the vent is reparable without removal of the roof. You also will be able to tell if there is any damage to the vent itself, but usually these leaks are caused by failed edge seals and not the vent itself. There may be a rubber seal around the edge that the cover sets to, and a good cleaning sure can't hurt the operation and looks of the original vent. Personally, I would not replace it unless you find obvious damage to it, or are installing a Fantastic Fan in its place. Vikx has a great method of reinstalling the vent, where the skin is propped about 1/8 inch with shims at the edge of the hole. This raises the skin enough to promote runoff of water away from the vent. Removing the j-rails will not give you access to the underside of the roof, as the skin is stapled down over the wall skins all along the edges. The rails really should be resealed at some point, but leakage around the j-rails is usually more evident in the wall corners, and at the lower corners of the framework, rather than across the ceiling. (The skirt boards along the bottom usually suffers the most.) I would not remove the roof skin unless you find some really catastrophic damage when the vent is removed. That being said, the best way for the ceiling panels to be replaced is complete removal of the roof skin. It really isn't as complicated as it may seem, but is a large project that may not need doing. It is not obvious from your photos how extensive the damage is to the ceiling on the interior. If the panels have not separated and de-laminated, you may be able to sand and refinish them in place, without the need for a major overhaul. The trim strip over the seam may need replacement, but a much smaller task than full panels. So, should I send my address and await its arrival here? No, huh? It looks as though you really did score a very nice old unit. This one appears in lots better shape than a lot of them I have seen of similar age. Don't worry about lots of questions. There are lots of answers to go with them. |
|
newmexicogal
Junior Member
Posts: 77
Likes: 25
Currently Offline
|
Post by newmexicogal on Nov 2, 2013 9:04:17 GMT -8
Dear Number Ten,
Thanks so much for taking time to share the great advice. I've spent every spare minute out scraping sno seal from the roof and removing the tar around the vent with a heat gun. I got the vent out last night. I think you may be right -- the leak may be primarily due to the leaky vent -- however the vent's wooden frame seems pretty rotten so her lid may be coming off anyway.
I appreciate the nice comments about the trailer. I've been looking for about a year and found her on craigslist in Phoenix.(I live outside of Santa Fe in New Mexico.) She is dry and generally quite solid. However, mid-tar-removal yesterday evening I would have probably considered sending her your way! I'll let you know how the leak exploration goes this weekend. paula
|
|
|
|
Post by vikx on Nov 2, 2013 22:22:58 GMT -8
I agree with Number Ten.
Also: most of the time, there is skirt board damage on both sides, as well as front and rear edge wood damage. I would pull the skins front and rear (be sure to straighten the folded edge before moving the metal). While repairing the lower half, you will be able to see how high the rot is. If it goes above the front/rear windows, it is advisable to float the roof and inspect the edge wood. If the edge wood is not completely sound, the J rail screws will not seat the putty properly to prevent leaks.
Have fun.
|
|
cowcharge
1K Member

Posts: 1,003 
Likes: 328
Currently Offline
|
Post by cowcharge on Nov 3, 2013 14:39:14 GMT -8
I doubt that edge leaks would make it to the vent in your pic, they'd pretty much have to go uphill, when it's much easier for the water to just run down inside the wall. If there are no water stains at all along the edges of your ceiling, it's unlikely there is much edge leaking, but like Number Ten said, it's a good idea to replace the putty anyway, especially if the trailer's been parked for years. Definitely examine the bottoms of all the walls closely, though. That's where all the wall leak water eventually ends up sitting.
You can replace both roof edge framing and vent framing without taking the skins off if you have to (ANY framing, actually), especially if you don't have a barn to work in. It's tricky and a PITA and you'll say lots of bad words and you'll cut your arms trying to work new wood into the roof edge seams (use wedges to hold the skin seams apart, I used the 2-foot long triangles left over from cutting tapered rafters, inserted down into the walls), but it does work.
|
|
newmexicogal
Junior Member
Posts: 77
Likes: 25
Currently Offline
|
Post by newmexicogal on Nov 12, 2013 19:28:48 GMT -8
|
|
SusieQ
Global Moderator 
Posts: 4,781
Likes: 1,197
'62 Shasta Compact
Currently Offline
|
Post by SusieQ on Nov 12, 2013 19:45:11 GMT -8
Wow, you did a great job! I'm going to attempting the exact same thing this weekend. Fortunately, I have not goo or tar on mine. But I plan on installing a Fantastic Fan in the place of the vent.
Thanks for sharing your pictures. Nice trailer!!
|
|
mobiltec
5K Member
I make mistakes so you don't have to...
Posts: 9,822
Likes: 3,749
1954 Jewel In Progress...
Currently Offline
|
Post by mobiltec on Nov 12, 2013 21:43:12 GMT -8
Very proud of what you've accomplished NMgal. Quick too. See, it's as easy as it looks. Just takes confidence and endurance. Keep moving. Be efficient with your moves through good planning and lots of research. Keep up the good work!
|
|