smac75
Junior Member
 
Posts: 70 
Likes: 3
Currently Offline
|
Post by smac75 on Sept 18, 2017 9:08:40 GMT -8
Hello, I am hoping for some advice. I want to make sure my plan below isn't going to compromise any structural integrity / sheer strength of my trailer. I have the back end of my trailer opened up to replace some frame rot, ceiling panels and also the two rear side panels (on either side of the gaucho) that were damaged from leaking windows. I want to avoid removing the gaucho and replace the two rear side panels in two plywood pieces instead of one sheet - one above the gaucho platform and one below it (and hiding seam with a piece of trim). Will not having these panels run floor to ceiling in one sheet be an issue? My gaucho frame and wall studs are solid.
Thank you!
|
|
kirkadie
1K Member

Posts: 1,160 
Likes: 559
'69 Serro Scotty Hilander
Currently Offline
|
Post by kirkadie on Sept 18, 2017 13:20:02 GMT -8
Are your sides framed or plywood? Are the panels you want to replace inside the framing, meaning the inside show skin? If you have framing the shear strength is mostly in the framing so you could probably get away with that, but if the sides are only plywood, like Scottys, I would advise against it. Many repairs of members were "pieced" when the trailers had framed walls.
|
|
smac75
Junior Member
 
Posts: 70 
Likes: 3
Currently Offline
|
Post by smac75 on Sept 18, 2017 18:24:47 GMT -8
Thank you Kirkadie - my sides are framed with 1x's and the panels are attached to the walls from inside the trailer.
|
|
nccamper
Administrator     
Posts: 7,879 
Likes: 2,967
1962 Forester- 1956 Shasta
Currently Offline
|
Post by nccamper on Sept 19, 2017 12:59:37 GMT -8
I think I understand the question but photos always help. I've replaced side/rear pieces by sliding the new birch between the framing and gaucho. I've also taken the one side piece of gaucho framing off and installed two piece of new birch with the seam where the framing piece was reattached. Framing covered the seam: 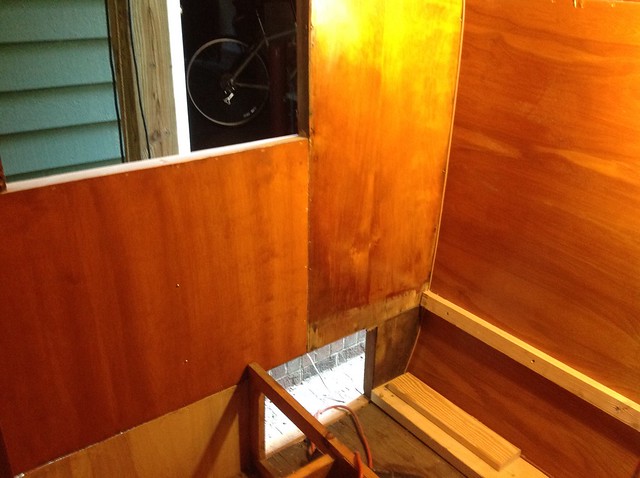 Hopefully this makes sense. |
|
smac75
Junior Member
 
Posts: 70 
Likes: 3
Currently Offline
|
Post by smac75 on Sept 20, 2017 7:33:18 GMT -8
Thanks nccamper! I think that's EXACTLY what I'm thinking....some pics below. I just want to panel the rear above and below the gaucho to avoid removing gaucho frame piece that is attached from the outside. I am doing everything in my power to NOT remove side skins. I know Larry says it's a piece of cake but my side skin is in 7 or 8 pieces all interlocking with Pittsburgh seams and I'm so nervous about losing my exact roof measures. The "big picture" 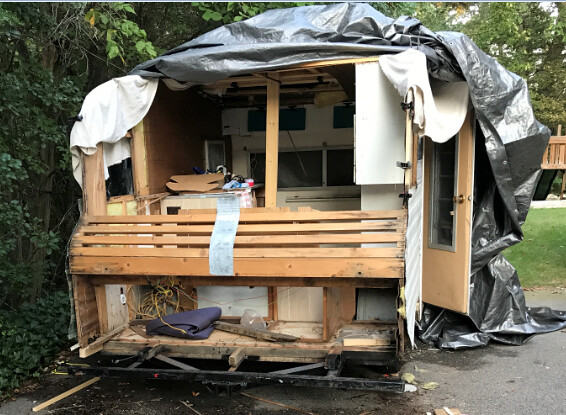 Street side rear: 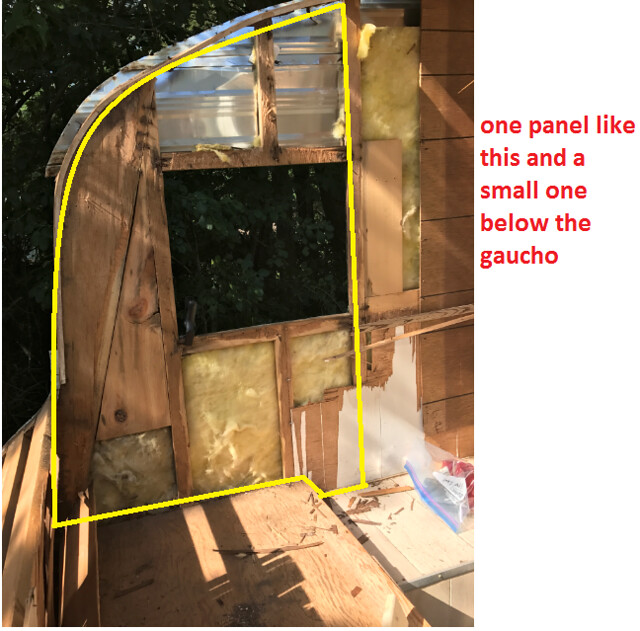 Curb side rear: 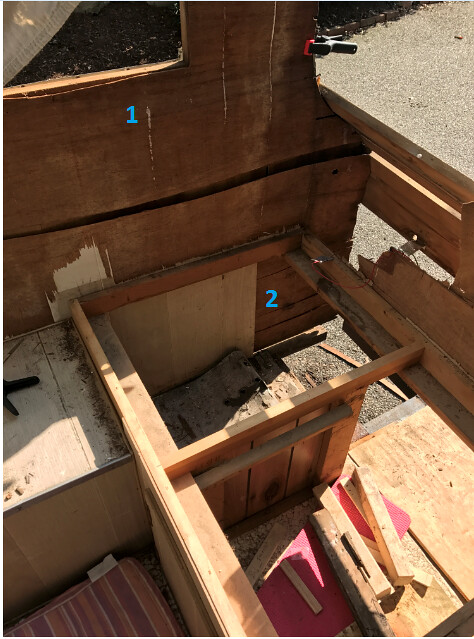 |
|
nccamper
Administrator     
Posts: 7,879 
Likes: 2,967
1962 Forester- 1956 Shasta
Currently Offline
|
Post by nccamper on Sept 20, 2017 8:49:24 GMT -8
I loosened the skin and replaced the sill at the bottom. This was on a camper getting new skin but I wanted the old skin to use as my guide. 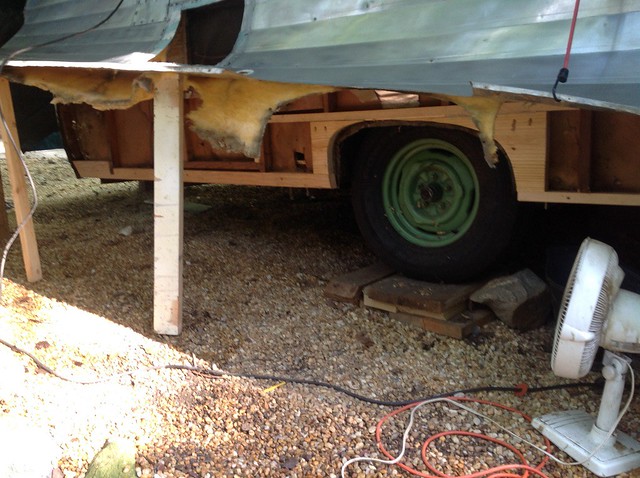 On this camper I cut away the nails between the wall framing/old birch/wood framing for the floor and slid the birch in between then screwed the 1x wall framing, birch, floor framing sandwiched together. Does that make sense? 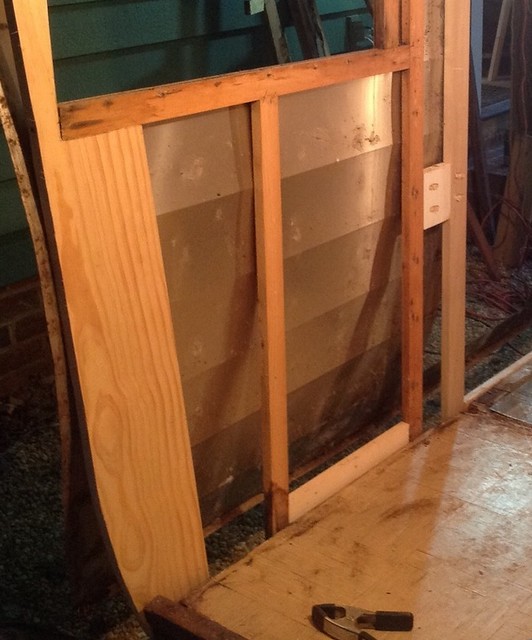 I'd use a multi-tool or saws-all and cut away the nails so you can sandwich the new birch as much as possible. On a side note, removing the skin takes no time at all. But if you're reusing the skin you'll need the old aluminum to guide the repair work especially the curving. |
|
smac75
Junior Member
 
Posts: 70 
Likes: 3
Currently Offline
|
Post by smac75 on Sept 20, 2017 9:54:26 GMT -8
I can't prop up my skin panel above skirt panel (the way you show) because it's still stapled along that pittsburgh seam and also under my door that I don't really want to remove right now either (is that my problem!? Am I crazy to be at this point without having removed my door?). Also, I can't be 100% sure without being in front of the camper but I was pretty sure my birch panel sat on top of the floor (as do my walls). 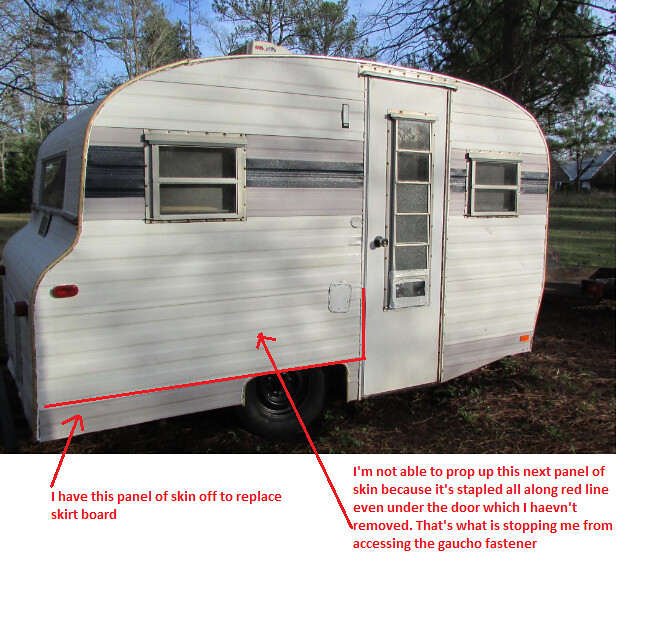 |
|
nccamper
Administrator     
Posts: 7,879 
Likes: 2,967
1962 Forester- 1956 Shasta
Currently Offline
|
Post by nccamper on Sept 20, 2017 11:43:02 GMT -8
What year and model are you working on? If there is a skirt board then I believe the birch is under it not on the floor.
You will make your life much easier if you pull the door off and flip up the skin. You leave the staples holding the skin in the Pittsburgh lock. Have you considered leaving the door hinged in place and just taking off the door jam to free up the skin? With that said, I understand why it seems overwhelming.
|
|
smac75
Junior Member
 
Posts: 70 
Likes: 3
Currently Offline
|
Post by smac75 on Sept 20, 2017 13:38:41 GMT -8
It's a 1968 and it didn't come with birch but white paneling. I'm replacing with plain plywood and painting. Maybe I should just pull off the door jam. If I leave the staples in the skin how do I re-attach without sliding the skin panels apart? Just bang them in intact and hope I get them back in the same staple holes? I'm calling these pieces my "skirt boards" - not sure if that's the correct terminology in this case. It's just two approx. 25" long 1.5x1.5's on top and underneath the floor. My interior panels sit on the floor in front of that top "skirt board". 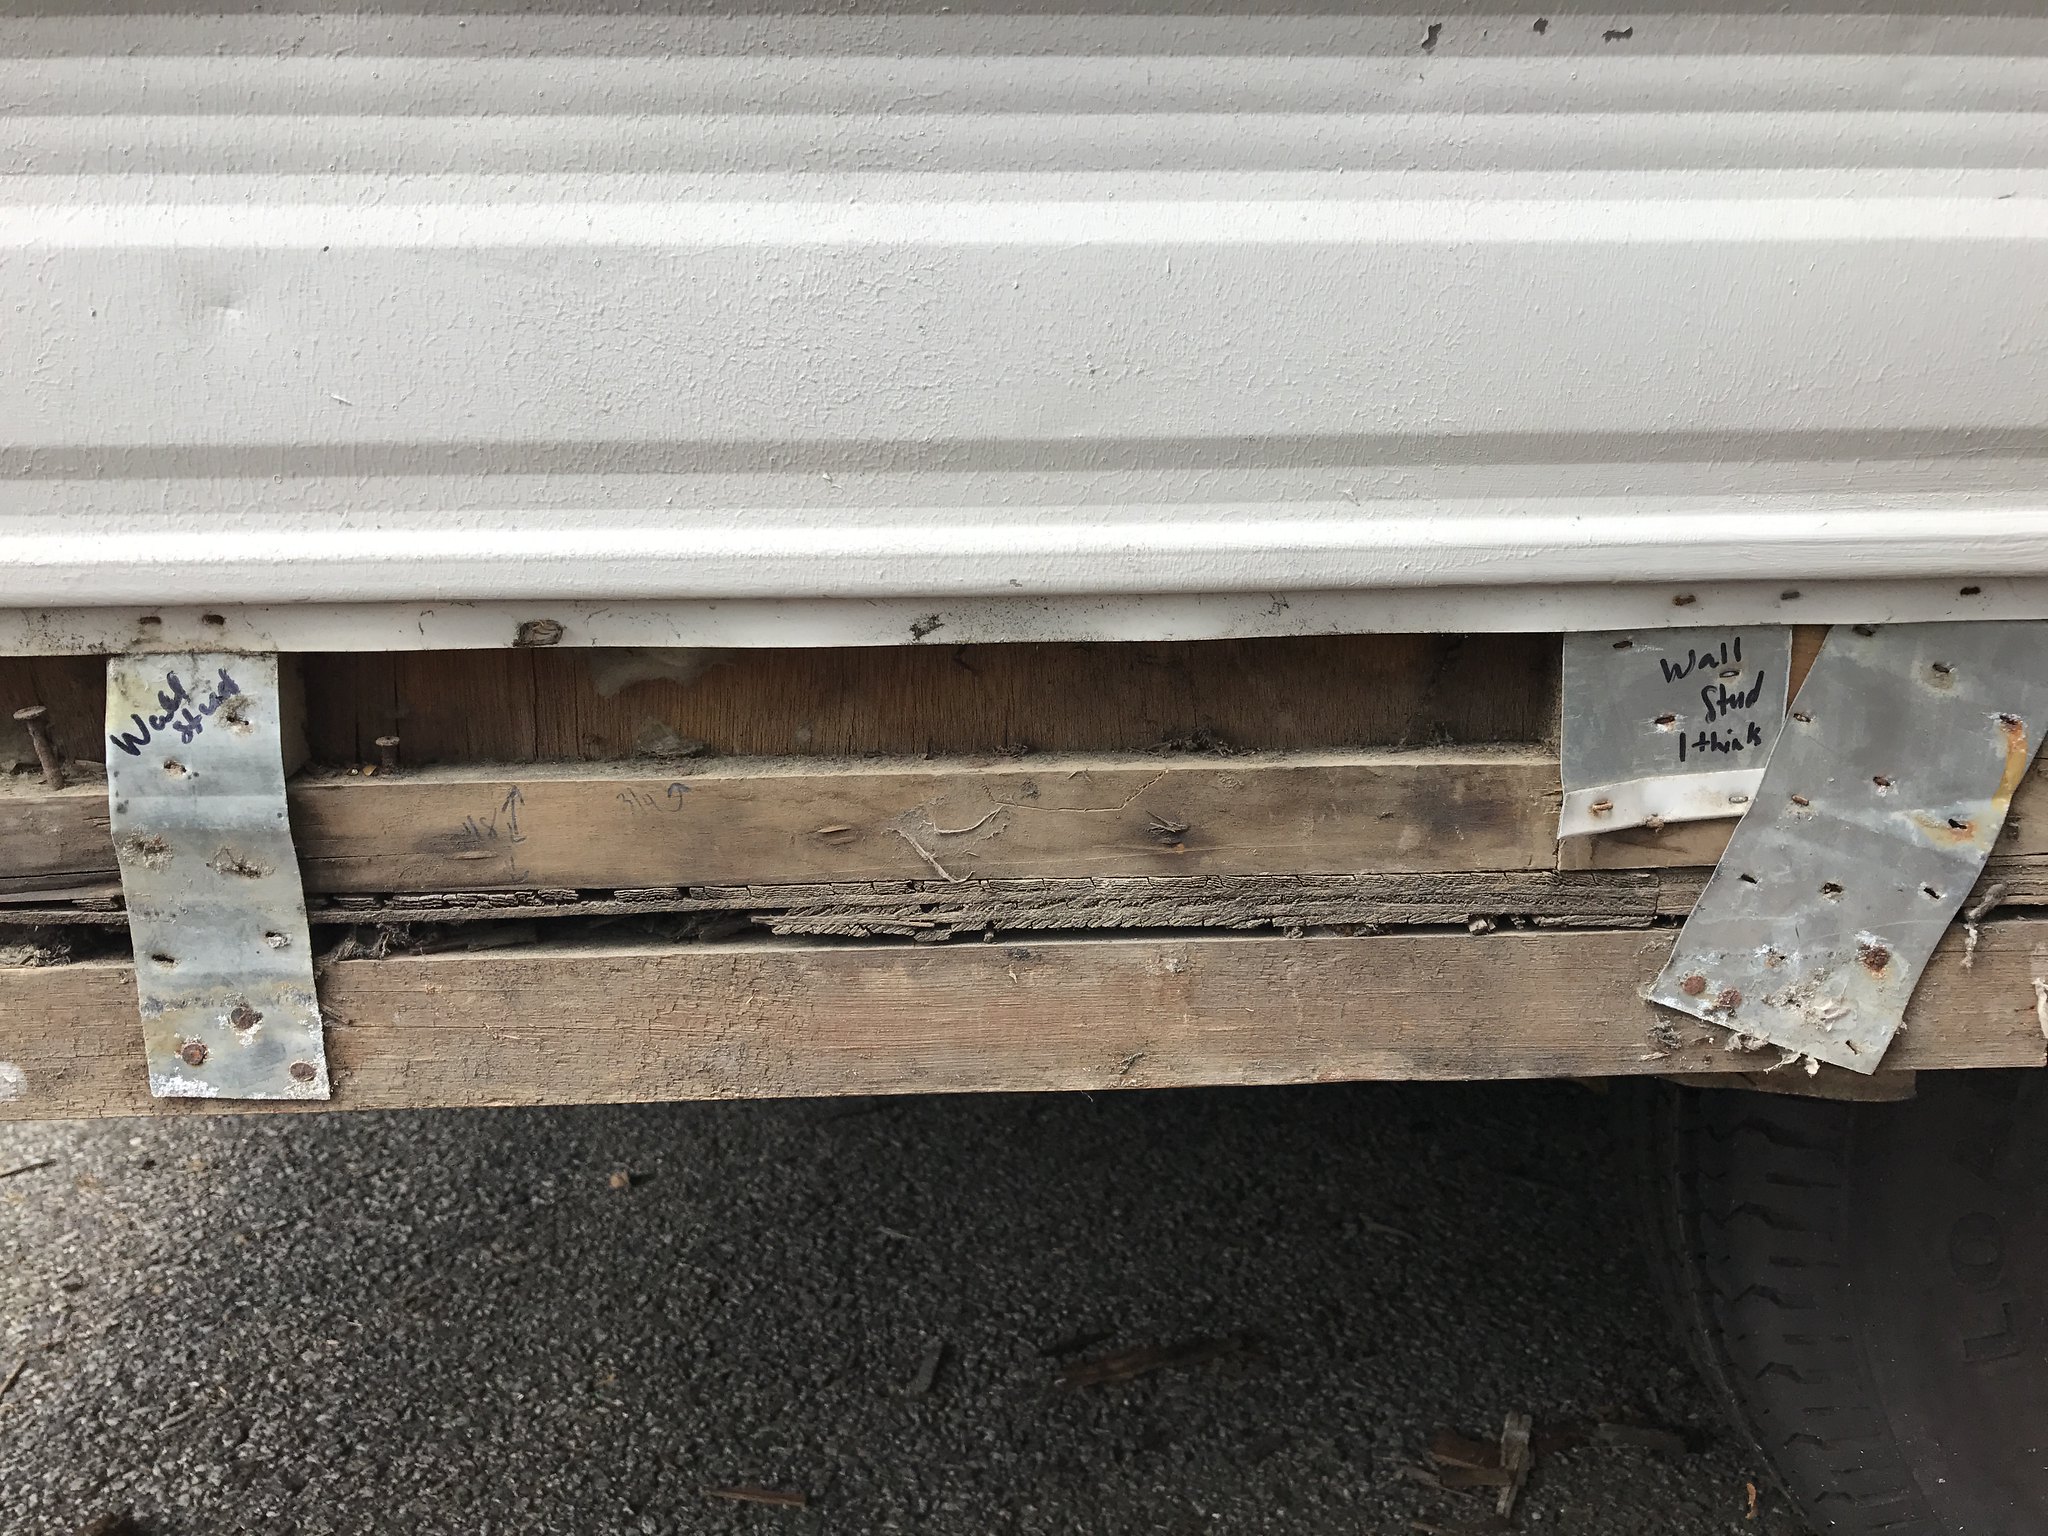 And here's what it looks like from the inside before I removed that delaminated panel and 10" of flooring. 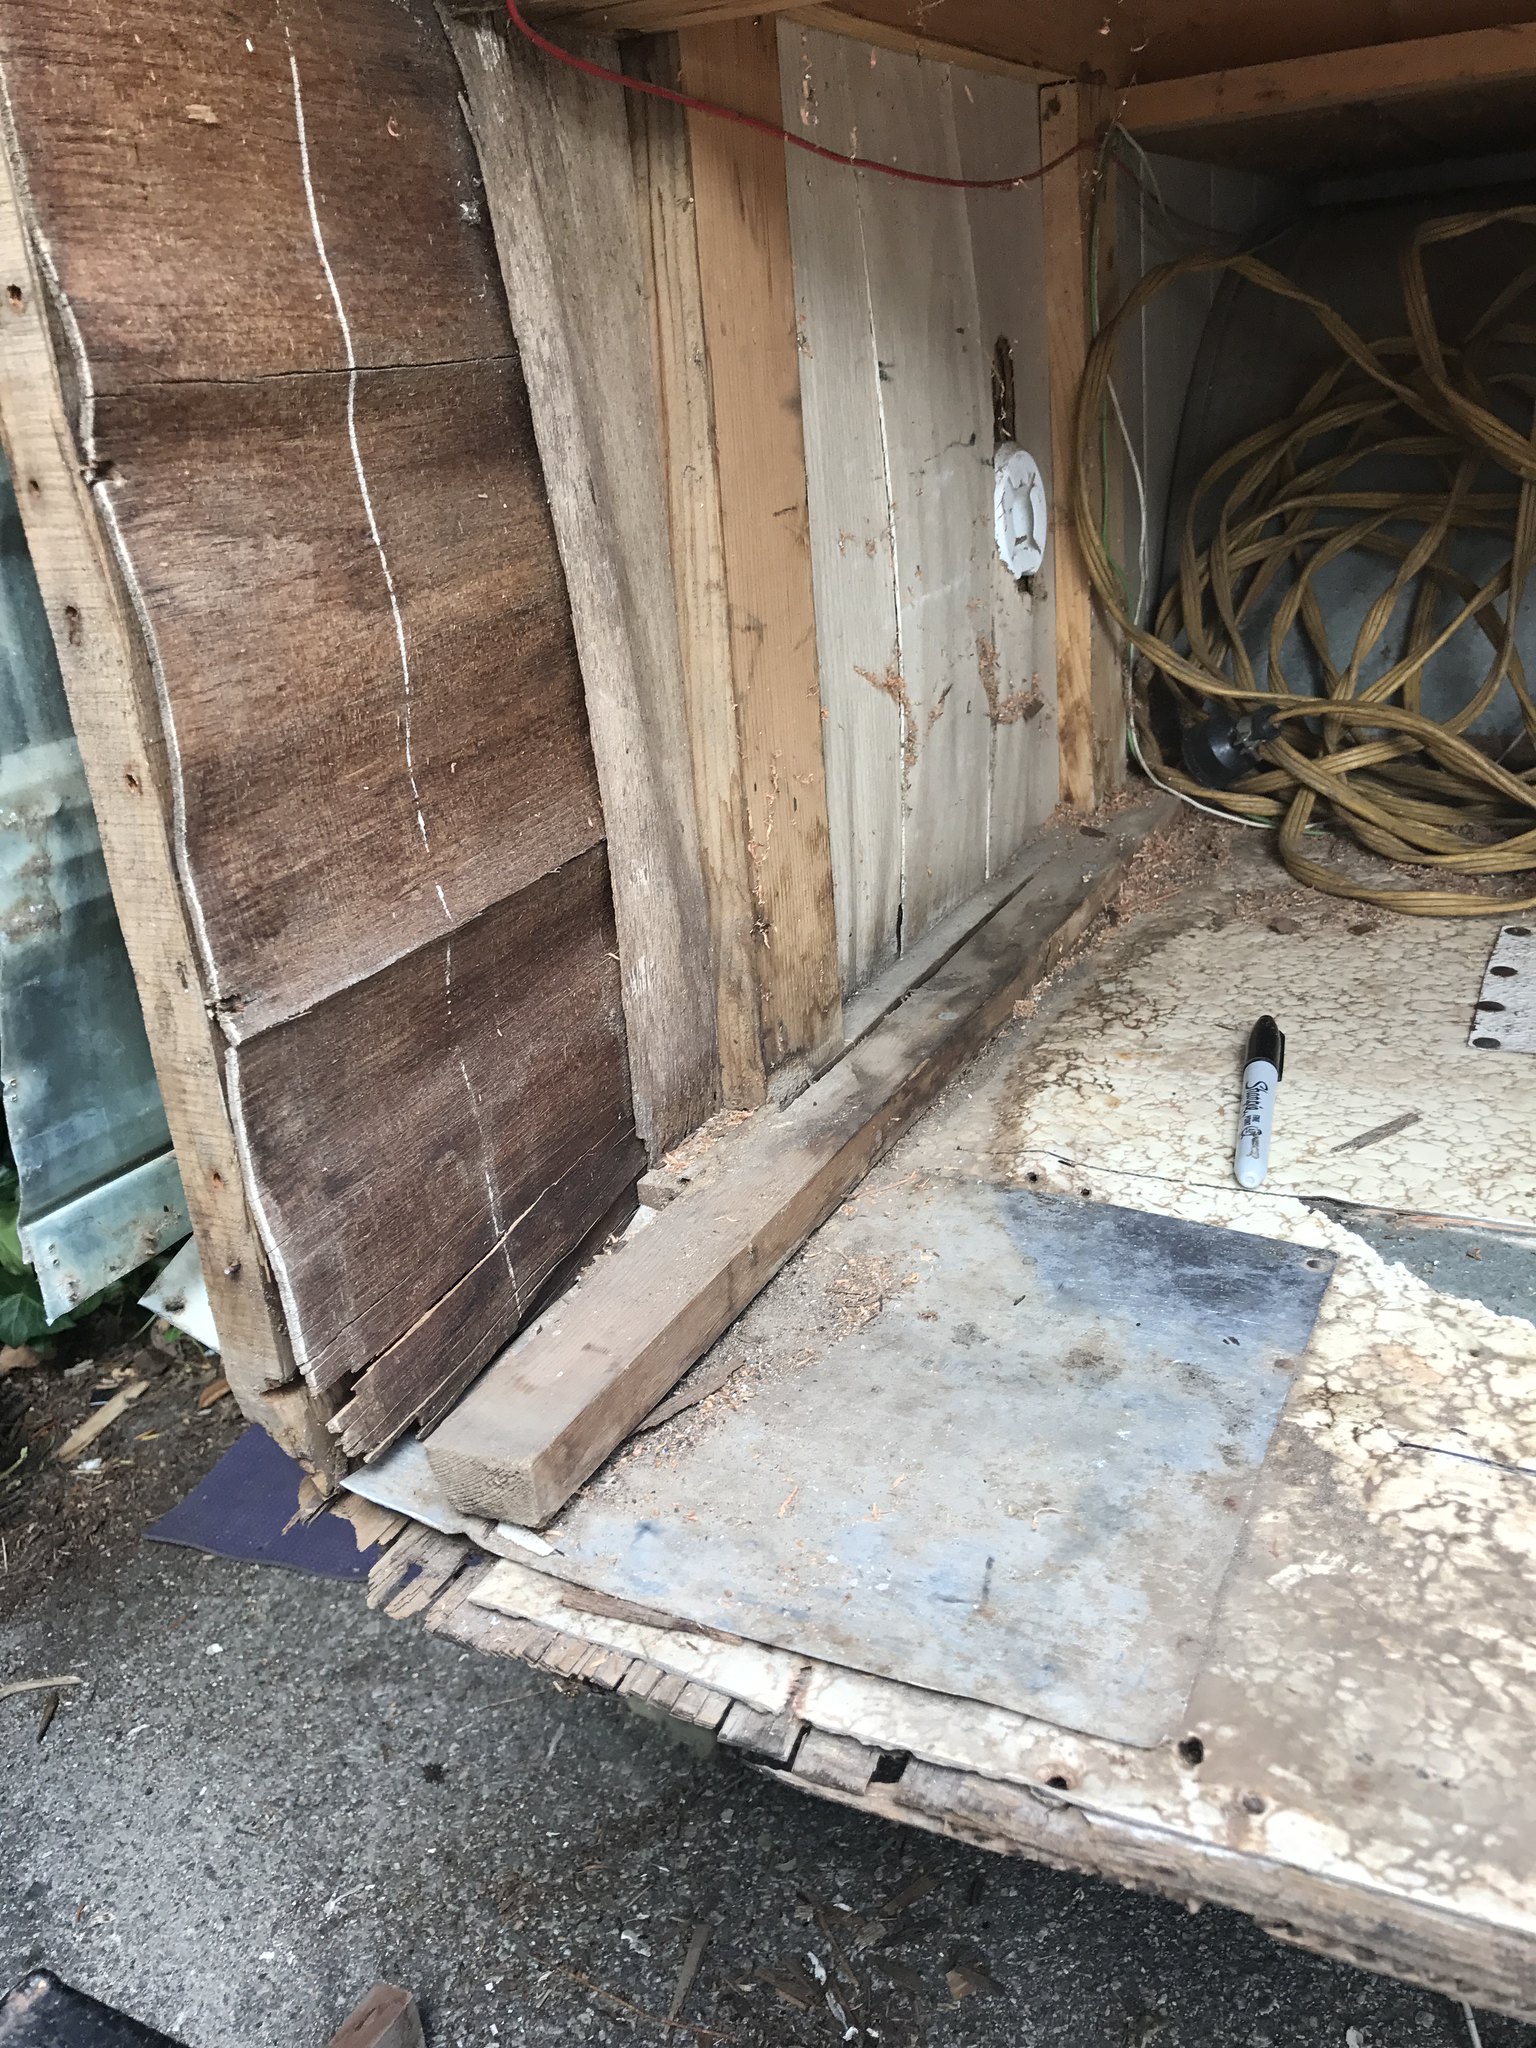 IMG_0321 IMG_0321 |
|
nccamper
Administrator     
Posts: 7,879 
Likes: 2,967
1962 Forester- 1956 Shasta
Currently Offline
|
Post by nccamper on Sept 20, 2017 14:29:38 GMT -8
|
|
smac75
Junior Member
 
Posts: 70 
Likes: 3
Currently Offline
|
Post by smac75 on Sept 20, 2017 18:27:28 GMT -8
No screws through my metal - only hidden staples under each seam lip. Appreciate all your advice nc. I think I'll focus on that door jam and gaucho this weekend. Stinks that I'm moving further away from the end goal instead of closer!
|
|
nccamper
Administrator     
Posts: 7,879 
Likes: 2,967
1962 Forester- 1956 Shasta
Currently Offline
|
Post by nccamper on Sept 20, 2017 18:35:31 GMT -8
Stinks that I'm moving further away from the end goal instead of closer! We all hit that point where the turn towards rebuilding seem to move further away. But working your way down to the rotten wood is really unavoidable. Once you rebuild the floor, everything will start to fall into place. If you need to add a couple of #6... 3/4" screws... to hold the skin on it should be fine as long as it's in a flat part of your skin pattern. |
|
|
|
Post by Teachndad on Oct 23, 2023 19:44:13 GMT -8
Hey smac75,
What happened with your build?
I know this thread is 6 years old, but I saw that your activity waned after 2019. Just curious.
I was researching the board on wall building and this thread came up. You sure had a lot of water damage on your trailer! Made me wonder how far you came. Hope to hear from you.
Cheers,
Rod
|
|