boholady
Junior Member

Posts: 56 
Likes: 10
Currently Offline
|
Post by boholady on Mar 21, 2016 13:30:44 GMT -8
I haven't been on the forum in so long! When we finally caved and took the back off of our 1962 Trotwood I thought for sure we would never see her together again. We put the wood on the back a few days ago. We finally have to use the door again instead of going through the back. Haha! We redid the whole back end, some of the floor, and went into the sides until we got to solid wood. Right now we're finishing up the rest of the wood so we can put the skin back on. I began painting the inside before we ever took off the back. So I'm finishing that too. All the old flooring came up and was replaced. The benches inside were rebuilt as well. There's a lot left to be done but I can see the light at the end of the tunnel!
|
|
Hamlet
2K Member

Posts: 2,820 
Likes: 925
Currently Offline
|
Post by Hamlet on Mar 21, 2016 15:15:19 GMT -8
Congrats! You have probably cleared the most frustrating hurdle (except for polishing the aluminum wings on a Shasta ;-). Anyhow, send pics of your progress when you get a chance. You know we are all voyeurs here!
|
|
boholady
Junior Member
Posts: 56
Likes: 10
Currently Offline
|
Post by boholady on Mar 21, 2016 15:24:43 GMT -8
[The back] Before: 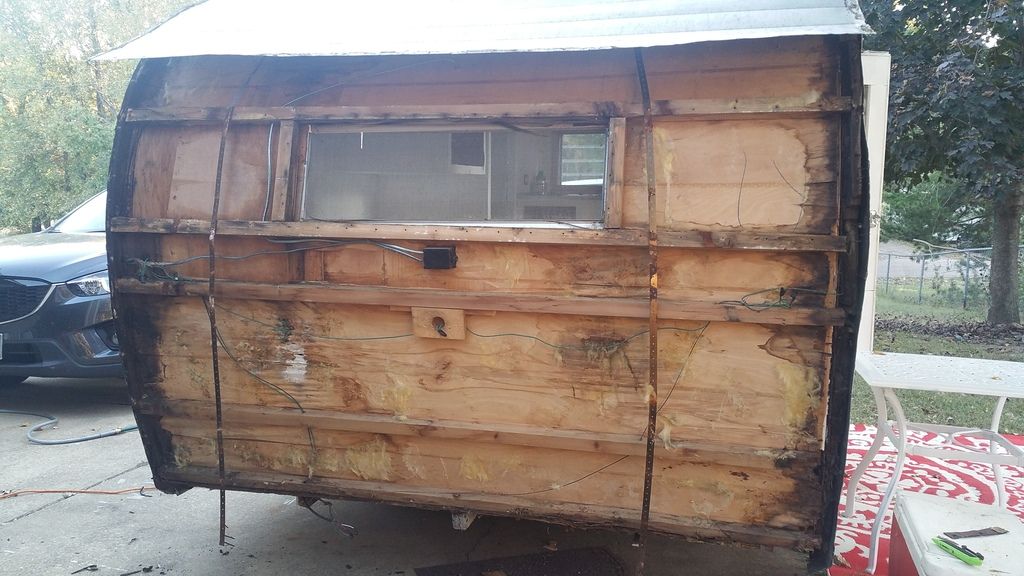 Before (the sides were destroyed): 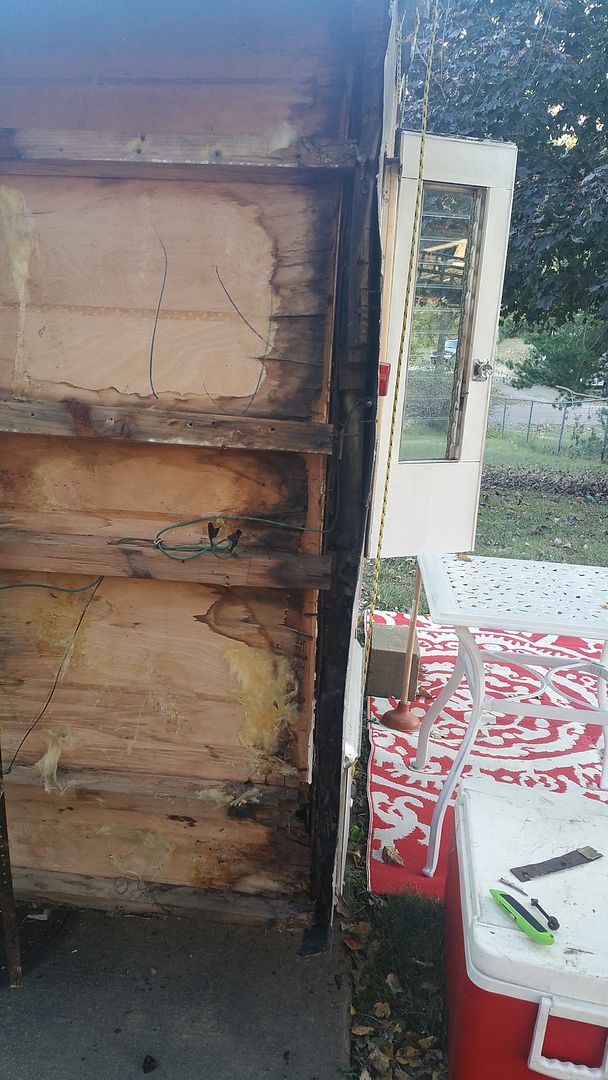 After (so far): 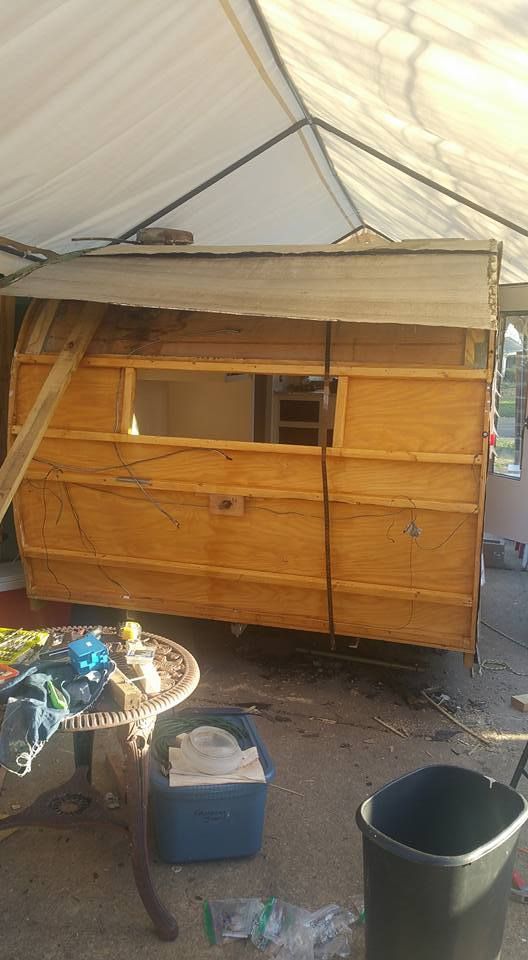 |
|
boholady
Junior Member
Posts: 56
Likes: 10
Currently Offline
|
Post by boholady on Mar 21, 2016 15:37:17 GMT -8
[The floor] Before: 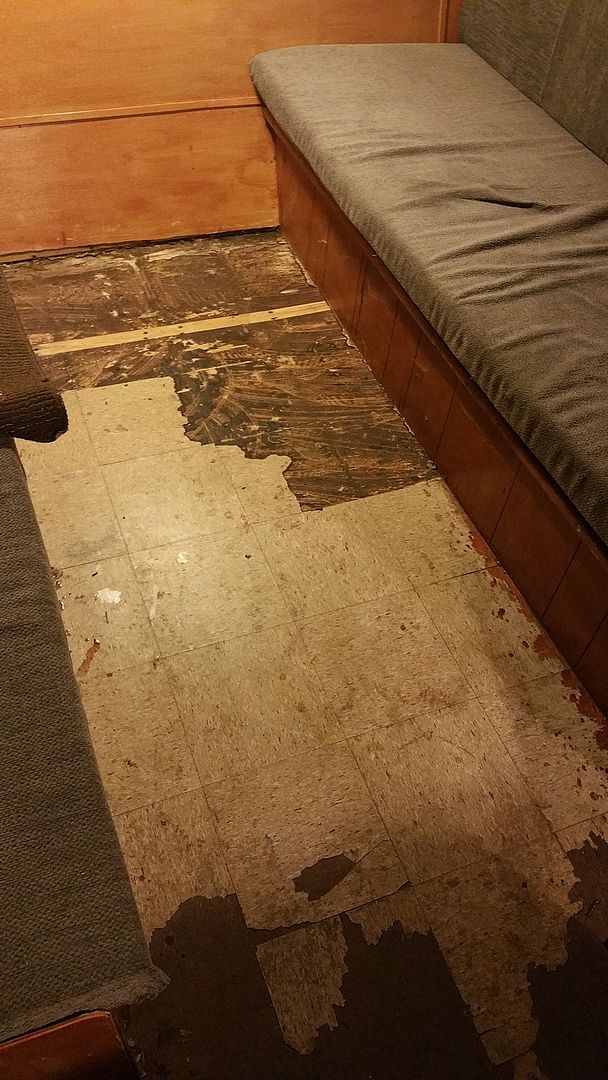 This was the floor next to the back wall (I forgot how bad it was until I saw this photo!). It was replaced with new wood before new flooring was put down. 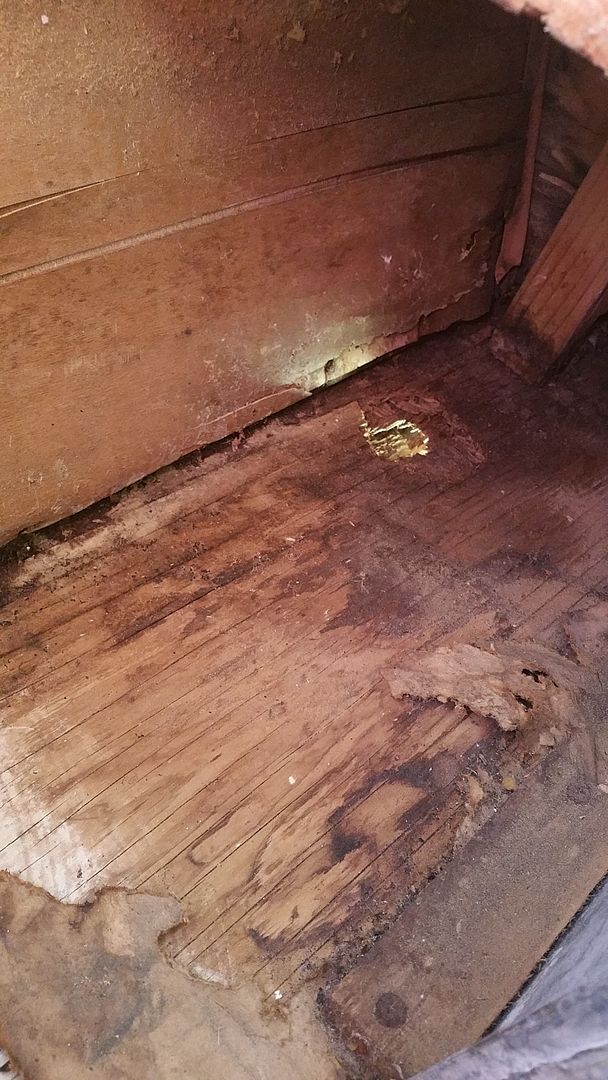 Progress (Here you can see what wood was replaced on the floor. We pulled up all the old tile.): 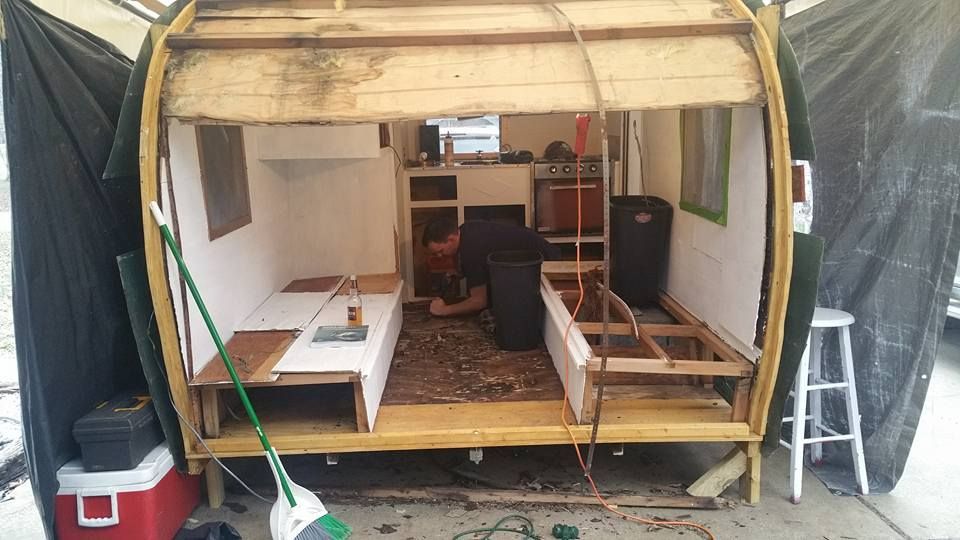 More progress (we're night owls so a lot of my photos are at night, haha): 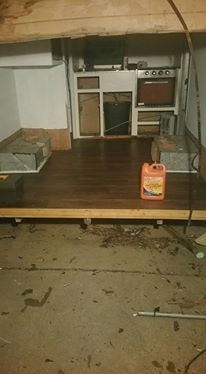 This is about where we are right now (floors done, benches rebuilt): 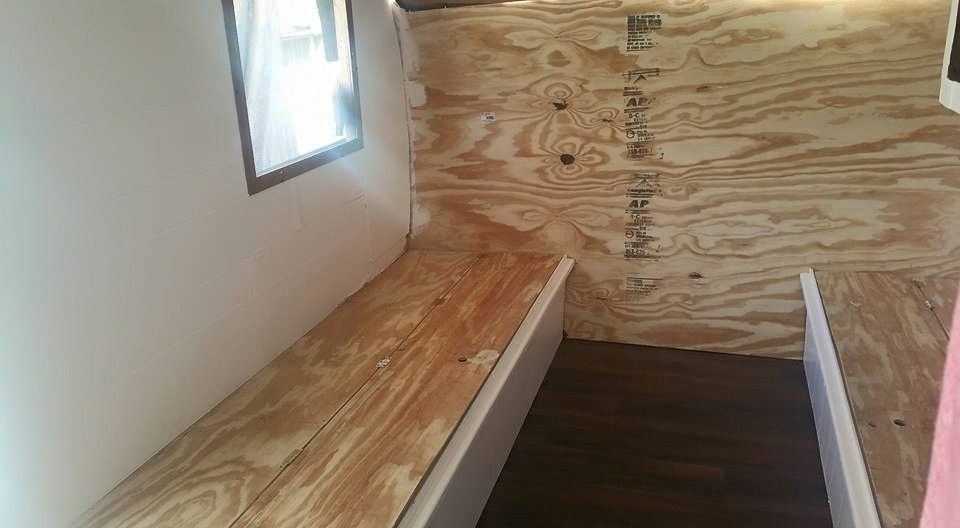 [The sides] Here is one side. We didn't have to go very far back before getting to solid wood. I'm sure one day we'll go ahead and rebuild both completely but this was our very first time and the goal was to make her safe and sturdy. 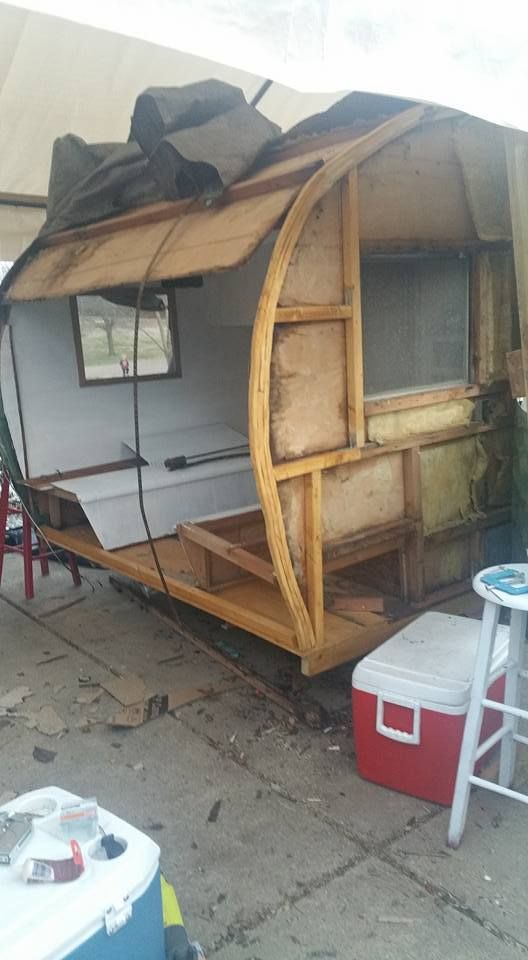 |
|
boholady
Junior Member
Posts: 56
Likes: 10
Currently Offline
|
Post by boholady on Mar 21, 2016 15:47:01 GMT -8
It's been scary and exciting at the same time. I honestly had no idea what we were getting ourselves into. I knew it was a mess but I had no idea how much of a mess was below the surface. Everyone kept saying to lift the skin to make sure it was safe. When we did it was a nightmare. The wood on the floor was so soft that you could punch holes though it. Someone had basically put a bandaid on the back. It was all small puzzled pieces of wood. The beam across the bottom was useless. I'm surprised we even made the 4 hour drive home without an accident. I was so upset to see how bad it was. Then winter came and all progress was halted for a while. Now we seem to be making leaps in progress. I'm so excited! The lesson learned is, never give up. We have learned so much and I'm sure we will never stop learning.
|
|
Lola53
Active Member
Posts: 150
Likes: 53
1953 Westfield Westerner
Currently Offline
|
Post by Lola53 on Mar 21, 2016 22:44:10 GMT -8
Wow, looking at your photobucket pictures that is/was a project. I love the jalousie door! Amazing that you made it home with the frame if it looks as bad in real life as it does in the picture.
Keep up the good work!
Mark
|
|
|
|
Post by vikx on Mar 21, 2016 22:52:31 GMT -8
Good on ya, Boholady and Guy! You see, it CAN be done. Congrats on hanging in there and doing it the right way. This kind of post will always help newbies who are waffling between Facebook patches and the real deal...
I learn every day. If I stop learning, I will never improve.
|
|
mobiltec
5K Member
 I make mistakes so you don't have to...
Posts: 9,825
Likes: 3,752
1954 Jewel In Progress...
Currently Offline
|
Post by mobiltec on Mar 26, 2016 16:31:10 GMT -8
You did the right thing and I really don't see any reason for having to rebuild it again. Looks plenty sturdy to me. Seal her up and have fun... I notice this is one of the very few canned hams out there with the walls built on top of the floor instead of connecting to the side rails of the chassis. The Oasis is built the same way and they are pretty dang strong. You'll never really have to worry much about a wall sagging.
Good job.
|
|
goshawks
Active Member
working on the trotwood when not camping
Posts: 182
Likes: 56
Currently Offline
|
Post by goshawks on Mar 27, 2016 3:14:51 GMT -8
Great job !! Keep at it, our Trotwood ( this month's calendar pics, was in WAY worse shape then yours and it dollied up nicely.
|
|


