spoma
Junior Member

Posts: 55 
Likes: 11
Currently Offline
|
Post by spoma on Jan 28, 2016 12:21:37 GMT -8
I recently purchased what appears to be a 1968-69 Shasta Starflyte. It is 17' and it has a toilet/shower room in it. I am noticing that the trailer appears to be plumbed with ABS (must be redone after original) that links the sink, toilet, and shower all into a single drain that comes out to a 5 or 6 inch capped pipe.
Do I need to separate all of these into separate pipes and add storage for them all?
I have been reading around online and watching videos and there was some talk of certain states having laws against this. I am wondering if it is against the law to have it piped this way or just to use the toilet in such a manner.
thanks for any help that you can provide.
Mark
|
|
|
|
Post by vikx on Jan 28, 2016 20:13:01 GMT -8
Welcome Mark!
I have a 68 Starflyte. I "think" it has at least a black holding tank. The grey water (sink, shower) drained on the ground back in the day, frowned on now. If you get a blue Tote, it will work as a substitute. The black valve normally shut the black tank. When dumping, a flexible sewer hose was connected to the outlet, then the valve allowed dumping of the toilet tank. (usually 4", sometimes 3")
Do you have any photos? We can try to decipher what you have.
|
|
spoma
Junior Member
Posts: 55
Likes: 11
Currently Offline
|
Post by spoma on Jan 29, 2016 6:44:26 GMT -8
Thanks for the response vikx. I can get some photos of the underneath this weekend and post them. Right now I have a water tank (clear - believe this is potable water) and then all of my drains run to ABS piping which is just capped at the end. My guess is they ran a flexible pipe from this and just let everything drain on the ground.
So, it seems at a minimum I need to isolate the toilet drain from everything else and install a black holder. Then I can pull the sink and shower drain together and use a portable blue tank for this runoff. Does this seem correct?
|
|
Ten
3K Member

Posts: 3,432
Likes: 1,467
70 Shasta 16SC + 1964 Airflyte
Currently Offline
|
Post by Ten on Jan 29, 2016 8:01:25 GMT -8
Back in the era of your Starflyte, the ABS was the most commonly-used plastic piping and was the material of choice amongst Shastas. Generally the gray water drain lines and vent should be 1-1/2", and the black tank 3".
The Starflyte should have an elevated floor in the bath area, and the toilet should be sitting on top of the black tank. Even though the shower shared the floor space, the drain from it should bypass the tank. The other drain for the kitchenette sink (and bath sink, if there was one) would join together with the shower drain line underneath. Those would join with the dump-end of the black tank drain, so that all drains would exit at the same point. There should be a shut off valve on the black tank, upstream of the outlet of the gray-water drain pipe.
Essentially this made it so the gray water would drain freely, and the black water would remain captive, no matter what else happened externally. It is important to remember that the black water cannot be allowed to drain freely. It needs to be captive in order to properly empty the tank, otherwise solids can plug up the works and make for a very unpleasant camping experience.
(Photos are currently unavailable, but I'll try to remember to illustrate my points later.)
|
|
spoma
Junior Member
Posts: 55
Likes: 11
Currently Offline
|
Post by spoma on Jan 29, 2016 8:20:51 GMT -8
Ten
That's great information about the raised floor. I was looking from underneath, but you are correct it is a raised floor for the toilet. Let me take a closer look at this as i pull it apart and maybe I over looked this.
I will provide some pictures once I get them this weekend. If you could provide any illustrations as well that would be awesome.
Thanks so much for the help.
|
|
spoma
Junior Member
Posts: 55
Likes: 11
Currently Offline
|
Post by spoma on Jan 31, 2016 17:06:35 GMT -8
I do have pictures coming but i ran into a little problem and i'm hoping someone might be able to help me. I was planning on taking the trailer tomorrow to be sand blasted so i could paint it again (help get rid of rust). I wanted to remove the tanks underneath so the whole trailer underneath could be sand blasted. I am having some trouble getting the waste tank removed from the trailer.
I removed the front clamp, which had a carriage bolt coming down from above. There is also a back clamp which can't be removed because it is welded above the chassis (it appears). I am thinking maybe the tank pivots and just unclips from the back. I also remove the toilet and disconnected the ABS pipes that all connect to the tank so it should be free. Something is still holding it up. Does anyone know what usually attaches to the tanks and how they come out?
thanks.
|
|
Ten
3K Member
Posts: 3,432
Likes: 1,467
70 Shasta 16SC + 1964 Airflyte
Currently Offline
|
Post by Ten on Jan 31, 2016 20:25:11 GMT -8
It sounds like it is a similar setup to the one in my SC. Check the end of the tank where the clamp removes. The tank should be pushed fairly close to the wooden frame above the mount point. Mine had a small piece of plywood that was screwed into the wood frame. It acted to wedge the tank back toward the welded clamp. There was little room to unscrew it, but the tank pushed up and back enough to reach it. Once it was removed the tank slipped right out from the opening and down off the welded bracket. I don't have very many photos that really tell the story, but this one is the space the tank was removed from. The 1-1/2 inch pipe is the sink drain exiting the floor pan. The hole above is the exit point for the toilet drain. Centered in the forward part of the opening you can see the bolts which held the removable bracket, and the dark spot above that is where the wood block was located. 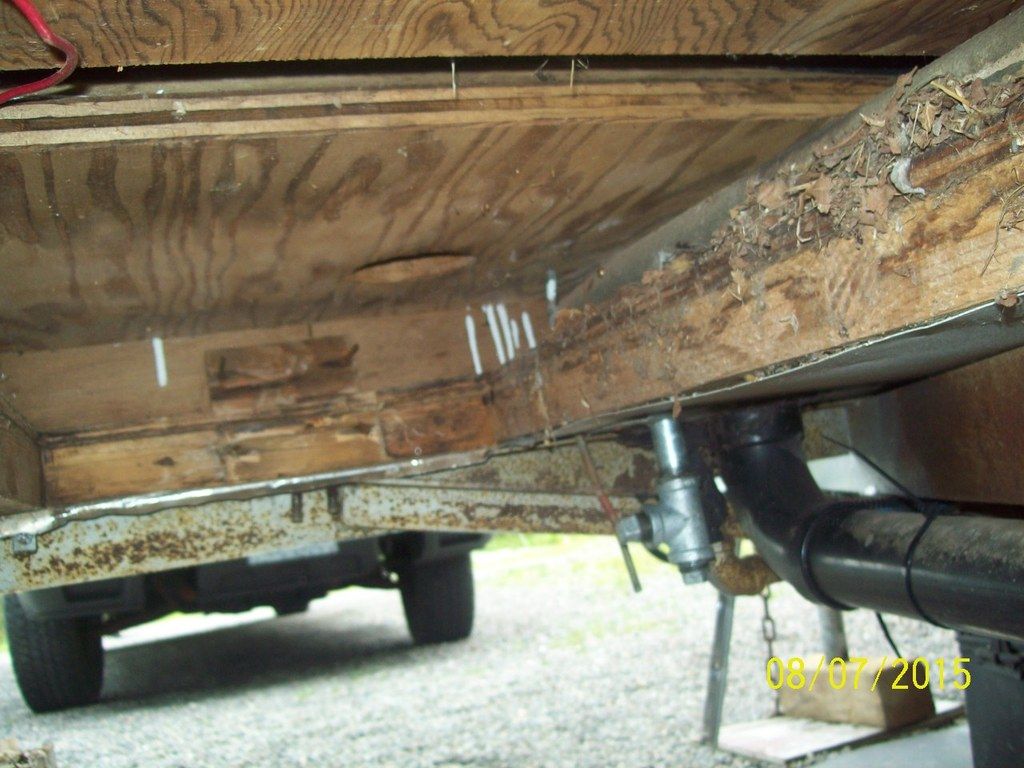 The forward end of the tank is the end to the left. The actual shape of the tank provided the wedging effect. The tighter the inclined end of the tank was drawn against the plywood block, the more it pushed rearward into the fixed bracket. 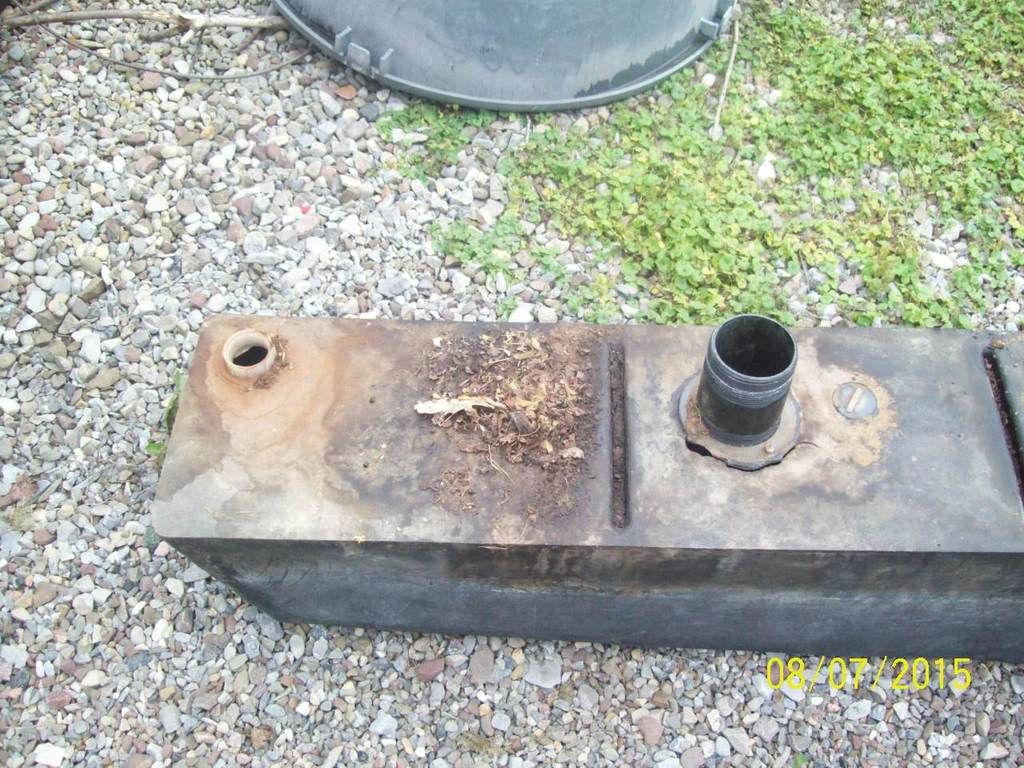 Before it was all removed, this is the outlet end of the tank, and the gray drain pipe cut off. (The joint of the shower drain and the sink drain is directly behind the outlet opening of the tank in the photo.) 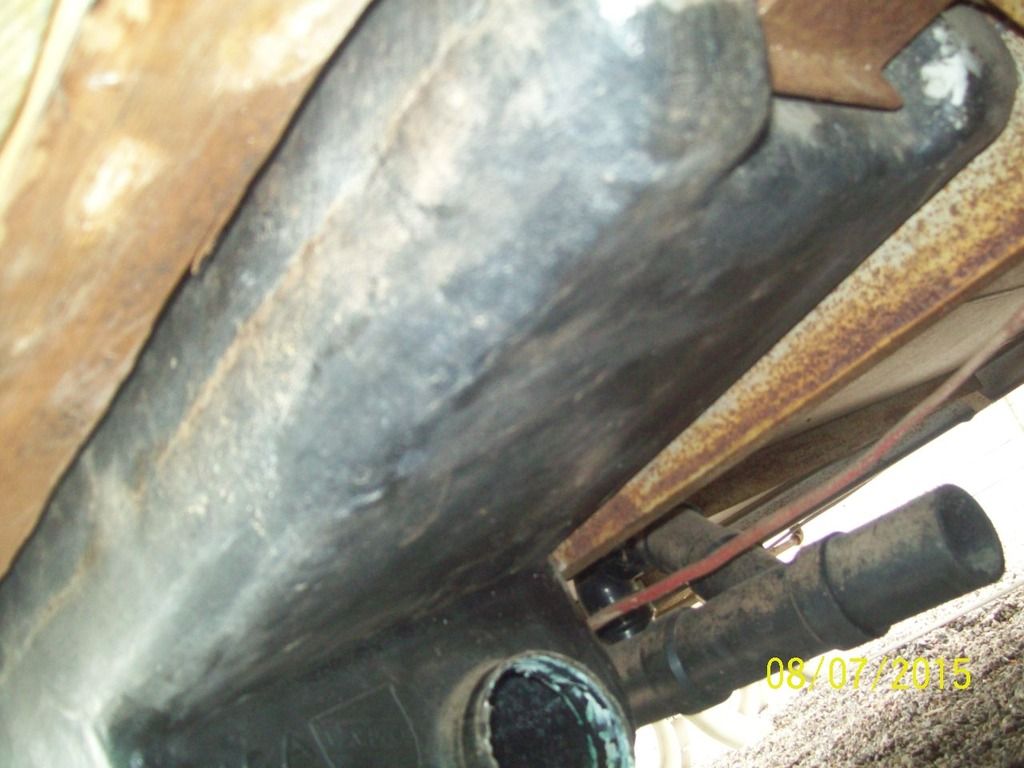 This is the valve from the dump and the junction point of the two:  |
|
spoma
Junior Member
Posts: 55
Likes: 11
Currently Offline
|
Post by spoma on Feb 1, 2016 12:17:38 GMT -8
Thanks for all the information Ten. The bottom of your trailer looks almost identical to mine. I took a bunch of pictures yesterday underneath and I removed most of the ABS coming through. the trailer is out right now getting sandblasted but I left the tank in the trailer. I was worried it was glued to the toilet flange and i didn't want to break a perfectly good tank.
I figure at a later point i will be removing the interior and floor and be able to see screws more easily to remove the tank. At that point i can probably wire brush the trailer frame where they couldn't sandblast and paint it by hand.
In my little exploration yesterday i could see that almost all wood is rotten and will have to come out at some point. So, I will get most of the stuff out at some point. I am just trying to do slowly and piece by piece so i can be sure everything goes back together correctly.
thanks for all the pictures and help.
|
|
Ten
3K Member
Posts: 3,432
Likes: 1,467
70 Shasta 16SC + 1964 Airflyte
Currently Offline
|
Post by Ten on Feb 1, 2016 12:57:19 GMT -8
If it is set up the same, the tank has a screw-thread fitting "welded" into it, and the flange in the floor is also threaded. The toilet will be connected with a 3" ABS nipple, threaded both ends. You will need to remove the toilet and then unscrew the flange from the floor in order to turn one or the other end out of the threads to release the connection. I am anxious to see how yours is set up and how similar the construction with the difference of the years and models. 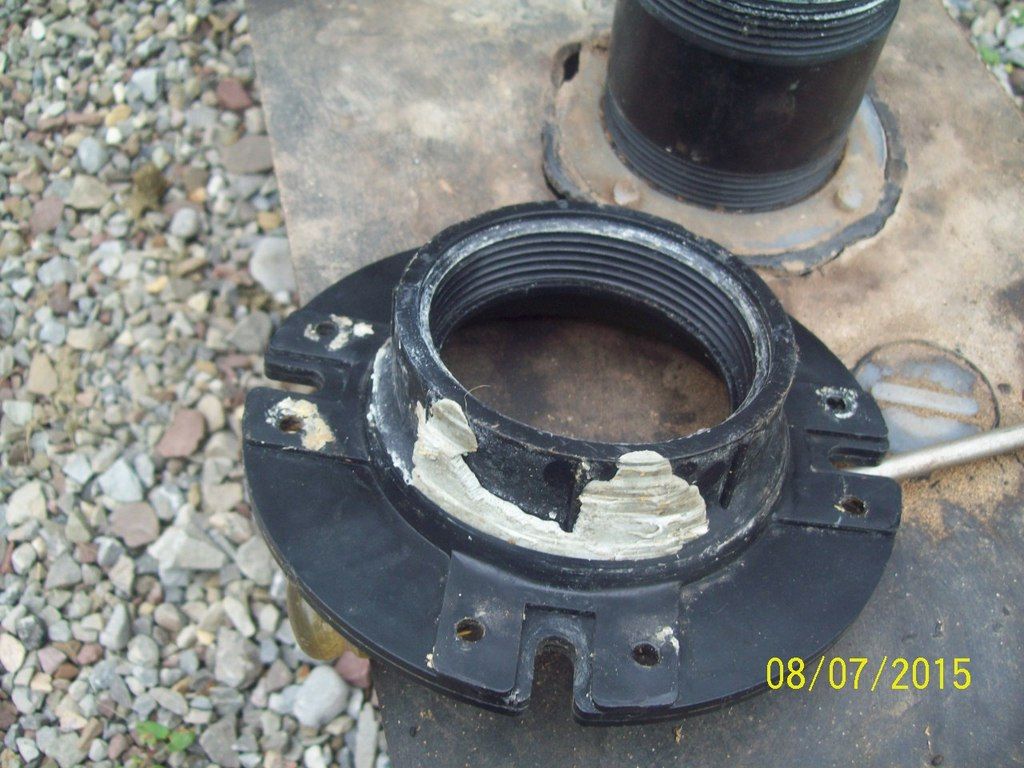 |
|


