How to paint your camper for $200
Aug 21, 2015 21:11:52 GMT -8
vintagebruce, kirkadie, and 28 more like this
Post by nccamper on Aug 21, 2015 21:11:52 GMT -8
Sorry about the length of this thread. There was no way around it.
Everyone has a different opinion of the “Right Way” to paint. Opposing opinions are welcome.
Most of the information here was compiled from great advice offered by vikx, Vas, BigBill, SusieQ, John Palmer and others. So everything good comes from them. Everything convoluted I own.
This is really a Painting 101 thread. Basics for beginners. If you have $3000 sitting around collecting dust, go to a body shop and you’ll be very happy.
You’re still reading? Okay, here we go!
You can do a nice paint job for around $200 if you own some basic tools.
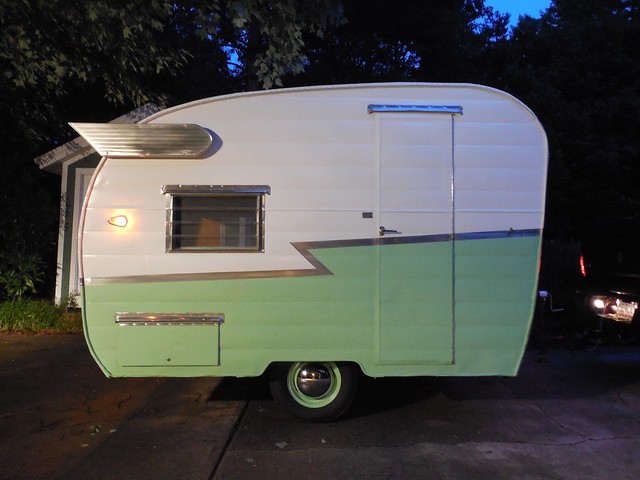
Compact-restored
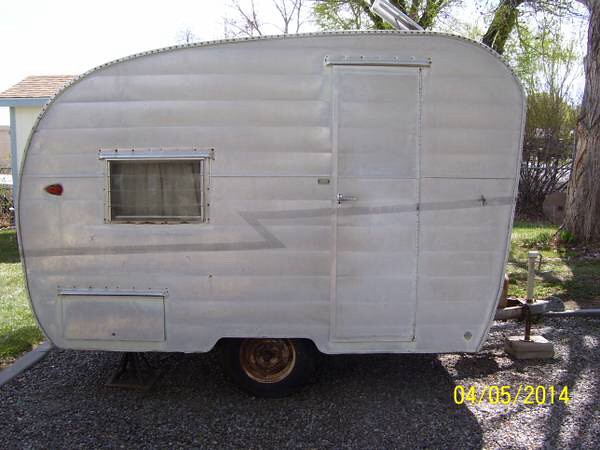
Compact as I found it
Supplies
1 Gallon of paint is plenty. You may only use half.
1 Gallon of primer is plenty. Again, you may only use half.
0000 and 000 steel wool
cheap plastic scraper(s)
Fineline Tape (I used 1/2”)
Painter’s tape
A roll of paper from Home Depot or Lowes
Cheap Tarps to protect the bushes, driveway, Etc.
Floetrol (thinner-see below)
Mineral Spirits
Paint Thinner
Denatured Alcohol
Rubber gloves
Tools:
Compressor that can provide steady air flow
A $10 oil/water separator for the hose (see below)
A $10 air regulator for the hose (see below)
Goggles
A respirator (see below)
HVLP Spray gun (Mine cost $50-See below)
Possibly a old fashion bottom tank spray gun (Mine cost around $35-See below)
A step ladder to reach the roof
Clothes you can afford to throw out when you’re finished
I’ll list below the exact supplies I bought and equipment I used. That doesn’t mean it’s the best way or only way to go, just the way I did it.
I took off plates, chrome pieces, door handle, vent, windows, Etc. I removed the Jrail to do repairs and prep it off of the camper then reinstalled it with new putty tape before painting. Some people like to polish Jrail and reinstall it once the paint is finished. It’s your call.
One last thing worth saying, prep takes 10 times longer than painting. It’s really boring but if you don’t do it you’ll be sorry.
Step 1: Remove the old paint.
You can just sand the old paint smooth (if it is not flaking or peeling) but I think removing it yields a better job in the end. Before sanding wash the camper. I used TSP cleaner then washed it a second time with water to be sure the cleanser was all off.
Then I used Jasco Paint Remover (semi paste) which is available at Home Depot or Lowes.
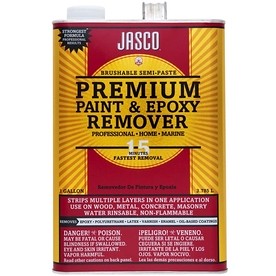
This is toxic so wear rubber gloves and goggles. I wore a long sleeve shirt and pants when doing big areas.
Follow the directions and the stripper does 90% of the work. Scrape it with a cheap plastic scraper, not a metal one. Metal will scratch the soft aluminum skin.
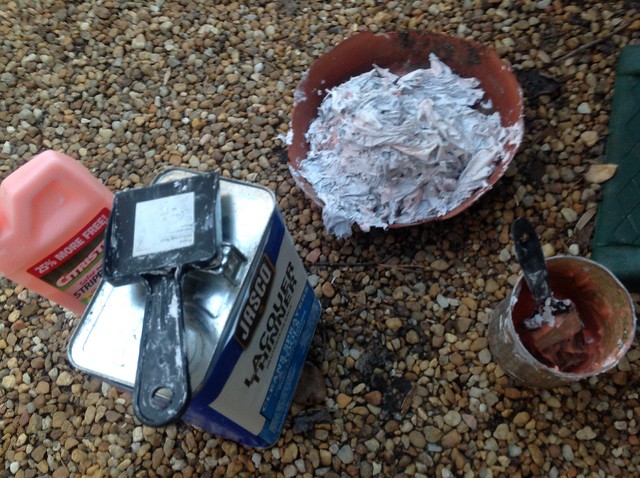
You might need a second round of stripper to get the final paint off. I brushed on the Jasco and used 000 steel wool so as not to scratch the metal. Be gentle.
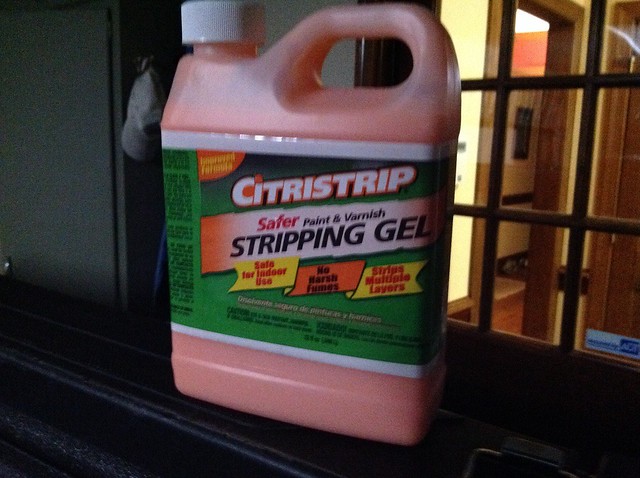
Some people like this stripper better. It’s not toxic but it takes more time and a little more effort to get the same results.
Step 2: Sand. Then sand. After that, sand.
I hand wet sanded the entire camper gently with 220 grit. Then 320 grit. Then 600 grit for any rough areas. If you can feel an imperfection when you run your hand over it, it will show when painted.
Step 3: To fill or not to fill?
I chose not to use body filler on our camper. Many people feel filler won’t hold up well long-term on such thin aluminum.
You’ll get some strong opinions pro-filler from people who love it. It does make the camper look great. It’s up to you.
A funny quote about filler: “Filler is like plastic surgery. You do it, then you swear you didn’t to everyone who asks.”
I decided to replace the roughest panels with new skin from Hemet Valley RV. Front panel and back panels up to the windows along with the jrail.
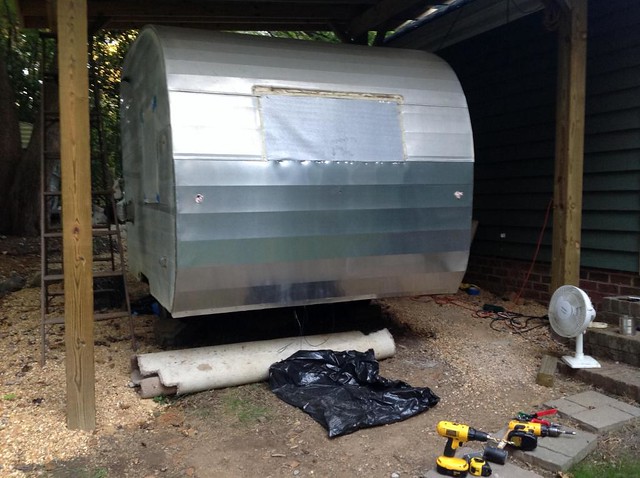
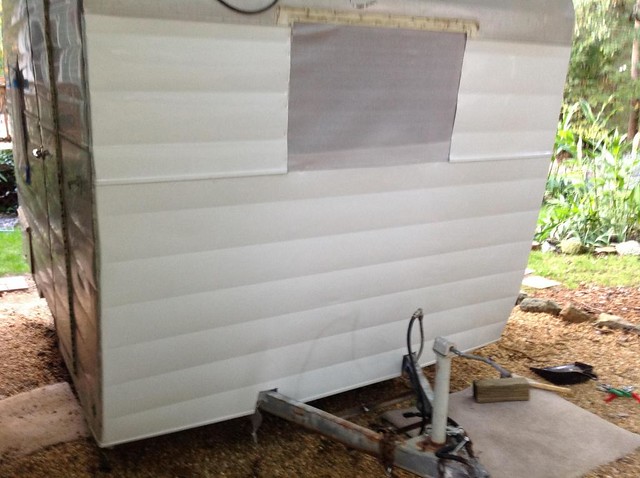
There are great videos on installing new skin at cannedhamtrailers.com so I won’t get into it here.
Tape covers over all window holes being careful not to have tape further than the reinstalled window edge. I used plastic at first so I could clean without water getting inside. A tricky process.
Step 4: Clean off the skin.
Residue from the Jasco (or other paint remover) will keep paint from sticking. That’s why some very knowledgable people skip it and just wet sand the old paint. Again, it’s your call.
Wash the camper down with water and a little soap. Then wipe it down with mineral spirits. Some people prefer lacquer thinner, which I believe is stronger. Again, wear gloves and goggles.
Rinse the camper down again or wipe down with denatured alcohol.
Once clean, it is important not to touch the surface with your hands more than absolutely necessary. As one person pointed out, your hands have oil on them. Don’t be obsessed, but only touch the camper when needed. And WASH your hands.
Step 5: Taping.
A helper makes taping much easier on long, straight lines but I did most of it on my own.
Tape all light holes. Tape all drain holes and anything else you don’t want painted.
We wanted a buffed metal stripe, not painted. This adds a step. You have to tape top and bottom of your stripe and buff it off with 0000 steel wool then polish it. Here’s the catch…polish keeps paint from adhering. So move slowly getting none outside the area.
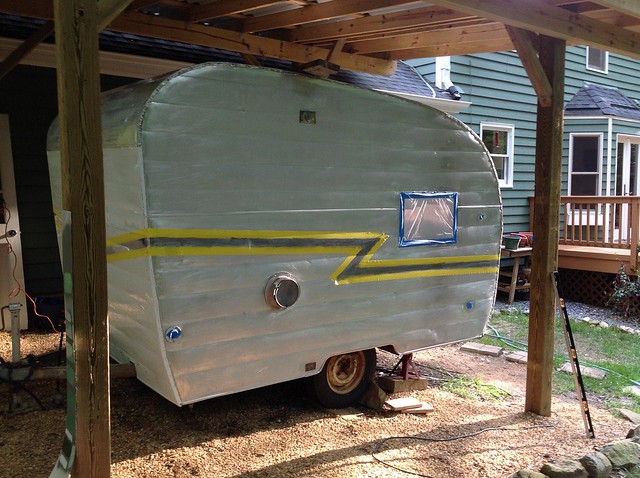
Now the tricky part. There may be a better way to do it, but I used 1/2” Fine Line tape (a must anywhere you want a straight, perfect line) to tape inside the stripe I just polished. Basically, follow the edge of the yellow tape you see with the blue Fineline tape.
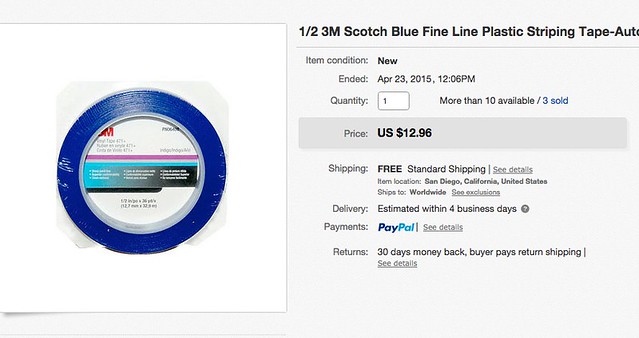
I filled in the space between the Fineline tape with standard blue painter’s tape. And remove the yellow tape top and bottom. The yellow tape I removed (after polishing) sat on top and bottom of the tape you see on the demo below.
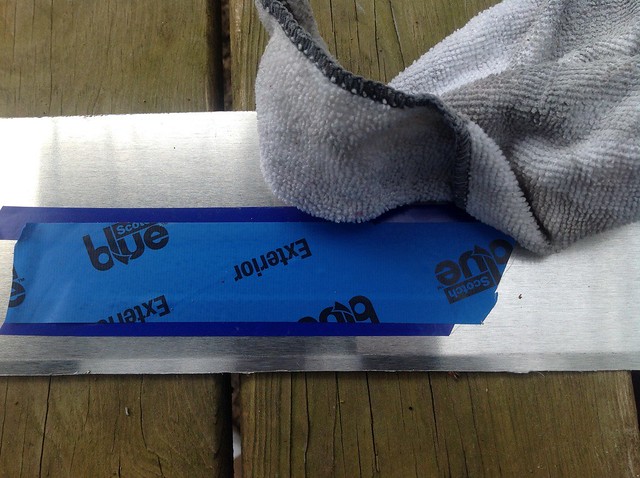
Use mineral spirits or lacquer thinner to carefully clean (small rags) above and below the fine line tape before priming and painting in case any polish is there. By the way, buy a big bag of rags (around $10). You will need to keep swapping them out. Don’t try to clean more than a few feet per rag.
If painting your stripe you should still use Fine Line Tape. Don’t cheap out.
The door is another “It’s up to you” area. I polished then taped the hinge with Fineline tape and left the door on. Some people take the door off. Unfortunately I don’t have a photo of how I taped it. I basically taped off the inside of the door frame, then the back side of the door itself that I didn’t want paint on, then taped with 2 inch blue painters tape between the two. This in essence left the door ajar but the camper sealed off from paint spray. Odd, I know, but it worked perfectly. I was able to spray everywhere I wanted.
The door will look like this while spraying.
(Yes, this is a different camper.)
Step 6: Choosing a primer and paint.
As somebody smarter than me advised, pick one brand and use the system they recommend. Don’t mix and match primer and paint.
Rustoleum has been used with great results by many members. (Share some photos, folks) The downside, you have to use one of their pre mixed colors. Some people mix Rustoleum colors to make a new color. I tried it on test pieces with poor results.
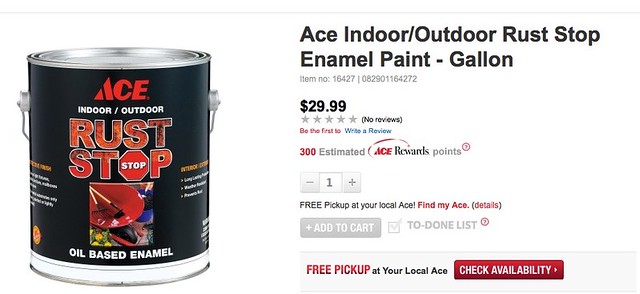
ACE oil based enamel and Ace aluminum primer latex…an odd combo but I spoke with the tech people at the manufacturer and they swear it’s the best primer for their paint. You can mix the color which is great. And it’s a proven system for adhering to aluminum. The downside, it’s getting harder to find ACE oil based paint. I was told within a year it may all go over to latex.
Tractor Paint from Tractor Supply. A quality paint but again only in pre-mixed colors.
Auto paint. It’s the ideal way to go but it’s expensive. You can get amazing results. It’s a multi-step system that’s too complicated for my first paint job and more than I wanted to pay without some experience. Sherwin Williams Auto quoted me around $800. I thought, “If I screw up and have to redo it, I’ll kill myself.”
So we chose ACE.

Step 6A: Picking a paint gun.
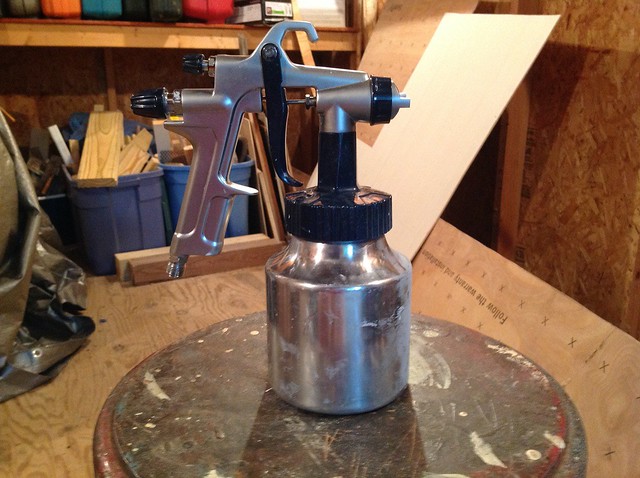
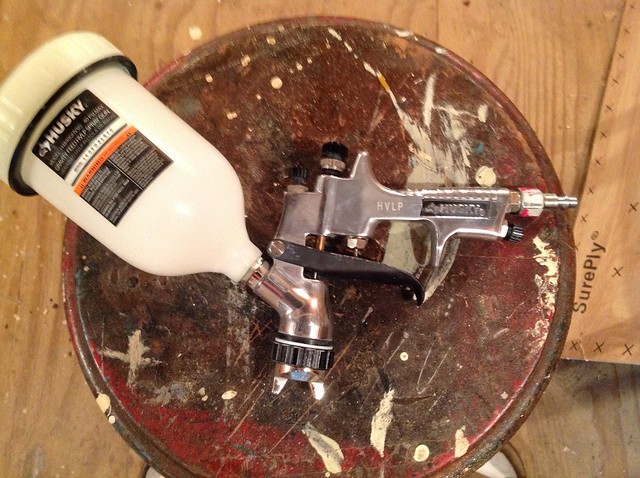
I used this gun ($35) for Ace Primer which is very heavy even thinned. It puts it on heavier than an HVLP gravity fed gun. I wet sanded some off. With other primers you may just need the HVLP gun.
This is my HVLP gun ($50). It did a nice smooth paint job.
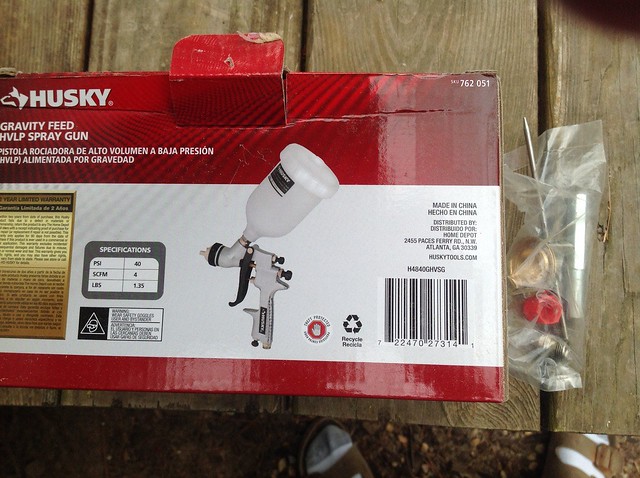
www.homedepot.com/p/Husky-Gravity-Feed-HVLP-Spray-Gun-H4840GHVSG/203497519
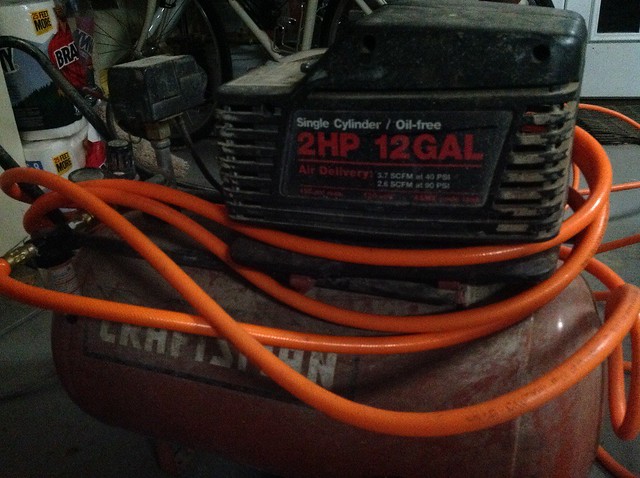
I used my old compressor which worked although it struggled to maintain pressure.
You’ll need two cheap parts for your compressor hose. One to keep water from being mixed with your air ($10) and another to control pressure ($15). The gun instructions will give you the right PSI air pressure.
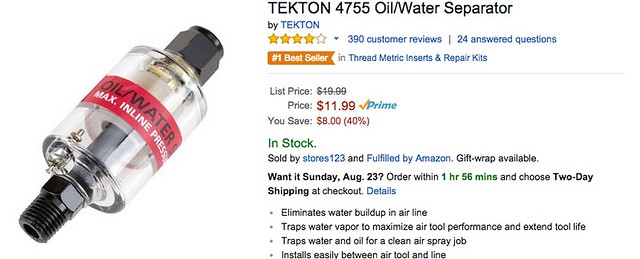
www.amazon.com/gp/product/B001NSYV58?psc=1&redirect=true&ref_=oh_aui_detailpage_o03_s00
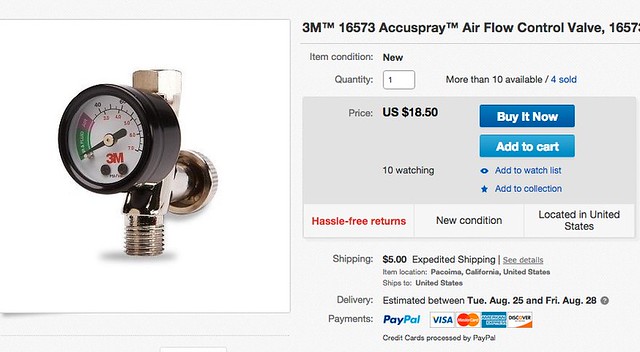
www.ebay.com/itm/221547452390?_trksid=p2057872.m2749.l2648&ssPageName=STRK%3AMEBIDX%3AIT
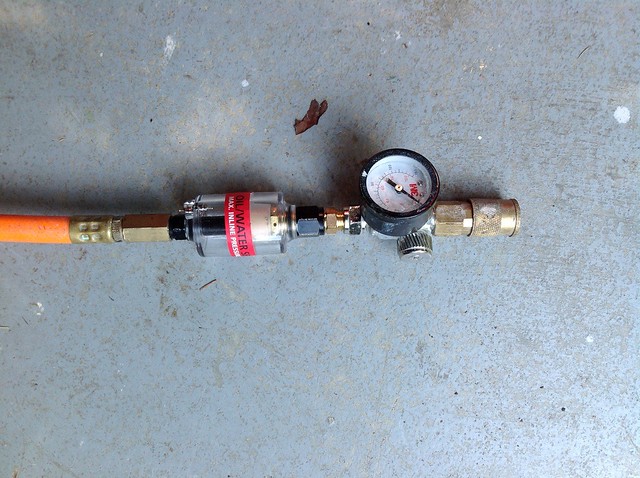
The webpage below will make it easy to adjust the gun properly and shows you how to shoot paint without sloppy runs. (You’ll have a couple of small runs to repair whether you like it or not.)
How to Set up an HVLP gun for painting:
www.how-to-build-hotrods.com/set-up-hvlp.html
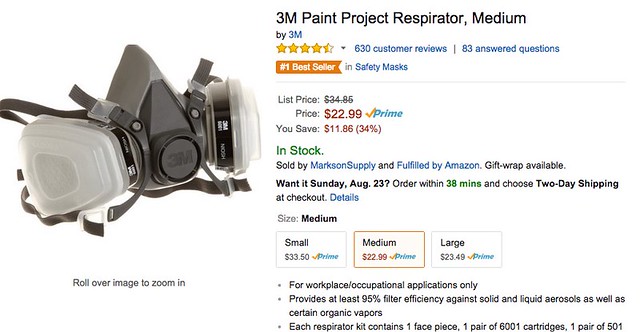
Wear a respirator and goggles. If you’re a man, you’ll try it once without them…and you’ll be sorry! I sure was sorry when I tried it.
Important: Don’t paint if it’s humid. I was told to avoid painting when humidity was over 50%. Don’t paint if rain is forecast within 24 hours. Don’t paint if it’s windy. Try not to paint in strong, direct sunshine. Don’t paint during heavy pollen. Don’t paint if you’re rushed for time. I was told to paint when it’s between 60 and 85 degrees. Others will chime in on this.
Step 7: Primer
You’ll find this especially rewarding. Practice first. After that, practice more. I used an old piece of camper skin. You can use old plywood but it’s better to use something smooth like wood or sheetrock.
Adjust the gun using the link above as your guide.
Mixing primer is like picking a bathing suit. You have to find what works best for you. I followed advice given me and mixed 4 parts primer to 1 part Floetrol.
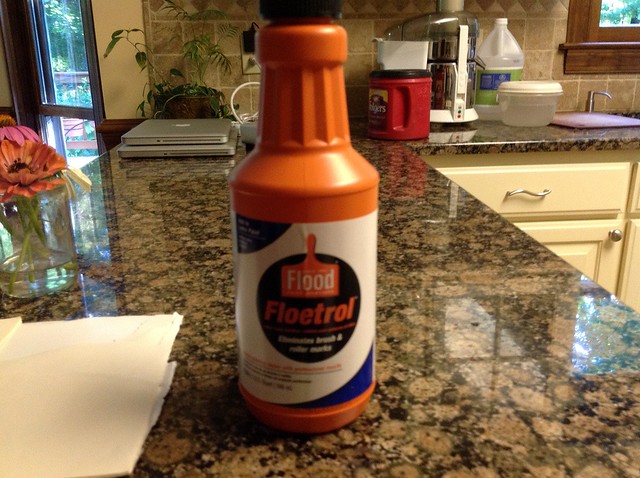
Floetrol is used to thin the primer enough to get it through the gun for a smooth coat. There are a lot of products that do the same thing. They make Floetrol for latex or oil based primer/paint so make sure you get the right one.
Fill the canister half way with mixed primer. Practice.
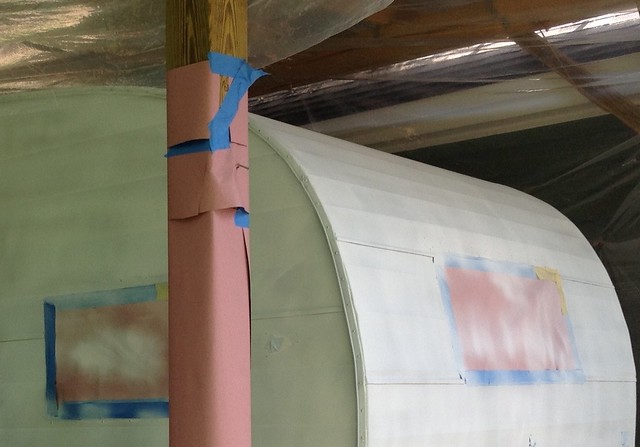
The first coat is a dusting. Not heavy enough to cover completely. Don’t stop moving while your finger is on the trigger. Let go of the trigger while still moving or keep shooting as you move off whatever you’re painting.
Example of dusting:
Ready? Feeling good?
Quickly wipe the camper down with a Tack Cloth. Or have a helper do it while you practice with the gun. Tell them not to touch the camper with their hands if possible.

www.amazon.com/gp/product/B001YJFYE8?psc=1&redirect=true&ref_=oh_aui_detailpage_o06_s00
Start with the roof. It’s the part of the camper where you can afford to make mistakes. Get the gun working well. Don’t put it on thick! Again, spray a dusting (see above) on the first coat. Not quite covering.
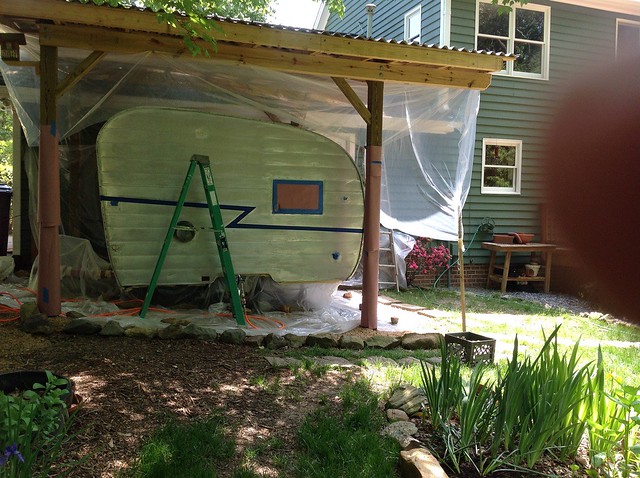
Continue priming the entire camper. Then wait until it’s tacky but not wet to the touch. About 15 minutes worked the day I primed. Spray another slightly heavier coat to completely cover.
Both coats need done within an hour. Any longer and you should stop and wait for the primer to dry completely (follow instructions on can) before doing a second coat.
Once you’re finished priming, wait as long as the manufacturer recommends to let it dry. Then very lightly wet sand with 600 grit sandpaper. Some people rinse it with water others wipe it down with denatured alcohol. Don’t use thinner or anything strong or you will take off the primer.
Wipe the camper again with a new tack cloth.
Step 8: Prep for paint
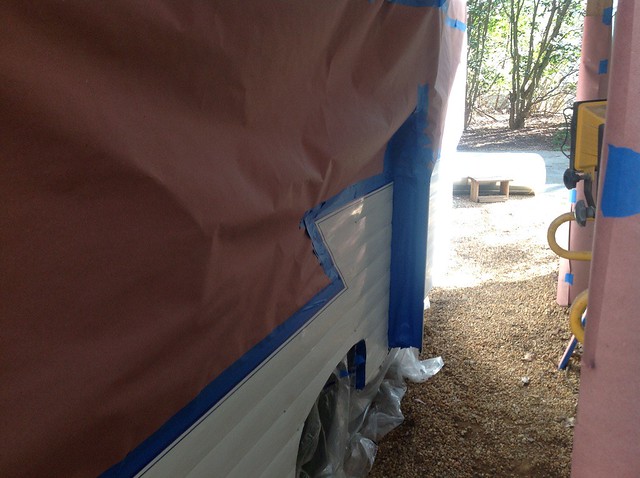
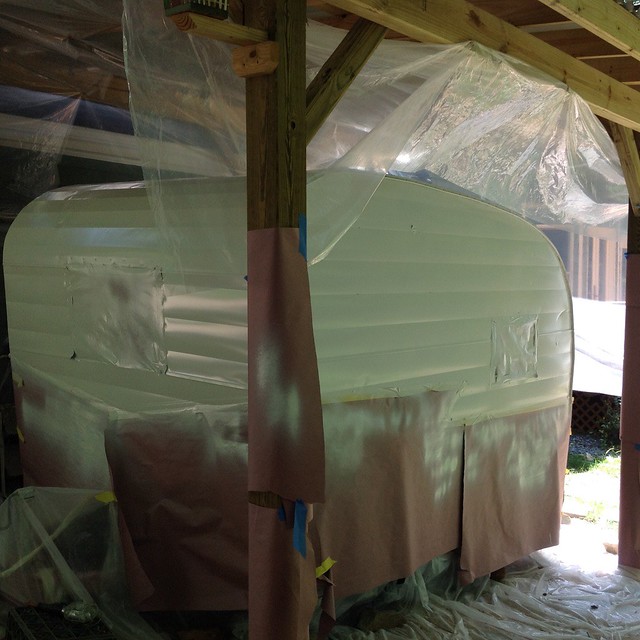
We wanted green below the stripe and white above. This means taping off the bottom first with paper. This photo is after the top was painted but again you get the idea.
Use the stripe as your area to tape (attach) the paper. Do not apply tape anywhere other than the taped stripe or against other paper. The tape holding the paper in place should not be making contact directly to the camper at all. Think of it more like a big bag over the camper. I hope this makes sense.
Step 8: Paint
This is the best part of the project. I followed a recommendation to mix 4 parts paint with 1 part paint thinner. Again, you do this to get the oil based paint flowing through the gun.
I switched to the HVLP gun. Adjust it the same way and practice.
Ready?
First wipe the camper lightly again with a fresh tack cloth.
Start spraying at the roof. Slow (not very slow) even passes overlapping each other by about 1/3. The same movement as you used priming. Once again, a light dusting of paint then wait until it’s tacky but not wet to the touch. About 15 minutes worked for me but it was a dry day. Spray another slightly heavier coat to completely cover.
If you don’t get the second coat on within an hour you have to stop.This is a hassle because you’ll have to wait until the base coat is completely dry then lightly sand and clean the camper again or the second coat won’t adhere. So the day you paint, nobody is allowed to talk to you, no kids in the yard near you, no dogs moving around, no texting, no distractions, nothing but painting. Try to do both coats within an hour.
Step 9: Prep for the bottom
Wait a day or two until the top is dry. Follow the directions for dry time on the can. Then remove the paper from the bottom and paper over the top. Be careful not to let tape touch the new paint. You’re covering the camper, not taping to it. Use the stripe again as your tape point.
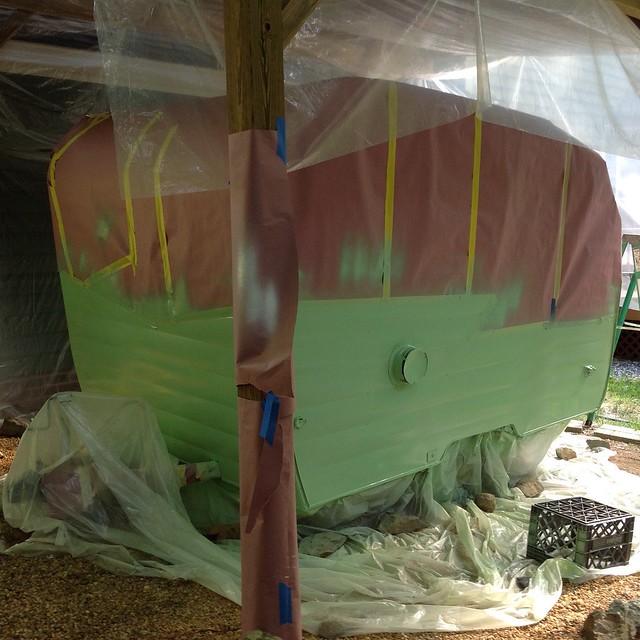
Step 10: Paint the bottom
Basically, it’s a repeat of what you did above.
Step 11: Remove the paper from the top after the bottom dries.
Step 12: Removing the stripe tape
This requires a delicate touch. Peel the tape in the center back away from itself.
This photo to show the center tape comes off first.
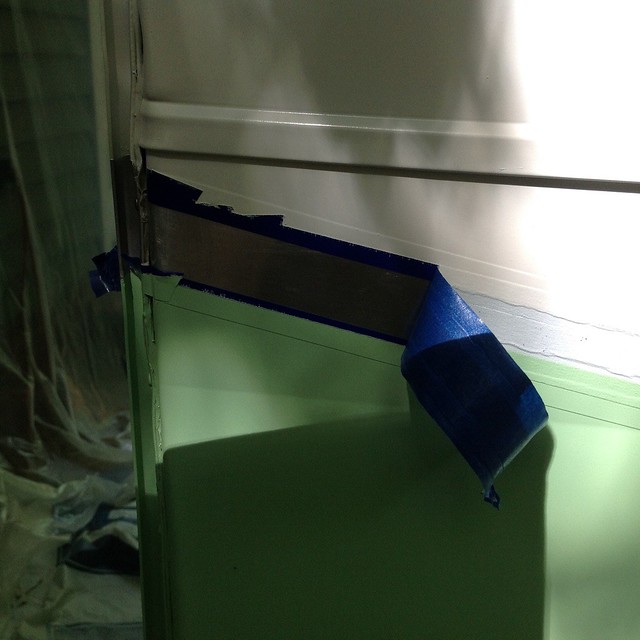
Do not pull straight up or you will pull off new paint that hasn’t cured.
Once the center tape was off I pulled away the Fineline tape the same way. Very slowly, away from itself. Leave the door taped and ajar until the paint is cured.
(This is a different camper but it's a good photo of pulling off tape straight back)
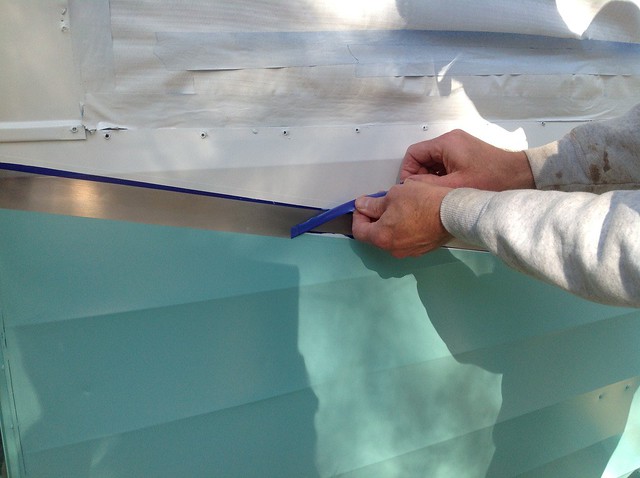
Step 13: Step back and admire your work.
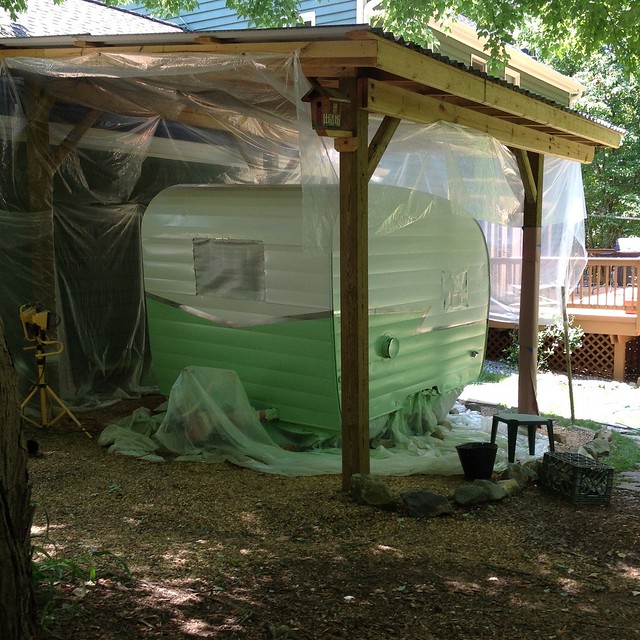
Don’t touch the paint. Don’t use the camper. Don’t go in and out. Let it sit and cure for at least a week. I was told in humid weather it may take longer. Some people say it can take a month to fully cure oil enamel paint outside. After a few weeks curing we had a very tough paint job that looked great.
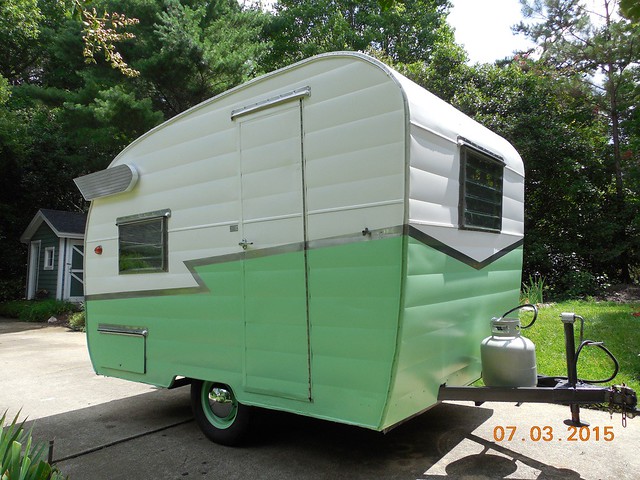
I hope this helps give you a few of the basics. Keep in mind this is a beginner sharing other people’s advice. If I’m forgetting anything, more experienced folks should chime in.
Have fun painting.
Everyone has a different opinion of the “Right Way” to paint. Opposing opinions are welcome.
Most of the information here was compiled from great advice offered by vikx, Vas, BigBill, SusieQ, John Palmer and others. So everything good comes from them. Everything convoluted I own.
This is really a Painting 101 thread. Basics for beginners. If you have $3000 sitting around collecting dust, go to a body shop and you’ll be very happy.
You’re still reading? Okay, here we go!
You can do a nice paint job for around $200 if you own some basic tools.

Compact-restored

Compact as I found it
Supplies
1 Gallon of paint is plenty. You may only use half.
1 Gallon of primer is plenty. Again, you may only use half.
0000 and 000 steel wool
cheap plastic scraper(s)
Fineline Tape (I used 1/2”)
Painter’s tape
A roll of paper from Home Depot or Lowes
Cheap Tarps to protect the bushes, driveway, Etc.
Floetrol (thinner-see below)
Mineral Spirits
Paint Thinner
Denatured Alcohol
Rubber gloves
Tools:
Compressor that can provide steady air flow
A $10 oil/water separator for the hose (see below)
A $10 air regulator for the hose (see below)
Goggles
A respirator (see below)
HVLP Spray gun (Mine cost $50-See below)
Possibly a old fashion bottom tank spray gun (Mine cost around $35-See below)
A step ladder to reach the roof
Clothes you can afford to throw out when you’re finished
I’ll list below the exact supplies I bought and equipment I used. That doesn’t mean it’s the best way or only way to go, just the way I did it.
I took off plates, chrome pieces, door handle, vent, windows, Etc. I removed the Jrail to do repairs and prep it off of the camper then reinstalled it with new putty tape before painting. Some people like to polish Jrail and reinstall it once the paint is finished. It’s your call.
One last thing worth saying, prep takes 10 times longer than painting. It’s really boring but if you don’t do it you’ll be sorry.
Step 1: Remove the old paint.
You can just sand the old paint smooth (if it is not flaking or peeling) but I think removing it yields a better job in the end. Before sanding wash the camper. I used TSP cleaner then washed it a second time with water to be sure the cleanser was all off.
Then I used Jasco Paint Remover (semi paste) which is available at Home Depot or Lowes.

This is toxic so wear rubber gloves and goggles. I wore a long sleeve shirt and pants when doing big areas.
Follow the directions and the stripper does 90% of the work. Scrape it with a cheap plastic scraper, not a metal one. Metal will scratch the soft aluminum skin.

You might need a second round of stripper to get the final paint off. I brushed on the Jasco and used 000 steel wool so as not to scratch the metal. Be gentle.
Some people like this stripper better. It’s not toxic but it takes more time and a little more effort to get the same results.

Step 2: Sand. Then sand. After that, sand.
I hand wet sanded the entire camper gently with 220 grit. Then 320 grit. Then 600 grit for any rough areas. If you can feel an imperfection when you run your hand over it, it will show when painted.
Step 3: To fill or not to fill?
I chose not to use body filler on our camper. Many people feel filler won’t hold up well long-term on such thin aluminum.
You’ll get some strong opinions pro-filler from people who love it. It does make the camper look great. It’s up to you.
A funny quote about filler: “Filler is like plastic surgery. You do it, then you swear you didn’t to everyone who asks.”
I decided to replace the roughest panels with new skin from Hemet Valley RV. Front panel and back panels up to the windows along with the jrail.


There are great videos on installing new skin at cannedhamtrailers.com so I won’t get into it here.
Tape covers over all window holes being careful not to have tape further than the reinstalled window edge. I used plastic at first so I could clean without water getting inside. A tricky process.
Step 4: Clean off the skin.
Residue from the Jasco (or other paint remover) will keep paint from sticking. That’s why some very knowledgable people skip it and just wet sand the old paint. Again, it’s your call.
Wash the camper down with water and a little soap. Then wipe it down with mineral spirits. Some people prefer lacquer thinner, which I believe is stronger. Again, wear gloves and goggles.
Rinse the camper down again or wipe down with denatured alcohol.
Once clean, it is important not to touch the surface with your hands more than absolutely necessary. As one person pointed out, your hands have oil on them. Don’t be obsessed, but only touch the camper when needed. And WASH your hands.
Step 5: Taping.
A helper makes taping much easier on long, straight lines but I did most of it on my own.
Tape all light holes. Tape all drain holes and anything else you don’t want painted.
We wanted a buffed metal stripe, not painted. This adds a step. You have to tape top and bottom of your stripe and buff it off with 0000 steel wool then polish it. Here’s the catch…polish keeps paint from adhering. So move slowly getting none outside the area.

Now the tricky part. There may be a better way to do it, but I used 1/2” Fine Line tape (a must anywhere you want a straight, perfect line) to tape inside the stripe I just polished. Basically, follow the edge of the yellow tape you see with the blue Fineline tape.

I filled in the space between the Fineline tape with standard blue painter’s tape. And remove the yellow tape top and bottom. The yellow tape I removed (after polishing) sat on top and bottom of the tape you see on the demo below.

Use mineral spirits or lacquer thinner to carefully clean (small rags) above and below the fine line tape before priming and painting in case any polish is there. By the way, buy a big bag of rags (around $10). You will need to keep swapping them out. Don’t try to clean more than a few feet per rag.
If painting your stripe you should still use Fine Line Tape. Don’t cheap out.
The door is another “It’s up to you” area. I polished then taped the hinge with Fineline tape and left the door on. Some people take the door off. Unfortunately I don’t have a photo of how I taped it. I basically taped off the inside of the door frame, then the back side of the door itself that I didn’t want paint on, then taped with 2 inch blue painters tape between the two. This in essence left the door ajar but the camper sealed off from paint spray. Odd, I know, but it worked perfectly. I was able to spray everywhere I wanted.
The door will look like this while spraying.
(Yes, this is a different camper.)

Step 6: Choosing a primer and paint.
As somebody smarter than me advised, pick one brand and use the system they recommend. Don’t mix and match primer and paint.
Rustoleum has been used with great results by many members. (Share some photos, folks) The downside, you have to use one of their pre mixed colors. Some people mix Rustoleum colors to make a new color. I tried it on test pieces with poor results.
ACE oil based enamel and Ace aluminum primer latex…an odd combo but I spoke with the tech people at the manufacturer and they swear it’s the best primer for their paint. You can mix the color which is great. And it’s a proven system for adhering to aluminum. The downside, it’s getting harder to find ACE oil based paint. I was told within a year it may all go over to latex.
Tractor Paint from Tractor Supply. A quality paint but again only in pre-mixed colors.
Auto paint. It’s the ideal way to go but it’s expensive. You can get amazing results. It’s a multi-step system that’s too complicated for my first paint job and more than I wanted to pay without some experience. Sherwin Williams Auto quoted me around $800. I thought, “If I screw up and have to redo it, I’ll kill myself.”
So we chose ACE.


Step 6A: Picking a paint gun.
I used this gun ($35) for Ace Primer which is very heavy even thinned. It puts it on heavier than an HVLP gravity fed gun. I wet sanded some off. With other primers you may just need the HVLP gun.

This is my HVLP gun ($50). It did a nice smooth paint job.

www.homedepot.com/p/Husky-Gravity-Feed-HVLP-Spray-Gun-H4840GHVSG/203497519
I used my old compressor which worked although it struggled to maintain pressure.

You’ll need two cheap parts for your compressor hose. One to keep water from being mixed with your air ($10) and another to control pressure ($15). The gun instructions will give you the right PSI air pressure.

www.amazon.com/gp/product/B001NSYV58?psc=1&redirect=true&ref_=oh_aui_detailpage_o03_s00

www.ebay.com/itm/221547452390?_trksid=p2057872.m2749.l2648&ssPageName=STRK%3AMEBIDX%3AIT

The webpage below will make it easy to adjust the gun properly and shows you how to shoot paint without sloppy runs. (You’ll have a couple of small runs to repair whether you like it or not.)
How to Set up an HVLP gun for painting:
www.how-to-build-hotrods.com/set-up-hvlp.html
Wear a respirator and goggles. If you’re a man, you’ll try it once without them…and you’ll be sorry! I sure was sorry when I tried it.

Important: Don’t paint if it’s humid. I was told to avoid painting when humidity was over 50%. Don’t paint if rain is forecast within 24 hours. Don’t paint if it’s windy. Try not to paint in strong, direct sunshine. Don’t paint during heavy pollen. Don’t paint if you’re rushed for time. I was told to paint when it’s between 60 and 85 degrees. Others will chime in on this.
Step 7: Primer
You’ll find this especially rewarding. Practice first. After that, practice more. I used an old piece of camper skin. You can use old plywood but it’s better to use something smooth like wood or sheetrock.
Adjust the gun using the link above as your guide.
Mixing primer is like picking a bathing suit. You have to find what works best for you. I followed advice given me and mixed 4 parts primer to 1 part Floetrol.

Floetrol is used to thin the primer enough to get it through the gun for a smooth coat. There are a lot of products that do the same thing. They make Floetrol for latex or oil based primer/paint so make sure you get the right one.
Fill the canister half way with mixed primer. Practice.
The first coat is a dusting. Not heavy enough to cover completely. Don’t stop moving while your finger is on the trigger. Let go of the trigger while still moving or keep shooting as you move off whatever you’re painting.
Example of dusting:

Ready? Feeling good?
Quickly wipe the camper down with a Tack Cloth. Or have a helper do it while you practice with the gun. Tell them not to touch the camper with their hands if possible.

www.amazon.com/gp/product/B001YJFYE8?psc=1&redirect=true&ref_=oh_aui_detailpage_o06_s00
Start with the roof. It’s the part of the camper where you can afford to make mistakes. Get the gun working well. Don’t put it on thick! Again, spray a dusting (see above) on the first coat. Not quite covering.

Continue priming the entire camper. Then wait until it’s tacky but not wet to the touch. About 15 minutes worked the day I primed. Spray another slightly heavier coat to completely cover.
Both coats need done within an hour. Any longer and you should stop and wait for the primer to dry completely (follow instructions on can) before doing a second coat.
Once you’re finished priming, wait as long as the manufacturer recommends to let it dry. Then very lightly wet sand with 600 grit sandpaper. Some people rinse it with water others wipe it down with denatured alcohol. Don’t use thinner or anything strong or you will take off the primer.
Wipe the camper again with a new tack cloth.
Step 8: Prep for paint
We wanted green below the stripe and white above. This means taping off the bottom first with paper. This photo is after the top was painted but again you get the idea.
Use the stripe as your area to tape (attach) the paper. Do not apply tape anywhere other than the taped stripe or against other paper. The tape holding the paper in place should not be making contact directly to the camper at all. Think of it more like a big bag over the camper. I hope this makes sense.
Step 8: Paint
This is the best part of the project. I followed a recommendation to mix 4 parts paint with 1 part paint thinner. Again, you do this to get the oil based paint flowing through the gun.
I switched to the HVLP gun. Adjust it the same way and practice.

Ready?
First wipe the camper lightly again with a fresh tack cloth.
Start spraying at the roof. Slow (not very slow) even passes overlapping each other by about 1/3. The same movement as you used priming. Once again, a light dusting of paint then wait until it’s tacky but not wet to the touch. About 15 minutes worked for me but it was a dry day. Spray another slightly heavier coat to completely cover.
If you don’t get the second coat on within an hour you have to stop.This is a hassle because you’ll have to wait until the base coat is completely dry then lightly sand and clean the camper again or the second coat won’t adhere. So the day you paint, nobody is allowed to talk to you, no kids in the yard near you, no dogs moving around, no texting, no distractions, nothing but painting. Try to do both coats within an hour.

Step 9: Prep for the bottom
Wait a day or two until the top is dry. Follow the directions for dry time on the can. Then remove the paper from the bottom and paper over the top. Be careful not to let tape touch the new paint. You’re covering the camper, not taping to it. Use the stripe again as your tape point.

Step 10: Paint the bottom
Basically, it’s a repeat of what you did above.
Step 11: Remove the paper from the top after the bottom dries.
Step 12: Removing the stripe tape
This requires a delicate touch. Peel the tape in the center back away from itself.
This photo to show the center tape comes off first.

Do not pull straight up or you will pull off new paint that hasn’t cured.
Once the center tape was off I pulled away the Fineline tape the same way. Very slowly, away from itself. Leave the door taped and ajar until the paint is cured.
(This is a different camper but it's a good photo of pulling off tape straight back)

Step 13: Step back and admire your work.

Don’t touch the paint. Don’t use the camper. Don’t go in and out. Let it sit and cure for at least a week. I was told in humid weather it may take longer. Some people say it can take a month to fully cure oil enamel paint outside. After a few weeks curing we had a very tough paint job that looked great.

I hope this helps give you a few of the basics. Keep in mind this is a beginner sharing other people’s advice. If I’m forgetting anything, more experienced folks should chime in.
Have fun painting.




 Rattle, rattle. I just picked the cans up and rattled away. Not too much to post about that.
  I'm not a talented painter. Definitely not my calling. And my son hates blue tape. But I love my son and he loves camping.