nccamper
Administrator     
Posts: 7,818 
Likes: 2,930
1962 Forester- 1956 Shasta
Currently Offline
|
Post by nccamper on Mar 7, 2015 20:10:07 GMT -8
|
|
|
|
Post by bigbill on Mar 8, 2015 8:15:35 GMT -8
i have never used it on a camper but have had good luck with it on other things.
|
|
nccamper
Administrator     
Posts: 7,818 
Likes: 2,930
1962 Forester- 1956 Shasta
Currently Offline
|
Post by nccamper on Mar 8, 2015 19:07:53 GMT -8
i have never used it on a camper but have had good luck with it on other things. I don't know anybody who ever used it on a camper. I like the idea of it, but it may be best to avoid it without somebody giving me the thumbs up. |
|
John Palmer
Leading Member
    Hi, From a vintage trailer guy located in Santa Ana, CA. It's good to see lots of activity here.
Posts: 1,772 
Likes: 625
Currently Offline
|
Post by John Palmer on Mar 8, 2015 19:29:58 GMT -8
I have used PPG DTM on two trailer's so far.
It is not a gloss top coat type product, I would consider it as a primer "for external use". It sticks very well to bare metal. It's not very thick and it's easier to spray it. If you try to roll it on with a small mini roller, make sure you only roll it one time, do not try to over lap the half dry areas because it will lift the partially dry paint.
I used it on a flat bed car trailer that sits outside 24/7 365 days a year for the past ten years. The only bad areas after ten years of weather are places that we scratched to bare metal. It has held up very well, but it's not shiny, more of a white satin finish.
I recently used an airless sprayer to spray the entire ceiling of a 1953 Silver Streak. We had the white PPG DTM paint tinted to an egg shell color. Again, this is very thin paint, and it needed two very thin coats to prevent runs (upside down ceiling) while spraying. The surface prep was by sand blasting to a fine grit surface. The paint has stuck very well, and hand prints wipe off easily.
Do not confuse DTM paints with paints that bond to iron oxide (rust) like P.O.R. 15, it's not the same type of mechanical adhesion.
I would not use DTM to paint the outside of a camper. Epoxy "two part" primer, with a top coat of your choice would be a better option.
|
|
nccamper
Administrator     
Posts: 7,818 
Likes: 2,930
1962 Forester- 1956 Shasta
Currently Offline
|
Post by nccamper on Mar 9, 2015 7:51:34 GMT -8
John, Thanks for the answer. It's just the kind of hands-on experience I was hoping to find. Since neither you or Bill recommend it, I won't use DTM paint on the outside of the camper.
|
|
4sweeper
Junior Member
 
Posts: 68 
Likes: 27
1963 Leisurehome
Currently Offline
|
Post by 4sweeper on Mar 18, 2015 18:30:48 GMT -8
|
|
nccamper
Administrator     
Posts: 7,818 
Likes: 2,930
1962 Forester- 1956 Shasta
Currently Offline
|
Post by nccamper on Mar 19, 2015 5:23:37 GMT -8
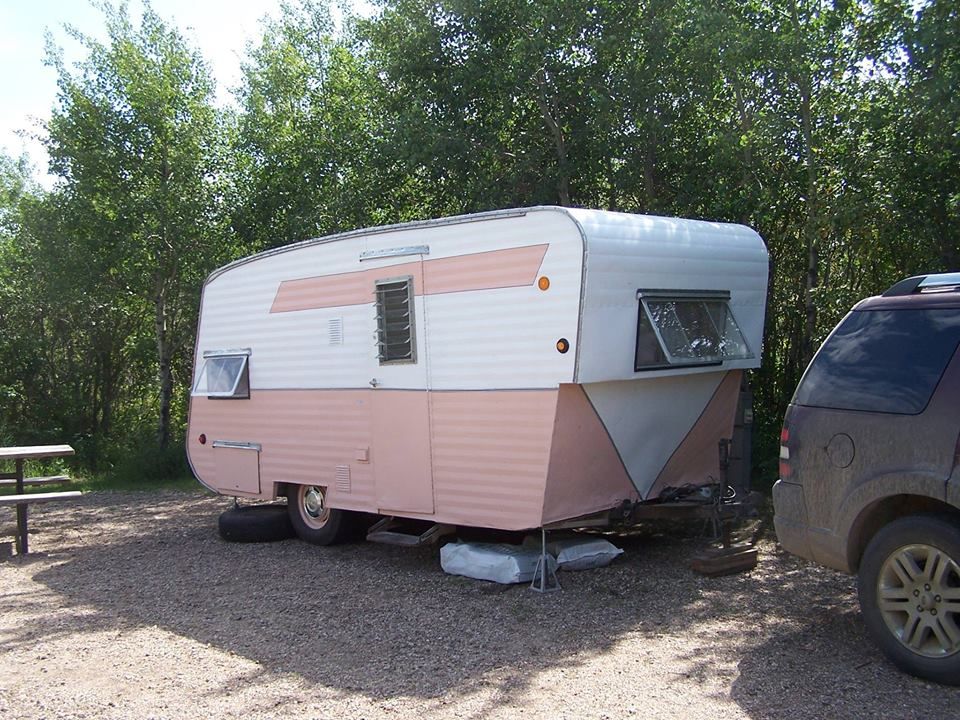
I used Benjamin Moore SuperSpec DTM alkyd in semi-gloss to paint the outside of my trailer last summer. I cleaned and sanded the previous paintjob and sprayed it on. It was a fairly thick paint and I had to thin it a little (although that wasn't recommended in the literature) in order to use my hvlp spray gun. I used a small microfibre roller to paint the stripes. It went on well. I'm really happy with it so far, but it hasn't been on that long. I really liked that it was economical for me and that I could have it tinted to match the original paint colour. The dealer was able to colour match a small piece I took in that still had some of the original paint. I used semi-gloss rather than gloss because my skin has a lot of 'character', and this way the dings and dents weren't accentuated as much. Keep in mind that this isn't a 'show-trailer' project.  It looks like you did a very nice job on it. What did you thin the paint with? What mix?...4to1, 3to1, etc. After more than 6 months, how did you feel about it? Holding up well? Parked outside? Does it chip or scuff easily? By the way, I'd rather have "character" than body filler. |
|
4sweeper
Junior Member
 
Posts: 68 
Likes: 27
1963 Leisurehome
Currently Offline
|
Post by 4sweeper on Mar 19, 2015 9:22:23 GMT -8
Thanks!
I used mineral spirits and thinned 4 parts paint to 1 part thinner. It took me four light coats to get the coverage I wanted. I don't know a lot about painting with compressors and spray guns - this was my first time ever using them - I suspect it would depend upon your nozzle and your pressure how much you'd need to thin it. I just experimented on some scrap tin until I found a ratio that worked for me and my equipment and which was easy to remember. For the stripes I used the paint straight from the can with the roller and only needed 2 coats. I bought one gallon of each colour and had between 1/4 to 1/3 of a pail left of each.
I painted her towards the end of June, 2014. The trailer has only ever been stored outside. There has been absolutely no chalking, flaking, chipping or peeling as of yet. We have driven on over 150 miles of gravel road since the paint-job. She has been washed a couple of times and none of the paint has come off.
I also used it on the tire rims, applied by brush.
I am very happy with the paint job, and I wouldn't hesitate to use this paint again. It was cost effective enough that even if it does happen to deteriorate over the next few years a re-paint wouldn't break the bank; each gallon cost me $50 here in Canada, pricing might be different for you.
One other thing I like is that if I want to paint something else to match in the same colour, say....a side table done with a latex paint, I can easily get some mixed up with exactly the same tint. This pinkish colour is call 'Tofino Sunset' by the way.
If you have any more questions, I'll answer as best I can!
|
|
nccamper
Administrator     
Posts: 7,818 
Likes: 2,930
1962 Forester- 1956 Shasta
Currently Offline
|
Post by nccamper on Mar 20, 2015 5:14:03 GMT -8
Thanks! I used mineral spirits and thinned 4 parts paint to 1 part thinner. It took me four light coats to get the coverage I wanted. I don't know a lot about painting with compressors and spray guns - this was my first time ever using them - I suspect it would depend upon your nozzle and your pressure how much you'd need to thin it. I just experimented on some scrap tin until I found a ratio that worked for me and my equipment and which was easy to remember. For the stripes I used the paint straight from the can with the roller and only needed 2 coats. I bought one gallon of each colour and had between 1/4 to 1/3 of a pail left of each. I painted her towards the end of June, 2014. The trailer has only ever been stored outside. There has been absolutely no chalking, flaking, chipping or peeling as of yet. We have driven on over 150 miles of gravel road since the paint-job. She has been washed a couple of times and none of the paint has come off. I also used it on the tire rims, applied by brush. I am very happy with the paint job, and I wouldn't hesitate to use this paint again. It was cost effective enough that even if it does happen to deteriorate over the next few years a re-paint wouldn't break the bank; each gallon cost me $50 here in Canada, pricing might be different for you. One other thing I like is that if I want to paint something else to match in the same colour, say....a side table done with a latex paint, I can easily get some mixed up with exactly the same tint. This pinkish colour is call 'Tofino Sunset' by the way. If you have any more questions, I'll answer as best I can! If it holds up in Canada, it probably can hold up to being outside in any area. Do you have a close-up of what semi-gloss looks like? Every company has a different view of "gloss". As John said above, epoxy two part primer with a top coat may be best, but I'm new to painting so I'm considering all options. One thing I have decided... no body filler. I replaced part of the skin to avoid it. But it's still not factory perfect skin on 100% of the camper. And as many people have said, gloss will show every ding. Another member had excellent results with Ace Primer and paint. I have a bad habit of learning too much and confusing myself.  |
|
4sweeper
Junior Member
 
Posts: 68 
Likes: 27
1963 Leisurehome
Currently Offline
|
Post by 4sweeper on Mar 20, 2015 6:50:38 GMT -8
I'll try to get out a get a close-up sometime today. I know exactly what you're saying about the learning and confusion. And for me, budget usually ends up being the deciding factor. Often "good enough" has to trump "best" for me. I just wanna be camping!  And we got more snow overnight.....arghhhh. |
|
4sweeper
Junior Member
 
Posts: 68 
Likes: 27
1963 Leisurehome
Currently Offline
|
Post by 4sweeper on Mar 20, 2015 7:41:23 GMT -8
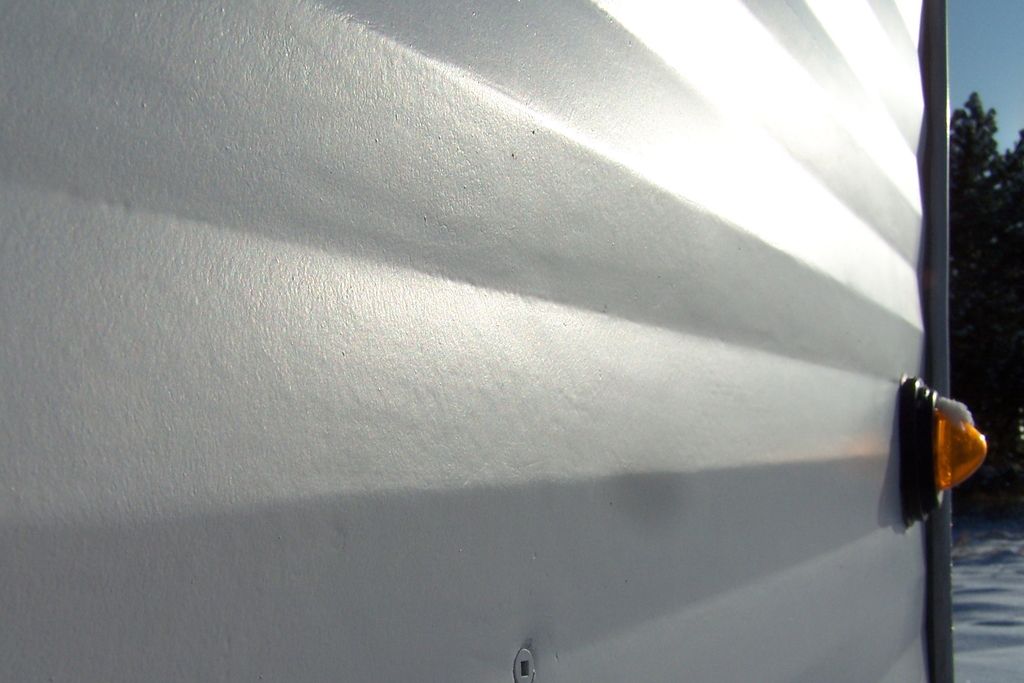
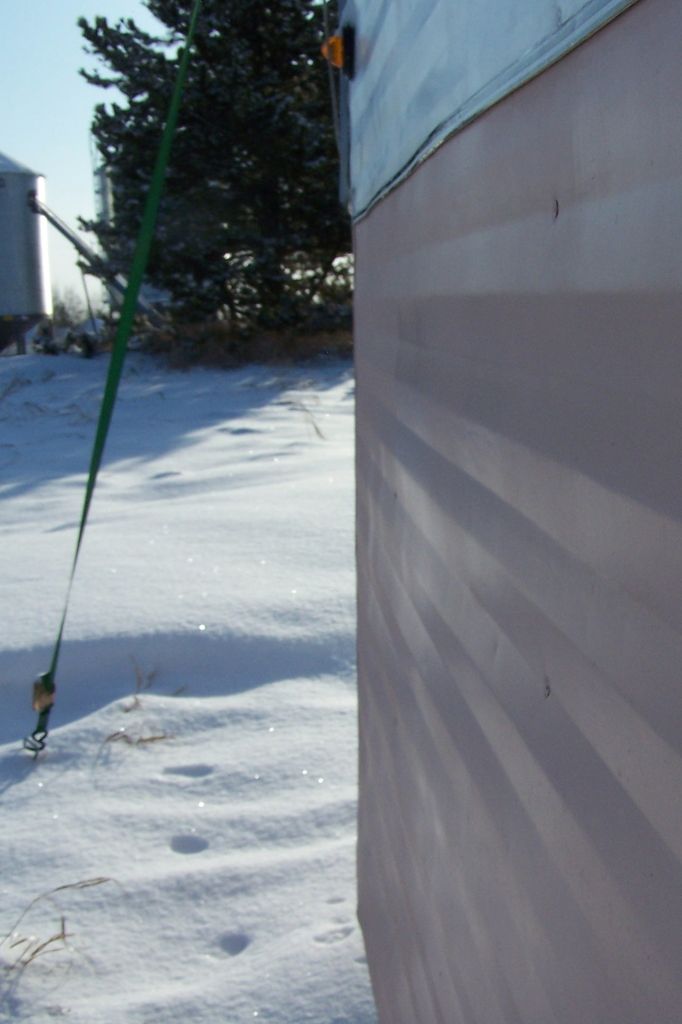
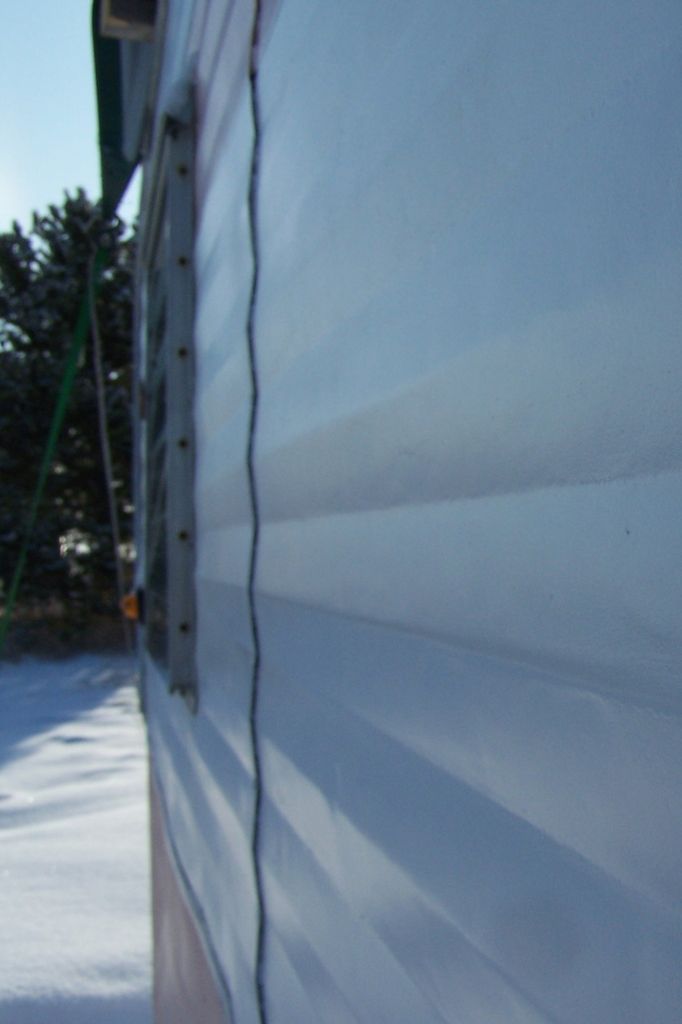
Okay, I went out and took some photos pretty much right away, thinking that the lower angle of the morning sun might capture the glossiness best. It's harder to capture than I thought! And, I must say, it's a little nerve-wracking posting close-ups of my first ever spray-paint job on a word-wide public forum  This first photo was on the sunny side, angled toward the sun......and it looks like there was a spot on my lens, it's not the paint.  The next two photos were taken on the shaded side, looking into the sun. I got the lens spot wiped off this time.    |
|
nccamper
Administrator     
Posts: 7,818 
Likes: 2,930
1962 Forester- 1956 Shasta
Currently Offline
|
Post by nccamper on Mar 20, 2015 12:14:24 GMT -8
And, I must say, it's a little nerve-wracking posting close-ups of my first ever spray-paint job on a word-wide public forum Excellent. Every "first paint job" should turn out this nice. I would call it gloss but not high gloss. Smoother than I expected for DTM paint. You sanded between coats? Wet sanded? Or just the initial sanding? Thanks again for the information. |
|
4sweeper
Junior Member
 
Posts: 68 
Likes: 27
1963 Leisurehome
Currently Offline
|
Post by 4sweeper on Mar 20, 2015 19:44:14 GMT -8
It's definitely not high-gloss, but there is a sheen to it. I only sanded before beginning painting, using an electric orbital sander. No wet-sanding. I did not sand between the coats at all. I had a small window of opportunity between rainshowers and windy weather forecasts so I pretty much re-coated as soon as each previous coat was dry. As I said, my coats were pretty thin though; I was so worried about runs. I did end up having a couple of small runs, but they're not very noticeable.
|
|
wetbrush
New Member
Posts: 4 
Currently Offline
|
Post by wetbrush on Jul 7, 2015 22:11:03 GMT -8
|
|
nccamper
Administrator     
Posts: 7,818 
Likes: 2,930
1962 Forester- 1956 Shasta
Currently Offline
|
Post by nccamper on Jul 7, 2015 23:24:40 GMT -8
  Tried to post a photo...guess I don't get it...anyway...I used Benjamin Moore DTM paint..I was happy with the results..I used high gloss and I sanded between coats...I have two coats of the yellow and the red...no drips...used a gravity feed gun and compressor...first time ever using a spray gun...I also did some bondo work...the skin was actually in good shape. I chose high gloss paint...glad I did ![]() If you can post a photo I'd love to see it. I'm not exactly sure what a Holiday House looks like. |
|