|
|
Post by Teachndad on Jan 28, 2015 23:01:51 GMT -8
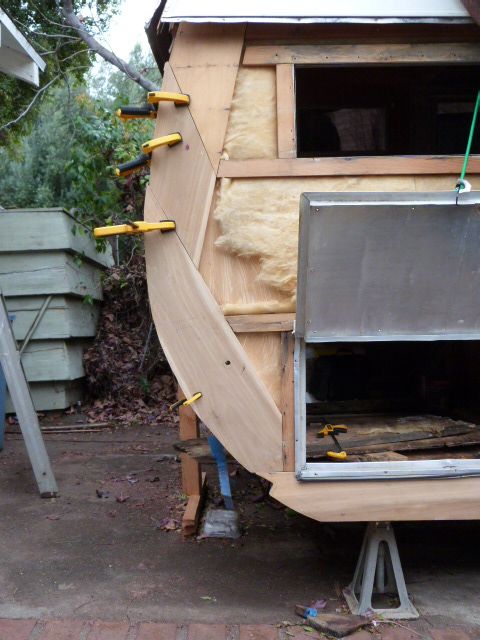
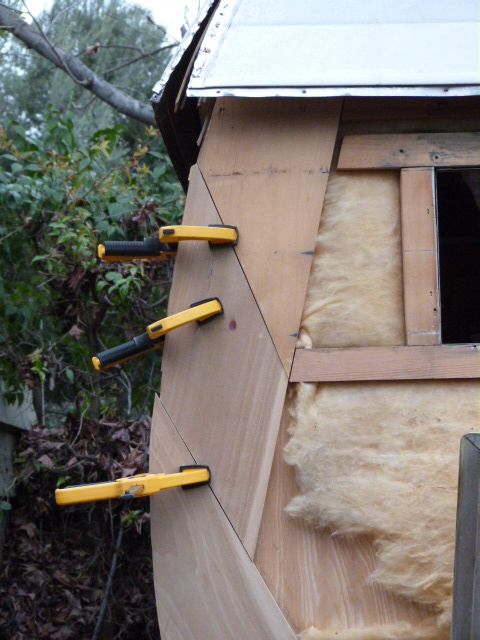
Hi Everyone, I just completed my first ever setting of the curbside radius boards on my 57 Westerner, Andy.  As seen in the images below, I currently have the boards and the sill board clamped in place. I still need to use the pocket hole jig for the anchoring screws and the staples on the interior need to be added as well. I have not worked out the thin paneling "spacer" that sits between the sill and the floor joist, yet. The outer edge of the radius boards will be sanded when the kerfing goes in...much later. The left vertical support next to the storage door frame will be removed for a new piece. It's currently the original piece. The sill is tight up against the lower aluminum frame of the storage access door. I made sure boards to the left were all aligned to sit on top of the sill. Originally, the sill did not sit directly under the aluminum door frame. I would appreciate any comments or suggestions for improvement before anchoring in the boards. The upper most diagonal separation near the top clamp is the result of not making that cut at a perpendicular angle to the wood. I had the multi tool(unbenownst to me) angled a bit, thus the gap. I did take the belt sander to it, and that decreased the gap a little. thanks Rod
   |
|
|
|
Post by vikx on Jan 28, 2015 23:33:33 GMT -8
Looking very good to me. I would put spacers at the gaps, with Gorilla glue. Every piece should have a strong connecton.
That Helper Cat knows what's up...
|
|
|
|
Post by Teachndad on Jan 29, 2015 15:33:34 GMT -8
Thanks, Vikx.
What should be the order of the glue?
Like this?:
1. Glue between gaps and let dry
2. Sand off any excess
3. Drill pocket holes
4. Drill screws to tighten
Where does the stapling from the interior come into the order?
Thanks,
Rod
|
|
|
|
Post by vikx on Jan 29, 2015 22:43:24 GMT -8
I would do all at the same time. You've already test fit and it looks good. Glue, clamp and screw. You can tap with a rubber hammer to adjust before screwing if necessary.
I build the structure first. The panels come later.
|
|
nccamper
Administrator 
Posts: 7,745 
Likes: 2,872
1962 Forester- 1956 Shasta
Currently Offline
|
Post by nccamper on Jan 30, 2015 7:10:04 GMT -8
The cat seems bored with the entire vintage camper project, but I think your work so far looks really good.
|
|
mobiltec
5K Member
 I make mistakes so you don't have to...
Posts: 9,825
Likes: 3,752
1954 Jewel In Progress...
Currently Offline
|
Post by mobiltec on Jan 30, 2015 8:21:54 GMT -8
Looks good to me. I just belt sand the outer radius smooth once it's all installed. I always end up with little mess ups like that too.
|
|
RJ
Active Member

Posts: 416
Likes: 144
Currently Offline
|
Post by RJ on Jan 30, 2015 10:57:37 GMT -8
Back off mister; when I'm done with my inspection and filed my report, we'll have a talk. Dang trailer inspectors seem to pop up when you least expect them   Nice job on the radius boards; looking good! Don't listen to what that inspector sais; they'are all fur and no bite  |
|


