|
|
Post by norwellequipped on Sept 5, 2014 11:39:08 GMT -8
After purchasing our Shasta… Time is my biggest enemy..or lack of it.But I have started to get a few things in order.We have pulled the original rims of and are having them stripped so I can begging painting them…In the mean time,I pulled one of the Aluminum window tops(not sure of the proper terminology) but gave about 1.5 hours of cleaning and buffing…. came out beauty! I will keep the board posted when more happens. I do have a question….NanaT sealed up the trailer seams very very well.I will bet if she did not.. the interior would have never lasted….. (we purchased the Shasta from NanaT)..great lady!…. anyhow…. I wanted to remove the excess silicon, from the ares and overlaps…. I plan a repaint within the next 6-8 months..I have used some Goo Gone.. but with limited success… i was going to try Lacquer thinners or Acetone… but it removes paint.. and skin pretty fast. hah ha. 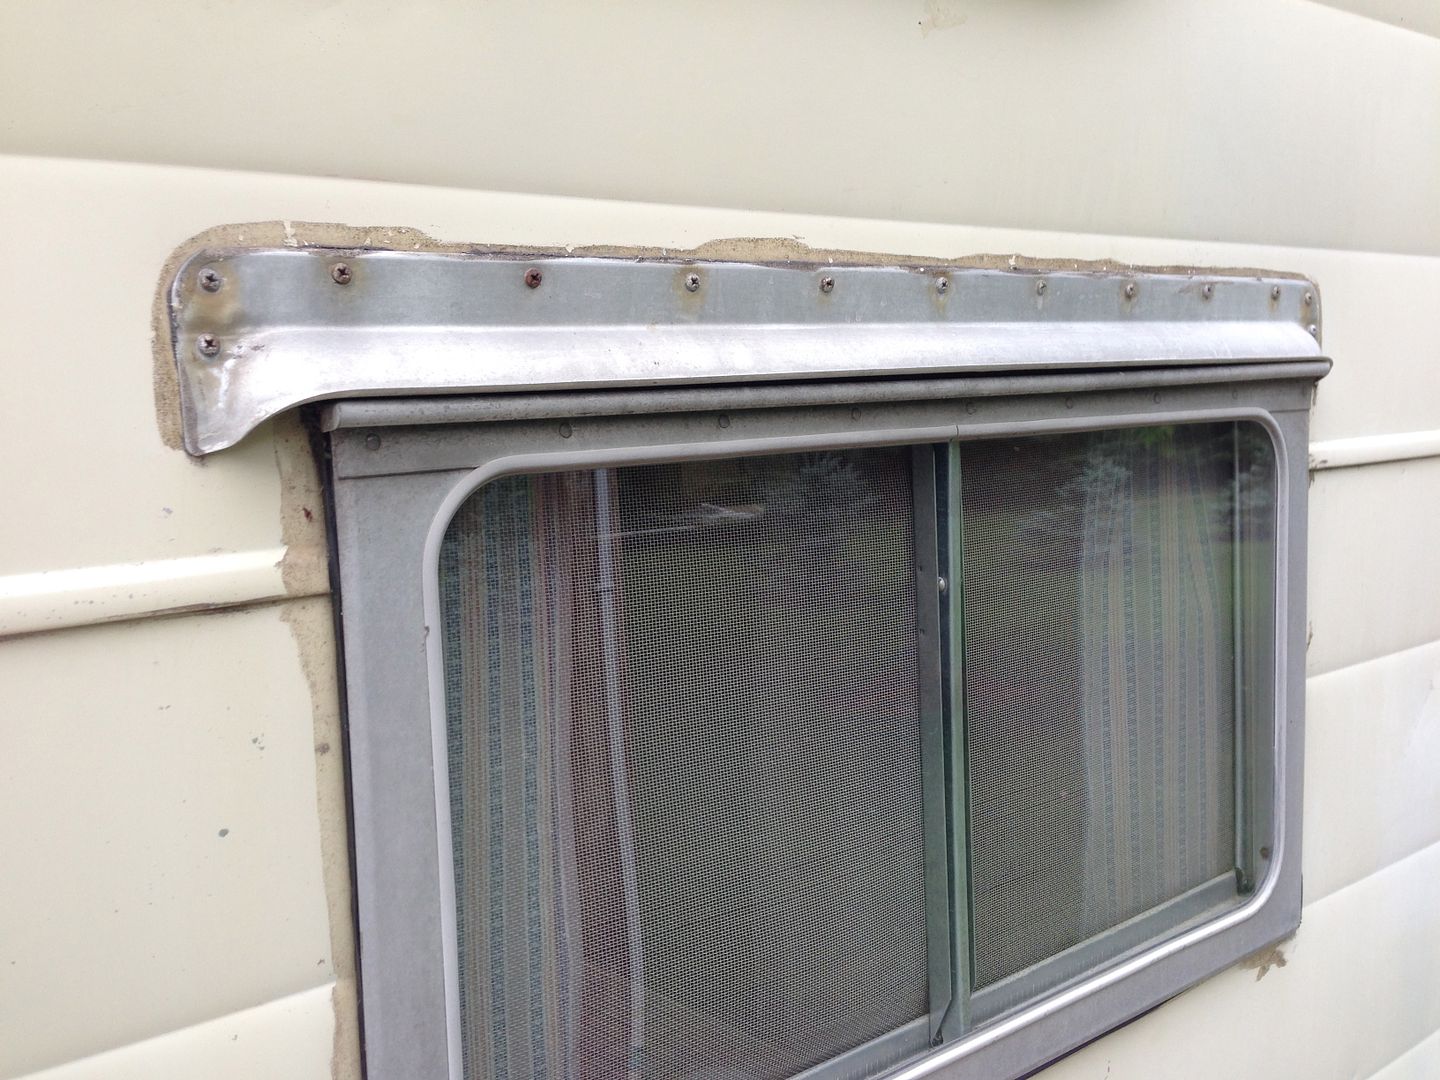  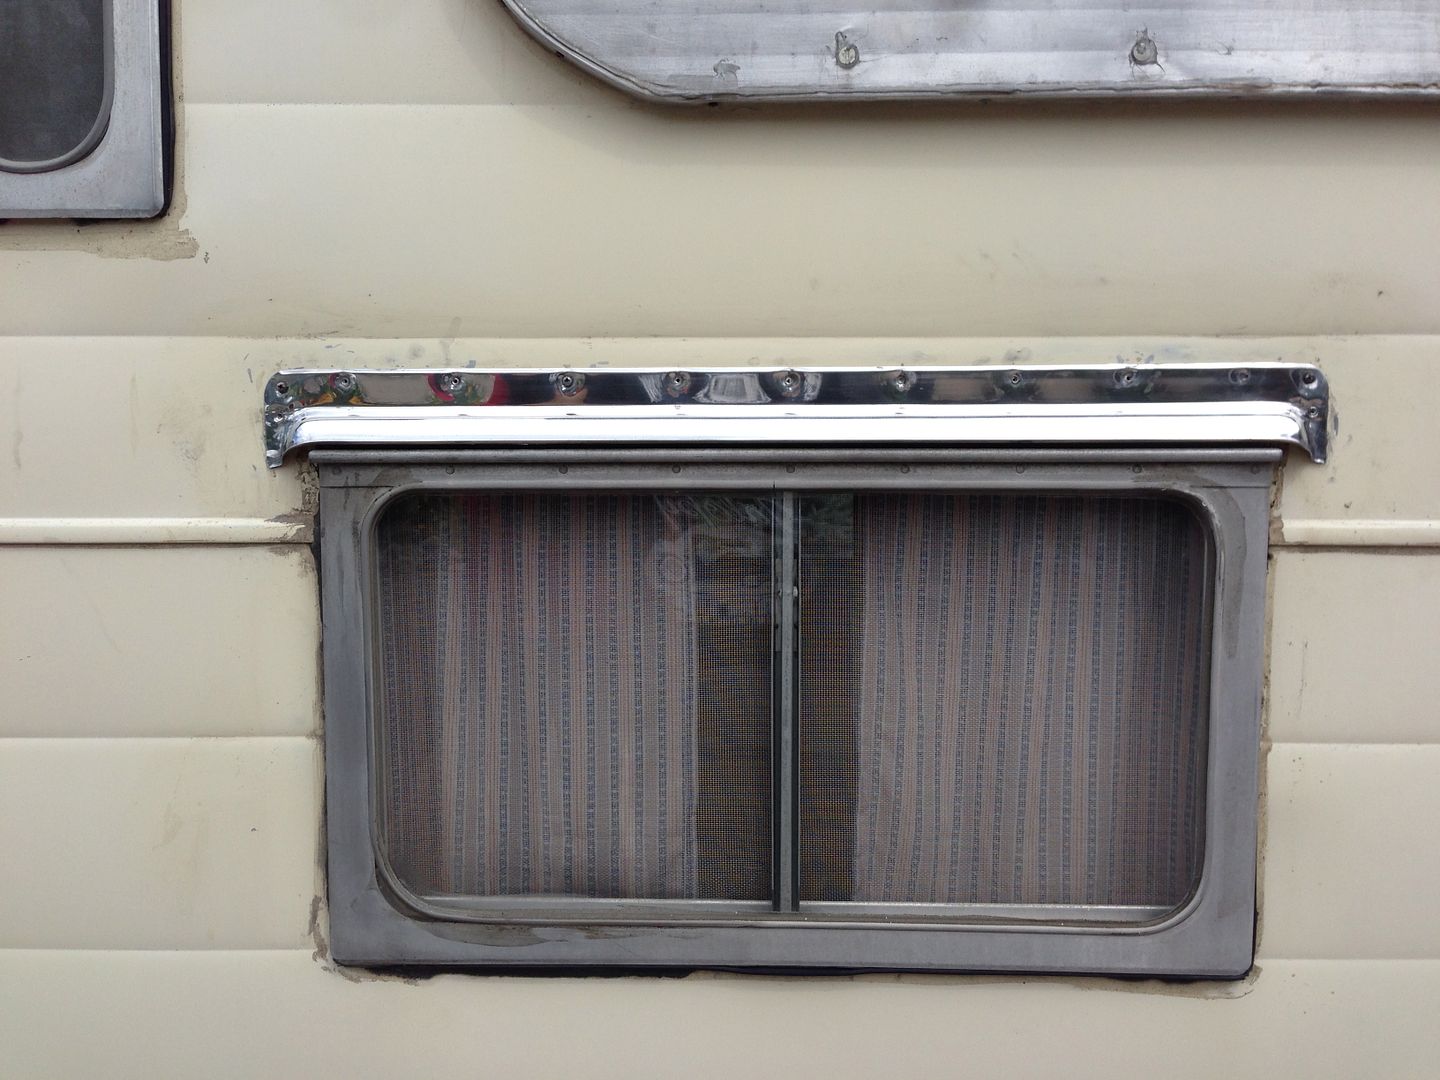  |
|
SusieQ
Global Moderator 
Posts: 4,781 
Likes: 1,197
'62 Shasta Compact
Currently Offline
|
Post by SusieQ on Sept 5, 2014 11:50:52 GMT -8
EYEBROWS! That's what they are called and you did a fabulous job! If silicone was used to seal, I'm so sorry. It is very difficult to remove and requires a sharp blade and patience. Also, Goo Gone would have been my first suggestion. I like the orange citrus version. Do not reseal anything with silicon! Use putty tape/butyl tape. If you search here, you will find much discussion about it. Silicon fails and is difficult to remove.
From the pics, I can't really tell but it looks like that it might be putty tape. If so, first scrape off as much as you can and the citrus Goo Gone with patience will work. Another alternative os Goof Off, much stronger, but it will remove paint.
|
|
|
|
Post by norwellequipped on Sept 5, 2014 12:59:19 GMT -8
Ah.Eyebrows!…good….Well the sealant will come off.I have a few painter friends… just going to be some elbow grease involved.
|
|
John Palmer
Senior Member
 Hi, From a vintage trailer guy located in Santa Ana, CA. It's good to see lots of activity here.
Posts: 1,683 
Likes: 589
Currently Offline
|
Post by John Palmer on Sept 5, 2014 15:56:01 GMT -8
Jeff, Welcome to our little world of vintage trailers. They will fit well with your car habit, LOL.
For those on this forum that do not already know, Jeff is a very talented automotive artist. He has had a feature about his work, in the last two months of Street Rodder Magazine.
Good to see another 1957 Ford Guy.
New Paint, and Silicone are not a good mix. The new paint will not adhear to areas that had the Silicone on it. Make sure you discuss this with your painter before he starts sanding, priming and painting.
John |
|
|
|
Post by norwellequipped on Sept 6, 2014 4:12:37 GMT -8
Thank you John for the very kind words.I intend in the future for the 57 to Haul the Shasta… ha ha ha
Yes.My painter pal is coming around the ranch tomorrow to discuss a plan of attack….(John,You may know HotrodDonnie from another board!)
At any rate…. I will keep all posted.
As I mentioned eager in the intro section… the Shasta inside is 100% mint and original…The exterior needs a bit of love . but nothing massive or Major.
I am so very happy to be here and many thanks to nanat.
This is a super wonderful board with tons of info.
I will add more as progress rolls out.
|
|
Schatzi
Active Member

Posts: 113
Likes: 46
1964 Shasta Compact
Currently Offline
|
Post by Schatzi on Sept 6, 2014 8:54:37 GMT -8
Sorry, I posted my reply in the wrong spot. So here it is in the right spot. To remove the silicone, use a oscillating tool with the flexible scraper attached. Then remove the residue with spray Goo-Gone.
|
|
corky
Member
Posts: 48
Likes: 7
1964 Shasta 16-SCS
Currently Offline
|
Post by corky on Sept 7, 2014 19:39:33 GMT -8
Jeff,
That first eyebrow sure looks good! Do you mind sharing what you used to clean and polish?
The wheel looks great too...If you're willing to get dirty, I learned a nifty electrolysis process you can do in your shop to strip and de-rust those wheels...
I'll look for my old pictures from a tractor restoration a few years ago and post here.
Corky
|
|
|
|
Post by norwellequipped on Sept 8, 2014 5:30:58 GMT -8
Corky..sure thing. the polishing was very simple. I removed the rear window eyebrow carefully. the eyebrow itself is a very soft and easily bent aluminum.I used Goo Gone and then some Acetone to remove all the excess Silicon off the eyebrow and the trailer are as well.PLEASE use industrial gloves when using Acetone..very nasty stuff. After that I used the wadding from Never dull(a Eagle One product.)I feel this loosens up any built in residue before polishing. After that i used a Rouge Compound.Buffing rouge is found in any store that has metal cleaning supplies.Very easy to find.. but in comes in different grades.Bought some cheap buffing wheels and off I went! I cleaned up the eyebrow with a clean rag after using the Eagle One Never Dull. I began with the soft metal rouge…(As the buffing wheel is spinning… apply the rouge(it's like a giant chalk stick) and begin a forward motion like a sander.Since the eyebrow is very pliable …. be careful….. it can bend and get messed up. After 10-15 minutes the eyebrow really began to sparkle and shine.I then moved to the hi-polish rouge and proceeded the same way until I got my results. PLEASE NOTE-- when ever metal polishing.. wear a good mask. and eye protection. There are MANY ways to do this….. this is the way that works for me. I will use Stainless screws when i do the final assembly…. only on the eyebrows…. never where paint will eventually be. Corky. please tell us your electrolysis process….. I already have my rims at a friends industrial sandblaster…. and will paint in a few weeks if the weather holds out. Hope that helps…and sorry for being long winded!  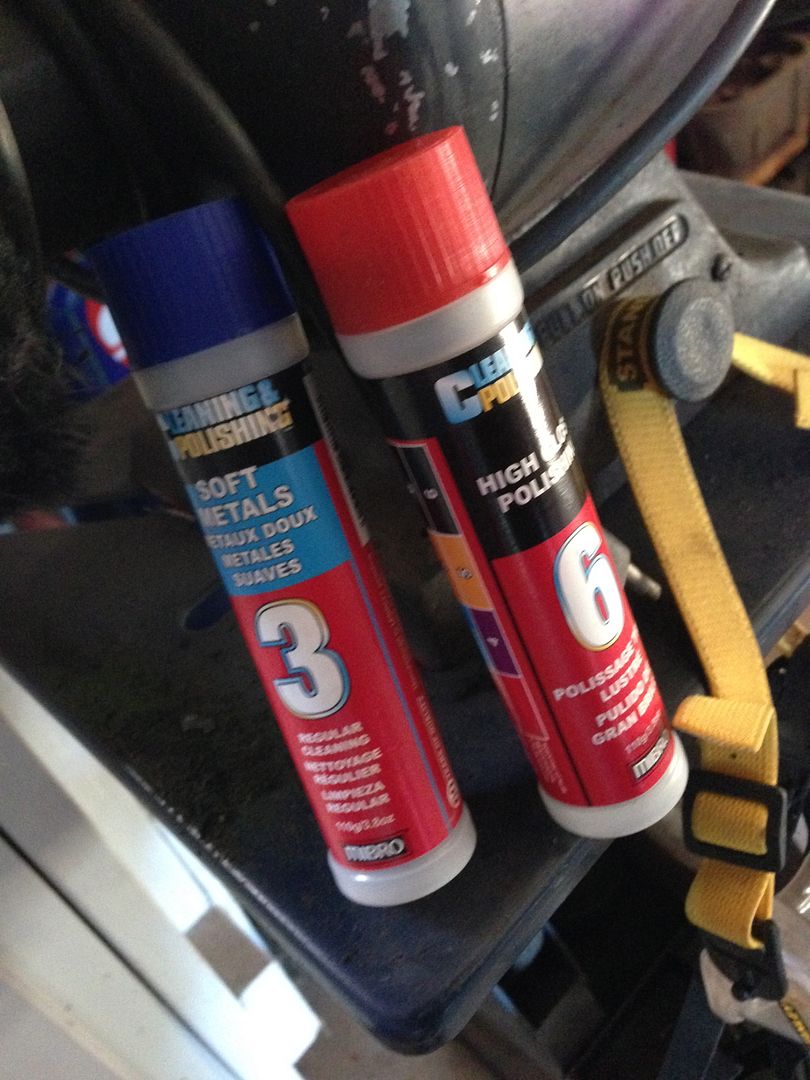 |
|
corky
Member
Posts: 48
Likes: 7
1964 Shasta 16-SCS
Currently Offline
|
Post by corky on Sept 8, 2014 20:48:17 GMT -8
Back in 2007 I was restoring an old tractor, and started building my own Electrolysis Tub to remove rust from a large number of steel parts.
Here's a series of pictures of the assembly, with notes of my experimentation with TSP as the active agent. SPECIAL NOTE: BE CAREFUL AND ALWAYS WEAR EYE PROTECTION..THIS SOLUTION IS NOT GOOD IN YOUR EYES! (ask me how I know...)
1. Cable assembly


2. I mounted the cables for the electrodes on the outside of the tank

3. And then attached the electrodes on the bolts inside the tank. Since this tank is made of hard rubber, I drilled the holes a little smaller than the bolts so there would be no leakage.

4. After the electrodes were mounted, the first wheel went in, sitting on two wood blocks, and with a wire lead bolted to the stud hole.

5. Next came the second wheel, sitting on another two wood blocks, with another wire bolted to the stud hole.

6. Next came the witches brew...4 pounds of tsp for about 25 gallons of water.

7. Hooked the positive cable to the electrodes and the negative to the wires connected to the wheels, and she's boiling immediately.

8. Here my charger was set on 10 amps. but the indicator shows it's pulling 30 amps. After about 3 minutes, it clicks and goes down to 2 amps, and a few minutes later, it clickes again and goes back up to 30 amps. Cycling means you've got the TSP solution too strong.

9. I forgot to post this picture, which shows how I have the positive connected to the electrodes...the black cable goes around the outside of the tank and attaches to each bolt...and both wheels are attached to the negative side only.

10. I drained off 1/3 of the solution and replaced it with fresh water...and guess what? The charger is now running at a steady 22 amps, with no cycling! It's boiling along nicely, (maybe even better than it did at 30 amps), and the water is churning up and bubbling like a real witches brew!

11. Checked the progress the very next morning, and here is what I found. The tank was foaming really good, with a bunch of paint and rust floating all around.

What surprised me was that the charger was pushing 26 amps, and probably indicates that I have better connectivity now that a bunch of the paint has fallen off the wheels.
If your charger starts cycling again, it probably means you still have too much TSP in the solution. Remove some more of the solution and dilute with more fresh water to see what happens.
__________________________________
(And Jeff thought HE was long-winded! LOL...sorry folks!)
Corky |
|
|
|
Post by norwellequipped on Sept 9, 2014 3:10:54 GMT -8
Most excellent Corky!!!
|
|
corky
Member
Posts: 48
Likes: 7
1964 Shasta 16-SCS
Currently Offline
|
Post by corky on Sept 10, 2014 17:34:01 GMT -8
Thanks Jeff.
I know those pictures kinda make me look like some sort of mad scientist. But it was me friends what had all the knowledge...I just had an inquiring mind and a poorly developed sense of fear! LOL. From what those friends described, what they came up with, is apparently the reverse of electrolysis...the 12-volt charge on the metal bars that surround the tank somehow pull the paint and rust off the items with the negative charge--(the wheels in my example)--because when the process is complete, the nice shiny bars of steel shown above are heavily caked with rust and gunk!
They also admonished me NOT to try it with aluminum, and NOT to try it with galvanized metals...don't know why, but I'm not going there!
Try on your steel parts in a well-ventilated area, and keep your eye protection on!
Enjoy,
Corky
|
|
nanat
Junior Member
Posts: 66
Likes: 17
Currently Offline
|
Post by nanat on Sept 27, 2014 17:00:40 GMT -8
Hey Jeff..You can be brutal with me LOL..I should never have used silicone.
Unfortunately I never found this board until after the application of it. I could almost feel the members here cringe when I told them what I had done. I can't recall the name of the stuff but it was not the usual stuff as I felt it spread after it was applied (your pics kind of show that). Then it collected dust and looked like heck.
Hard to believe the eyebrows could look so good. You did a super job.
And those tires are super nice too.
|
|
soup
1K Member
"I hate cold Soup"
Posts: 1,237
Likes: 204
Currently Offline
|
Post by soup on Sept 28, 2014 3:05:38 GMT -8
Corky,
All I can say is WOW!!
That tank is totally AWESOME!!!!!!!!!!!!!!!!
|
|
mobiltec
5K Member
 I make mistakes so you don't have to...
Posts: 9,843
Likes: 3,761
1954 Jewel In Progress...
Currently Offline
|
Post by mobiltec on Sept 28, 2014 19:42:16 GMT -8
|
|
|
|
Post by norwellequipped on Oct 8, 2014 17:38:24 GMT -8
Can't seem to load the link……
|
|


