


Post by pathfinder3081 on Jun 8, 2014 8:17:48 GMT -8
I thought I would take a minute to give a few quick notes and pics for other Loflyte owners in search for the basics in mapping out an upgrade to 30 amps from the factory 15.
First of all I got my plan from hitting the boards hard right here and asking quite a few questions. I wasn't able to get all of the text and answers at one place of course, but Vikxs' approach and diagrams as well as Kto's notes and pictures and quite a few others help me round the corners..
 So thank you
Here it goes and I do hope that it will help some others to gear up and approach it with confidence. It's really not that difficult at all. This was a renovation and a upgrade.. not a start from day one wiring project.
Conditions; I was tripping the 15 amp breaker alot while in the field. I found the culprit and not a moment to soon either. This breaker was shot! It was old and needed to be replaced.. So if you buy a Vintage camper. Be prepared to replace these old breakers first thing.
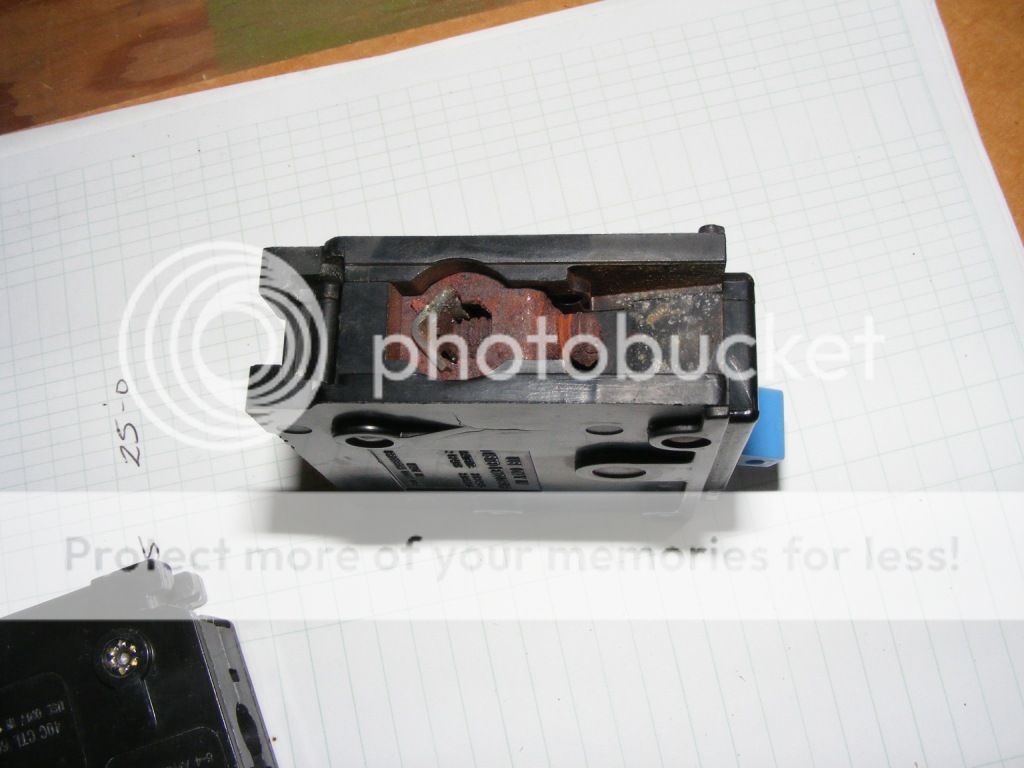
nasty and coroded!
What I had in place upstairs is what most of you will find in yours. The box was okay, servicable and operational. I went ahead and started opening stuff up and seeing where the wires went.. It's all 14 guage.. "14-2"... When you buy wire for your camper you will buy it like this.. 12-2, 10-2.. that ='s a Black wire, a White wire (2) and then a bare copper ground wire..

I still had the old breaker in when I took this photo.. After I decided to go with the 30amp service, I went with the option to install all of the upgrades in the "Power Chord" area behind the fender well.
The stuff up here was still good and the original set up was fine. Three lights and 3 outlets. When you go to 30 amps you need to change out the Main wire from your shore power to your breaker box to a 10 guage wire. (simple you have new hotter juice coming in) I did not want to "fish" up the new large wire through the wall.. And again, this is not a rebuild so much. The panneling and skin is on and all is well. I hooked all of this original stuff up to the new 15 amp breaker below. The Original J-box was there on the lower wall and a simple connection. (see pix)
I am going to go back and find the link where Vikx (see the end of this post) and some others pulled one of these together. I got this at lowes for $18.00. It had 30 amp breaker in it that I did not need. I also had to buy a another bar for the ground/float wires. It only had one in it. I was able to wire these groups on my work table and walk back and forth into the camper for "fit and size".
Working bent over in the tight confines of this area well can be a real pain for me. I was able to complete 95% of everything while out side, standing at my work table.
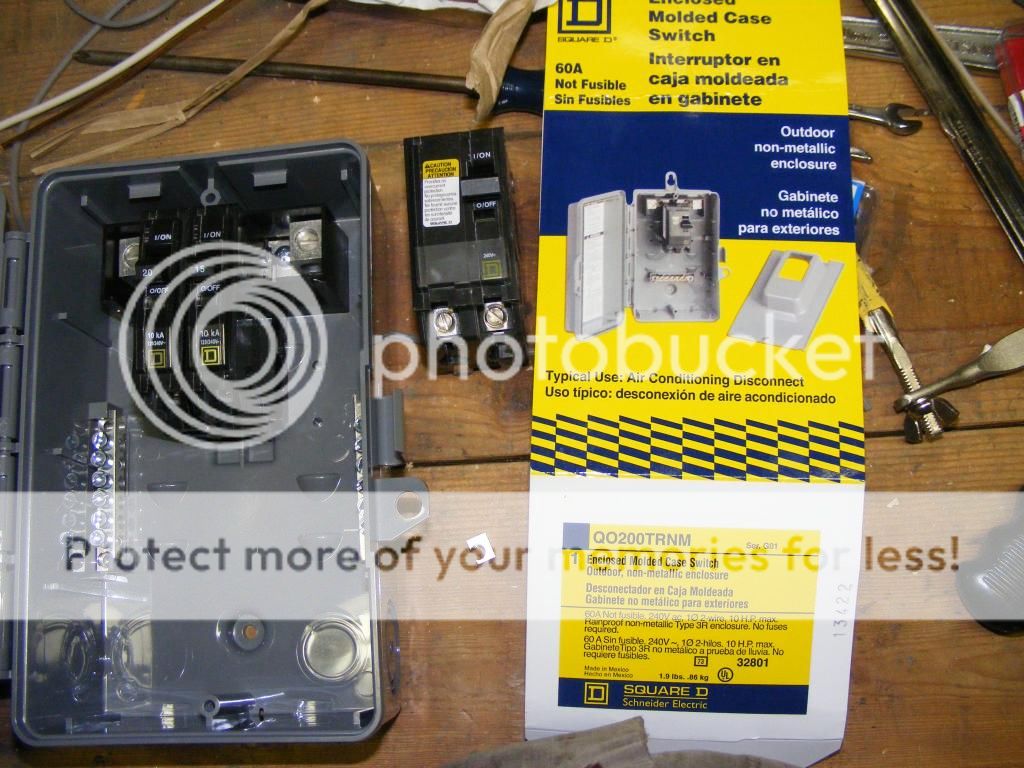
I installed the 20 amp and 15 amp breakers and got a feel for placeing the jumper wire.. It is as shown.. The main hot wire from the shore power will go to the 20 amp left side and then this jumper just goes over to the right side..

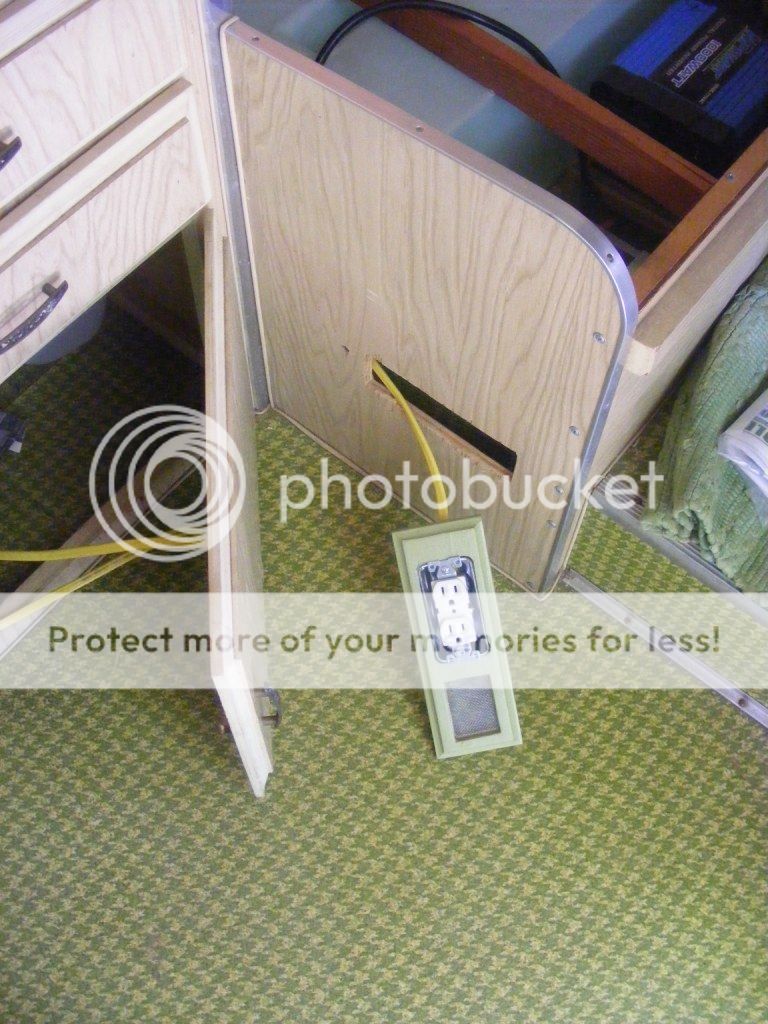
Next I decided on what I was going to set up for my new 20 amp plugs. I have had a nasty hole in the side board from the PO where he had a old radio.
I have since placed some DC power stuff in this locker and said "Bingo"! I will place a solid 20 amp plug here and screen out the rest so our Dynamic Battery Charger can vent. It's fan is right at this opening.. Sweet!


I spent a couple afternoons fiddle fart'in with this thing..


The wife was not impressd and blessed me out for not sweeping the gargage out after using the router
It was the fist run and install.. 12-2 Romex wire. Now I could have installed a "true" 20 amp breaker style plug at this location. It's the kind that you have around the bathroom sink or on your kitchen counter.
I did not use one, but might jump the circut when I install the other outlet and use one then. We'll be right on top of these circuts when this stuff is being used..I'd like to stay away from using one here.

This will be a good place to plug up the Big Coffee pot, Toaster or Blender.
Next on the assembly was the J-boxes for the new transfer of power, wire runs and the like.. The rule of thumb as my father told me years ago.. "always make all of your connections of wire to wire in a box". These are J-boxes and when you are buying them do not forget that you need to buy the "insert connection clamps" and anchors. They run about 60 cents a piece and the box will run about a $1.25.

As I mention above I was able to assemble most of this on my work bench. This really helps in creating the paths of the wire. The load box can get "Busy" and get that way fast. I only have three circutts in this thing..Yikes!


I have two new j-boxes. Box one is to receive my new shore power and connect to a new 10 ga. (10-2) wire. This goes into my new box. (load center)... Black wire connects to the left top, ground to the left side bar, White wire to the right side bar. It is the J-box on the bottom of the load center, closest to the fender well.

The other, J-box #2 is the for outlet connection up front. I am going to add another outlet, but ran out of 12 ga. The other yellow wire connects to my 14 gage wire running through the wall to the existing system, the Breaker box above the stove.


In closing.. The main ground.. I was able to drill a hole right through the floor. I went out of the bottom hole on my load center and grounded as show in the pic with a 10 ga run. I cleaned up the surface with a wire brush after I back off the exisitng nut. I added some new washers and made a good connection. I didn't have to drill any new holes in the frame.

Well, I'll clean this up and proof it later. My spell checker is off and I am not that good with "right'in".
I hope that this can give a few new builders a little insight to what is involved in a 30 amp switch over. I guess when it was all over I have about $100 in it and a Saturday or two.
Wire is expensive. The new Power chord for the shore line is really high. I got 15 feet and added the plug.. still expensive.. I might have gotten a better deal at Walmart..
Good luck.
Other really helpful post in this subject for me were:
vintagetrailertalk.freeforums.net/thread/218/breakers-wire
vintagetrailertalk.freeforums.net/thread/69/providing-safe-power-vintage-trailer
vintagetrailertalk.freeforums.net/thread/812/confusion-regarding-upgrades-circuits-converters#page=2
First of all I got my plan from hitting the boards hard right here and asking quite a few questions. I wasn't able to get all of the text and answers at one place of course, but Vikxs' approach and diagrams as well as Kto's notes and pictures and quite a few others help me round the corners..
 So thank you
Here it goes and I do hope that it will help some others to gear up and approach it with confidence. It's really not that difficult at all. This was a renovation and a upgrade.. not a start from day one wiring project.
Conditions; I was tripping the 15 amp breaker alot while in the field. I found the culprit and not a moment to soon either. This breaker was shot! It was old and needed to be replaced.. So if you buy a Vintage camper. Be prepared to replace these old breakers first thing.

nasty and coroded!
What I had in place upstairs is what most of you will find in yours. The box was okay, servicable and operational. I went ahead and started opening stuff up and seeing where the wires went.. It's all 14 guage.. "14-2"... When you buy wire for your camper you will buy it like this.. 12-2, 10-2.. that ='s a Black wire, a White wire (2) and then a bare copper ground wire..

I still had the old breaker in when I took this photo.. After I decided to go with the 30amp service, I went with the option to install all of the upgrades in the "Power Chord" area behind the fender well.
The stuff up here was still good and the original set up was fine. Three lights and 3 outlets. When you go to 30 amps you need to change out the Main wire from your shore power to your breaker box to a 10 guage wire. (simple you have new hotter juice coming in) I did not want to "fish" up the new large wire through the wall.. And again, this is not a rebuild so much. The panneling and skin is on and all is well. I hooked all of this original stuff up to the new 15 amp breaker below. The Original J-box was there on the lower wall and a simple connection. (see pix)
I am going to go back and find the link where Vikx (see the end of this post) and some others pulled one of these together. I got this at lowes for $18.00. It had 30 amp breaker in it that I did not need. I also had to buy a another bar for the ground/float wires. It only had one in it. I was able to wire these groups on my work table and walk back and forth into the camper for "fit and size".
Working bent over in the tight confines of this area well can be a real pain for me. I was able to complete 95% of everything while out side, standing at my work table.

I installed the 20 amp and 15 amp breakers and got a feel for placeing the jumper wire.. It is as shown.. The main hot wire from the shore power will go to the 20 amp left side and then this jumper just goes over to the right side..

Next I decided on what I was going to set up for my new 20 amp plugs. I have had a nasty hole in the side board from the PO where he had a old radio.
I have since placed some DC power stuff in this locker and said "Bingo"! I will place a solid 20 amp plug here and screen out the rest so our Dynamic Battery Charger can vent. It's fan is right at this opening.. Sweet!


I spent a couple afternoons fiddle fart'in with this thing..


The wife was not impressd and blessed me out for not sweeping the gargage out after using the router

It was the fist run and install.. 12-2 Romex wire. Now I could have installed a "true" 20 amp breaker style plug at this location. It's the kind that you have around the bathroom sink or on your kitchen counter.
I did not use one, but might jump the circut when I install the other outlet and use one then. We'll be right on top of these circuts when this stuff is being used..I'd like to stay away from using one here.


This will be a good place to plug up the Big Coffee pot, Toaster or Blender.
Next on the assembly was the J-boxes for the new transfer of power, wire runs and the like.. The rule of thumb as my father told me years ago.. "always make all of your connections of wire to wire in a box". These are J-boxes and when you are buying them do not forget that you need to buy the "insert connection clamps" and anchors. They run about 60 cents a piece and the box will run about a $1.25.

As I mention above I was able to assemble most of this on my work bench. This really helps in creating the paths of the wire. The load box can get "Busy" and get that way fast. I only have three circutts in this thing..Yikes!


I have two new j-boxes. Box one is to receive my new shore power and connect to a new 10 ga. (10-2) wire. This goes into my new box. (load center)... Black wire connects to the left top, ground to the left side bar, White wire to the right side bar. It is the J-box on the bottom of the load center, closest to the fender well.

The other, J-box #2 is the for outlet connection up front. I am going to add another outlet, but ran out of 12 ga. The other yellow wire connects to my 14 gage wire running through the wall to the existing system, the Breaker box above the stove.


In closing.. The main ground.. I was able to drill a hole right through the floor. I went out of the bottom hole on my load center and grounded as show in the pic with a 10 ga run. I cleaned up the surface with a wire brush after I back off the exisitng nut. I added some new washers and made a good connection. I didn't have to drill any new holes in the frame.

Well, I'll clean this up and proof it later. My spell checker is off and I am not that good with "right'in".
I hope that this can give a few new builders a little insight to what is involved in a 30 amp switch over. I guess when it was all over I have about $100 in it and a Saturday or two.
Wire is expensive. The new Power chord for the shore line is really high. I got 15 feet and added the plug.. still expensive.. I might have gotten a better deal at Walmart..
Good luck.
Other really helpful post in this subject for me were:
vintagetrailertalk.freeforums.net/thread/218/breakers-wire
vintagetrailertalk.freeforums.net/thread/69/providing-safe-power-vintage-trailer
vintagetrailertalk.freeforums.net/thread/812/confusion-regarding-upgrades-circuits-converters#page=2


