cheri
Active Member

Posts: 163 
Likes: 46
1967 Vanbrook Trunkback
Currently Offline
|
Post by cheri on Apr 10, 2014 1:59:57 GMT -8
My camper has a galvanized roof that seems to be in ok condition. I have almost finished removing silver and black coatings, and I'm trying to plan how to protect it. There are a couple of small rusty spots where the coatings failed, but the factory seams appear to be intact. I plan to remove surface rust, and then coat with something to prevent rust. The seams where the front and back siding meet the roof are leaking. My plan is to remove the screws and replace the butyl tape and use tape along the edge. Is this a good plan? If yes, what should I use?
Plan A. Prime and paint with a good quality primer and paint made for galvanized metal. (Not made for rv) and use eternabond tape where metals meet. plan B. Use Dicor metal roof primer, coating ready tape at seams and top coat with elastomeric metal roof coating. plan C. What do you recommend. Thanks, Cheri  |
|
John Palmer
Senior Member
 Hi, From a vintage trailer guy located in Santa Ana, CA. It's good to see lots of activity here.
Posts: 1,629 
Likes: 576
Currently Offline
|
Post by John Palmer on Apr 10, 2014 13:15:11 GMT -8
A new skin will cost less than all of the cleaners/paints/chemicals/sealers that you have named.
Your photo shows the roof panel does not "overlap" the side wall and will require corner edge trim.
Lots of different ways to approach this, but a replacement skin would be both the fastest, and also the longest lasting repair.
|
|
cheri
Active Member
Posts: 163
Likes: 46
1967 Vanbrook Trunkback
Currently Offline
|
Post by cheri on Apr 10, 2014 14:42:33 GMT -8
A new skin will cost less than all of the cleaners/paints/chemicals/sealers that you have named. Your photo shows the roof panel does not "overlap" the side wall and will require corner edge trim. Lots of different ways to approach this, but a replacement skin would be both the fastest, and also the longest lasting repair. I guess I need a better picture. It's really windy and rainy here today, so I don't dare take off the tarp. The "roof" is actually three sections, one flat galvanized piece that does over lap the sides and an aluminum pieces that extend down to just above the window in front and rear. The two aluminum pieces but together and are covered with corner trim. Not the best design I guess. If I put on a new roof, should it go all the way from rear window to front window? |
|
John Palmer
Senior Member
Hi, From a vintage trailer guy located in Santa Ana, CA. It's good to see lots of activity here.
Posts: 1,629
Likes: 576
Currently Offline
|
Post by John Palmer on Apr 10, 2014 17:01:58 GMT -8
A new skin will cost less than all of the cleaners/paints/chemicals/sealers that you have named. Your photo shows the roof panel does not "overlap" the side wall and will require corner edge trim. Lots of different ways to approach this, but a replacement skin would be both the fastest, and also the longest lasting repair. I guess I need a better picture. It's really windy and rainy here today, so I don't dare take off the tarp. The "roof" is actually three sections, one flat galvanized piece that does over lap the sides and an aluminum pieces that extend down to just above the window in front and rear. The two aluminum pieces but together and are covered with corner trim. Not the best design I guess. If I put on a new roof, should it go all the way from rear window to front window? You will most likely find an "S" lock seam at the front window, and also at the rear window. That is the length of the roof you need fabricated (plus a little extra length, so you can have the option of trimming the front and rear skins to fit). Buy the roof "wide enough" to bend over the front/top/rear edges to secure it. |
|
|
|
Post by vikx on Apr 12, 2014 22:10:18 GMT -8
I agree on new aluminum roofing. Order a snip wider and trim to fit.
Also: Dicor self leveling lap sealant is for roof protrusions, not sealing seams and the like. It's good stuff and removable for repairs. Just not a roof sealant product.
|
|
cheri
Active Member
Posts: 163
Likes: 46
1967 Vanbrook Trunkback
Currently Offline
|
Post by cheri on Apr 13, 2014 3:37:36 GMT -8
I agree on new aluminum roofing. Order a snip wider to fit and trim to fit. Also: Dicor self leveling lap sealant is for roof protrusions, not sealing seams and the like. It's good stuff and removable for repairs. Just not a roof sealant product. Hi again, Thank you so much for all your encouragements. I agree that the roof needs to be replaced. I'm thinking the best plan would be to get one that goes all the way from the front to the back windows. This is a job that I need to think a whole lot about before I actually order a new one. (lots more videos  My concerns are proper measurement and cutting out for windows etc. It is so easy to ruin the aluminum. Luckily, I have had a great improvement in circumstances. My hubby freed up a space to work on the trailer inside. This makes an amazing difference. No more worries about springtime weather here in Michigan. So, I have been working steadily and reading and watching videos. I have the roof detached, but still sitting on top. I don't have anywhere to put it, and don't want to trash it until I am sure I can handle dealing with a new one. I will post pics of my progress soon. Thanks again. |
|
|
|
Post by vikx on Apr 13, 2014 10:08:41 GMT -8
If you straighten the roof edges, you should be able to roll it and get it off with help. (it will be HEAVY with that galvanized strip) Straight edges prevent splits, not the idea with a roof that will be tossed, but lets it roll easily. 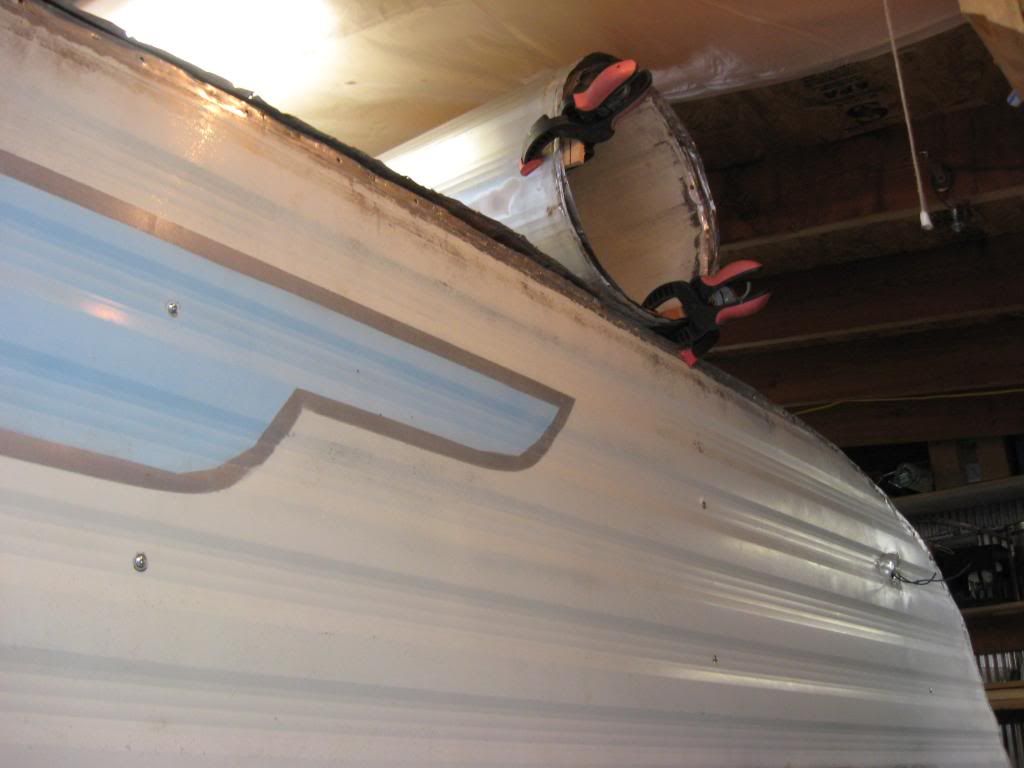 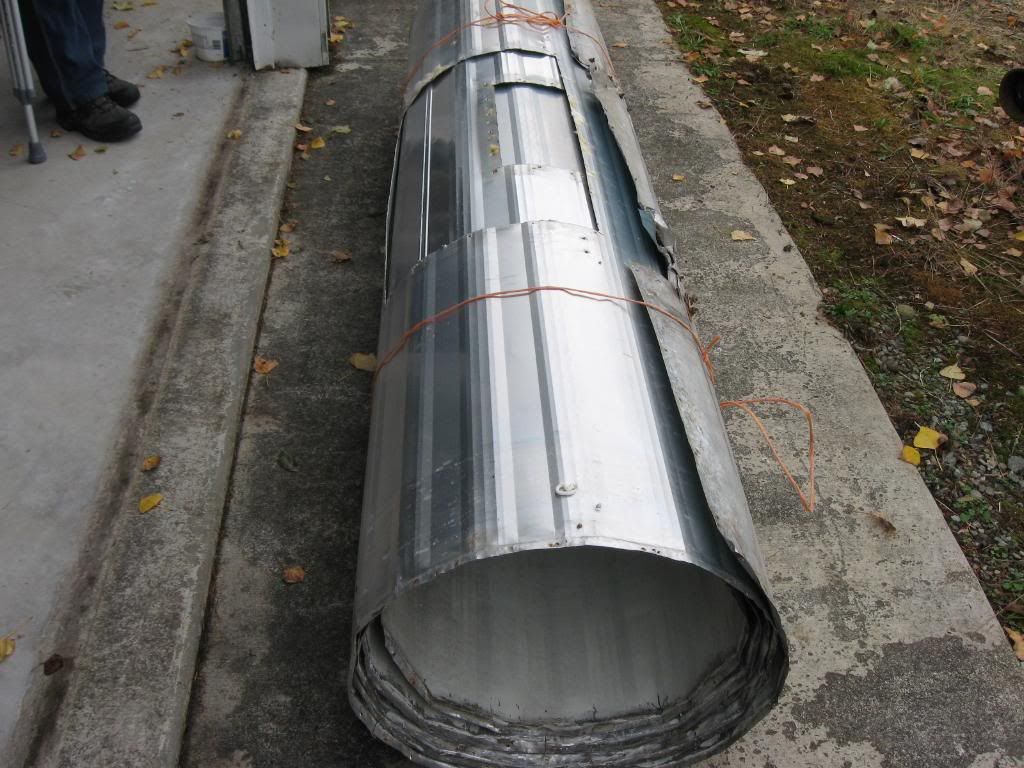 OR: You can float the roof side to side to do repairs. It can come off at a later date. 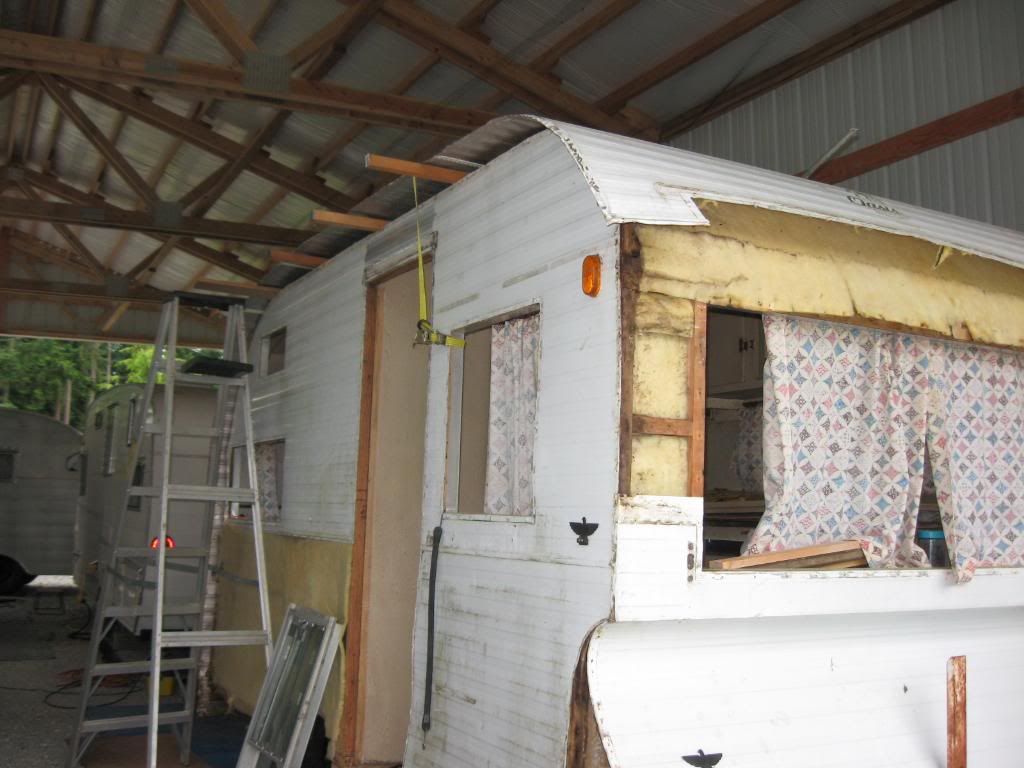 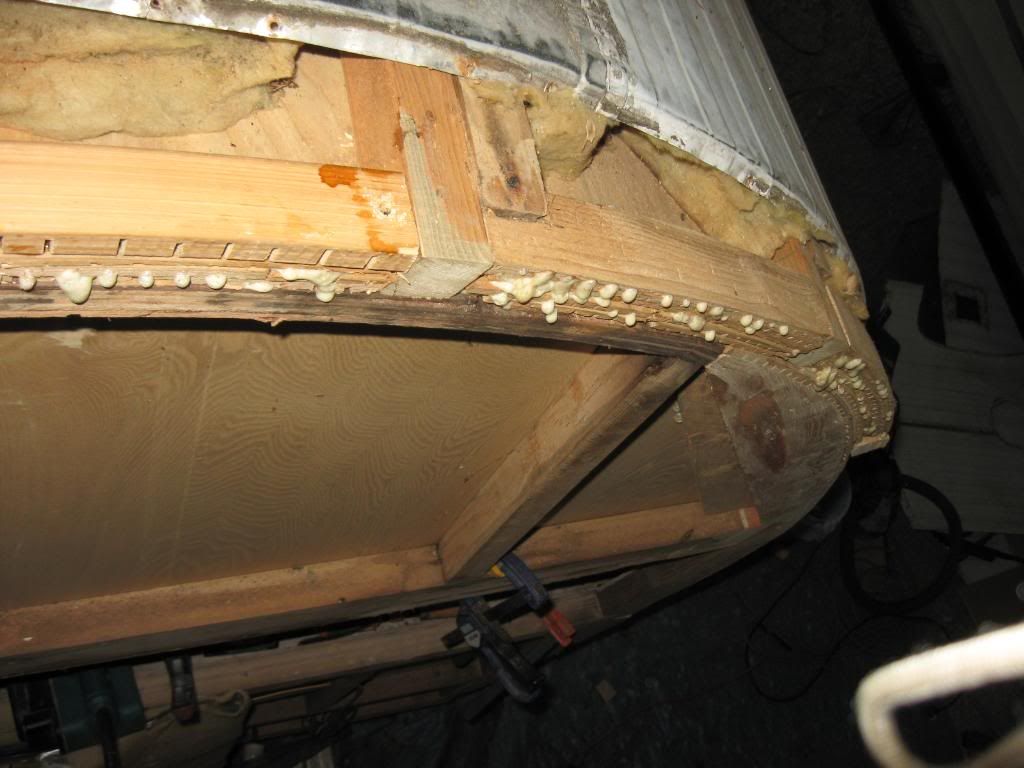 Also, there is nothing wrong with a properly seamed RV roof. It just takes time and correct measurements to get it right the first time... You may not need ALL new metal: I just recently re-worked the siding for my Little Dipper. It isn't perfect but once I started cleaning and straightening, it will be fine. I'll prime the back side and re-install. The trailer has to have a new roof. Good luck and have FUN! |
|
|
|
Post by bigbill on Apr 13, 2014 18:58:21 GMT -8
I was always lead to believe that galvanize and alum didn't coexist together very well.
|
|
John Palmer
Senior Member
Hi, From a vintage trailer guy located in Santa Ana, CA. It's good to see lots of activity here.
Posts: 1,629
Likes: 576
Currently Offline
|
Post by John Palmer on Apr 13, 2014 19:58:02 GMT -8
I was always lead to believe that galvanize and alum didn't coexist together very well. BigBill, That's what I also have always heard. But looking at the roof skin "lapjoint" joint above, it's still looks pretty good after all these years, so go figure? It just makes you wonder.
On the 1953 riveted skin trailer that I'm currently working on, I have extensive aluminum rot (actually it's corrosion) where the aluminum wall side frames meet the plywood floor. Thin aluminum, next to wet plywood, is not a long lasting combination.
I guess the key in any of these trailer's is, "if they leak water, they will quickly fail".
|
|
|
|
Post by bigbill on Apr 14, 2014 9:18:05 GMT -8
I wonder if it is some early type of galvalum instead of actual galvanized steel or if it has a chemical coating between joints, makes one wonder.
|
|
pam
Junior Member
Posts: 61
Likes: 15
Serro Scotty 69
Currently Offline
|
Post by pam on May 20, 2014 9:37:30 GMT -8
OOPS! I accidentally wandered into the advanced class!  You guys are awesome so generous with your experience and "know-how" but I need to go back a class or two or three! Freshman Roof Repair class 101  |
|
mobiltec
5K Member
 I make mistakes so you don't have to...
Posts: 9,824
Likes: 3,750
1954 Jewel In Progress...
Currently Offline
|
Post by mobiltec on May 20, 2014 11:16:43 GMT -8
Vikx I'm still jealous of your metal cover... Looking for mine now. I may just build it all myself.
|
|
|
|
Post by vikx on May 21, 2014 21:46:42 GMT -8
Vikx I'm still jealous of your metal cover... Looking for mine now. I may just build it all myself. Larry, many already know, but I have weird, extremely nasty neighbutts. They have reported us multiple times for being in "business", drainage issues and a complaint about my portable building lacking a permit. Each time, we have proved that the law is on our side. Very annoying situation. He recently caught our back field on fire with a weed burner, just 30 feet from the shop. The County claimed that the 20 x 40 portable metal shelter was no longer portable because it had been in place longer than 6 months... They required $800 for a permit and engineering plans. (around $2500) After doing research, it wasn't worth it for the wind sensitive portable. Lady neighbutt was doing a jig when it came down the day after Christmas. Instead, I contracted for an RV roof. It was built by a local company and up in just a week, $500 for the permit. I added the bird net and one side. (here, once the roof is permitted, siding is as well) The building is 20 feet longer and 5 feet higher than the removable portable. We love it. Neighbutts: BE CAREFUL WHAT YOU WISH FOR. I sincerely hope you get a roof over your trailers. It is a godsend to be able to work out of the sun and weather. |
|
mobiltec
5K Member
I make mistakes so you don't have to...
Posts: 9,824
Likes: 3,750
1954 Jewel In Progress...
Currently Offline
|
Post by mobiltec on May 22, 2014 6:53:13 GMT -8
I'm going to have to build my own. And it will have to be able to be moved if I ever leave. That was the main consideration, will I stay or not. It's still a consideration because I kind of hate living here.
|
|
|
|
Post by vikx on May 22, 2014 21:47:43 GMT -8
Nothing wrong with the portables! Mine was quite large and the winds can be incredible here. Shelter was rated at 80 mph. It was good most of the time, but I tied it to our Blazer bumper one Winter day. LOL
|
|


 My concerns are proper measurement and cutting out for windows etc. It is so easy to ruin the aluminum.


 You guys are awesome so generous with your experience and "know-how" but I need to go back a class or two or three!

