nccamper
Administrator 
Posts: 7,744 
Likes: 2,871
1962 Forester- 1956 Shasta
Currently Offline
|
Post by nccamper on Aug 26, 2020 4:04:12 GMT -8
Larry, you did a great job with the flat skin. No waves that I can see.
All I've done since selling the Shasta two weeks ago is power wash the trailerport and move the Forester under it.
I did also clean up my workspace in the little barn, organize the camper parts/supplies and take 4 trips to the dump.
|
|
WhitneyK
Active Member

Posts: 492
Likes: 169
'67 Shasta Compact
Currently Offline
|
Post by WhitneyK on Aug 26, 2020 5:48:23 GMT -8
Trying to get all the things caught up around the house so I can get back on the camper. Off topic, but did get our major pond build completed...  I see light at the end of the tunnel, just hope it's not a train... |
|
mobiltec
5K Member
 I make mistakes so you don't have to...
Posts: 9,822
Likes: 3,749
1954 Jewel In Progress...
Currently Offline
|
Post by mobiltec on Aug 28, 2020 11:51:29 GMT -8
I've been trapped inside my swamp cooled house for the last two weeks while recovering from Sinus Surgery. Two days after the surgery California broke out in flames again. Thanks California... The smoke has been so dense that even healthy people have stayed indoors for the duration. Yesterday was the first day that I could actually go outside for more than 15 minutes without choking to death. No trailer work but I've been working on my "Canned Ham Trailers Hall Of Fame" on my website. This is for people in my class who have finished their trailer projects. I give them a diploma when finished and they send me a photo of them with diploma in hand in front of their trailer. So here's what's up there so far. I have more to post. www.cannedhamtrailers.com/fame.htm |
|
Hamlet
2K Member

Posts: 2,819
Likes: 925
Currently Offline
|
Post by Hamlet on Sept 2, 2020 15:05:18 GMT -8
We brought Hamlet home from our property on Sunday. We bought the wreck he was 11 years ago next month and it is now time for some tweaks, repairs and maintenance. We had some scary stuff early this year when we noticed tailings across the table and benches from above the back window. Turns out it wasn’t wood from the big winged ant things we kept finding (we bombed Hamlet three times, they still come back), but my hubby lifted the upper rear skin and found no damage at all to the wood. He did, however, pull the foam panels and found chewing and tunneling in the foam itself. Crazy.
There has has been some leaking in one of the rear upper corners, so we’ll check that and repair if needed. Also, as the front upper was missing when we got him, we didn’t have any idea what it looked like, except for the wavy cutouts for the sliders. Didn’t know about the scalloped bottom, so that will get rebuilt. The other (and most important) thing is to fix a tiny, tiny gas leak that seems to be coming from behind the stove. So we’ll pull that and find the leak. We are always super careful to turn off the gas as soon as we’re done with it, but we don’t want any accidents.
We figure we have at least three or four more weeks before the rains start and since we no longer have a garage or shelter, we’re doing this outside. Of course with at least the next ten days with temperatures in the 80s, heatstroke is more likely than being waterlogged!
|
|
Hamlet
2K Member
Posts: 2,819
Likes: 925
Currently Offline
|
Post by Hamlet on Sept 4, 2020 8:09:41 GMT -8
We had some good news in Hamlet’s maintenance. First, and most important, the damage from the “flying ants” seems to have been only to the foam insulation., so Hamlet won’t be falling apart any time soon. THe leaking in the upper rear corners also has left no damage to the structure. The discoloration inside on the wood isn’t too bad, so we’re just going to leave it and call it “character.”
The gas leak proved to be the most difficult problem. We couldn’t find a leak, but I kept smelling gas, so my hubby kept going back over every possible place there’s could be a leak and he finally found one. It’s fixed now which means we won’t have to run outside to turn the gas on and off every time we use the stove or gas lamp.
We will replace the butyl tape, do some paint touch up on the lower front, and remake the front upper cabinet face and it will be ready for a short road teip. We just got word that our new tow vehicle will be ready for delivery in a couple weeks, so we’d better get a move on!
|
|
|
|
theresa
1K Member
from Northern Maine ~ Proud new owner of Lola, a 1960 Shasta Airflyte and Pearl, a 1962 Mobile Scout
Posts: 1,055 
Likes: 347
Currently Offline
|
Post by theresa on Sept 21, 2020 17:01:18 GMT -8
F I N A L L Y completed my first "major" system. Got gas flowing tonight and the flame looks good on all burners. I'll need to adjust the air flow a bit, but I'm thrilled to see flames (where they're supposed to be).
 2020-09-21_08-57-22 by t_in_maine, on Flickr 2020-09-21_08-57-22 by t_in_maine, on Flickr |
|
mobiltec
5K Member
I make mistakes so you don't have to...
Posts: 9,822
Likes: 3,749
1954 Jewel In Progress...
Currently Offline
|
Post by mobiltec on Sept 22, 2020 7:29:20 GMT -8
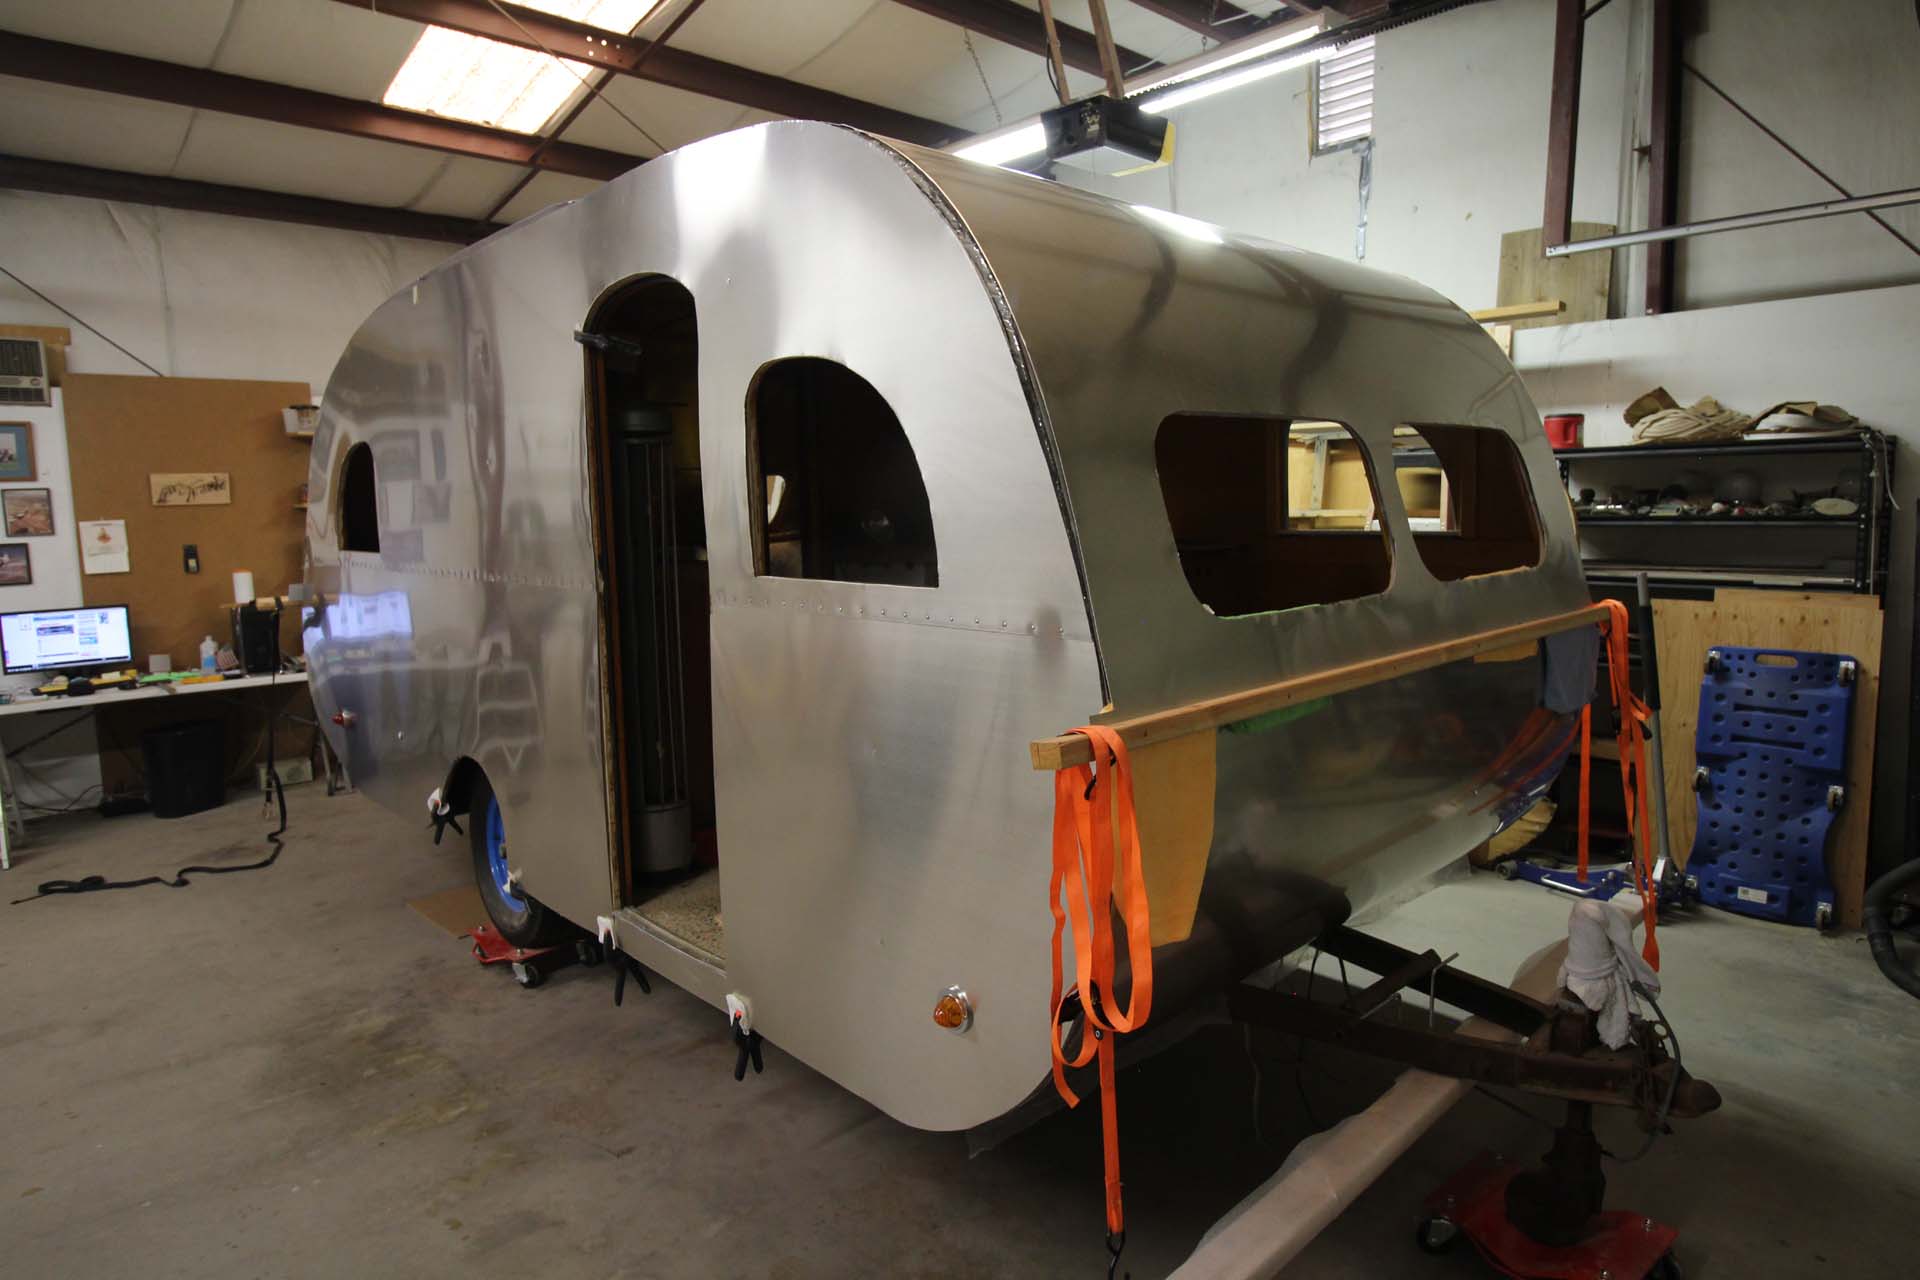
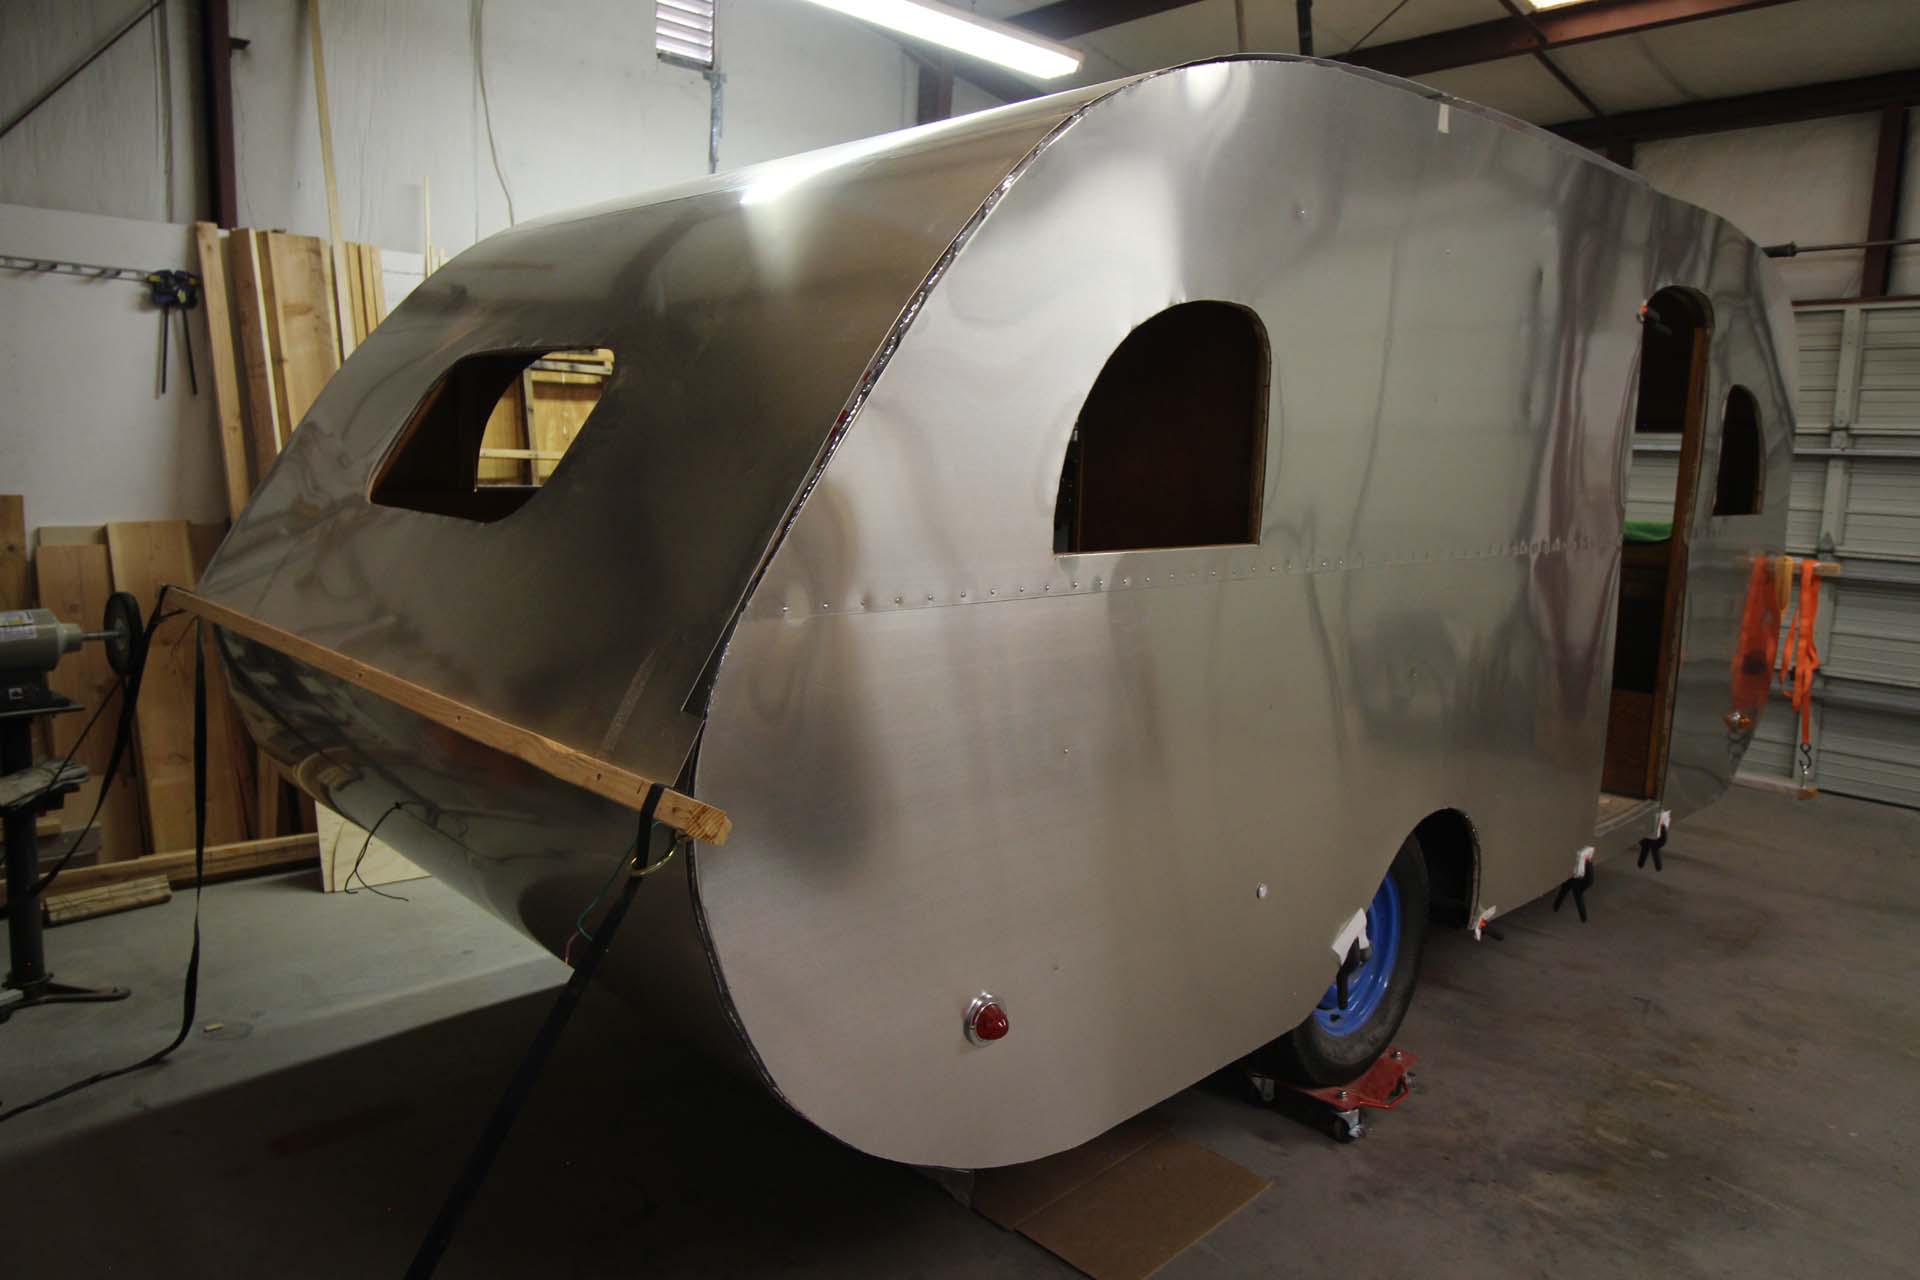
Ready for trim... The trim is "Top Edge Molding" or Corner Cap. Then the trailer will be shot with two coats of clear coat that is UV resistant. Then the glass goes in and we are almost there. This has been the most difficult trailer I've done so far. Solid plyood walls, smooth metal with no paint, round cornered windows and a lot of head scratching trying to figure out how to do it all without making too many mistakes. A mistake on the metal would cost me a 1000 mile drive and 3 wasted days going to pick up a new piece of metal. This metal could not be shipped as you can't roll it tight enough for shipping without damaging it. Oh did I mention HUNDREDS and HUNDREDS of twisty nails? I'm figuring it will use 500 total once all the trim is on. I'll post the playlist of the videos for installing the metal when I'm finished. 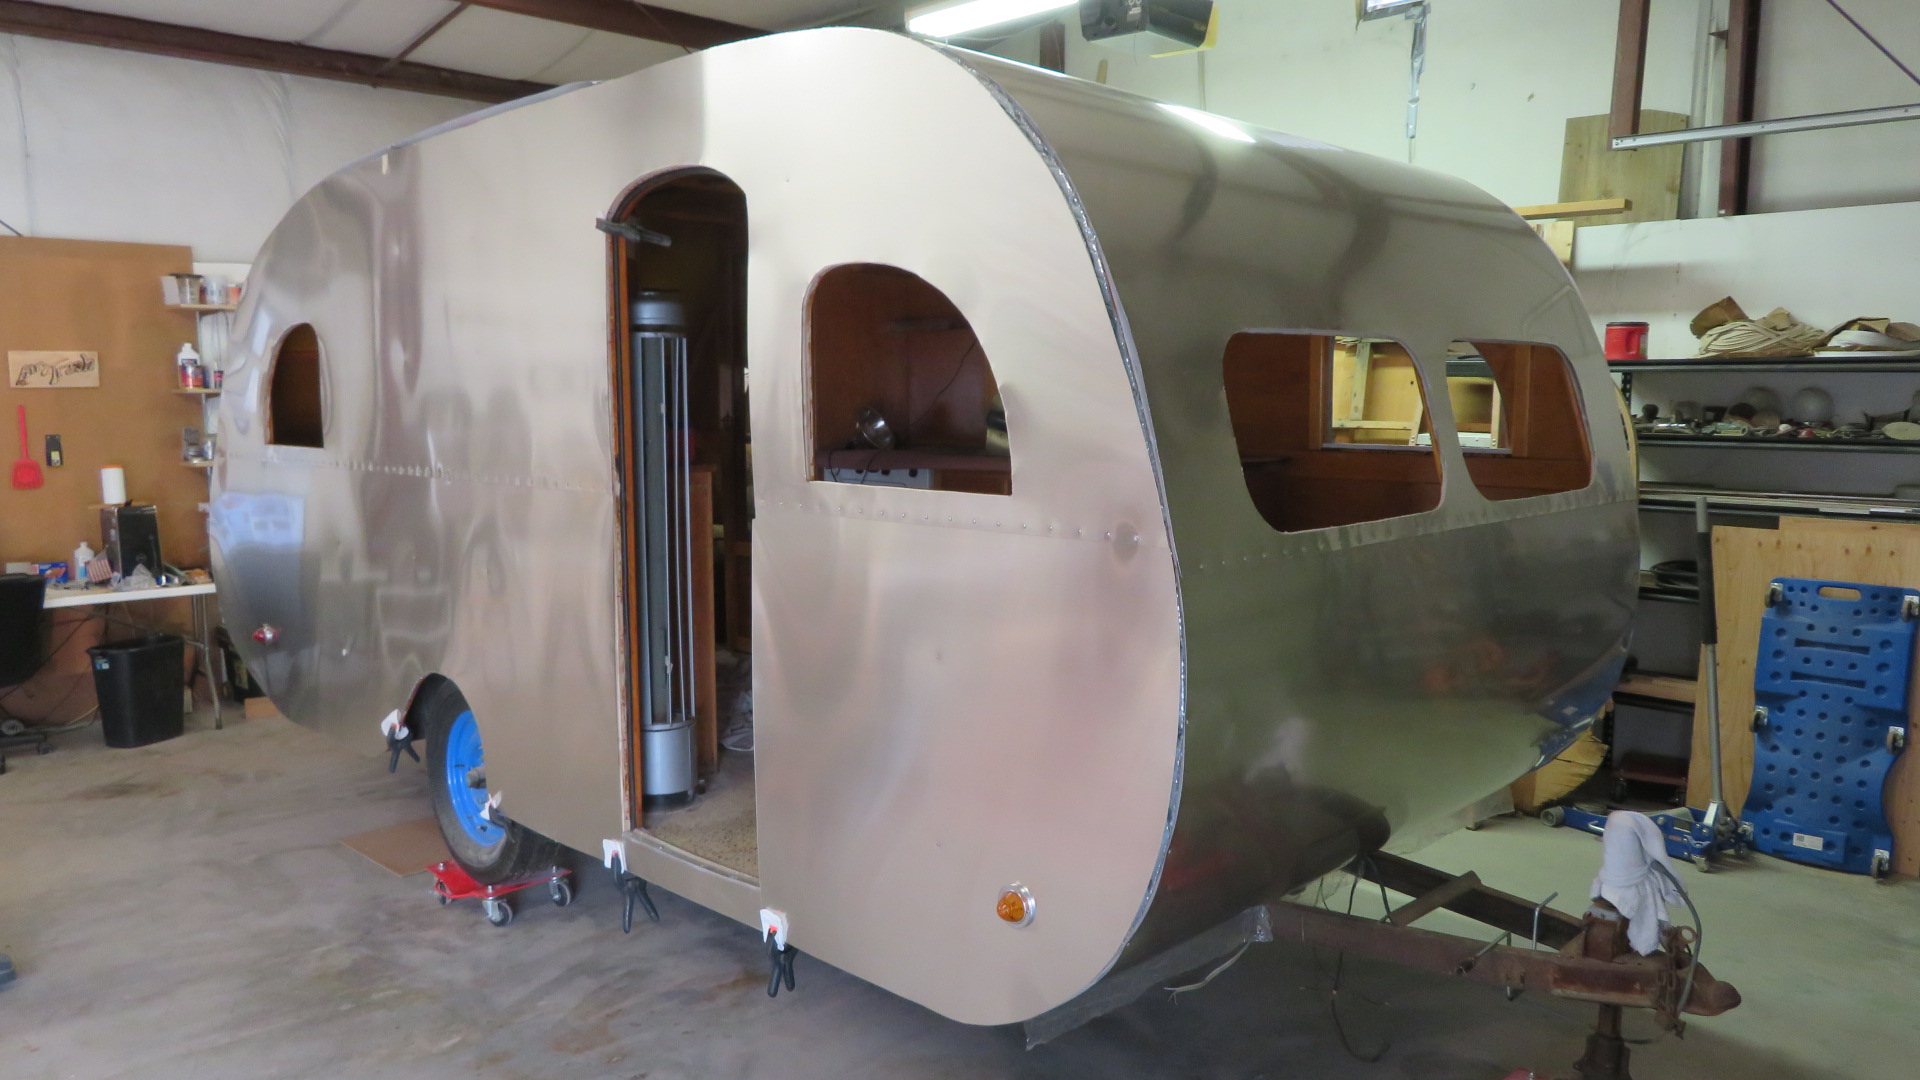 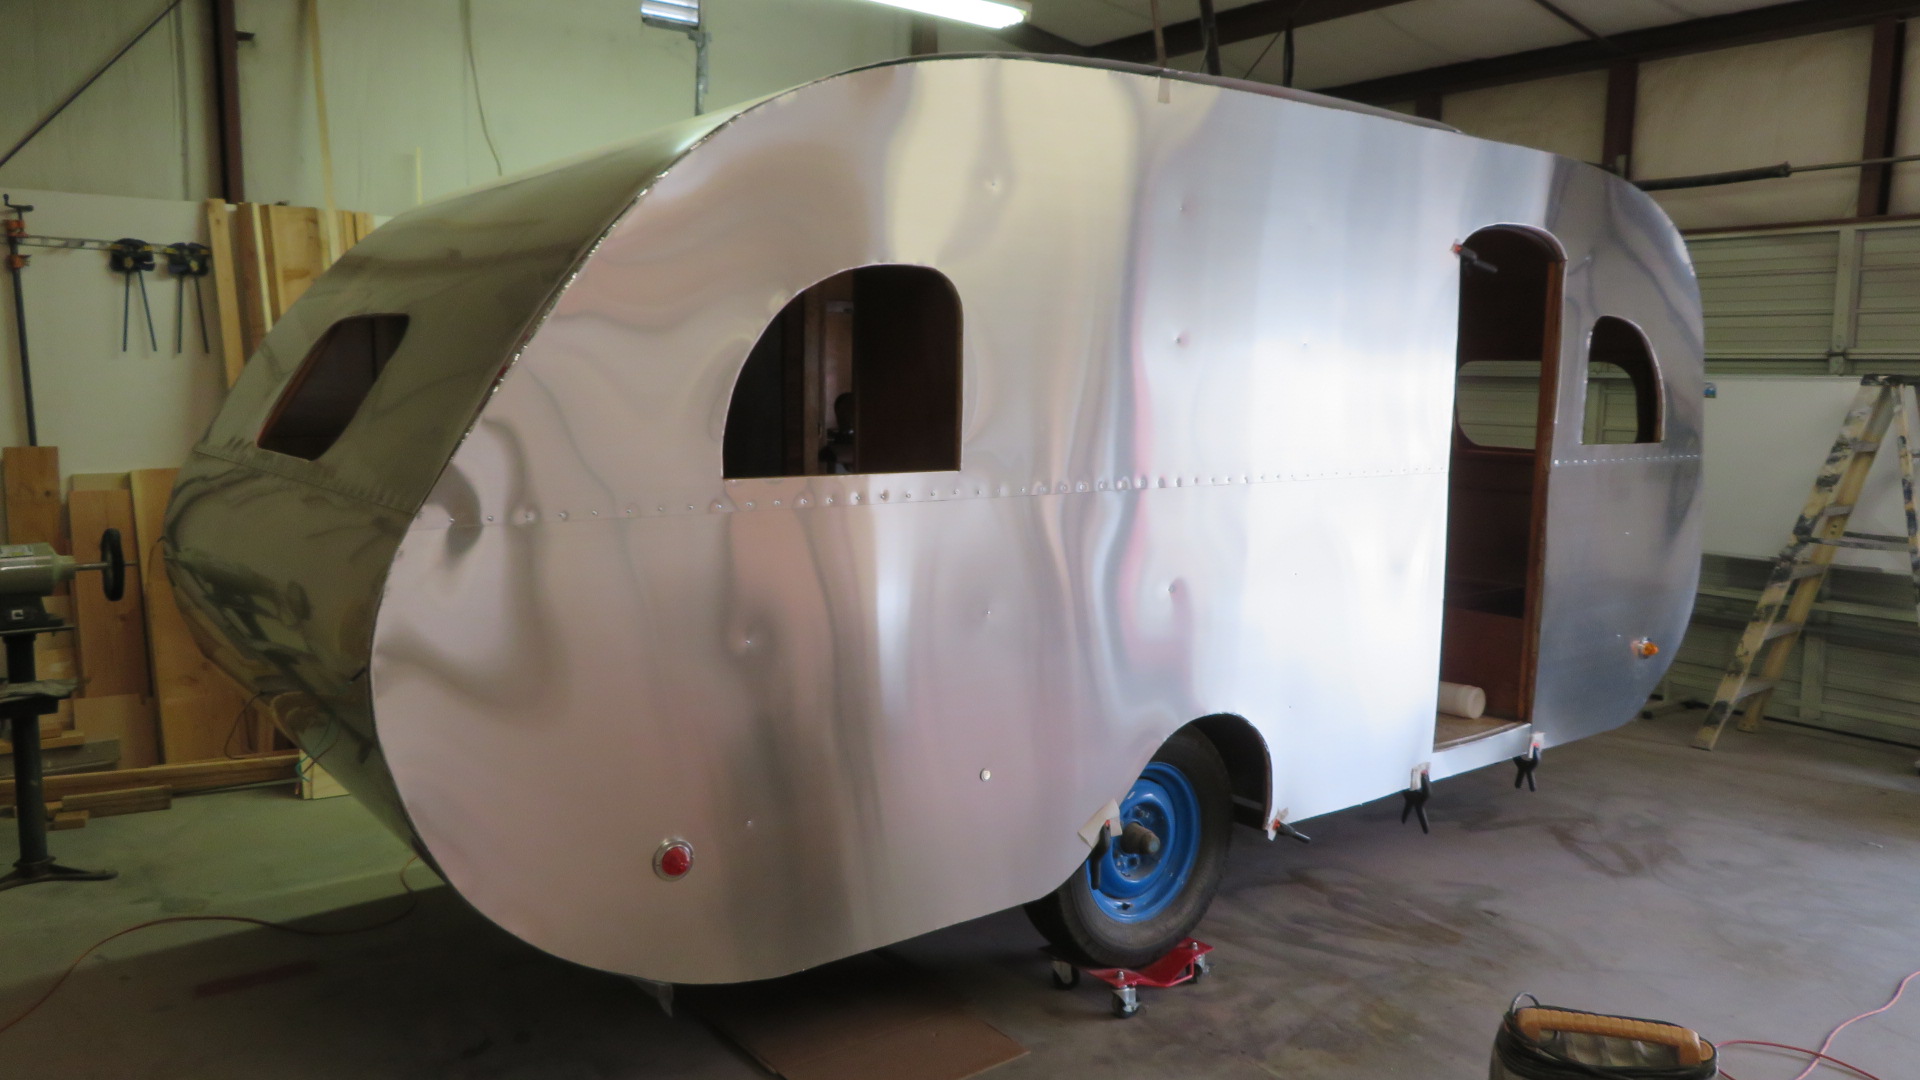 |
|
|
|
Post by Teachndad on Oct 15, 2020 5:37:36 GMT -8
Hi Friends, Back to working on the Floor of my ’57 Westerner. I continue to level out the floor. Last weekend, I used a belt sander to notch two 4 foot 2 x 4’s to the correct height so that the floor could sit level on the frame. Thank you Vikx for that idea to notch the wood(a long time ago). A speed square and a pencil were my best friends. In the picture below, you can see the two pieces of wood are straddling the outside of the C-channel.  PXL_20201011_173819527 PXL_20201011_173819527  Leveled front Leveled front Cheers, Rod |
|
cozwurth
New Member
Posts: 14
Likes: 6
Currently Offline
|
Post by cozwurth on Oct 15, 2020 10:10:11 GMT -8
I'm glad that there is one of these type threads on this board... Since my Rancho has been "finished" for several years I have not done much with it. Yesterday I got out in the carport and jacked it up off the wheels so I could check the bearings and brakes. I've pulled this thing probably less than 500 miles total, so I didn't expect to find anything wrong. Good to go there. I'm hoping to go camping on a long weekend soon. Next up is making the solar charger connection permanent at the battery itself.
|
|
WhitneyK
Active Member
Posts: 492
Likes: 169
'67 Shasta Compact
Currently Offline
|
Post by WhitneyK on Oct 18, 2020 7:40:38 GMT -8
Hi Friends, Back to working on the Floor of my ’57 Westerner. I continue to level out the floor. Last weekend, I used a belt sander to notch two 4 foot 2 x 4’s to the correct height so that the floor could sit level on the frame. Thank you Vikx for that idea to notch the wood(a long time ago). A speed square and a pencil were my best friends. In the picture below, you can see the two pieces of wood are straddling the outside of the C-channel. Cheers, Rod Wait? Whut? Are you saying notch the boards rather than rip them down? Does your plywood not rest on the frame rail? |
|
|
|
Post by vikx on Oct 18, 2020 10:23:38 GMT -8
Rod, the level looks good. Install your runners before the boards side to side. Most trailers have 2 front to back runners in the middle. I use 3 when I'm down to the frame.
Trailers are all different but I'm pretty sure you need runners. Even if you didn't have them originally, they will help sturdy up the floor.
RED DALE Compact:
<a data-flickr-embed="true" href="https://www.flickr.com/photos/53634851@N03/50502530716/in/dateposted-public/" title="002 l Redd Subfloor (1)"><img src="https://live.staticflickr.com/65535/50502530716_64b5f8f811_w.jpg" width="400" height="300" alt="002 l Redd Subfloor (1)"></a><script async src="//embedr.flickr.com/assets/client-code.js" charset="utf-8"></script>
58 Cardinal with 1/8 Masonite belly (coated underneath with Black Beauty):
<a data-flickr-embed="true" href="https://www.flickr.com/photos/53634851@N03/50501822653/in/dateposted-public/" title="003 g Cardinal Belly Top (6)"><img src="https://live.staticflickr.com/65535/50501822653_ccd6d733b9_w.jpg" width="400" height="300" alt="003 g Cardinal Belly Top (6)"></a><script async src="//embedr.flickr.com/assets/client-code.js" charset="utf-8"></script>
52 Hanson with Coroplast belly:
<a data-flickr-embed="true" href="https://www.flickr.com/photos/53634851@N03/50501836538/in/dateposted-public/" title="002 j Coroplast More (2)"><img src="https://live.staticflickr.com/65535/50501836538_ae07178ea1_w.jpg" width="400" height="267" alt="002 j Coroplast More (2)"></a><script async src="//embedr.flickr.com/assets/client-code.js" charset="utf-8"></script>
|
|
|
|
Post by bigbill on Nov 2, 2020 17:28:01 GMT -8
Good advice vikx.
|
|
tpcm5000
Junior Member
Posts: 84
Likes: 45
Yellowstone 1966
Currently Offline
|
Post by tpcm5000 on Nov 23, 2020 16:23:00 GMT -8
Was about to give up on my little guy but no sense in tarping a trailer that's missing a roof in an upstate NY winter! Ha! PO ceiling, circa spring 2020 (ceiling insulation was still soaking wet when I demo'd):  D2984E93-710D-4F30-BAFF-2C77B4CB0626 D2984E93-710D-4F30-BAFF-2C77B4CB0626 by Tom Myers, on Flickr Installed sun roof, ha, summer 2020:  sunroof1 sunroof1 by Tom Myers, on Flickr Followed Larry's French polish method and related vids on paneling, and lots of posts/replies from Vik on installation tips. Thanks! So ceiling is in, I went with cutting to size, then stapling to rafters first, temp screws to framing, will move to curbing and securing all the framing next:  new ceiling new ceiling by Tom Myers, on Flickr So pleased with it, here is another one:  new ceiling from door new ceiling from door by Tom Myers, on Flickr And have to mention how much of an upgrade the economical, extra tall party tent has been over tarping. Sheeting rain and near freezing temperatures last night here and was able to sleep well. I hate tarping (you can see some water damage on the bunk in the third photo due to my crappy tarping).  party tent party tent by Tom Myers, on Flickr Sheet metal roof on order, will be nice if I can button down the top before serious snow. |
|
|
|
Post by vikx on Nov 23, 2020 20:42:23 GMT -8
shelter looks good!
|
|


/Campers/67%20Shasta?preview=2019-02-03+18.01.00.jpg)