kaffi311
Active Member

Posts: 283 
Likes: 98
1963 Shasta 16 SC
Currently Offline
|
Post by kaffi311 on Dec 6, 2018 16:24:32 GMT -8
Sooo....my back skin is in good shape other than these holes the PO put in to add crappy lights:  IMG_5325 IMG_5325 by kathy, on Flickr   IMG_5326 IMG_5326 by kathy, on Flickr I would like to reuse the back metal skin. Ideas for a fix? I am going to order the reproduction wedding cake lights from VTS- and their diameter is 6.5"- and are surface mounted. Can you give me some ideas for how to best fix this? Put metal behind hole I presume and seal...but need specifics from the pros ! Thanks all Kathy |
|
dragonwagons
Junior Member
Polish
Posts: 87
Likes: 18
Currently Offline
|
Post by dragonwagons on Dec 6, 2018 21:06:49 GMT -8
Depends on how the buckets and lenses fit with those holes. If you can get it nice and flat and it all fits well then you could get away with reinforcing it behind the skin. I would also add extra wood framing so the light assembly has a solid attachment mounting points. From the picture it looks uncertain if that will cleen it up. If not i would add a doubler ( like a patch) to the outside. I would make the patch about 2 inches great in Diameter than the lens. Thus giving you a patch about an inch all the way around. I’d use a heavier piece of Aluminum something like .063, with the skin off solid rivets would be great, but to the untrained and without the tools for that pop rivets would still work spaced in the middle so 1/2” from the outside edge and 1/2” from the lens, then space them about every 1 inch. The patch would also need to be sealed down. Something like this for spacing thevap.com/blog/wp-content/uploads/2006/09/panel3.jpg |
|
|
|
Post by vikx on Dec 6, 2018 21:17:55 GMT -8
About the only fix is a circle of aluminum to "patch" the hole... With the big wedding cake lights it won't show too much.
Use a circle bigger than the hole, at least 3/4 all around and clean the old metal meticulously. Pre-drill for rivets. I would use pure butyl tape between the circle and patch,it's stickier than RV butyl putty. Once riveted, you'll need to determine where to drill a larger hole for the light wiring. Placing the light base on the patch should help with that.
I always like to frame under where the light will be attached. (backing boards) Most Shastas already are, but you might want to add to it. Also, Shastas should have a couple of added cross boards in the back while the skin is off. Be sure that your backer will accept screws from the light base and you will have a secure attachment.
After rehanging the skin and stapling the edges, you can carefully seal the patch edge and rivets with OSI clear gutter seal. Be sparing and smooth with a paint thinner dipped finger. Eye it from the side to be sure the seal is complete. The same can be done to the divots on the skin edges; extra insurance before the J rail is installed.
NOTE: if the skin is curved at the light attachment, the patch may need to be shaped to fit.
|
|
|
|
Post by youngbloodhawk on Dec 7, 2018 4:54:15 GMT -8
To repair remove any sealant
And sand flat. Dolley any high
Spots flush especially around the
holes themselves.
Using automotive panel adhesive
Attach an oversized patch to the
Back side Of each hole.
Then apply a premium body filler
Like evercoat gold .Sand and prime
With epoxy primer.
|
|
mobiltec
5K Member
 I make mistakes so you don't have to...
Posts: 9,822 
Likes: 3,749
1954 Jewel In Progress...
Currently Offline
|
Post by mobiltec on Dec 7, 2018 11:13:59 GMT -8
To repair remove any sealant And sand flat. Dolley any high Spots flush especially around the holes themselves. Using automotive panel adhesive Attach an oversized patch to the Back side Of each hole. Then apply a premium body filler Like evercoat gold .Sand and prime With epoxy primer. That large of a hole being filled with bondo may not stay sealed due to the fact that aluminum expands and contracts so much with heat and cold. |
|
HOTRODPRIMER
Full Member
Posts: 774
Likes: 257
1957 Shasta
Currently Offline
|
Post by HOTRODPRIMER on Dec 7, 2018 12:25:42 GMT -8
Kathy,you might try having someone make you a couple of 1/8" aluminum or stainless trim rings to cover the damaged area, similar to my installation of 1960 Buick taillights. If you do decide to use body filler (Bondo) get the type that has fiberglass (kitty hair), it will hold up better, but don't expect long term,as Larry said the aluminum will expand and contract. Danny 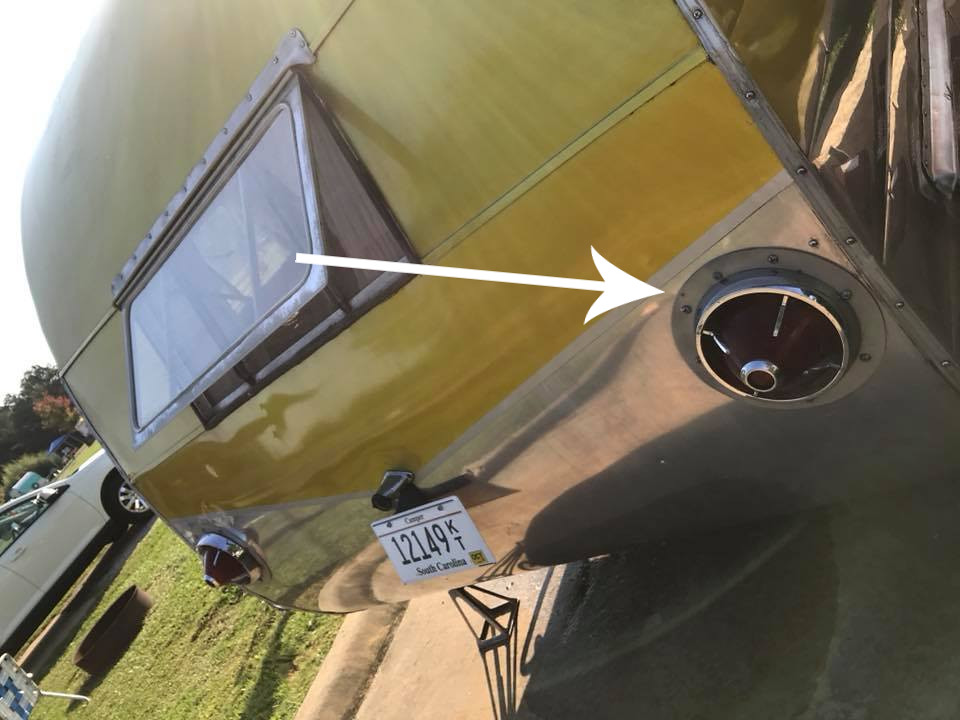 |
|
|
|
Post by youngbloodhawk on Dec 7, 2018 13:24:13 GMT -8
To repair remove any sealant And sand flat. Dolley any high Spots flush especially around the holes themselves. Using automotive panel adhesive Attach an oversized patch to the Back side Of each hole. Then apply a premium body filler Like evercoat gold .Sand and prime With epoxy primer. That large of a hole being filled with bondo may not stay sealed due to the fact that aluminum expands and contracts so much with heat and cold. I have a 36’Featherlite 2 deck enclosed car hauling Trailer that I bought from Neil Bonnett several years ago. I did this excepted repair to several spots before Painting. For the life of me after 25 years I can’t Tell where they are today. Didn’t fail-not visible. Sorry if my input was bad I’m certainly no camper trailer expert. |
|


