mrmarty51
Leading Member

Posts: 1,787 
Likes: 423
1972 HOMEMADE
Currently Offline
|
Post by mrmarty51 on Oct 29, 2017 13:24:19 GMT -8
Before doing the final paint and installing the floor.
Weld on a 1/4" bolt back near the axle to use as a ground lug for the brakes. Also weld one near the tongue/jack area for ground from the connection box. I also welded a bolt on the back end to run the tail/marker lamps ground to.
|
|
papamike95
Member

Posts: 30
Likes: 13
1954 Terry - 16'
Currently Offline
|
Post by papamike95 on Oct 29, 2017 13:48:26 GMT -8
Thanks guys for your comments. I am planning to use bituthene wrap all along the bottom, and up the sides of the deck, so there should be no issue of the aluminum coming close to the PT ply. I will also investigate carriage bolts that can take the PT (if they exist - such as with special coatings). If I can find those, then I think I will keep what I have in place. If not... we'll see. I forgot to post the stripping and polishing of my window eyebrows... It will be a lot of work, but it should look pretty sharp when they are all done! 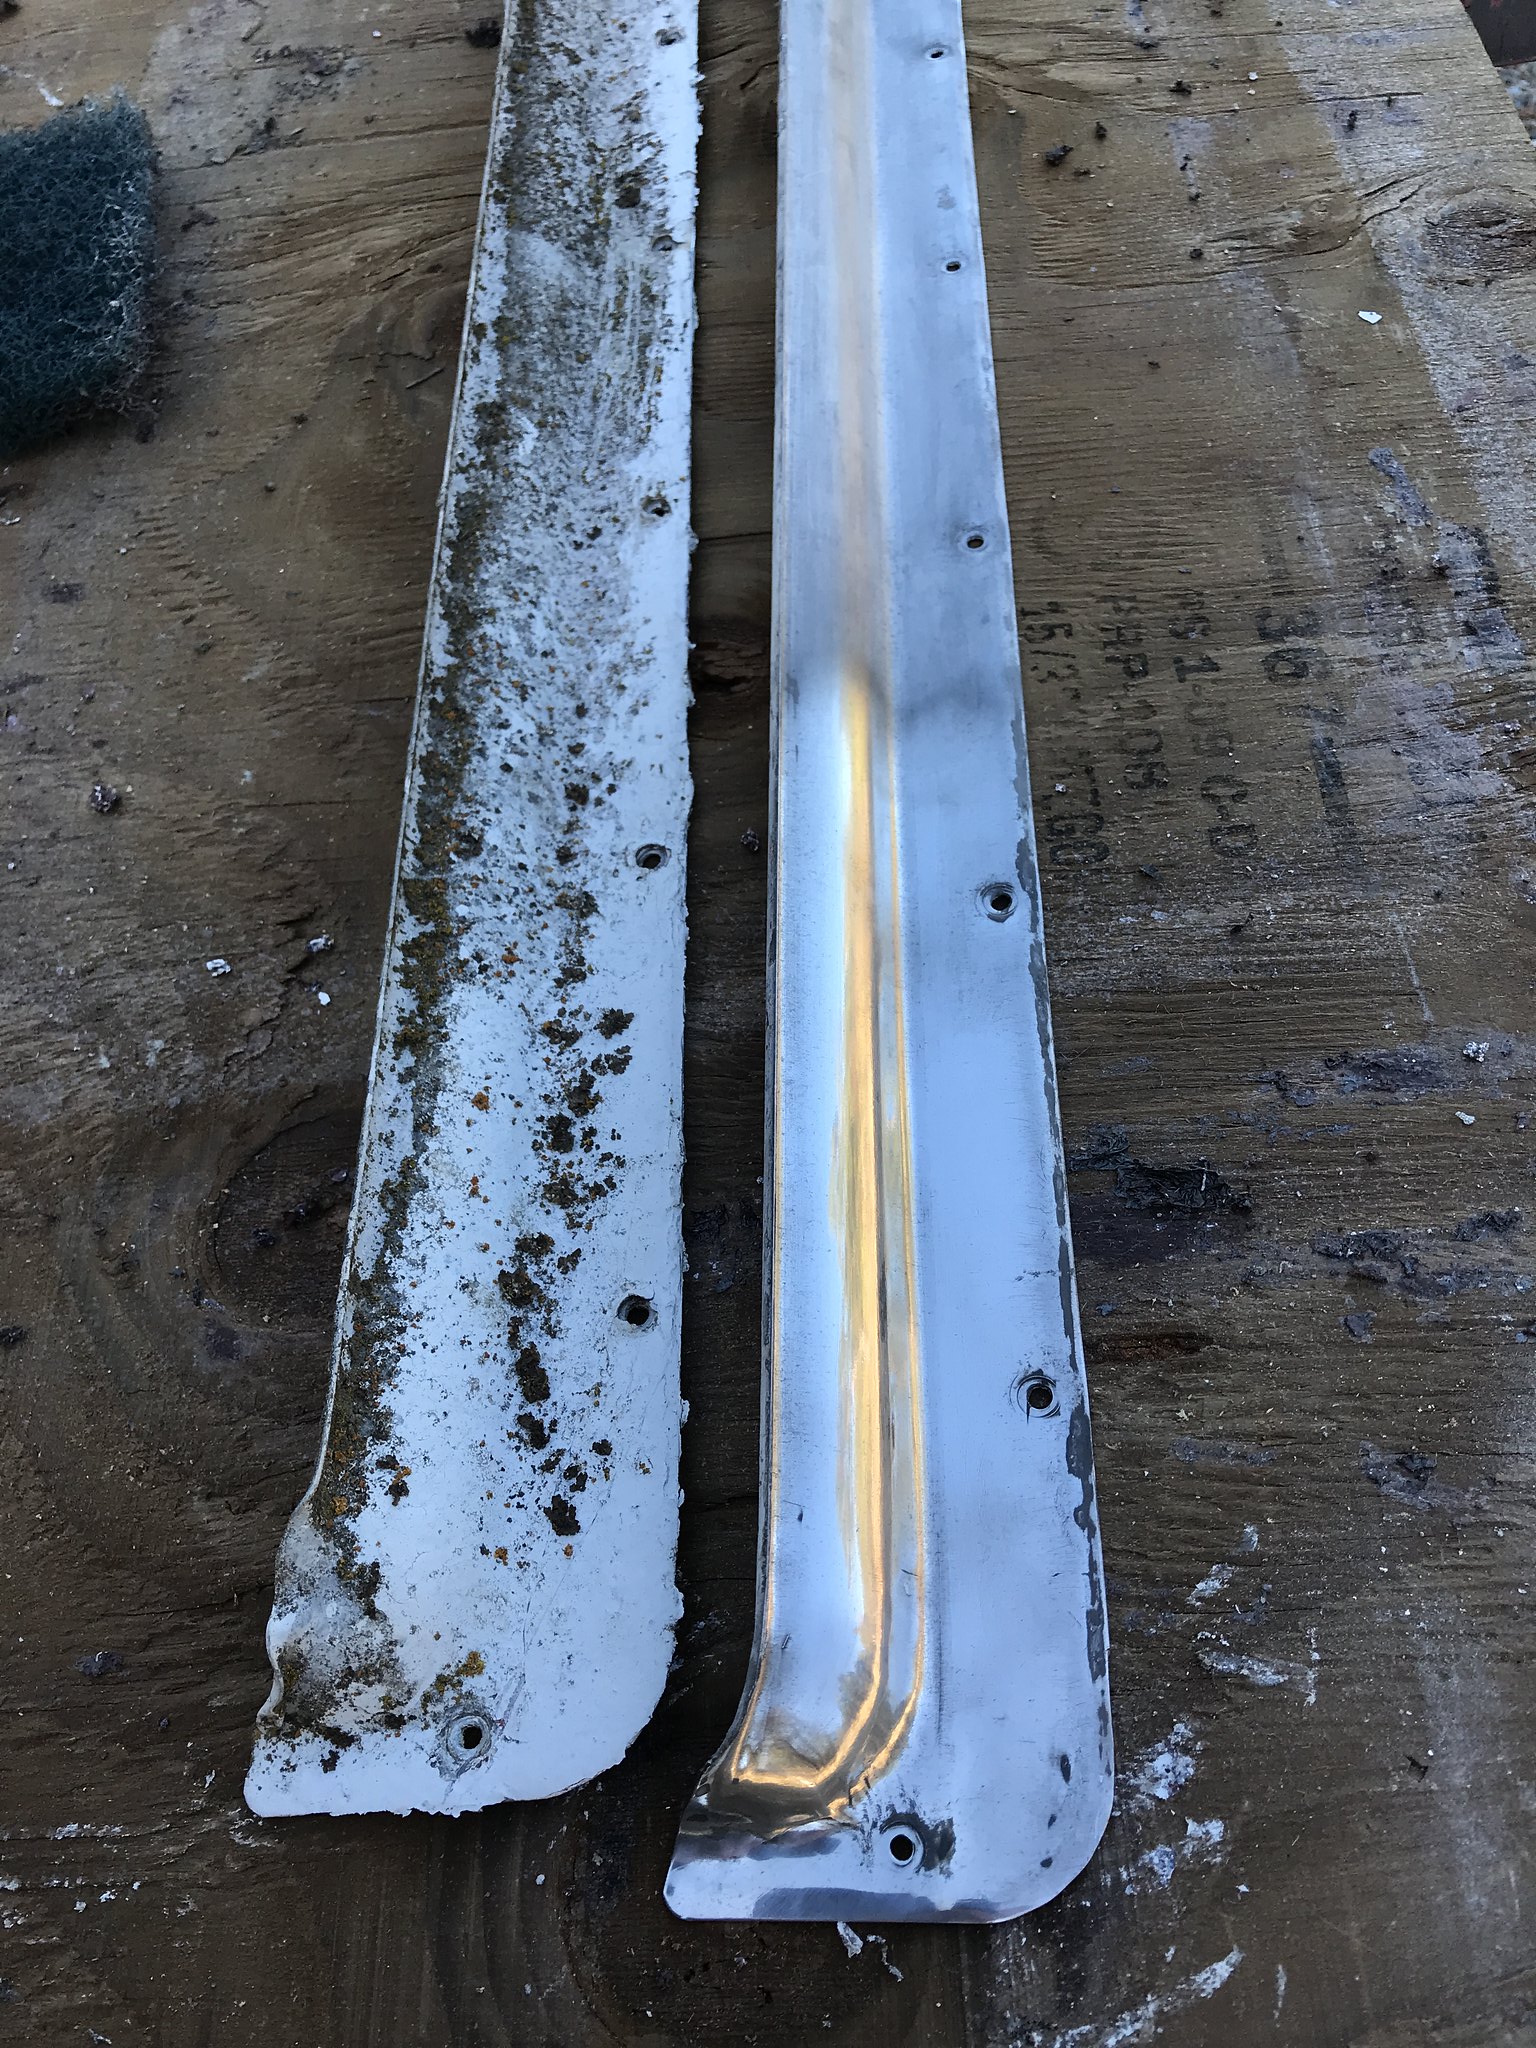 Untitled Untitled by Mike Estrada, on Flickr |
|
jan
New Member
Posts: 12 
Likes: 2
1954 Terry Cub
Currently Offline
|
Post by jan on Nov 3, 2017 20:22:43 GMT -8
I'm loving seeing a stretched out version of my Terry Cub from the inside out. I'm curious what kind of insulation you are using in the floor; I've been wondering if I could poke some up inside without taking mine apart.  ? Thanks, Jan |
|
papamike95
Member
Posts: 30
Likes: 13
1954 Terry - 16'
Currently Offline
|
Post by papamike95 on Nov 4, 2017 11:22:38 GMT -8
Thanks Jan, I just used basic 2x4 (R-13) roll-out wall insulation that I got at Lowes. I know it is compressed more than it should be, and that will reduce the R factor, but the hard board insulation I was looking at was only an R-4 or so, and much more expensive. I did have to cut it length-wise as my framing was less than 15".
|
|
papamike95
Member
Posts: 30
Likes: 13
1954 Terry - 16'
Currently Offline
|
Post by papamike95 on Dec 1, 2017 20:21:04 GMT -8
Ok, I am at my wits' end. My welder friend told me my "z-rings" on my axles were wasted, and I needed to replace them. I have done all the research I can imagine, and even called the manufacturer of the 1954 axle/hubs (Hadco Engineering), and after giving them my bearing numbers, I was told they did not have the z-rings I need. Does anyone have any ideas on where I can get new ones? Here is a pic of my axle: 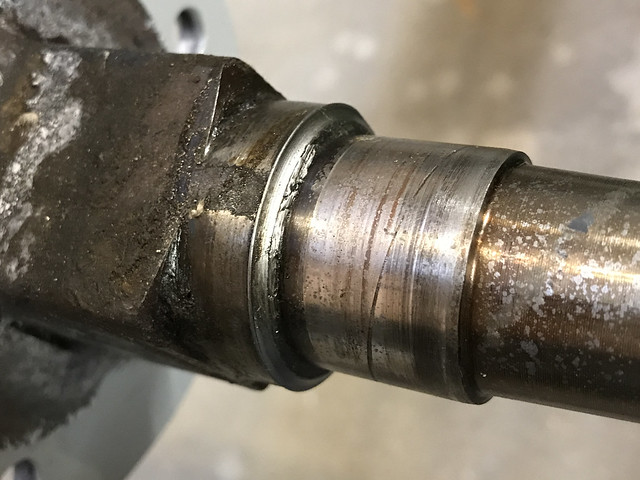 Untitled Untitled by Mike Estrada, on Flickr As you can see, the ring is basically crumbling away, and from what my friend said, there is supposed to be a flange on the top that the grease seal rides against. Mine is gone. Here is a picture of the grease seal (the old one) slipped completely over the ring. My friend said it is not supposed to do that... I am new to anything having to do with axles, and so I need some help on this. Any thoughts? 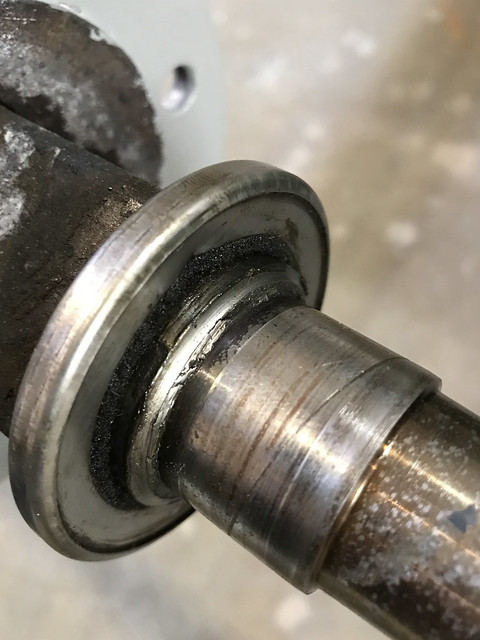 Untitled Untitled by Mike Estrada, on Flickr |
|
mrmarty51
Leading Member
Posts: 1,787
Likes: 423
1972 HOMEMADE
Currently Offline
|
Post by mrmarty51 on Dec 1, 2017 21:17:40 GMT -8
Is that a solid bar axle with the hub/seal provisions machined into it or is it a tube ?
If it is a square tube it might be time to cut off the spindles and have new ones welded into the axle.
If it is a solid bar, a good machine shop should be able to chuck it up, build up the seal area and turn them down to specs.
You might also be able to find a seal and a speedy sleeve.
Other than that, time for a new axle, or, just pack the bearings, put it together with what You have then do an annual bearing inspection and packing.
If the trailer is not run in water, the bearings should last a good long while with annual cleaning and packing.
|
|
|
|
Post by Teachndad on Dec 6, 2017 20:06:37 GMT -8
Hey Mike, I don't know if this helps. In this thread: vintagetrailertalk.freeforums.net/thread/6477/hadco-modern-grease-seal-numberI post about a related issue with a Hadco axle. The General Manager from Hadco left a post to the thread with her phone number in it. Like you, when I was asking about my Hadco axle, I was initially turned away. Maybe contacting her would yield different results. I had a 1966 vintage trailer, but yours is older, so I don't know if the axles are the same. Is the Z - ring, like what I mention in the video in my linked thread? I can't tell from your photo, what a z - ring is supposed to look like right out of the box. If so, this might work. DUNNO though, www.wholesaletrailerb2b.com/z-ringsFinally, if your interested in cleaning up your springs, here is a link that might be helpful. I used this one to clean up my springs on my Westerner. vintagetraileraxle.blogspot.com/ Cheers, Rod |
|
silvertonguedevil
Member
1958 Shasta ~ 1959 Windsor
Posts: 47
Likes: 9
Currently Offline
|
Post by silvertonguedevil on Dec 28, 2017 11:50:07 GMT -8
Awesome work here! Keep going!
|
|
swampthing
Active Member
Posts: 100
Likes: 19
1958 Boles Areo Zenith
Currently Offline
|
Post by swampthing on Jan 9, 2018 7:43:13 GMT -8
Mike. This is probably to late. I had a lot of problems figuring out what to do with my axel and brakes. I had Dexter Axel make me one. It seems great with new electric brakes.
|
|
papamike95
Member
Posts: 30
Likes: 13
1954 Terry - 16'
Currently Offline
|
Post by papamike95 on Jan 21, 2018 21:58:12 GMT -8
Ok, it has been a while, and I'm not going as fast as I would like, but I did make some good progress, now that I have determined how to go forward with my axles. After taking Rod's suggestion above, I contacted Adele at Hadco Engineering, and she said they did not have z-rings for that axle. After my friend saw my axle in person, he began to doubt that my axle even requires z-rings... Since I had a trip to Southern California to visit family planned anyway, he suggested I go to Arrow Trailer in Pomona and check with them. They referred me to Midpoint Bearing, where a manager (I think) said that a simple grease seal is all I needed. So I am going with that! Yesterday, I re-packed my bearings and assembled everything with my new brakes and leaf springs. 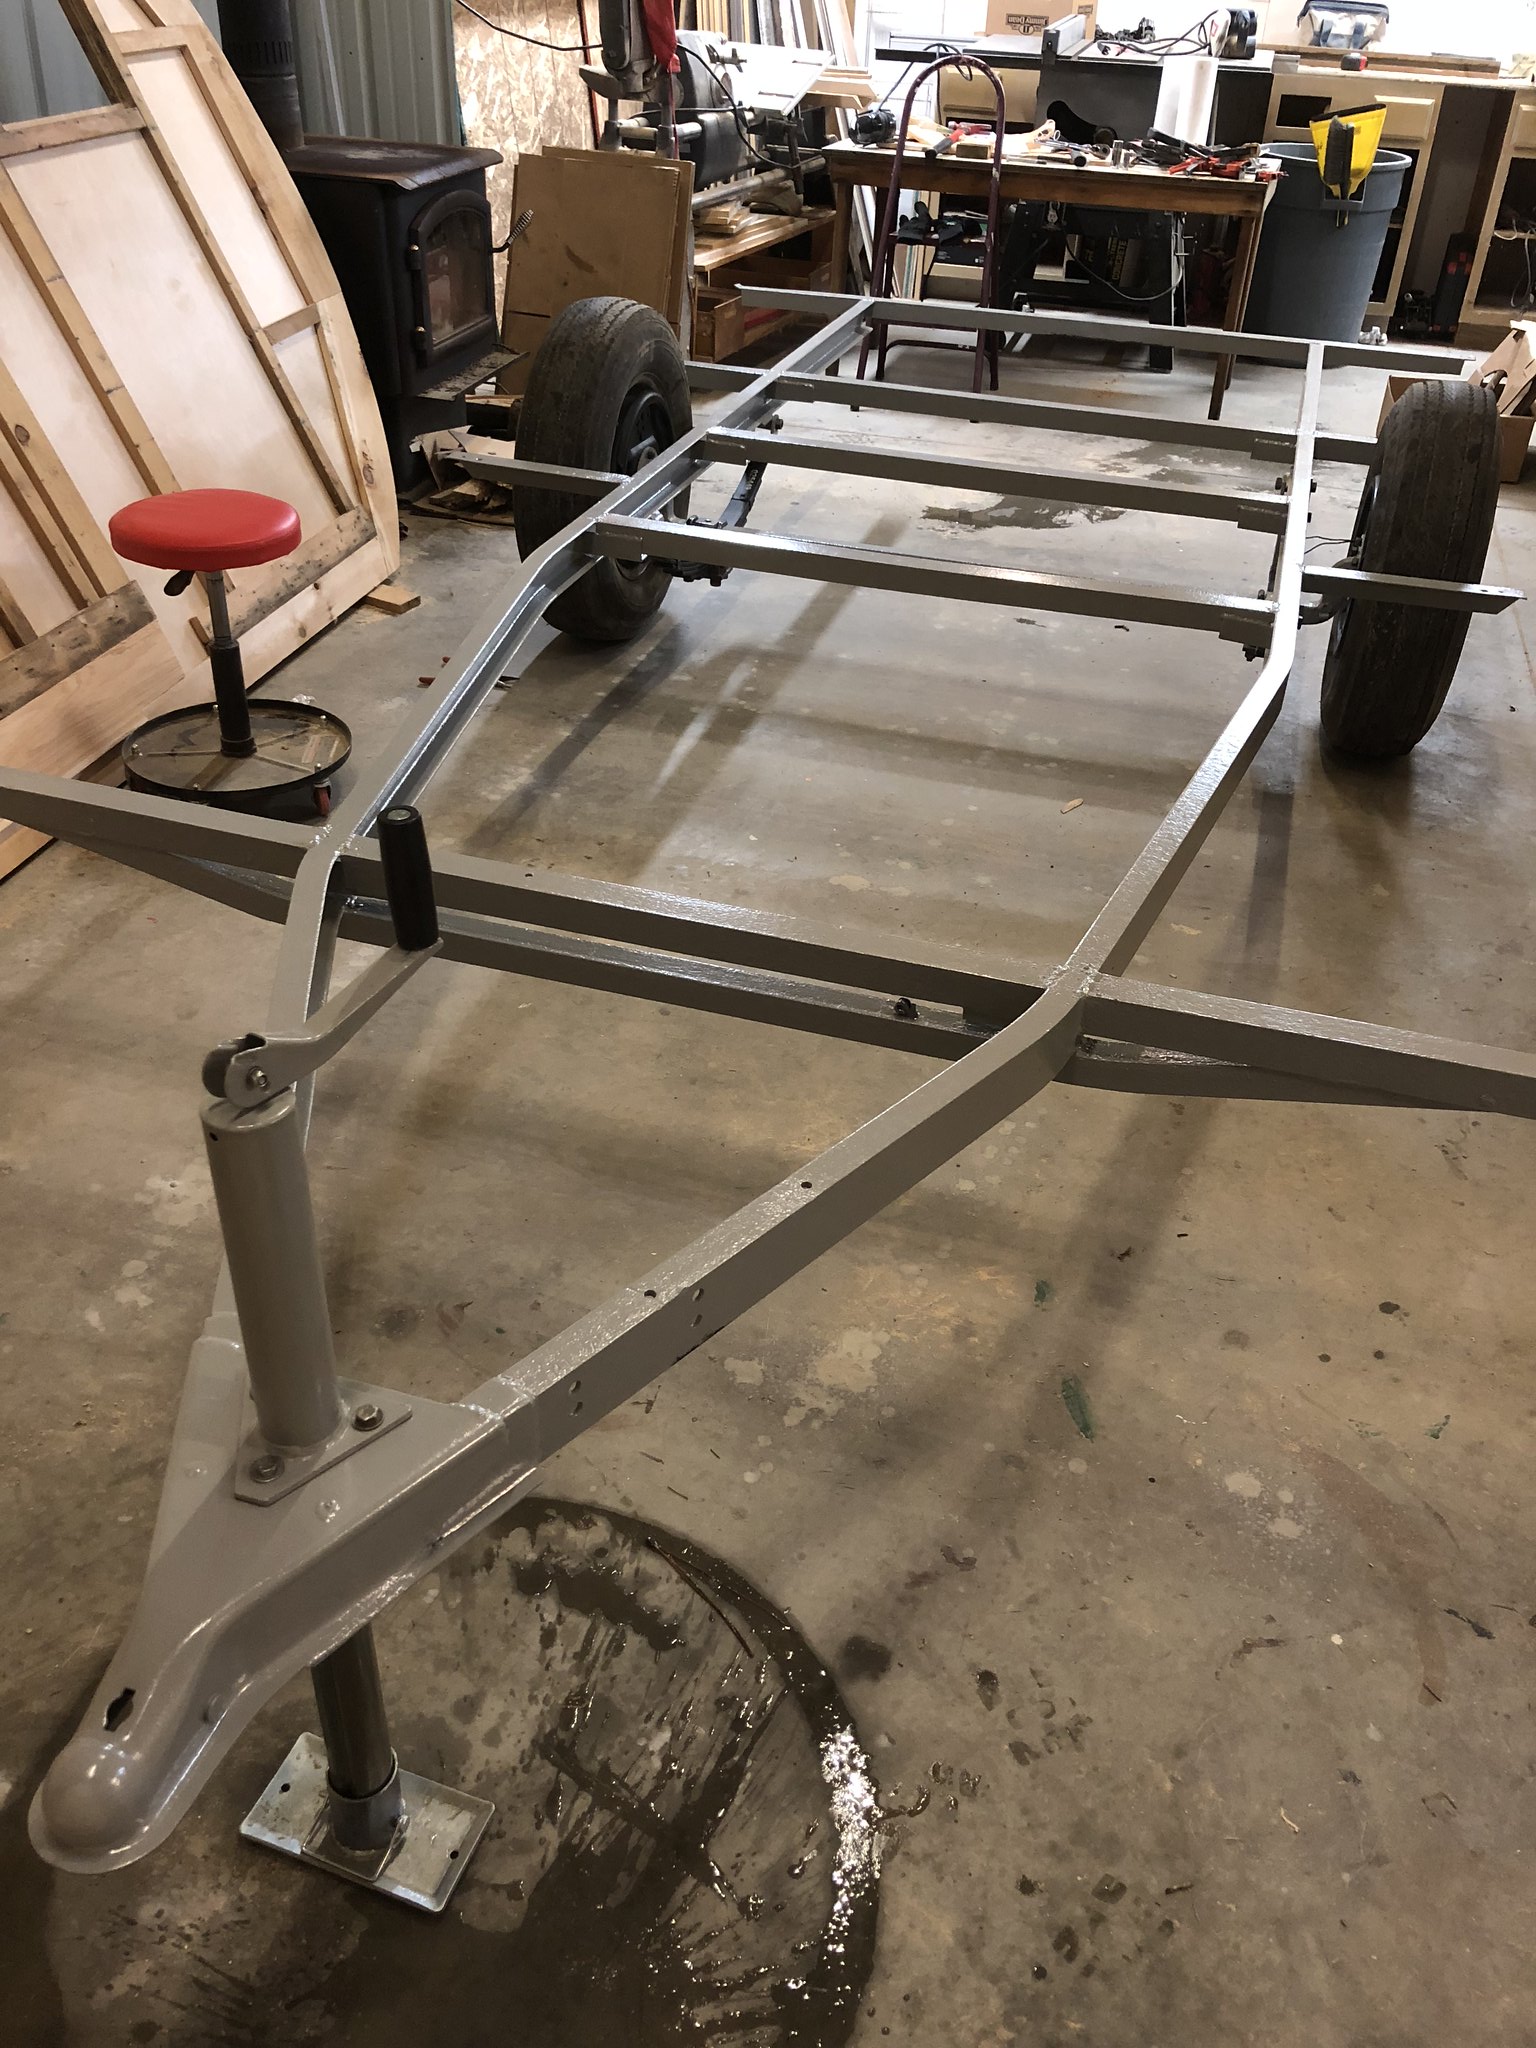 Untitled Untitled by Mike Estrada, on Flickr  Untitled Untitled by Mike Estrada, on Flickr I also took advantage of my trip to CA to order and pick up the new aluminum exterior skin from Hemet Valley RV! Saved me over $500 in freight and shipping! My in-laws took a trip down around Thanksgiving, and agreed to take their utility trailer down and leave it there for me for when I went (right after Christmas). When I got there, I had to build a cradle to hold it, and everything withstood the almost 1,400 mile trip back to North Idaho. 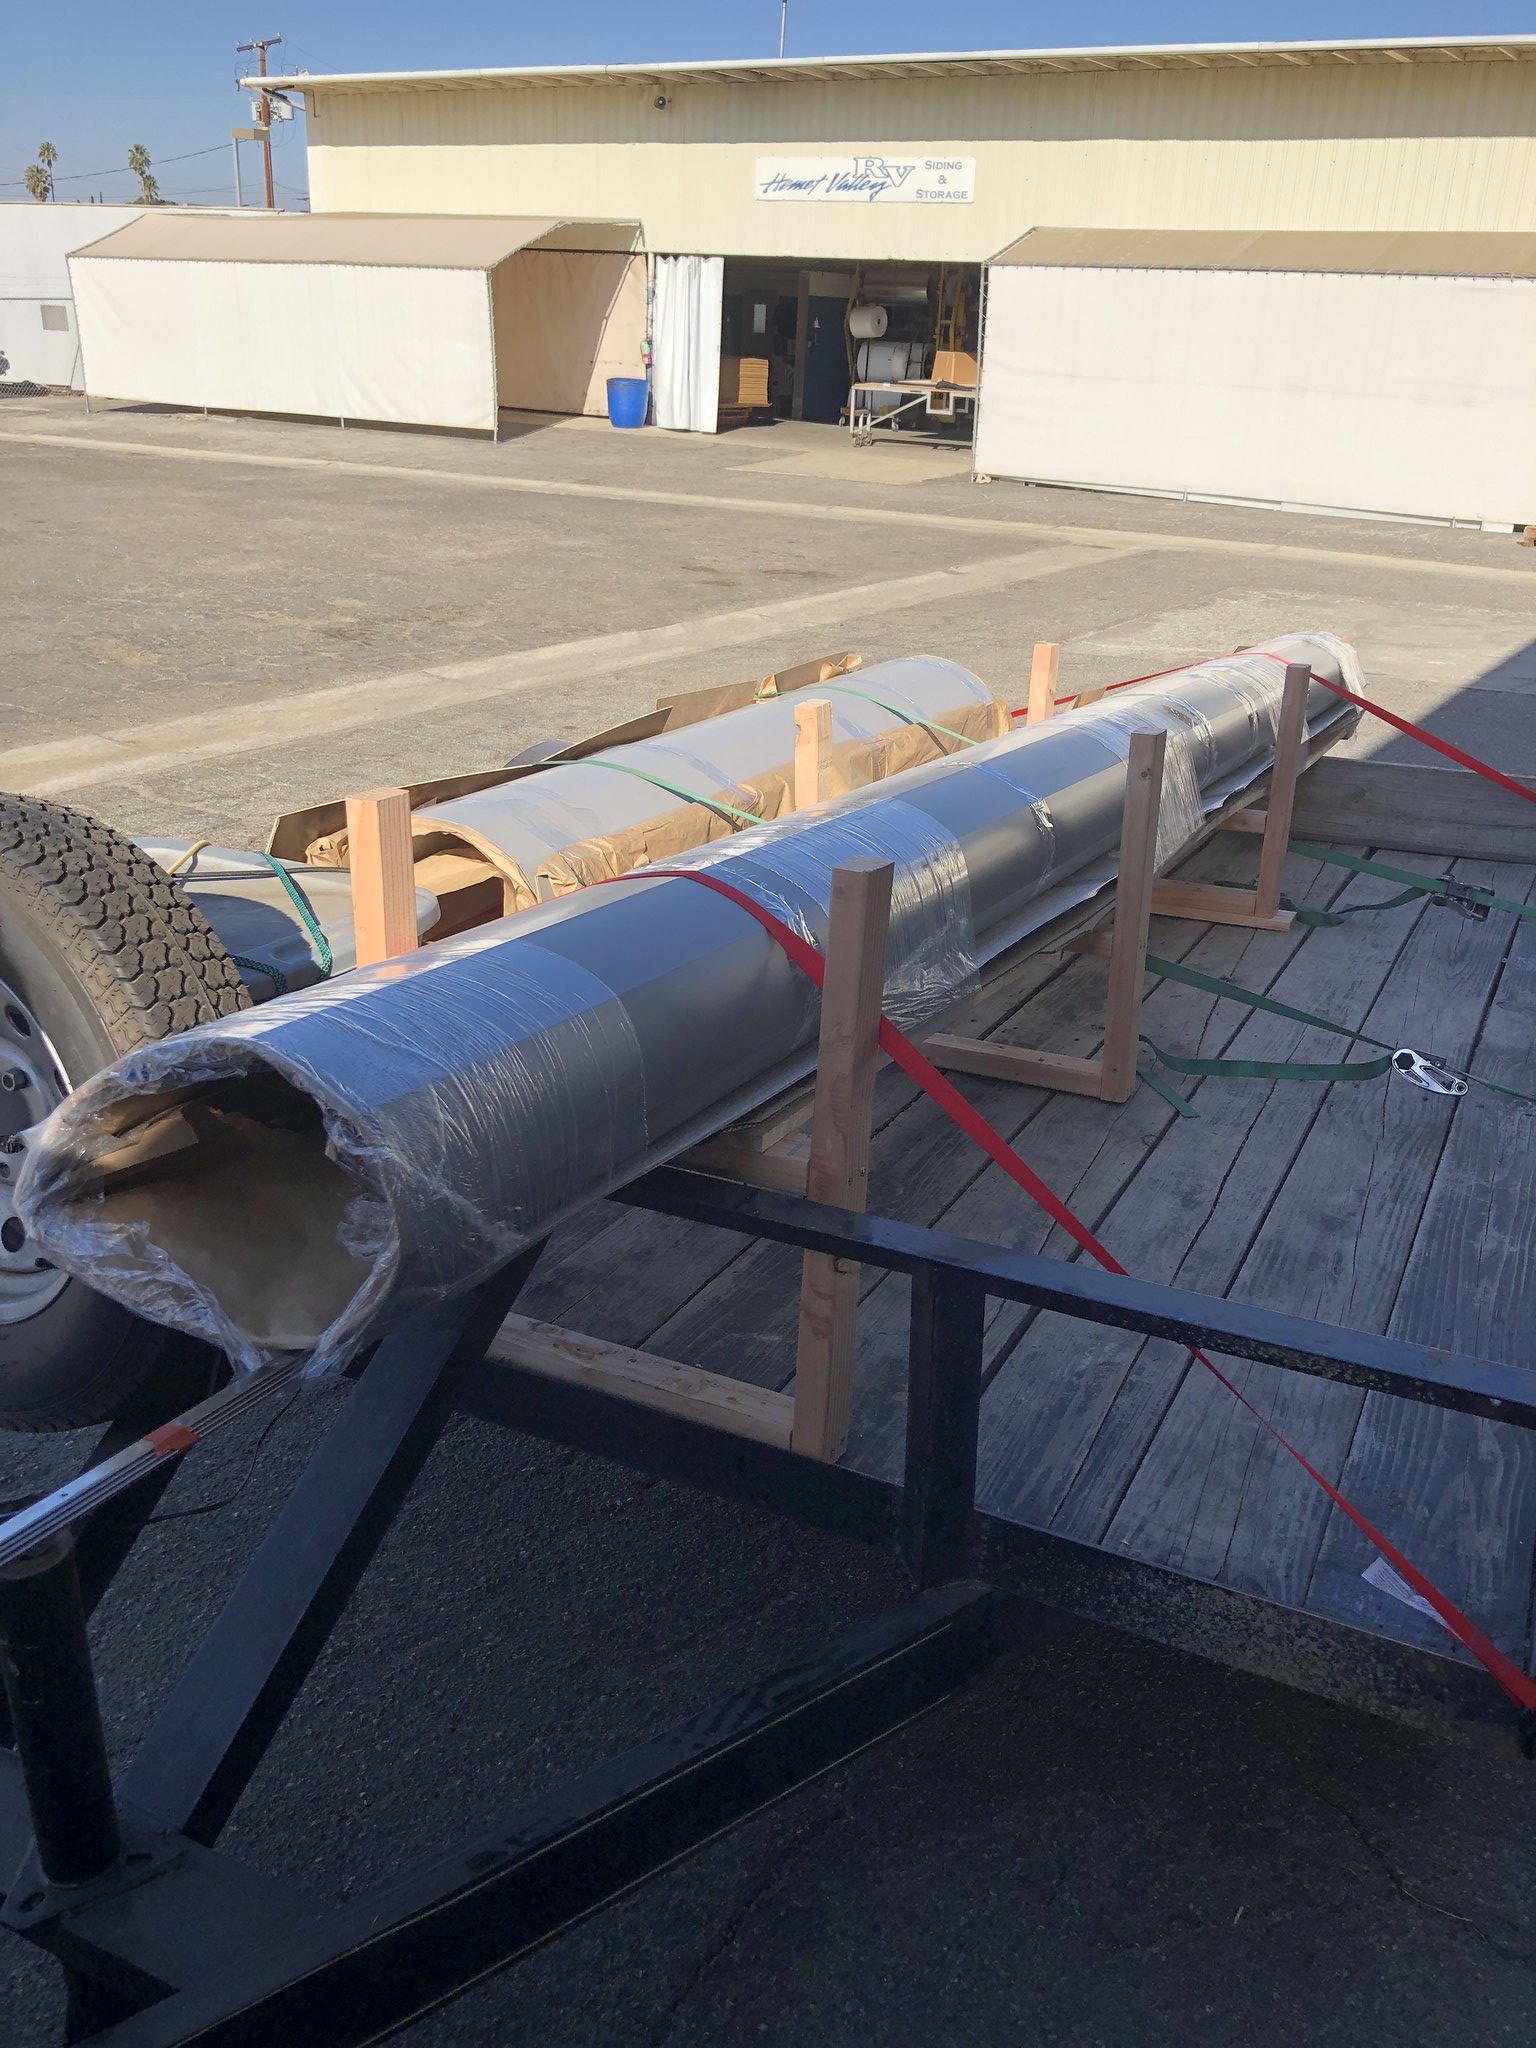 Untitled Untitled by Mike Estrada, on Flickr I've also been working on re-building my walls, and yesterday, I finally finished both. I only had one wall preserved enough to use as a template, and so I built that one (the curb-side) first. I then used that as a template for the street-side wall. 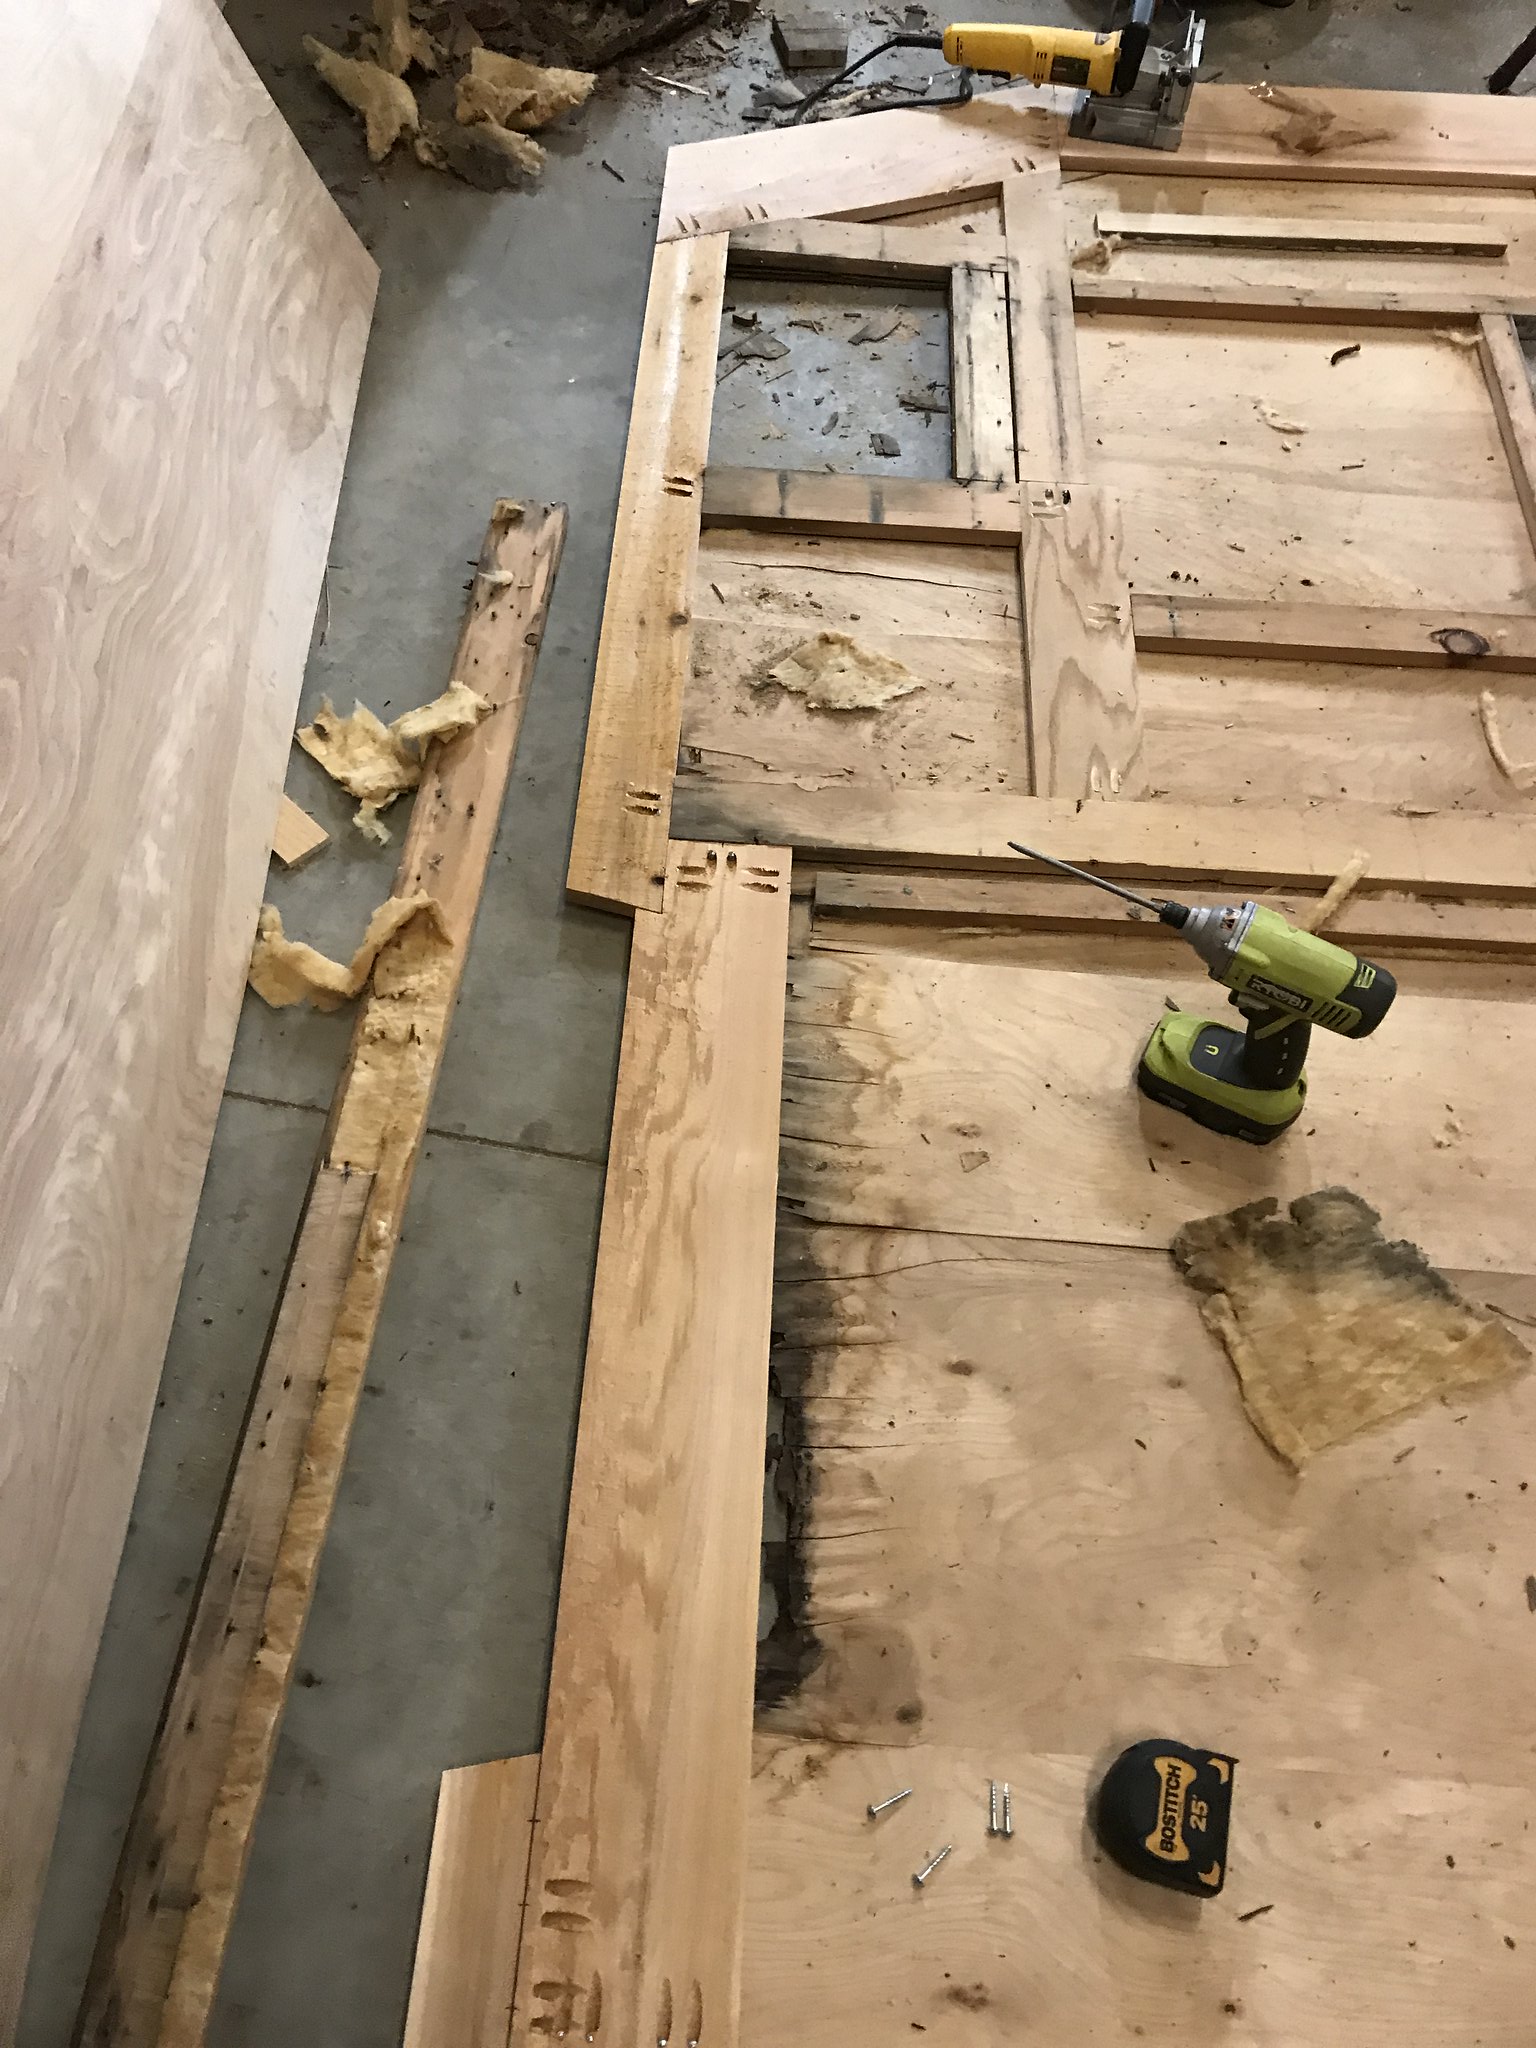 Untitled Untitled by Mike Estrada, on Flickr 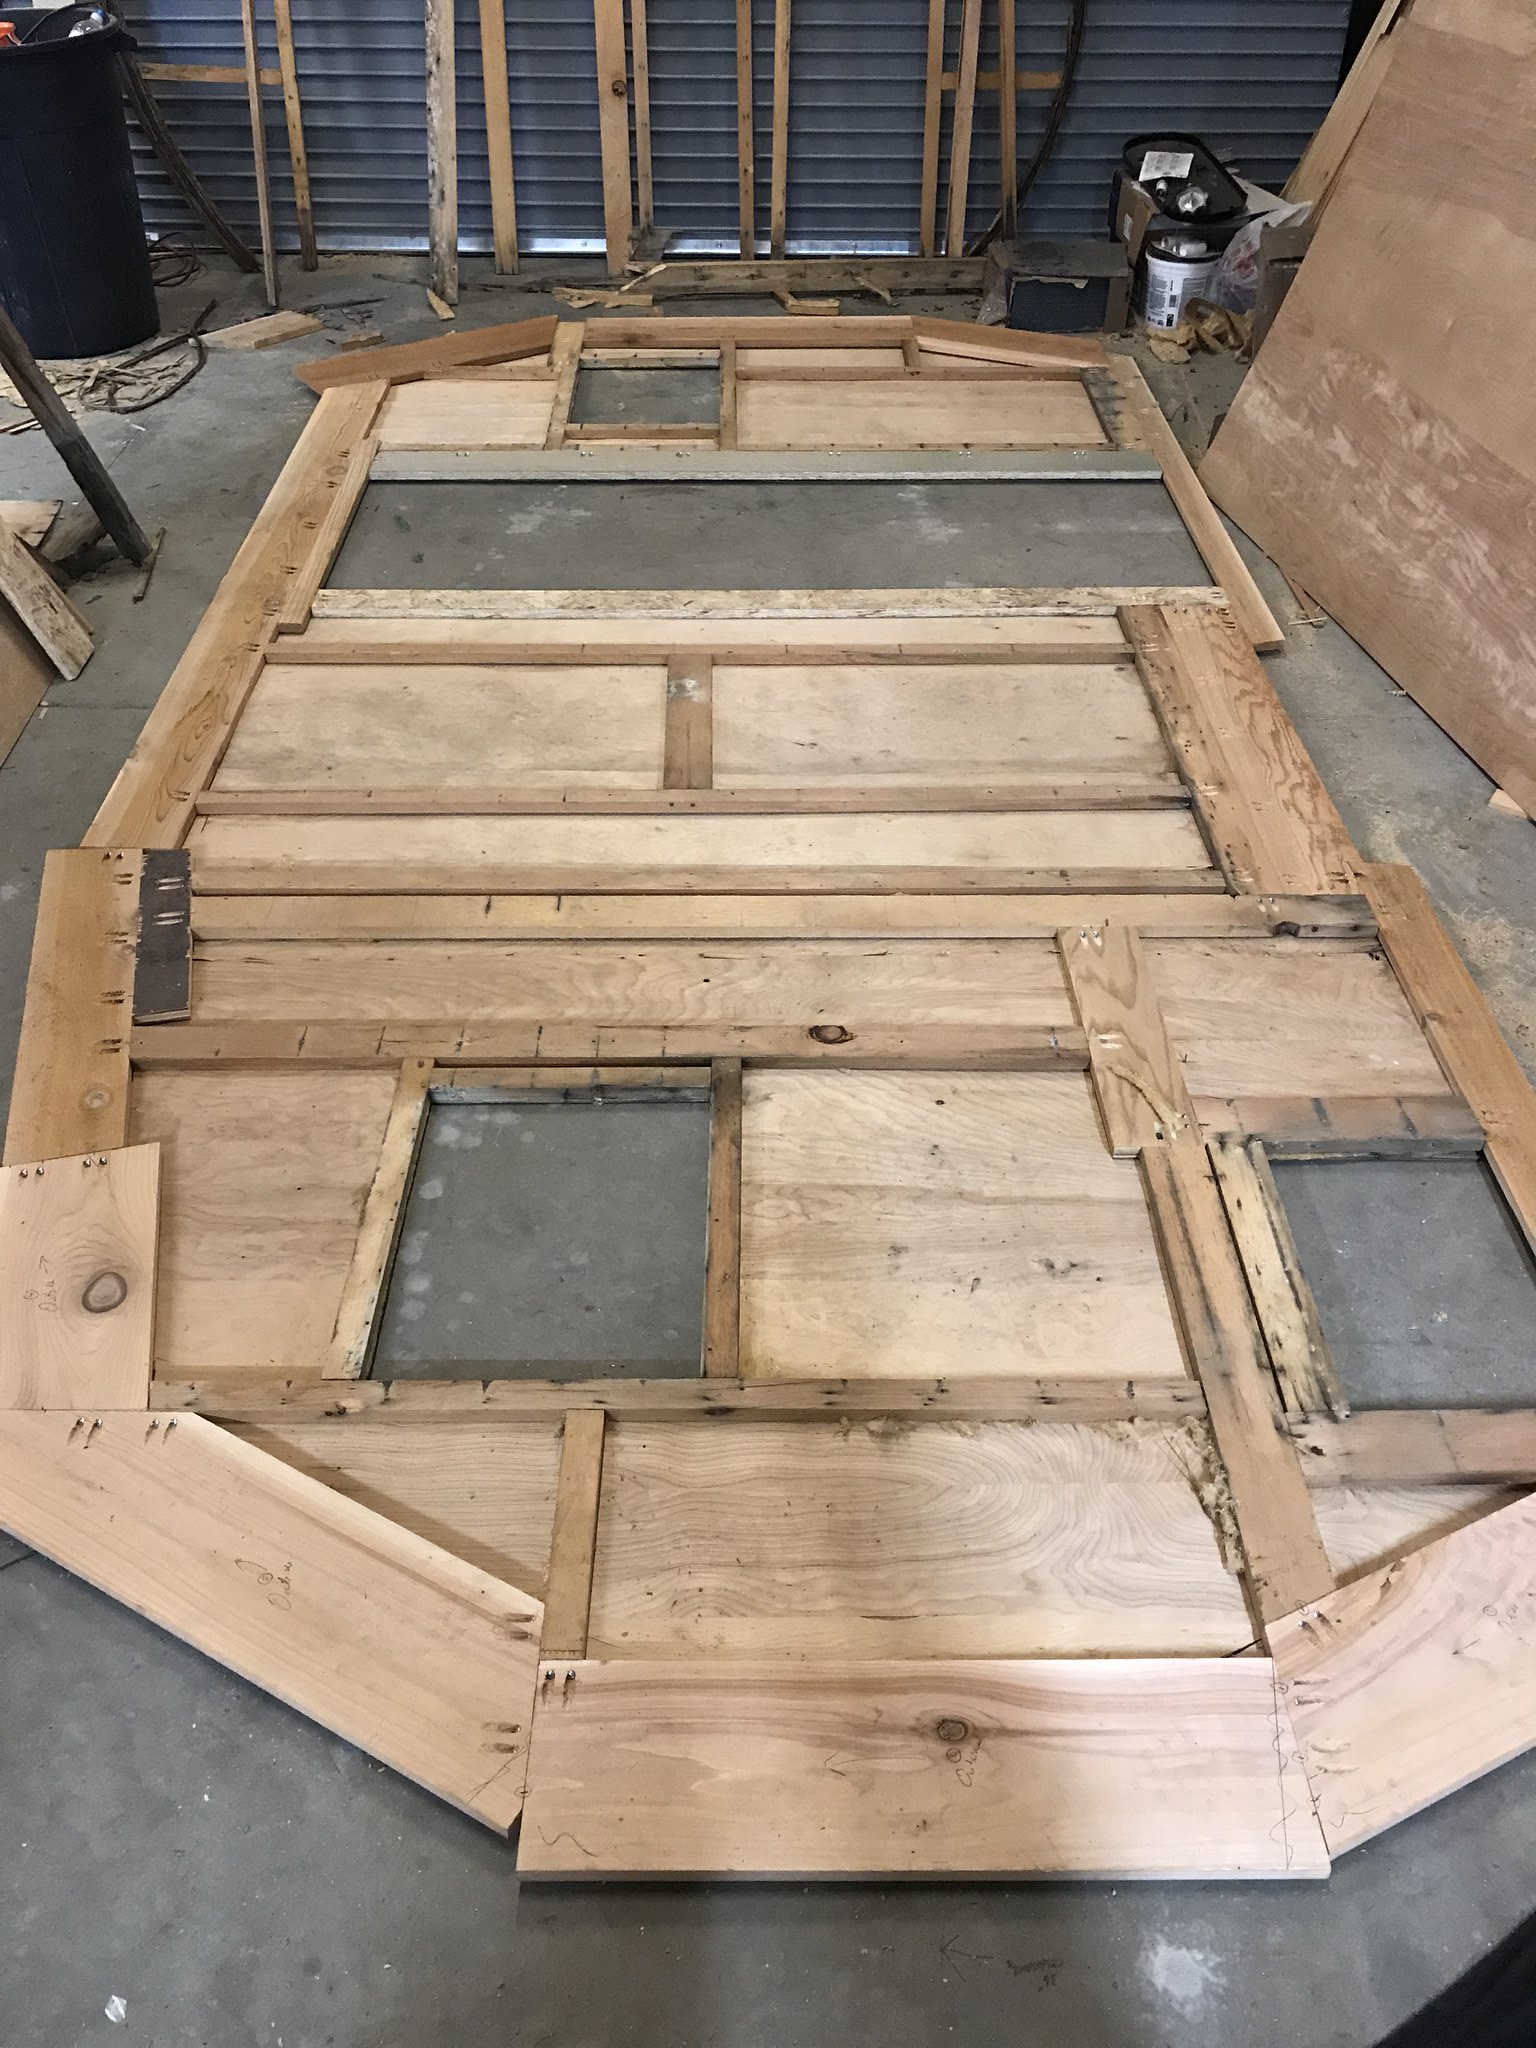 Untitled Untitled by Mike Estrada, on Flickr 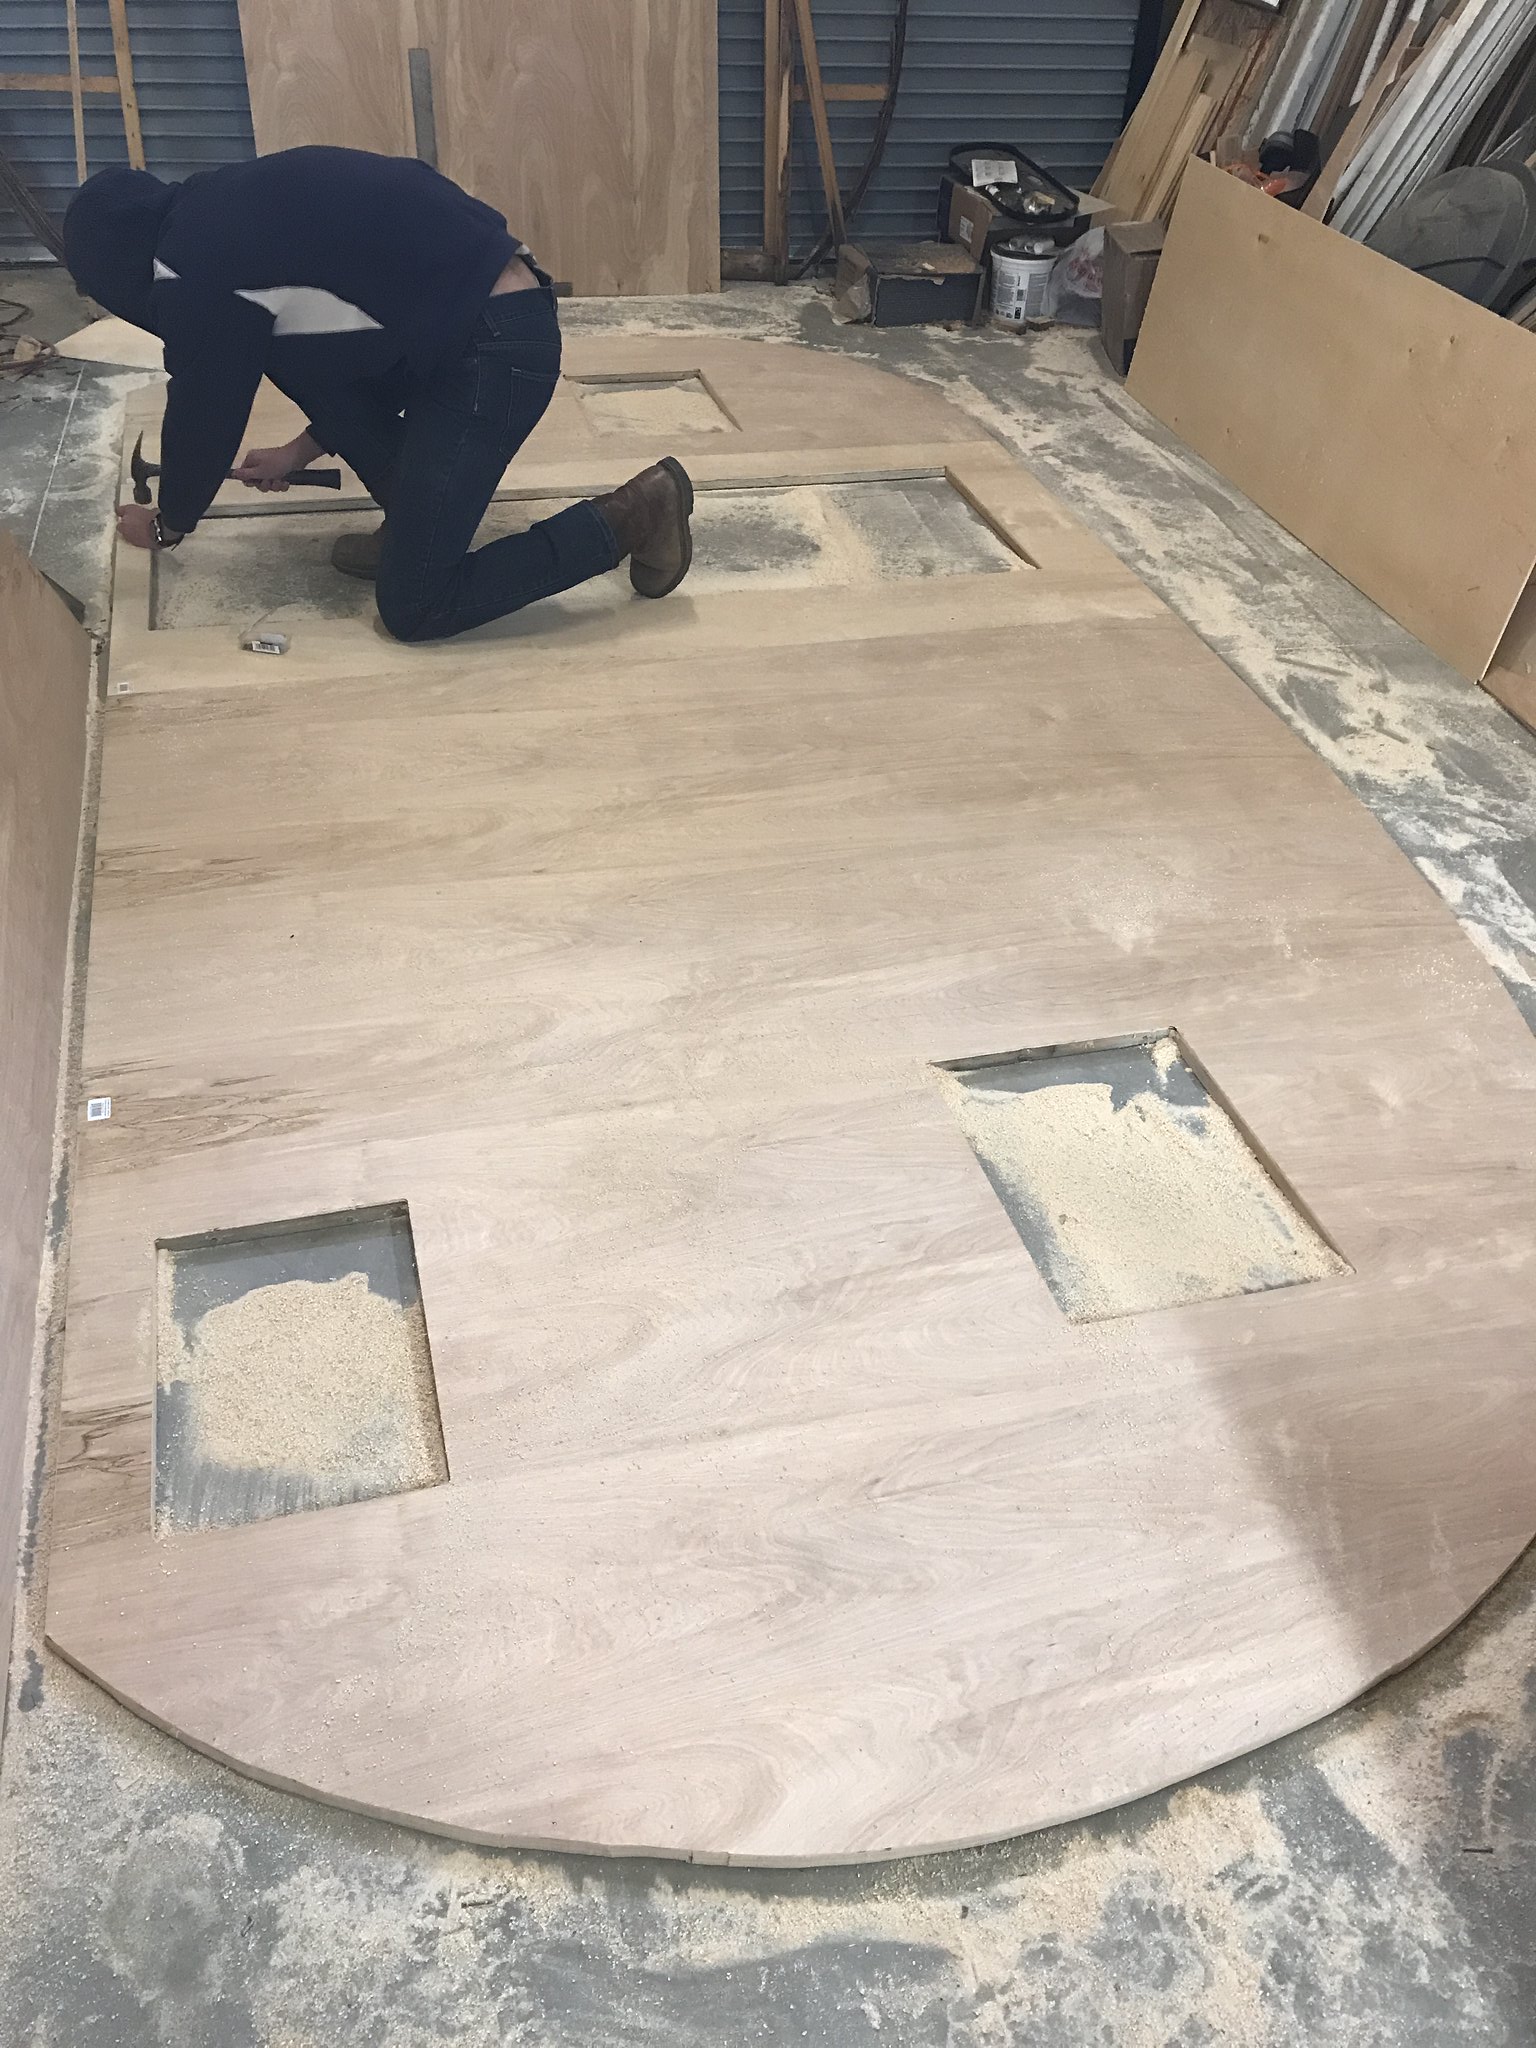 Untitled Untitled by Mike Estrada, on Flickr Next up is painting the bottom of my deck and applying the bituthene. (likely, just around the edges, not sure yet). I have a couple of small repairs I need to have my welder friend fix (a small crack in one of the flanges that holds the wall, and another bent one). So I'll need to do some touch up epoxy paint to the frame. Then, I can mount the deck to the frame and begin with tiling the floor. I can't wait to get to that point! |
|
papamike95
Member
Posts: 30
Likes: 13
1954 Terry - 16'
Currently Offline
|
Post by papamike95 on Jan 21, 2018 22:02:49 GMT -8
For those who may point out that the interior skin does not look like birch, you are correct. My wife is preferring that the walls and ceiling be painted, so I did not spend on birch plywood. I will attempt to restore the cabinets with their original birch... hopefully that turns out.
|
|
nate
Active Member
Posts: 112
Likes: 15
1963 Comet 17'
Currently Offline
|
Post by nate on Jan 22, 2018 14:09:40 GMT -8
Looking good! Wish I could take a trip to Hemet Valley.
|
|
Deleted
Posts: 0
Currently Offline
|
Post by Deleted on Jan 22, 2018 14:17:40 GMT -8
Here's a suggestion Nate...
There are a few of us up here on the tundra that would like to get exterior materials from a place like Hemet Valley. Maybe we give you our orders, you take the trip out there to pick everything up, and we all split the cost of your travel expenses?
|
|
papamike95
Member
Posts: 30
Likes: 13
1954 Terry - 16'
Currently Offline
|
Post by papamike95 on Mar 3, 2018 20:27:40 GMT -8
Ok, it has been a little while, but I've been busy... we decided after all to have a bumper welded on the frame, along with a receiver so we can put a bike rack on the back. 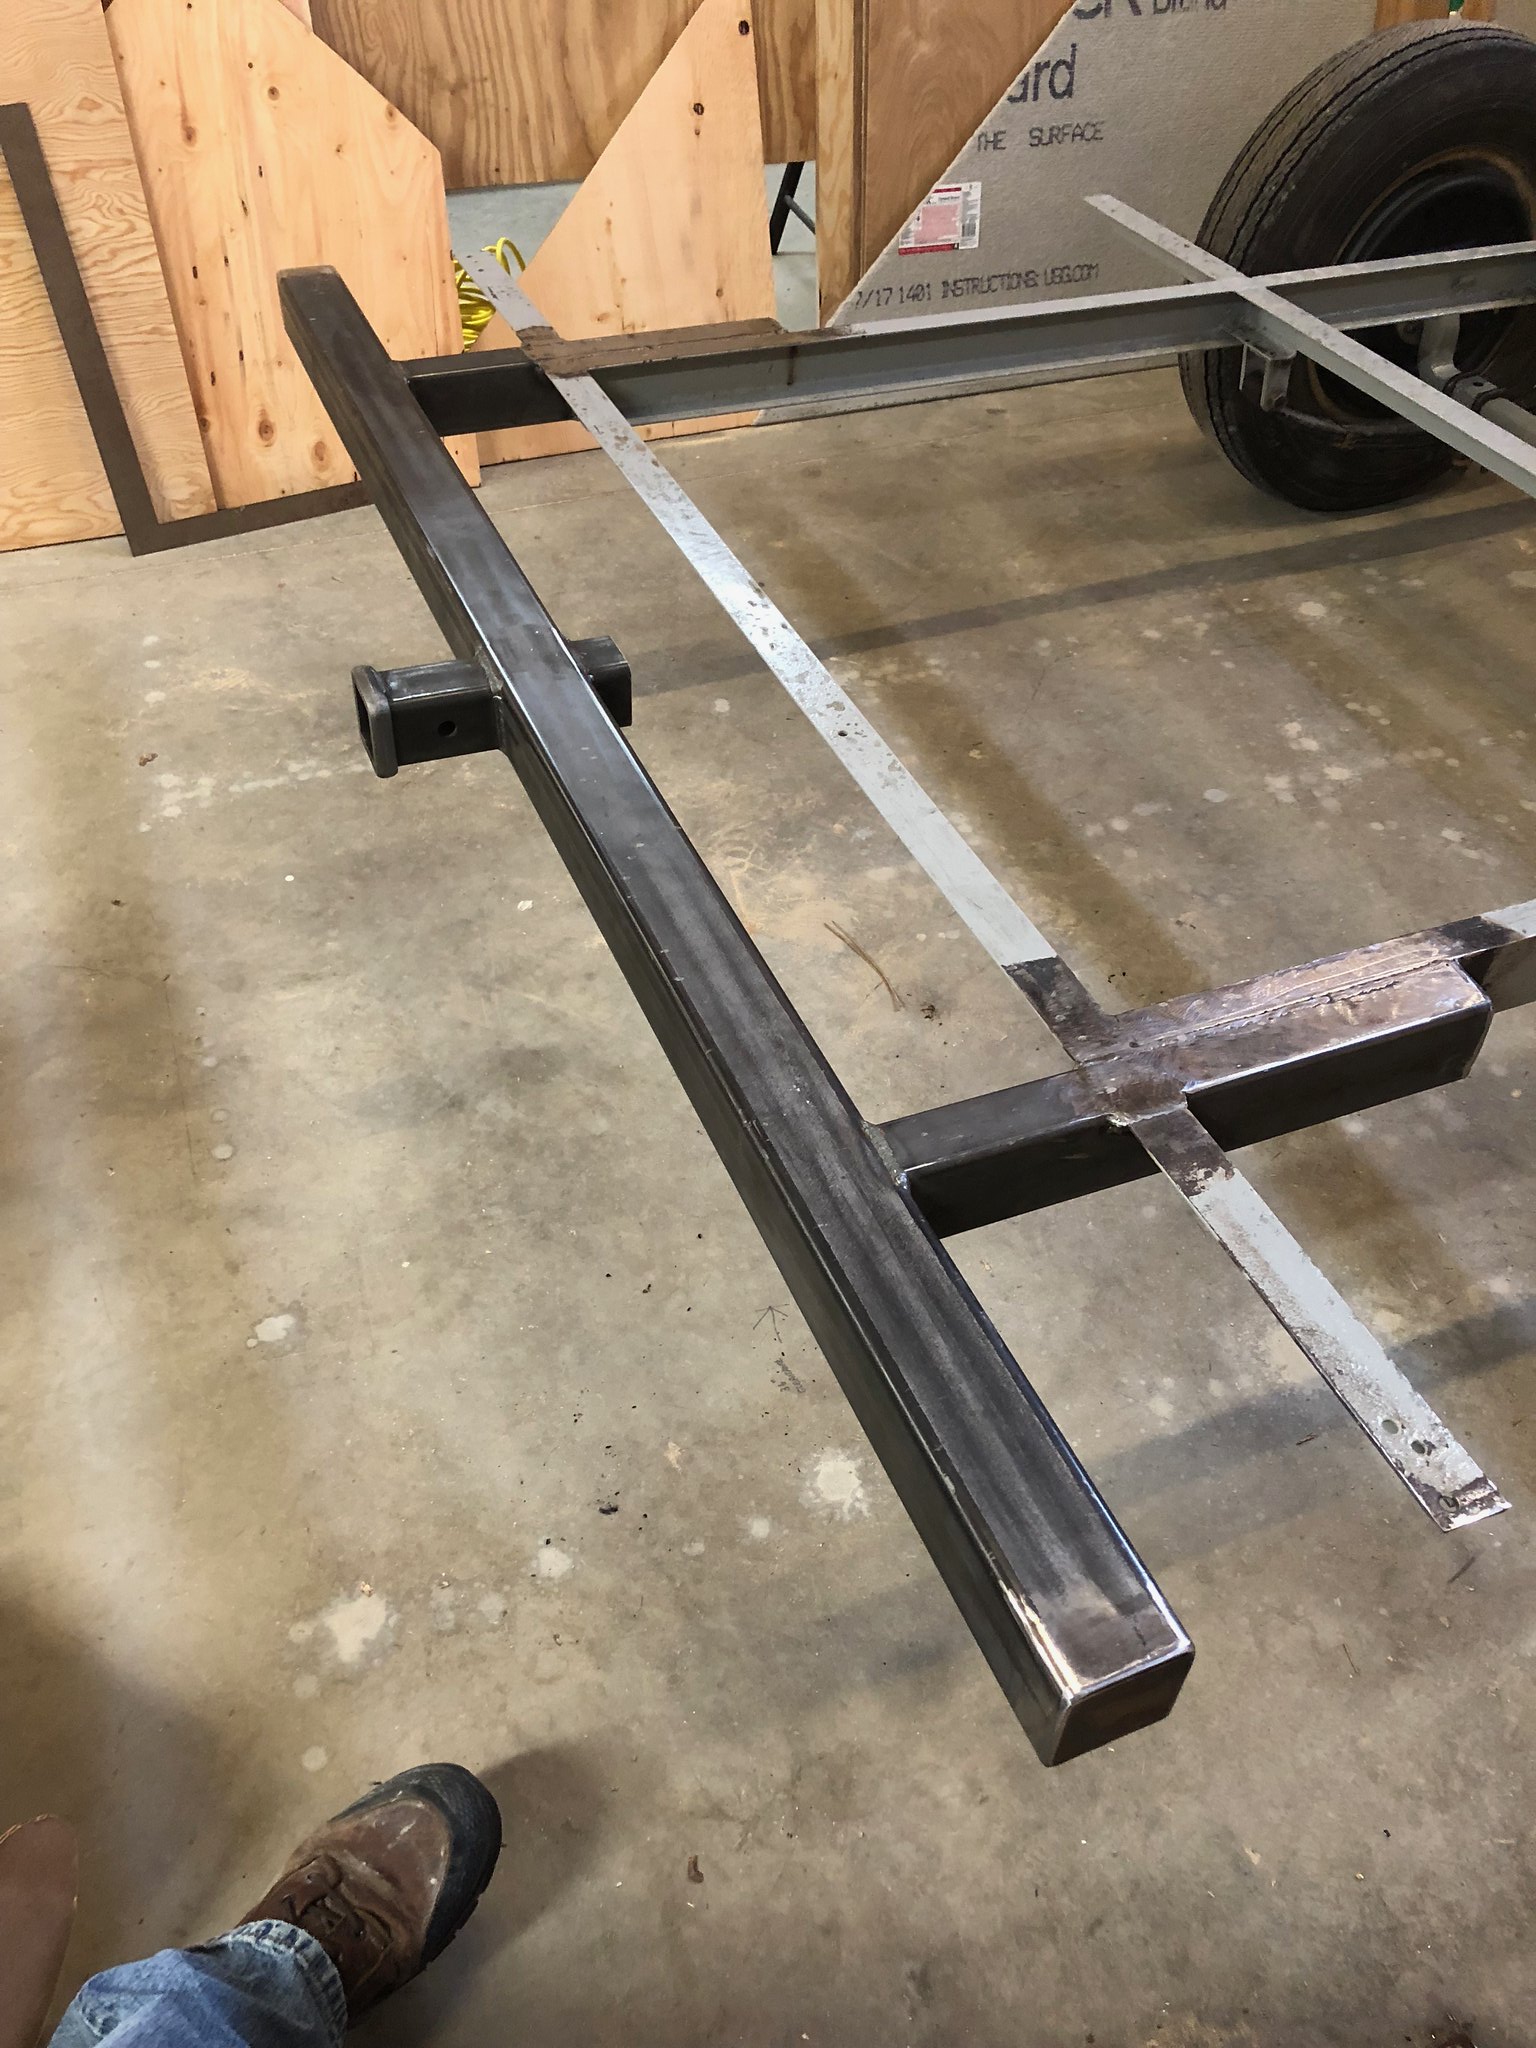 Untitled Untitled by Mike Estrada, on Flickr 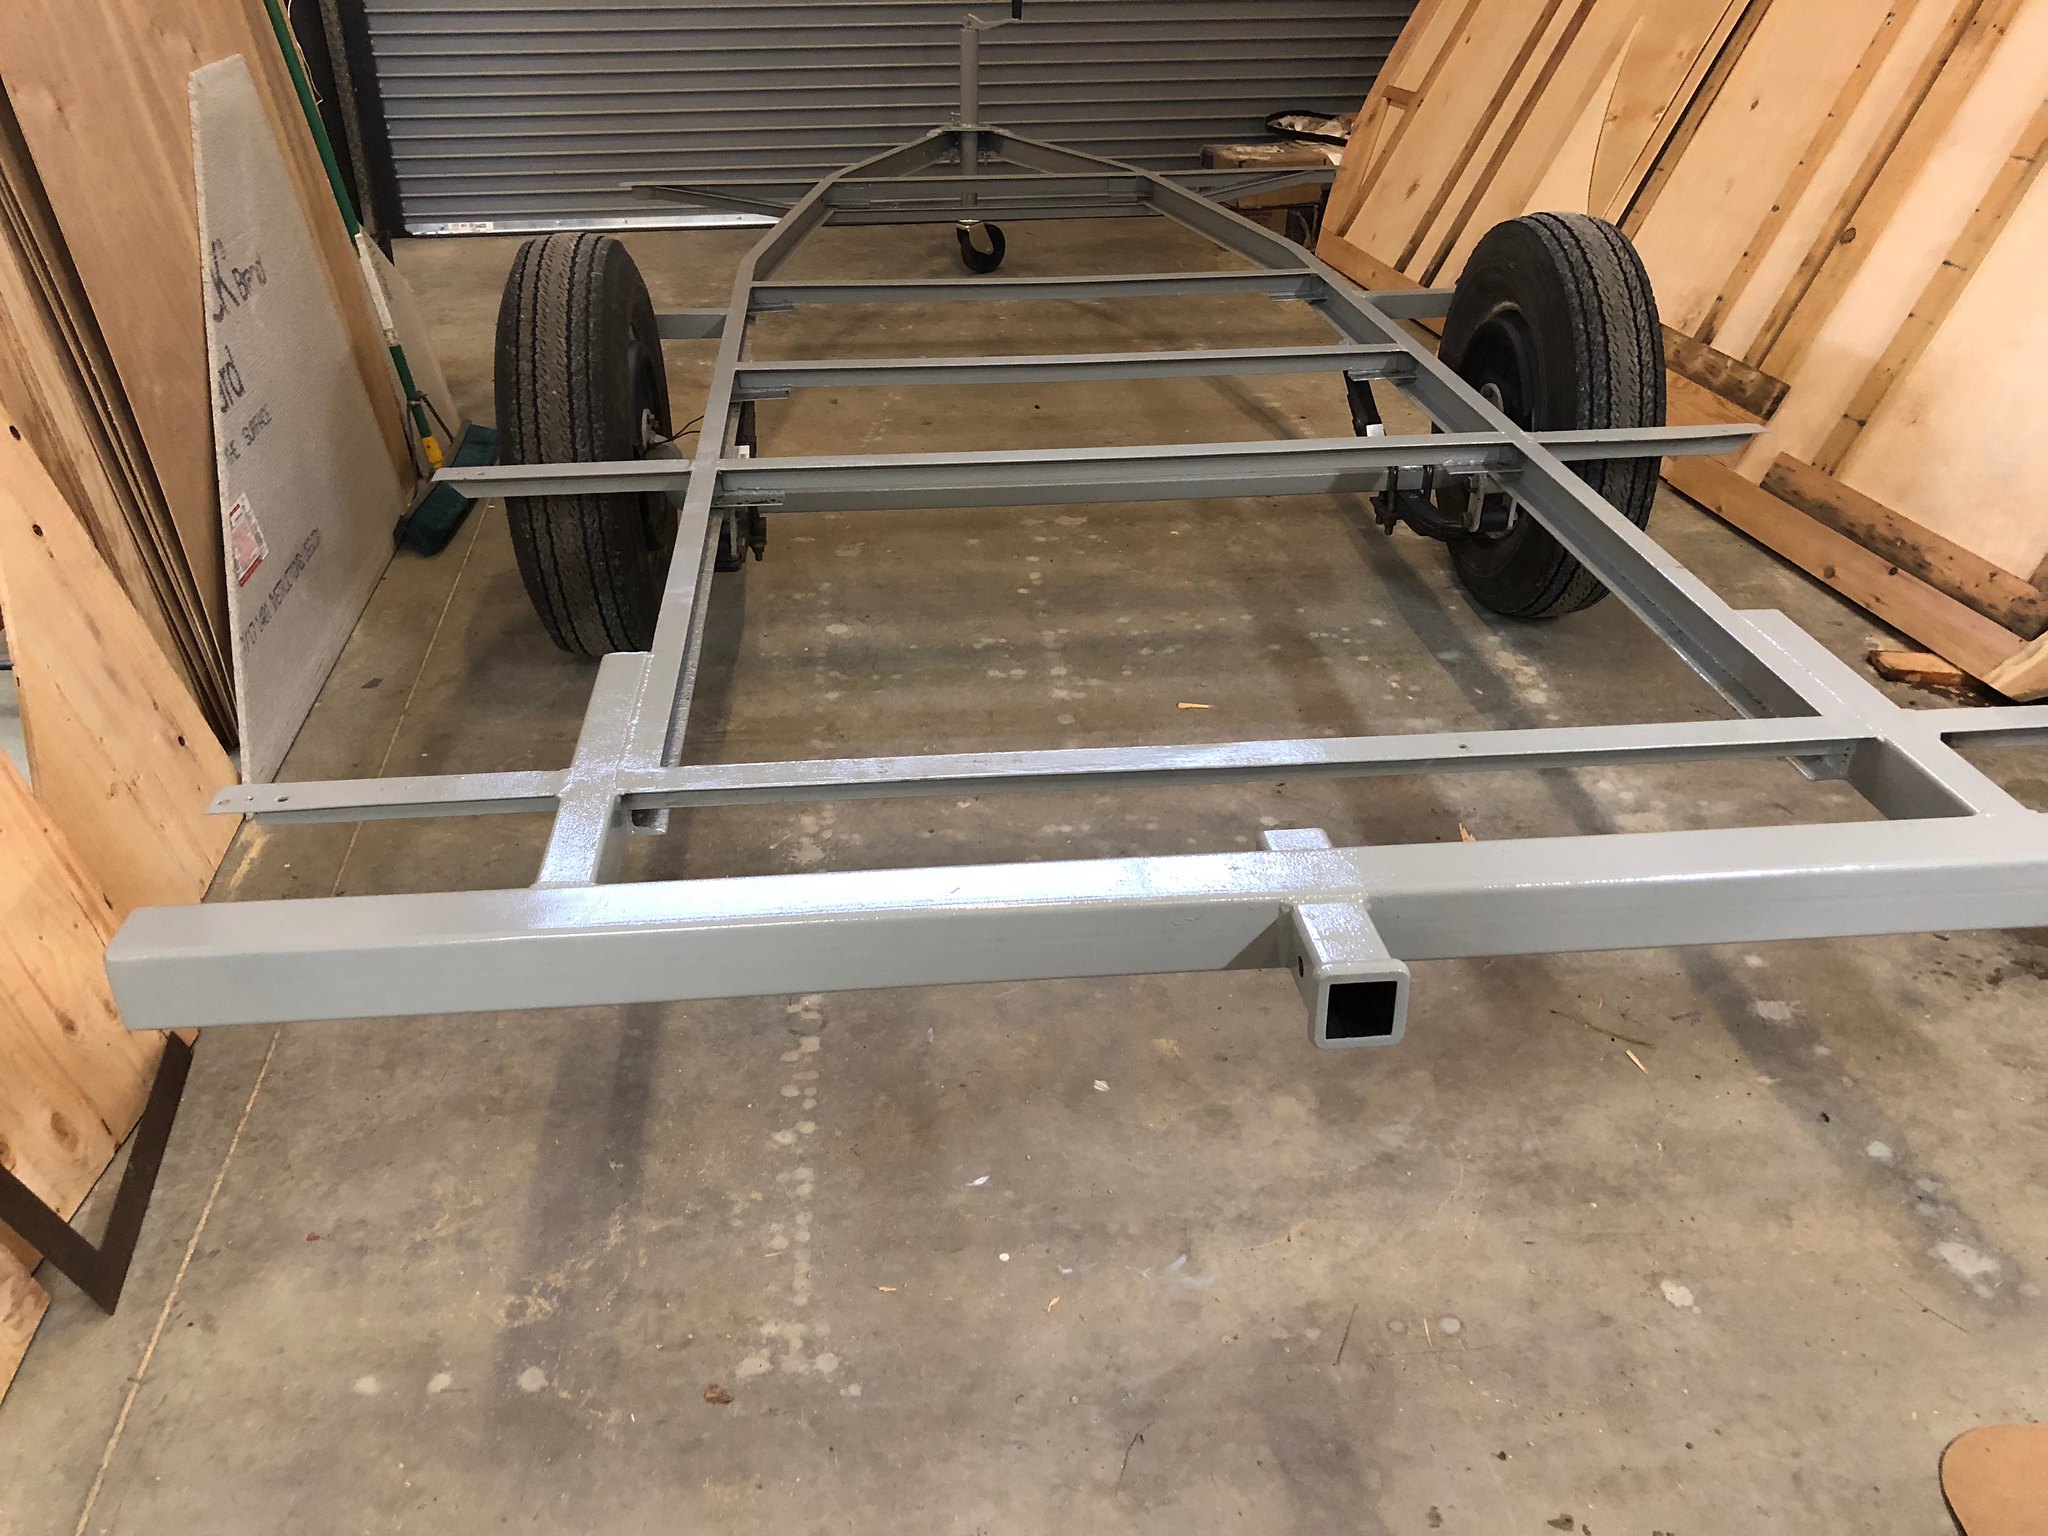 Untitled Untitled by Mike Estrada, on Flickr I traded with my welder friend... I built a corner hearth for his mother's wood stove and tiled it. I also painted the underside of my deck with Fence Post Black Black Beauty. 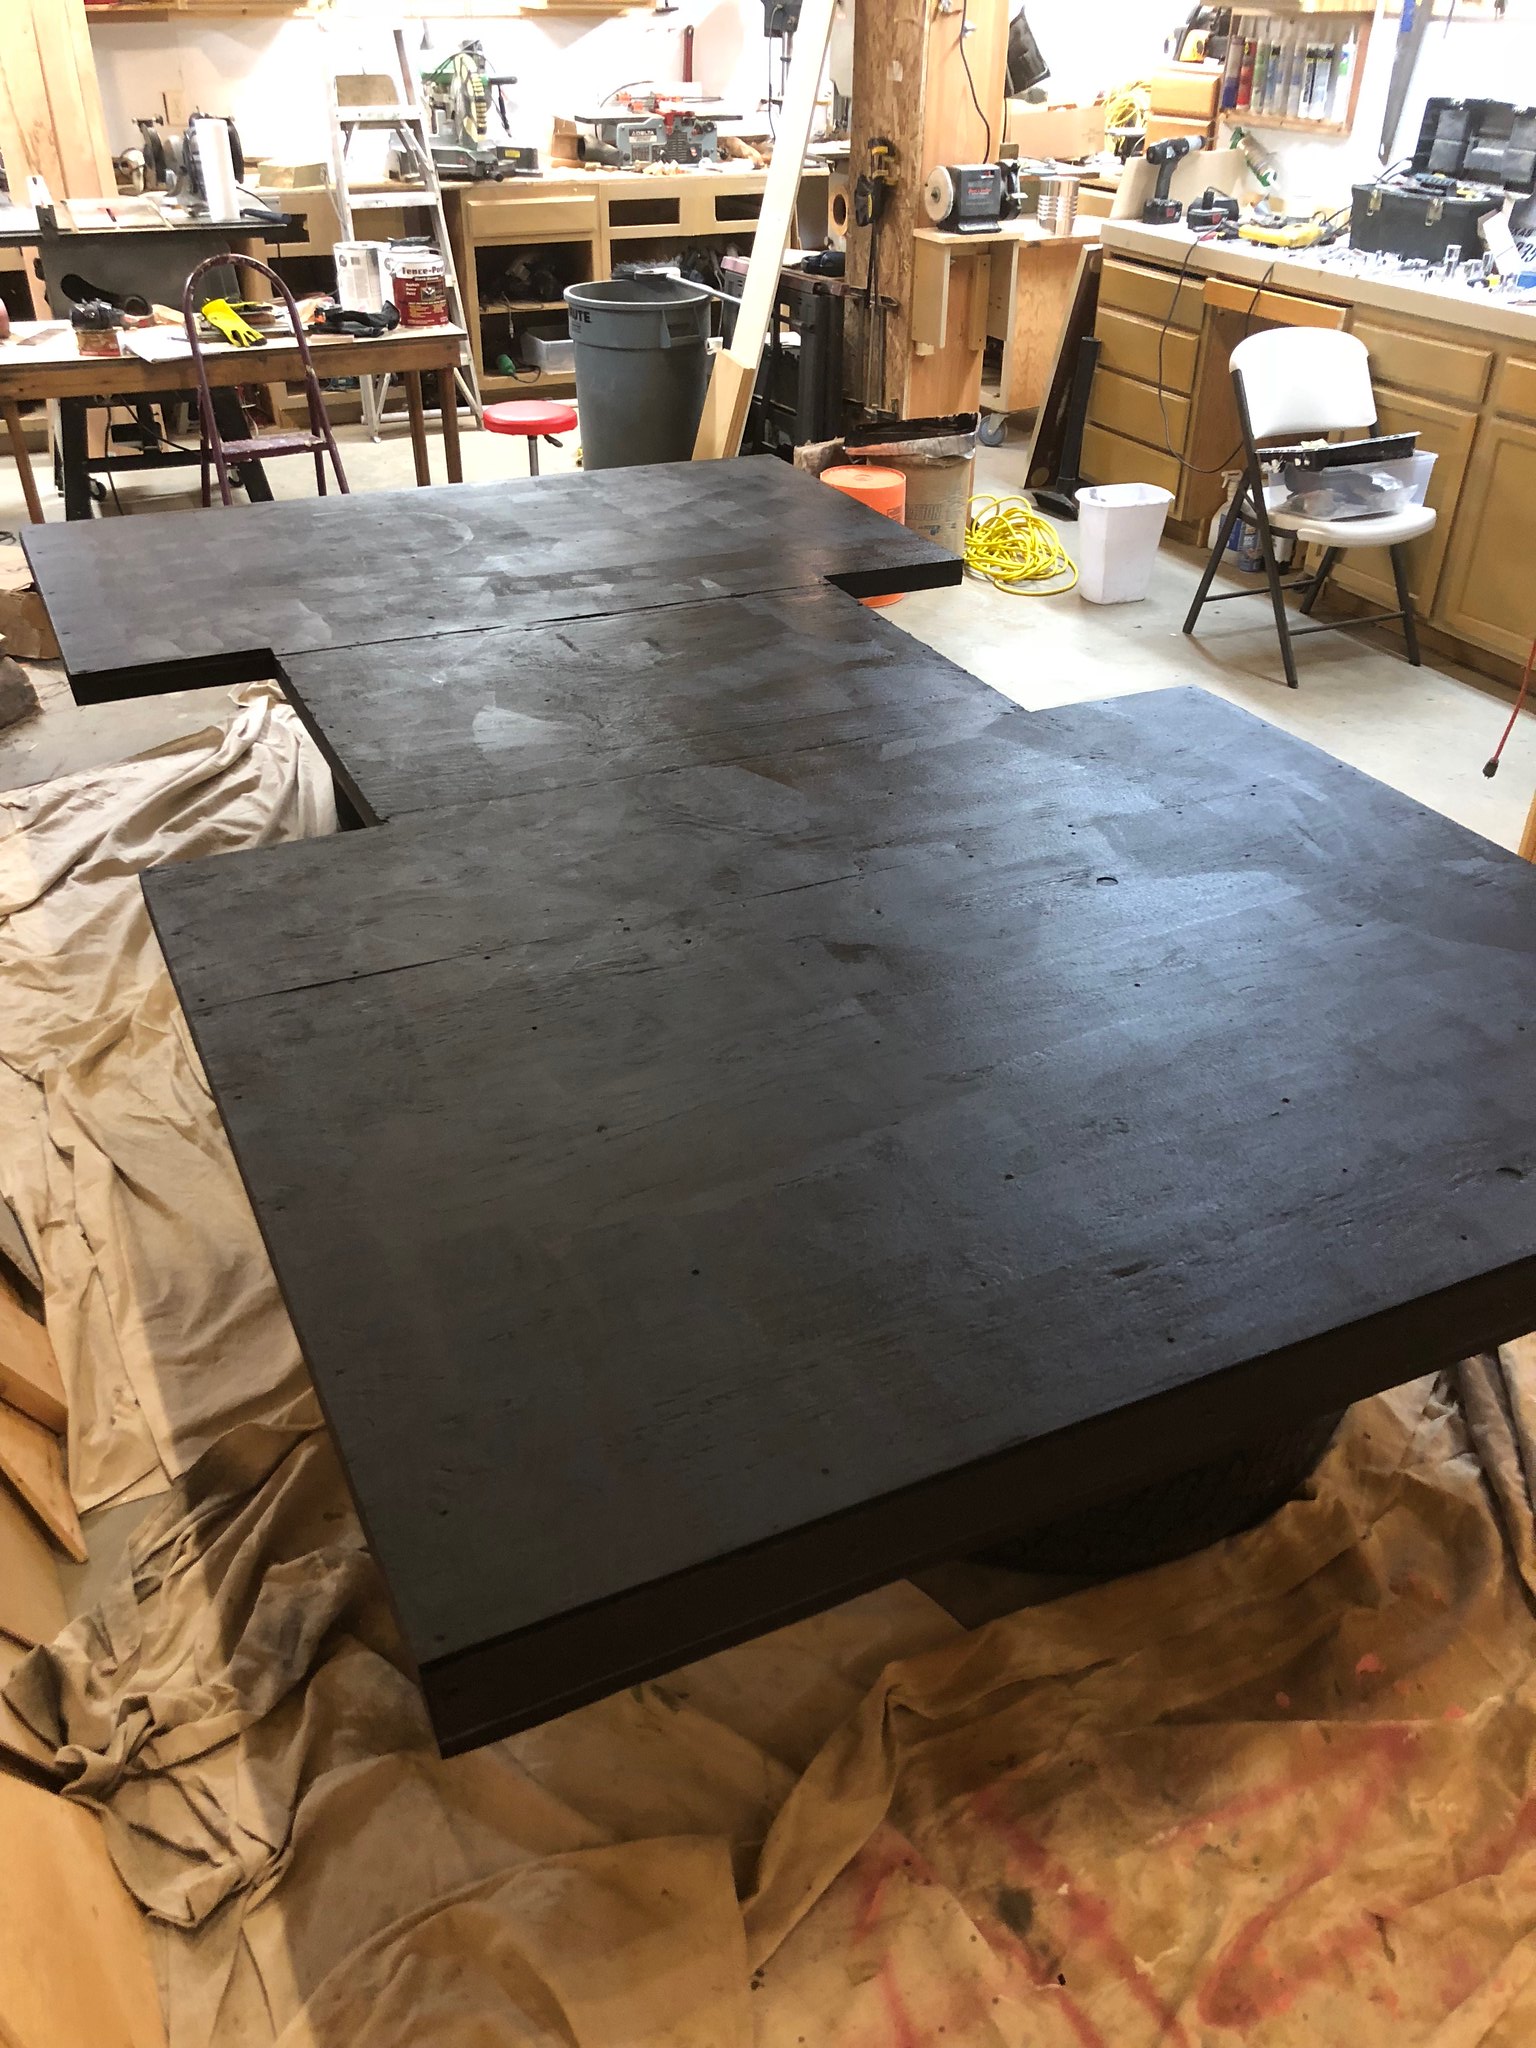 Untitled Untitled by Mike Estrada, on Flickr Then I positioned my deck on my frame and laid the VCT. It was a pain cutting all the 12" squares down to 9", but worth it! I also had to heat my garage to 65 degrees and keep it there for several days while the VCT glue dried. 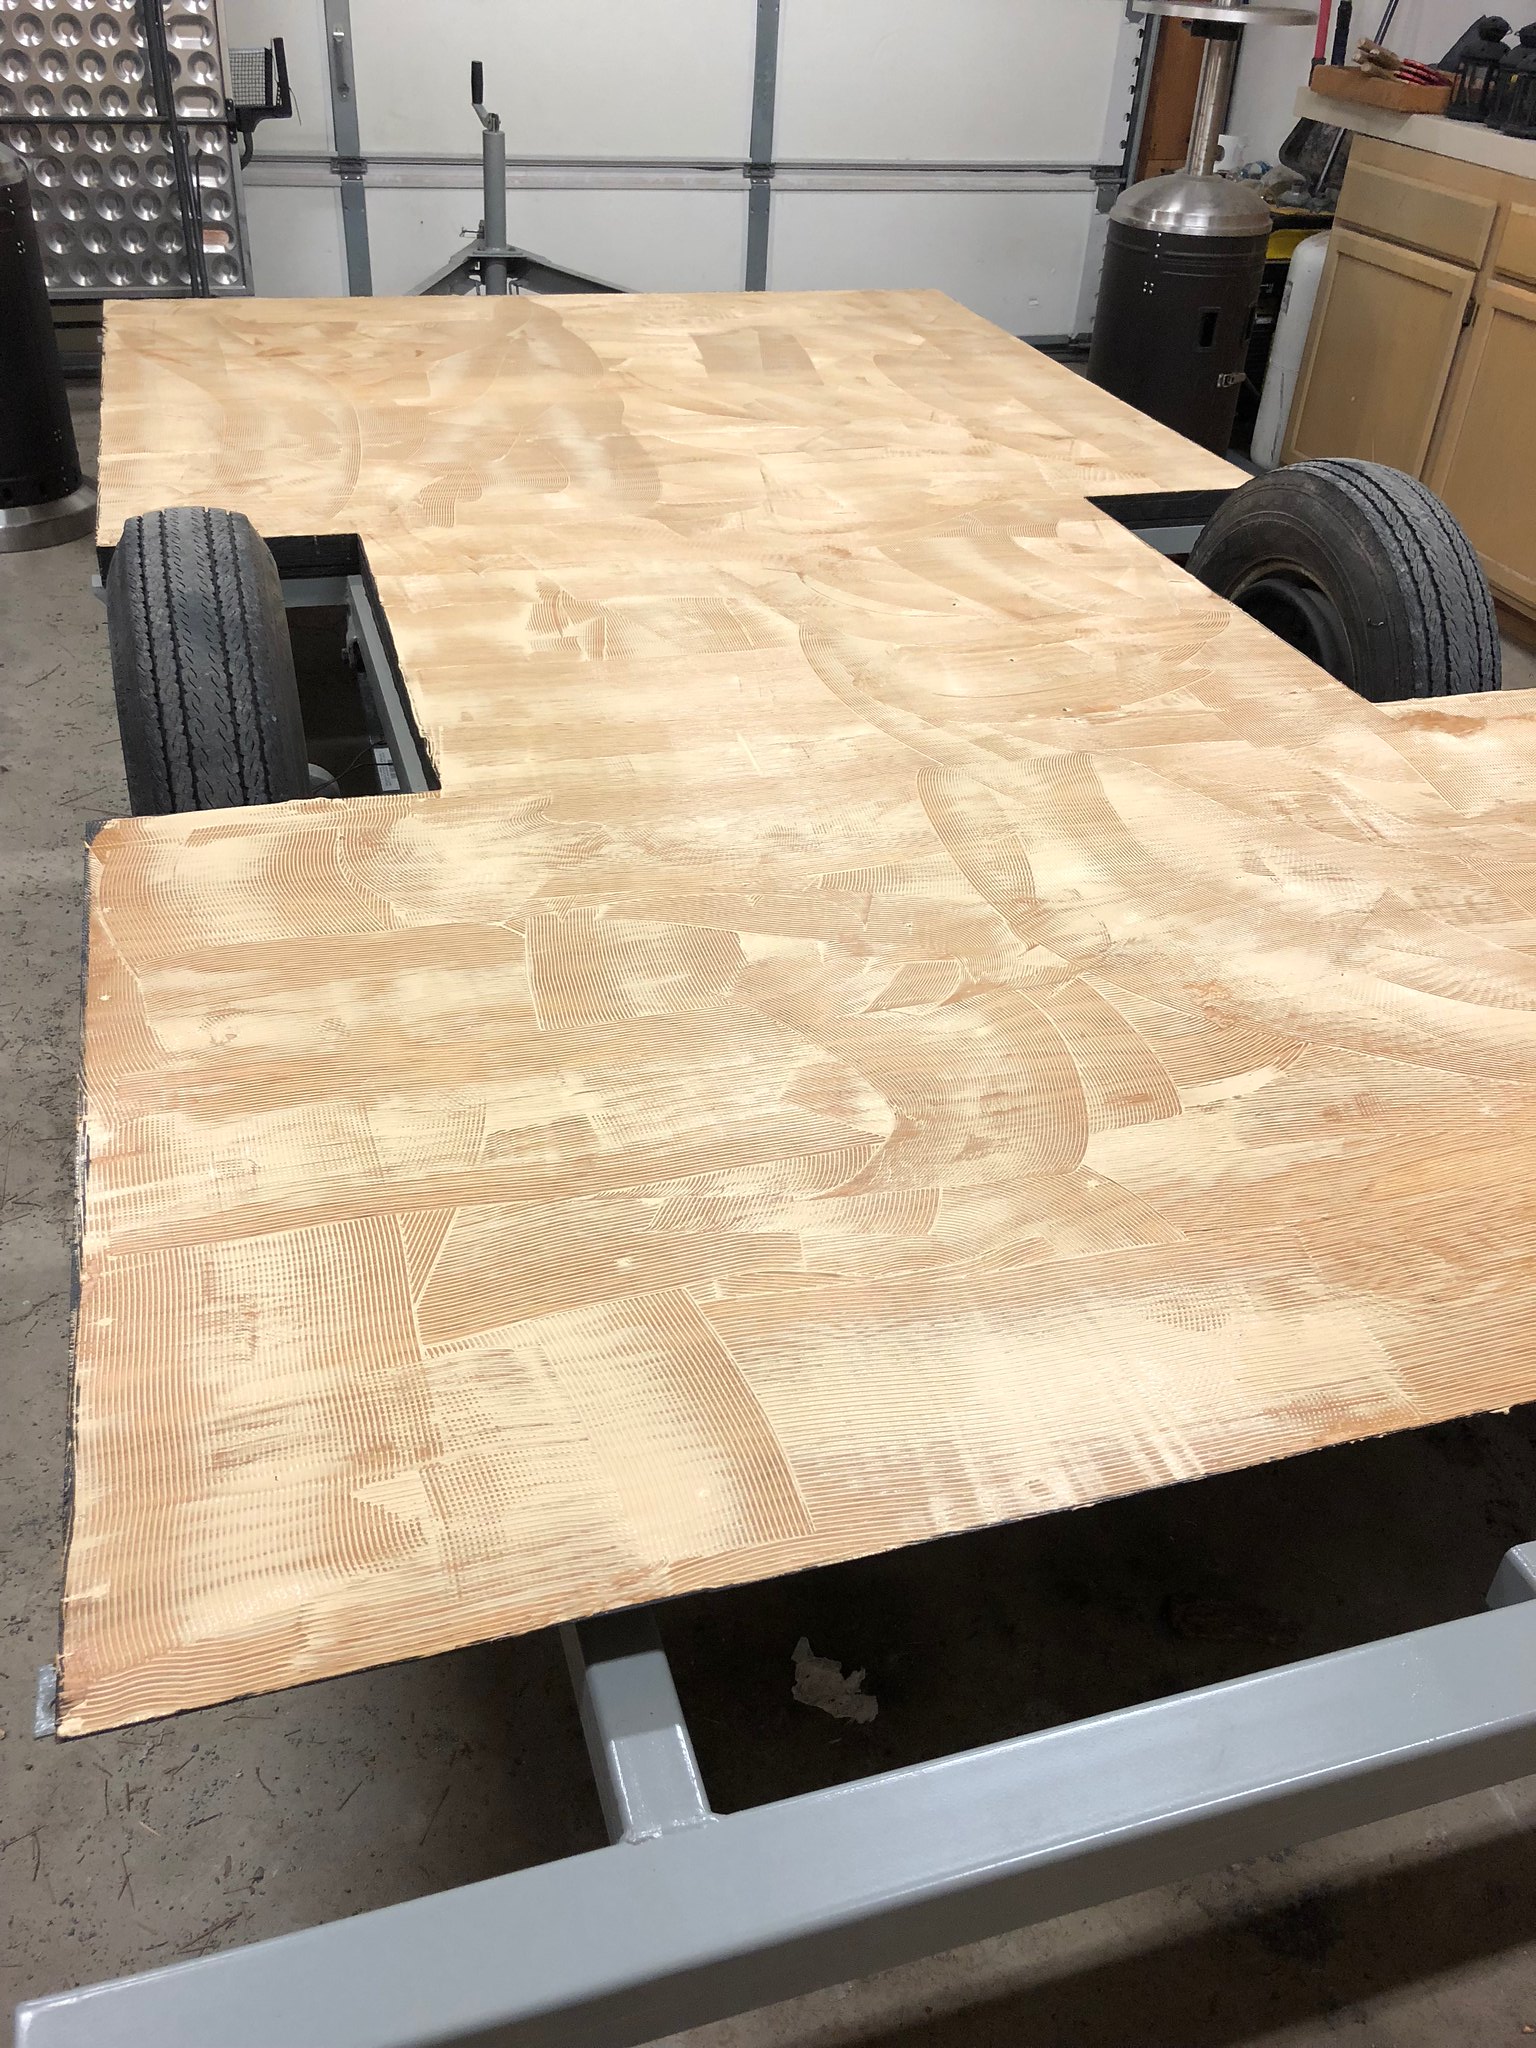 Untitled Untitled by Mike Estrada, on Flickr 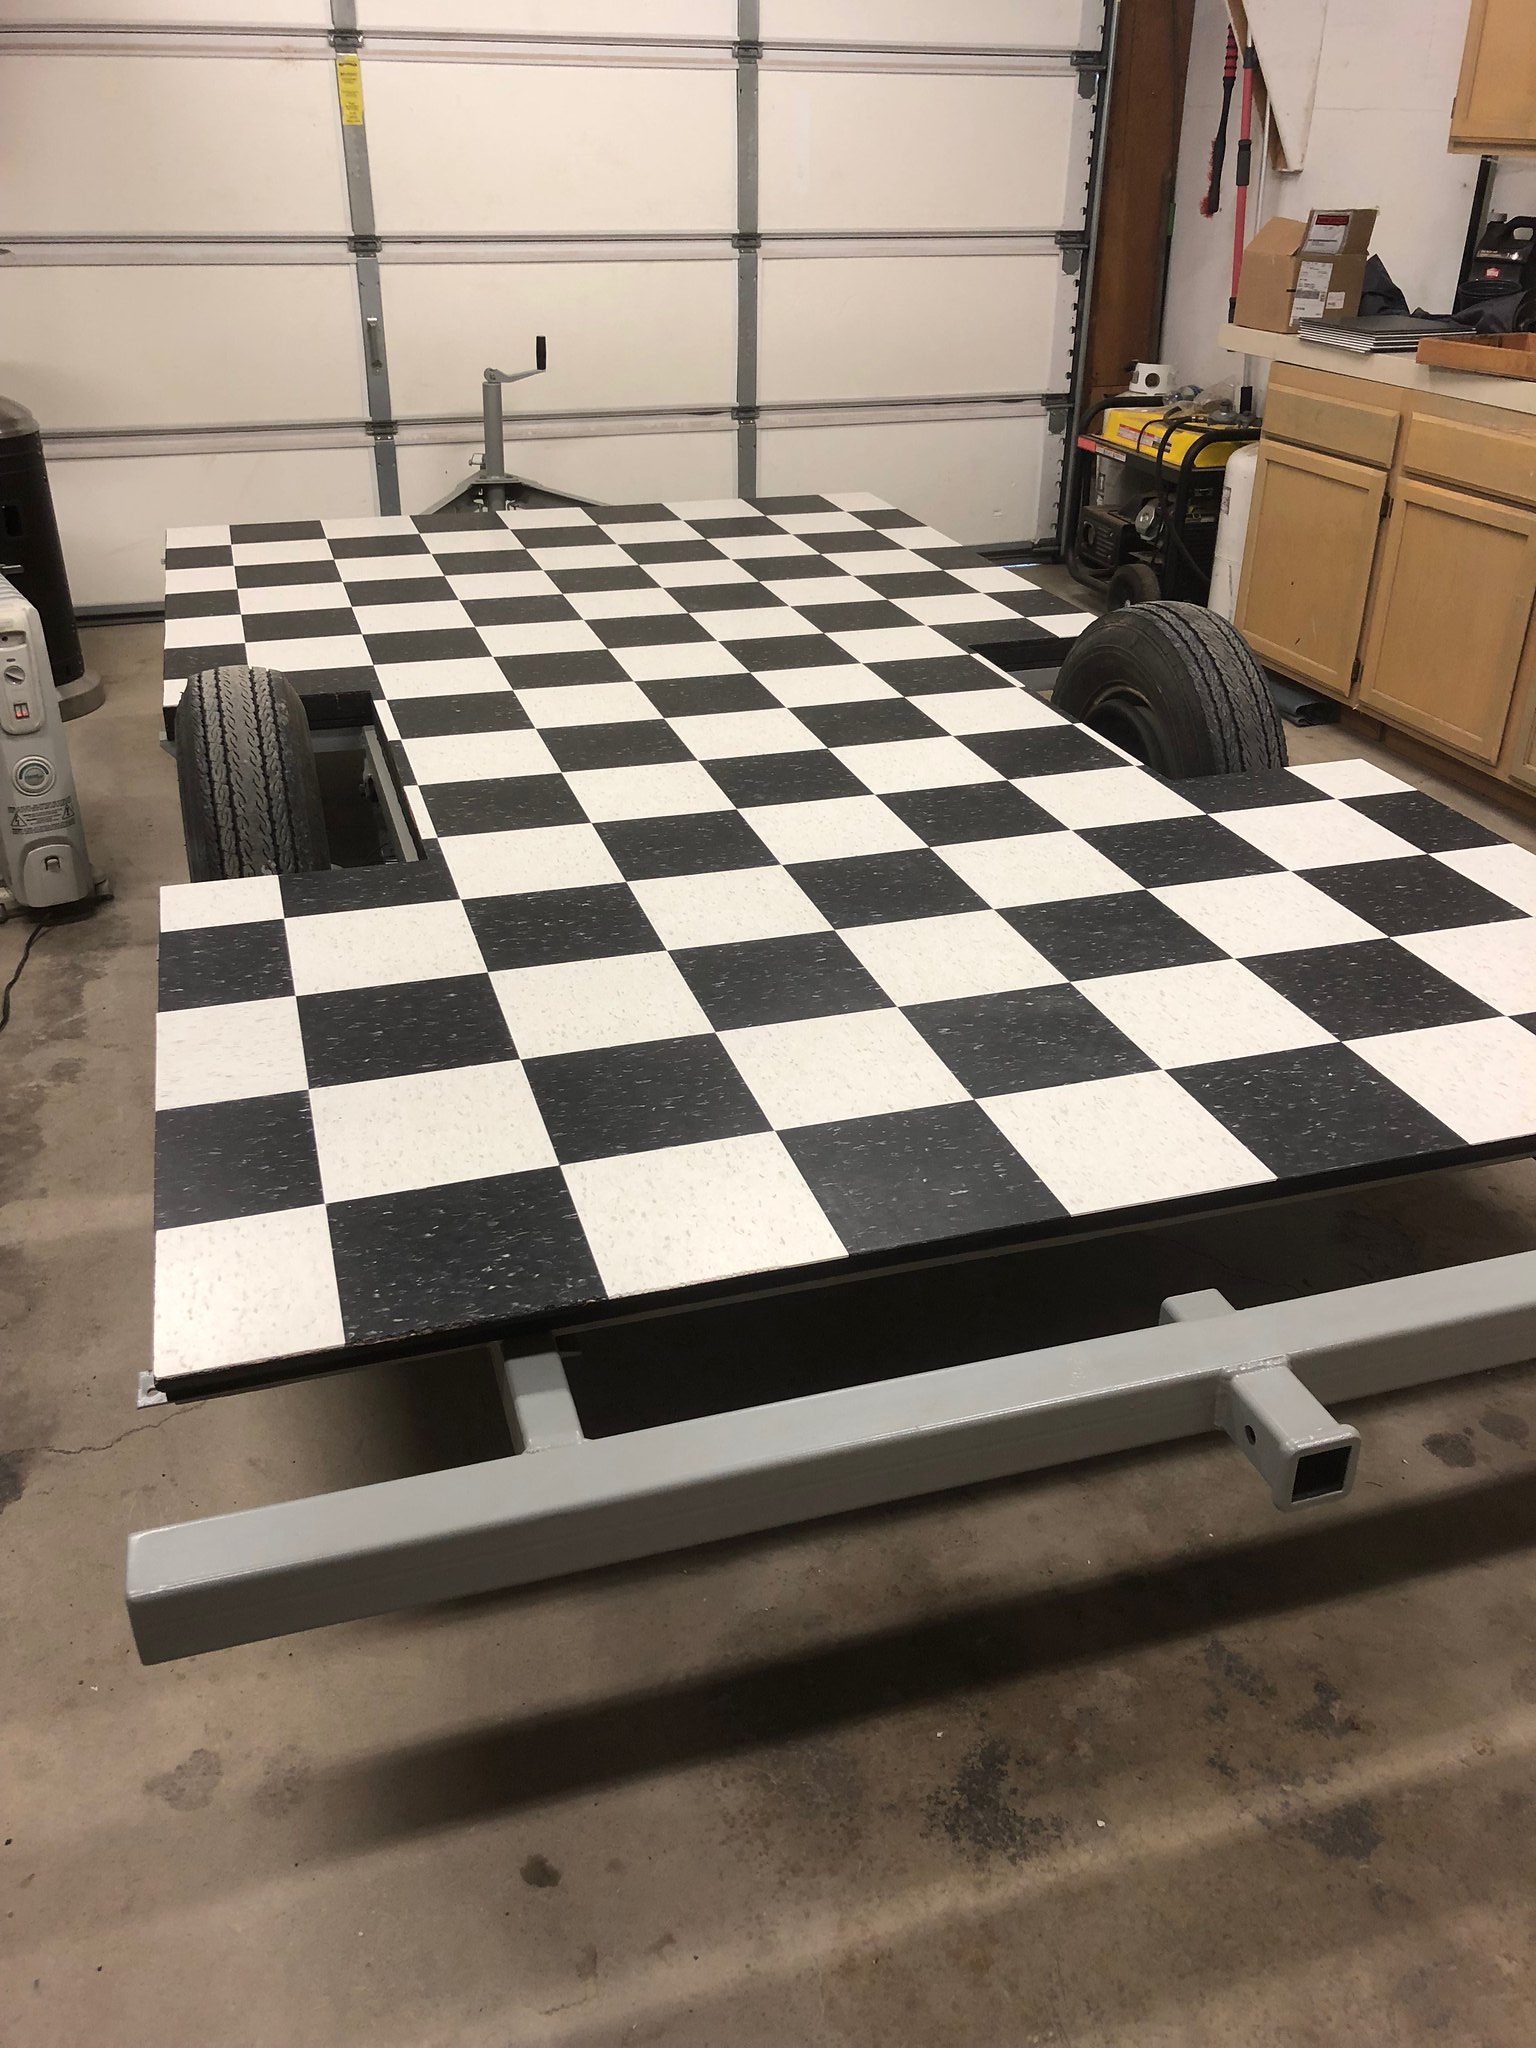 Untitled Untitled by Mike Estrada, on Flickr I then re-built the bed/couch mechanism, and screwed that onto the floor. 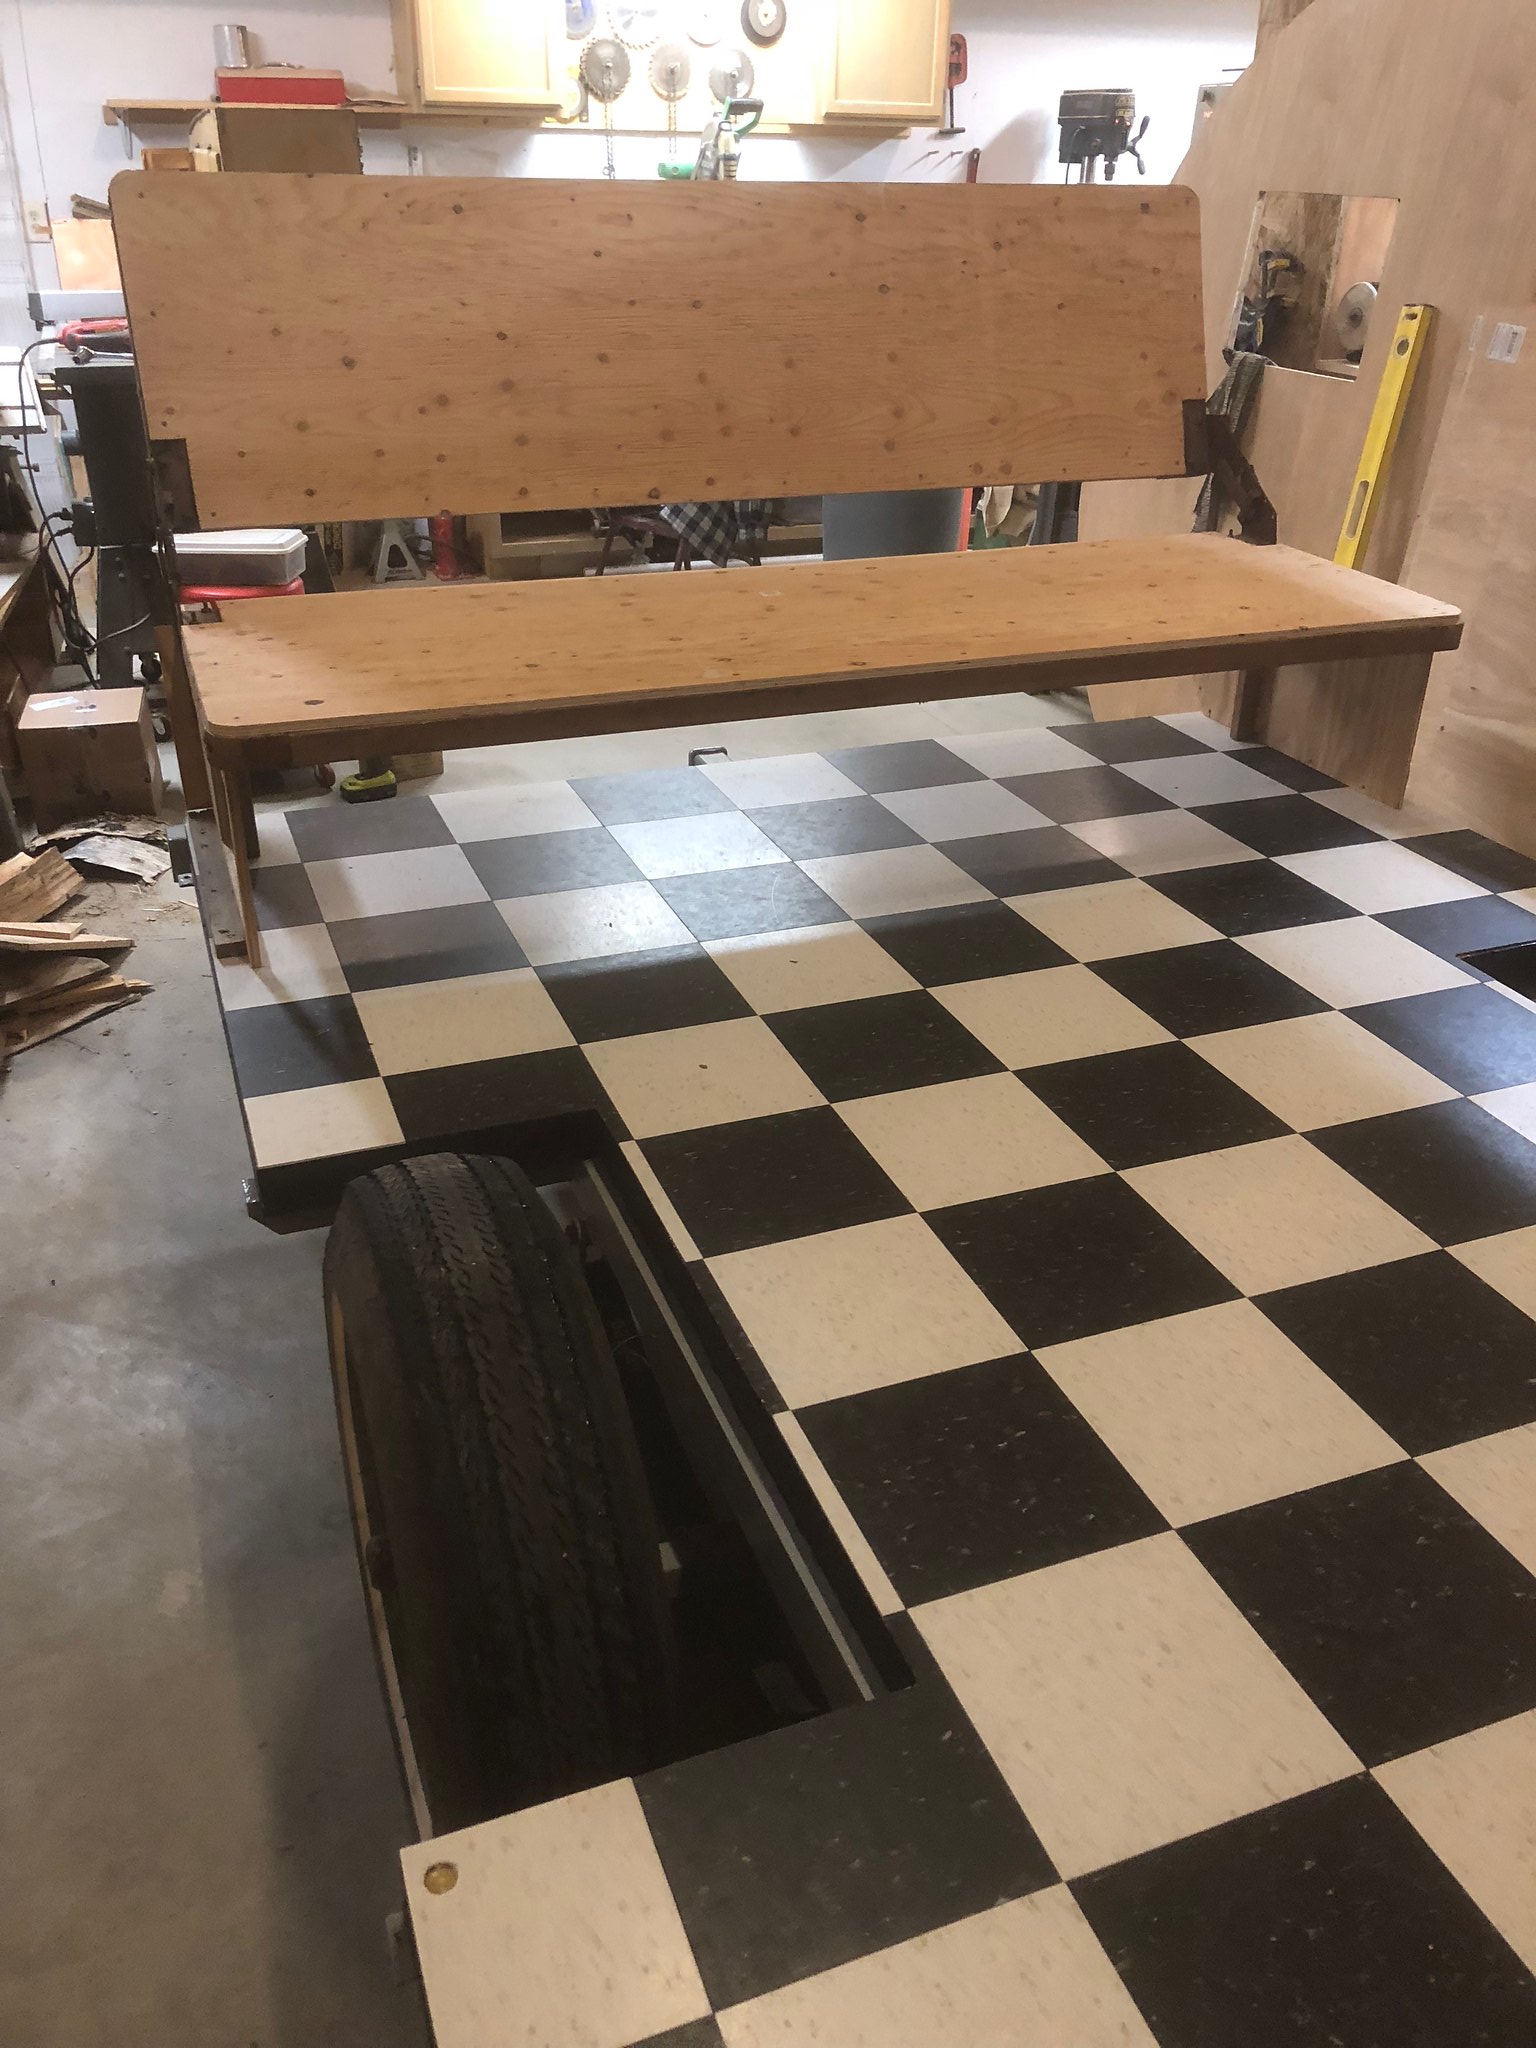 Untitled Untitled by Mike Estrada, on Flickr 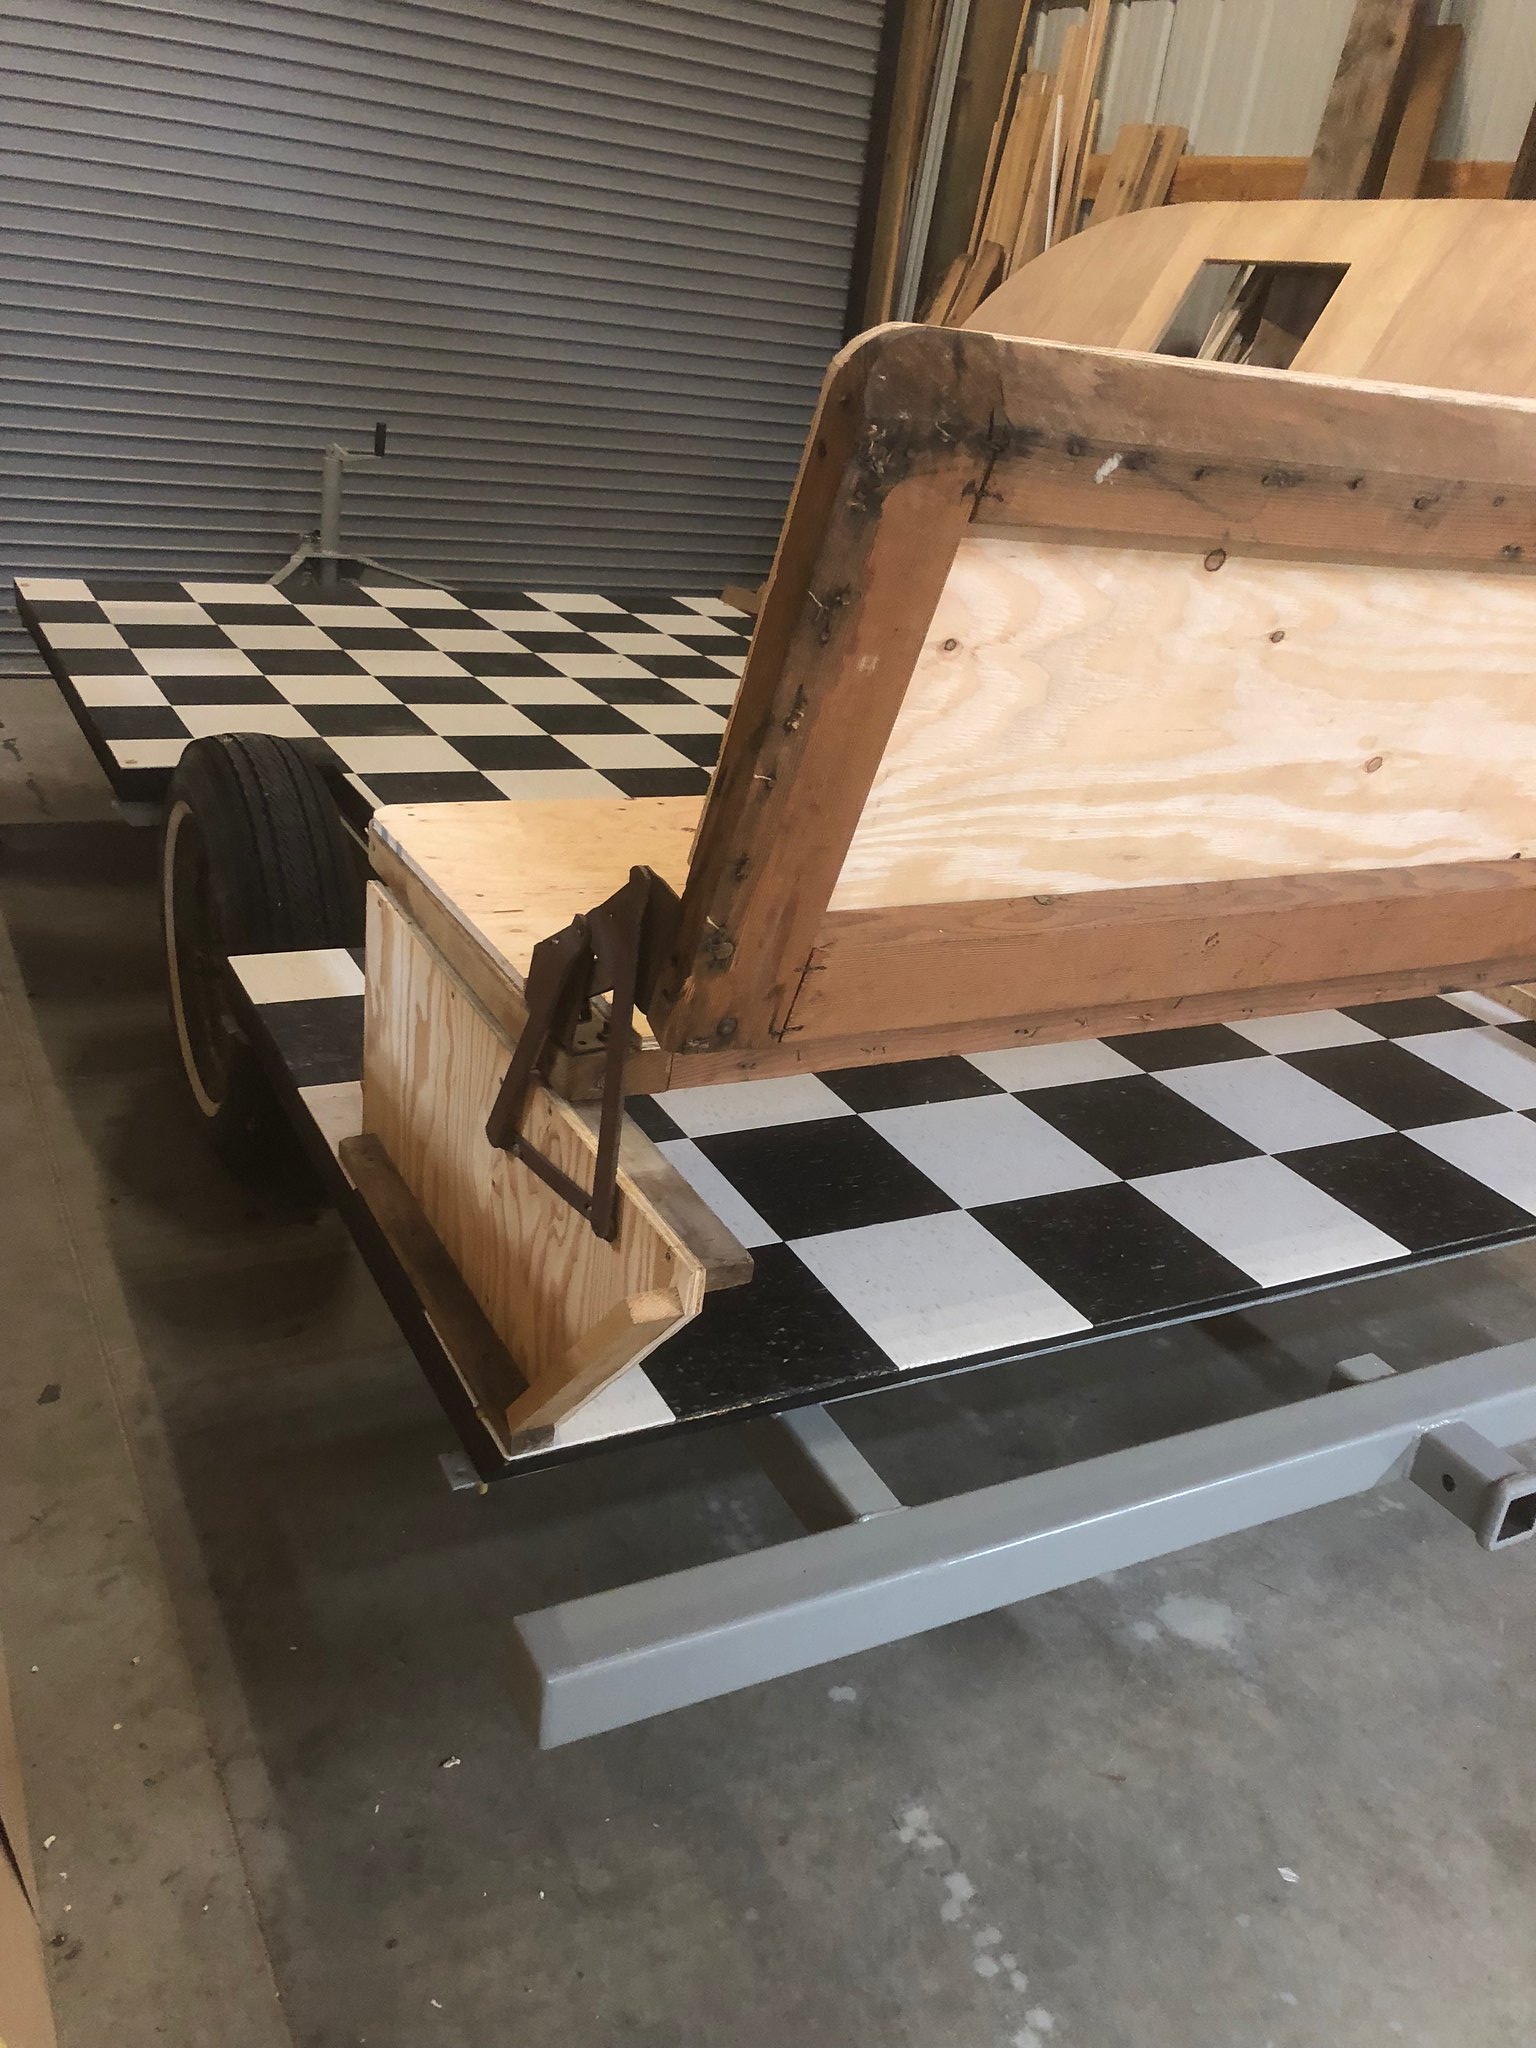 Untitled Untitled by Mike Estrada, on Flickr 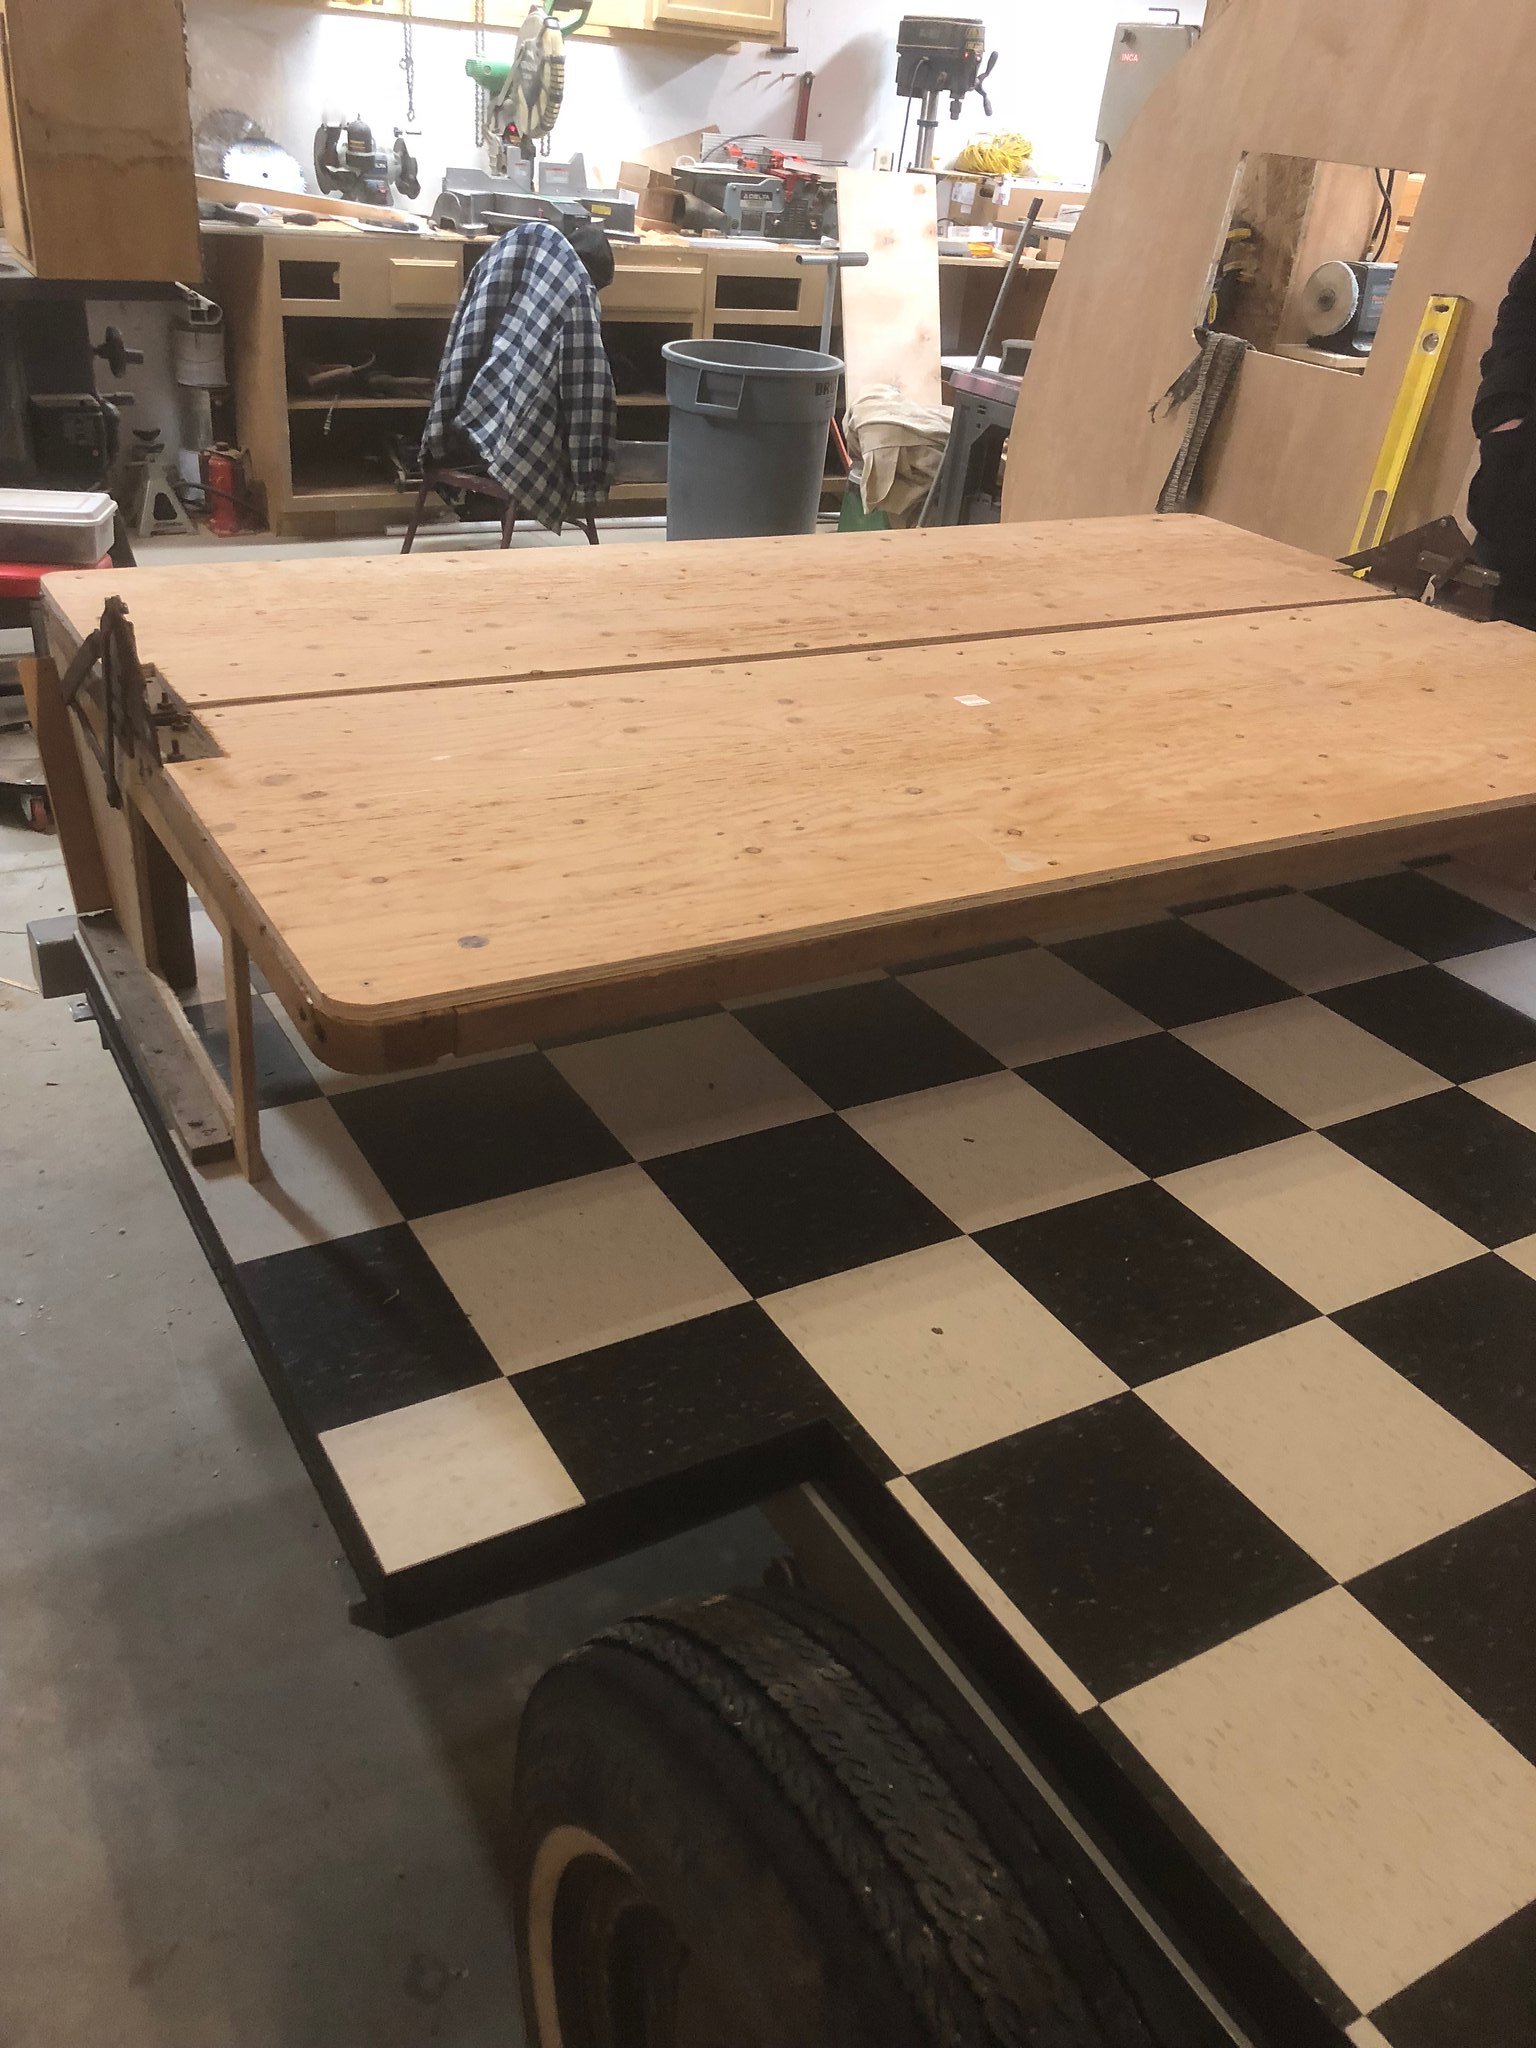 Untitled Untitled by Mike Estrada, on Flickr I should probably wax the floor before putting too much more down. Also worked on stripping the door... ugh. Glad I'm not trying to get to a polished aluminum! My original colors were a colonial white with a maroon bottom with the traditional Terry three stripes. A paint job I hope to copy on my new skin! 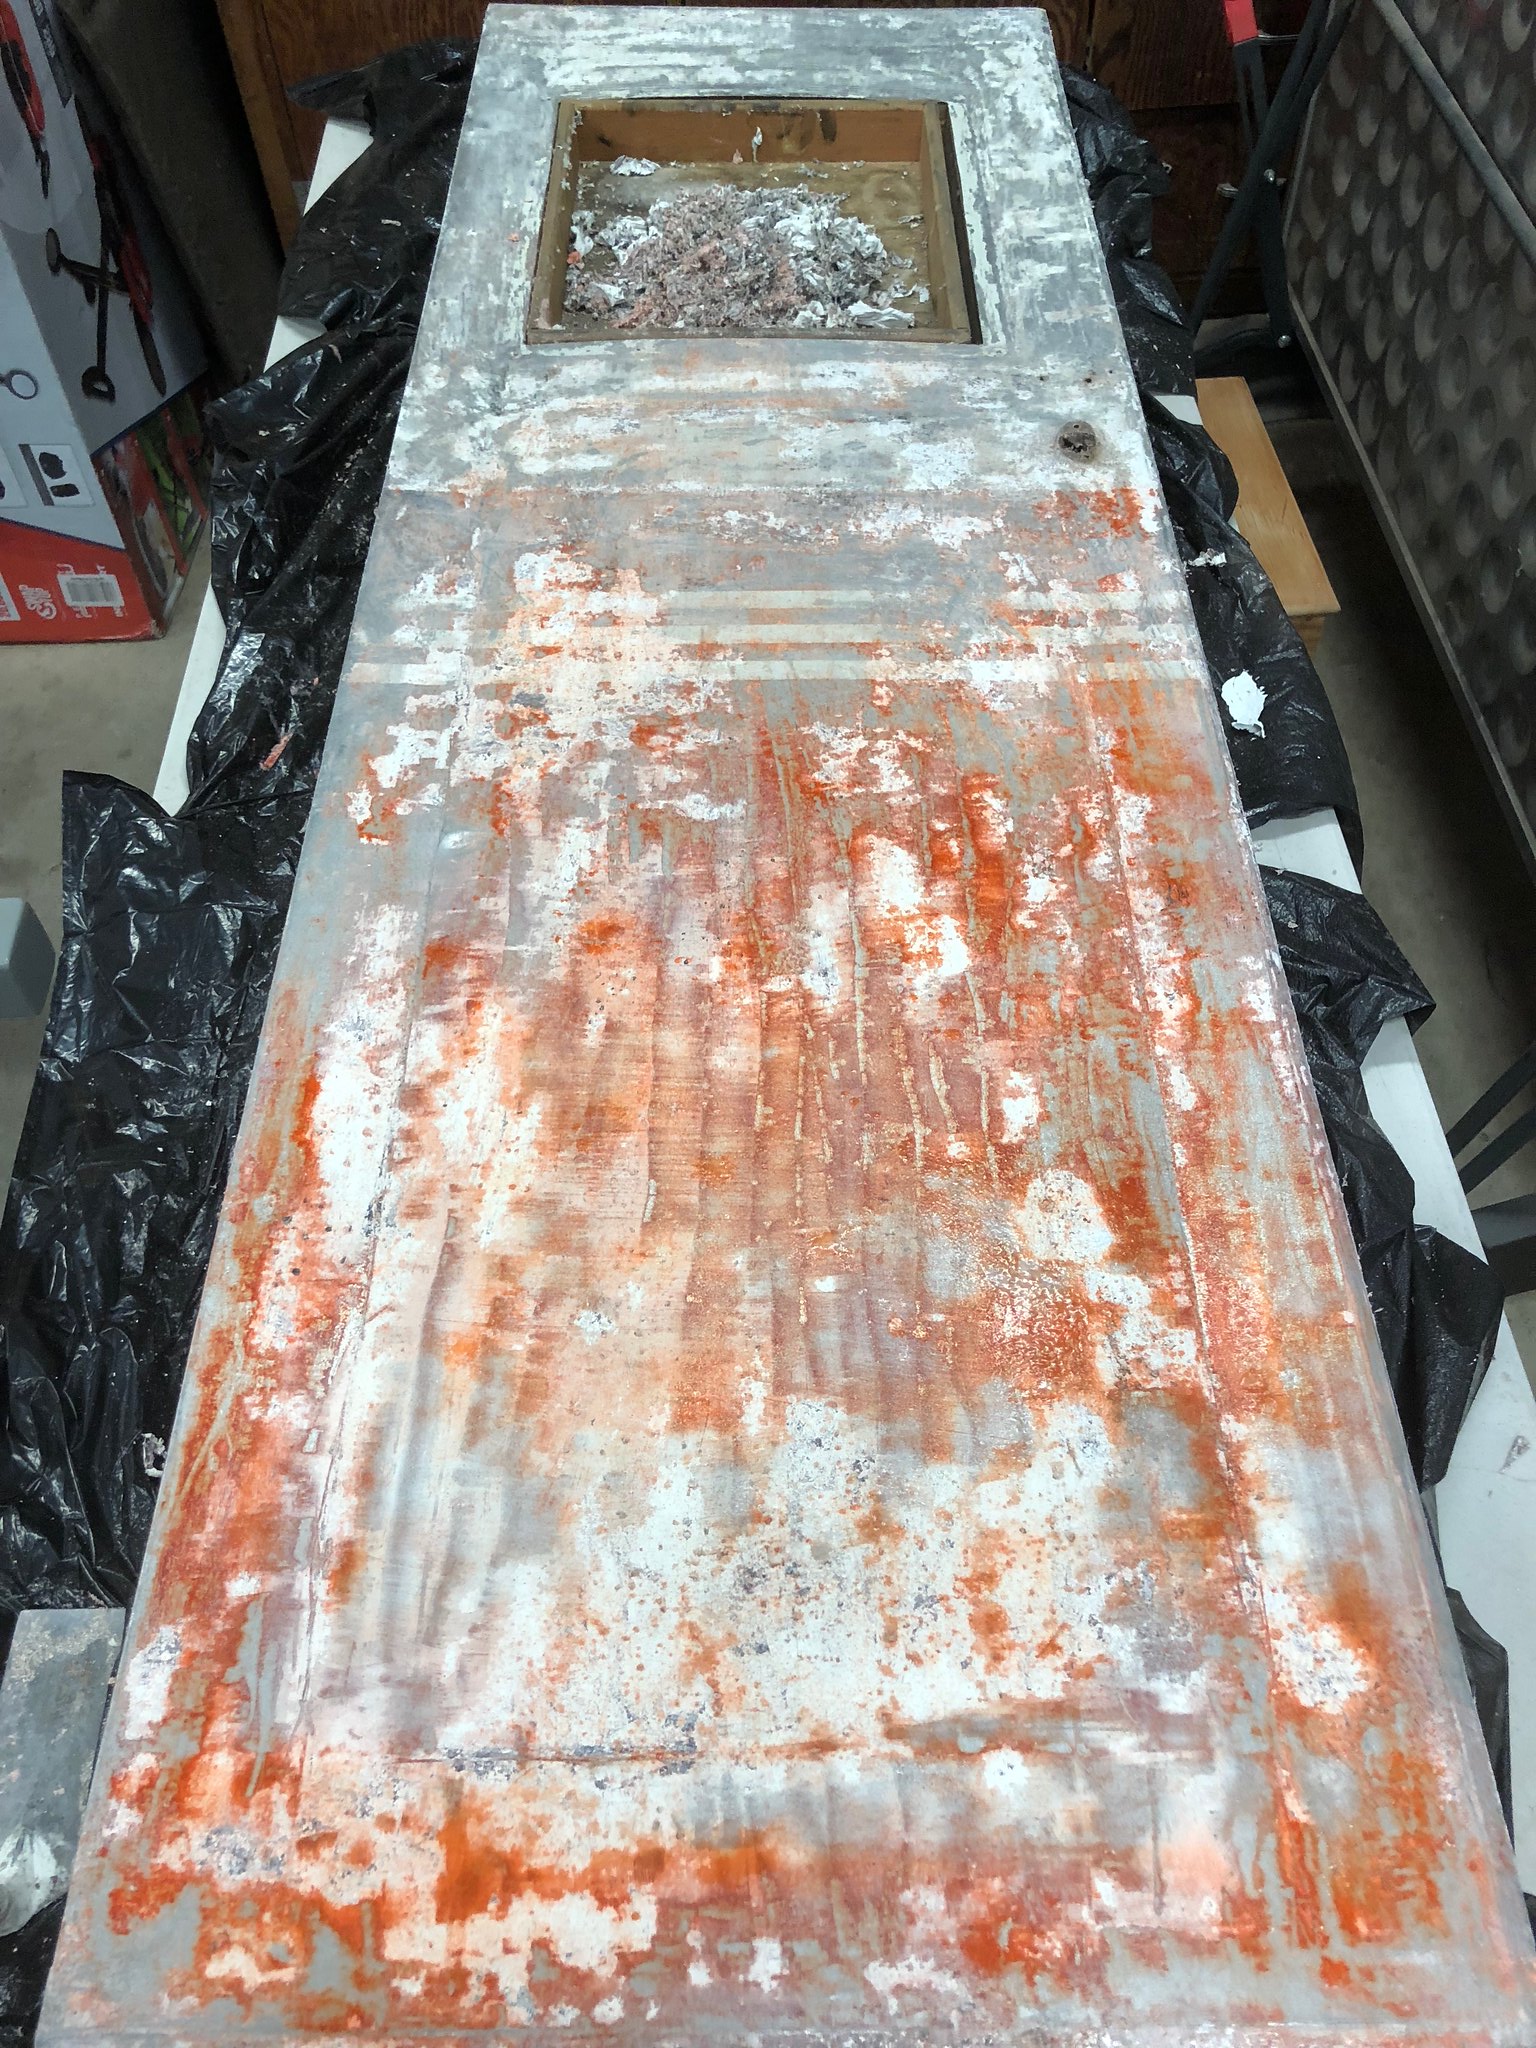 Untitled Untitled by Mike Estrada, on Flickr |
|
|
|
Post by vikx on Mar 3, 2018 20:44:25 GMT -8
Fun to see. Thanks for sharing, Mike. That door looks like a pain...
|
|


 ?
?