roadtripper
Active Member

Posts: 311 
Likes: 116
Currently Offline
|
Post by roadtripper on Jan 11, 2017 7:34:21 GMT -8
Finally got her home in a lull in the storm the other day. She's parked under a new carport cover but it's been raining sideways ever since. The rear sheet comes off as soon as the sun comes out for phase one re-frame. 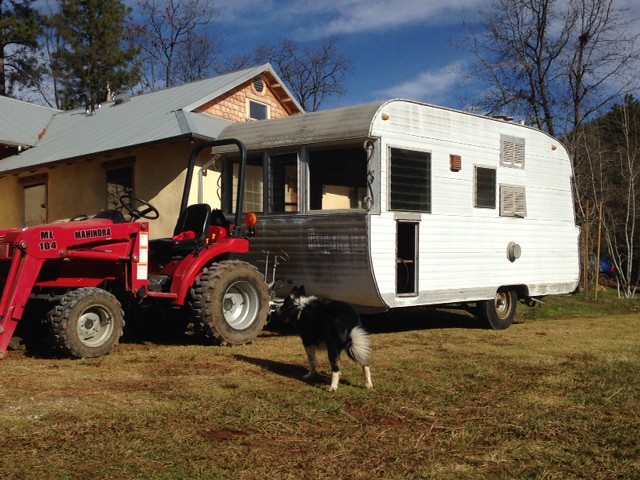 trailer comes home trailer comes home by P. Michael Grayum, on Flickr |
|
mel
Senior Member
 1964 Shasta Airflyte
Posts: 1,729 
Likes: 523
Currently Offline
|
Post by mel on Jan 11, 2017 9:56:27 GMT -8
Love the big front window!
|
|
|
|
Post by vikx on Jan 11, 2017 22:26:30 GMT -8
And the dog...
|
|
roadtripper
Active Member
Posts: 311
Likes: 116
Currently Offline
|
Post by roadtripper on Jan 12, 2017 17:37:37 GMT -8
So first day of getting down and dirty. Demo in the rear where the most obvious problems are. Do you ever uncover stuff and wonder, "What in the world were they thinking?." I think a couple of places might have leaked since it rolled off the assembly line. Well, we'll fix er'. (we hope). 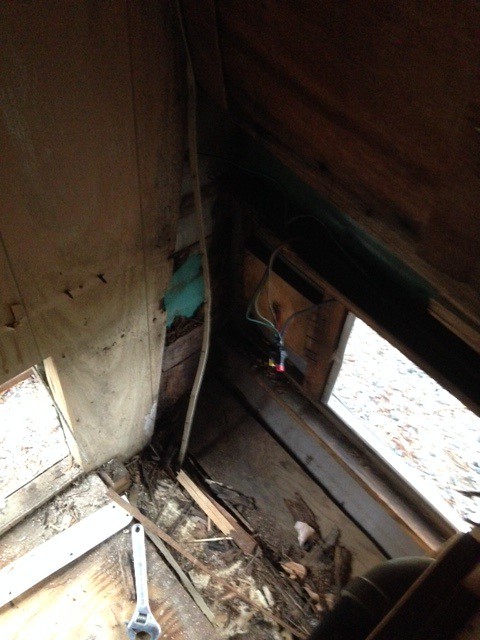 rear demo rear demo by P. Michael Grayum, on Flickr |
|
msgoehring
Full Member
Just call me Margaret the shellac, buff, sand an shine queen.
Posts: 860
Likes: 303
1957 Westerner Deluxe
Currently Offline
|
Post by msgoehring on Jan 12, 2017 20:28:44 GMT -8
Roadtripper haven't I given you my spiel for newbies?? It appears that you're working from the inside out and that's not the right way. Here's what I post for all the new people who are starting work on their trailers: When restoring or repairing a vintage trailer, you must start from the OUTSIDE and work your way in. You must leave the cabinets, closets and other interior items in place because they provide the structural integrity of the trailer. In order to safely and properly repair rot or water damage in a trailer you need to start with removing the skins and shoring up the frame while it is still supported by the interior. You also need to check the boards that hold the body to the frame which are called skirt board (this one is the bottom board of the trailer body) and the sill board (which is attached to the frame to nail or screw the body to) as these are likely to be rotted also. Here is a thread that tells you the names of the trailer frame parts: vintagetrailertalk.freeforums.net/thread/1093/vintage-trailer-framing But before you even remove a piece of skin, paneling or anything else please, please check out these following two resources that are available from members of this forum who restore and repair vintage trailers for a living. They have been a complete life saver not just for me, but for many others. You have no idea of what can happen if a trailer is not repaired correctly, but one thing is you can be driving down the road and the entire body of the trailer will come off the frame like this one did:  The first resource is mobiltec. He makes videos and posts them on YouTube of his work sharing how to do everything on a trailer from start to finish. His website is: www.cannedhamtrailers.com and I recommend you watch this video first so you better understand why these things have to be repaired from the outside in: www.youtube.com/watch?v=hDdpZgSD1JM . He does all these videos for free to help others who are interested in vintage trailers, but he does appreciate donations from his website if you feel he's been a help and are so inclined. Next is a wonderful repair manual put together by another long time member that restores trailers, whose forum name is vikx. You can find the manual here : vintagetrailerrepairmanual.weebly.com My husband doesn't do computers so this manual has become very important to him as we work to do a frame off restoration of our 57 Westerner Deluxe travel trailer. You're going to find it's much easier to get all the rot when you work in the correct order. |
|
roadtripper
Active Member
Posts: 311
Likes: 116
Currently Offline
|
Post by roadtripper on Jan 13, 2017 6:43:58 GMT -8
Hi, Thanks, and yes I've read your outside-in info and have seen the picture, and watched the videos. Soon as I posted my picture of this I thought it might look like inside out to some, but it's not. The whole rear skin is loose for but 2 screws, and one side is loose near the rear, with the first bottom piece off behind the wheel. What you see is a view from the interior closet where the water heater was I removed through the exterior. All cabinets are still in place and all paneling except a couple of square feet that you see that had just vanished. It was raining yesterday (last 2 weeks actually) and I was just waiting for that to end before I let the skin off---maybe today I'm hoping. Thanks for keeping an eye on us new guys.
|
|
|
|
Post by vikx on Jan 13, 2017 20:52:17 GMT -8
Good on ya, Roadtripper!
|
|
mobiltec
5K Member
 I make mistakes so you don't have to...
Posts: 9,822
Likes: 3,749
1954 Jewel In Progress...
Currently Offline
|
Post by mobiltec on Jan 14, 2017 18:43:47 GMT -8
I have a special place in my heart for TravelEZE trailers. Kenskills also... They are a lot alike.
|
|
roadtripper
Active Member
Posts: 311
Likes: 116
Currently Offline
|
Post by roadtripper on Apr 18, 2017 13:53:28 GMT -8
Going to try and bring this up to date as I have some down time out of town. No guarantee on pictures. Just missing something there.
So far has been very enjoyable even though the time involved is mind boggling. And building stuff is really all I know how to do. I see posts where some do this completely in a few weeks... beyond me. Guess I do too much head scratching on how to do something a little better, stronger, cleaner?
I removed all the skins. Saved all but the top which will go on as one sheet. Found some wide and long and the .032 through a guy Steve at hv told me about.
Rebuilt all 4 corners, beefed up the studs and blocking in a few spots, re did some of the skirting and the rear 2' of floor, and total new roof. On the roof I made mostly new rafters (used poplar) and all new paneling (oak). Some is 1/8 and some 1/4 as was the old. The old wasn't too bad, was just luan with a fake oak paint job on it and after going that far just couldn't live with it. Keeping most of the cabinet framework but did almost all new oak face frames. Going to re use drawers and doors but re skin with new 1/8 oak. By the way our local small town supply has 1/8 and 1/4 oak and birch ----very nice stuff--- in stock all the time at under 25 bucks a sheet.
Took out and re did all the windows and they are ready to go back in when the time comes.
still a lot to do but think I can have phase one ----clean, safe, strong with new 12 v and water soon. Then out for some fishing.
Will try and get some pictures up, otherwise I guess use you're imagination. I know most of you have been through all this and can picture it. And thank you all for the tips so far....from my questions and from what I pick up browsing through.
|
|
|
|
Post by vikx on Apr 18, 2017 21:26:42 GMT -8
Roadtripper, "most" of us do not build a trailer in a "few weeks". I highly doubt a build can done be correctly that quickly. Sure, if you're changing it all out from vintage to modern, things can move right along. Attention to detail and saving everything you can is worth it to me. Should be to all of us...
|
|


