theresa
1K Member
 from Northern Maine ~ Proud new owner of Lola, a 1960 Shasta Airflyte and Pearl, a 1962 Mobile Scout
Posts: 1,055 
Likes: 347
Currently Offline
|
Post by theresa on Jul 28, 2016 17:59:17 GMT -8
If you've done a frame-off restoration by lifting the cabin, either by jacking it up or by whatever means, what did you do with your closet? I have been able to get the sink/kitchen cabinets out, but I'm struggling with what to do with the tall floor to ceiling closet and attached cabinets?
My original plan was/is to put in supports, detach the walls from the frame, then lift the entire cabin off the frame by hoist/pulley system (not completely thought out at this point). Then I can quickly and easily remove the old sound board and ply, and replace everything by having the cabin off. Then put it back into place and being replacing the birch panels, etc.
But right now, I'm unsure how exactly to get the closet and cabinets out without completely destructing and rebuilding them?
Maybe I'm overthinking it? Maybe my plan isn't a good one to start with?
|
|
|
|
Post by vikx on Jul 28, 2016 21:27:39 GMT -8
I had to do that to the Red Dale. With all the skin and roof off, I jacked it up with everything in place until the closet fell on my head. LOL. We put heavy 2 x 4s the length of the outside framing and tied heavy straps to the rafter pulley system. It worked pretty well in the lean to and no wind to contend with. Go slow and easy. Safety is upmost when lifting a body.   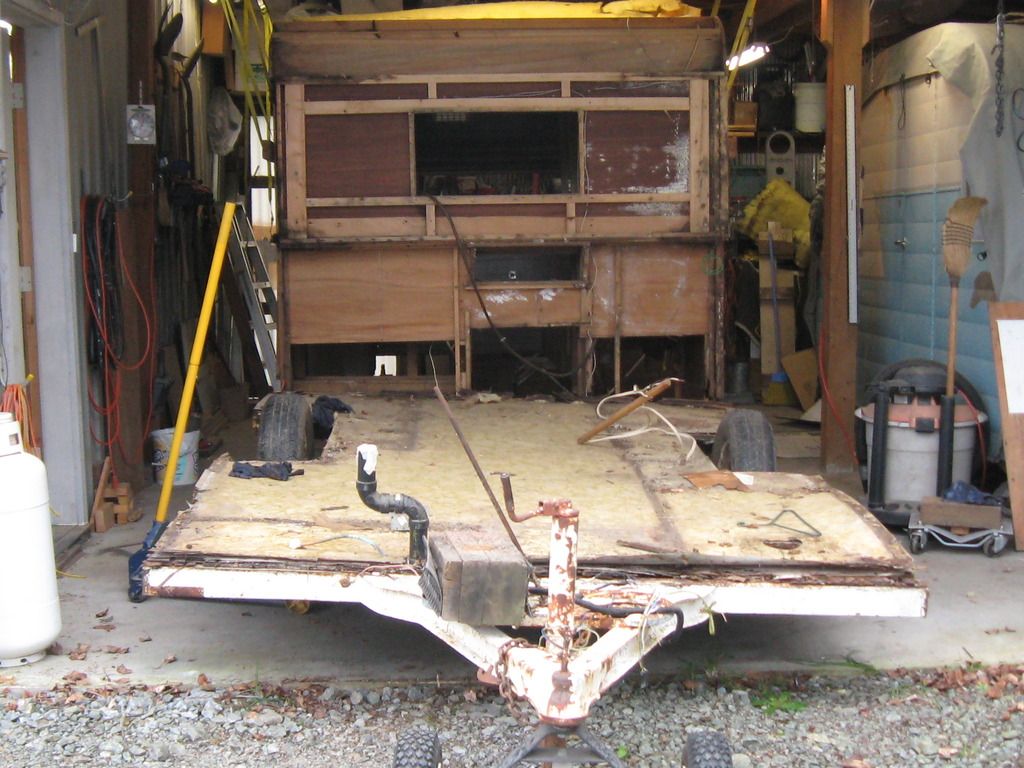 |
|
theresa
1K Member
from Northern Maine ~ Proud new owner of Lola, a 1960 Shasta Airflyte and Pearl, a 1962 Mobile Scout
Posts: 1,055
Likes: 347
Currently Offline
|
Post by theresa on Jul 29, 2016 3:56:51 GMT -8
vikx that's almost exactly what I want to do vikx, except I'm not sure what to do with my closet to get to that point? (this is in my Shasta Airflyte). I'm having a tough time figuring how to get it out, or apart, or what to do with it.
|
|
|
|
Post by danrhodes on Jul 29, 2016 5:23:33 GMT -8
My closet is attached at the ceiling and walls. I think if I unscrewed the floor, it would just rise up with the body. It only weighs about 40 lbs without the door and I could move it easily alone. That being said, I contemplated doing what you are planning, except with sawhorses. After just a few inches, I totally chickened out and took it apart like RinTin...makes working on each piece much easier and safer overall. |
|
|
|
Post by vikx on Jul 29, 2016 9:58:20 GMT -8
I didn't remove any interior cabinets except the closet that fell on me. Front kitchenette, potty closet, dinette framing was all there, just detached from the floor. Believe me, I didn't want to do it, but there was no way to replace the floor without.
|
|
RinTin
Full Member

Posts: 760 
Likes: 292
Currently Offline
|
Post by RinTin on Jul 29, 2016 10:12:58 GMT -8
Theresa,
On my 65 Aloha, the tall cabinet was fastened with screws from both the inside of the cabinet and from the outside through the ceiling, wall paneling and framing. There may have been a few nails as well. You will have to examine and figure out how the cabinet is fastened on your trailer.
Once the tall cabinet is loose you can either lift the body up high enough to lay the tall cabinet down and slide it out, or you can remove the bottom piece of paneling from either end and slide it out through the opening.
That being said, unless you are trying to retain the ceiling paneling by keeping it intact, it is much faster, safer, and easier to remove the ceiling framing and paneling and then remove the walls versus lifting the entire body. However, if you do remove the ceiling framing and paneling and also plan to re-use your roof skin, you will need to carefully note and replace the framing so the re-framed window and vent openings land in the exact location as original or you risk the roof skin not fitting correctly.
Another issue is that just like people as we age, your trailer body has sagged and settled into its current condition. Rebuilding your trailer body from the floor up will create a new framework to hang the old skin on which will almost certainly not be the exact same dimensions as before. This is not an issue for the sides as much as it is for the roof. If after re-framing, your walls are either taller or shorter than before, it changes the entire circumference of the ceiling which will affect where the roof skin lands. Can you see how this can be an issue? This is why we suggest erring on the short side so the worst that happens is you have to trim a little excess metal.
If you will be using new roof skin, which is what I prefer, all these issues go away.
|
|
theresa
1K Member
from Northern Maine ~ Proud new owner of Lola, a 1960 Shasta Airflyte and Pearl, a 1962 Mobile Scout
Posts: 1,055
Likes: 347
Currently Offline
|
Post by theresa on Jul 31, 2016 5:30:44 GMT -8
Theresa, On my 65 Aloha, the tall cabinet was fastened with screws from both the inside of the cabinet and from the outside through the ceiling, wall paneling and framing. There may have been a few nails as well. You will have to examine and figure out how the cabinet is fastened on your trailer. Once the tall cabinet is loose you can either lift the body up high enough to lay the tall cabinet down and slide it out, or you can remove the bottom piece of paneling from either end and slide it out through the opening. That being said, unless you are trying to retain the ceiling paneling by keeping it intact, it is much faster, safer, and easier to remove the ceiling framing and paneling and then remove the walls versus lifting the entire body. However, if you do remove the ceiling framing and paneling and also plan to re-use your roof skin, you will need to carefully note and replace the framing so the re-framed window and vent openings land in the exact location as original or you risk the roof skin not fitting correctly. Another issue is that just like people as we age, your trailer body has sagged and settled into its current condition. Rebuilding your trailer body from the floor up will create a new framework to hang the old skin on which will almost certainly not be the exact same dimensions as before. This is not an issue for the sides as much as it is for the roof. If after re-framing, your walls are either taller or shorter than before, it changes the entire circumference of the ceiling which will affect where the roof skin lands. Can you see how this can be an issue? This is why we suggest erring on the short side so the worst that happens is you have to trim a little excess metal. If you will be using new roof skin, which is what I prefer, all these issues go away. The original ceiling framing is nonexistent, per se', as the PO removed it from the inside and replaced it with beefier framing, which was unsightly and didn't fit well. They also replaced and/or painted every single panel in the trailer. So basically the skin is the only original thing that will remain, with the exception of the cabinets and the few trim pieces that I can strip the paint from. As a complete floor replacement is necessary, this is the easiest, quickest method I can see of replacing the flooring. Side note, the roof skin IS still attached, and I have replaced the integral wall framing that needs to be fixed already. SaveSave |
|
|
|
Post by danrhodes on Jul 31, 2016 5:51:04 GMT -8
Read through RinTin thread... He tried lifting the body and realized it really is easier to just take it apart and repair the walls separately. You can then reframe and shellac each ceiling panel and drop them right into place. I did the same. |
|
msgoehring
Full Member
Just call me Margaret the shellac, buff, sand an shine queen.
Posts: 860
Likes: 303
1957 Westerner Deluxe
Currently Offline
|
Post by msgoehring on Jul 31, 2016 9:11:02 GMT -8
Yeah, Theresa, after reading RinTin's thread Sam and I decided it just wasn't worth the trouble of lifting the body like we had originally planned. It really has turned out to be easier and better this way. But if you do decide to lift the body, just be very careful and brace stuff so it doesn't warp on you.
|
|


