mckaylife
Junior Member

Posts: 88 
Likes: 42
66 Shasta Super 18
Currently Offline
|
Post by mckaylife on Apr 22, 2016 11:03:49 GMT -8
I am new to VTT and just wanted to start a thread on the Super 18 I am starting to work on. This is my first trailer. Last summer on a trip to visit family in the NW from Oceanside, CA we found this trailer on CL. We had been toying around with the idea of buying a trailer for some time. We have 3 young kids and we have been passing on our love of camping with our children as my wife and I have been tent campers since we were young. All though we love tent camping we are hoping that getting a trailer will enable us even more time out on the open road discovering cool places. Back to the trailer... The goods.. Well she has her wings! Most of the original pieces inside and out are still there. That includes the bunk, the stove, heater, water heater, water tank, fridge. She can easily sleep our family of 5. The bottom is clean no crashes or bends that are immediately concerning. The bads.. Water damage galore. She was purchased in Washington and I think she spent most of her days in Bremerton where they get plenty of rain. All 4 corners are no bueno. Lots of silicone all over the drip rail. The roof is not saggy or rotten so the water damage may be limited to the corners. The original rear window (which I hear is quite a leaker) is no longer there it was replaced by some home grown metal/plexi glass number. The bathroom wall was removed and the toilet is gone. The rear bumper is currently a pressure treated 4X4. The roof appears to have had some sort of treatment on it, I would imagine some sort of water proofing. For San Diego we have had plenty of rain this winter, so I have only started working on her last week. In my research I have found that luckily within driving distance is Hemet Valley RV where i can get new drip rail and siding if I need it. I am curious about the inside paneling. I know we are going to need some new pieces I wonder if that is something that can still be found or if I should plan on gutting all of it and replacing with wood (which I hear has its own set of sourcing problems). Also the back window if anyone has insight of where one may find a window for the rear.  Here she is last summer at my parents house in Hood River Or  Here she is on the Southern Oregon Coast. We drove her home coastal since we had our Honda Pilot and not my Tundra. A little easier going with the slower speed limits.  We spent a few days camping in her on the way down. Stove works, not sure about the water or fridge situation.  Here you can see the wood paneling and above the pillows some wood they used to patch up some water damage  Now the fun begins. Have a look at that rot!  Here is the back window that might be leaking  (not sure why but the image is displayed upside down) I have a bunch more photos that will post shortly. I have removed all the windows and exterior covers that way i can pull the skins to access the rot situation. It appears I am not the only 66 Super in the works  |
|
|
|
Post by vikx on Apr 22, 2016 21:04:50 GMT -8
Welcome Mckaylife! It's a cute trailer and fixable. Sorry about the silicone but that's the PO norm.
You might try unfinished birch for paneling. That's about as close to "blonde" as you're going to find. I recently did a 66 Kit in the back and it's hard to tell the difference. Some tasteful trim sticks help at the seams and you can get a sort of tan paint to blend.
|
|
modernme
Active Member
Posts: 206
Likes: 74
1966 Shasta Super 18'
Currently Offline
|
Post by modernme on Apr 22, 2016 22:23:06 GMT -8
Welcome to the board! I'm glad to see another Super in the process. Mobiltec has mine underway. We are re-doing the interior paneling also. I couldn't find the exact original paneling so we are using Almondine Elm from Mantelcraft. It is a bit lighter and the grooves are not white, but it is the same 9 panel pattern. It was as close as I could find.
|
|
mel
Senior Member
 1964 Shasta Airflyte
Posts: 1,729 
Likes: 523
Currently Offline
|
Post by mel on Apr 23, 2016 3:33:51 GMT -8
Menards has a larger in store stock of wood paneling, I recall seeing a lighter wood paneling color there, but I dont remember how light it was.
|
|
RinTin
Full Member
Posts: 760
Likes: 292
Currently Offline
|
Post by RinTin on Apr 23, 2016 5:05:05 GMT -8
Welcome McKaylife, Nice trailer, looks like you are now in it for the long haul. Don't expect to be camping in it this summer, unless you are working on it full time, and work very fast.
Funny that you are from S.D. and picked your trailer up north here. I live about 30 minutes from Bremerton and spent 5 beautiful days on Coronado Island in late February, just before the rains came.
Nothing beats kids and camping. We camped with our kids growing up and as young adults they continue to love the outdoors and getting out there. Having a vintage trailer will add a fun dimension to their experience that I assure you they will always remember fondly.
|
|
mckaylife
Junior Member
Posts: 88
Likes: 42
66 Shasta Super 18
Currently Offline
|
Post by mckaylife on Apr 25, 2016 10:45:42 GMT -8
Thanks for the tips on wood. Depending on how far the rot goes back in the footers will determine if I salvage and match, or just rip all the walls out and start over. I am pretty realistic about not camping with the trailer this summer. I am a work from home Software Engineer. Without the commute I am able to work on her everyday so we will see how far that gets me Here are some more photos of my progress.  All the windows, doors, and covers are off.  I have not removed the water inlet yet, I would like to keep and am worried I will break it taking it off. Been spraying it with a thread treatment to hopefully get it off easier. 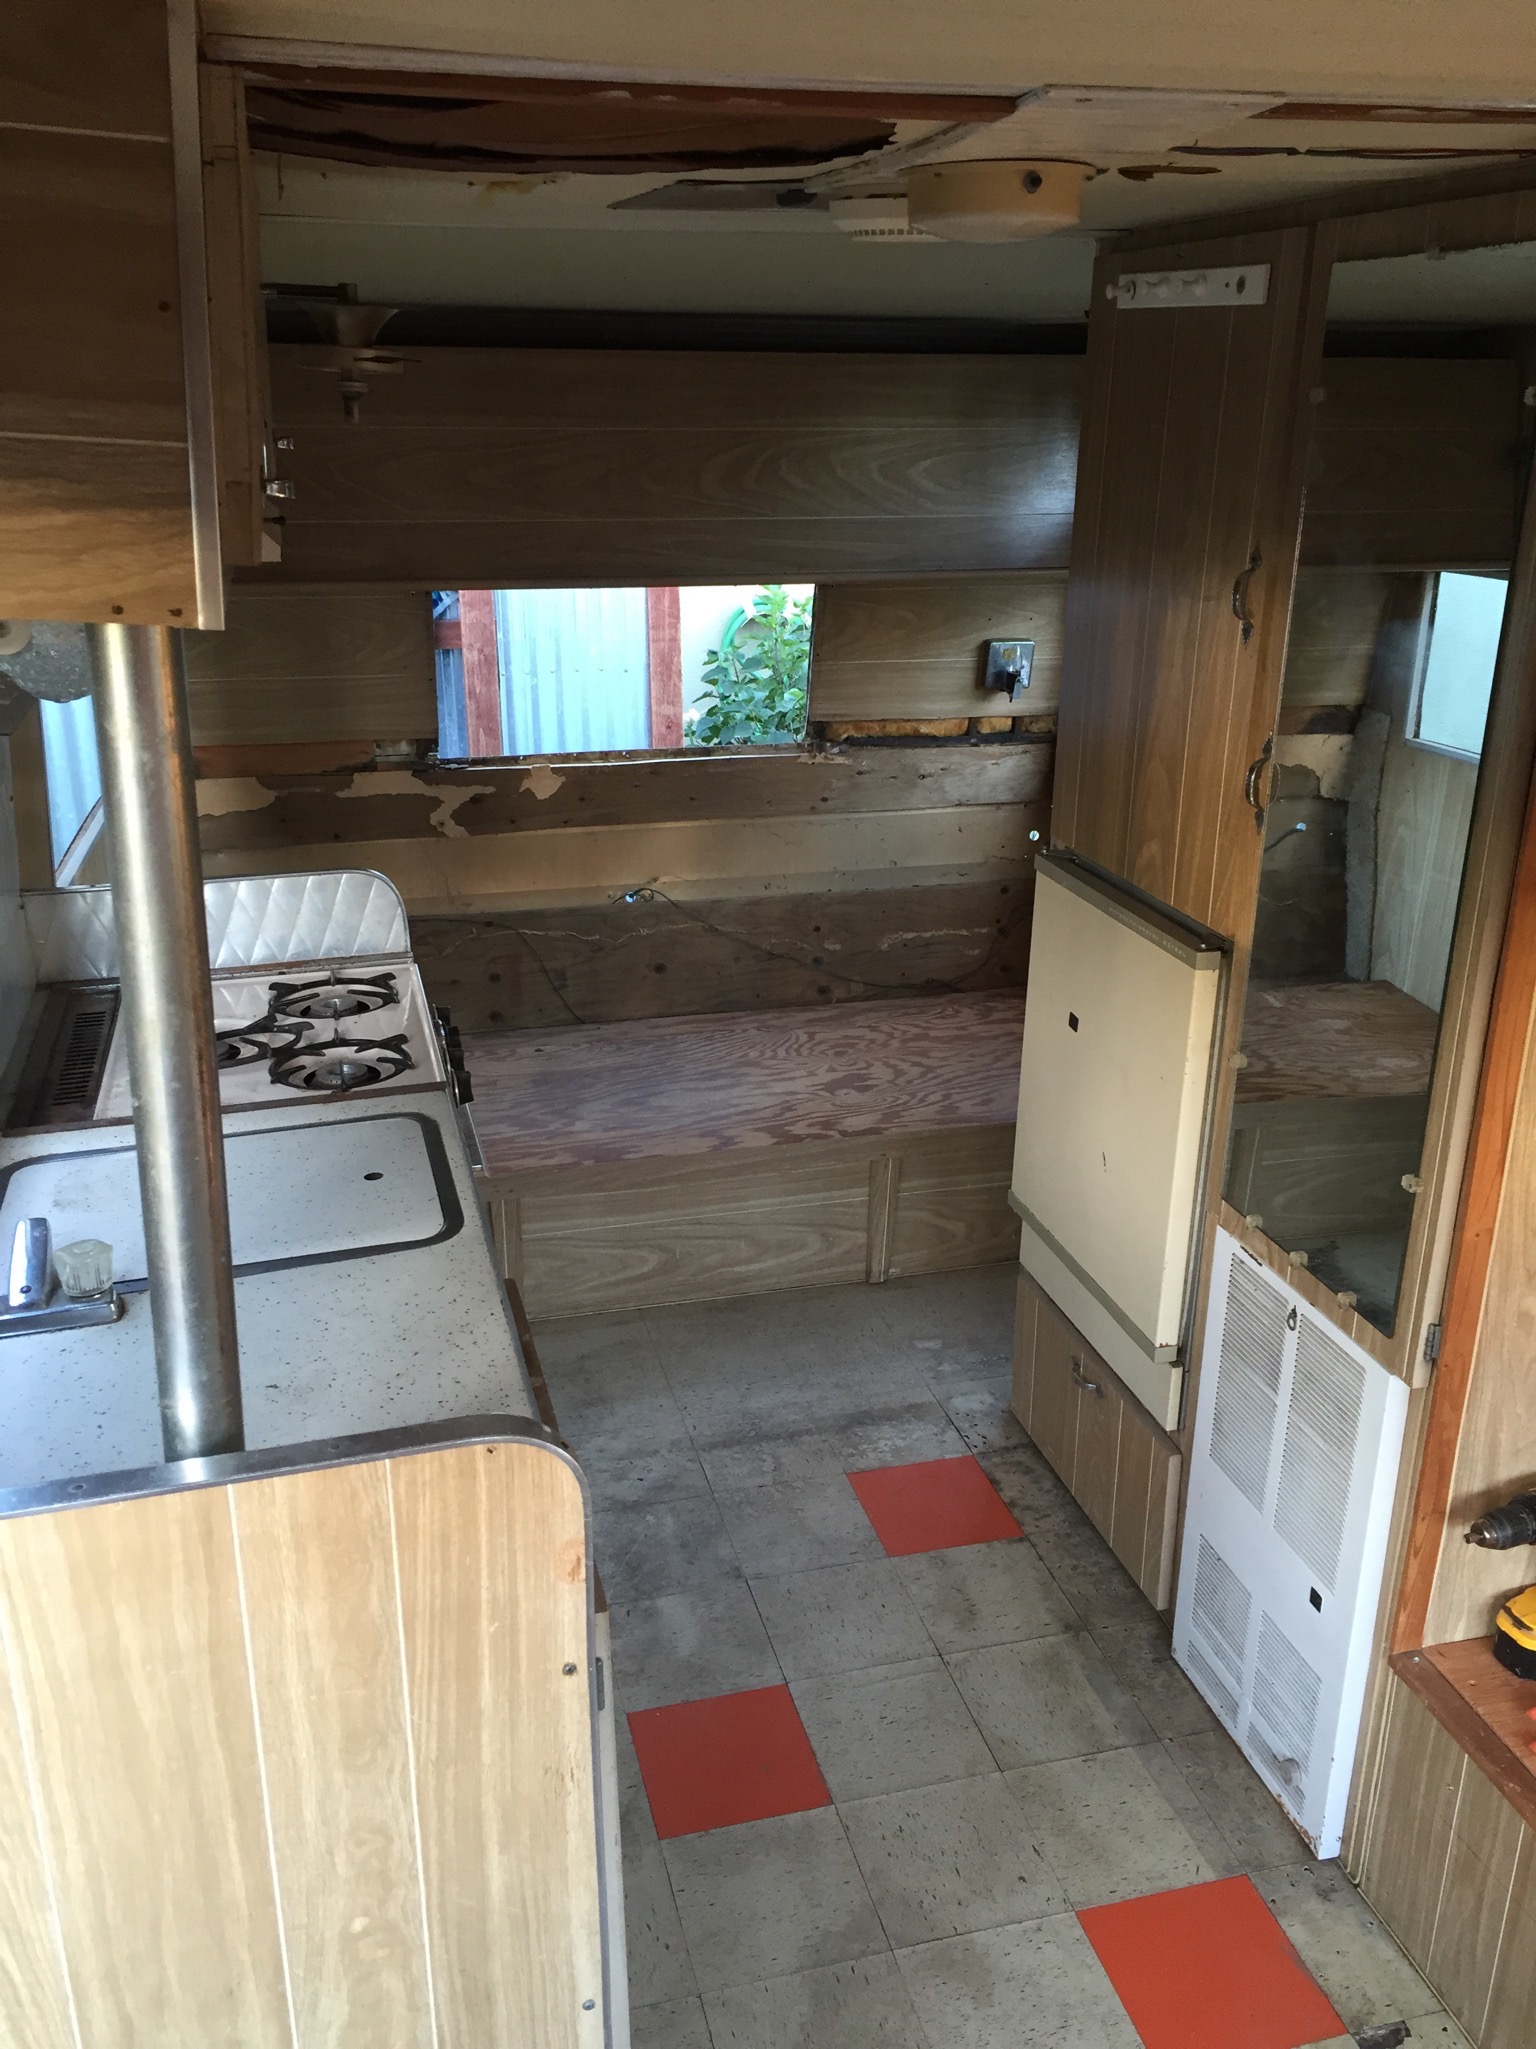 Pulled the carpet that was stapled down and cut into one of the ceiling panels to see if it was water damaged and guess what? It was damaged. I am hoping it was just due to the vent leaking.  The view from the back window. Lots of light.  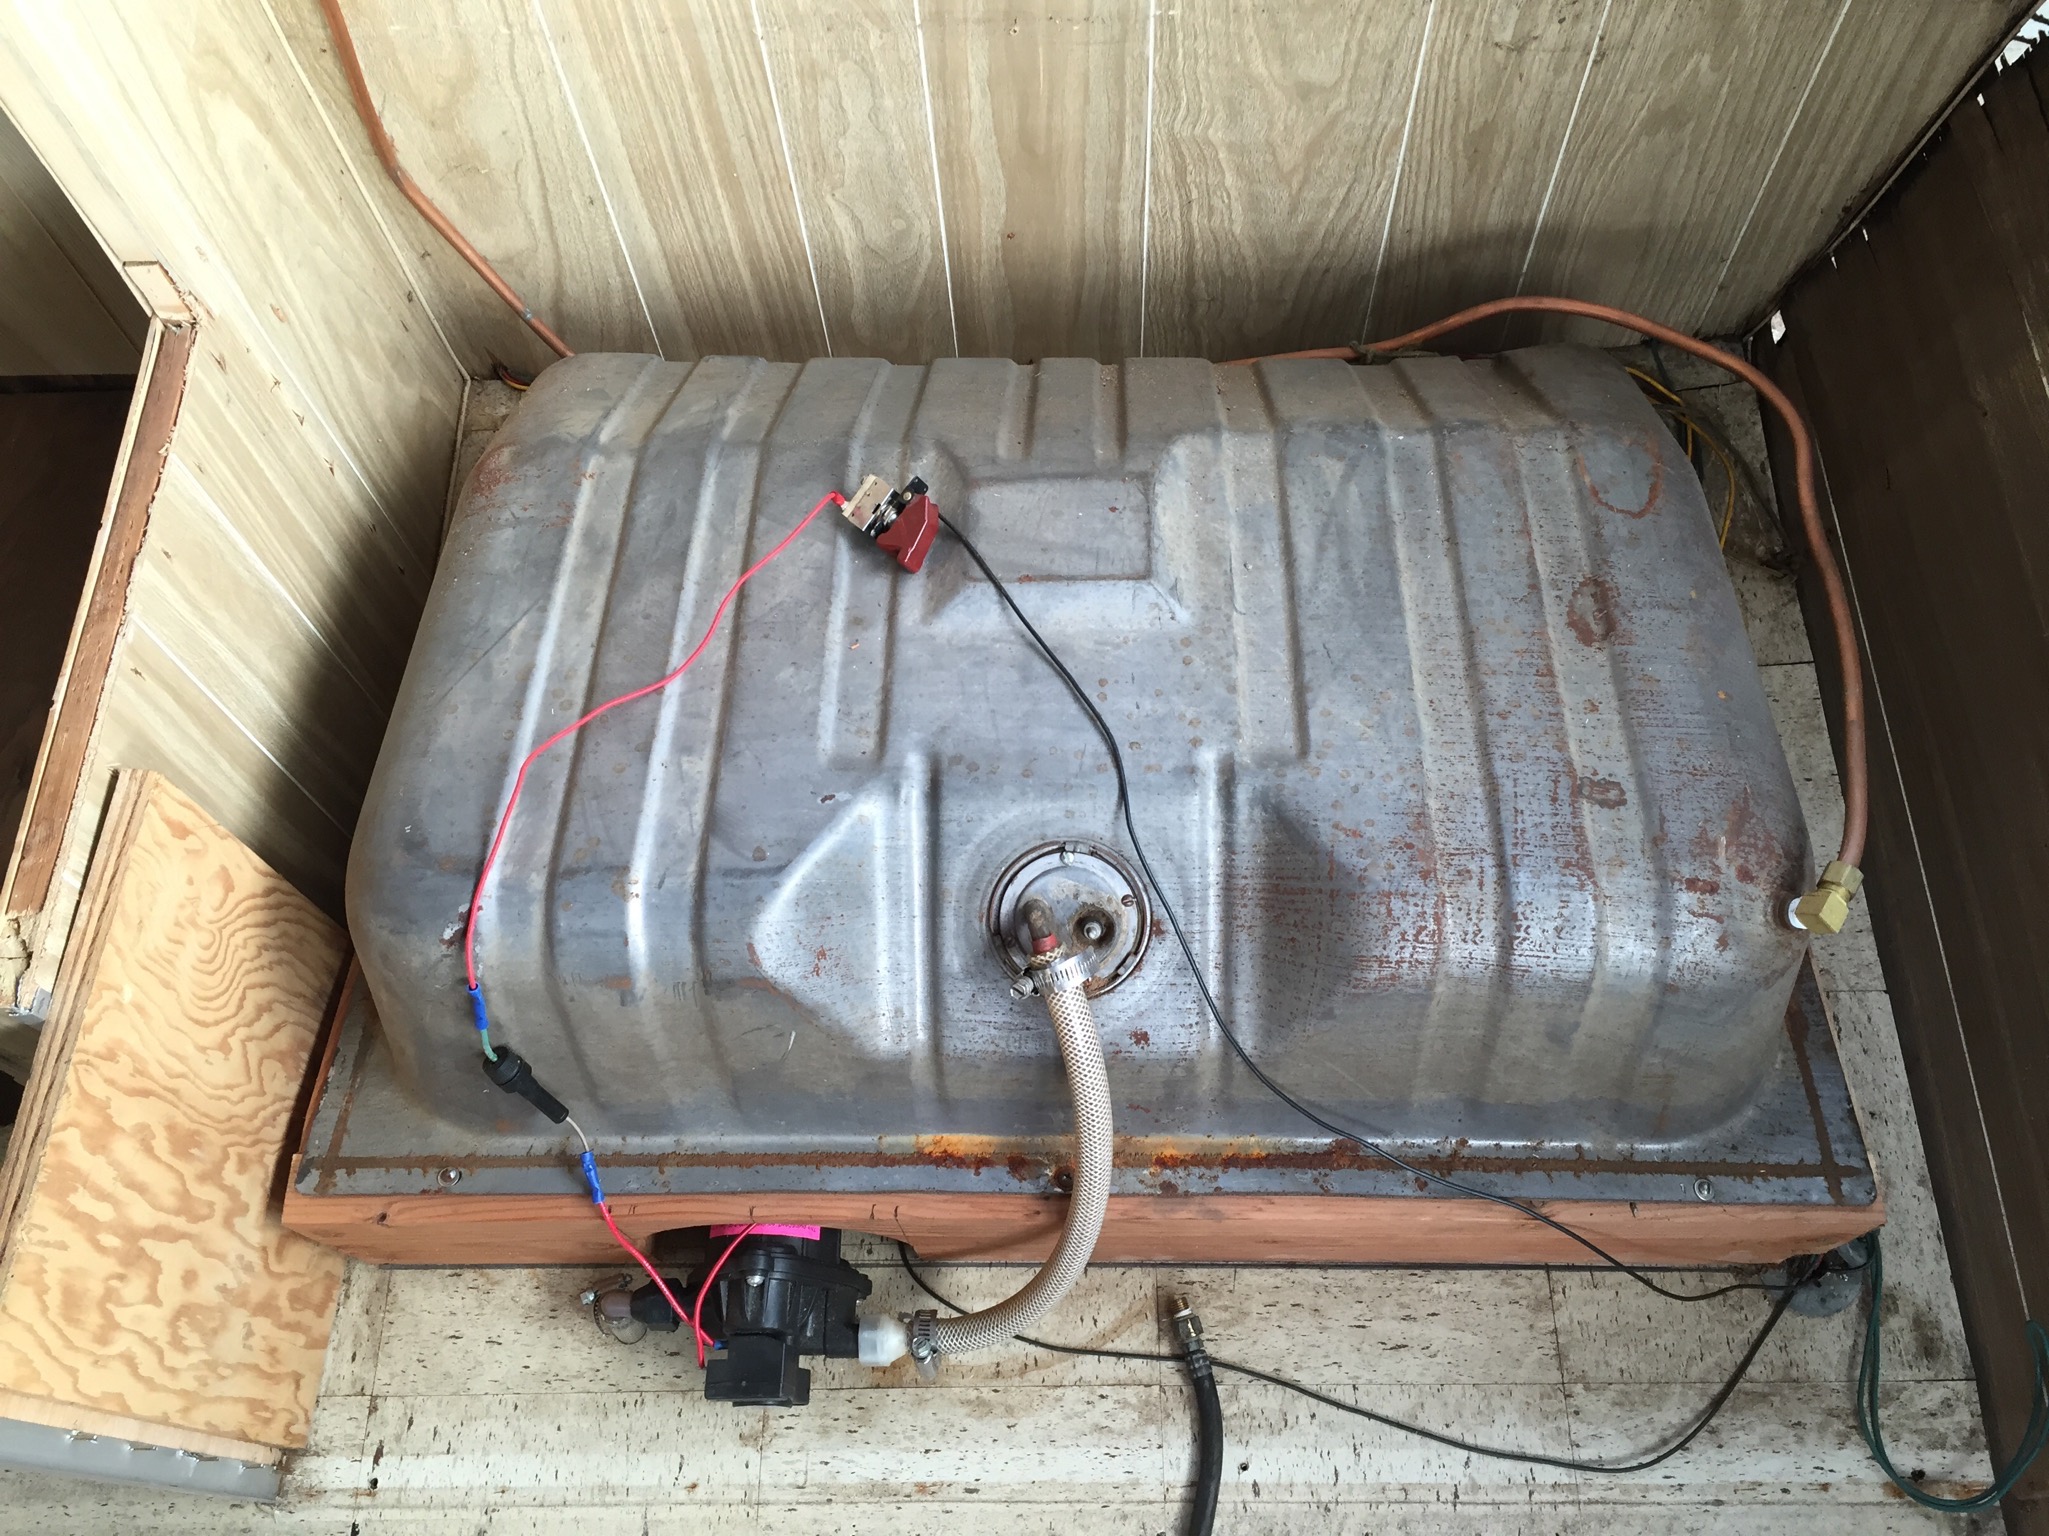 Front seating and cabinets are out. Is that the grey water tank that was under the driver side seat? The pump itself looks new but not too sure I understand how it works. seems like a small input line through the pump and that water line out the right was not hooked up to anything. |
|
mckaylife
Junior Member
Posts: 88
Likes: 42
66 Shasta Super 18
Currently Offline
|
Post by mckaylife on Apr 25, 2016 12:59:01 GMT -8
Funny that you are from S.D. and picked your trailer up north here. I live about 30 minutes from Bremerton and spent 5 beautiful days on Coronado Island in late February, just before the rains came. I went to HS in Kent/Covington area. My parents live in Hood River now but my wife's parents still live in Covington. Each summer we spend a month or two in the NW visiting friend and family. Trailers in So Cal are pricey. We paid 1700 for that in the NW and I feel like the same trailer down here would be double that at least. |
|
modernme
Active Member
Posts: 206
Likes: 74
1966 Shasta Super 18'
Currently Offline
|
Post by modernme on Apr 25, 2016 13:13:01 GMT -8
Looks like the bathroom wall is cut out?
|
|
mckaylife
Junior Member
Posts: 88
Likes: 42
66 Shasta Super 18
Currently Offline
|
Post by mckaylife on Apr 25, 2016 15:41:54 GMT -8
Looks like the bathroom wall is cut out? Yeah they did. Thankfully they left all the plumbing and it appears to be intact. Will attempt to recreate the bathroom. |
|
Ten
3K Member

Posts: 3,432
Likes: 1,467
70 Shasta 16SC + 1964 Airflyte
Currently Offline
|
Post by Ten on Apr 25, 2016 16:54:47 GMT -8
Any holding tanks for waste water would have been situated underneath the trailer, and I am not 100% sure but I do not believe that Shasta ever installed any grey water holding before the Coachmen era, post-1975. That tank looks like a gas tank from a sedan to me....
|
|
mckaylife
Junior Member
Posts: 88
Likes: 42
66 Shasta Super 18
Currently Offline
|
Post by mckaylife on Apr 25, 2016 22:52:25 GMT -8
Any holding tanks for waste water would have been situated underneath the trailer, and I am not 100% sure but I do not believe that Shasta ever installed any grey water holding before the Coachmen era, post-1975. That tank looks like a gas tank from a sedan to me.... Oh man.... I will have to look more closely underneath and snap some good photos but looks like this is a home made grey water tank out of like you said an old gas tank. The pump in the photo is tied in to the drain that is coming from the sink in the kitchen / the bathroom shower and sink. I think the pump is there to overcome the whole gravity issue with the tank not being under the trailer. I have not tested this system but the obvious flaw that I see is look how small the hose from the drain is that pumps water into the tank. I would think after a while this would get pretty clogged from grease and grime that ends up in your plumbing from the sink. I like the idea of having a grey water tank attached guess I will have to do some more research on the topic |
|
mckaylife
Junior Member
Posts: 88
Likes: 42
66 Shasta Super 18
Currently Offline
|
Post by mckaylife on Apr 28, 2016 10:58:34 GMT -8
Since i am having to replace the subfloor in the front I had to remove the homemade gray tank. Sure am glad I did. The whole bottom is rusted out! Looks like they did quite a number on the floor with the leaking too.  Besides the bad idea of using a metal gray water tank they did a pretty good job  Won't be hard to remove the diversion that they added. Did these trailers use black abs back in the day or has all of that been replaced?  Look at all of those holes yikes!  This was my first tip that the rust was an issue.  All that flooring was sucked up with a shop vac. That is either a super rotten floor or a very strong shop vac!  Here is a shot of the removed bathroom. The black water tank seems to be intact with no damage so hopefully we can put a toilet back in. Not going to try and put an indoor shower in there. With kids I feel like that is a recipe for disaster. We will try and add an outdoor shower instead. |
|
mckaylife
Junior Member
Posts: 88
Likes: 42
66 Shasta Super 18
Currently Offline
|
Post by mckaylife on May 4, 2016 13:54:29 GMT -8
I learned a good lesson this past weekend working on the trailer. Order matters! I realized that I did not take the roof vent off before pulling the front and back of the trailer apart. When it came time to crawling up there I realized I was not confident even with some wood supports up there that I would be safe. So.... I had to squeeze through the vent to remove the 16 screws! This was screws covered in goop that i had to grind flat heads into to get out. This is when being 6'3 with wide shoulders is not an advantage!  I felt bad about ruining the old vent, but I plan on replacing it with a Fantastic Fan anyways. 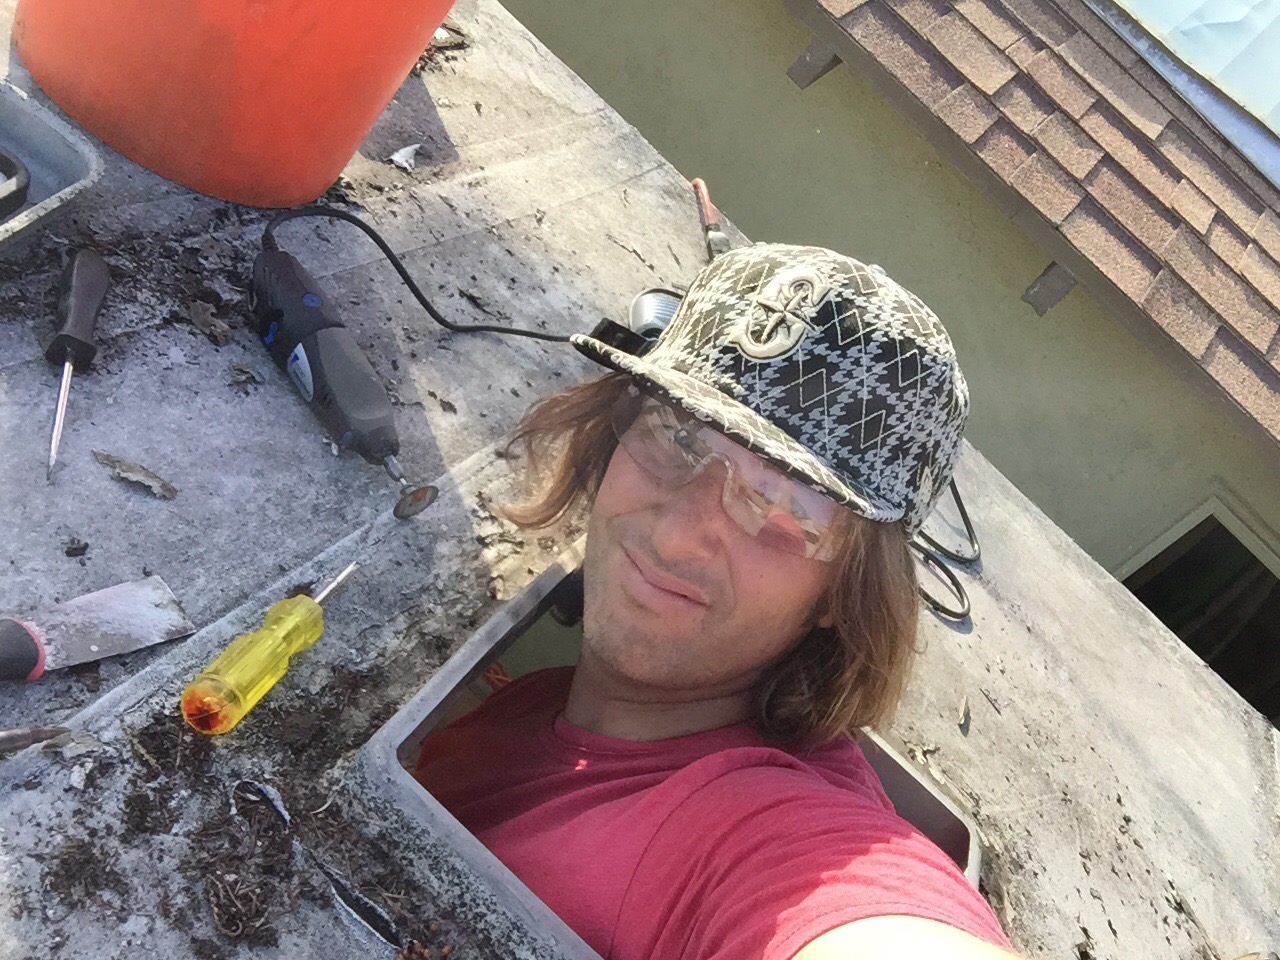 There is some strange coating on my roof. It is peeling so hopefully I will be able to remove it easily. Will depend if i see any water leaking areas from below. So far so good. I also got the back skins off. This area has been redone (albeit not very well) at some point.  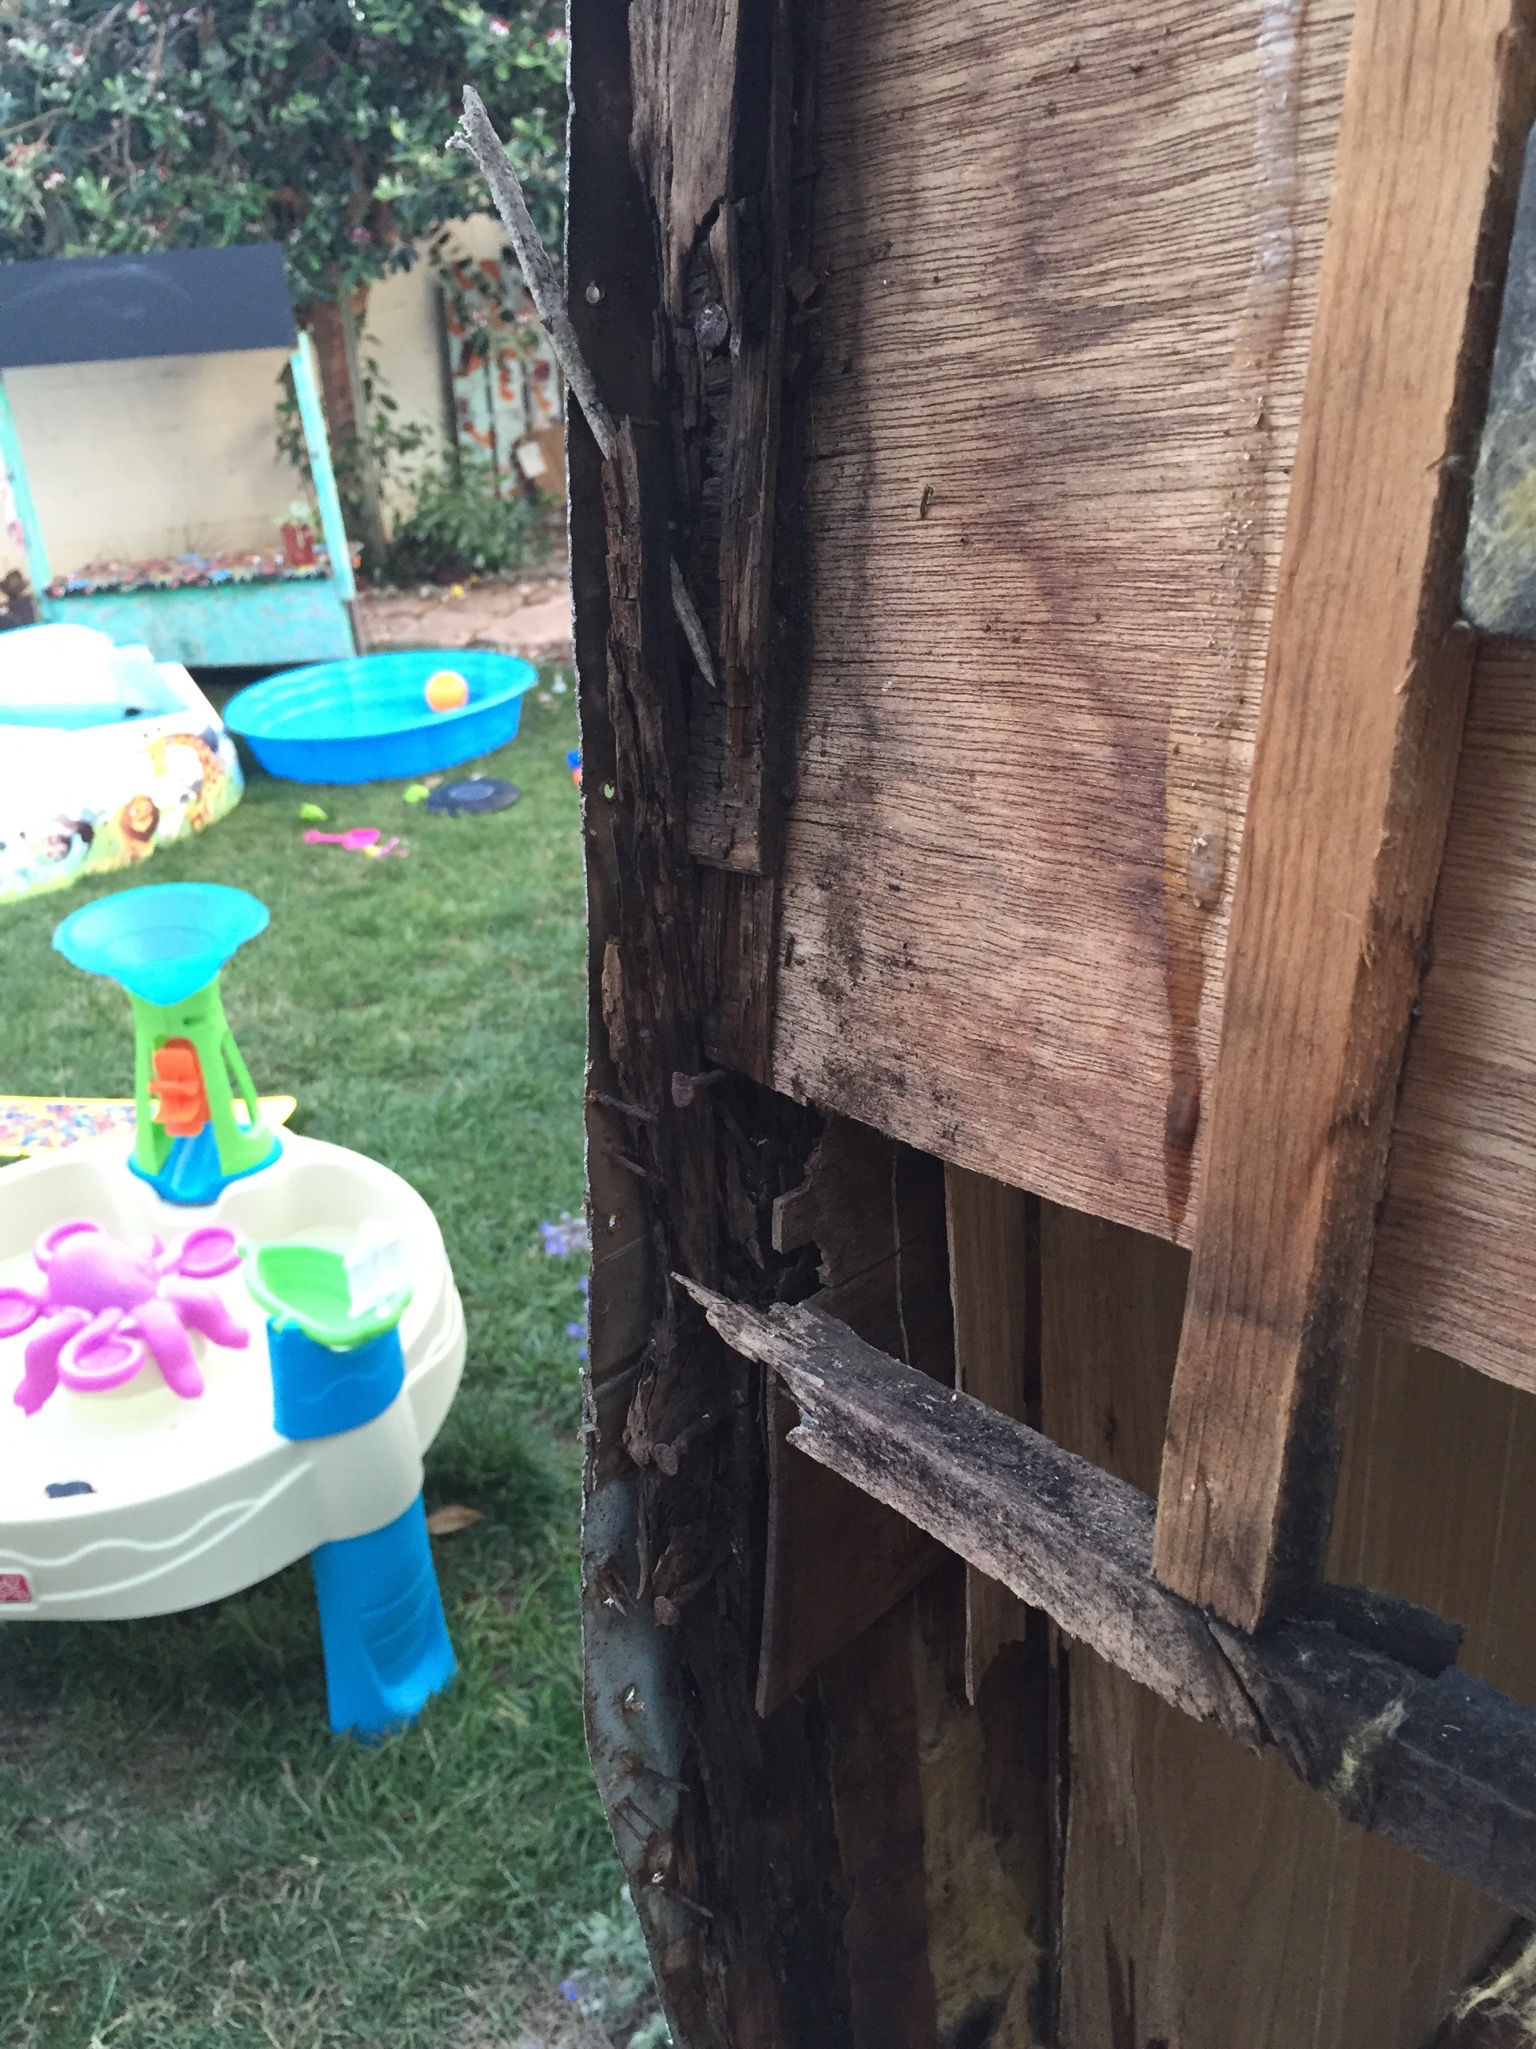 More rot!  With 3 kids running around in the backyard. I have all the skin panels stored on the garage roof. I have a few more cabinets to go then i can begin rebuilding the floor supports. |
|
|
|
Post by vikx on May 4, 2016 20:00:37 GMT -8
Enjoying your trials and tribulations, Mckaylife! You're doin' good...
|
|
mckaylife
Junior Member
Posts: 88
Likes: 42
66 Shasta Super 18
Currently Offline
|
Post by mckaylife on Jun 1, 2016 9:39:35 GMT -8
Been a while since I posted any photos of the progress. I have been using all my free time to work on the trailer but most nights are dark by the time I finish so hard to see the progress. I knew going in on this that there was as lot of water damage in the floor all the way down to the floor joists. I know for sure that all the edge joists need replacing and I am going to do all new plywood as well. As you can see in my photos I have a small workspace and cannot take the walls off to rebuild them so I am doing them piece by piece on the trailer. I am in a bit of a chicken and egg situation of where to start, but I figured get the wall framing rebuilt and secured to new outside joists then tackle pulling up the old plywood and repairing any inner joists.  Here you can see I got the front framing done less the very top board. I will pull that one off once I get the roof off. I am going to try and roll my roof up so I can put it in my garage.  You can see how i have been cutting out pieces of the floor to put in new joists without taking out the whole floor.  Here is a pulled back shot of the gutted interior. I created a 2X4 interior frame to provide some structure while rebuilding the wall structure.  I pulled the roof off too in an effort to lighten the load. Was getting considerable swaying as I was pulling the flooring apart. I made the mistake of reading too many of the posts of users doing full tear downs where they can lay down the walls to rebuild them and thinking i could achieve the same while leaving the walls on. I think I can pull it off but if I had to do it again I would have done it way more in sections leaving as many of the internal cabinets in place to maintain structure. You can see so much of the roof structure was compromised by drilling holes through the one by to run romex. I am considering running the one piece of romex that I will run into the kitchen down through the floor since that is at least 2 inch wood. Will cross that bridge when i get there. I also gotta try and roll up the roof to store in my garage. It looks way too much like a dance floor laying on the back lawn. |
|


 (not sure why but the image is displayed upside down)


