|
|
Post by danrhodes on Feb 9, 2016 9:22:50 GMT -8
Moved because of Great Information: As for myself, after a windstorm shredded my carport and broke some cabinets, I was a little discouraged, so I spent this weekend doing some tests. I bought myself a new cabinet scraper.  But before using, you need clamp it in a vice and use a burnishing tool to create a burr on the edge that removes the material. Since I had the vice but couldn't get to my bench with all the cabinets in the garage, I built a small bench outside from scraps.  I then used the card scraper on a test scrap of ash. It works great, gently removing thin curls of finish and wood, creating a smooth flat surface. After one coat of shellac, the ash was bright and refreshed.  I even got a chance to fix the new stove/icebox cabinet I built, then was broken by the wind. We're moving the icebox off the counter and putting it under the stove to open up the kitchen counter area.  |
|
mobiltec
5K Member
 I make mistakes so you don't have to...
Posts: 9,822 
Likes: 3,749
1954 Jewel In Progress...
Currently Offline
|
Post by mobiltec on Feb 9, 2016 9:47:36 GMT -8
How big is that scraper, where did you get it, what did it cost and how exactly do you use it?
|
|
|
|
Post by danrhodes on Feb 9, 2016 10:04:54 GMT -8
How big is that scraper, where did you get it, what did it cost and how exactly do you use it? discussed a set of german and swedish scrapers he used for many years, so I went with the Swedish made Bahco 5 inch, 0.80 thick model for about $20. You can get others for less, even sets of 3 for the same price, but this size seemed to be the most common in the videos I watched. Some people use other types of blades they have laying around... vikx uses plane blades, but I'm not sure if she/he does the burnishing step that makes a card scraper really work well. www.amazon.com/gp/product/B0001P0PHW?psc=1&redirect=true&ref_=oh_aui_detailpage_o03_s00The use of the scraper is a bit tricky, but there are many tutorials and videos online. It took me a few tries to figure out, and I'm still learning, but I absolutely hate sanding, so I will keep practicing. The basic steps are this: 1. File a flat, square edge on the scraper. It came flat, but I practiced by placing the scraper on a block of scrap, then holding my diamond stone that I use for my kitchen knives upright perpendicular to the scraper and polishing the edge a bit more. I think many use a file for this as well. 2. Lay the scraper flat on a bench and use a burnishing tool to raise a burr that extends straight off the edge. Only some tutorials showed this step, so maybe it's not necessary. 3. Clamp in a vice and again use your burnishing tool at an angle, some say 10 degrees, but 20 ended up working well for me. This step rounds the burr over, making a very small plane blade you can see in the illustration below. You can buy expensive tools, but you can also use a carbide drill bit or even a screwdriver as a burnishing tool. I used a nail set tool as it is very hard material and was already angled on the tip. 4. To use the scraper, you hold it at an angle against the wood and either push or pull, whatever feels right. I ended up getting my best results slightly bending the scraper with my thumbs and pushing it. You end up with a surface that is very smooth and takes finish well. This was one of the best tutorials I found. woodgears.ca/scraper/ I wonder if actual woodworkers like RinTin or bmxovich can give better advice than a noob like me? 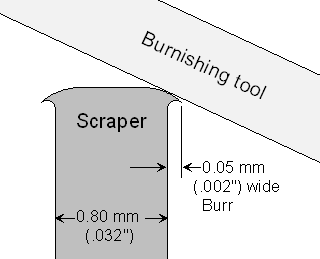 |
|
mobiltec
5K Member
I make mistakes so you don't have to...
Posts: 9,822
Likes: 3,749
1954 Jewel In Progress...
Currently Offline
|
Post by mobiltec on Feb 9, 2016 13:00:36 GMT -8
OK Thanks Dan. I ordered the card scraper and the Crown burnishing tool. This is great because I'm not really happy with the match I got for the ash finish in the 59 Shasta so I'm going to take it all the way down and go with Amber Shellac.
|
|
bmxovich
Active Member

Posts: 187
Likes: 69
1952 Airfloat Skipper
Currently Offline
|
Post by bmxovich on Feb 9, 2016 17:13:55 GMT -8
danrhodes, You described it better than I ever could. I've had them for so long I don't give it much thought. I do use a file on them, but real fine or it will wear them down prematurely. And burnishing does make it much more effective, takes practice to get it right. I've even used cut glass in a pinch, I don't advise it, but I'll try anything 
|
|
|
|
Post by vikx on Feb 10, 2016 21:11:39 GMT -8
Here is the plane blade and scraping mentioned above. Vicx is wanting a bigger blade! The plane blade is beveled when new. Vicx sharpens as he goes (grinding stone), but they do get dull fairly quickly. 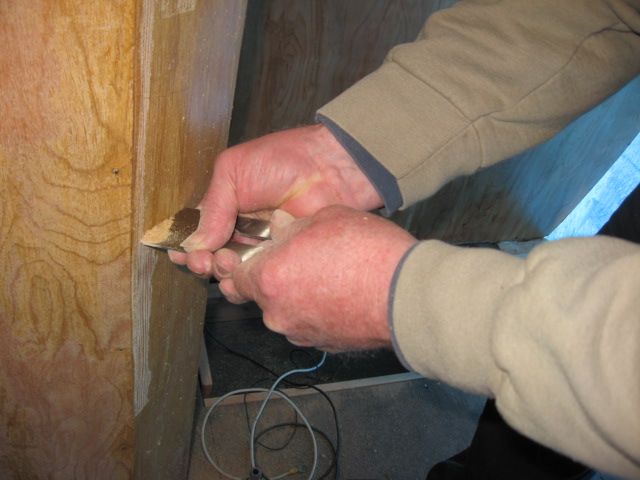 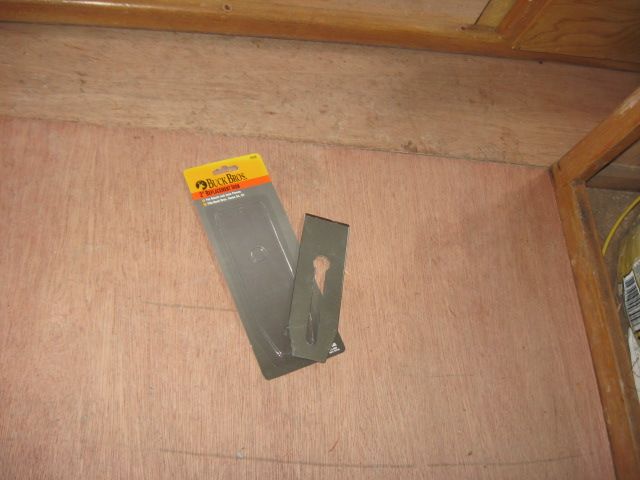 |
|
|
|
Post by danrhodes on Feb 10, 2016 21:20:59 GMT -8
vikx you could just tack it onto the "how do you remove shellac" post... That's where I got the info.
|
|
nccamper
Administrator 
Posts: 7,744
Likes: 2,871
1962 Forester- 1956 Shasta
Currently Offline
|
Post by nccamper on Feb 11, 2016 8:16:10 GMT -8
I would really like an alternative to sanding. It doesn't take off too much wood? I see a lot of shavings in the photos.
And according to the video it needs resharpened every few minutes. On an entire camper is it very slow going?
|
|
|
|
Post by danrhodes on Feb 11, 2016 9:02:17 GMT -8
I would really like an alternative to sanding. It doesn't take off too much wood? I see a lot of shavings in the photos. And according to the video it needs resharpened every few minutes. On an entire camper is it very slow going? I am probably not very good at burnishing the burr, and I don't have the real burnishing tool, so YMMV. On the old ash boards, it really just removed the finish into a fine dust. I didn't get any shavings at all. When I was testing it on some softer pine that I used as clamp spacers, I was able to get some very fine shavings, but they are almost transparently thin, so I still would not worry too much. It seems Vicx doesn't do the burnishing step at all and is still able to get the brittle finish to flake off without touching the wood. |
|
|
|
Post by vikx on Feb 11, 2016 21:40:29 GMT -8
Yes, the shellac flakes off pretty easily. Piles of little light weight flakes, have a vacuum handy...
NOTE: The plane blades are no longer available at our Home Depot.
|
|
ommmjenny
New Member
Posts: 24 
Likes: 5
'55 Kenskill
Currently Offline
|
Post by ommmjenny on Feb 16, 2016 5:52:53 GMT -8
I also got a Bahco blade and a Crown burnisher this week and HOLY CRAP – I was amazed at how fast and effective it is for getting old shellac off! Tested it on the water damaged door panel I'll be throwing out. Tiny flakes/dust that were easy to vacuum as I went. The blade needs to be sharpened frequently but it works so well. Tried it on the side of a cabinet that was not completely flat and it wasn't as great due to surface irregularities, but I have a ways to go in terms of technique! It should be perfect for drawer and cabinet fronts. Thanks, all!
|
|
|
|
Post by danrhodes on Feb 16, 2016 6:25:20 GMT -8
I also got a Bahco blade and a Crown burnisher this week and HOLY CRAP – I was amazed at how fast and effective it is for getting old shellac off! Tested it on the water damaged door panel I'll be throwing out. Tiny flakes/dust that were easy to vacuum as I went. The blade needs to be sharpened frequently but it works so well. Tried it on the side of a cabinet that was not completely flat and it wasn't as great due to surface irregularities, but I have a ways to go in terms of technique! It should be perfect for drawer and cabinet fronts. Thanks, all! If you bend it slightly with your thumbs in the middle, it will more effectively follow the contours of a warped surface. |
|


