


Post by Teachndad on Dec 27, 2015 21:48:48 GMT -8
Hi Everyone,
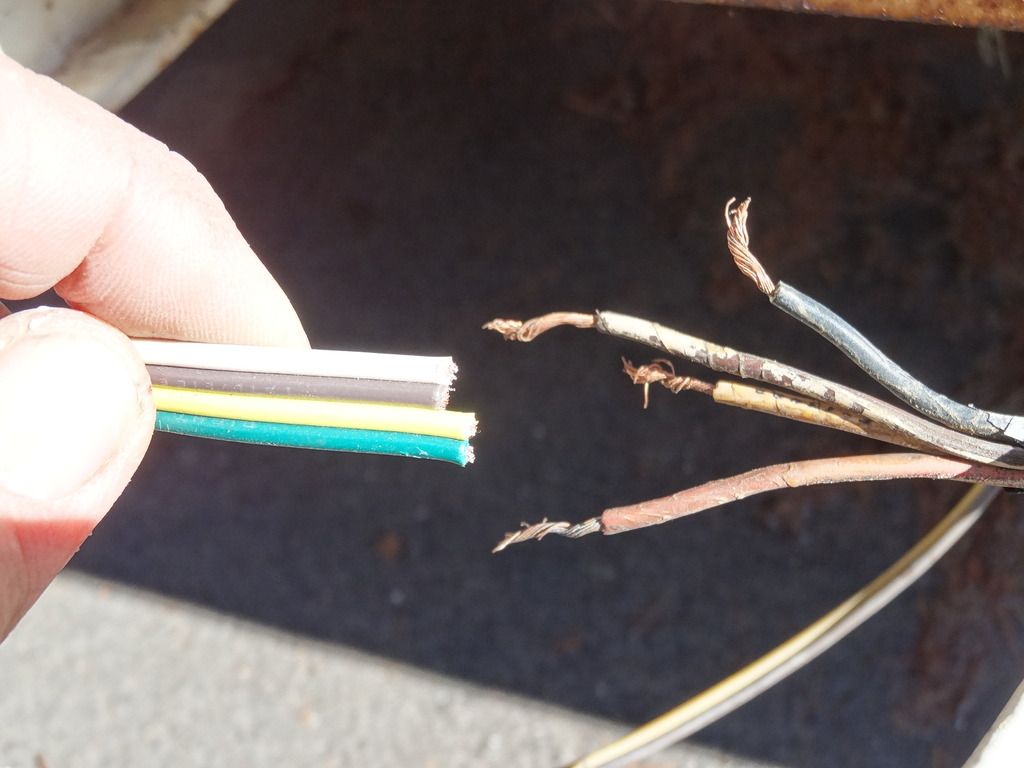
I spent the afternoon trying to get the wiring up and running on my Scotsman. Note: this trailer has no internal wiring. The only wiring is from the rear marker lights and tail lights. The wires are all accessible under the bed frame and then go underneath the trailer at the just below the rear hatch. The wires continue twisted along the entire length of the center joist. The ground ends at the front outrigger, and the wires continue to the the base of the tongue. The wires are then cut at that point. No 4 pin connector at all. See the wires at the right below.
Ignore wires in my left hand. Also, the wire that appears to go downward in the photo below the frayed ends is not from this bundle of wires. Ignore it.
I used an automotive light tester to check current. I checked the wiring on the vehicle at the 7 pin connector and I am getting current. I have an adapter to my 7 pin that has an auxiliary port for a 4 pin connector. The pins sit vertically.
FYI, the ground wire runs from the front outrigger where it used to be attached. It was broken off before I reconnected it. For the repair, I took out the rusted bolt that connected a stub of wire and replaced the bolt and ground down the rust on the side of the outrigger where I attached the ground wire with an O- ring connector. I did not have a spider washer(not sure if that's an issue). There was a rusty spider washer on before I reconnected the ground, but I lost it. Grrrr. So, the o-ring connector is pressed directly to the steel outrigger(bare metal) with a washer on top and then the head of a screw.
In testing the circuitry, I tried first with the alligator clip from the tester attaching it to the ground at the rear of the TV and then taking the point of the light tester and pressing it on each of the wire ends of the wiring. Nothing happened - the tester would not activate it's light. I then reversed things and attached the alligator clip to each one of the wire ends coming from the rear of the trailer. This yielded some results, though confusing.
There are 4 wires coming from the rear. They are brown, dirty white, black, and red. The white is the ground and looks newer than the other colored wires. As mentioned, it ends before the front of the trailer, so it's no longer in the equation.
The brown one was a just a remnant of some wire. It only exists near the front and has no use.
That leaves dirty white, black and red. See below. Ignore the wiring in my left hand.
When I used the tester with the pointer touching each pin, here is what I found.
The dirty white wire yielded the brightest light on the tester.
The red wire yielded a dimmer light on the tester.
The black yielded nothing.
The following mentions pointing the pointer in the three pins(holes) at the TV.
Top hole: Right blinker - tester light activated when touching the dirty white wire or the red wire
Middle hole: Left Blinker - tester light activated when touching the dirty white wire or the red wire
Lowest hole: Parking lights - tester light activated when touching the dirty white wire or the red wire
Again: contact with the red wire was dimmer than with the dirty white wire.
Should the dirty white wire and the red wire both be hot each time I touch every one of the holes? That doesn't seem correct, but maybe it's my inexperience.
What's going on?
Note:
The rear side marker lights and each one of the taillight bases has it's own ground riveted to each base. I believe that's what Vikx recommends doing.
The side marker lights have only one wire coming from them and then they merge with one of the wires coming out of the taillight base. The taillight bases are the wedding cake style lens bases. So, there is only one light fixture in the taillight.
Below are some pix that might help.
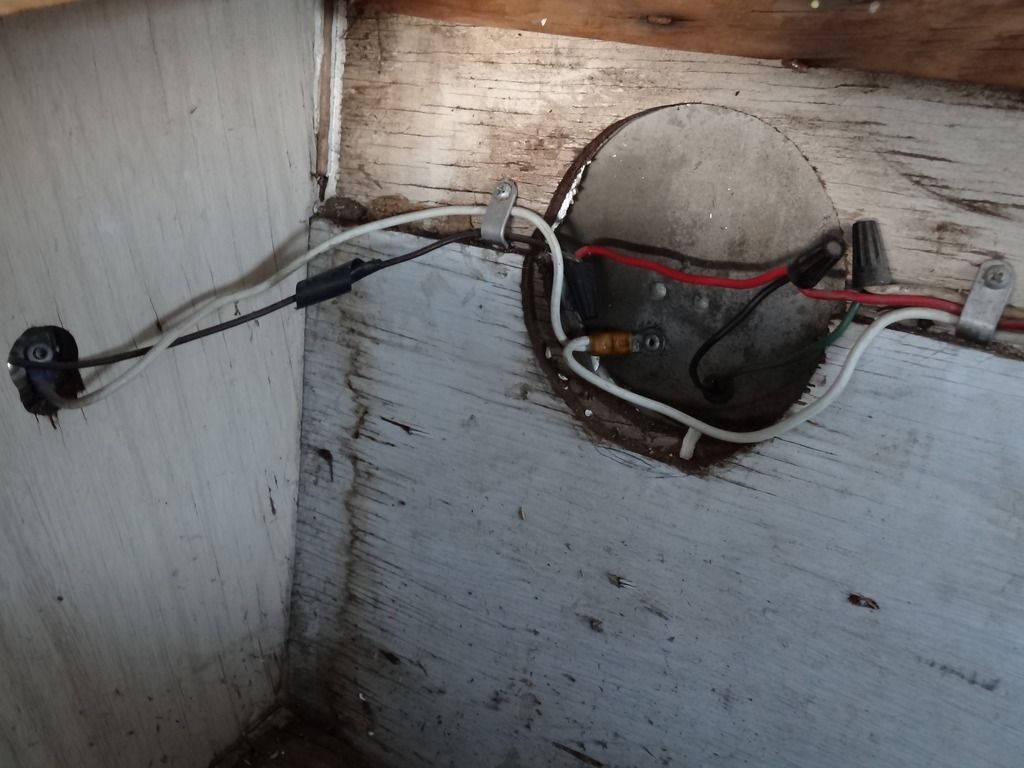
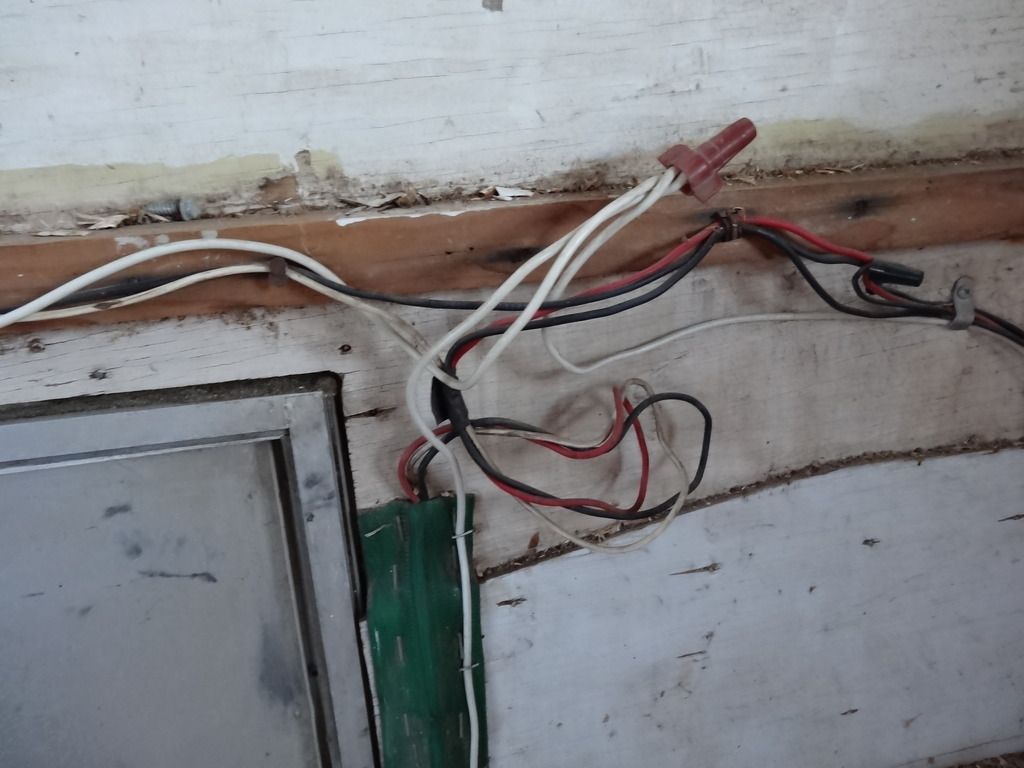
The white wire on the far left is the ground wire. I replaced the pinch connector after taking this picture with a new one thinking that it might be rusty inside, but it wasn't. The wiring to the right goes to a set of bolt on lights that some PO had attached so they wouldn't be doing what I am doing now - trying to get the original lights hooked up(I would imagine).
Below is the close up of the interior view of the curbside tail light base and the curbside marker light. The wiring color changes. Grrrrrr! as you go from left to right with each image. All three images below are in sequence from left to right. White is ground. Note the black turns to red and later turns to black again.
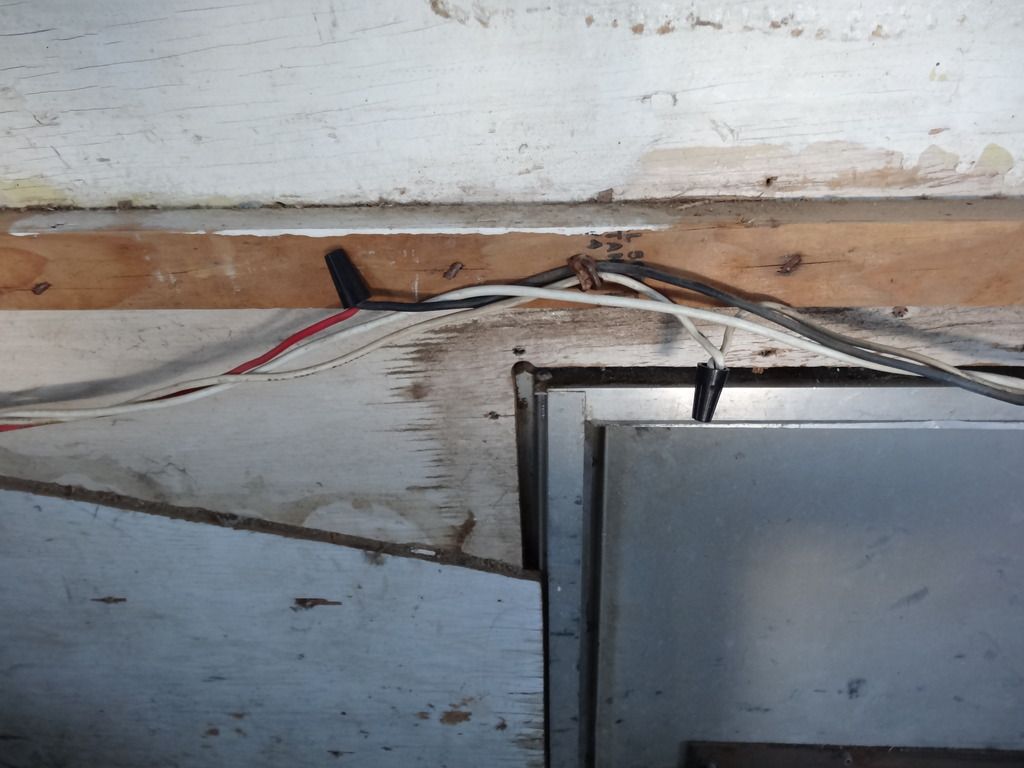
Below you can see the transition from red to black. The difference in the bright white ground wire and the dirty white wire is hard to see, but evident.
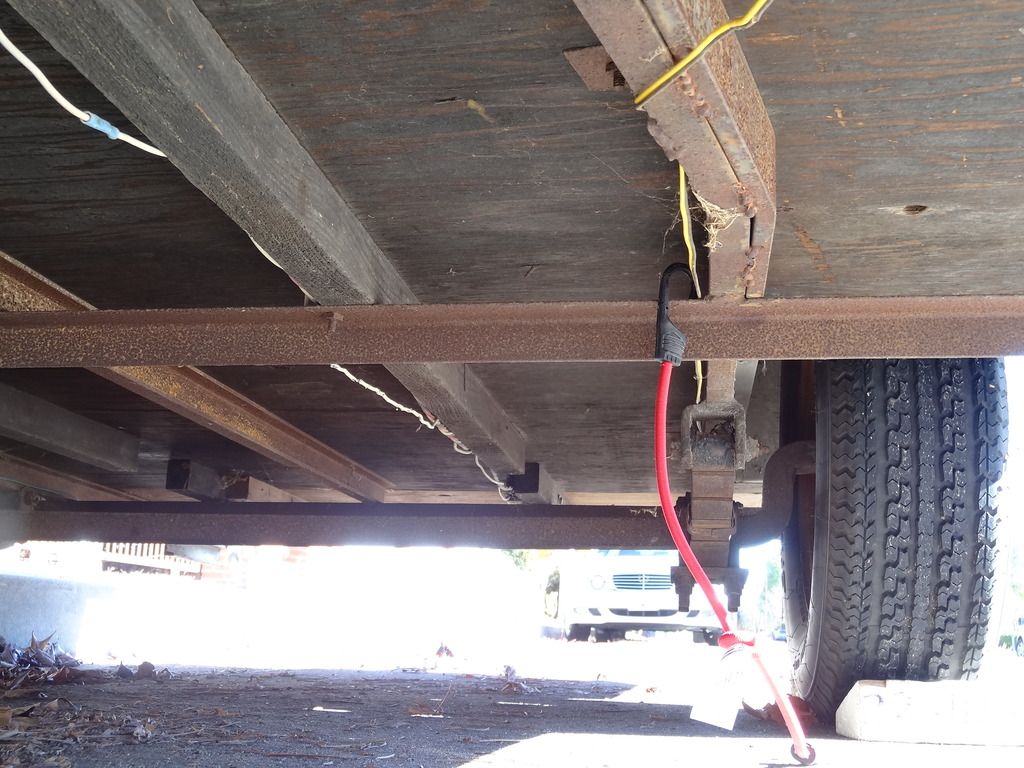
Finally, below is where all the wires merge before going down under the trailer. Note the water hose covering. (scratches head)
Comments?
Thank you for reading all this.
Rod
I spent the afternoon trying to get the wiring up and running on my Scotsman. Note: this trailer has no internal wiring. The only wiring is from the rear marker lights and tail lights. The wires are all accessible under the bed frame and then go underneath the trailer at the just below the rear hatch. The wires continue twisted along the entire length of the center joist. The ground ends at the front outrigger, and the wires continue to the the base of the tongue. The wires are then cut at that point. No 4 pin connector at all. See the wires at the right below.
Ignore wires in my left hand. Also, the wire that appears to go downward in the photo below the frayed ends is not from this bundle of wires. Ignore it.
I used an automotive light tester to check current. I checked the wiring on the vehicle at the 7 pin connector and I am getting current. I have an adapter to my 7 pin that has an auxiliary port for a 4 pin connector. The pins sit vertically.
FYI, the ground wire runs from the front outrigger where it used to be attached. It was broken off before I reconnected it. For the repair, I took out the rusted bolt that connected a stub of wire and replaced the bolt and ground down the rust on the side of the outrigger where I attached the ground wire with an O- ring connector. I did not have a spider washer(not sure if that's an issue). There was a rusty spider washer on before I reconnected the ground, but I lost it. Grrrr. So, the o-ring connector is pressed directly to the steel outrigger(bare metal) with a washer on top and then the head of a screw.
In testing the circuitry, I tried first with the alligator clip from the tester attaching it to the ground at the rear of the TV and then taking the point of the light tester and pressing it on each of the wire ends of the wiring. Nothing happened - the tester would not activate it's light. I then reversed things and attached the alligator clip to each one of the wire ends coming from the rear of the trailer. This yielded some results, though confusing.
There are 4 wires coming from the rear. They are brown, dirty white, black, and red. The white is the ground and looks newer than the other colored wires. As mentioned, it ends before the front of the trailer, so it's no longer in the equation.
The brown one was a just a remnant of some wire. It only exists near the front and has no use.
That leaves dirty white, black and red. See below. Ignore the wiring in my left hand.
When I used the tester with the pointer touching each pin, here is what I found.
The dirty white wire yielded the brightest light on the tester.
The red wire yielded a dimmer light on the tester.
The black yielded nothing.
The following mentions pointing the pointer in the three pins(holes) at the TV.
Top hole: Right blinker - tester light activated when touching the dirty white wire or the red wire
Middle hole: Left Blinker - tester light activated when touching the dirty white wire or the red wire
Lowest hole: Parking lights - tester light activated when touching the dirty white wire or the red wire
Again: contact with the red wire was dimmer than with the dirty white wire.
Should the dirty white wire and the red wire both be hot each time I touch every one of the holes? That doesn't seem correct, but maybe it's my inexperience.
What's going on?
Note:
The rear side marker lights and each one of the taillight bases has it's own ground riveted to each base. I believe that's what Vikx recommends doing.
The side marker lights have only one wire coming from them and then they merge with one of the wires coming out of the taillight base. The taillight bases are the wedding cake style lens bases. So, there is only one light fixture in the taillight.
Below are some pix that might help.
The white wire on the far left is the ground wire. I replaced the pinch connector after taking this picture with a new one thinking that it might be rusty inside, but it wasn't. The wiring to the right goes to a set of bolt on lights that some PO had attached so they wouldn't be doing what I am doing now - trying to get the original lights hooked up(I would imagine).
Below is the close up of the interior view of the curbside tail light base and the curbside marker light. The wiring color changes. Grrrrrr!
 as you go from left to right with each image. All three images below are in sequence from left to right. White is ground. Note the black turns to red and later turns to black again.
 Below you can see the transition from red to black. The difference in the bright white ground wire and the dirty white wire is hard to see, but evident.
Finally, below is where all the wires merge before going down under the trailer. Note the water hose covering. (scratches head)

Comments?
Thank you for reading all this.
Rod


 ; This (likely blue) would have gone to the 12 interior lighting and would not be used with the 4way connector unless you want to have it constantly on (brown from TV) or go for the disco feel when turning (green/yellow from TV)
