low-lincoln
Member

Posts: 27 
Likes: 11
1967 Field & Stream
Currently Offline
|
Post by low-lincoln on Oct 17, 2015 19:28:52 GMT -8
I'm trying do a quick temporary re-wire on a trailer I just bought to get to the CHP for a VIN verification, but the original wires are not the standard 4 pin colors. I have white, black, green, orange & red. What should the individual color combinations be so I can connect them? Thanks for the help.
|
|
|
|
Post by trailertrasher on Oct 17, 2015 22:11:35 GMT -8
Hi Ranger.
I don't think there is any such thing as standard back then,so best to use an ohm meter and trace each and check each for being grounded out. All bulbs will need to be removed for the ground test.
In the absence of a meter, pull one of the marker lights off and see what color feeds the bulb,being sure to look back to the trailers wire,not that of the marker itself. This color will be your Running lights. In your case (trailer fiberglass) you'll have a second wire there to provide ground. This your ground wire as no doubt you guessed. Now pull each tail lamp. The two colors from the marker will be there performing the same job. Each light will have one other color this will be the corresponding turn signal. Again looking back to trailer wires..
I'm assuming this trailer does not have brakes,so the 5th wire is likely for an interior light.
On you new 4 way plug:
White=ground
Brown=Run
Yellow=turn
Green=turn
DO NOT ASSUME the white on the trailer is ground etc. Probably is hot..
Good luck!
|
|
|
|
Post by vikx on Oct 17, 2015 22:24:32 GMT -8
I agree with TT, test to find out which wire is which. Many trailers used odd colors back in the day...
|
|
|
|
Post by bigbill on Oct 18, 2015 4:47:21 GMT -8
Most marker lights will start out as a black wire then change to a different color inside the wall. After years of repairs and rewires you may discover the same circuit may change colors multiple times. As advised above use an ohm meter or test the wires with a 12 volt power source to see what lights. If you use your tow vehicle tail light circuit to test be prepared to replace lots of fuses.
|
|
low-lincoln
Member
Posts: 27
Likes: 11
1967 Field & Stream
Currently Offline
|
Post by low-lincoln on Oct 18, 2015 19:43:13 GMT -8
Thanks for all the info and tips. I will start tinkering...electrical is not my strong suit.
|
|
low-lincoln
Member
Posts: 27
Likes: 11
1967 Field & Stream
Currently Offline
|
Post by low-lincoln on Oct 21, 2015 10:11:35 GMT -8
Ok I figured it out, this thing is weird.
Green = ground
Red = running lights
Orange = left T/S
Black = Right T/S
White = extra hot for interior lights
|
|
|
|
Post by vikx on Oct 21, 2015 21:11:15 GMT -8
You weren't kidding about weird colors... Thanks for posting Ranger.
|
|
|
|
Post by Teachndad on Dec 25, 2015 15:21:36 GMT -8
Most marker lights will start out as a black wire then change to a different color inside the wall. After years of repairs and rewires you may discover the same circuit may change colors multiple times. As advised above use an ohm meter or test the wires with a 12 volt power source to see what lights. If you use your tow vehicle tail light circuit to test be prepared to replace lots of fuses. Hi ya all, What are the steps to testing with an ohm meter. I am not even sure what settings would be needed on the ohm meter. i have taken a left over 4 pin connector wire harness adapter that I had left over from when I towed a trailer with a 96 Honda minivan and cut off the adapter to the minivan taillights that left the 4 pin connector and @ 3 feet of 4 wires. That's what I am calling my wire harness. I wanted to test conductivity with it as well as connect to the original taillight/running lights on the 66 Scotsman I now own. i was considering before reading this thread to plug in the harness into the 4 pin connector on the TV and then use the ohm meter with one contact on the wire from the TV and the other contact on the wire coming from the trailer lights. help me with my plan, please. thanks. Rod |
|
Ten
3K Member

Posts: 3,432
Likes: 1,467
70 Shasta 16SC + 1964 Airflyte
Currently Offline
|
Post by Ten on Dec 25, 2015 16:27:51 GMT -8
Rod,
I know there are several methods that are possible, but what I have done in the past is use a 12-volt battery, usually the one out of my lawn mower. Connect the ground to the frame of the trailer with a jumper cable. Then, cut into and bare the wires going to your system. Touch them to your positive side. This will power whatever you are hooking up and should light up. If you connect your ground you will know immediately, as you will get a very hot spark which will try to weld your wire end to the post of the battery. Anything else should ground through the trailer and light up. If nothing happens, then you have a bad bulb filament (turn or tail lights) or possibly a bad ground in the fixtures. This happens when screws rust and when the backing plates etc. get rusty enough to lose contact with the skin of the trailer. You can determine this by using a short piece of wire to make contact to the trailer frame.
Most of this will make a lot more sense when you actually are doing it. There is a certain amount of detective work, usually, trying to track down bad grounds is a tedious job to say the least. Patience is a real virtue, especially since there are so many variables. Most times though, something will light right up to give a clue as to the rest of the wiring. Be aware that there is a possibility that one wire may run interior lights or pump, if equipped, from the tow vehicle battery, bypassing the battery on board, if it is set up to run on a 12-volt system. You may find a fuse panel hidden in a cargo hatch or cupboard, if this is the case. (Hidden blown fuses can really throw off test results!) If you find such a fuse panel, it can help in tracing the circuits to give a better educated guess before hooking into anything.
|
|
|
|
Post by Teachndad on Dec 25, 2015 19:41:15 GMT -8
Hi Ten, Thanks. I will see what I can do with your suggestions. I can pull the car battery out of my son's Corolla for testing. Also, the situation on the Scotsman is more simplified in that the only wiring is to the tail lights, running lights in the rear And the license plate light fixture. That's it. The electricity inlet into the trailer is completely missing. It's high up near the j-rail streetside. While the inlet is missing, the junction box is still present, and I see no wiring beyond that. The inlet is on the street side and the kitchen cabinets have been removed by the PO and I have to assume that they typically had a light fixture in the upper kitchen cabinet. I managed to remove the streetside rear wedding cake lense and water drained out as I loosened the screws. Five days ago, I drove the trailer home during nearly 3 hours of driving rain.... I will try to add a picture later to show the rust on the light backing plate, as that might be a grounding issue. Rod Here is an image of the streetside rear fixture in all it's rusty glory. 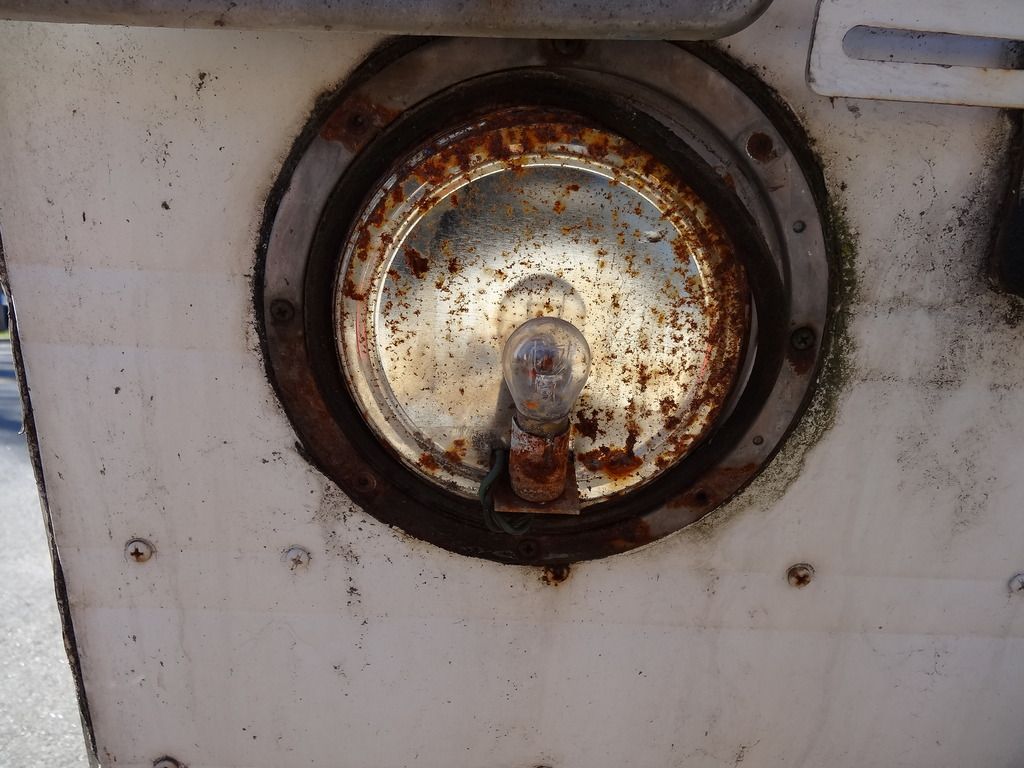 For what it's worth, here is the license plate light fixture. 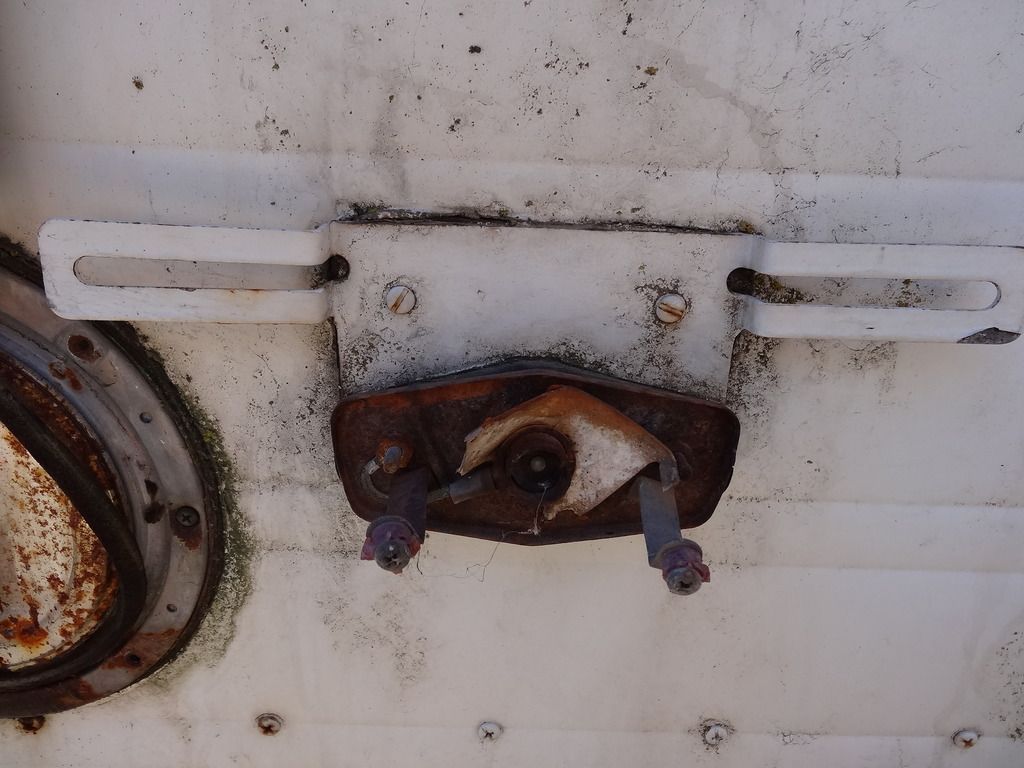 |
|
Ten
3K Member
Posts: 3,432
Likes: 1,467
70 Shasta 16SC + 1964 Airflyte
Currently Offline
|
Post by Ten on Dec 25, 2015 21:42:34 GMT -8
You may want to try dismounting the light fixtures and cleaning them up some before you even start to put the juice to it. Might alleviate some of the grounding issues first. Also may give you a clue as to wire colors, but as has been said, the colors can change between the plug and the fixture.
If they are real bad, being that they hold that much water, you might run a jumper to the frame from the fixture before you try adding the power. Also, you may be able to run jumper cables to the harness rather than having to pull the battery out. Be advised too, that testing this way does not "fuse" your hookup, unless you add something to give that protection that is. Watch for hot sparks that could indicate a dead short.
|
|
|
|
Post by Teachndad on Dec 26, 2015 1:05:39 GMT -8
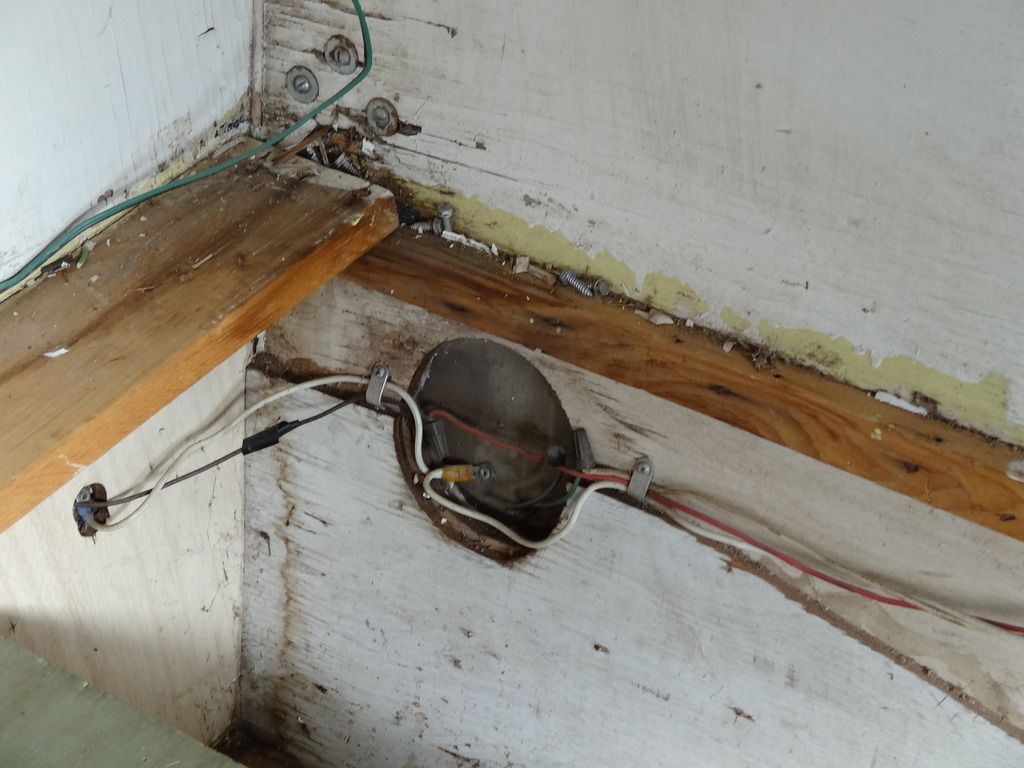
Ten, Your advice for improving the ground will be useful. After thinking this over and considering the simplicity of the wiring in that it doesn't involve any wiring for interior lights and just the running and tail lights, I thought it would be easier just to run a new wiring from the tip of the tongue all the way back to the fixtures. Then I can use the standard color coding for current wiring 4 pin to match to their location in the rear. Then I can pursue what you were detailing in your posts above. Would that be simpler? Below is a picture of the rear of the curbside tail light backing plate. The ground on the image below looks to be riveted to the back of the fixture. I should mention, that I don't have an image of the interior side of the street side fixture which I had referred to opening earlier. I can't remove that tail light lense because I stripped out the screws  . .
 On this Scotsman, the rear 2 feet of flooring were replaced and the wiring inside to the tail lights and running lights looks like it was replaced or tampered with at some point. 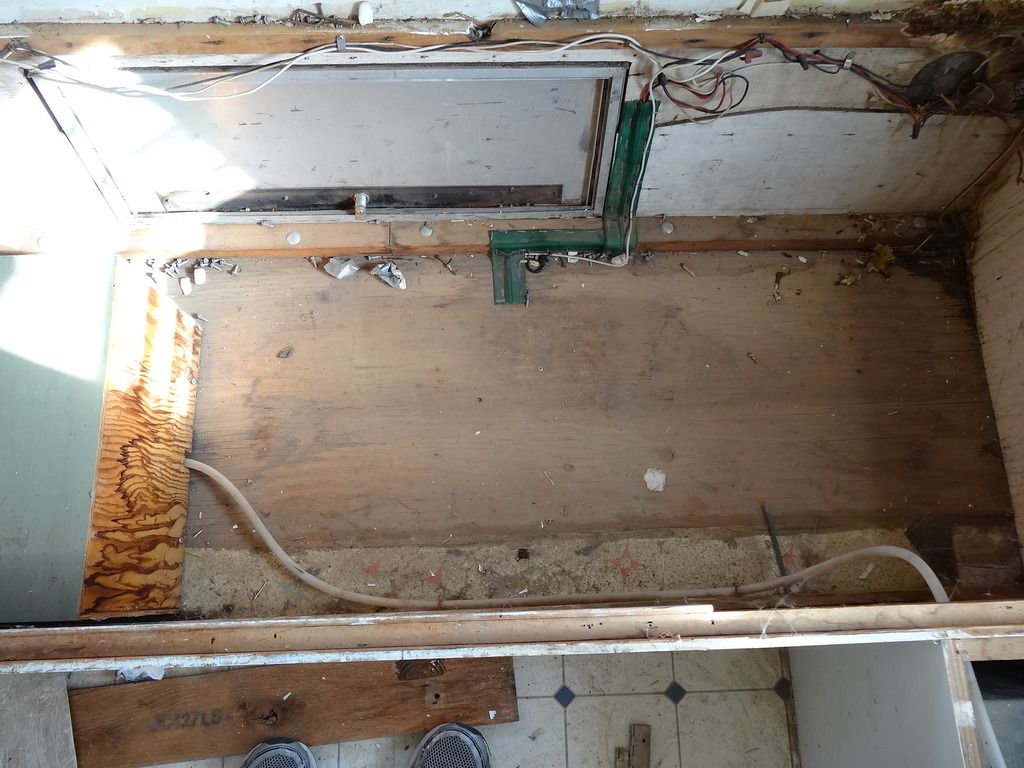 The run of wires to the front seem to be older than what is inside. those had just been cut and wrapped with electrical tape just under the front of the body. Casings are dry. Rod |
|
|
|
Post by Teachndad on Dec 27, 2015 22:30:45 GMT -8
Ten, I decided pulling the battery out of my son's Corrolla was going to be too cumbersome. I just couldn't bring myself to haul out that heavy battery. So, I did some more research and found I could use an automotive light tester. Based on that experience, I started a new thread specific to my situation with more details. For anyone else reading this thread, you can find the new thread here: vintagetrailertalk.freeforums.net/thread/5792/pin-wiring-color-time-quandry?page=1&scrollTo=55455Cheers, Rod |
|


