|
|
Post by rogerthedodger on Jul 8, 2015 19:15:56 GMT -8
My trailer was gutted and new interior paneling installed, but the PO used finish nails to attach them. The finish nails have all come out. I am removing windows to clean and polish, so want to re-attach with screws, under the alluminum window frames. Any one give me ideas? #6 or #4. 3/4" or 1". The paneling is 3/16" thick. Wood screws or metal screws? Trailer is not original so not concerned with originality.
Roger
|
|
|
|
Post by vikx on Jul 8, 2015 21:09:31 GMT -8
Do you have any pictures? I think you'll need better attachment than screws below the window. If you know where the wall studs are, you can space screws every so many inches or so. I often paint the screw heads to match the panel.
Are you sure it's 3/8?? Sounds like overkill.
#6 x 3/4 or 1 are usually sufficient for 3/16 paneling. At the seams, you'll have trim sticks, so you would need 1" there. If your panels really are 3/8, you'll need longer screws, maybe 1 1/4"; depends on the wall thickness.
|
|
|
|
Post by rogerthedodger on Jul 9, 2015 4:48:57 GMT -8
Yes, you are right, I measured again, 3/16" is the paneling thickness. What are trim sticks? I will get some picks today. The PO stained the paneling a dark color to "look like an Airstream". Do you use wood screws with beveled philips head or something else?
|
|
|
|
Post by vikx on Jul 11, 2015 21:15:25 GMT -8
I use pan head screws, flat on the underside so they don't dig into the wood. There are also decor washers that set the screws off if you like the look. The washers make for a very strong attachment. Here's our Corvette ceiling. Trim stick with decor washers and oval head screws: 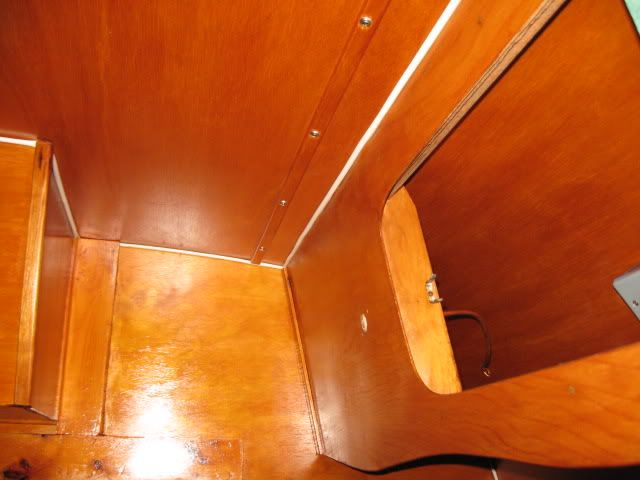 And another look at pan head painted screws in the "field": 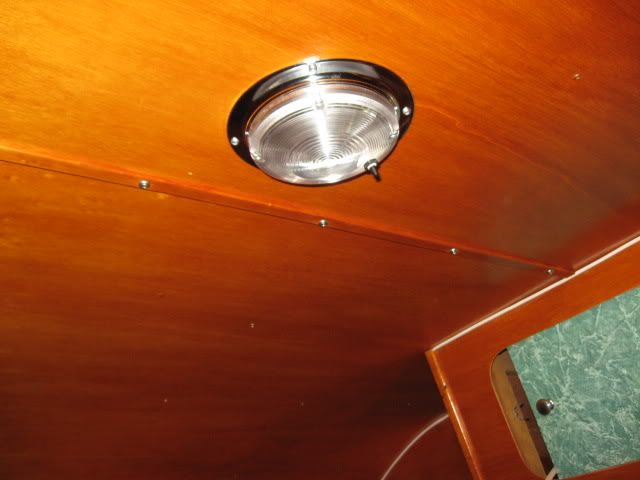 The wall seams can be done the same way; with trim sticks (sometimes called screen door trim, 3/4 x 3/16) and either pan heads or decor/ovals. |
|
|
|
Post by rogerthedodger on Jul 12, 2015 5:43:08 GMT -8
vikx, that looks good. Thank you so much for the ideas and pics.
Roger
|
|
tikimitch
Member

Posts: 33 
Likes: 6
1974 Go Tag-A-Long
Currently Offline
|
Post by tikimitch on May 23, 2016 4:05:58 GMT -8
Hi all! I was reading this over the weekend and have a related question. What do you all do to attach the wall paneling at the edges? I cannot get the staples or nails close enough to the edge of the board for my gimp to cover? Do you use a finish nail or narrow crown staple, countersink them and then use some filler to cover the hole? Or is there another technique altogether?
Thanks!!
|
|
|
|
Post by vikx on May 24, 2016 22:18:02 GMT -8
Tikimitch, the wall panels are attached to the studs before the gimp goes on; they are stapled fairly close to the top, maybe 1/4". (any closer and it breaks the edge) Wood putty will fill divots if needed. Just to be clear, the gimp is always stapled on the wall top before the ceiling panels are placed. Then rafters and so on.
Screws and decor washers work well at the wall tops after light stapling, if you like the look.
It is not possible to install gimp if the ceiling panels are already in place. People sometimes use synthetic "floppy" quarter round to trim at the ceiling edges.
|
|
tikimitch
Member
Posts: 33
Likes: 6
1974 Go Tag-A-Long
Currently Offline
|
Post by tikimitch on May 26, 2016 7:05:48 GMT -8
Vikx, I am with you on the install order. I am doing new walls (now) and new ceiling (later). The gimp I have is the round stuff that VTS sells. It does not appear large enough to cover the staples once it is installed on top of the wall. I think I will need to fill the staple divots with something. I may try some shellac sticks and fill the holes like they do on old instruments. If that works I will post some pictures (or if someone has already done this and there is a thread or instructions somewhere, I would love to take a look.
|
|
|
|
Post by vikx on May 27, 2016 20:54:41 GMT -8
Cherry wood putty isn't too bad, and a coat of amber shellac blends well. Not perfect, but hey, it's a TRAILER...
|
|


