longroads
Junior Member

Posts: 50 
Likes: 17
Currently Offline
|
Post by longroads on Jul 7, 2015 11:21:24 GMT -8
Do you have any photos down to bare trailer frames? When removing the floors, did you take off the other side walls a little to remove the entire flooring?
Thanks for sharing your progress.
|
|
bmrrwolfe
Member
Posts: 36
Likes: 3
Currently Offline
|
Post by bmrrwolfe on Jul 7, 2015 12:23:27 GMT -8
Do you have any photos down to bare trailer frames? When removing the floors, did you take off the other side walls a little to remove the entire flooring? Thanks for sharing your progress. I am sorry but I did not get any pictures of the bare frame, and I did not take off the other wall off, but the entire floor did come off. For the outer floor support on the drivers side, I simply cut the bolts and and broke it loose from the frame (but still attached to the wall) and did not screw the floor down on that side. So when the other wall is removed I will be able to pull out the support and slide the new one in. Then bolt to the frame and screw to the supports. I will be sure to get some pictures of that. But will all the rain we have been getting in Cleveland right now, I had 4 days rain free and was trying to get as much done as possible. Also an update I did get a 10x20 portable garage/canopy from Harbor Freight to keep the camper dry. For anyone who can not fit their camper in their garage or don't have a garage space this is a great investment as it was $130 after tax (on sale for $149 and you can use a 20% coupon) |
|
|
|
Post by danrhodes on Jul 7, 2015 12:35:04 GMT -8
Do you have any photos down to bare trailer frames? When removing the floors, did you take off the other side walls a little to remove the entire flooring? Thanks for sharing your progress. Something I am also wondering...can the entire body be repaired and then supported on stilts, so the floor can be removed from within the trailer? bmrrwolfe I have a costco version of that car cover. I put it together with only the first 2/3 sections and it is a perfect 14 feet to cover the trailer, just leaving the extra roof tied down in the rear wall. |
|
bmrrwolfe
Member
Posts: 36
Likes: 3
Currently Offline
|
Post by bmrrwolfe on Jul 7, 2015 13:33:00 GMT -8
Do you have any photos down to bare trailer frames? When removing the floors, did you take off the other side walls a little to remove the entire flooring? Thanks for sharing your progress. Something I am also wondering...can the entire body be repaired and then supported on stilts, so the floor can be removed from within the trailer? bmrrwolfe I have a costco version of that car cover. I put it together with only the first 2/3 sections and it is a perfect 14 feet to cover the trailer, just leaving the extra roof tied down in the rear wall. With the inner paneling off (so just the 1/2" plywood wall on this model) the floor could be removed from within the trailer. Probably would need to cut sections out at a time though and be sure to remove or cut the bolts that hold the floor down to the frame. |
|
bmrrwolfe
Member
Posts: 36
Likes: 3
Currently Offline
|
Post by bmrrwolfe on Jul 10, 2015 19:25:52 GMT -8
  New door side wall cut and installed! Door frame and bracing put in place to hold it in while I start on the roof and other wall. |
|
|
|
Post by vikx on Jul 10, 2015 20:58:40 GMT -8
Bmrrwolfe, beautiful job! I appreciate that you are showing others a build CAN BE DONE outside....
|
|
bmrrwolfe
Member
Posts: 36
Likes: 3
Currently Offline
|
Post by bmrrwolfe on Jul 20, 2015 17:44:51 GMT -8
A little update. We have been having a lot of rain here in NE OH, so work has been a little slow. I got the other wall and roof torn down, pulled staples off most of the skins (a task in itself) and cut and put in the new drivers side wall. The wall was very rotten and pretty much feel apart so the template came from the door side, with some measuring to get the wheel cut, and left the window holes until I get the skin on.   Next is to get the 1/8" subfloor down over the ply, then the side wall interior paneling put up then the front/rear/roof paneling and supports. I know most people use 1/4" birch paneling, but are they any good alternatives that are easier on the budget to use? I am not worried about a perfect finish or grain pattern as its going to be painted not stained. The goal of this project is to keep the exterior looking original, but since there was no original components left when I got it, to make it very modern/contemporary inside. |
|
kirkadie
1K Member

Posts: 1,156
Likes: 556
'69 Serro Scotty Hilander
Currently Offline
|
Post by kirkadie on Jul 21, 2015 4:00:56 GMT -8
bmrrwolfe, when I was at the stage where you are now I made a bunch of 'warp stabilizers'; my '69 is 76" wide so I cut a bunch of 1Xs to that length, glued and stapled 2"X3" pieces of 1/4" plywood to the ends so they would just overhang the walls, then attached 1X scraps to the stabilizers just inside the walls. Keeps the plywood sides parallel plus I can reuse the stabilizers as horizontals after the ceiling panels go on. They fit tight enough that you don't need to fasten them to the walls and can be moved around as needed.
If someone could explain to me how to add my flickr pics to my signature I could show instead of mumble through verbally.
|
|
bmrrwolfe
Member
Posts: 36
Likes: 3
Currently Offline
|
Post by bmrrwolfe on Jul 21, 2015 12:21:13 GMT -8
bmrrwolfe, when I was at the stage where you are now I made a bunch of 'warp stabilizers'; my '69 is 76" wide so I cut a bunch of 1Xs to that length, glued and stapled 2"X3" pieces of 1/4" plywood to the ends so they would just overhang the walls, then attached 1X scraps to the stabilizers just inside the walls. Keeps the plywood sides parallel plus I can reuse the stabilizers as horizontals after the ceiling panels go on. They fit tight enough that you don't need to fasten them to the walls and can be moved around as needed. If someone could explain to me how to add my flickr pics to my signature I could show instead of mumble through verbally. I think I understand what you are saying. Right now all the supports are clamped in place to the walls to avoid putting any screws through the new wall. It was kind of done quickly with scrap wood as we were expecting another storm last night. But I am going to get some paneling in the next day or two and hope to have the structure leveled and square and get some installed by the weekend. |
|
bmrrwolfe
Member
Posts: 36
Likes: 3
Currently Offline
|
Post by bmrrwolfe on Jul 23, 2015 18:53:54 GMT -8
Well I got the 1/8" interior paneling put in this week, and will be getting the luan flooring down over the plywood tomorrow The next step is to get the front/roof/rear walls in. Any advice on getting the right wood, and tips on installing the paneling?
Thanks!
|
|
bmrrwolfe
Member
Posts: 36
Likes: 3
Currently Offline
|
Post by bmrrwolfe on Sept 7, 2015 10:58:33 GMT -8
Well it has been a while since I last updated this, but work has slowly been continuing. The structure has been completed, and the skin was set in place to test fit, and mark locations of windows and roof vent to finalize the locations for the cross braces. 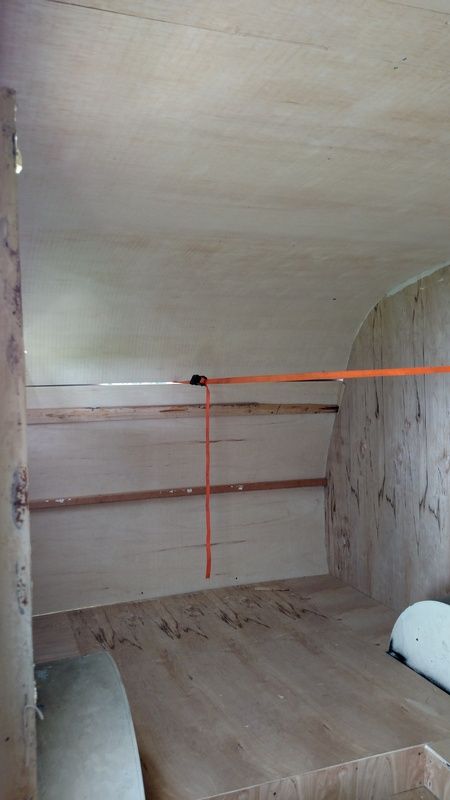 (ignore the old rotten boards that were used as temporary supports) 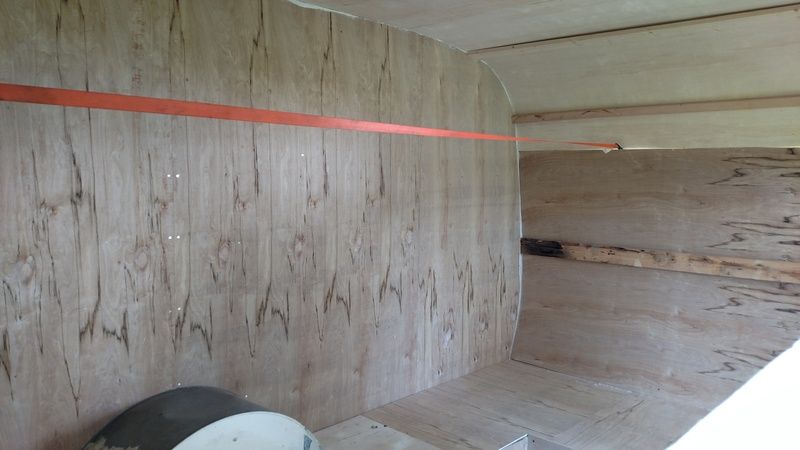 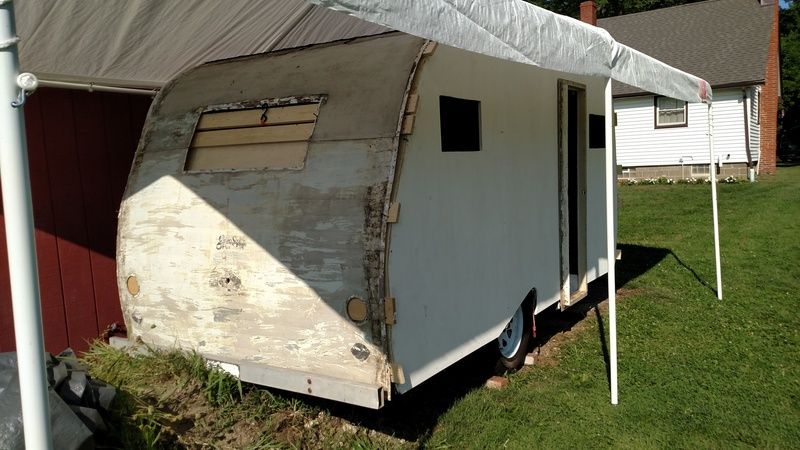 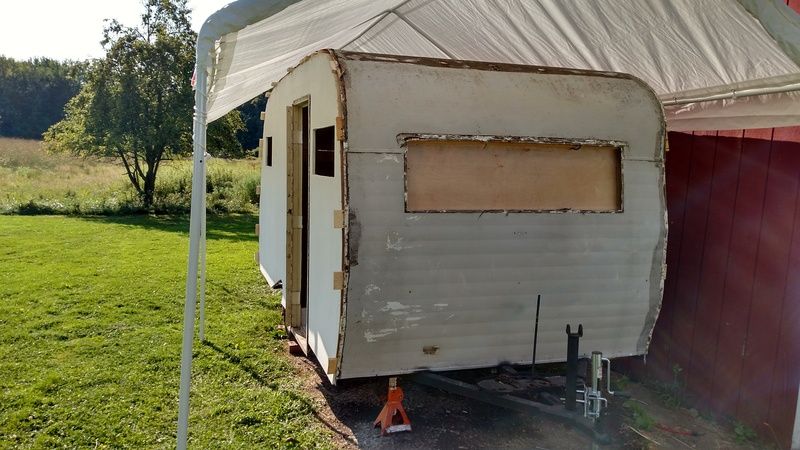 I spent way to much time arguing with the city, who cited me for having the canopy & camper, stating it was against city ordinances to have, and that I can not major repairs to an RV in my yard, after trying to fight it, I was told if it wasn't moved then I would get additional citations.. After getting a councilman involved, I still had to move to a spare concrete pad, but can keep the canopy for now. Anyone else have any issues like this?? Next update was cutting out the front and rear windows, and running the wiring for the taillights, marker lights, and the clearance lights. As well as started planning out the interior wiring system. I originally was going to just have a 110 system, but decided to include a 12V system as well. I was leaning towards the Parallax 6730D www.parallaxpower.com/6730d-power-center-6730d or the WFCO WF-8735-PB www.amazon.com/WFCO-WF-8735-PB-Black-Power-Center/dp/B004LF14Q4 |
|
kirkadie
1K Member
Posts: 1,156
Likes: 556
'69 Serro Scotty Hilander
Currently Offline
|
Post by kirkadie on Sept 7, 2015 16:32:12 GMT -8
Bmrrwolfe, looks like 'all systems a go'. I'm interested in your decision about power panels 'cause I'm scratching my head there too.
|
|
diymom
Active Member
enthralled with my 1969 Terry, problem is it keeps me awake at night planning
Posts: 323 
Likes: 51
1969 terry 18'
Currently Offline
|
Post by diymom on Sept 7, 2015 19:56:46 GMT -8
We had a warning issued by the city per a complaint by an irritated neighbor about our Shasta when we brought it home. It had been in our driveway 8 days, consequently we had just removed the grass from the front lawn and got cited for lack of landscaping too.
We had to install water tank, propane, trailer chains, locks, rebuild the oven bay and side panel and some other things within the month of grace before a citation would be issued...not easy with a 7 month pregnant belly and a two year old and a husband who worked full time. It basically rules out any future long term camper maintenance at our house. It's not really feasible to do it where we store it 2 hours away.
When we get our new trailer this coming weekend, we will have it at the house a week on and a week off until we are issued a warning, then push to finish the work within the 30 days. Since we had to landscape our yard, we ended up going all out and now have the nicest yard on the block...so maybe the neighbors won't complain now.
Trailers aren't allowed to be parked at our residence, rvs, however, are....6 months after we bought our house, the neighbor next door parked his 32' giant fading blue 90s rv in his driveway and most of the time, his tail pipe and tires were over the property line on our lawn...that's ok, but a trailer in the driveway isn't....lame.
I feel for your predicament, it's obvious you are actively fixing your trailer and that it won't just sit there forever, I wish your neighbors could delight in that instead of report you.
|
|
|
|
Post by vikx on Sept 7, 2015 21:54:09 GMT -8
I feel for you guys.
The City, State, County ought to have better things to do than picking on honest people who have a camp trailer. REALLY??? Things like controlling drug distribution, gang activity and road rage come to mind. Oh, and let's not forget the DUIs running over our kids and pets... Don't get me started on HOAs.
AND: We have the nastiest Neighbutts ever. They have reported us multiple times for multiple infractions, including costing us 22K for a modern septic system. (old one was working fine) Now, they have barking dogs and burn during bans. Nice people.
Sometimes, all you can do is live with it. Sometimes, you get lucky and can make the Butt's lives unpleasant.
Find out what IS allowed: Horrid yard art? Wind chimes? Football on the front lawn? A nice shedding Cottonwood comes to mind, too. A totally tacky garage sale.. hmmm.
Always sorry to hear neighbors trying to control others. It's really none of their business except in the case of excess noise or some sort of contamination. Perhaps chatting with other neighbors would give a few clues as to why such strict rules exist. Motorhomes are often uglier than trailers.
|
|
diymom
Active Member
enthralled with my 1969 Terry, problem is it keeps me awake at night planning
Posts: 323
Likes: 51
1969 terry 18'
Currently Offline
|
Post by diymom on Sept 7, 2015 22:50:24 GMT -8
Yeah, that motorhome was hideous and as tall as his house, stuck out clear to the sidewalk and blocked our entire view of anything but what was directly across the street...we began to hate sitting in our front room, all we could see was that blue monster! When telling people directions to our house, we would tell them we were the house after the monster rv...Nobody had a problem finding our house. The houses on our street are tiny, that thing was like the same size as his blue house!
I think a little vintage camper being worked on hardly necessitates a call to the city. Look at his property, it's really big, he cleans up and there isn't any junk around! Maybe he should have planted some trees/bushes around his work station or set up behind his outbuildings.
People just love to complain, seems they have nothing more exciting to do.
I look forward to the day I have no neighbors for several acres. No smokers stinking up my house, no screaming kids playing basketball untill 11 pm, no barking dogs waking up my kids, no Harley and crotch rockets down the street revving engines for no reason....oh and no marching band rehearsals at 7 in the morning-no, I'm not kidding...it has happened.
Be a good neighbor people!
Seriously the yard art is the best revenge...get some rusty oil drums and decaying tires and make a giant rust snowman/scarecrow with a muffler head and arms that double as wind chimes! Spray paint a pink bikini on that thing and plant a patch of weeds around it with some dead branches stuck in the ground. If you could hook up some lights in the muffler so it's eyes glow red and face the neighbors at night, even better! Don't let the darkness give them a break from the horror!
|
|