bmrrwolfe
Member

Posts: 36 
Likes: 3
Currently Offline
|
Post by bmrrwolfe on Jun 28, 2015 18:02:09 GMT -8
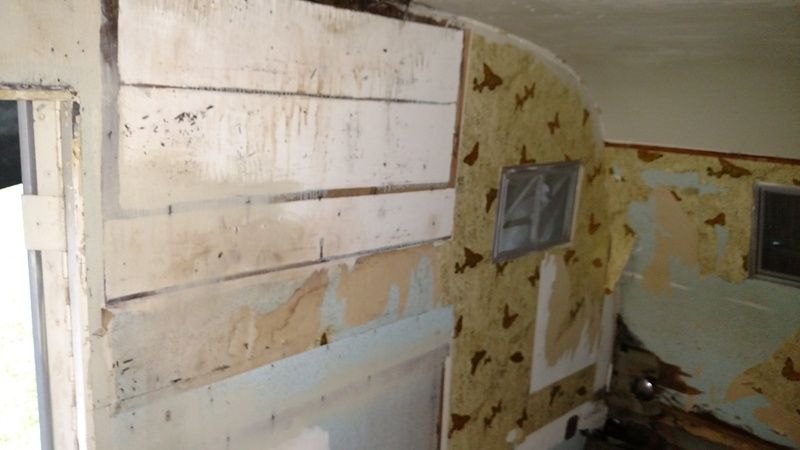
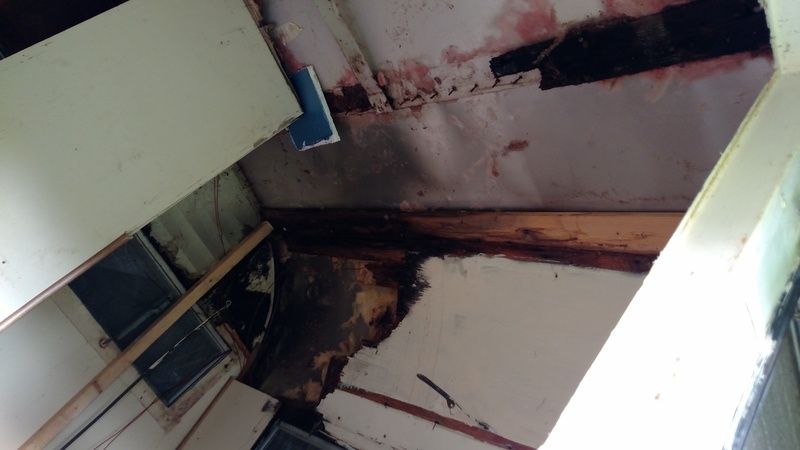
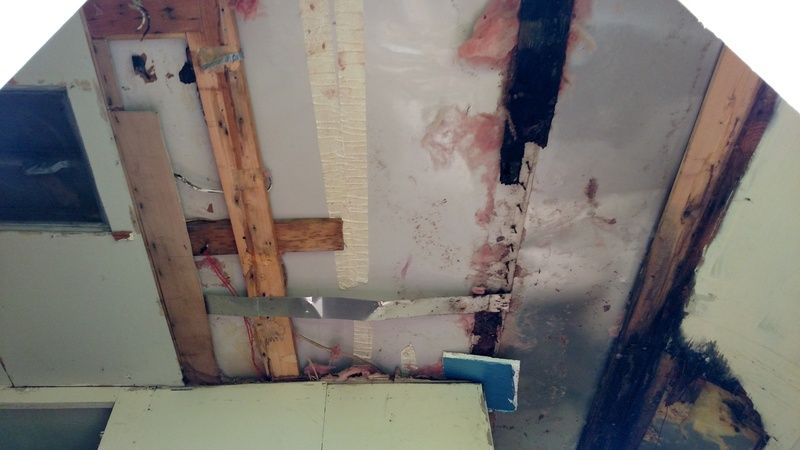
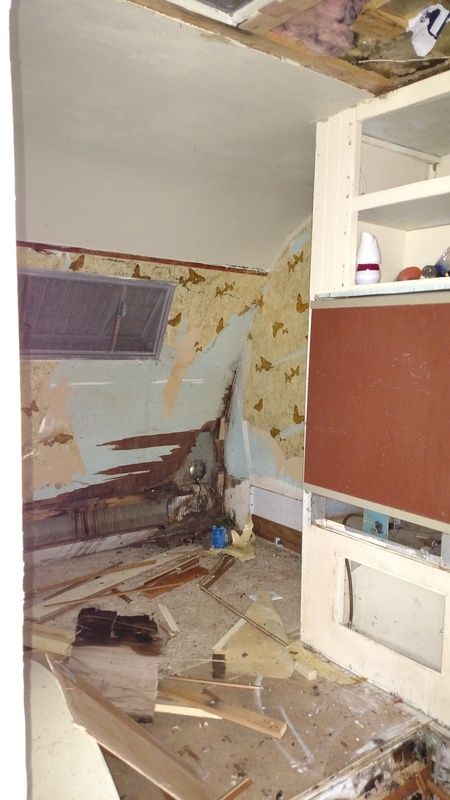
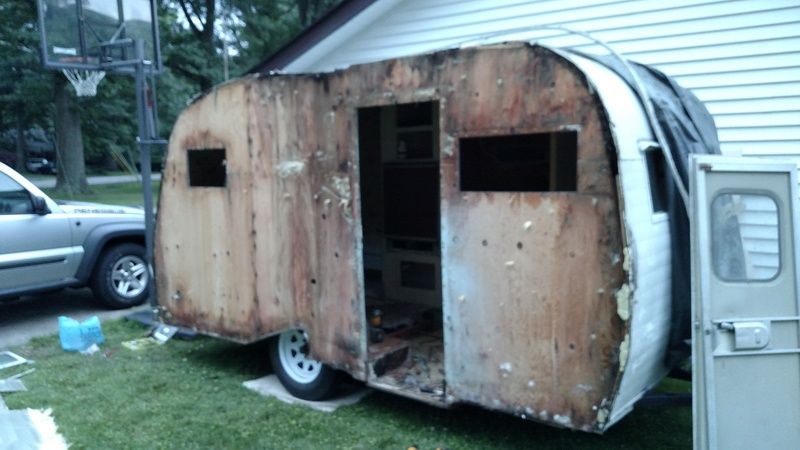
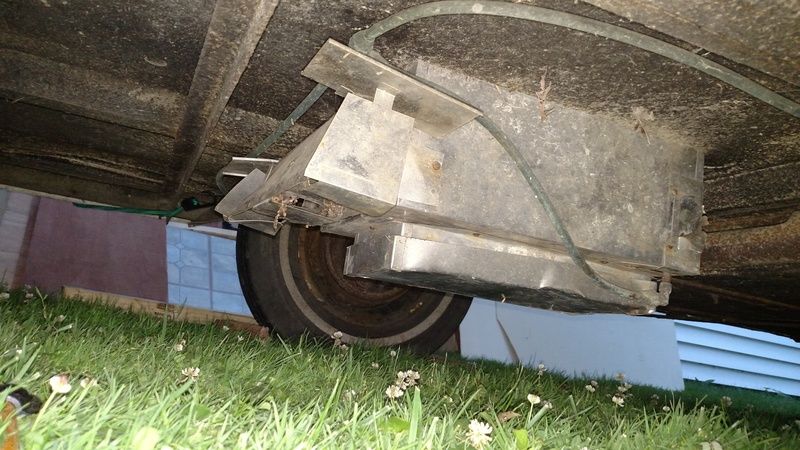
I found this 1966 Scotty Serro Sportsman on Craigslist for $250 and thought it must be too good to be true, so I went and sure enough it was real, but far worse then the PO description and pictures were.. None the less, they had the title for it and couldn't pass on the price, so I put a new rim and tire on it and limped her home. She made it home ![]() and after putting a new tongue jack on it, the teardown started right away. This will be my first vintage camper build, so I am sure I have alot to learn! I noticed that someone must of "redid" it in the past and removed all the original equipment inside except for the fridge. So this makes the decision to rip it all out and start from scratch pretty easy. The tear down brought out some severe rot along the drivers side front corner and roof, that they added paneling over the issue.. so I will have to decide the best route to repair it without getting too far over my head.    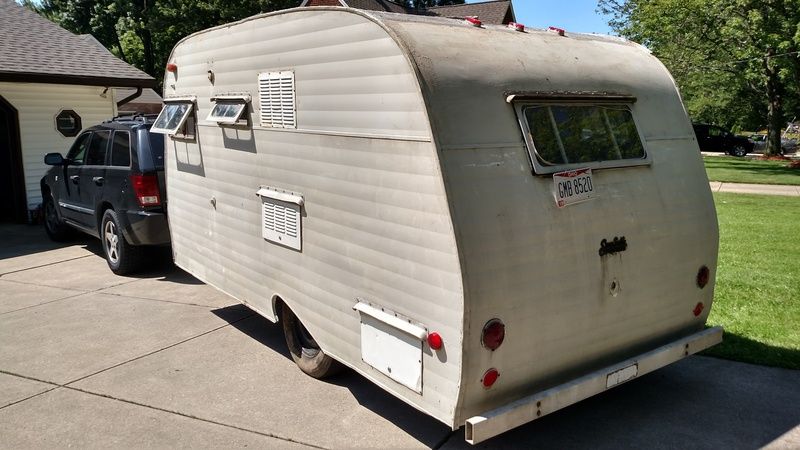 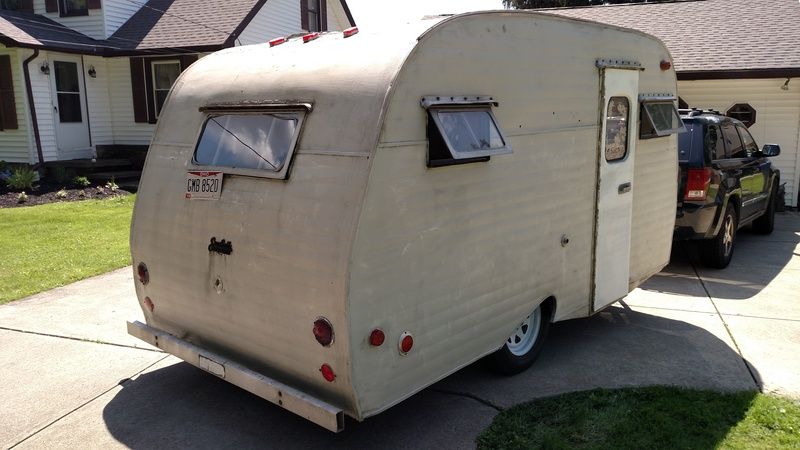 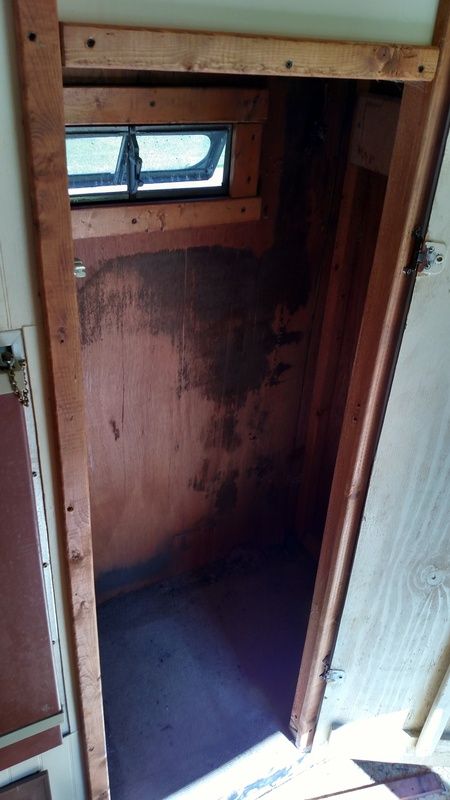 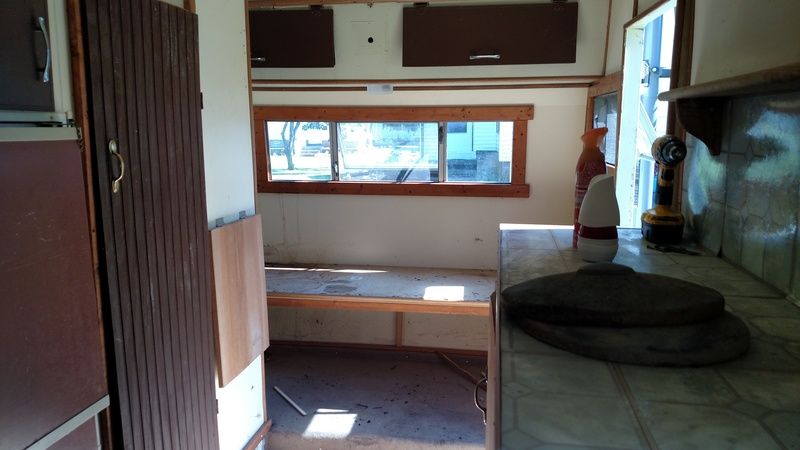 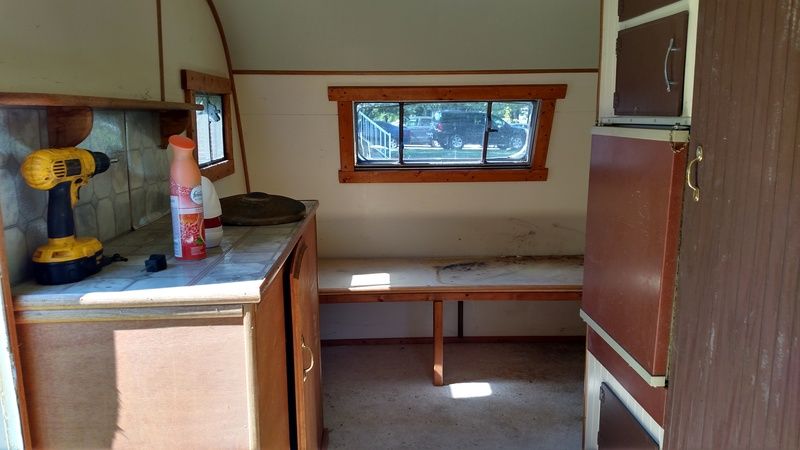 As can be seen in the pictures the PO globbed on something? on the corners that looks horrible, and also the entire roof has been covered as well, and has cracked and let in a lot of water with these big storms we have had. Any ideas on what this is stuff is, and after removing it all, whats the best stuff to use to reseal the roof and seams? |
|
|
|
Post by vikx on Jun 28, 2015 21:31:56 GMT -8
Welcome Bmrrwolfe!
Couple of things:
1. They have plywood walls. Any rot and they have to go down to the frame. It's almost impossible to piece plywood and keep the integrity of the original design.
2. The "coating" appears to be Silver Slop. It is rock hard and not easily removed. We've sanded for days and never got it all off. If it is only on the edges and seams, maybe...depends if it is peeling or loose at all.
To seal a trailer, all the edge trim must come off. Rot is repaired with the skins off. The edge trim/J rail, windows and doors are re-installed with new Putty Tape. There is absolutely no product that will prevent leaks if proper repairs are not done first.
Once that is accomplished, the roof vent and any other protrusions can be sealed with Dicor self leveling lap sealant. It is removable with a lot of elbow grease, allowing repairs. Proflex paint on roof sealer (not the caulk) will sometimes help it the roof seams are compromised. It is advisable to use waterproofing tape on the underside of the roof metal before re-attaching.
Hope this helps. It sounds like a lot of work, but is rewarding when your trailer is camping sound and road worthy.
Lots of help here!
|
|
|
|
Post by vintagebruce on Jun 29, 2015 5:40:28 GMT -8
 to VTT. Good news bad news time, imo. The good news you got a great deal on a nice model Scotty. You have what appears to be good "skins", good windows and the basic interior cabinetry to use as patterns or refurbish. Bad news, again just my opinion...if it has leaked as much as the sealant suggests, you will probably be much better off taking it down to the frame and rebuilding the structure. As vikx indicated Scotty(s) have plywood walls. It will be time consuming but there is an abundance of rebuild blogs, Scotty Forums and of course VTT to aid you every step of the way. Whatever problems and headaches you might encounter on your rebuild journey will be diminished by the pleasure and enjoyment you will harvest from the completed project. You have gotten a good start with the photographs you are already posting...I suggest creating a blog. Document EVERYTHING you do with this Scotty from the moment you knew it was for sale til you can post the finished rebuild/restoration photos, and in doing so, you will increase the $ value of the camper by a minimum of 25%. Good Luck. 
|
|
bmrrwolfe
Member
Posts: 36
Likes: 3
Currently Offline
|
Post by bmrrwolfe on Jun 29, 2015 9:02:32 GMT -8
Thanks for the info thus far. I should be clearer on the water damage ad it is limited to the front. The rear of the structure from the door back is pretty solid. My main fear is that if I tear down to the frame that I will not get it put back together.. So I was hoping with temporary bracing I could pull one side off at a time, rebuild and then do the roof pieces and front panel once I have new solid walls. It might be untraditional but if it doesn't work I will go down to the frame.
When it comes to building the structural parts of the walls, what is the best wood to use?
|
|
bmrrwolfe
Member
Posts: 36
Likes: 3
Currently Offline
|
Post by bmrrwolfe on Jun 29, 2015 13:55:32 GMT -8
I now understand the issue of repairs "sections" at a time. As I had assumed there was some type 1x2 or 1x3 framing in the sides, after pulling back some of the paneling, I now see that there is only plywood sides, with strips that run from side to side, along front back and roof. Well I make just bite the bullet and try removing the skin carefully to reuse, and see what the sides look like. What type of wood is best to use for the sides? And where is the best place to pick this stuff up?
Thanks!
|
|
|
|
Post by vikx on Jun 29, 2015 21:03:28 GMT -8
I'm thinking pretty nice quality exterior plywood, but not treated. Maybe check into marine grade. Here's the build on our 57 Corvette: vikxtrailers1.shutterfly.com/906It shows the ply walls and how we did it. Also check out the NSSO, Nat'l Scotty Serro Organization. Lots of great Scotty info there. |
|
kirkadie
1K Member

Posts: 1,156
Likes: 556
'69 Serro Scotty Hilander
Currently Offline
|
Post by kirkadie on Jun 30, 2015 5:31:04 GMT -8
I used a U.S. made 1/2" 5 ply, A/C grade interior/exterior from my local Contractor building supply. The A grade is nice enough to shellac if you choose, and smooth enough to paint too.
Cost me about $32 a sheet and took 6 sheets for the hilander, and left enough drops for dinette seat sides and lots of other things.
I joined the sides by running the router with a 1/4" splining bit down each side of the sheets and glued in shop made splines. Joints are clean and smooth, but it took a mess of clamps.
|
|
kamhawk
Active Member
Posts: 100
Likes: 40
1975 Scotty Serro
Currently Offline
|
Post by kamhawk on Jun 30, 2015 9:40:07 GMT -8
I am currently doing a frame off re-build of a 1975 Scotty Serro. I am planning on replacing the side walls with 3/4" birch plywood (to replace the 70's panneling). I will have to route out the bottoms and around the wheel wells to 1/2" as to not change the diminsions so the metal fits back in place. I just think that the 1/2" is too weak.
|
|
bmrrwolfe
Member
Posts: 36
Likes: 3
Currently Offline
|
Post by bmrrwolfe on Jun 30, 2015 12:40:56 GMT -8
Thanks for the input! What wood does everyone use as the roof & front/rear supports? I am going to get some this long weekend and hope to start building some walls.
|
|
kirkadie
1K Member
Posts: 1,156
Likes: 556
'69 Serro Scotty Hilander
Currently Offline
|
Post by kirkadie on Jun 30, 2015 13:19:47 GMT -8
Don't take your walls off until you have your materials together. After the skin is off, use the standing walls as templates; trace them onto the new plywood noting where the 1X cross boards are also on the new ply. I screwed scraps to the underside bottom of the existing walls so the new plywood could rest against the old.
My mistake was assuming both sides were mirror image and after tracing the curb side wall, I used it for the street side. Unfortunately the excellent craftsmen at Serro Scotty hadn't thought of that because the street side was 3/4" shorter.
I left both sides symmetrical but had to make a zero to 3/4" tapered bottom board to make up the gap.
Or you could just measure both sides to verify they are the same.
|
|
kamhawk
Active Member
Posts: 100
Likes: 40
1975 Scotty Serro
Currently Offline
|
Post by kamhawk on Jun 30, 2015 14:32:01 GMT -8
I was just going to use 1" x 4" yellow pine unless someone tells me different. I was also thinking of painting the ends and any supports framing the windows or vent with asphalt post hole paint from Tractor Supply to maybe protect the wood in case of a water leak in the future
|
|
kirkadie
1K Member
Posts: 1,156
Likes: 556
'69 Serro Scotty Hilander
Currently Offline
|
Post by kirkadie on Jun 30, 2015 17:51:08 GMT -8
I'm a big fan of Tractor Supply's fence post paint. I did a report on it about a year ago and am pleased to say it is still as bonded, especially after our winter temperature swings as it was when applied.
Two thumbs up from here!
|
|
bmrrwolfe
Member
Posts: 36
Likes: 3
Currently Offline
|
Post by bmrrwolfe on Jul 5, 2015 13:44:36 GMT -8
|
|
bmrrwolfe
Member
Posts: 36
Likes: 3
Currently Offline
|
Post by bmrrwolfe on Jul 5, 2015 13:51:33 GMT -8
I am doing this a little unconventional, but I want to keep the camper as complete as possible while working on it instead of going down to the frame.. So the passenger side wall came off, and the floor was inspected, and although mostly solid, I decided to do it right and pull it all out section by section and replace. In the process I also pulled out any of the floor supports that had any damage (about half) and replace with new as well as new bolts dropped through the frame. Quick wire brush on the angle grinder to the frame and a quick coat of black paint on the top side of the frame and the floor supports and the new floor started going down. 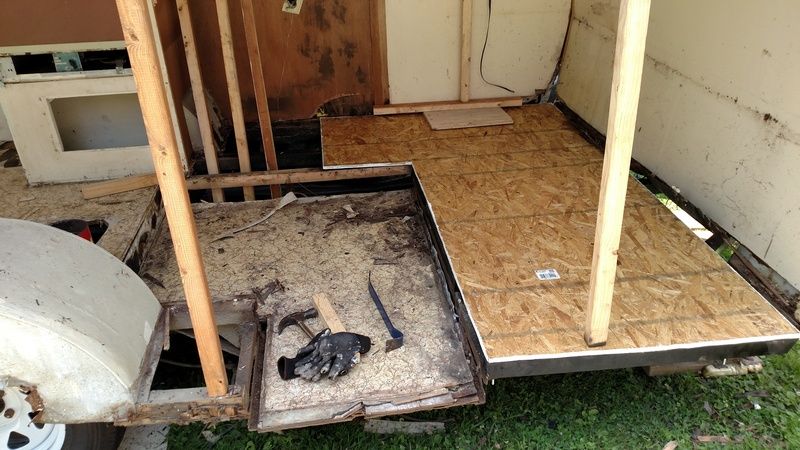 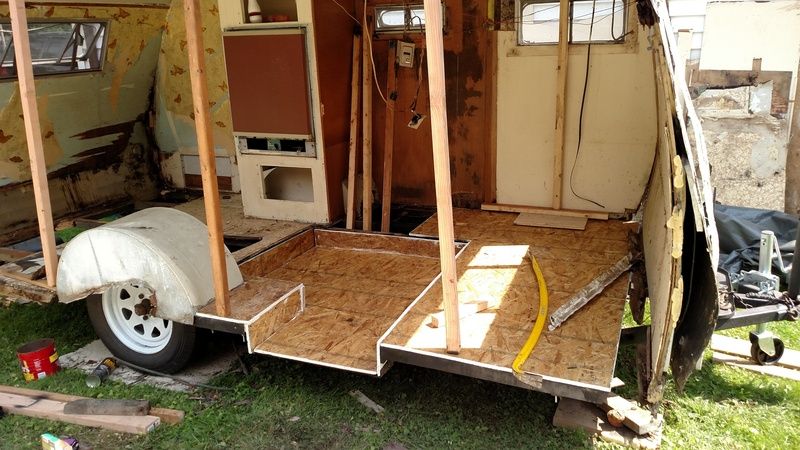 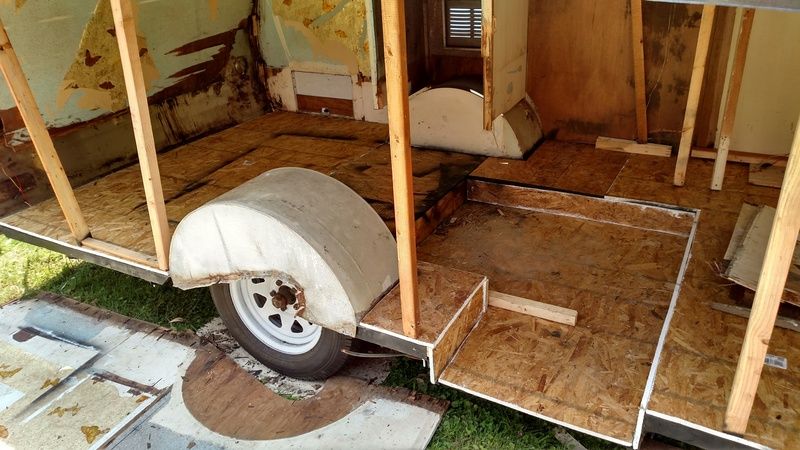 All of the floor was coated on the bottom and edges before going down, and will also probably get a heavy coating of undercoating once the shell is finished. I also picked up the 1/2" boards to construct the side, but ran out of steam for the weekend.. |
|
|
|
Post by vikx on Jul 5, 2015 21:12:58 GMT -8
Fun to see your progress on the Scotty! Thanks for posting the pix. Looks like it will be a great little trailer when you're done.
|
|


 to VTT. Good news bad news time, imo. The good news you got a great deal on a nice model Scotty. You have what appears to be good "skins", good windows and the basic interior cabinetry to use as patterns or refurbish. Bad news, again just my opinion...if it has leaked as much as the sealant suggests, you will probably be much better off taking it down to the frame and rebuilding the structure. As vikx indicated Scotty(s) have plywood walls. It will be time consuming but there is an abundance of rebuild blogs, Scotty Forums and of course VTT to aid you every step of the way. Whatever problems and headaches you might encounter on your rebuild journey will be diminished by the pleasure and enjoyment you will harvest from the completed project. You have gotten a good start with the photographs you are already posting...I suggest creating a blog. Document EVERYTHING you do with this Scotty from the moment you knew it was for sale til you can post the finished rebuild/restoration photos, and in doing so, you will increase the $ value of the camper by a minimum of 25%. Good Luck.