hoosierpoet
Active Member

Posts: 187 
Likes: 18
Currently Offline
|
Post by hoosierpoet on Jul 24, 2013 13:58:12 GMT -8
I've removed most of the items on the outside of my '61 Shasta Airflyte, but have run up against one I can't seem to remove: the external water filler. The tank is under the dinette (street side), I plan on removing it and probably won't replace it, at least not for now. We figure we'll mostly camp at sites with water hookup, and aren't too proud to carry water in a bucket if needed... Anyhow, I've removed the screws from the filler, there's a single flat-slotted screw inside it but that just seems to turn, it doesn't appear to be holding anything. The filler is loose, the whole tank moves when I jiggle it! So, what's the secret to getting it off the tank, and removing the tank from the trailer? I'll try to add a couple photos...   |
|
Ten
3K Member

Posts: 3,432
Likes: 1,467
70 Shasta 16SC + 1964 Airflyte
Currently Offline
|
Post by Ten on Jul 24, 2013 14:27:13 GMT -8
Been here... The filler is threaded onto the tank. It is a white metal, and is brittle and will break easily if you apply too much torque to it. Vikx has recommended heating it gently from inside the filler and giving it some penetrating oil along the threads. The threads will be accessible only from the outside of the filler though, best to use a straw-type spray nozzle along the siding... The tank will seem like it should come right out once you have the filler off and the lines inside all detached, but don't forget that it has a drain tube (nipple) that goes out the bottom through the floor, and depending on how it is capped or valved, can be stubborn about coming out. When I tried to unscrew the cap from the drain nipple, it ripped loose from the bottom of the tank. Tank filler: 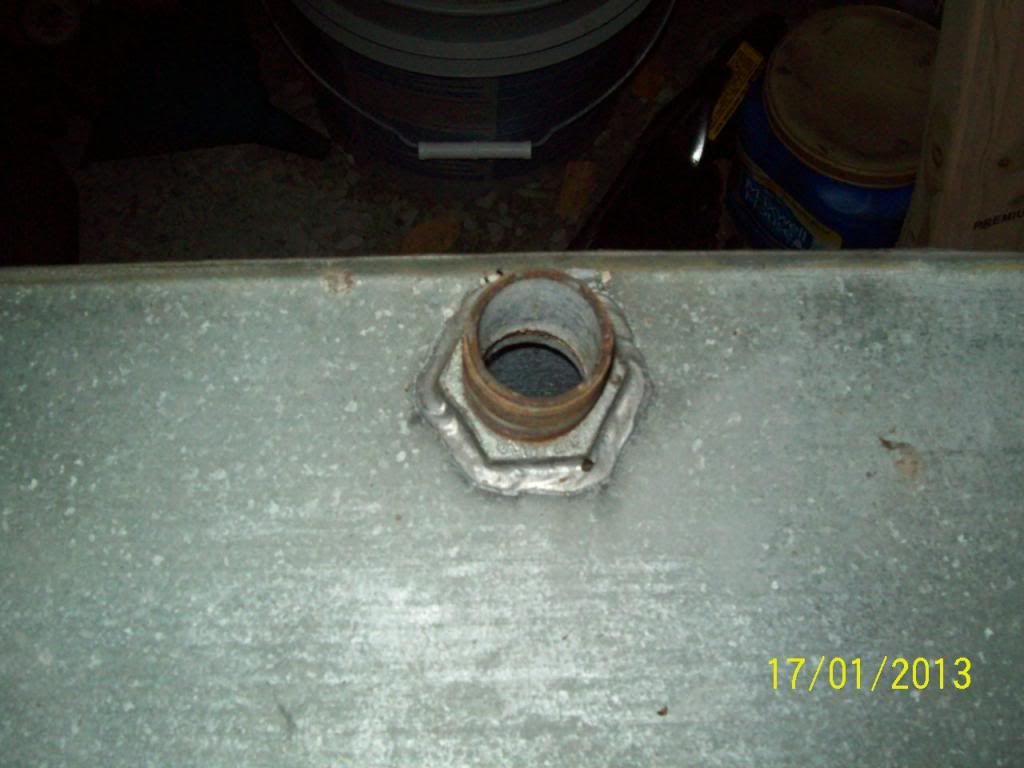 Drain side: 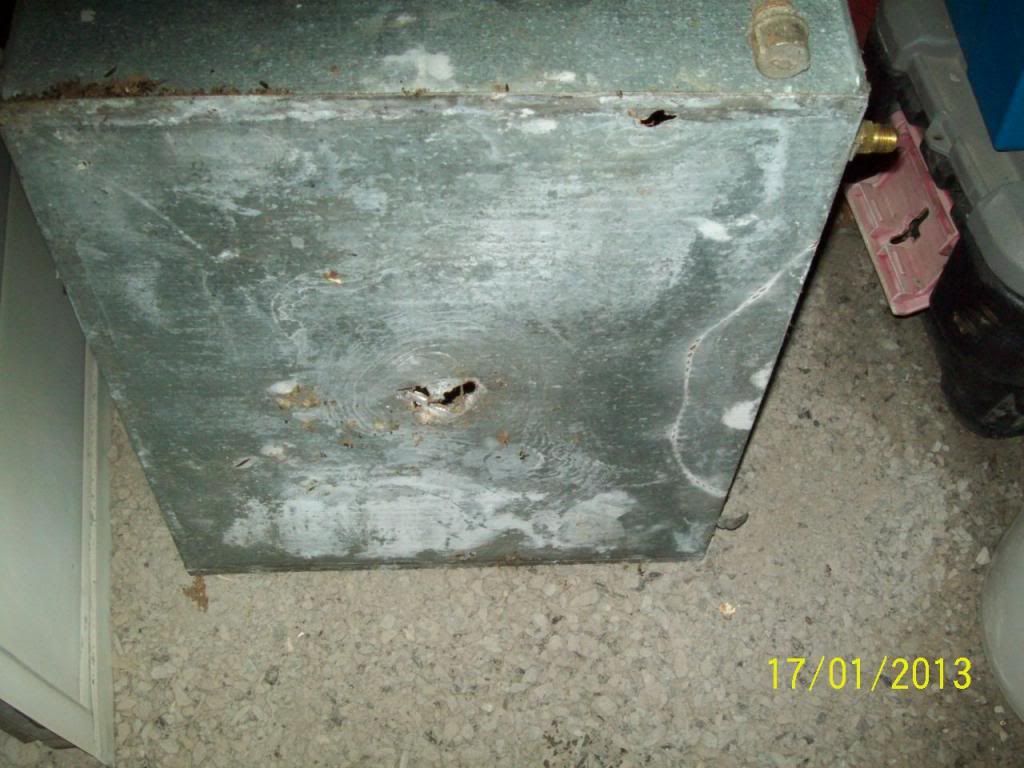 My water fill did not fare too well, because I got anxious and tried to force it loose, with no help from oils or heat. 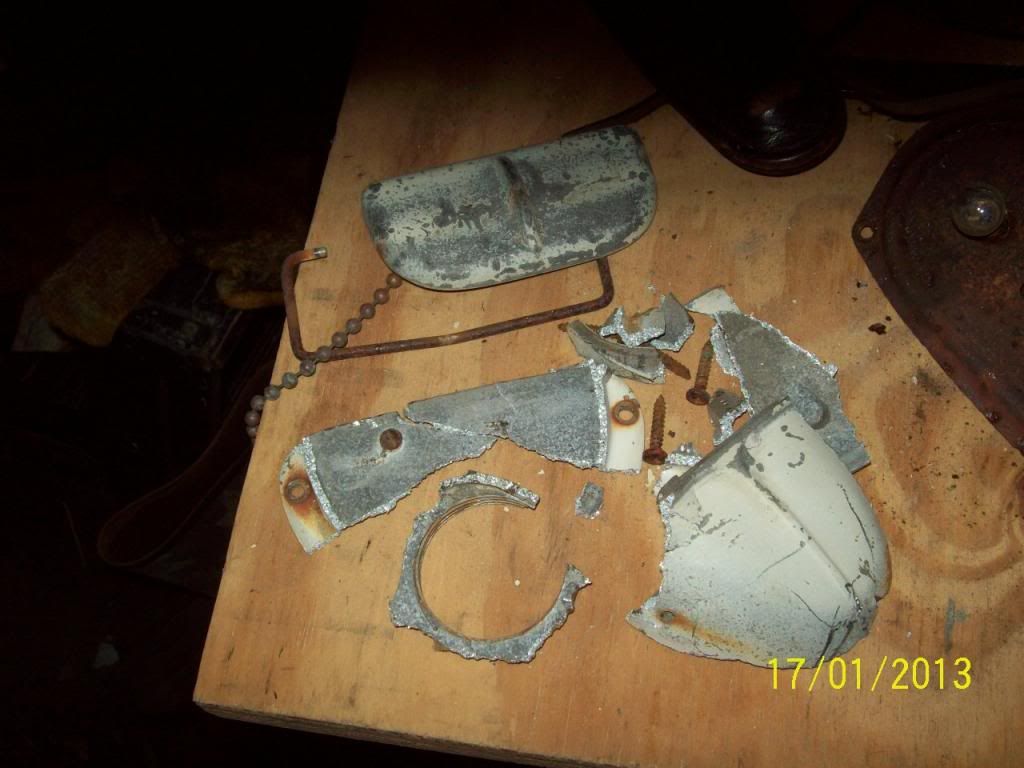 Finally, this is the dinette with the tank removed.  |
|
|
|
Post by bigbill on Jul 24, 2013 14:49:56 GMT -8
Short instruction: a dull axe
|
|
hoosierpoet
Active Member
Posts: 187
Likes: 18
Currently Offline
|
Post by hoosierpoet on Jul 24, 2013 17:09:23 GMT -8
Lovely! Gives me something to look forward to.  Did you put in a new (plastic) tank? And if not, what did you do with the opening from the filler? I suppose I could find an interesting plate or plaque of some sort to put there... |
|
keri
Active Member
Posts: 127
Likes: 15
Currently Offline
|
Post by keri on Jul 24, 2013 17:18:45 GMT -8
My dad took mine out the other day (well, we had to remove the skin on that side to removal was the only way to do that). He basically just used force and the outside fill part just broke loose from the tank. He tried cutting it but wasn't having any luck. I don't have a bathroom in my Bellwood so I'm going to just use a small, portable water container under the sink instead of installing another tank and infill. I figured I would just cover the hole with a patch for now. Not pretty but my trailer will eventually (in the far far future unless I win the lottery) be completely reskinned because it is rather golfball-like from hail damage, so I'm not especially worried about it.
Getting those old water tanks is way harder that it would seem like if should be!!!
|
|
Ten
3K Member
Posts: 3,432
Likes: 1,467
70 Shasta 16SC + 1964 Airflyte
Currently Offline
|
Post by Ten on Jul 24, 2013 18:03:27 GMT -8
Although a dull axe would work, saving the fill for someone that may need one is a nice idea, if you are not planning to reuse it.
I am planning to replace the tank with a plastic one and put things back sorta the way they were. I want to have the "original" feel to it. I've found that the 16-gallon size tank is fairly common and an easy size to find a replacement for. Since the Airflyte is already plumbed for "city water" hookup, bypassing the tank is not really necessary.
You might use a vent cover similar to the stove vent cover to camouflage the hole if you are not replacing the tank (and I would suggest window screen on the inside to keep insects and small pests out).
Universalexports was using the hole from the water fill to re-route the electric cord for a new 30-amp box setup in his. I really thought about copying that idea too.
|
|
hoosierpoet
Active Member
Posts: 187
Likes: 18
Currently Offline
|
Post by hoosierpoet on Jul 24, 2013 19:02:16 GMT -8
I guess since I'm not planning to reuse the tank, maybe I could take a sledge to it - then the inlet might come loose, and I could just pull it through from the outside? Seems possible, if all else fails. I will tackle it tomorrow!
|
|
|
|
Post by vikx on Jul 24, 2013 22:01:02 GMT -8
Save the inlet! It's a treasure to some of us... To remove the tank without messing with the inlet, hacksaw the pipe and the inlet will be loose...
Forgot to thank Chris again for saving the lid. LOL!
|
|
hoosierpoet
Active Member
Posts: 187
Likes: 18
Currently Offline
|
Post by hoosierpoet on Jul 25, 2013 2:51:41 GMT -8
I have my lid, too. Will do my best to save both!
|
|
kirkadie
1K Member

Posts: 1,156 
Likes: 556
'69 Serro Scotty Hilander
Currently Offline
|
Post by kirkadie on Jul 25, 2013 3:59:42 GMT -8
I used PBblaster, bought at auto parts store. Sprayed it on from the inside of my Scotty, let it work overnight and it came off fairly easily the next day. It didn't work on the drain though, and the nipple broke off like NT's. Local machine shop will braze on a new one.
My tank had/has no rust inside or out, may never have been used, so maybe that's why it was successful.
Good luck.
|
|
hoosierpoet
Active Member
Posts: 187
Likes: 18
Currently Offline
|
Post by hoosierpoet on Jul 25, 2013 14:14:19 GMT -8
Got it! Thanks for all the help - I was thankful for the photos, it always helps to know how things are put together before you try to take them apart! I sprayed PB Blaster and let it work for a while, then grabbed a rubber mallot and had at it. It took quite a number of whacks, but began to move; once it was sideways instead of vertical, it freed up and I was able to unscrew it the rest of the way. And the tank came out intact, including the drain on the bottom. So I have the tank, and also the filler with lid and even the chain - all in good, usable condition. Went much better than I expected!
|
|
mobiltec
5K Member
I make mistakes so you don't have to...
Posts: 9,825
Likes: 3,752
1954 Jewel In Progress...
Currently Offline
|
Post by mobiltec on Jul 25, 2013 17:28:45 GMT -8
Don't ya love it when something works?
|
|
hoosierpoet
Active Member
Posts: 187
Likes: 18
Currently Offline
|
Post by hoosierpoet on Jul 25, 2013 18:11:34 GMT -8
Don't ya love it when something works? Happens so seldom, it sorta scares me! |
|
|
|
Post by vikx on Jul 25, 2013 22:07:03 GMT -8
Karma will get you tomorrow...
|
|
cowcharge
1K Member
Posts: 1,003
Likes: 328
Currently Offline
|
Post by cowcharge on Jul 26, 2013 8:53:26 GMT -8
As for patching the filler hole, I used a self-sticking aluminum screen patch from the auto parts store on the inside, and used bondo both on the inside and outside. It's virtually invisible. Did the same thing on the roof after the tree limb fell on it.
|
|


 Did you put in a new (plastic) tank? And if not, what did you do with the opening from the filler? I suppose I could find an interesting plate or plaque of some sort to put there...


