|
|
Post by schweetcruisers on Sept 28, 2014 17:35:25 GMT -8
So we all know of the poor framing method of pieceing little scraps together to make up the curves, Shasta used. But what other methods have blown your minds when taken your trailer apart? I'm going to blow everyone's mind in a couple of days when I pull the Kenskill apart. I spotted something today while pulling the roof vents off that to me is crazy. Stay tuned, in the mean time please post your own crazy build methods!
|
|
|
|
Post by vikx on Sept 28, 2014 22:09:23 GMT -8
Since you mentioned vents, Shasta was infamous for floating wood around the roof vent. Not square, not connected, just sitting there...
Not knocking Shastas, but one of my Loflytes had the 110 wiring run thru the corner of the roof vent. Seriously, a wayward screw waiting to happen.
The most irritating of all is short siding. I've found metal cut an inch too short at the roof line, with no attempt having been made to rectify or improve the situation. (mid 60s Aristocrats and Shastas) A simple L shaped piece of aluminum under the roof and overhanging the siding would work.
I'm sure there's things I'm forgetting.
|
|
jnordgren42
Member

Posts: 35 
Likes: 12
1954 Silver Dome
Currently Offline
|
Post by jnordgren42 on Jun 26, 2016 21:53:37 GMT -8
Resurrecting an old thread, since there were quite a few in my Silver Dome. It's a bread loaf style and all of the seams in the skin have a decent amount of overlap. Enough so that the screws all go through both pieces of metal and into the frame. All except one that is. The rear panel fully overlaps with the curb side corner, but the street side has just enough so that the panel overlaps but the screws only go through the top skin. The bottom is just clamped down by the top add frame.
Alsi it seems like the just had a random bin of screws and nails and used whatever they happened to grab. There are at least 5 different types of screws including some with a bow tie shaped head that were an incredible pain in the rear to remove. I ended up having to basically fabricate a but to remove them with any measure of reliability. And of course the majority of that type were used on the roof where it was the most difficult to reach them and get any leverage on them. By far the most frustrating thing I have done on her so far.
Also a lot of the exterior trim pieces have no backing in the frame and are just screwed the into bare skin, most notably the awning rail. Scratching my head on that one.
|
|
|
|
Post by bigbill on Jun 27, 2016 6:24:33 GMT -8
Those "bow tie screws" are called clutch head screws and bits are available at many hardware and tool shops.
|
|
edbrown
Member
Posts: 33
Likes: 14
Currently Offline
|
Post by edbrown on Jun 27, 2016 7:00:41 GMT -8
This was my favorite. On the right side at the wheel well there was a gap between two pieces of aluminum, with no overlap. Behind the gap was a piece cut from a coffee can and flattened. 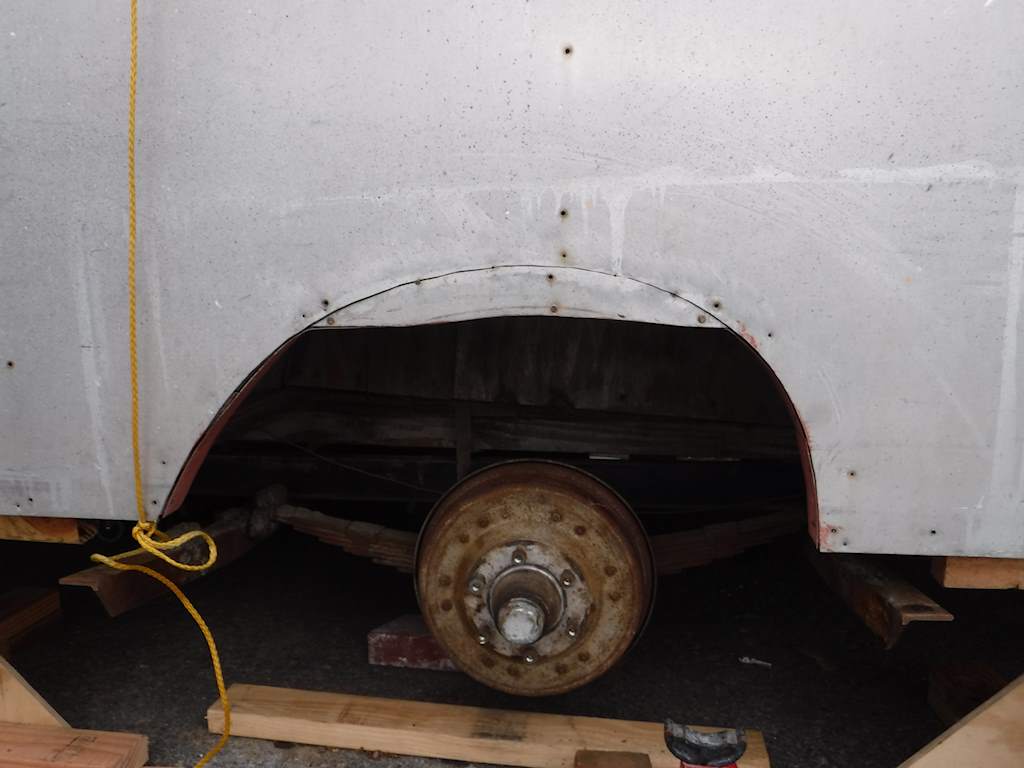 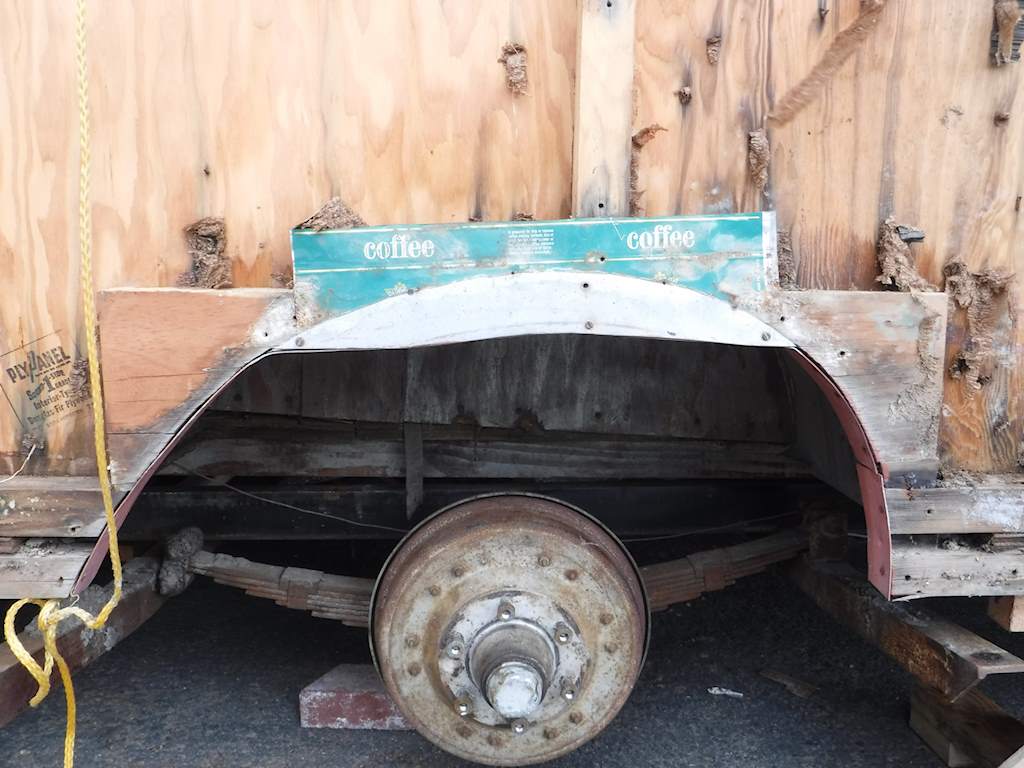 |
|
Deleted
Posts: 0
Currently Offline
|
Post by Deleted on Jun 27, 2016 7:10:52 GMT -8
No crazy stories of my own, but it's amazing how even the new Reissue Shastas have poor craftsmanship top. Down to the should-be simple job of putting on a jrail correctly.
|
|
|
|
Post by danrhodes on Jun 27, 2016 7:25:28 GMT -8
Just found a funny one yesterday. Half of the lower screws in my side rear window didn't hit any wood at all. I guess the window was held in by the skin and staples. I have a little extra overlap at the top, so I might try to lower the skin just enough to get some wood there.  |
|
|
|
Post by vikx on Jun 27, 2016 21:47:05 GMT -8
Dan, add a shim or stick to support the screws. (glue and tack) You can slip a piece of aluminum under the skin and cut to fit. The seam won't show, window flange should cover it...
|
|
|
|
Post by trailertrasher on Jun 28, 2016 0:29:56 GMT -8
Waste not,Want not.
Not a great pic,but this has always been one of my favorites discoveries. A sampling of the available or discontinued counter tops of the day in the roof arcs of this 51 Prairie Schooner.
<a href="http://photobucket.com/" target="_blank"><img src="http://i227.photobucket.com/albums/dd106/amctogo/IMAG0245.jpg" border="0" alt=" photo IMAG0245.jpg"/></a>
|
|
|
|
Post by danrhodes on Jun 28, 2016 5:52:04 GMT -8
Dan, add a shim or stick to support the screws. (glue and tack) You can slip a piece of aluminum under the skin and cut to fit. The seam won't show, window flange should cover it... Wouldn't it show inside? The interior trim is the same size as the opening, so I can't tuck it underneath. |
|
|
|
Post by vikx on Jun 28, 2016 10:38:35 GMT -8
On the inside, you might consider larger trim, either aluminum or picture frame in wood. Hope this makes sense. The window has to have good wood for the screws to seat, so adding the sticks is important. Most metal shops can bend you trim the size you want/need.
|
|
mobiltec
5K Member
 I make mistakes so you don't have to...
Posts: 9,822
Likes: 3,749
1954 Jewel In Progress...
Currently Offline
|
Post by mobiltec on Jun 28, 2016 15:44:28 GMT -8
This was my favorite. On the right side at the wheel well there was a gap between two pieces of aluminum, with no overlap. Behind the gap was a piece cut from a coffee can and flattened. That's most likely a repair. I doubt Spartan did that. Wheel wells got damaged all the time from tire blow outs. The rubber peels off at high speed and damages the wells. A good percentage of all vintage trailers have damage like that. |
|
edbrown
Member
Posts: 33
Likes: 14
Currently Offline
|
Post by edbrown on Jun 28, 2016 18:55:34 GMT -8
This was my favorite. On the right side at the wheel well there was a gap between two pieces of aluminum, with no overlap. Behind the gap was a piece cut from a coffee can and flattened. That's most likely a repair. I doubt Spartan did that. Wheel wells got damaged all the time from tire blow outs. The rubber peels off at high speed and damages the wells. A good percentage of all vintage trailers have damage like that. It's not a Spartan. It's a Coastbilt, which as far as I can tell nobody but me and the previous owner ever heard of. I disassembled and rebuilt all that, and it really really looks original. I'd be VERY surprised if anyone but me ever saw that area once it left the factory. The framing and everything except that aluminum joint was the same left and right. Hard to believe somebody would do that repair and reproduce the exact same worksmanship. Even things like using the identical nails. |
|
mobiltec
5K Member
I make mistakes so you don't have to...
Posts: 9,822
Likes: 3,749
1954 Jewel In Progress...
Currently Offline
|
Post by mobiltec on Jun 28, 2016 19:00:15 GMT -8
Well ya just never know I guess. Every time we think we've seen it all, something like that shows up. It's an amazing hobby really.
|
|


