|
|
Post by bigbill on Jan 7, 2014 11:46:11 GMT -8
That solves that question, I knew it changed but did not know why. Thanks I can now add that to my knowledge base.
|
|
|
|
Post by universalexports on Jan 7, 2014 16:53:45 GMT -8
How do VCT tiles hold up after lots of expanding and contracting and different temperatures and humidity? I live in Wisconsin and am worried about the gaps between tiles growing and ruining my floor. from my understanding they will hold up fine, but they do shrink and expand with temp change, thats an advantage to smaller 9x9 tiles, each tile is smaller so it contracts and expands less than a 12x12 tile. basically you have more lines between the tiles due to having more smaller tiles, so each line will grows or shrinks less due to their being more of them. did that make any sense? maybe I should have said if a tile shrinks lets say 1%, well 1% of a 9x9 tiles is less than 1% of a 12x12 tile. |
|
kwaggs
Junior Member

Posts: 77
Likes: 10
Currently Offline
|
Post by kwaggs on Jan 7, 2014 17:08:05 GMT -8
How do VCT tiles hold up after lots of expanding and contracting and different temperatures and humidity? I live in Wisconsin and am worried about the gaps between tiles growing and ruining my floor. from my understanding they will hold up fine, but they do shrink and expand with temp change, thats an advantage to smaller 9x9 tiles, each tile is smaller so it contracts and expands less than a 12x12 tile. basically you have more lines between the tiles due to having more smaller tiles, so each line will grows or shrinks less due to their being more of them. did that make any sense? maybe I should have said if a tile shrinks lets say 1%, well 1% of a 9x9 tiles is less than 1% of a 12x12 tile. Got ya! Im just worried about being in Wisconsin for hot humid summers and NEGATIVE 41 in the winter HAHA! Thanks for that summary I think we will try working with the 9x9's when it gets a little warmer out! |
|
|
|
Post by universalexports on Jan 7, 2014 19:27:02 GMT -8
people have recommended laying them with the temperature in the middle of the extreams, I remember pics of one that laid theirs as soon as the floor was in with no walls or top on yet (complete rebuild) it was hot and they were in the sun and after it cooled they shrunk quite a lot.
also set the tiles where they will also be at that temp for at least 48 hours prior to putting them down.
|
|
|
|
Post by universalexports on Jan 7, 2014 19:35:56 GMT -8
see above post, out of curiosity I went out and looked at mine, it is about 10 degrees here and honestly I cant really tell if they have shrunk or not, the floor looks fine.
|
|
|
|
Post by bigbill on Jan 8, 2014 17:15:01 GMT -8
With the thought of shrinkage and the tile designs that we saw posted has any one ever thought about cutting the 12" x 12" tiles into four six inch squares. Which would eliminate waste plus add a multitude of patterns that could be arranged in the narrow space of a trailer aisle? It would allow the creation of a whole new look, maybe start a new trend or at least mess with peoples head wondering where you acquired the flooring.
|
|
SusieQ
Global Moderator 
Posts: 4,781 
Likes: 1,197
'62 Shasta Compact
Currently Offline
|
Post by SusieQ on Jan 8, 2014 17:28:07 GMT -8
With the thought of shrinkage and the tile designs that we saw posted has any one ever thought about cutting the 12" x 12" tiles into four six inch squares. Which would eliminate waste plus add a multitude of patterns that could be arranged in the narrow space of a trailer aisle? It would allow the creation of a whole new look, maybe start a new trend or at least mess with peoples head wondering where you acquired the flooring. Bill, that's exactly what I plan on doing. I just can't see wasting it or making the extra cut. Plus, it wouldn't be mistaken for old 9x9's in the future after I'm dead and gone. I just wasn't going to say anything until I've actually accomplished it. The floor area is so small in the Compact that it seems that would be the best way to accomplish a pattern other than alternating squares. |
|
|
|
Post by bigbill on Jan 8, 2014 17:32:02 GMT -8
SusieQ Great minds travel the same paths now the question becomes, are we trying to become artistic or are we just being cheap/thrifty.  |
|
SusieQ
Global Moderator
Posts: 4,781
Likes: 1,197
'62 Shasta Compact
Currently Offline
|
Post by SusieQ on Jan 8, 2014 17:41:57 GMT -8
Maybe a little of both. I had truly considered cheap stick on tiles. I put some in our really larger basement/rec room and they've held up well for 10 years! But this forum may be turning me into a Glamper, just kidding. I have a crafty bit of artsy in my background.  |
|
|
|
Post by bigbill on Jan 8, 2014 17:44:51 GMT -8
The only thing I have to say is post pictures so we can see what you design.
|
|
mobiltec
5K Member
 I make mistakes so you don't have to...
Posts: 9,822 
Likes: 3,749
1954 Jewel In Progress...
Currently Offline
|
Post by mobiltec on Jan 9, 2014 8:18:51 GMT -8
well, I attempted to cut down my 12x12 tiles to 9x9, and happy to report it was a success. I have a flooring cutter I got from a pawn shop for $70.00 I then built a guide 9 inches from the blade to make perfect repeatable 9x9 cuts each time, it seems to work perfect. and the cut edges are smoother than the factory cuts. here are some pics. 12x12 tiles ready to cut down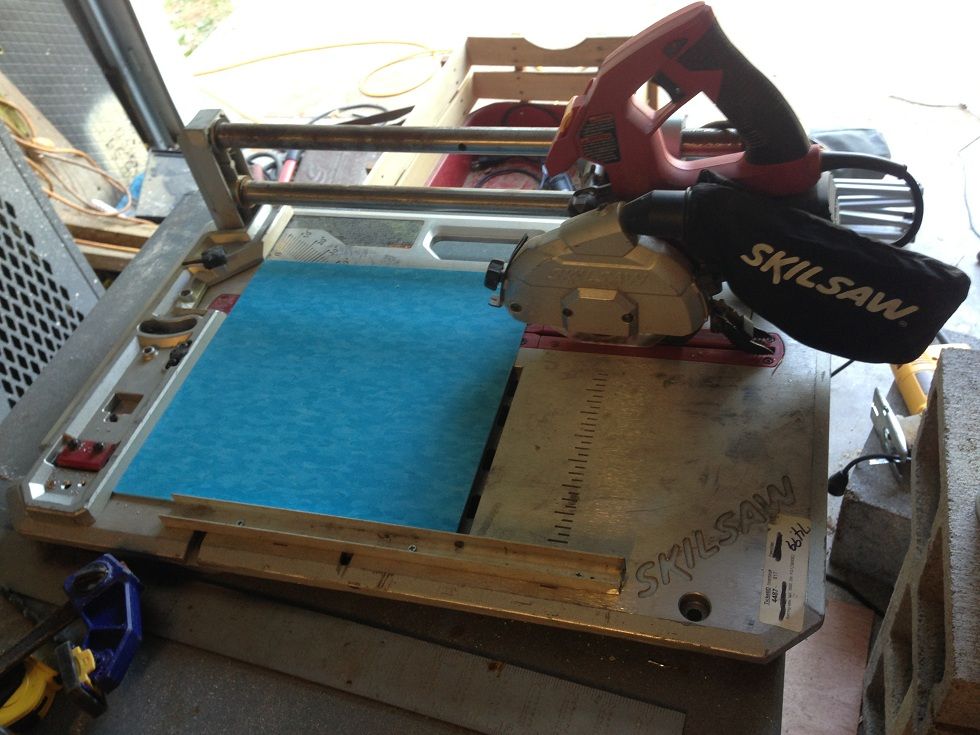 2 sides cut so it is now 9x9 2 sides cut so it is now 9x9
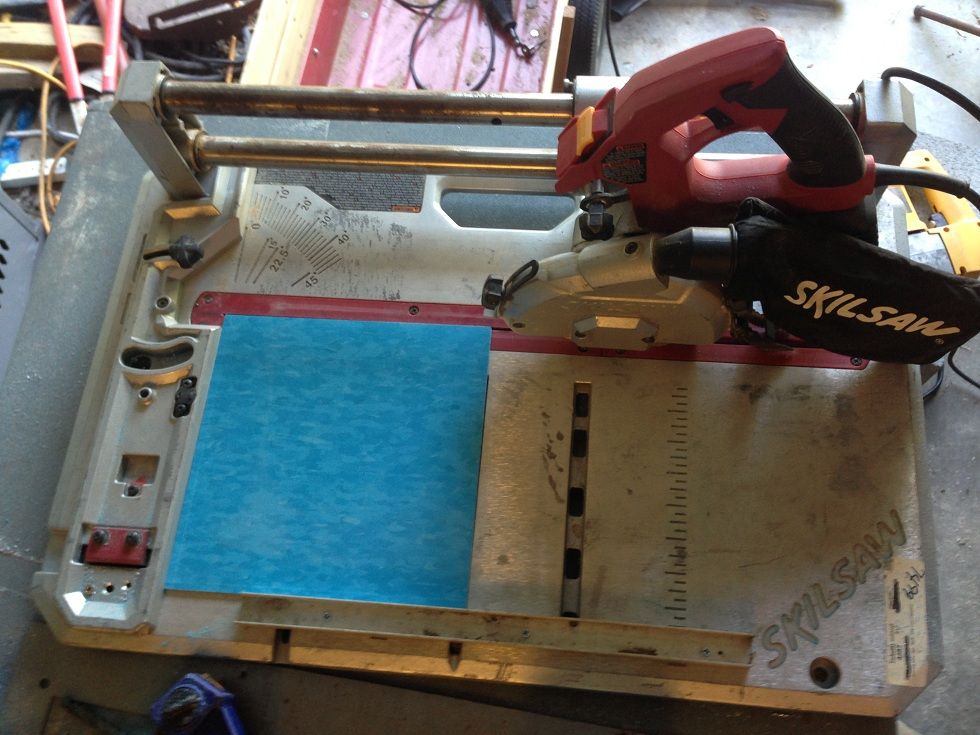
4 pieces cut to 9x9

I found this saw on You Tube. I'm going to get one because I want to do 9 inch tiles in the Shasta. But the problem is this one is claimed to only be able to do flooring up to 8 inches wide? What model of Skillsaw Flooring Cutter do you have UE?
|
|
|
|
Post by universalexports on Jan 9, 2014 16:34:01 GMT -8
mine is the 3600, I think that video is Wrong, I can cut a piece 15 inches deep, it is marked out to the side to 8 inches, (see my pic, the tic marks have small numbers every inch), but the measurement starts almost 2 inches from the groove the blade travels down, you can see the U channel aluminum i screwed in place, it is 9 inches from the blade.
|
|
|
|
Post by universalexports on Jan 9, 2014 16:40:56 GMT -8
done some googleing and found the answer for you, it will cut up to an 8" piece at a 45 degree angle.
Specifications
Amperage: 7.0
Arbor Size: 20 mm
At 0 miter/0 bevel: 3/4″ x 15″
At 45 miter/ 0 Bevel: 3/4″ x 8-1/2″
|
|
mobiltec
5K Member
I make mistakes so you don't have to...
Posts: 9,822
Likes: 3,749
1954 Jewel In Progress...
Currently Offline
|
Post by mobiltec on Jan 9, 2014 18:32:16 GMT -8
OK Thanks UE... I'm buying one. The 59 Shasta is getting 9 inch tiles. |
|
jodybitzz
Active Member
Posts: 238
Likes: 87
1968 Shasta 1500
Currently Offline
|
Post by jodybitzz on Jan 10, 2014 19:30:22 GMT -8
I have a whole tutorial on VCT cutting and installation. There are four parts to this series and you can also find them in my Trailer Tidbits on the website... I was taught by a professional who has done lots and lots of Walmart floors not to mention thousands of houses and other types of industrial buildings. This tutorial is with the cabinets still in place. On my trailers I remove everything but the floor to ceiling cabinet then I cover the entire trailer floor. But this shows lots of different cuts and how they are made which is why I chose this job for the series. Part 1 Mobiltec, do you suggest laying the tiles before any cabinets/frames are installed? We are starting frame up and there is a little dispute as to when to lay tiles. I see the advantage of laying them before any cabinets or even frame work is done. We won't have to fuss with cutting them to fit. I don't want to risk damaging the tiles(VCT). What are your thoughts? |
|


