jannica
Active Member

Posts: 185 
Likes: 26
Currently Offline
|
Post by jannica on Feb 2, 2014 9:28:55 GMT -8
I'm excited because the welder came yesterday and replaced the bent piece of framing on Junebug that had been giving me problems with the floor. Now the floor is finally level! He also added two additional beams to extend to the rear of the camper in preparation for the bumper that he will add later. In order for the beams to fit flush with the floor, the original design is obviously not going to work. I need advice on what to do later when I reattach the skin. The previous design had some wood and metal flashing going all the way across the bottom, just underneath the floor. Then the skin folded around that and screwed in underneath the floor. Should I cut slots in the skin in order to still be able to fold it under and go around the metal beams? Or should I screw it into the floor just above the beams, and then attach the metal flashing and wood to extend along the floor, filling in the gaps around the beams? 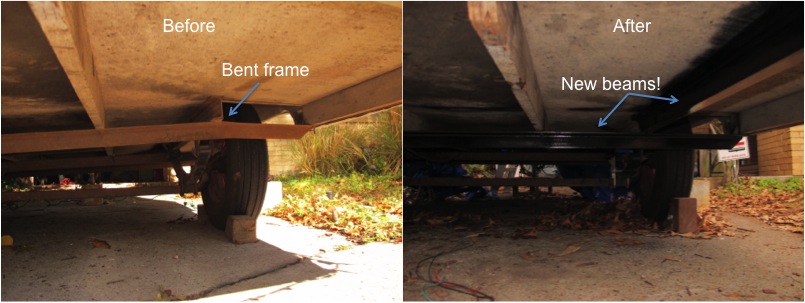 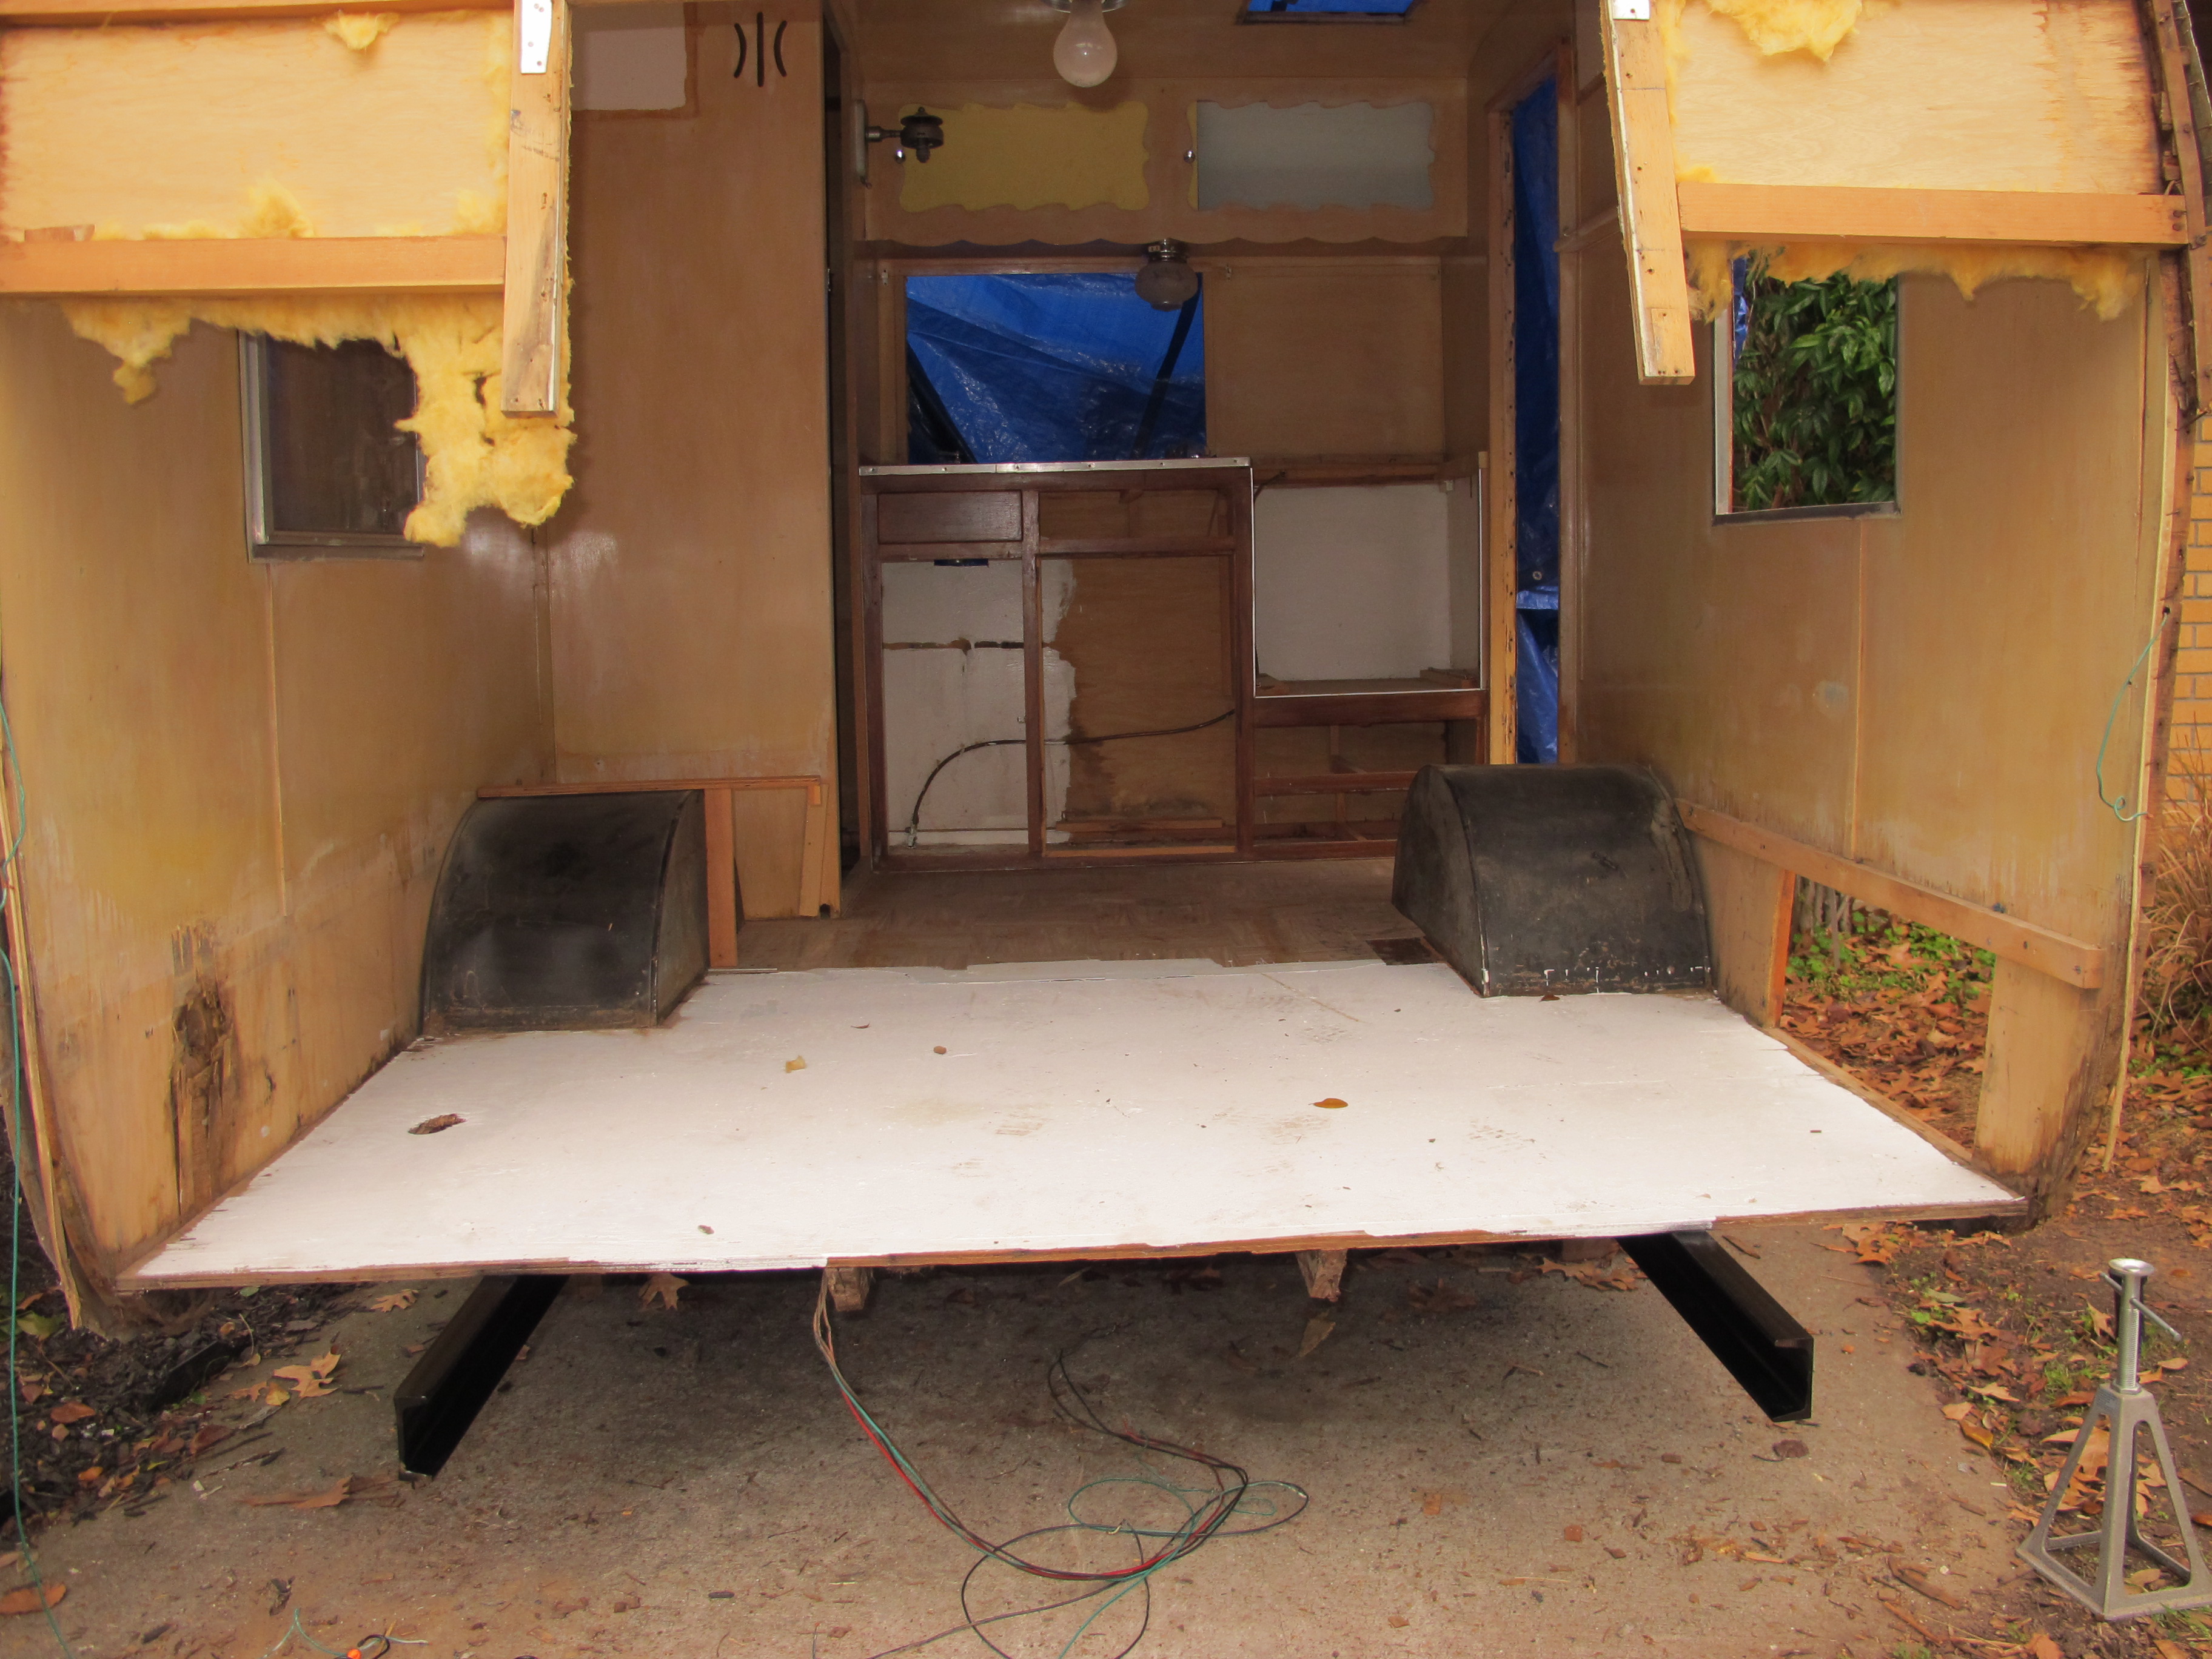 |
|
pirateslife
Active Member
Posts: 426 
Likes: 137
1969 Shasta Compact
Currently Offline
|
Post by pirateslife on Feb 2, 2014 16:37:31 GMT -8
the good thing about cutting the slots, is you still get good wrap around for drainage. My 69 compact is done like that in the front, doesn't look too bad
|
|
|
|
Post by bigbill on Feb 2, 2014 17:29:59 GMT -8
Looks good, and much easier than a total rebuild.
|
|
pathfinder3081
Active Member
Posts: 457
Likes: 138
1971 Shasta Loflyte
Currently Offline
|
Post by pathfinder3081 on Feb 3, 2014 5:50:34 GMT -8
Nice looking work Jannica and thanks for posting your work in progress .. Mmmm? What is keeping the whole thing from flopping to one side like a wet sandwich? Does it stand strong enough without any temporary bracing inside it.. to hold the roof up? I guess so, but be careful. I wouldn’t want you to loose or break anything that you are wanting to keep.  Just visited your blog.. Everything is looking good. I don't think that he's gonna flip or flop. You got your game on gal, nice new toys, soon you and the UPS rep will be on a first name basis.  |
|
mobiltec
5K Member
 I make mistakes so you don't have to...
Posts: 9,822
Likes: 3,749
1954 Jewel In Progress...
Currently Offline
|
Post by mobiltec on Feb 3, 2014 9:54:20 GMT -8
You need starter board on the top of the plywood floor. This will be a 1x6 ripped on one edge at close to the same angle as that of the sides at the bottom of the radius. I showed this to SusieQ in another thread and here it is again.


|
|
jannica
Active Member
Posts: 185
Likes: 26
Currently Offline
|
Post by jannica on Feb 4, 2014 6:05:33 GMT -8
Thanks, I did read that thread. I thought it was focused more on how to install new paneling in the rear. My concern was more around how to reattach the skin at the bottom once everything else is in place. It was folded under before and now the beams are in the way. I've seen some campers that have the skin screwed into the floor and it doesn't fold under and then others where it folds under the camper. Just wanting to make sure I do it the best way.
|
|
SusieQ
Global Moderator 
Posts: 4,781
Likes: 1,197
'62 Shasta Compact
Currently Offline
|
Post by SusieQ on Feb 4, 2014 10:54:43 GMT -8
I don't whether to interject this here or put it in quirks, but I thought my frame was bent unintentionally on the rear end, and it actually turned out that each side was bent exactly the same, sort of twisted for the bolt to go into it at an angle. I looked for some of my pics but I guess I'll have to take some more before I finish the last board on my back end.
|
|
jannica
Active Member
Posts: 185
Likes: 26
Currently Offline
|
Post by jannica on Feb 4, 2014 13:54:47 GMT -8
That's interesting, too bad that wasn't the case with mine or it could have saved me a lot of trouble.
|
|
SusieQ
Global Moderator
Posts: 4,781
Likes: 1,197
'62 Shasta Compact
Currently Offline
|
Post by SusieQ on Feb 4, 2014 14:49:42 GMT -8
Yes, but it has posed a different problem trying to add a support board next to the old one.
|
|
mobiltec
5K Member
I make mistakes so you don't have to...
Posts: 9,822
Likes: 3,749
1954 Jewel In Progress...
Currently Offline
|
Post by mobiltec on Feb 4, 2014 15:43:17 GMT -8
This is where you get to become creative and inventive. Isn't this stuff fun?  |
|


