oakback
Active Member

Posts: 263 
Likes: 55
Currently Offline
|
Post by oakback on Jul 30, 2018 7:11:36 GMT -8
Our wheel wells were hitting the fenders, so we needed a bit of extra height added on. A simple job, but it sure helps having a professional shop to do some things in. Kreg jig? Nah, Kreg machine: 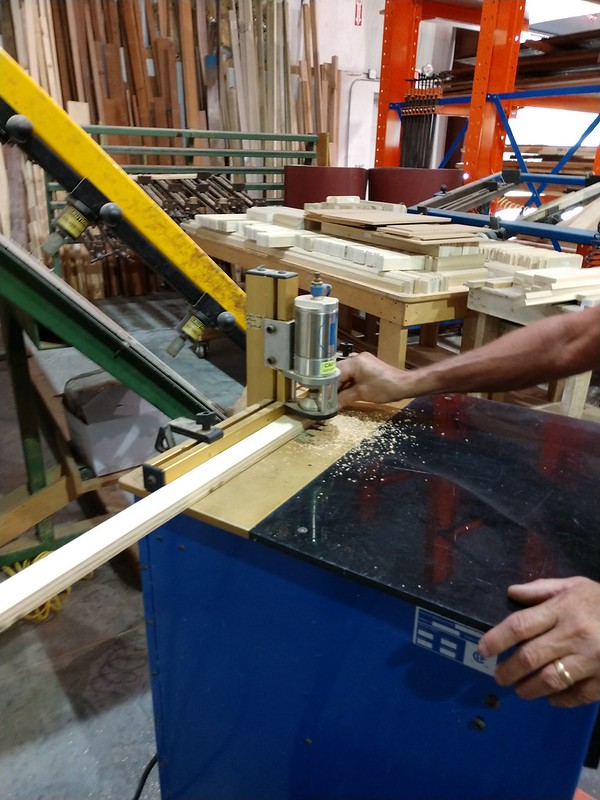 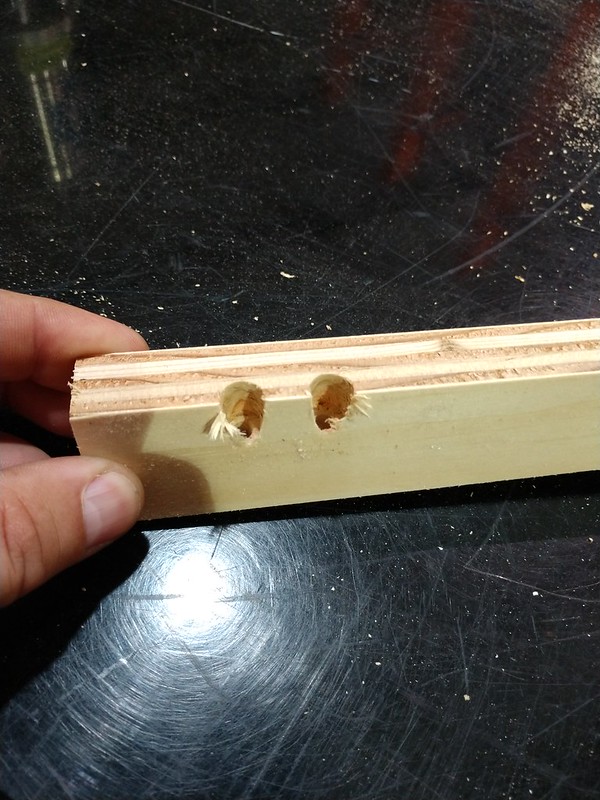 Quick work with an pneumatic stapler, I miss having an air compressor at home: 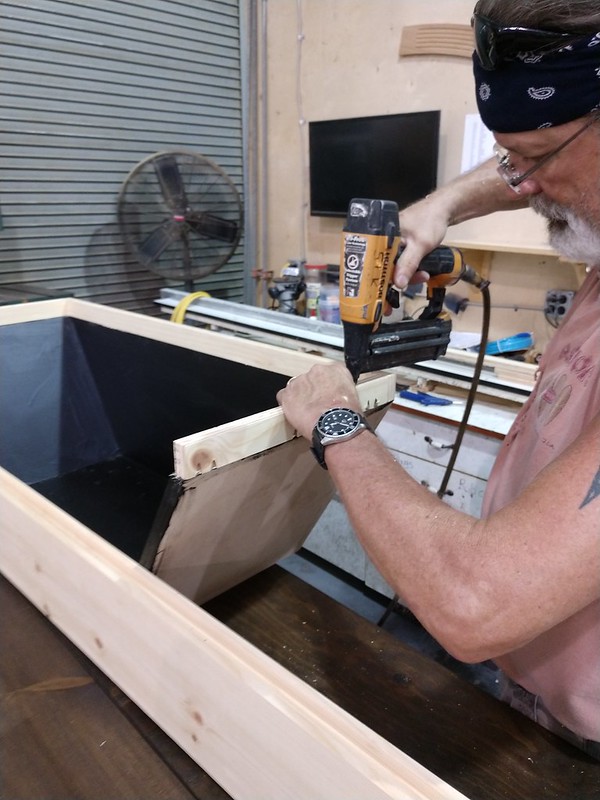 The next day we put the floor on, which was a big moment for us. I rented a roller from Home Depot to get it pressed in place (in retrospect, really glad I did), it's fully glued over the entire surface. It's a single sheet of vinyl, no seems anywhere, which was important to me. We're really happy with the color. The next step will be getting the walls up.  In the mean time I'm shopping for a used door and frame. The door that came with our camper was homemade, and already rotting and falling apart. I stupidly chucked the whole door frame during demo, all I have is the screen door and double hinge. |
|
oakback
Active Member
Posts: 263
Likes: 55
Currently Offline
|
Post by oakback on Aug 6, 2018 17:32:19 GMT -8
Drove an hour each way to get a door this past weekend, but it was a pretty good deal. I've already disassembled it. It'll get new innards, paint, new latch/knob (currently has no key), and probably new screen. 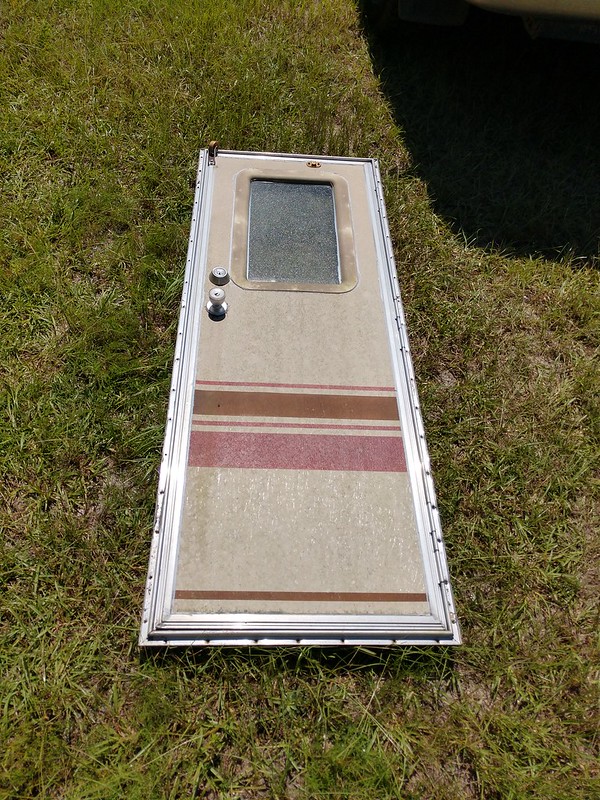 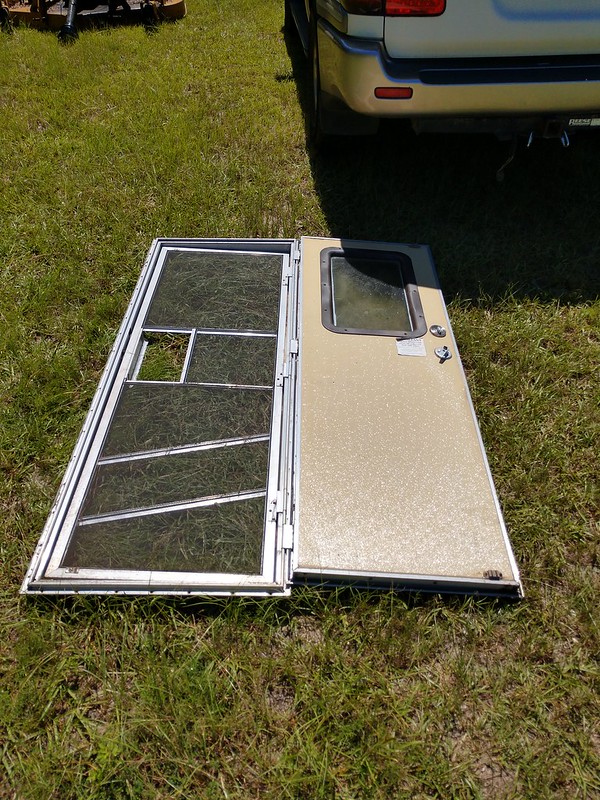 |
|
oakback
Active Member
Posts: 263
Likes: 55
Currently Offline
|
Post by oakback on Aug 12, 2018 17:52:49 GMT -8
Some good progress this week. We couldn't find 2x2's that we liked, so we made some. These are for the front and rear walls. 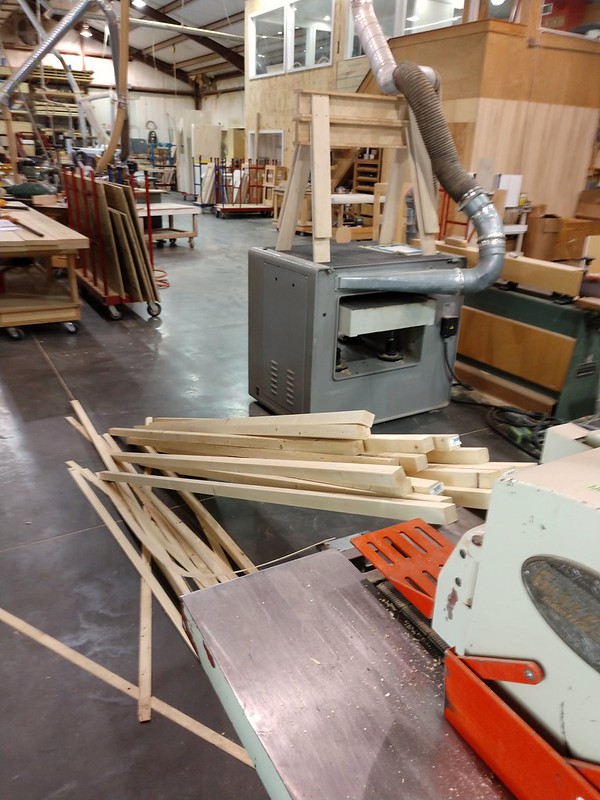 Got the exterior layers of the walls cut, I think we ended up with birch ply. The big CNC cutting out parts: 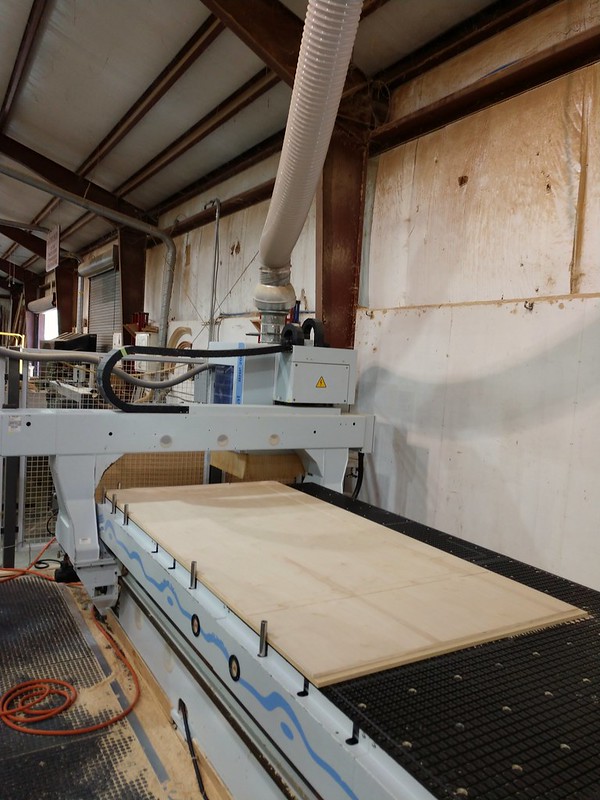 Checking the output: 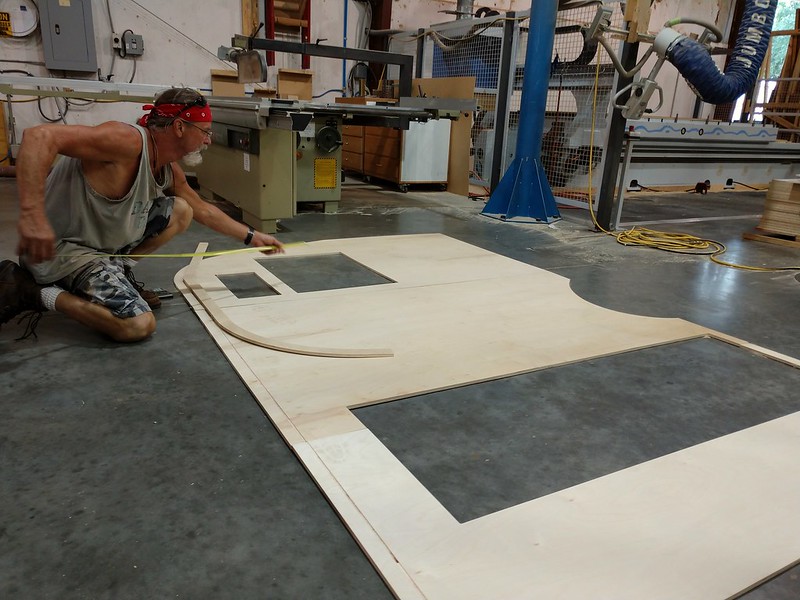 Unpacking it at home was like we ordered a camper-in-a-box kit, just a bunch of pieces we had to sort out and assemble. 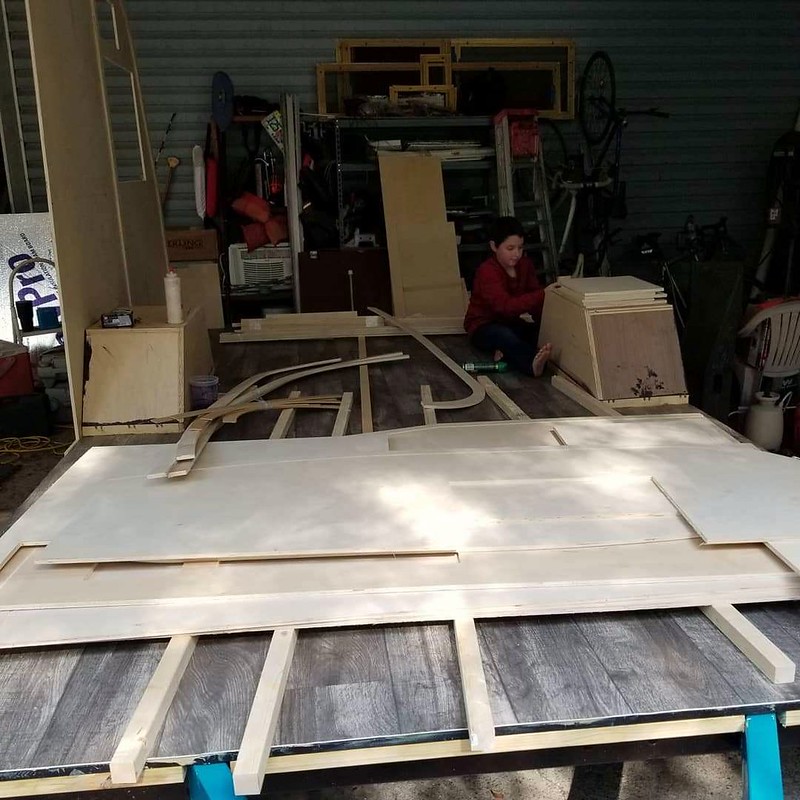 We added support ribs over the joints, around windows and doors, and along the front/roof/rear. All glued and screwed. 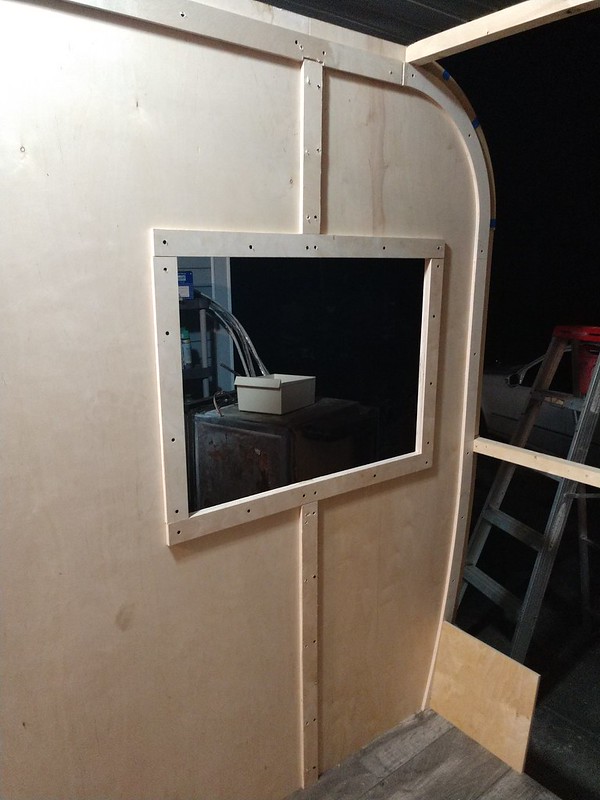 Here's how it sits tonight. 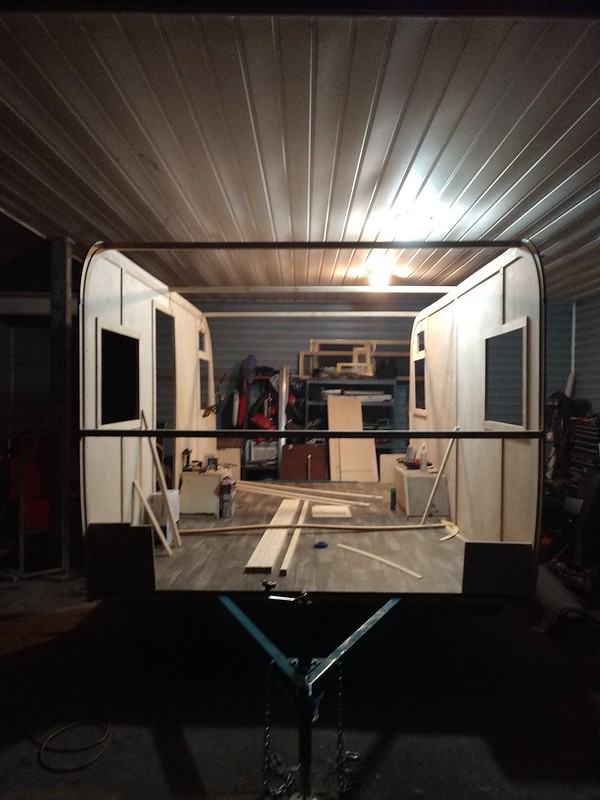 Next will be mounting more 2x2's, and framing the front/rear windows. Then I think we'll need to work out cabinet/dinette/etc locations, and start electrical. |
|
oakback
Active Member
Posts: 263
Likes: 55
Currently Offline
|
Post by oakback on Sept 10, 2018 14:51:54 GMT -8
The single layer of 3/4" ply floor was flexing too much over the larger unsupported sections, which we noticed when the wheel wells started separating from the floor. I'm adding some supports. I'm aware of the cost of weight, but the only other option at this point was having metal supports welded on, and that's not possible at this time.  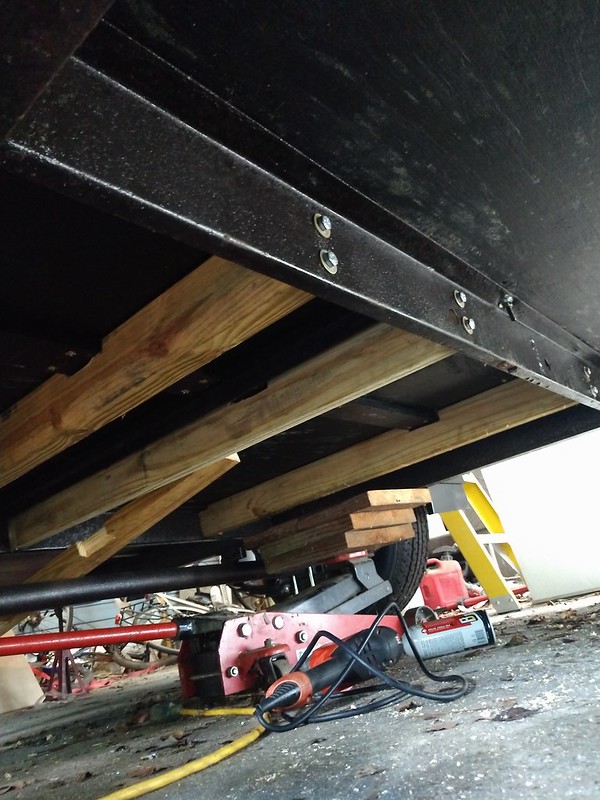 We mapped out all our cabinets/dinette/beds with masking tape, so we knew where to add the internal wall supports, which have been screwed in place. We also cut crowned roof supports, matching the curve it came with from the factory. These have been installed as well. 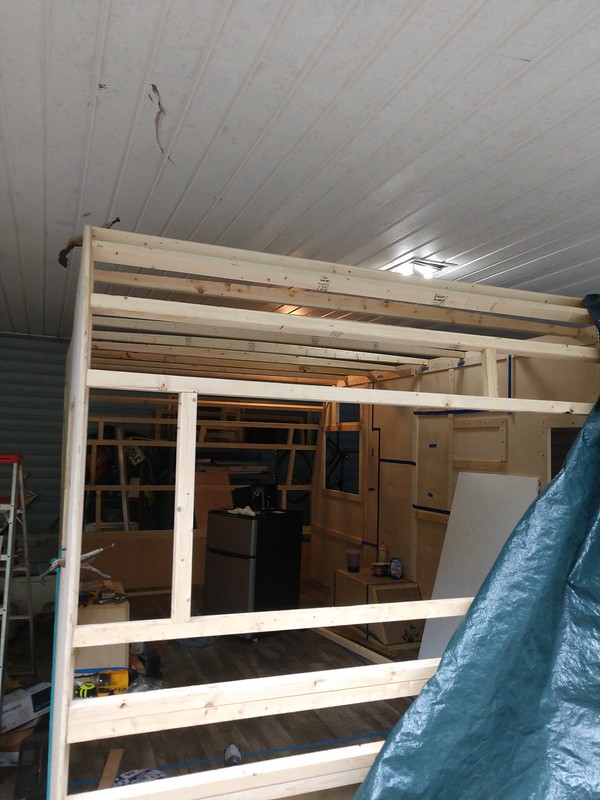  Next up is electrical, which I have not been looking forward to. Then insulation. |
|
RinTin
Full Member
Posts: 760
Likes: 292
Currently Offline
|
Post by RinTin on Sept 11, 2018 5:15:20 GMT -8
I find your build and approach very interesting. Perhaps one of the reasons you do not have many responses is that it is clear you have a plan and none of us have attempted your method before so we are watching and waiting to see how it all works out.
I think you'll find that the electrical isn't that hard once you get into it. I like to do my electrical after the cabinets and built-ins are installed but before the doors, drawers, lids and such are. I might suggest that you leave one end of the trailer open to make it easier to access and install the interior. You will be amazed at how many trips in and out of the trailer you will make. Have you planned what/when/how you'll do your finishing?
Usually the rafters and ceiling are installed after the interior is built out so I'm curious to see how that works out for you. It is hard to see just how much crown you put into your rafters. You may find it difficult to pull your roof metal down and fold it over the edges as it appears that with the crown it will need to shrink quite a bit to do so.
|
|
oakback
Active Member
Posts: 263
Likes: 55
Currently Offline
|
Post by oakback on Sept 11, 2018 6:05:09 GMT -8
I think I'll run most of the wiring inside the wall, but have junctions boxes accessible inside cabinets, I just need to plan my wire junctions carefully. If I ever need to run new wire in the future, I'll do it inside cabinets or under the floor in conduit.
After electrical and insulation we'll do the interior skin. Whatever can't fit through the door we'll slide in the roof between rafters. Then we'll install the interior using the "build-on-site" method. As opposed to pre-building them and then installing, we'll build them into the camper piece by piece.
The rafters have 1" of rise from the edge to the center. This was exactly how it was originally, I just measured an old rafter and replicated it.
edit: The original roof had a crown, but the original skin had no foldover. It ended right at the corner, same with the sides, there was zero overlap. When I talk to the metal supplier (local place) I'll ask them about options to solve that problem. Relief cuts? Crimps? Shave down the crown? We'll see what they say.
|
|
oakback
Active Member
Posts: 263
Likes: 55
Currently Offline
|
Post by oakback on Sept 18, 2018 5:38:36 GMT -8
Ended up deciding to put all the wiring inside the walls. This is about as annoying of a process as I thought it would be. But progress is progress. I've been using my skilsaw to make shallow cuts in the wall supports to allow the wires to pass through, but there are a few places near the dinette where this won't work (saw can't fit). I need to borrow/buy a saw that will work, then I can complete the 12v wiring. The 120v won't take long since they're all on the same circuit, and the stiffer wire requires fewer staples. Question: the layout is such that it would make my life easier if I can have 3 lines of 14/2 at one outlet. I'll be using surface-mount outlets (walls aren't thick enough for flush mount), but I haven't purchased them yet. Do regular outlets have the ability to attach 3 sets of wires? All on the same circuit, not a 3-way switch situation. For instance, wire from power source to one outlet, then one above it, and one to the right: O | O-O | S 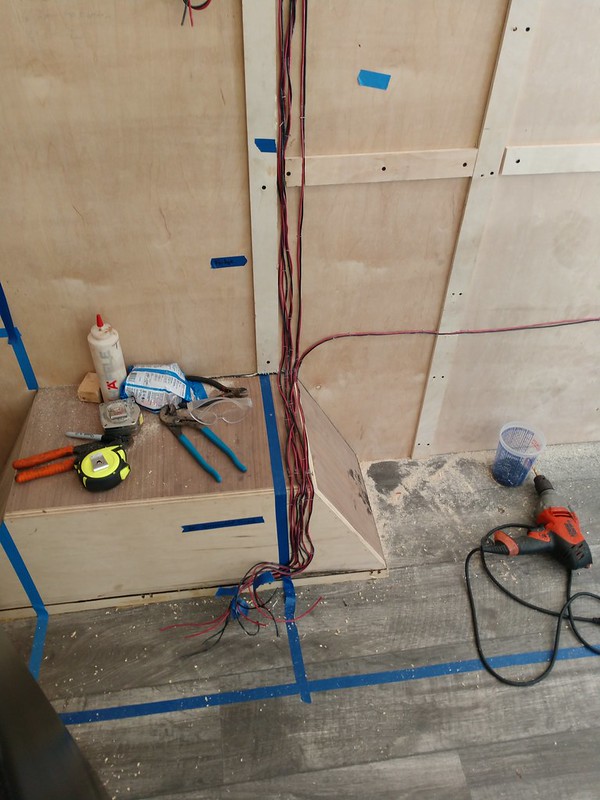 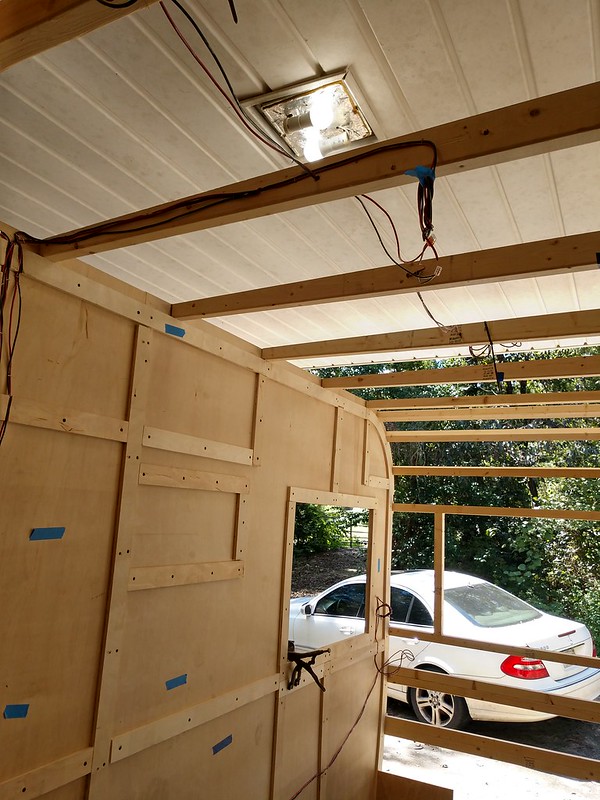 |
|
Bob92057
Member
Posts: 49
Likes: 12
1955 Pleasurecraft - 13'
Currently Offline
|
Post by Bob92057 on Sept 18, 2018 13:04:14 GMT -8
I was able to find the shallow elec boxes at Home Depot. They fit my 2” walls perfectly
|
|
|
|
Post by vikx on Sept 18, 2018 20:03:16 GMT -8
Oakback, be very careful how much you load the boxes, especially shallow ones. I suggest you read the NEC and follow the rules. For instance, each box is labeled and allows so many ?gauge wires but the fixture is included, so a good understanding of code will help you.
Also, some of today's shallow boxes are not legal for anything but low voltage. It's important to understand what the code requires and follow it.
|
|
oakback
Active Member
Posts: 263
Likes: 55
Currently Offline
|
Post by oakback on Sept 19, 2018 5:07:00 GMT -8
I was able to find the shallow elec boxes at Home Depot. They fit my 2” walls perfectly The total thickness of my walls (excluding aluminum siding) will be 1.5", the cavity inside is .5". I gave up any idea of mounting any boxes inside the wall, all the outlets will be surface mount. Oakback, be very careful how much you load the boxes, especially shallow ones. I suggest you read the NEC and follow the rules. For instance, each box is labeled and allows so many ?gauge wires but the fixture is included, so a good understanding of code will help you. Also, some of today's shallow boxes are not legal for anything but low voltage. It's important to understand what the code requires and follow it. Are surface mount boxes considered shallow? Looking online it seems there is quite a variety of choices. I'll drop by the local places soon and see what's in stock. I'll be sure to read the labels. If it's too much I'll have a surface-mount blank box for the 3 wires to join, then the outlet immediately above or below it. Sound reasonable? |
|
|
|
Post by vikx on Sept 19, 2018 19:09:36 GMT -8
Surface mount boxes come in varying depths. The shallow ones are OK if you are using 14ga Romex. If 12ga, you really should go with a deeper box. There are tons of boxes as you've found. Take a look in a big box store, that will give you even more ideas.
You shouldn't need too many surface mount boxes if you use your cabinets. If mounted with a backer in the cabinet, they will be flush with the side/front and look very nice. If you have too many wires for the box, a hidden junction box should work well. I wouldn't surface mount it. The trick is to go from outlet to outlet without crowding the box. That's usually 3 wires in, 3 out with the fixture.
Also, Backwire receptacles make it easier to join wires in case you need to add more wires. (say another out) you will have the ability to join 4 white wires, 4 blacks and combine the grounds. Again, keep in mind that 14 ga is much easier to work with than 12. I limit my 20 amp circuits to fewer outlets and a light or two.
|
|
oakback
Active Member
Posts: 263
Likes: 55
Currently Offline
|
Post by oakback on Sept 20, 2018 4:50:12 GMT -8
4 outlets will be completely hidden within cabinets: fridge, a/c, microwave, and stove (single burner induction cooktop). These 4 will each be on their own circuit breaker. The remaining 4 outlets will be on one shared circuit. I'll have one outlet at the center of the dinette on the front wall, one on the kitchen counter (tossing around the idea of a popup outlet), and we'll have 2 at on either side of the rear. For the dinette outlet I might be able to get away with mounting a thin box in-wall, since it's 2x2 framing there. The 2 at the rear will be directly behind cabinets on both sides, they won't be visible unless you're on the rear bed, so I'm not too concerned about aesthetics of surface mount. I could mount them on the cabinets, but one has the fridge which will be just barely wide enough, so I'd have to widen the entire cabinet by a few inches for the outlet. On the opposite side will be a general storage cabinet, but I figure if I have surface mount one side, no harm in having it on the opposite side. Still not sure on that last one though. btw thanks for all your input vikx! |
|
ruderunner
Active Member
Posts: 471
Likes: 97
Currently Offline
|
Post by ruderunner on Sept 23, 2018 2:33:41 GMT -8
Earlier you commented on how getting all the pieces was like a kit. If you saved the CNc files you could actually sell camper kits.
I could see them being sold to folks with junk pop up campers
|
|
oakback
Active Member
Posts: 263
Likes: 55
Currently Offline
|
Post by oakback on Sept 23, 2018 5:26:20 GMT -8
Earlier you commented on how getting all the pieces was like a kit. If you saved the CNc files you could actually sell camper kits. I could see them being sold to folks with junk pop up campers We've talked about this a few times, me and my wife, family, friends. However you'd need a frame that fits it perfectly. I think if we wanted to sell a kit, we'd have to find a trailer frame that's commercially available all over (like something Home Depot or Lowe's sells), and build off of that. It would need to be the right size, and have the weight capacity. Or the ability to easily modify it to the plans. We would also need to source a window kit, from a source that had a ready supply, and make a shipping list for our kit buyers (as opposed to buying windows ourselves). And we'd need to test it, building a few ourselves first. I've also thought about just streamlining the process as much as possible, and building/selling several. Pre-make plug-and-play wiring harnesses, build several copies of internal cabinetry, etc., but I'd still need to get the frames made by a shop. I might draw up the details and get quotes from local shops for all the components just to see how much I can do on paper before spending a cent. Maybe finally get some use out of that MBA degree. Ive always wanted to own a business. Can you tell I daydream about this? Haha. |
|
oakback
Active Member
Posts: 263
Likes: 55
Currently Offline
|
Post by oakback on Sept 24, 2018 6:04:11 GMT -8
Wiring placement is complete, as well as the insulation on the side walls. 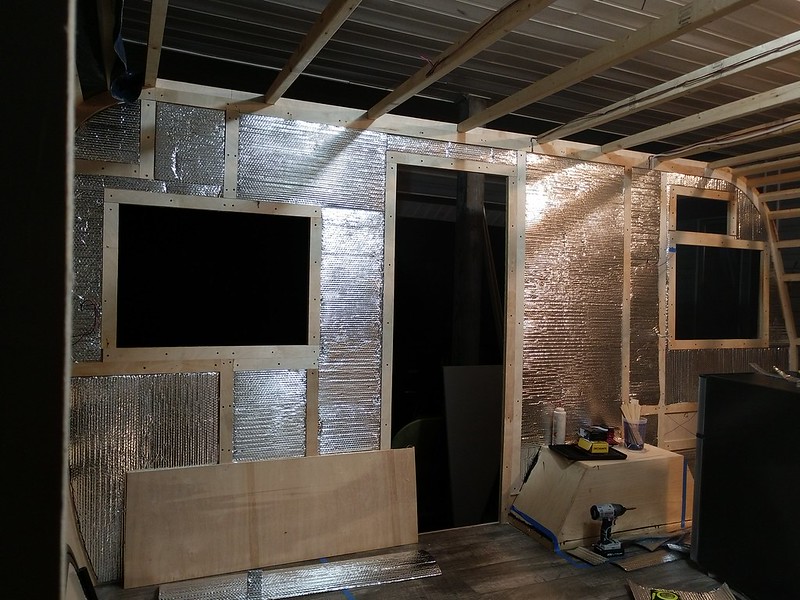 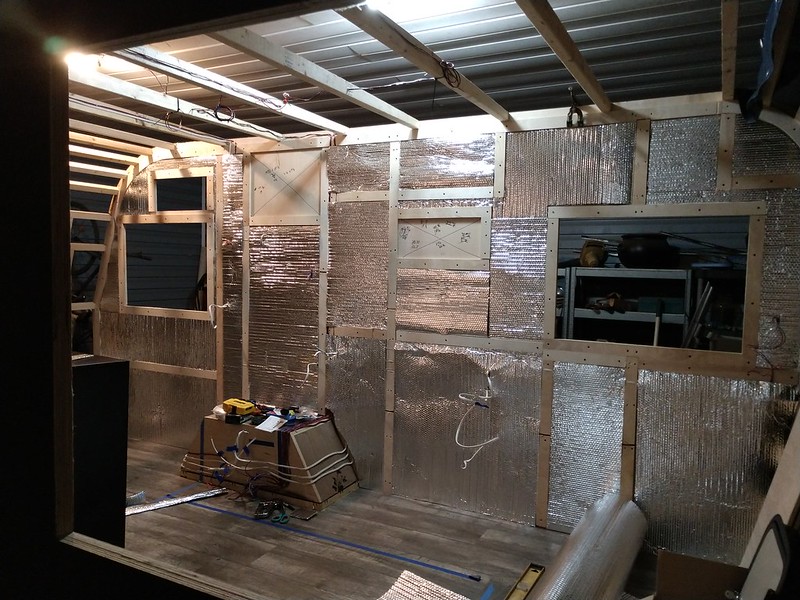 |
|


