kc
Active Member
  
Posts: 107 
Likes: 14
1959 Shasta
Currently Offline
|
Post by kc on Jun 11, 2014 19:49:33 GMT -8
What everyone up there said.  Plus... Make sure your painter knows how to prep aluminum for paint. This guy started out at $100 per foot when I first met him and that included the total length of the trailer from tongue to bumper. It included body work as long as it wasn't ridiculous. Anything other than small dings I replace instead of having my painter mess with it. Now after 3 years he is up about 35%. He took on a shop that he has to pay for and that had the most to do with the price increase but I can trust his job to last and he backs up his work 100%. He's here in Riverside County, Ca. down the road from me so he's close by and that's very convenient. He uses single stage auto paint. The paint runs about $800 with the hardener and what ever else goes with it for an average job on a 15 footer.  So Mobiltech....What color of blue/auqa is that exactly? And regarding prepping aluminum, my painter told me $300 for self etching primer alone....is that right? |
|
mobiltec
5K Member
     I make mistakes so you don't have to...
Posts: 9,884 
Likes: 3,809
1954 Jewel In Progress...
Currently Offline
|
Post by mobiltec on Jun 11, 2014 21:08:52 GMT -8
I suppose so KC. You would have to talk to my painter about that. I know that recently everything in California went up again due to the EPA. They also had to discontinue using a lot of stuff. They raided all the big box stores and made them empty their shelves of stuff we all use. You can not buy shellac in Gallons here any longer. Same with Denatured Alcohol for some reason. Oil Based Killz is gone.
I'm not a painter although I would like to learn. For now I have my hands full doing what I do. I don't do upholstery, curtains or paint. I sub all that out. Same with Awnings.
|
|
kc
Active Member
  
Posts: 107 
Likes: 14
1959 Shasta
Currently Offline
|
Post by kc on Jun 12, 2014 6:47:09 GMT -8
So what beautiful color of aqua blue is this Mobil?
|
|
John Palmer
Leading Member
    Hi, From a vintage trailer guy located in Santa Ana, CA. It's good to see lots of activity here.
Posts: 1,772 
Likes: 625
Currently Offline
|
Post by John Palmer on Jun 12, 2014 8:11:43 GMT -8
So what beautiful color of aqua blue is this Mobil? Trailer's were originally built in the 1950's, and sold in the 1950's, and towed by cars that were built in the 1950's! LOL
Go look at any of Ford's, or Chevy's original 1950's "two tone" colors, and you will have a nice vibrant selection.
|
|
mobiltec
5K Member
     I make mistakes so you don't have to...
Posts: 9,884 
Likes: 3,809
1954 Jewel In Progress...
Currently Offline
|
Post by mobiltec on Jun 12, 2014 13:29:21 GMT -8
|
|
txoil
Active Member
  
Posts: 459
Likes: 149
1960 Shasta Deluxe 19
Currently Offline
|
Post by txoil on Jun 12, 2014 14:28:33 GMT -8
Painting seems to have a 'voodoo' aspect to it that scares off those who haven't done it. It is not magic, it is just a series of steps, that if carried out correctly, lead to a great paint job and $$$in YOUR pocket for that first camping trip.
Bare metal needs to be primed with a self-etching primer.
Use the same type of system, in other words, if you use enamel primer, use enamel color coat.
The final quality of your paint is a result of the quality of your prep work.
PRACTICE! Get some scrap parts and practice using different settings on your gun.
HVLP equipment has far less overspray, and therefore more paint gets onto the surface.
DO NOT 'scrimp' by using low quality materials...you are taking the time to do it right, so get good quality paints/clears/primers/tape/masking paper!!!!
Quality HVLP paint systems can be rented at local hardware/box stores, but if you already own a compressor, a decent HVLP gun is worth the money.
I've been painting for 25 years, and if I can help anyone with answers please feel free to ask! This forum helped me immeasurably when I was redoing our Shasta. Pay it forward!
|
|
txoil
Active Member
  
Posts: 459
Likes: 149
1960 Shasta Deluxe 19
Currently Offline
|
Post by txoil on Jun 12, 2014 17:18:22 GMT -8
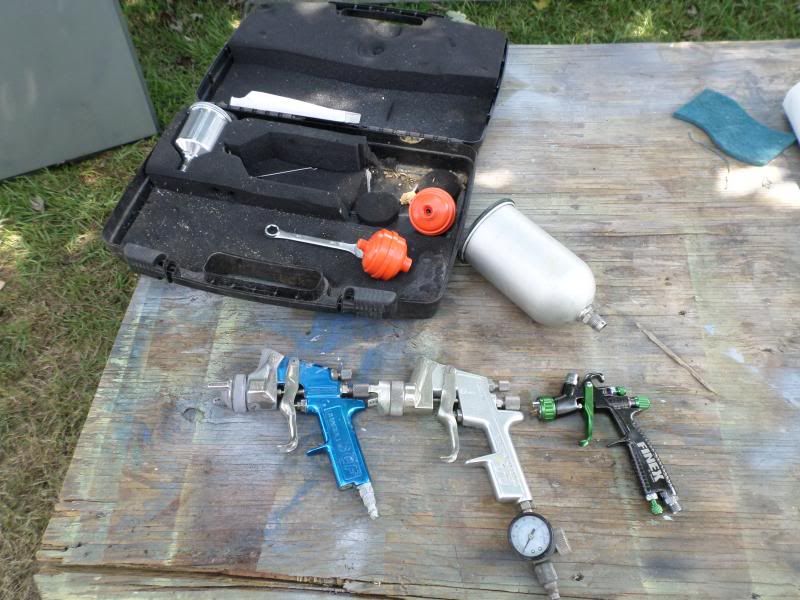
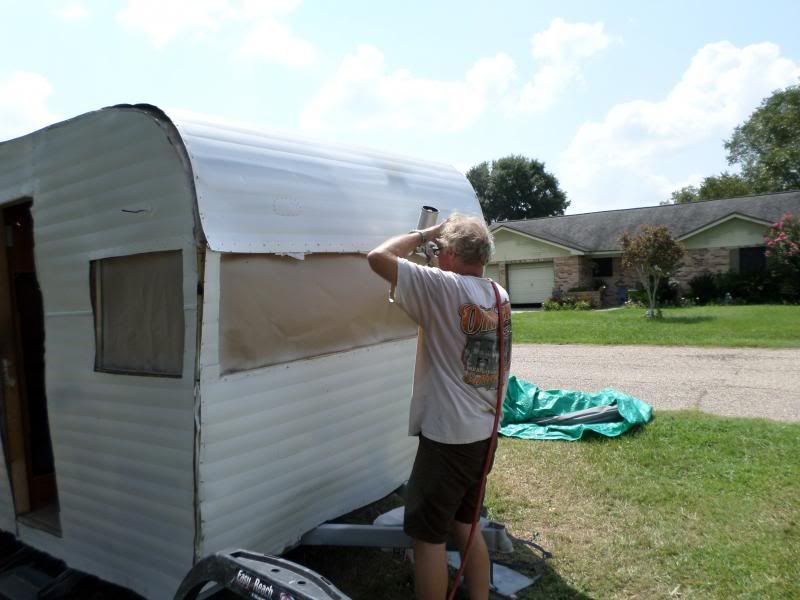
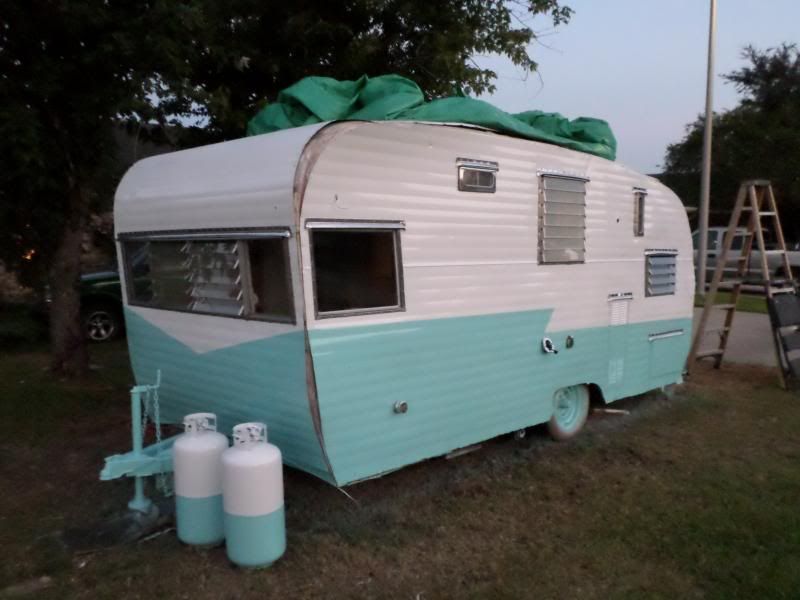
 My painting arsenal. From left, Sharpe SGF, general spray gun. Center, Sharpe Titanium T1, much better gun, more control and atomization, far right, Sharpe Finex, detail gun.  Spraying white tinted sealer (primer) to cover the old chalky paint.  Folks, it was REALLY hot!  Primer has cured 24 hours, I've sprayed white urethane basecoat on the whole trailer and allowed it to cure overnight, masking paper and tape applied for the aqua paint and you'll notice I am painting in early morning before the temp gets above 85F  Painting the propane bottles.  Base coat flashes off to a flat finish and the clear coat will make it shine.  Aqua is applied and waiting to remove masking paper. I waited until next morning to spray clear coat to again, avoid high temp which can cause problems in the finish.  Three layers of UV protected clear coat applied, cured and windows installed.  Silver stripe applied, detail work done and new sidewall tires installed. |
|
John Palmer
Leading Member
    Hi, From a vintage trailer guy located in Santa Ana, CA. It's good to see lots of activity here.
Posts: 1,772 
Likes: 625
Currently Offline
|
Post by John Palmer on Jun 12, 2014 19:36:37 GMT -8
Txoil, Looks good, thanks for showing the steps for others.
I have one question, why was the trailer painted with the skins loose? Were the edges bent over "after" it was painted?
|
|
txoil
Active Member
  
Posts: 459
Likes: 149
1960 Shasta Deluxe 19
Currently Offline
|
Post by txoil on Jun 12, 2014 19:45:23 GMT -8
John, it was so dang hot that I just wanted to get paint on it, and then worry about edge trim and fastening it down. I spent June to October working 14 hour days on it, lost 40 lbs from the heat and was just exhausted. I could have fastened edges down before paint but the polished edge trim was going on over the painted edges so I just saved that step.
|
|
John Palmer
Leading Member
    Hi, From a vintage trailer guy located in Santa Ana, CA. It's good to see lots of activity here.
Posts: 1,772 
Likes: 625
Currently Offline
|
Post by John Palmer on Jun 12, 2014 19:46:19 GMT -8
I have a HVLP gun with a gravity feed cup.
Your automotive paint store will have 3M special plastic "liner bags" that go inside the gravity feed paint cups. They serve two purposes. First it makes "clean up" a very easy task as you change paints and colors. Second, and "the best one" is that you can spray the paint in any direction, even with the gun "upside down" which makes spraying under the tongue and coupler much easier.
|
|
John Palmer
Leading Member
    Hi, From a vintage trailer guy located in Santa Ana, CA. It's good to see lots of activity here.
Posts: 1,772 
Likes: 625
Currently Offline
|
Post by John Palmer on Jun 12, 2014 19:48:07 GMT -8
John, it was so dang hot that I just wanted to get paint on it, and then worry about edge trim and fastening it down. I spent June to October working 14 hour days on it, lost 40 lbs from the heat and was just exhausted. I could have fastened edges down before paint but the polished edge trim was going on over the painted edges so I just saved that step. OK, Thanks. |
|
mobiltec
5K Member
     I make mistakes so you don't have to...
Posts: 9,884 
Likes: 3,809
1954 Jewel In Progress...
Currently Offline
|
Post by mobiltec on Jun 12, 2014 19:56:40 GMT -8
I have a HVLP gun with a gravity feed cup. Your automotive paint store will have 3M special plastic "liner bags" that go inside the gravity feed paint cups. They serve two purposes. First it makes "clean up" a very easy task as you change paints and colors. Second, and "the best one" is that you can spray the paint in any direction, even with the gun "upside down" which makes spraying under the tongue and coupler much easier. OH DANG what a great tip John!  |
|
SusieQ
Global Moderator     
Posts: 4,781 
Likes: 1,197
'62 Shasta Compact
Currently Offline
|
Post by SusieQ on Jun 12, 2014 20:15:48 GMT -8
John, it was so dang hot that I just wanted to get paint on it, and then worry about edge trim and fastening it down. Txoil, did you do the lettering on the back of your trailer? I was just wondering because it's fabulous! |
|
txoil
Active Member
  
Posts: 459
Likes: 149
1960 Shasta Deluxe 19
Currently Offline
|
Post by txoil on Jun 13, 2014 4:32:36 GMT -8
SusieQ, I did do the lettering. And by 'do' I mean I went to a sign shop, chose the color and font, had vinyl lettering cut, came home and applied it on the rear and by the door.
|
|
John Palmer
Leading Member
    Hi, From a vintage trailer guy located in Santa Ana, CA. It's good to see lots of activity here.
Posts: 1,772 
Likes: 625
Currently Offline
|
Post by John Palmer on Jun 13, 2014 9:44:47 GMT -8
SusieQ, I did do the lettering. And by 'do' I mean I went to a sign shop, chose the color and font, had vinyl lettering cut, came home and applied it on the rear and by the door.
Here's another variation in application of the lettering, done at a computerized sign shop.
When the sign shop does the vinyl sticker, it is die cut on a printer. They end up with both a "inner" and a "outer" image of your lettering on two part sticky paper. Depending on which area you remove, you will end up with either a sticker of your logo/lettering, or a stencil of your logo/lettering. Hope that makes some sense? LOL
You can apply "the stencil" portion to the trailer, then paint it with a small paint brush, if you use the One Shot brand sign paint it's self leveling and the brush marks will just flow out as it dries. One Shot is the same paint that pin stripers and sign painters use, it's also UV safe and holds up very well outdoors. Any good art supply stocks it in fifty or more colors in half pint cans, it goes "a long way", you won't need much. Remove the stencil about five minutes after the lettering is painted, and "the lettering edge" will lay down as it dries. It's a slow drying paint, and will take about 24 hours for it to dry "to touch".
You will end up with a perfect professional looking "painted, and hand lettered" logo on your trailer.
|
|