Deleted
Posts: 0
Currently Offline
|
Post by Deleted on Jan 2, 2018 0:40:48 GMT -8
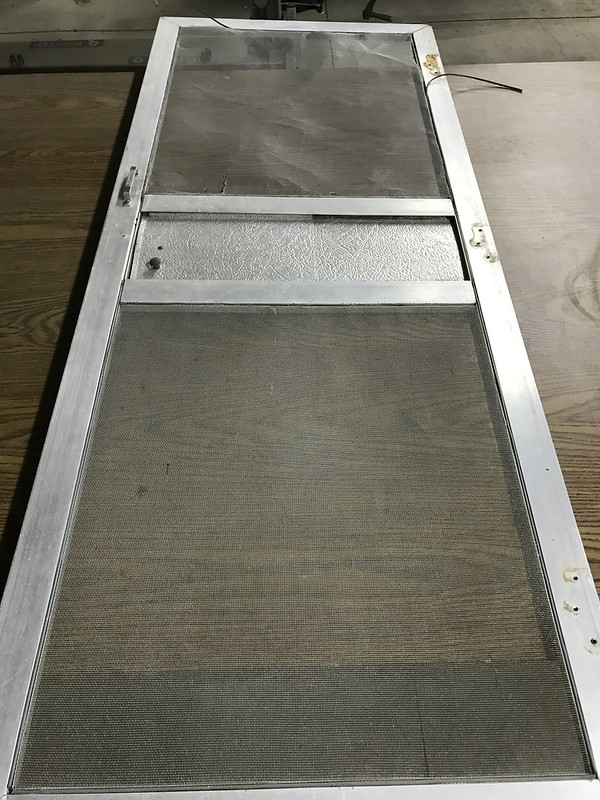
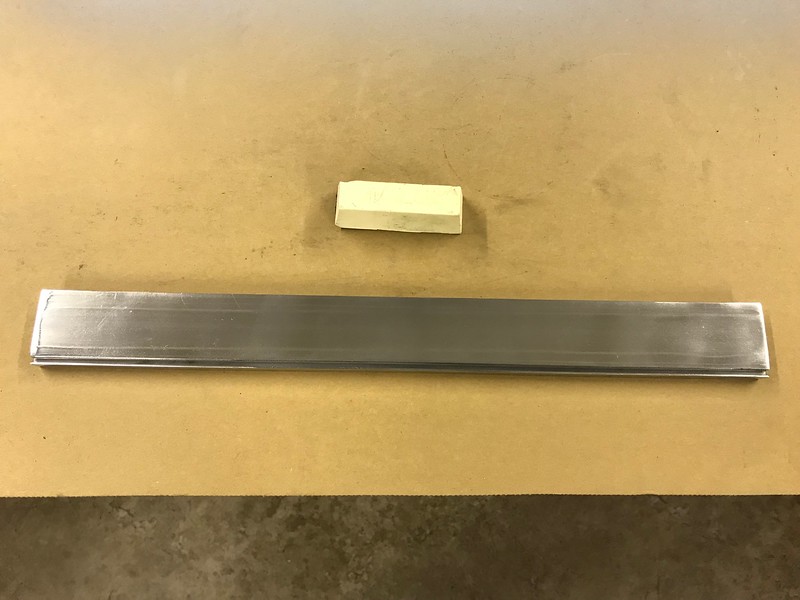
I'm experimenting with a surface finish for the Catalina aluminum screen door. Although, I'm still in the process of rebuilding the main steel entry door for this trailer (will post an update soon), I took a brief diversion to work on the screen door. See photos below of the screen door, and then it disassembled into pieces.

I have a desire to "resto-mod" this trailer as kind of an experiment. The exterior may be painted a deep red, accented in a cream or white finish. I'm envisioning lots of polished aluminum, LED lights, chrome wheels and accents, bike carrier, etc. The interior may be hickory wood throughout, LVT plank flooring, stainless appliances, deep red countertops, flat screen TV, etc. I say "may" as I'm a long way from getting to those decisions so things can change.
Back to the screen door....
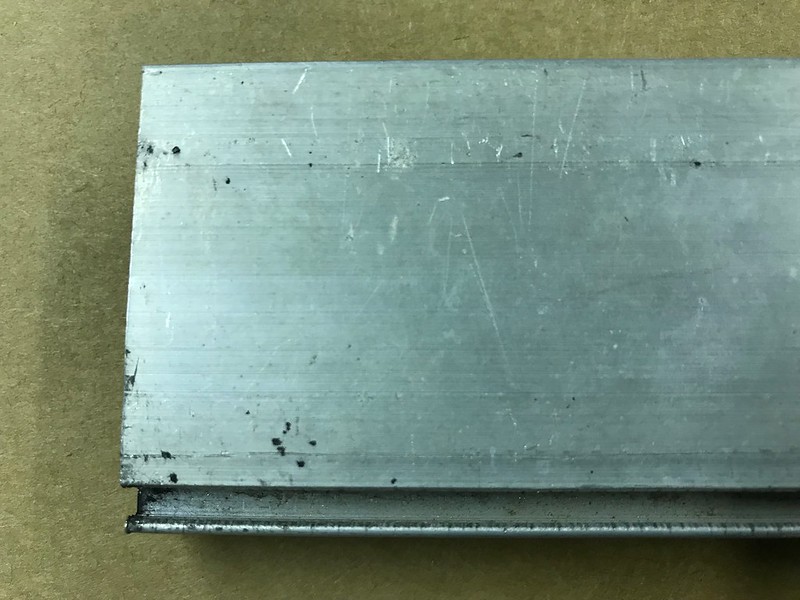
Knowing I'm looking for a resto-modern look, I thought I'd try to achieve a high polished finish on one of the cross members as an experiment. I initially used a polishing wheel with brown Tripoli compound. The result was a polished look, however all the surface extrusions, scratches, and imperfections were magnified.
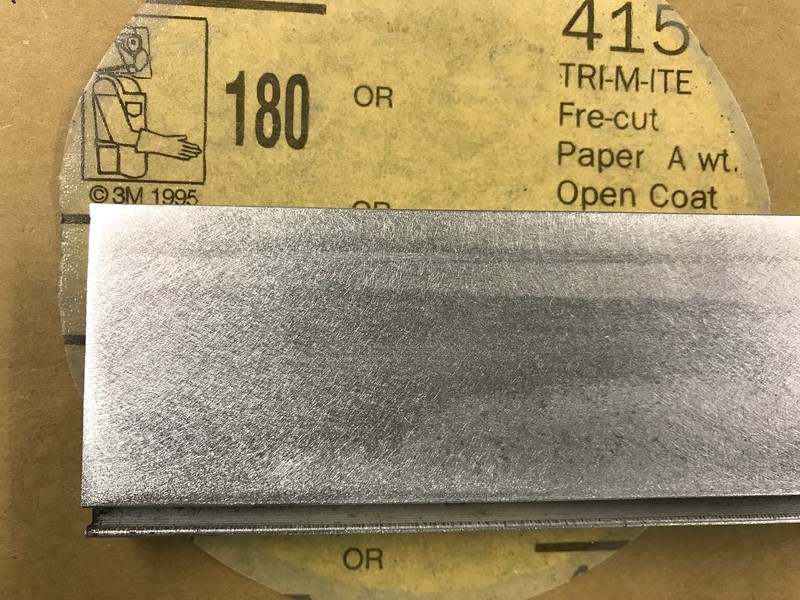
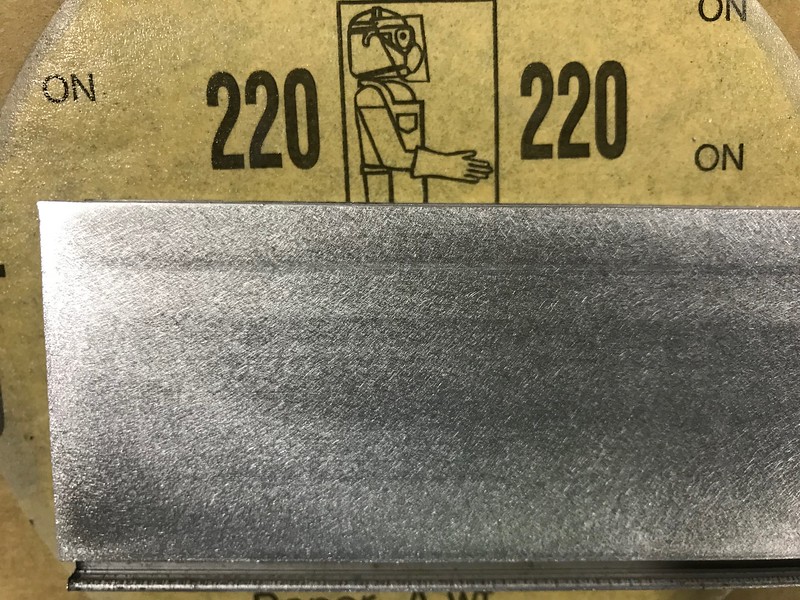
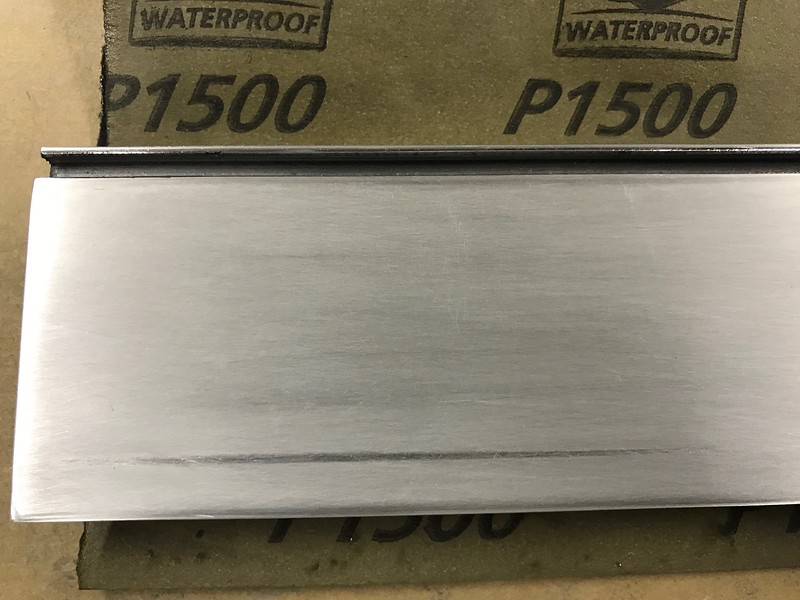
Base material:
Initial polish:

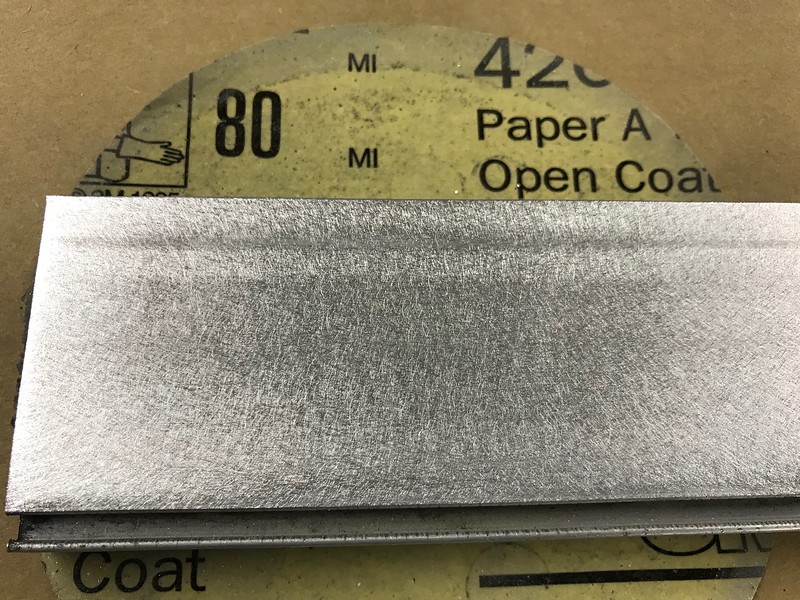
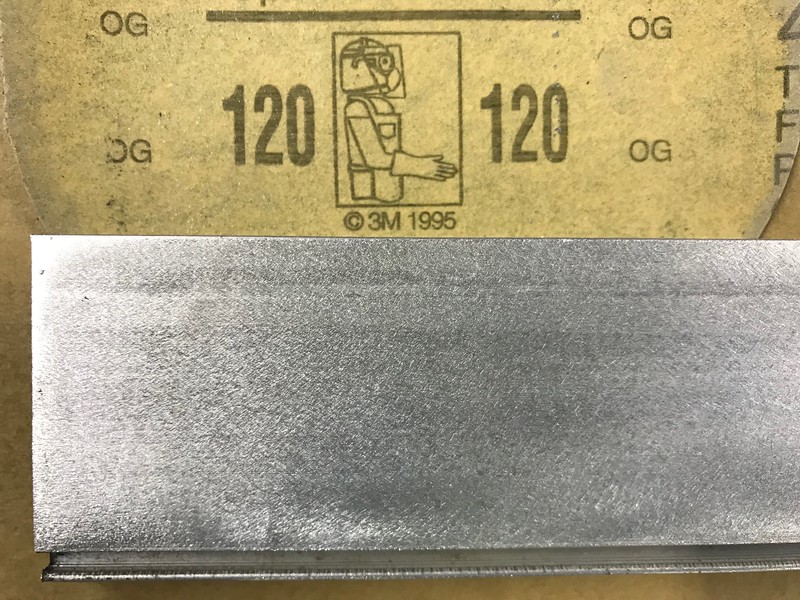
In effort to get rid of the deep imperfections, I used a DA sander starting with 80 grit and progressed to 220 grit:
Don't worry about my health...I have a good downdraft table, so I wasn't breathing aluminum dust during the sanding process.
I then polished with the brown Tripoli compound and progressed to white Jeweler's Rouge for a higher gloss finish:
A couple of photos with the brown Tripoli:
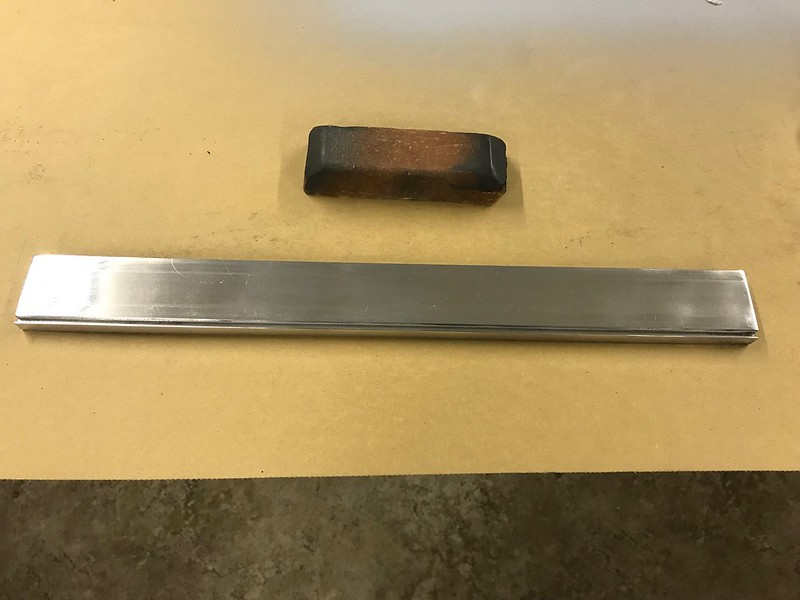
A couple of final photos with the white Jeweler's Rouge:
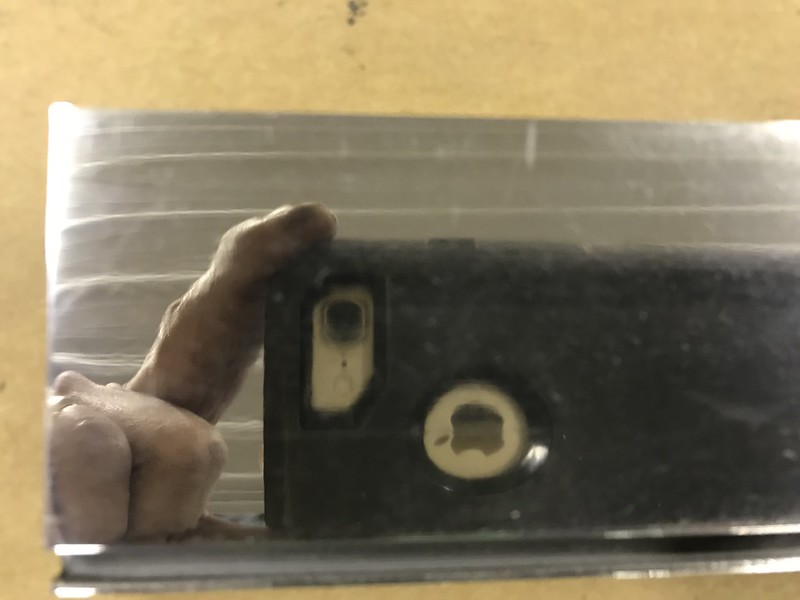
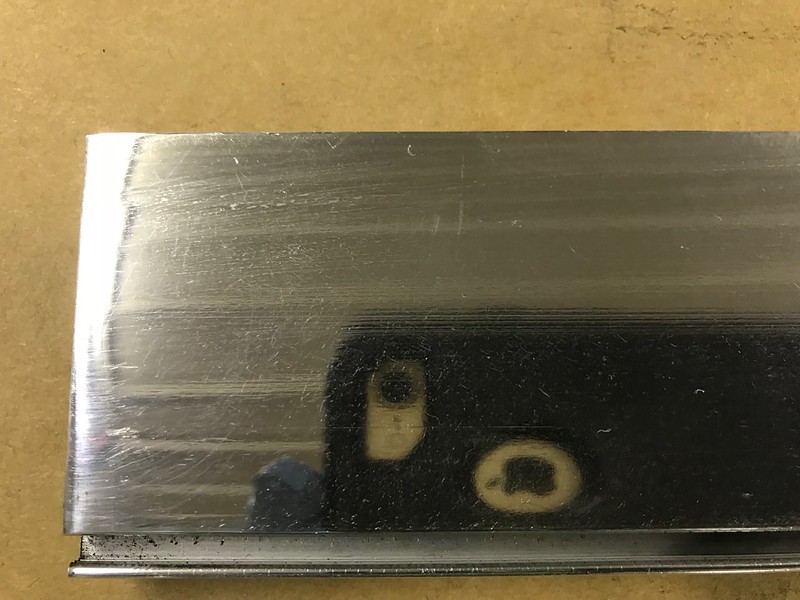
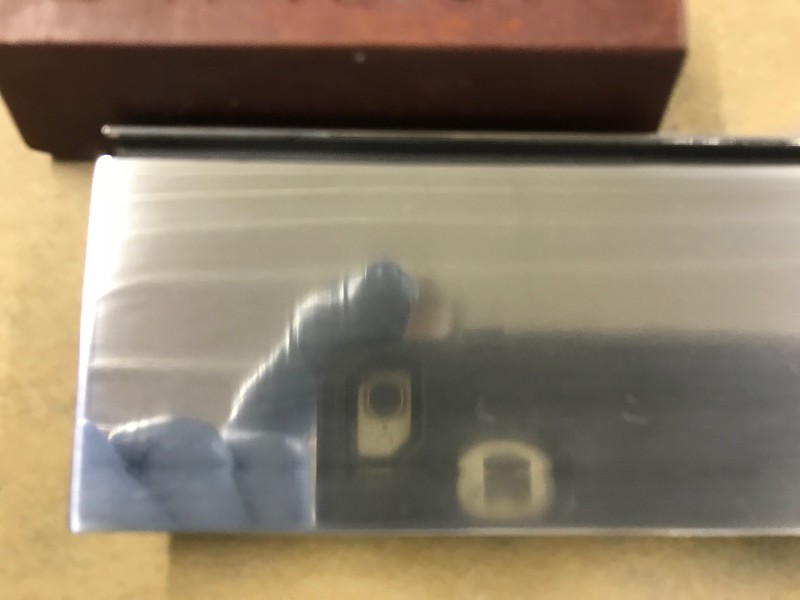
As you can see, the process worked quite well and the final product is definitely the mirrored finish I'm looking for. However, my wife actually likes the sanded look better. So...I ended up with a couple of options to choose from. By the way, those lines in the background behind the phone is the reflection from my shop ceiling.
Any thoughts from the gallery out there??? I appreciate your input like always...
|
|
|
|
Post by Ross on Jan 2, 2018 4:21:47 GMT -8
Whenever I am cleaning the aluminum window frames, screen door, etc, I simple use grade #0000 steel wool and lacquer thinner and buff with a clean white rag. My wife and I don't mind the scratches and imperfections in the aluminum frames, same with the skins on the vintage campers.
Just remember, once you get a polished surface, you will need to keep it polished, unless you plan on clear coating.
As for the sanded aluminum surfaces, it does have a unique look and it would be a way to hide any imperfections.
Ultimately, it comes down to what you and your wife like and the look that you are after. Just remember to keep having fun with your vintage camper restore/rebuild. Once it becomes a chore or hassle, is when the love falls by the wayside.
|
|
mobiltec
5K Member
 I make mistakes so you don't have to...
Posts: 9,822 
Likes: 3,749
1954 Jewel In Progress...
Currently Offline
|
Post by mobiltec on Jan 2, 2018 16:18:28 GMT -8
Whenever I am cleaning the aluminum window frames, screen door, etc, I simple use grade #0000 steel wool and lacquer thinner and buff with a clean white rag. My wife and I don't mind the scratches and imperfections in the aluminum frames, same with the skins on the vintage campers. Just remember, once you get a polished surface, you will need to keep it polished, unless you plan on clear coating. As for the sanded aluminum surfaces, it does have a unique look and it would be a way to hide any imperfections. Ultimately, it comes down to what you and your wife like and the look that you are after. Just remember to keep having fun with your vintage camper restore/rebuild. Once it becomes a chore or hassle, is when the love falls by the wayside. What he said... |
|
Deleted
Posts: 0
Currently Offline
|
Post by Deleted on Jan 2, 2018 19:06:39 GMT -8
Thanks Ross for the response. My wife is using steel wool and vinegar to clean her window frames for the Maple Leaf and that works quite well. I want the polished look for the Catalina, so am going through the more laborious multiple step process.
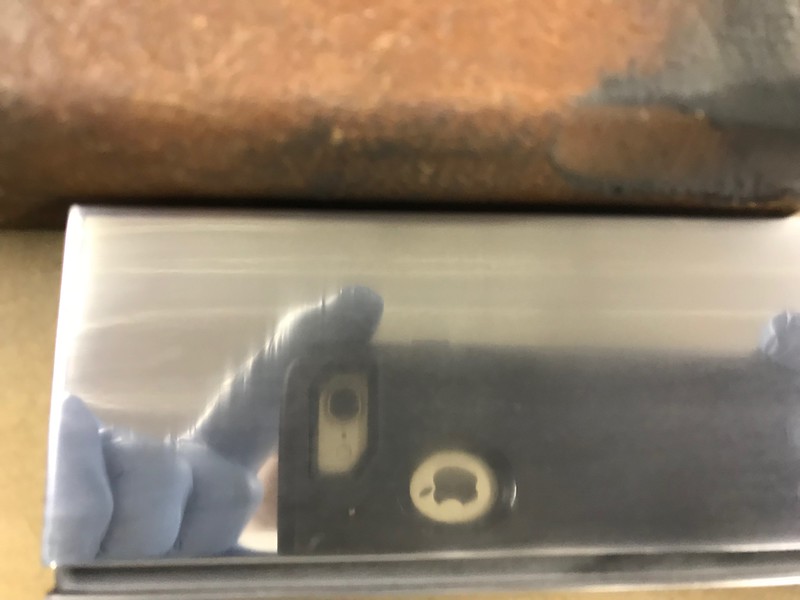
I wasn't completely satisfied with my end result as I still had a bit of a "mottled" finish. I believe this was due to not abrading fine enough before wheeling with the polishing compounds. So I added a few hand sanding steps to the process - dry sanded with 320, then wet sanded with 600 and 1500 per photos below:
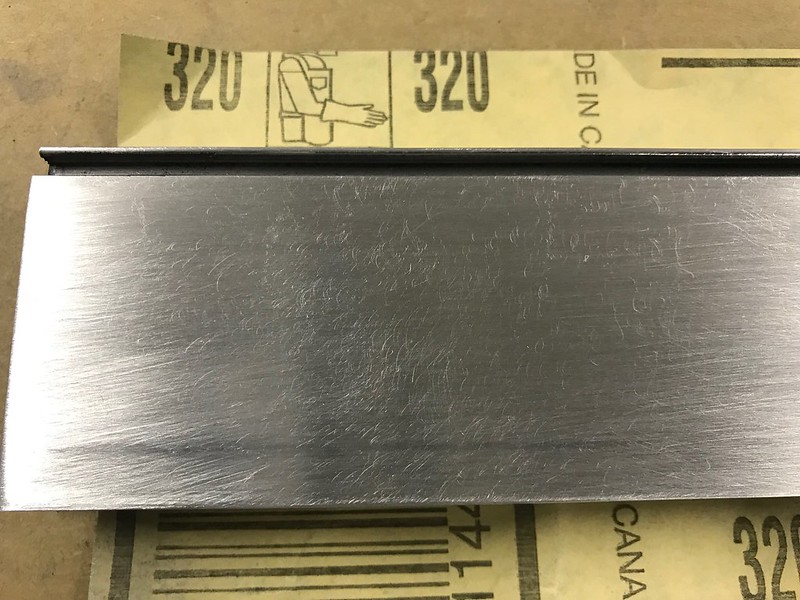
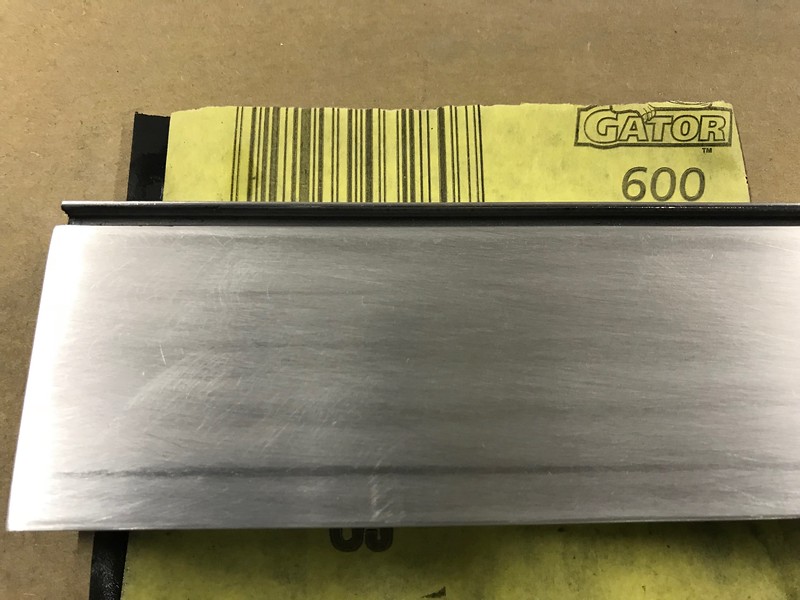
This definitely gave me the really flat finish I needed, same as wet sanding automotive paint before polishing.
I then polished with Brown Tripoli, White Rouge, and finished with Red Rouge:
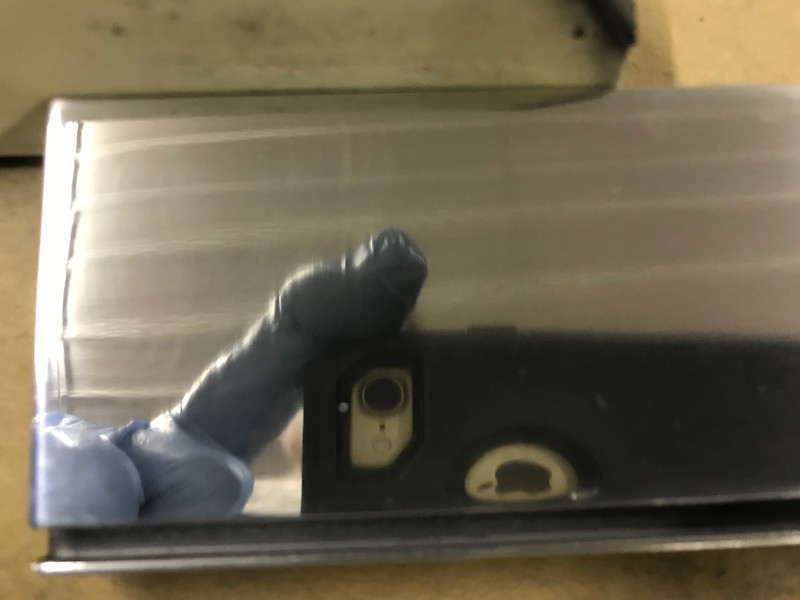
The photos probably don't do justice, but the final product looks nearly as good as chrome plating. The only problem is that it is not nearly as hard as chrome plating. Just laying this on a sheet of cardboard creates fine, but noticeable surface scratches.
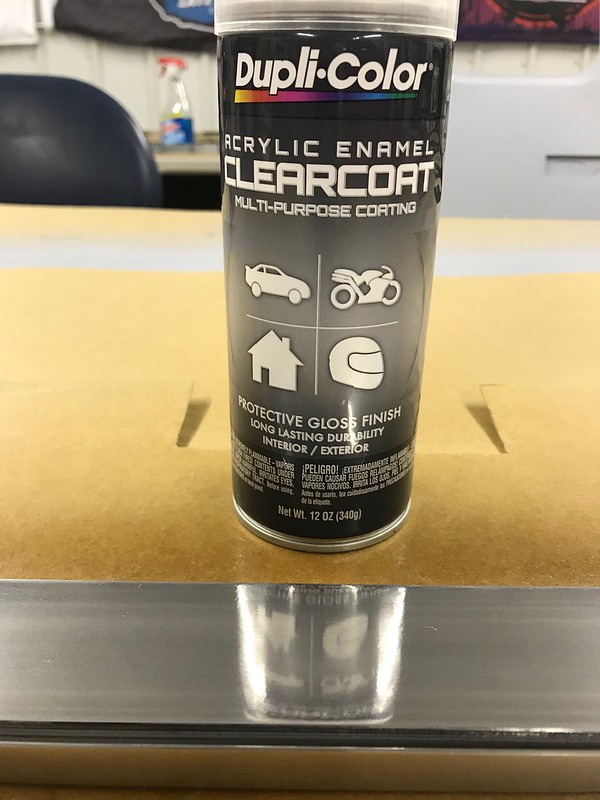
If I want to proceed with this look, I must now add a final step called "clear coating" to provide a hard and durable surface it needs, just as Ross eluded in his post above. I need to obtain a small spray can of a urethane clear finish to confirm. That will be provided in the next update...
By the way, for those of you counting, with final clear coating I'm now up to (11) steps in this process! Although each step goes relatively quickly, I'll likely pare it back to the necessary. Probably (2) dry sanding steps, (2) wet sanding steps, and (2) polishing steps. Adding the final clear spray will make (7) total. Quite the process, but hopefully the final look will be worth it.
|
|
nccamper
Administrator 
Posts: 7,744
Likes: 2,871
1962 Forester- 1956 Shasta
Currently Offline
|
Post by nccamper on Jan 2, 2018 19:26:17 GMT -8
Your system gets excellent results. Beautiful. "... I'm now up to (11) steps in this process! Although each step goes relatively quickly" This is a camper you'll keep? Do what makes you happy. Although once you do the door, you'll want the windows to match. The why not do the eyebrows and interior window trim? And, and, and... A camper you plan on selling can be made beautiful with less effort. I just do a good 0000 steel wool cleaning followed by an acid wash and Blue Magic polish. 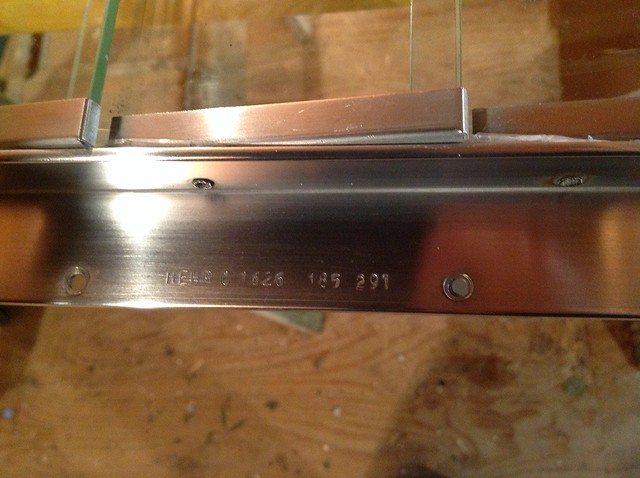
|
|
Deleted
Posts: 0
Currently Offline
|
Post by Deleted on Jan 2, 2018 19:48:28 GMT -8
Yes...this is the camper I plan to keep. I'll do lots of experimenting on this one to confirm what works and what doesn't work for campers that I would sell going forward. Who knows, maybe someone will offer me a fortune for all this test lab work!
And yes, I had already planned to polish everything that I possibly can...windows, eye brows, etc.
I expect the process will go a lot quicker with items like eye brows that don't have extruded ridges in the surface like door frames do. That is the reason for sanding with 80 grit as the first step in the process shown above.
|
|
|
|
Post by vikx on Jan 2, 2018 22:43:50 GMT -8
Vicx does a high chrome like polish on eyebrows and as high a polish as he can get on windows, inside and out.
Screen doors and J/awning rail are 220 sanded and smoothed to a mill finish with course steel wool. 00 works if they are not too badly scratched. Shiny is great if you won't be touching it everyday.
I like this combo and we do it on most trailers. Painted J rails are not my favorite; hard to paint and tend to chip over time. A quick steel wool touch up is all the J rails need...
|
|
Deleted
Posts: 0
Currently Offline
|
Post by Deleted on Jan 2, 2018 23:53:56 GMT -8
I found some acrylic enamel clear coat touch up spray in my automotive paints cabinet. After cleaning the polishing compound off with acetone, I applied (2) coats. It added some visual depth and looks absolutely fabulous! I'll let it cure over the next couple of days and then put it through some rigors of what to expect when camping. I'll let you know the results later this week. I hope it holds up, as this is really the look I want.
|
|
Deleted
Posts: 0
Currently Offline
|
Post by Deleted on Jan 7, 2018 22:53:48 GMT -8
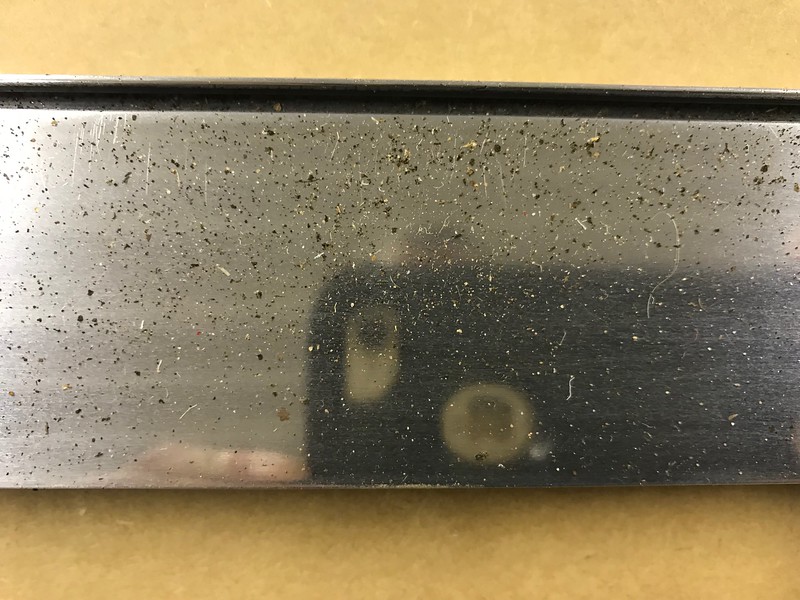
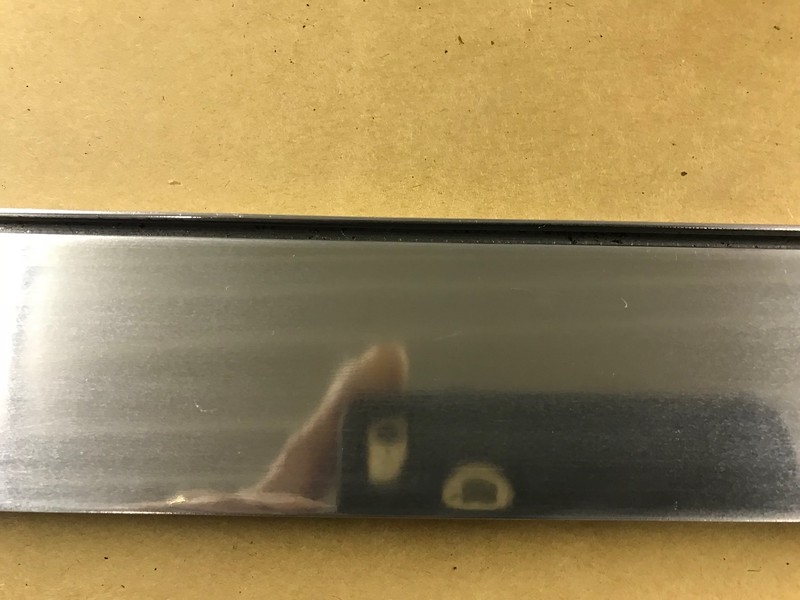
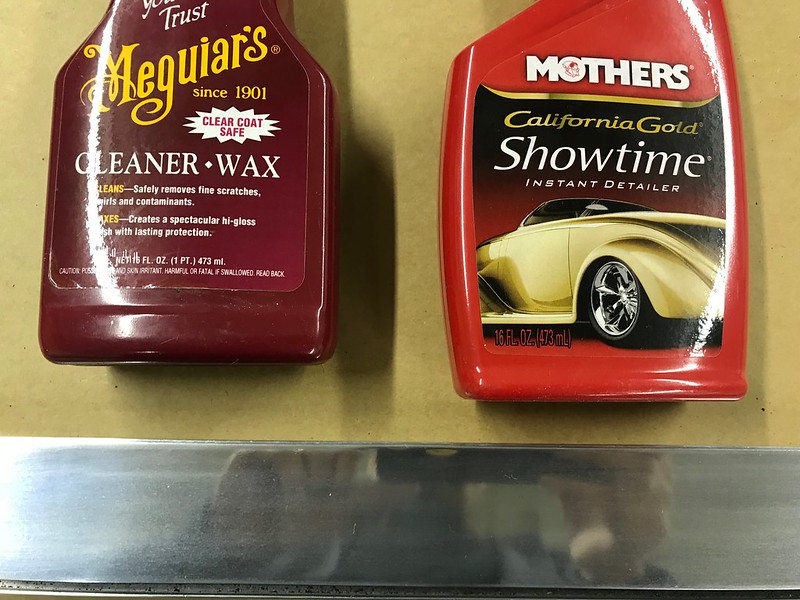
I let the piece cure for a few days and then replicated a dirty/dusty condition. This was accomplished by sprinkling some debris swept off my shop floor. I then wiped off the debris with a dry paper towel (kind of worst case condition). The part didn't scratch a bit, so I believe I accomplished what I was looking for. To keep shiny and clean, I'll plan to use the same products I use on my car finish - Meguiar's cleaner/wax, and Mothers detailer.
Next step is to create this surface finish on all the door components and reassemble. Then eventually window frames, wheel well trim, eyebrows, etc. Another expected side benefit is that components finished to this process will not oxidize or tarnish so long term maintenance should be minimal.
|
|
nccamper
Administrator
Posts: 7,744
Likes: 2,871
1962 Forester- 1956 Shasta
Currently Offline
|
Post by nccamper on Jan 8, 2018 4:31:28 GMT -8
That's a really beautiful shine. Your trim will be impressive.
Let us know the time required on the entire door. Or even on one eyebrow. I'm sure you'll get faster as you go. Or like me, numb to the passing of time.
I seem to remember Mobiltec doing it one piece at a time in his living room during the winter. My wife would kill me if I tried that.
|
|
Deleted
Posts: 0
Currently Offline
|
Post by Deleted on Jan 8, 2018 8:29:16 GMT -8
I'll keep track of the time it takes to do all the door pieces and let you know. The first step of sanding with 80 grit is necessary to remove the extrusion ridges from when it was manufactured. I'll experiment on a 2nd piece to see how many steps I can eliminate in between the 80 grit and the final polishing. I'll post the final process I come up with on this same thread.
Items like eye brows don't have that extrusion ridge, so many of the early coarser sanding steps will not be necessary.
|
|


