nate
Active Member

Posts: 112 
Likes: 15
1963 Comet 17'
Currently Offline
|
Post by nate on Jan 22, 2018 11:48:44 GMT -8
Nate, Thanks so much for posting the pix! I've got a '62 Meteor so it's almost the same trailer as yours -- 2' longer but the layout is very similar. It's really great to see how my trailer is constructed (by virtue of yours!) before I "tear into it" like you have. I absolutely can tell you that your trailer did have 9" armstrong asbestos tiles. You won't miss them... ;-) I simply encapsulated my tiles with latex paint and covered with carpet when I lived in my trailer. From your pix I see you have the same brown stove as mine and the same robinegg green wheels. What color is your sink? Mine matches the wheels and I always wondered just what was original and what was not I look forward to seeing how this goes back together! Good luck and enjoy the process! Hey Banman. My sink is also brown. The trailer looks to have been repainted at some point. I'll probably repaint the same color though. I'd love to see some pics of your trailer if you have a link to a thread! My progress has been held up due to needing some metal work. I just finished replacing all the suspension parts on my trailer frame - new leaf springs, hangers, shackles, and mounting hardware. I got it all from e-trailer for right around $100 so that was a good move. Now I'm getting ready to paint. It's been really cold in MN but there's a warm up coming where I don't mind running the garage heater for a whole weekend to do the painting. |
|
nate
Active Member
Posts: 112
Likes: 15
1963 Comet 17'
Currently Offline
|
Post by nate on Mar 11, 2018 18:31:32 GMT -8
Spent some time on the camper and am finally at a point where I can begin building upwards! After mulling over some suspension issues I decided to remove the old leaf springs and hardware and weld on all new hardware and upgrade my leaf springs. I wire wheeled the entired trailer and used POR15 rust preventative paint on the frame. It shouldn't rust ever again!  Untitled Untitled by nate kastle, on Flickr 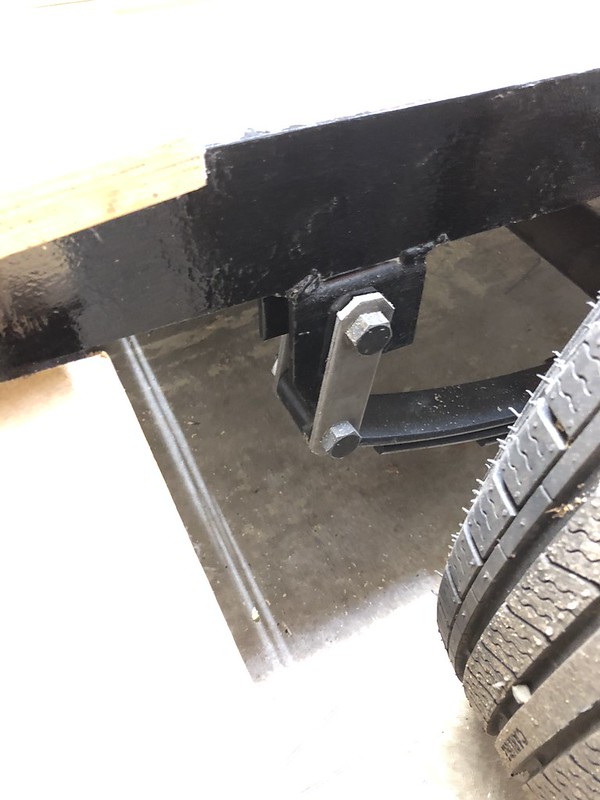 Untitled Untitled by nate kastle, on Flickr One of the toughest parts was figuring out how to flip the trailer over by myself. I ended up using a chain hoist in the garage and was careful not to put too much of the weight on the outriggers. I decided to insulate the floor so I ended up laying 1/4 masonite down on the cross members and then laying the floor joists on top. I stapled and screwed the masonite up to the framing. I used 2" and 3/4" foam pieces that end up being flush with the top of the floor joists. 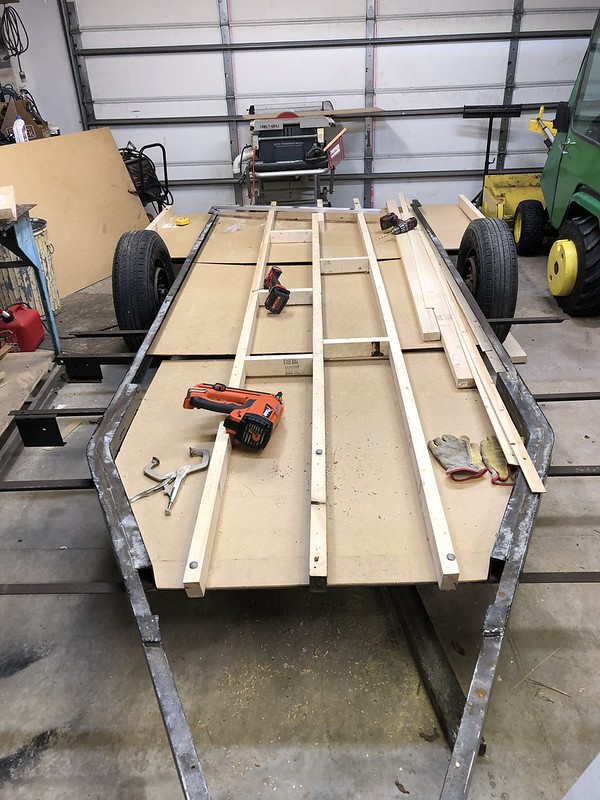 Untitled Untitled by nate kastle, on Flickr  Untitled Untitled by nate kastle, on Flickr 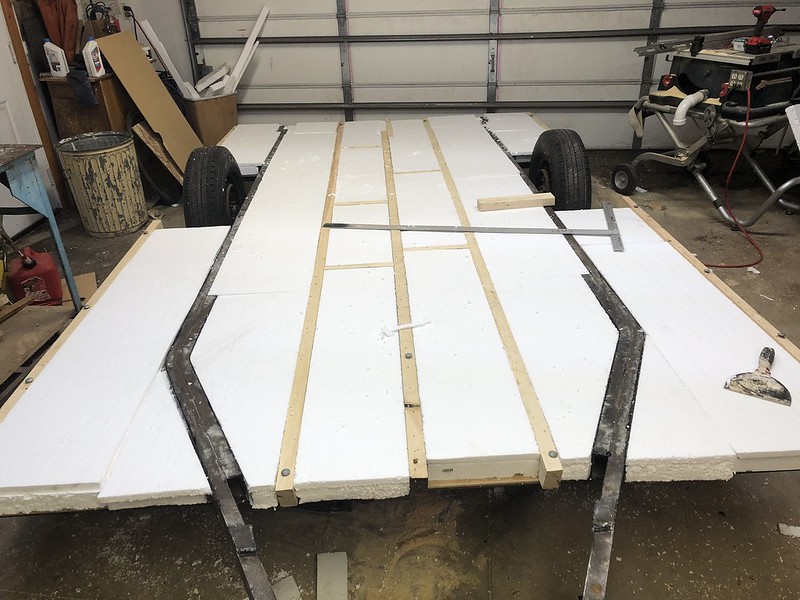 Untitled Untitled by nate kastle, on Flickr Just about ready to lay the floor. I have 4 sheets of 5/8" BCX plywood. I was planning on laying them all sideways. Do people like to lay full sheets down the middle to avoid seams in the visible area in the middle of the trailer? I didn't pay attention to how it was originally laid. It's been a cold, snowy winter and it's been tough to get time in the garage since it takes a while to warm up. Looking forward to warmer weather. I'm thinking ahead to how I'm going to work outside assembling the walls and ceiling. Thinking I'm going to go the Harbor Freight $120 portable carport. |
|
nate
Active Member
Posts: 112
Likes: 15
1963 Comet 17'
Currently Offline
|
Post by nate on Aug 21, 2018 15:58:10 GMT -8
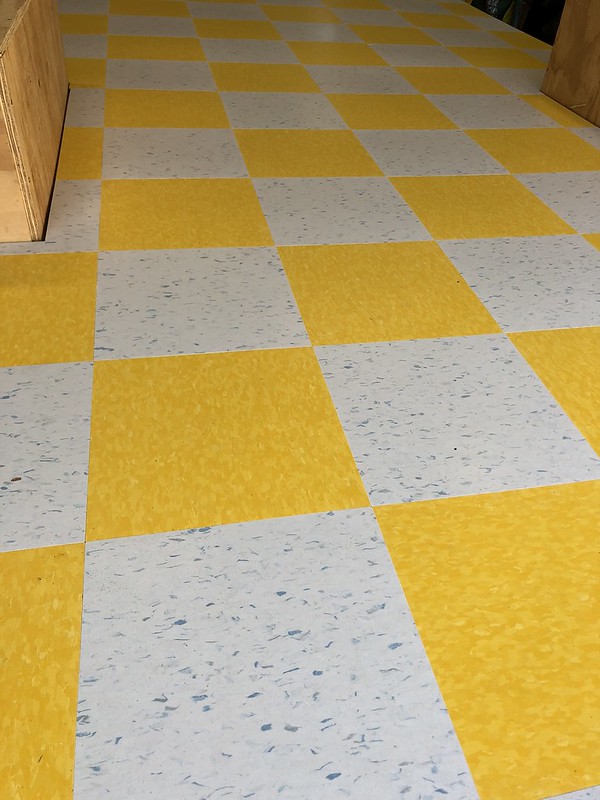
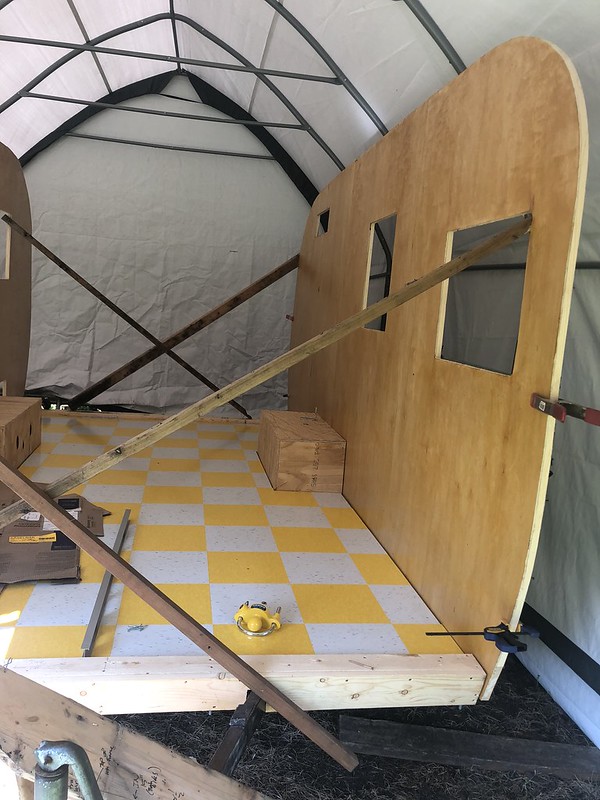
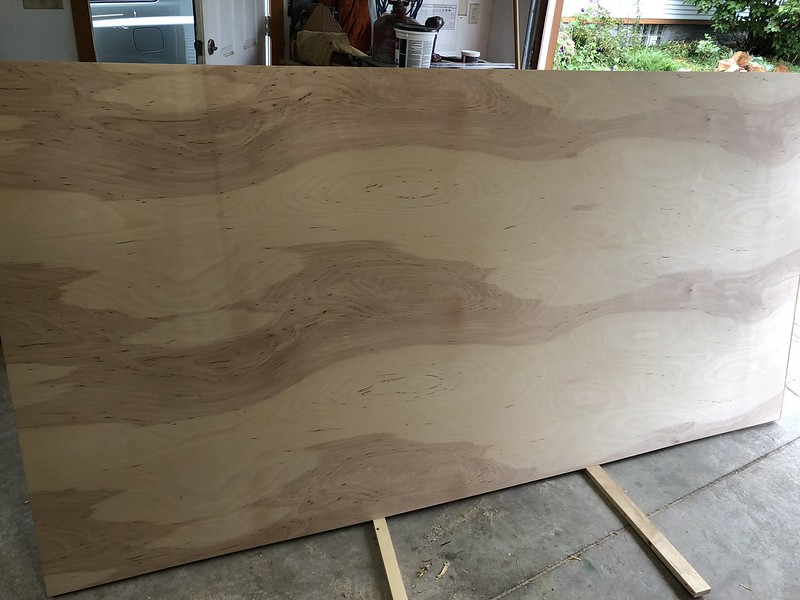
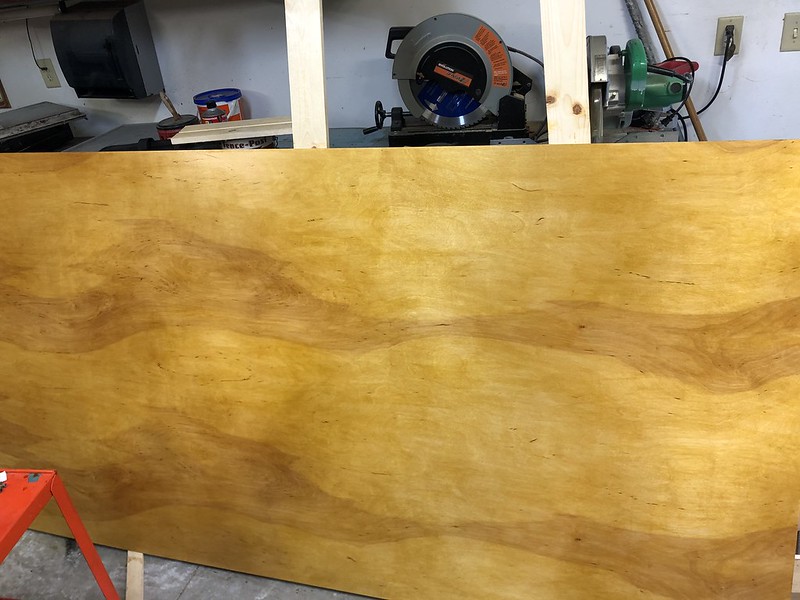
It's been a while since I've posted but I've been working on the camper here and there. I haven't had too many questions lately, just lots of labor. I think the tough parts are coming up.  Walls Walls by nate kastle, on Flickr I installed the decking and got that all bolted down. 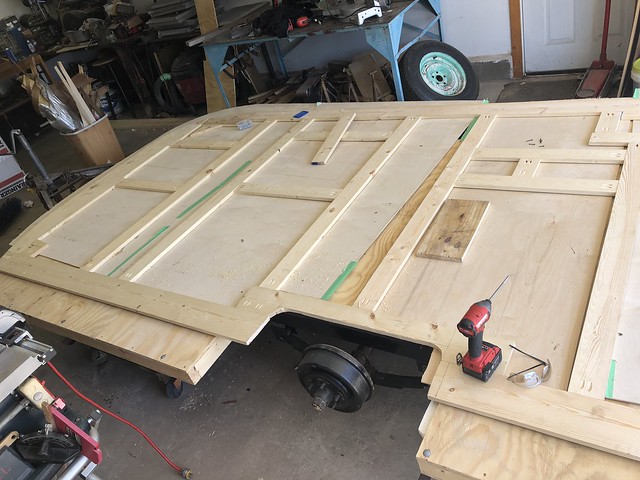 Untitled Untitled by nate kastle, on Flickr 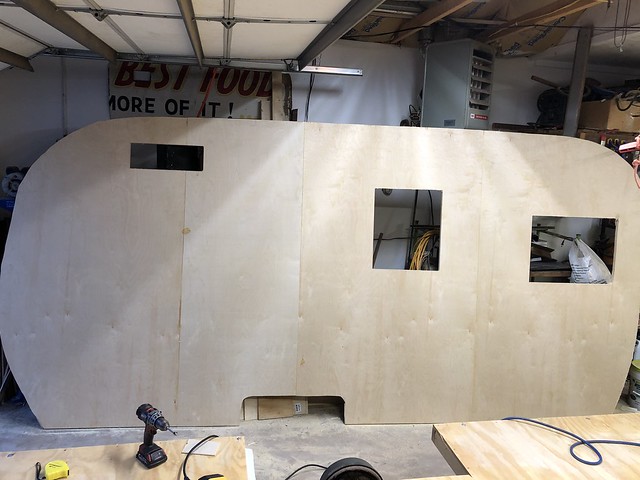 Untitled Untitled by nate kastle, on Flickr 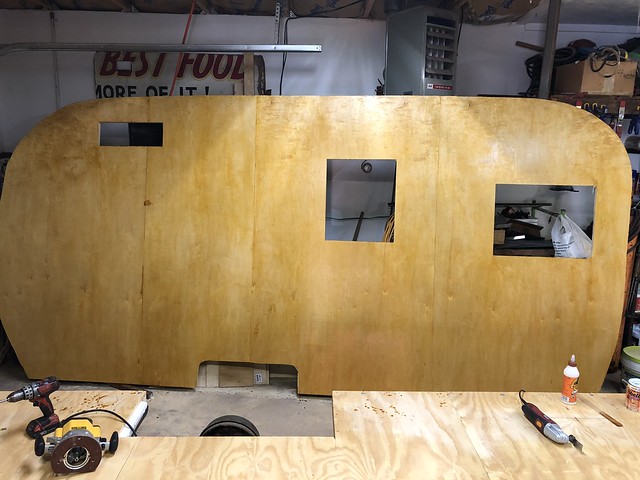 Walls Walls by nate kastle, on Flickr  Walls Walls by nate kastle, on Flickr 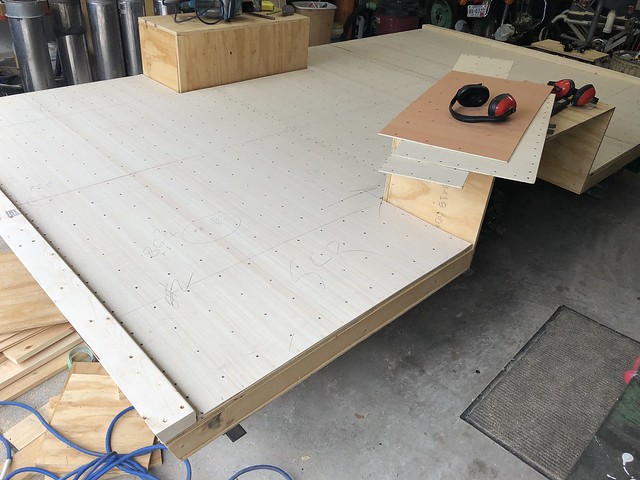 Untitled Untitled by nate kastle, on Flickr Got the two side walls built up and shellacked with 3 coats of amber and 2 coats of clear. It's not original to the trailer but it's what I want. We plan to do the floors very soon with VCT tile. We picked out a bright yellow and a blueish silver. Hope I like it...  I bought a Shelter Logic shelter (10 foot door height) to be able to complete the project. Once the tiles are on it we will move it into the shelter and put up the side walls. One question I have is whether it's better to build the cabinets before the ceiling and front/rear panels, or build all the walls and the build the cabinets to the ceiling. |
|
|
|
Post by vikx on Aug 21, 2018 20:17:09 GMT -8
I would start with the cabinets before going any further. It will help square the walls and give you support for the ceiling panels. 1/8 are really floppy. I used braces from the floor or clamped to a ladder to help until I get the seam rafters in place. Another little trick is to screw a block into the rafter (skinny trim screw) to help support the seams.
Once the ceiling is secure, you should be able to add the upper cabinets. I add blocking between the rafters to help secure them and also braces below to ensure they don't put too much stress on the panels until everything is sturdy.
Good luck and take lots of photos!
|
|
nate
Active Member
Posts: 112
Likes: 15
1963 Comet 17'
Currently Offline
|
Post by nate on Aug 22, 2018 8:50:29 GMT -8
I would start with the cabinets before going any further. It will help square the walls and give you support for the ceiling panels. 1/8 are really floppy. I used braces from the floor or camped to a ladder to help until I get the seam rafters in place. Another little trick is to screw a block into the rafter (skinny trim screw) to help support the seams. Once the ceiling is secure, you should be able to add the upper cabinets. I add blocking between the rafters to help secure them and also braces below to ensure they don't put too much stress on the panels until everything is sturdy. Good luck and take lots of photos! Hmm, okay, I was planning on bracing the walls while doing the ceilings but installing some of the cabinets does make sense. I'm worried about putting in any floor-to-ceiling cabinets before installing the ceiling for fear of mis-measuring. And as for the ceiling and front/back panels, I was planning to glue all the 1x4 boards and the ceiling braces to the panels and then install them between the upper part of the side walls. They get nailed in from the side. Are you saying to put in the braces and then push the paneling up to the framing? 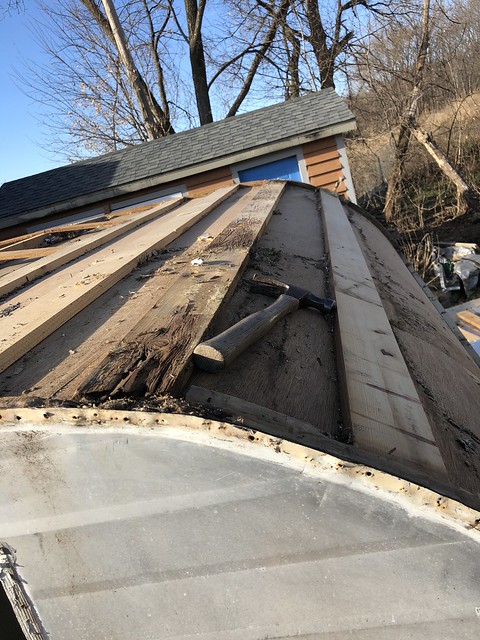 Untitled Untitled by nate kastle, on Flickr I have the old cut 2x4 bracing to use as a template to build new ones. I figured to build the roof panels to size, stick them between the walls, shoot them in, and then we're good.  Untitled Untitled by nate kastle, on Flickr Would it be better to install the curved ceiling framing after the panels are up and in? |
|
|
|
Post by vikx on Aug 22, 2018 20:11:33 GMT -8
Most panels go over the top of the walls. It's part of the strength of the trailer. I'm not seeing that with your trailer. Do you have more photos of the walls/ceiling panels before tear down?
Did the wall top 1 x 4 meet the top of the skins? If so, the panels may go between the walls, but I haven't seen this type of construction on a trailer this early.
|
|
nate
Active Member
Posts: 112
Likes: 15
1963 Comet 17'
Currently Offline
|
Post by nate on Aug 23, 2018 5:49:27 GMT -8
The ceiling panels were shot in with nails through the side wall 1x framing. Here are the best pictures I have that show it: 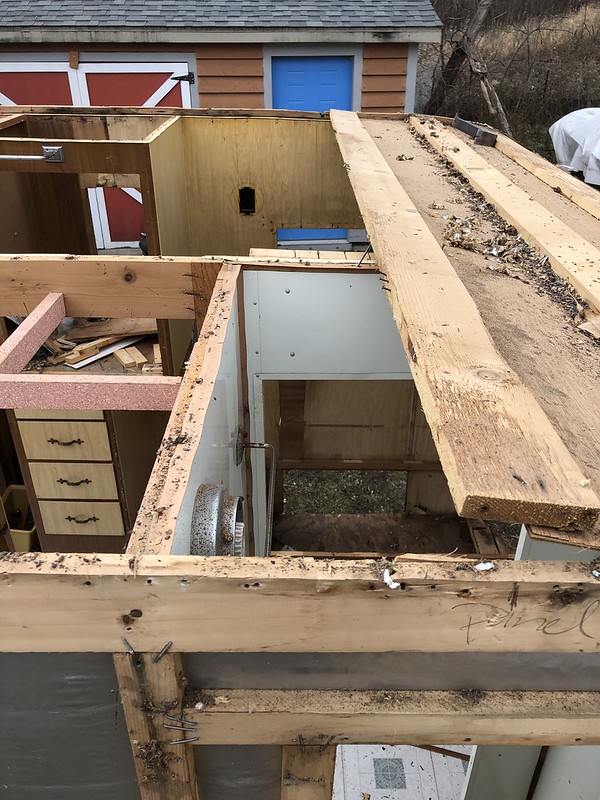 Untitled Untitled by nate kastle, on Flickr 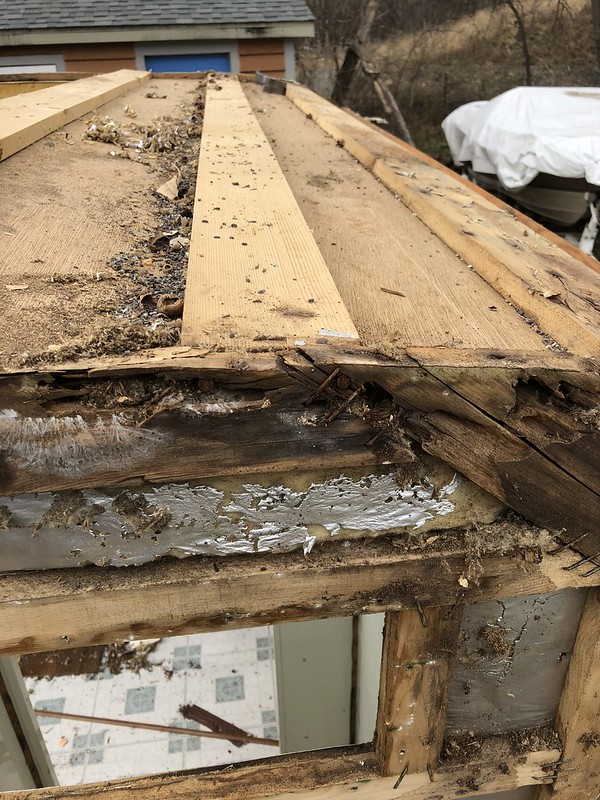
For the front and curved portions it was just 1x4 material nailed to the 1/8" plywood, overlapping at the seams. For the roof sections it was 2x4 lengths cut out with a curve. They were nailed in from the side wall and on top, through the cabinets. 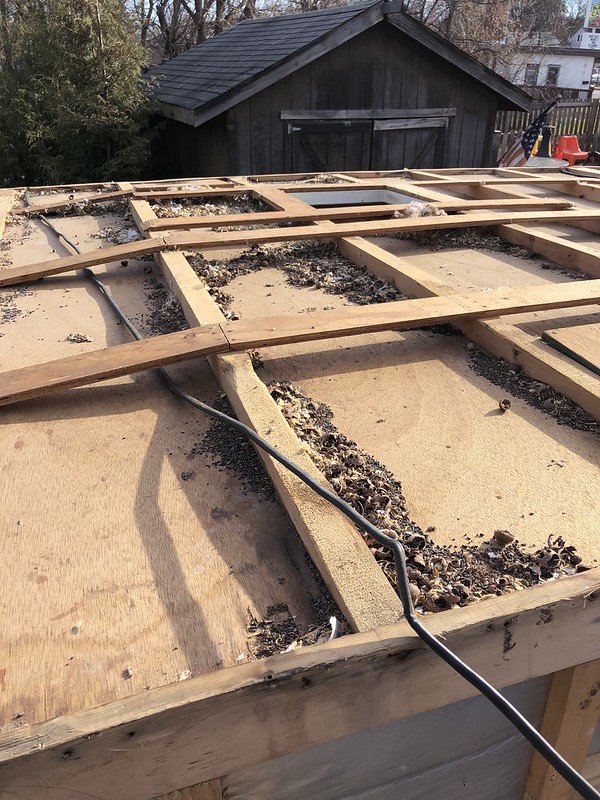 Untitled Untitled by nate kastle, on Flickr |
|
|
|
Post by vikx on Aug 24, 2018 20:07:26 GMT -8
In one photo, it looks as if there's an inside "ledge" that the ceiling panels rested on. You're right, very hard to tell from the pictures.
|
|
nate
Active Member
Posts: 112
Likes: 15
1963 Comet 17'
Currently Offline
|
Post by nate on Aug 24, 2018 20:14:04 GMT -8
You’re right. There was a small, routered out part of the upper side wall that gave a ‘ledge’ for the roof panels to rest in. Or maybe the paneling was cut 3/4” short? I can’t remember. Not sure how they did it and even more unsure how I could duplicate it. I didn’t plan to try... In one photo, it looks as if there's an inside "ledge" that the ceiling panels rested on. You're right, very hard to tell from the pictures. |
|
|
|
Post by vikx on Aug 24, 2018 20:29:12 GMT -8
The ceiling panels need to be very securely attached to each wall in any case. Be sure there are supports at the edges to keep the trailer integrity. The ceiling panels help hold the walls together.
|
|
nate
Active Member
Posts: 112
Likes: 15
1963 Comet 17'
Currently Offline
|
Post by nate on Aug 25, 2018 7:40:48 GMT -8
The ceiling panels need to be very securely attached to each wall in any case. Be sure there are supports at the edges to keep the trailer integrity. The ceiling panels help hold the walls together. Thanks for the input. I was planning to screw the ceiling panels in from the side, drilling pilot holes and using 2” screws. I wonder if that makes it too rigid? Originally there were two nails per board shot in through the side. I could add ceiling framing pieces or use 1x6 boards and triple nail them. What are your thoughts on screws? |
|
|
|
Post by vikx on Aug 25, 2018 10:05:39 GMT -8
Screws will work fine Nate. I would try to have a ledge or board so that the screws go in straight rather at an angle. (or both) Keep in mind some screws don't have sheer strength. Use good quality screws.
|
|
nate
Active Member
Posts: 112
Likes: 15
1963 Comet 17'
Currently Offline
|
Post by nate on Sept 22, 2018 6:04:25 GMT -8
|
|
nate
Active Member
Posts: 112
Likes: 15
1963 Comet 17'
Currently Offline
|
Post by nate on Apr 27, 2020 5:50:22 GMT -8
Wow, it's been a while since I've updated this thread. Still not done but still haven't called it quits, lol. I have the interior nearly completed with all new cabinetry, dinette, slide out couch with homemade cushions (ikea latex mattress), 12v and 120v electric installed and the trailer is nearly completely insulated. I have to finish the roof insulation and then I'll be ready to wrap and put up the siding. I'm going to use the old siding for a while until I can arrange to get new skin without paying for shipping. More on that later. There were some mistakes made. I have some buckling of the roof paneling where they meet the sidewalls which was caused by uneven walls (I made new walls based on old siding). It's not perfect but I think it's solid and I've never done anything like this before. Hoping to camp in it this year (year 3 of saying this haha). Here are some pictures of where I'm currently at. Hoping this virus thing ends so I can properly get my shopping done.  Camper Camper by nate kastle, on Flickr  Camper Camper by nate kastle, on Flickr 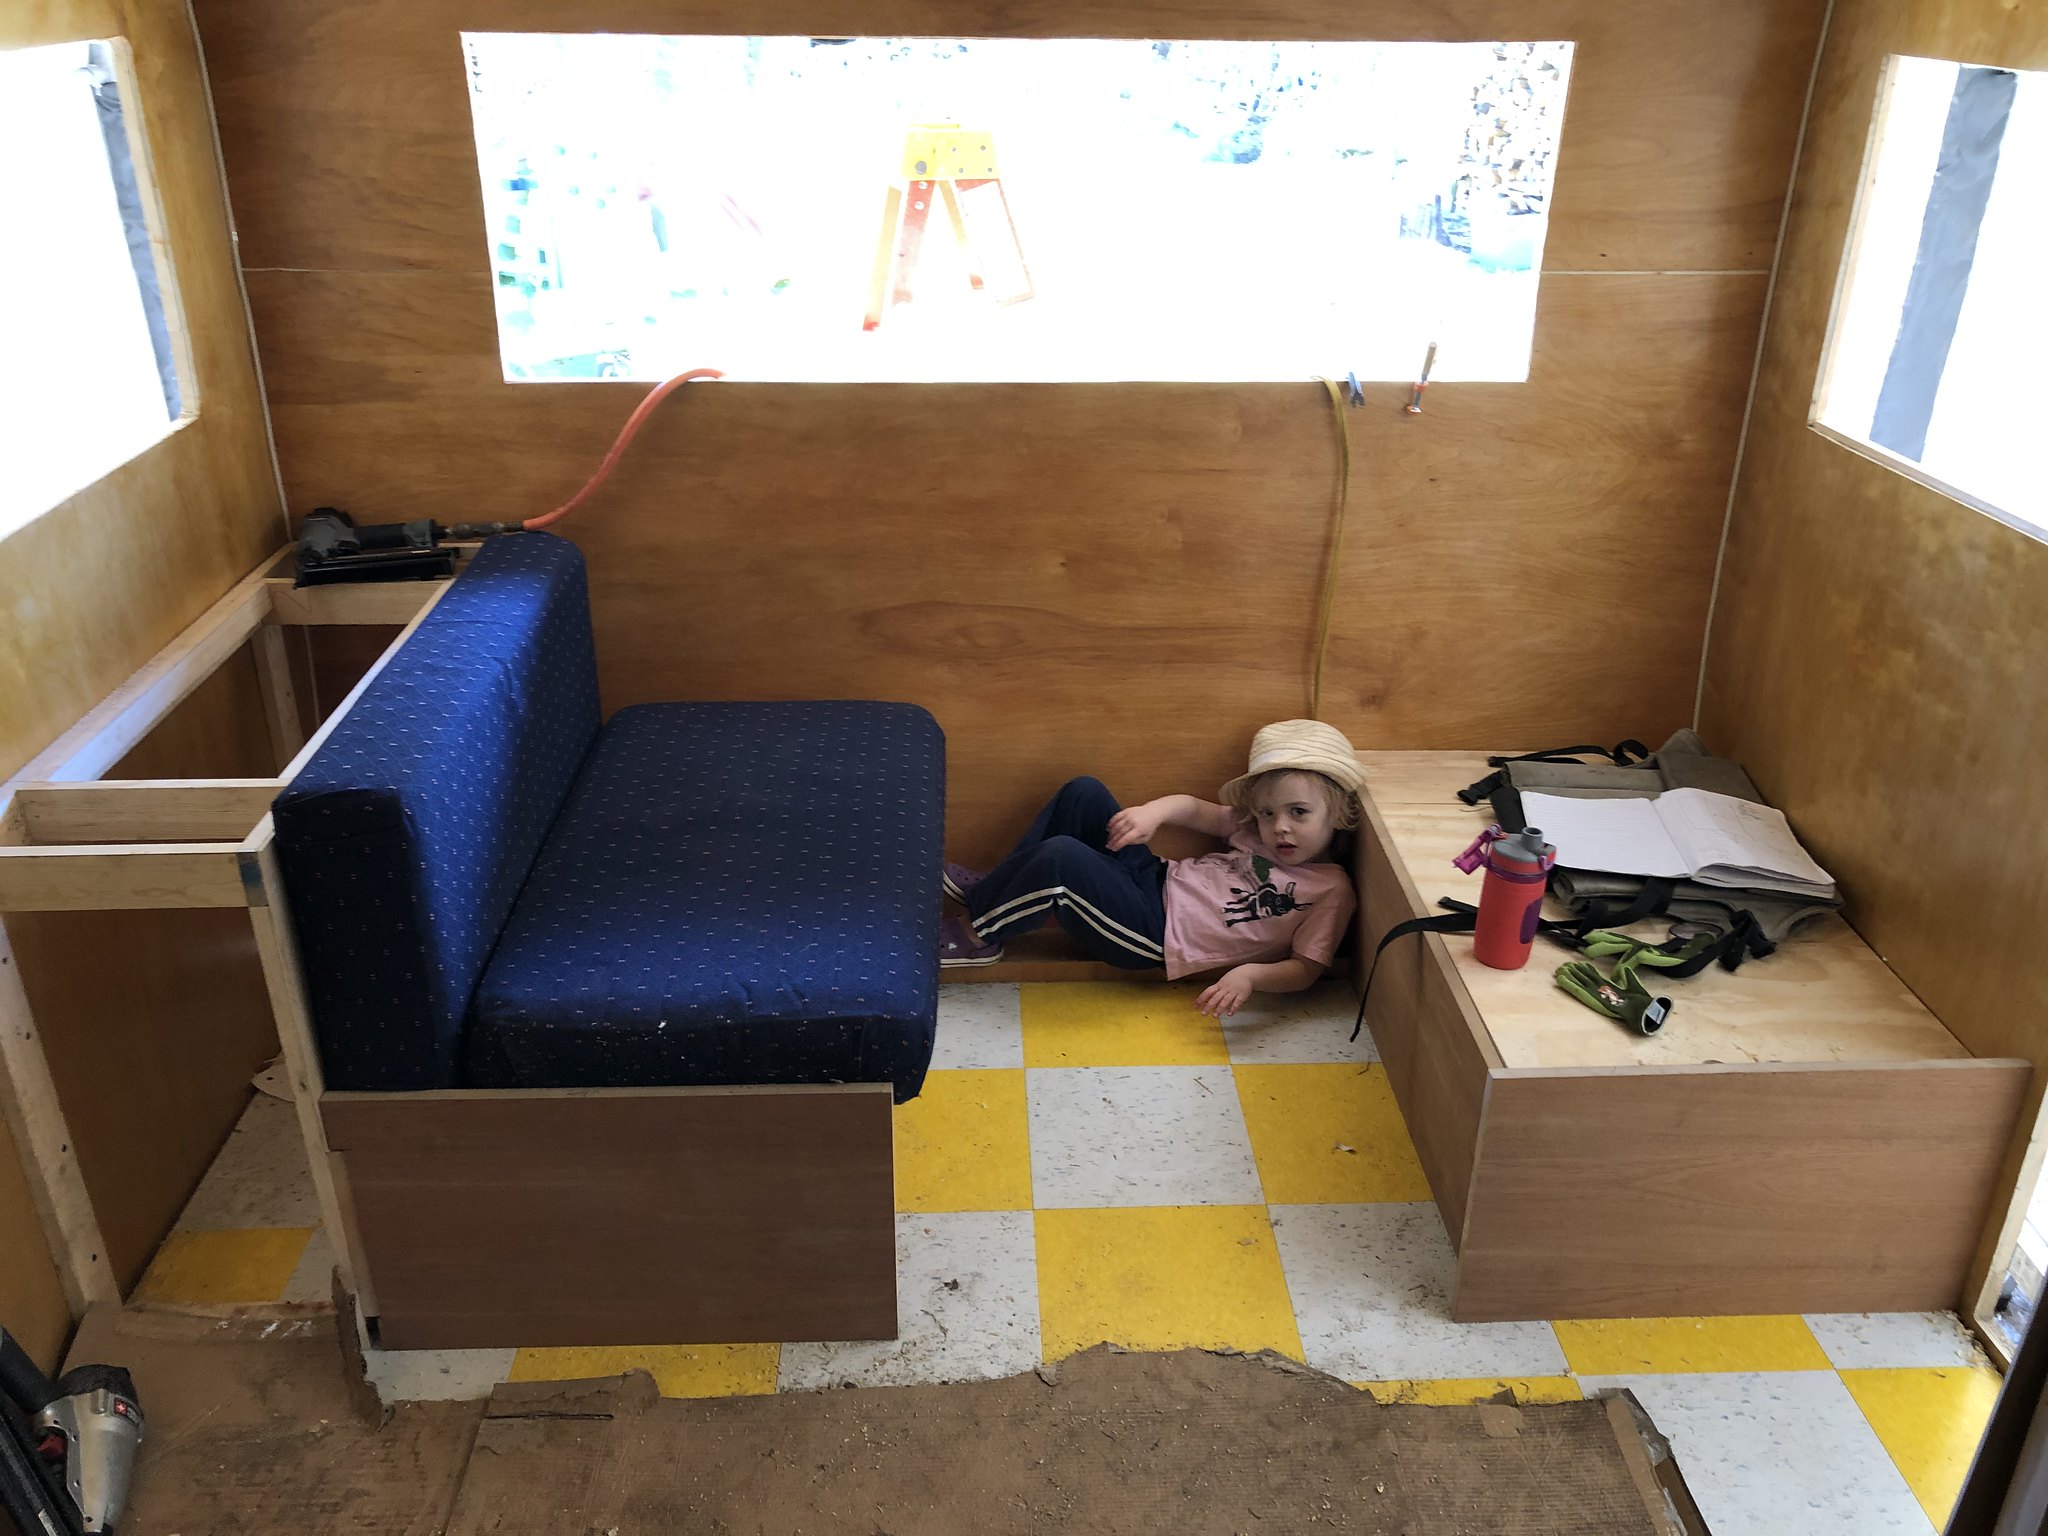 Camper Camper by nate kastle, on Flickr  Camper progress Camper progress by nate kastle, on Flickr  2 2 by nate kastle, on Flickr  Camper progress Camper progress by nate kastle, on Flickr  3 3 by nate kastle, on Flickr |
|
nccamper
Administrator 
Posts: 7,744
Likes: 2,871
1962 Forester- 1956 Shasta
Currently Offline
|
Post by nccamper on Apr 27, 2020 7:37:30 GMT -8
Looking good. Keep at it!
You'll never have more time to work on it than now.
|
|


 . It's starting to look like a trailer!