TheShastaProject
Member

Posts: 47 
Likes: 4
1967 Shasta Super 19
Currently Offline
|
Post by TheShastaProject on Nov 2, 2013 18:50:49 GMT -8
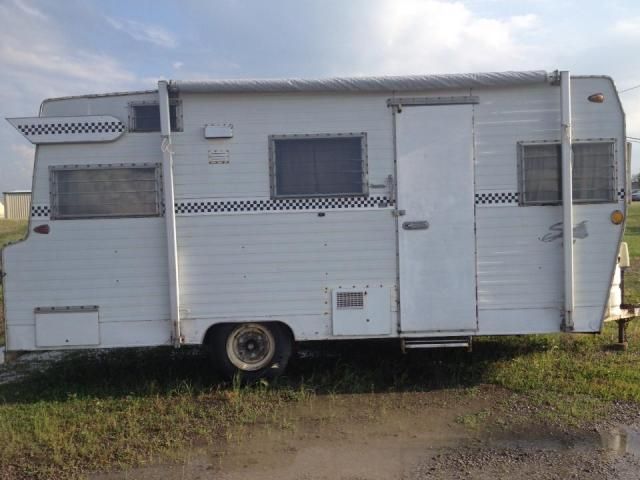
For the first time in months, had a Saturday with nothing schedule. What better way to spend it than pulling the skin off Sylvia and showing hubby that I really did find a gem. Back end looked pretty good. I expected the little "issues" that I found. 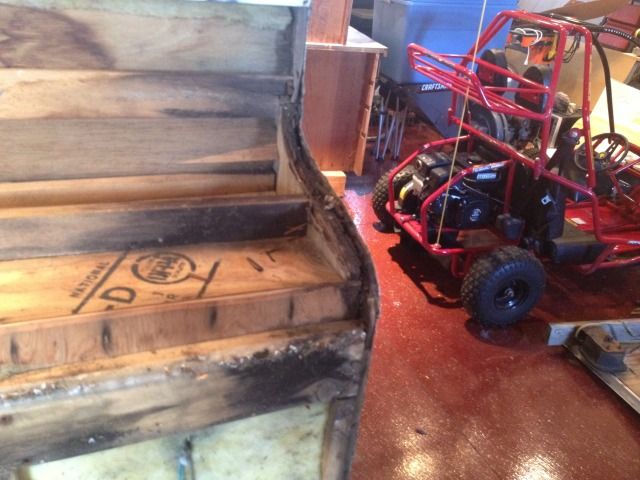 Although my electrical experience is limited, I would think you are suppose to hook the same color wir3es together. This looks like it may have something to do with why the lights didn't work very well. 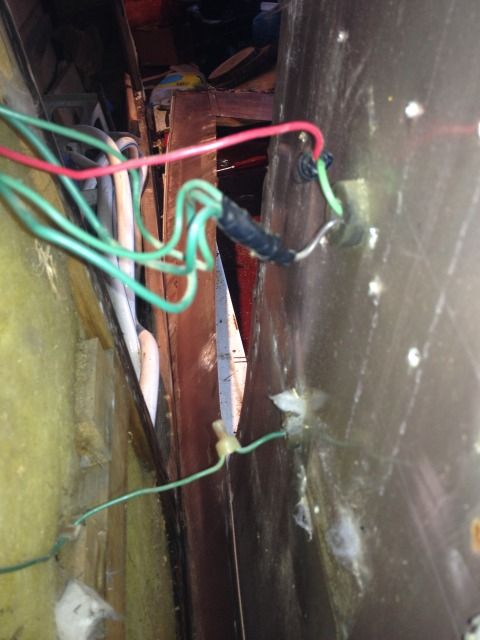 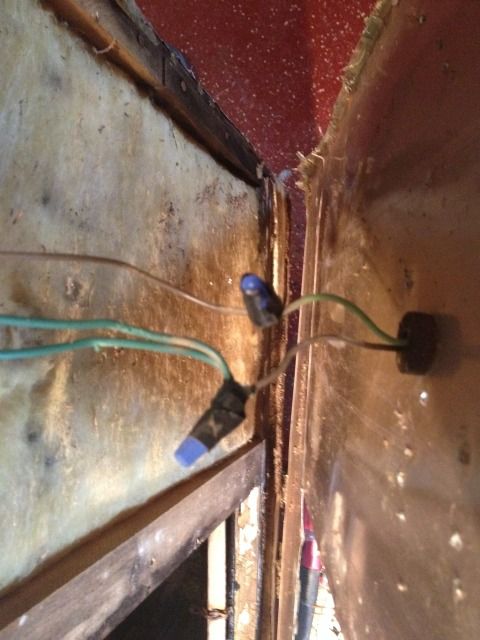 Looks like it was Foam Insulation to keep the back end from sagging. 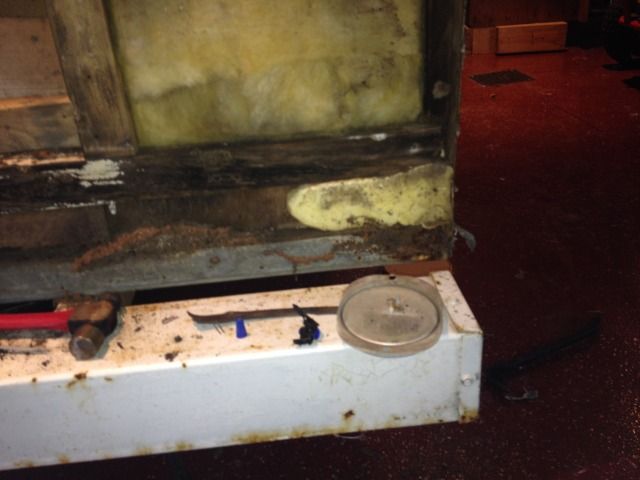 First peak on the road side didn't look too bad. 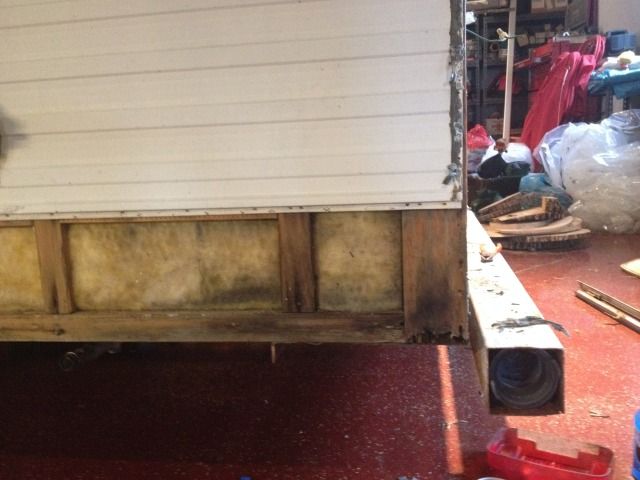 Then, I got to the wheel well. Undid one screw and the rest fell away. Boy is that UGLY!!!! 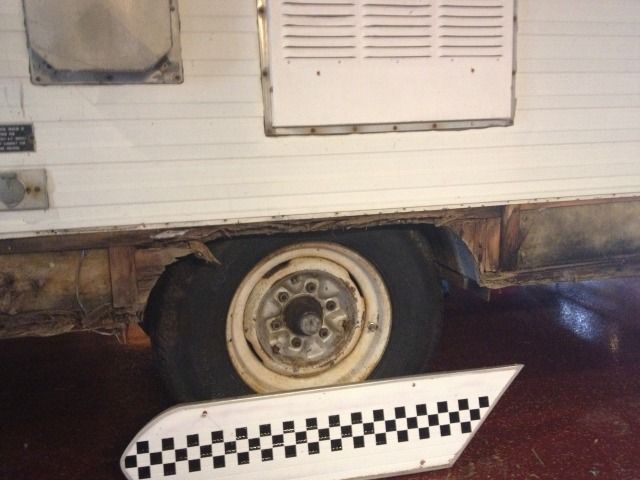 Plan is to pull the rest of Road Side, repair the frame work on Road Side and Back. Then move on to Curb Side followed by roof then, front. Biggest issue so far is those dad burn staples pulling through. I despise those buggers. Didn't expect to find them along the bottom edge of every piece of skin. Glad I didn't spend any more on her than I did but I'm not regretting the purchase yet. We will see how hubby reacts when he sees her tomorrow. Jennifer ![]() |
|
|
|
Post by vikx on Nov 2, 2013 22:40:53 GMT -8
HINT for staple removal: Use a sturdy sharp pick and tap the point under the staple head. Use a piece of wood or a putty knife to protect the skin and pry. Once the head is lifted a little, you should be able to grab it with side cutters... I have a very handy horse shoeing tool designed to pull horse shoe nails. It has two sharp little teeth perfect for pulling staples. www.hardwarestore.com/horseshoe-nail-puller-661417.aspx |
|
TheShastaProject
Member
Posts: 47
Likes: 4
1967 Shasta Super 19
Currently Offline
|
Post by TheShastaProject on Nov 3, 2013 6:00:57 GMT -8
I have been using needle nose vice grips but have had a horrible time getting the staple up where I could grab it. Thanks for the tip!
|
|
kirkadie
1K Member

Posts: 1,156 
Likes: 556
'69 Serro Scotty Hilander
Currently Offline
|
Post by kirkadie on Nov 3, 2013 6:24:16 GMT -8
I use a flat head screwdriver with the head ground down to the width of the staple, and bent to about 30 degrees. a tap or two with a small hammer gets the staple out enough to also use side cutters like vikx.
I also play some calming music on the little boom box during the exercise, and talk to each staple I'm working on. Most of the staples were rusty but cooperated; the ones that didn't were harshly chastised.
Patience. and try to enjoy even the s^*##*est jobs, as their completion is sweet success (revenge?).
|
|
cowcharge
1K Member
Posts: 1,003
Likes: 328
Currently Offline
|
Post by cowcharge on Nov 3, 2013 14:25:41 GMT -8
HINT for staple removal: Use a sturdy sharp pick and tap the point under the staple head. Use a piece of wood or a putty knife to protect the skin and pry. Once the head is lifted a little, you should be able to grab it with side cutters... I have a very handy horse shoeing tool designed to pull horse shoe nails. It has two sharp little teeth perfect for pulling staples. www.hardwarestore.com/horseshoe-nail-puller-661417.aspxOr, tap the slightly-bent point of a handy-dandy painter's tool under them and lift the handle to pry. Then use the same tool to get the old putty out. Then use it to take crap off the roof. Then use it to... |
|
timeout1
Member
Posts: 48
Likes: 14
"Vintage" White Water RETRO 150
Currently Offline
|
Post by timeout1 on Nov 13, 2013 13:01:11 GMT -8
|
|
mobiltec
5K Member
 I make mistakes so you don't have to...
Posts: 9,822
Likes: 3,748
1954 Jewel In Progress...
Currently Offline
|
Post by mobiltec on Nov 13, 2013 19:58:03 GMT -8
The trunk is going to be the fun part. I just did a Field And Stream with a trunk. Just take your time. Study what's there and then replace it one side at a time so you have something to look at while building.
It's in pretty dang good shape from what I can see. The bottom part of all trailers is the first to go. Gravity and moisture has something to do with it.
|
|
TheShastaProject
Member
Posts: 47
Likes: 4
1967 Shasta Super 19
Currently Offline
|
Post by TheShastaProject on Nov 14, 2013 18:11:20 GMT -8
Thanks for all the tips! I am taking my time and snapping lots of pictures before I move anything! I like the idea of doing one side of the trunk at a time. Hoping to have time to take measurements and make a shopping list this weekend. Still working on removing the fill for the fresh water tank. Been spraying it with penetrating oil but it is laughing at me. Might have to put away the pride and ask hubby for a little help with it.
|
|
cowcharge
1K Member
Posts: 1,003
Likes: 328
Currently Offline
|
Post by cowcharge on Nov 15, 2013 7:55:23 GMT -8
Hit it with heat, then more oil, then heat again, and more oil.
|
|
kirkadie
1K Member
Posts: 1,156
Likes: 556
'69 Serro Scotty Hilander
Currently Offline
|
Post by kirkadie on Nov 15, 2013 13:48:24 GMT -8
'PB Blaster'... all auto parts places sell it. I sprayed it on from the inside and around the outside after removing screws and inside tank hold-down. Let it steep over night, and it came off nicely the next day, as did the rusty drain pipe going thru the floor.
It smells like diesel fuel sort of so don't do it inside your garage without some good ventilation, and some cardboard on the floor beneath.
Don't use heat with it or a stuck filler will be the least of your problems.
Mechanics use it on any rusted metal, bolts etc, and have great success.
|
|
mobiltec
5K Member
I make mistakes so you don't have to...
Posts: 9,822
Likes: 3,748
1954 Jewel In Progress...
Currently Offline
|
Post by mobiltec on Nov 15, 2013 15:37:20 GMT -8
'PB Blaster'... all auto parts places sell it. I sprayed it on from the inside and around the outside after removing screws and inside tank hold-down. Let it steep over night, and it came off nicely the next day, as did the rusty drain pipe going thru the floor. It smells like diesel fuel sort of so don't do it inside your garage without some good ventilation, and some cardboard on the floor beneath. Don't use heat with it or a stuck filler will be the least of your problems. Mechanics use it on any rusted metal, bolts etc, and have great success. That has worked for me before also. Only thing is you may have to keep spraying it on and letting it set over night a few nights if it's REALLY stuck. I got impatient with one and it twisted the fitting right off the tank. |
|